
Build in progress


So, today I started the audio build. I have all next week off so I have plenty of time to get it all done and still make sure I get my beer time in the evenings.
The goods:
Pioneer Avic Z-2 H/U
Alpine 150.4 Amp
Diamond Audio D600A Components
100 sq. ft. of B-Quiet Extreme
4 ga. power and gnd. wiring
14ga speaker wire
I am only running the front stage for now and later I will toy around with a sub in the trunk. The stock setup was $hit and was barely audible with the top down.
So for today I got all the interior, carpet and plastic trim torn out. I got all the floors and doors done with the B-Quiet mat. Tonight I'll finish the wiring for the amp and possible the speakers.
Pics so far:
Last edited by gsxrsellout; Sep 9, 2009 at 05:37 PM.
2 hours working on speaker wire for one door!! I went along with the diy speaker wire run through the wiring harness in the door. That is an @$$ pain that I wouldn't wish on anyone! Has anyone else done something different that has worked well and still kept the wire hidden?


I got the driver side door half done... this is so irritating! I am half minded to pull the doors off and just drill some holes for a new loom. It's only 14ga wires but the insulation is very thick and is proving to be a royal pain to get through the plastic harness. The passenger side went flawlessly and smooth but I don't think I made the hole in the driver side big enough.
more tomorrow....
more tomorrow....

have you seen sintaxerror's post on his install, i followed it for the door it was very helpful
https://my350z.com/forum/5362223-post126.html
https://my350z.com/forum/5354725-post116.html
g/l
https://my350z.com/forum/5362223-post126.html
https://my350z.com/forum/5354725-post116.html
g/l
After getting my *** kicked a little more by the harness in the door the light bulb turned on and I cursed myself for not doing this before I tried to route the speaker wire though. I got a small file and filed down the messy cut up plastic and made the harness smooth. The wires slid right in nice and easy... Why didn't I do that to start with? Oh well...
I got all the interior back in and the trim re-installed. The doors are the only thing that is not finished. I got all the wiring done and the amp installed in the cubby behind the passenger seat.
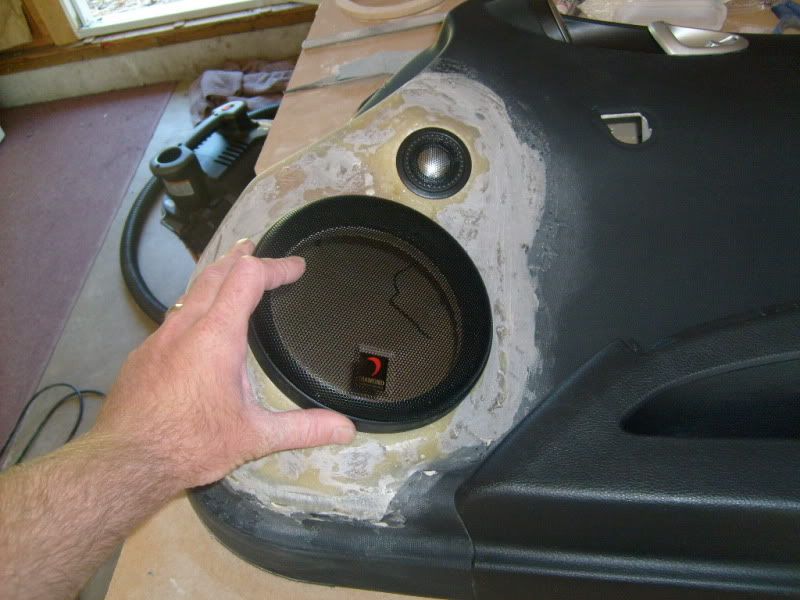
The doors are now the project on hand... I think what I have in mind is something like this:
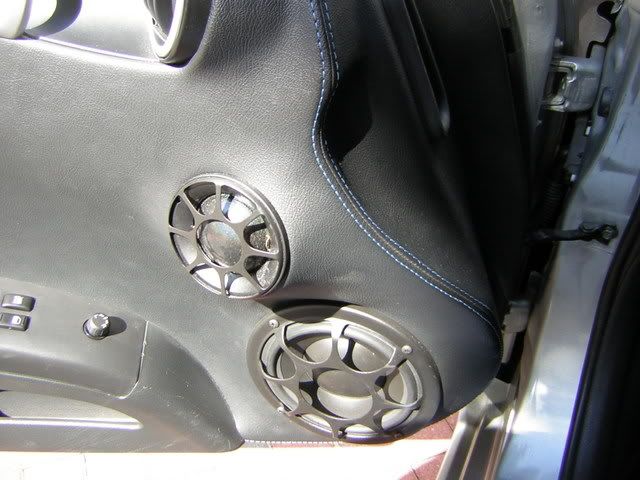
I will wrap the doors in leather but I don't know if I will use stitching on the edge. I'll have an upholstery shot wrap the door so we'll see what they recommend.
I got all the interior back in and the trim re-installed. The doors are the only thing that is not finished. I got all the wiring done and the amp installed in the cubby behind the passenger seat.
The doors are now the project on hand... I think what I have in mind is something like this:
I will wrap the doors in leather but I don't know if I will use stitching on the edge. I'll have an upholstery shot wrap the door so we'll see what they recommend.
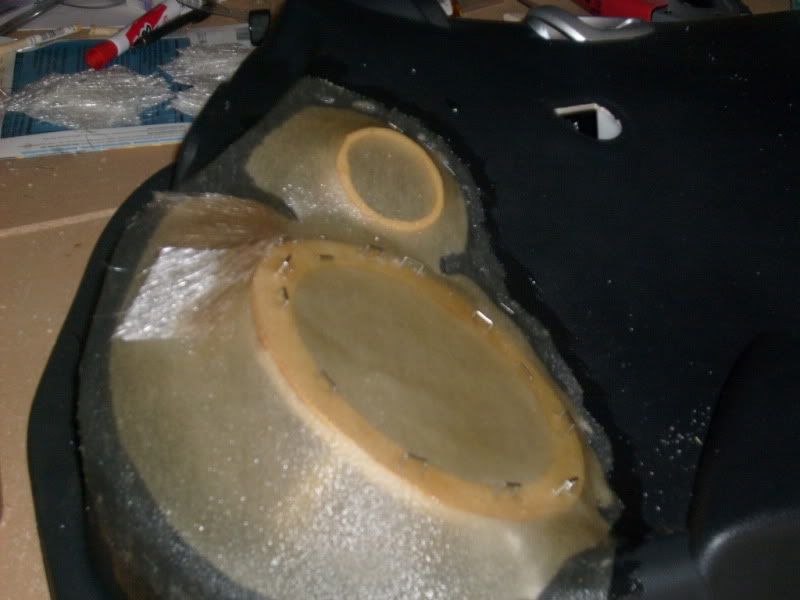
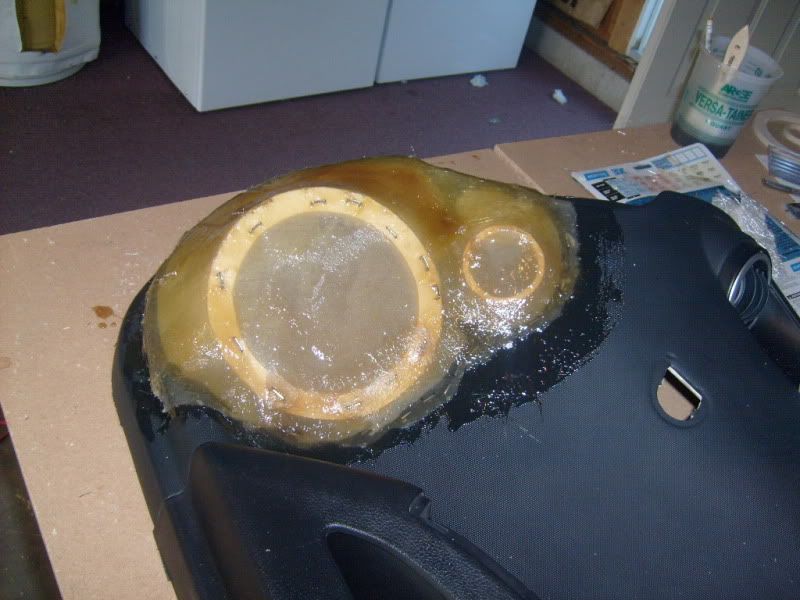
So I did the passenger side door this evening and right now it's ugly but after a bit of sanding it will start to look a bit better. I'm not striving for perfection here because it will be wrapped. Anyways, this is my first build... for a first timer I think it's going pretty well. The staples wouldn't go flush so they'll be clipped and filed down. Tomorrow I'll sand her smooth and throw some bondo in the bad spots, sand some more and do the driver side door.
Trending Topics
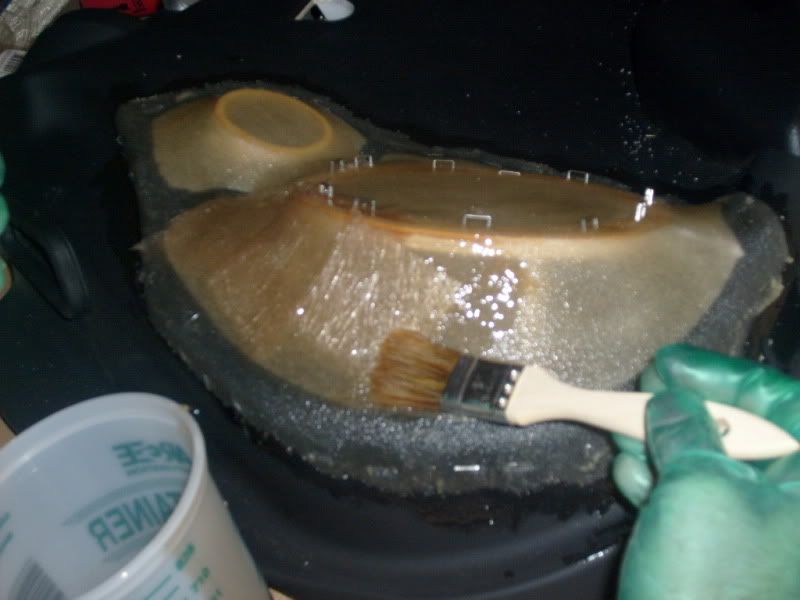
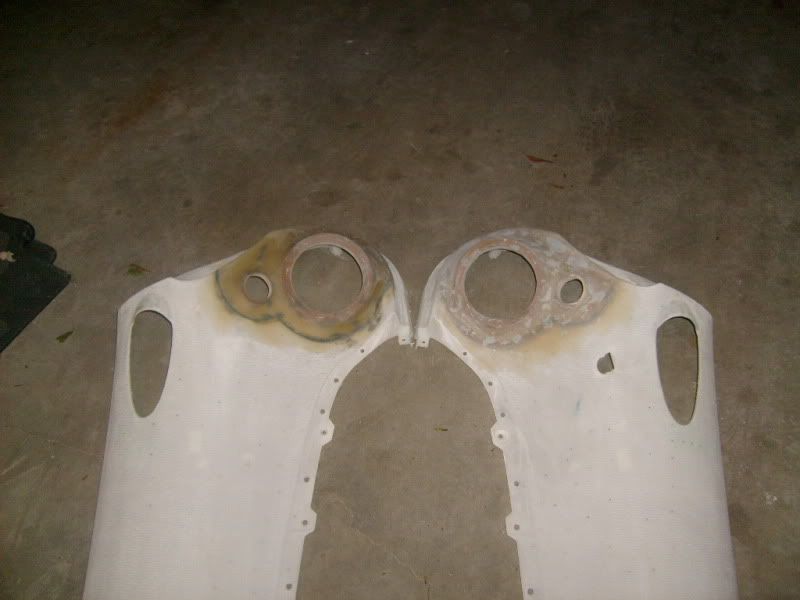
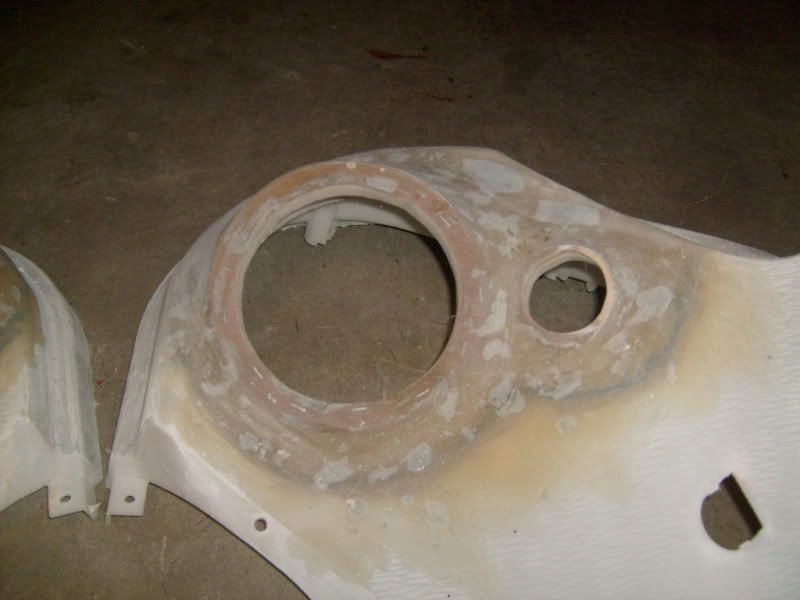
Passenger side door is filed and sanded and ready for some body filler. I am only doing the passenger side door for now because this is my first time doing this. If I mess something up beyond repair it's only one door. I am a lot more confident in all of this now that it's coming along. Here's what I have so far:
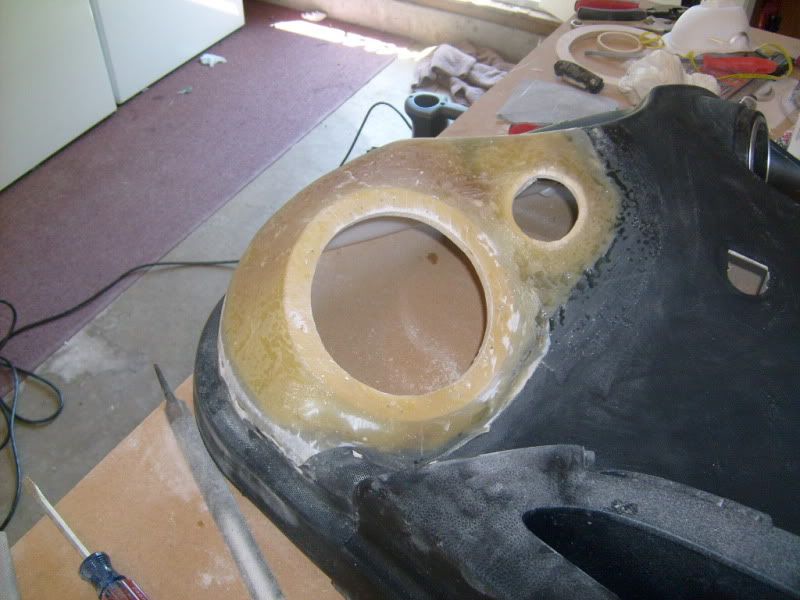

I am open to suggestions and constructive criticism. For my first custom build I think it's going pretty well. Some things that I will do different for the driver side door though is put a little less hardener in the resin so I can have a few more minutes of working time with the resin. It dries so fast that I can barely get one coat done without having to toss the plastic bucket and brush and make a new batch.
Anyone else that has done this or knows fiberglass very well feel free to give pointers.
Mine won't be quite that extreme but I'm not a fan of kick panels, however I have thought about adding some 8" mid bass drivers into some kicks but not sure. I like having my dead pedal and would rather have the speakers in the doors. From everything that I have seen I figured this would be my best route.

haha! Nice! I have looked at so many pages of audio builds and setups that I forget who has what. I do like the idea of stacking the speakers in the door though.
Did you do the stitching for the looks or was the vinyl too hard to stretch around everything? I want to wrap in vinyl or leather but I don't know how pliable the vinyl will be for so many curves. I have wrapped motorcycle seats with vinyl but this is a bit of a different animal.
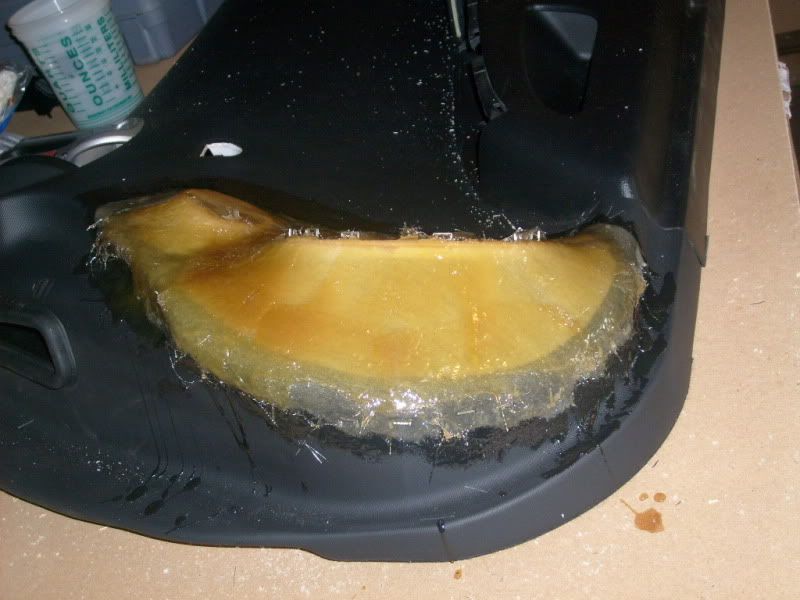
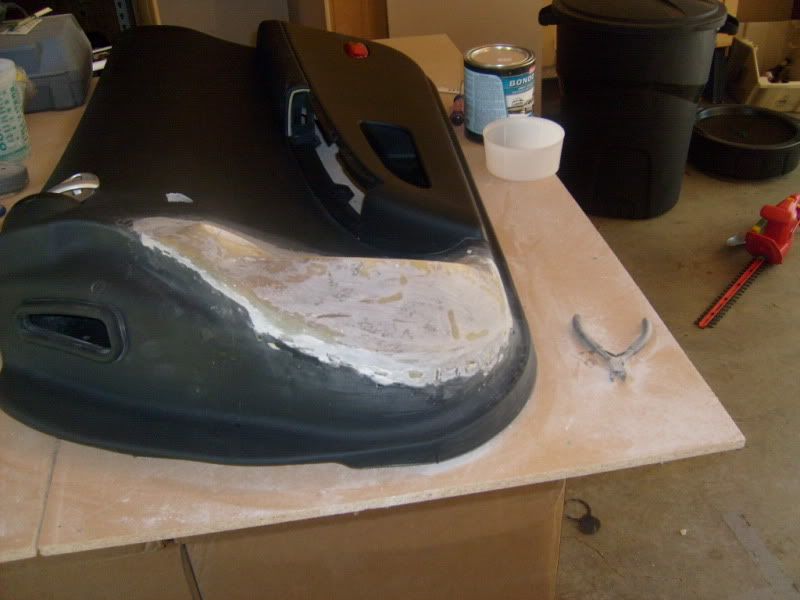
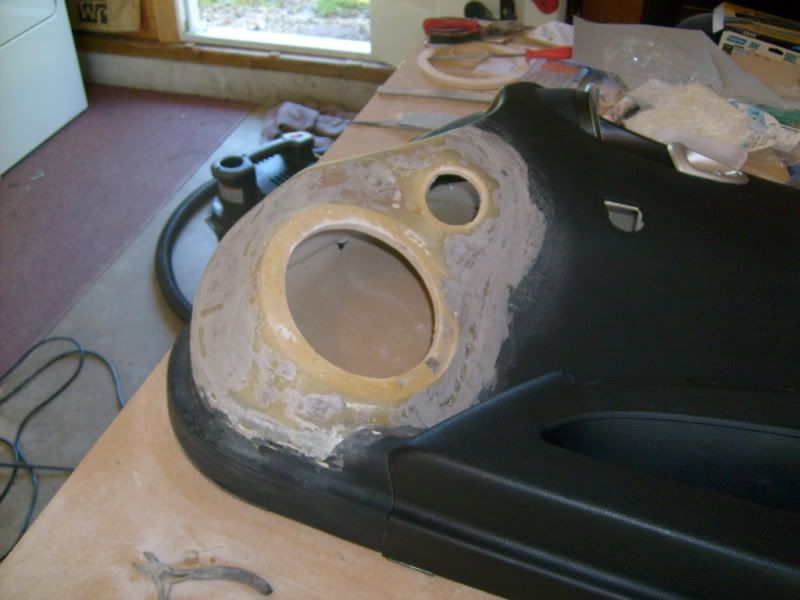
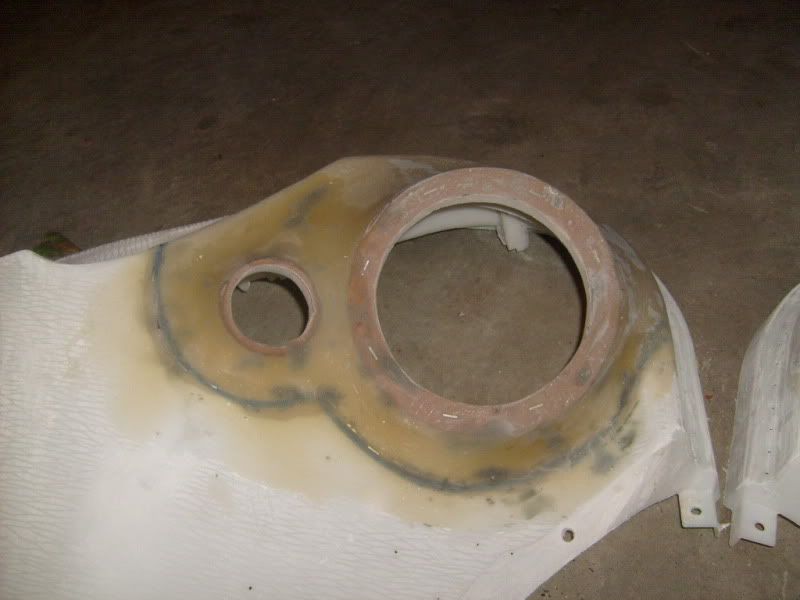
A little bit of glass bondo and a bit more sanding and I believe the passenger door is ready to get wrapped. It looks pretty smooth and feels smooth to the touch so the vinyl will look nice and clean once laid on the door.
Trying to vision the finished product
Trying to vision the finished product
haha! Nice! I have looked at so many pages of audio builds and setups that I forget who has what. I do like the idea of stacking the speakers in the door though.
Did you do the stitching for the looks or was the vinyl too hard to stretch around everything? I want to wrap in vinyl or leather but I don't know how pliable the vinyl will be for so many curves. I have wrapped motorcycle seats with vinyl but this is a bit of a different animal.
Did you do the stitching for the looks or was the vinyl too hard to stretch around everything? I want to wrap in vinyl or leather but I don't know how pliable the vinyl will be for so many curves. I have wrapped motorcycle seats with vinyl but this is a bit of a different animal.

After a closer look at the prices for leather I'll definitely use vinyl to wrap the doors with. I'm getting the impression that it will be about $500 to wrap both doors. That seems to be the average price.
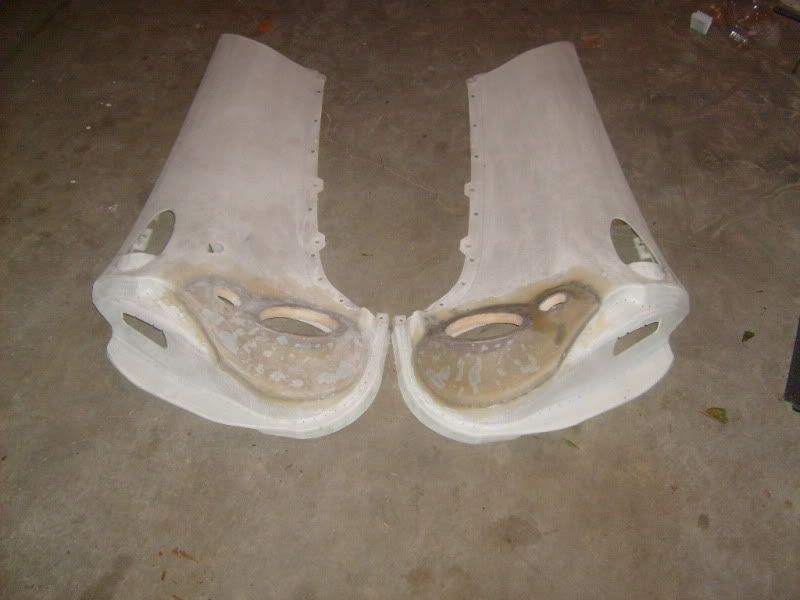
I guess here is where I get to slap myself and call myself an idiot!! I should have peeled all of the stock covering off the plastic before I started fiber glassing! So I'm back to square one and get to start all over. Learning curves are a b!tch! Oh well...
Lessons learned:
If you're going to fiberglass, put the fiberglass on the source (ie: the plastic frame of the door, not the original covering)
Use a good resin, order some online or go to a shop that has good resin. Thinner resin is better to work with, it spreads more evenly and depending on the resin has a longer cure time so you can work with it a little longer.
Use a thinner fiber mat. It will go around curves easier and will require less sanding because the overlapping won't be as severe of a bump.
Don't use too much resin on the fiberglass or the fleece. It will bite you in the @$$ when it comes time to sand everything smooth.
This is my first time with just about everything here so it's a pretty big learning curve. It's been fun and very educational. Maybe this next go-around I can get it right so I can finally start listening to my new system!
Back to the chopping block......")
Lessons learned:
If you're going to fiberglass, put the fiberglass on the source (ie: the plastic frame of the door, not the original covering)
Use a good resin, order some online or go to a shop that has good resin. Thinner resin is better to work with, it spreads more evenly and depending on the resin has a longer cure time so you can work with it a little longer.
Use a thinner fiber mat. It will go around curves easier and will require less sanding because the overlapping won't be as severe of a bump.
Don't use too much resin on the fiberglass or the fleece. It will bite you in the @$$ when it comes time to sand everything smooth.
This is my first time with just about everything here so it's a pretty big learning curve. It's been fun and very educational. Maybe this next go-around I can get it right so I can finally start listening to my new system!
Back to the chopping block......
Okay, between a week and a half of 12-14 hour days at work and trying to find time to work on the car and spend time with the wife I finally got all the fiberglass done

Thank you! I am trying to find an upholstery shop that can vinyl wrap the doors. I am quickly losing confidence in local shops because a lot of people are telling me that they cannot be wrapped. I see a lot of pictures of other doors with more extreme angles that are wrapped nicely. Hopefully I can find someone that can give me a little confidence in their ability.