
DIY Rear View Camera Install

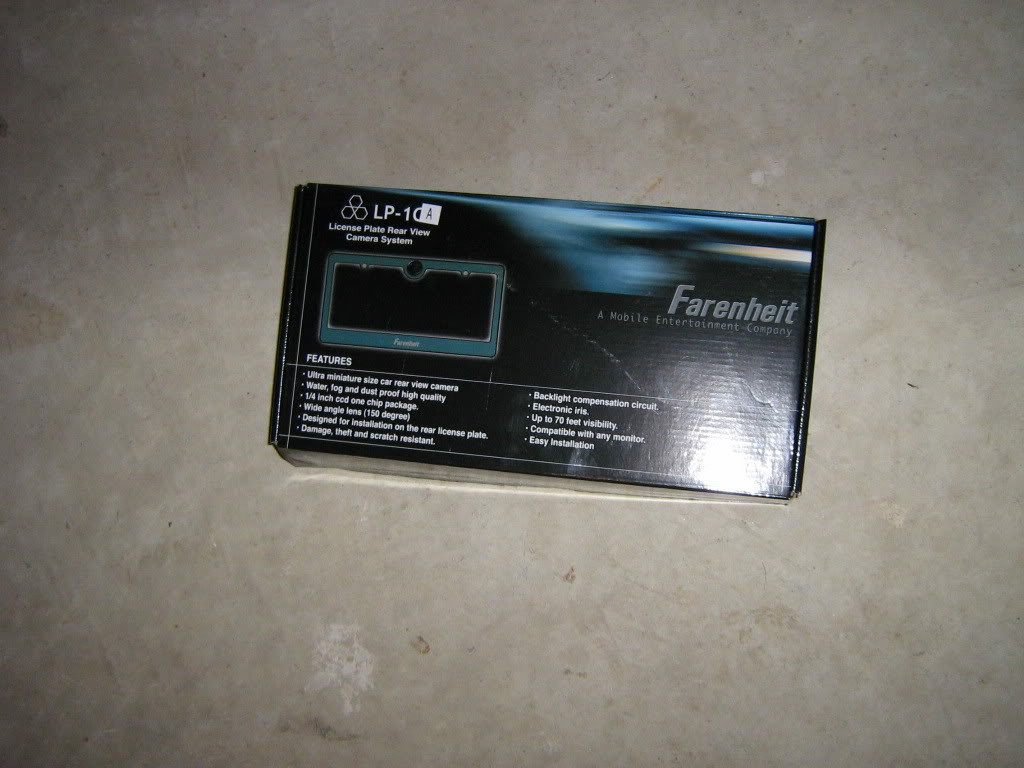
SO it was spring cleaning at the stereo shop I work at part time and I noticed a box I know I had seen at least twenty times before but never read. Whoa its a Farenheit rear view camera. SNATCHED (with permission of course). I already have the interior out of the car because I'm upgrading my sub and amplifiers so that just makes it easier to route the wires. Now the pics:
*ADDED - Camera model # - Farenheit LP-1CA
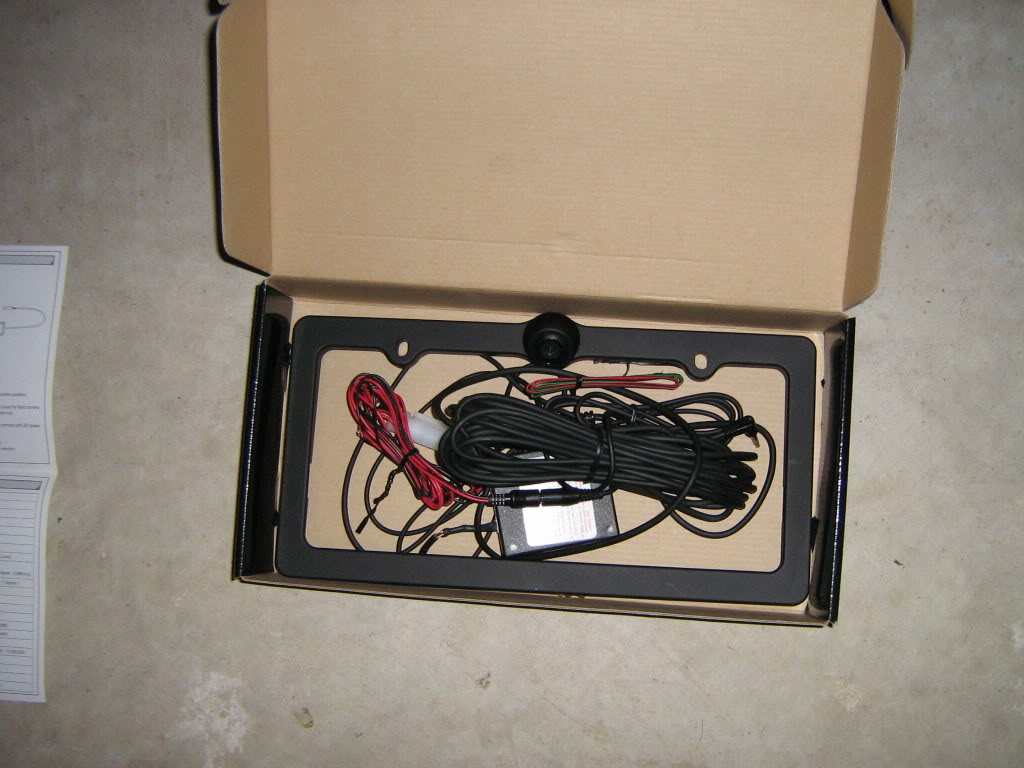
2. The contents of the box
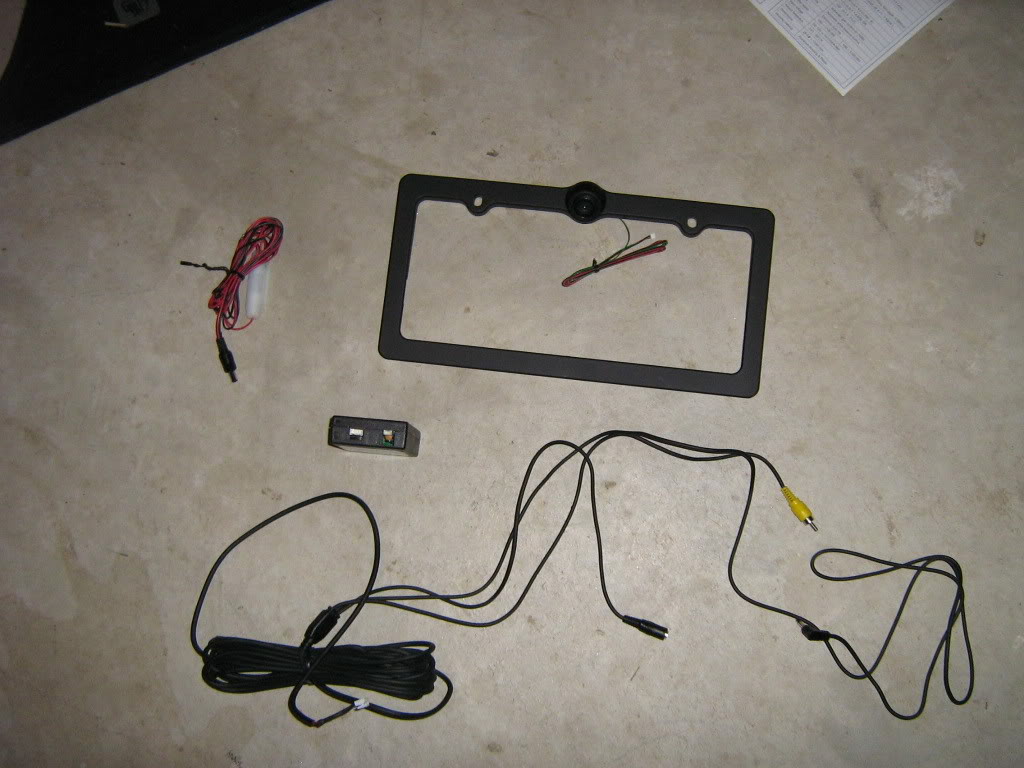
3. The contents sorted on the floor
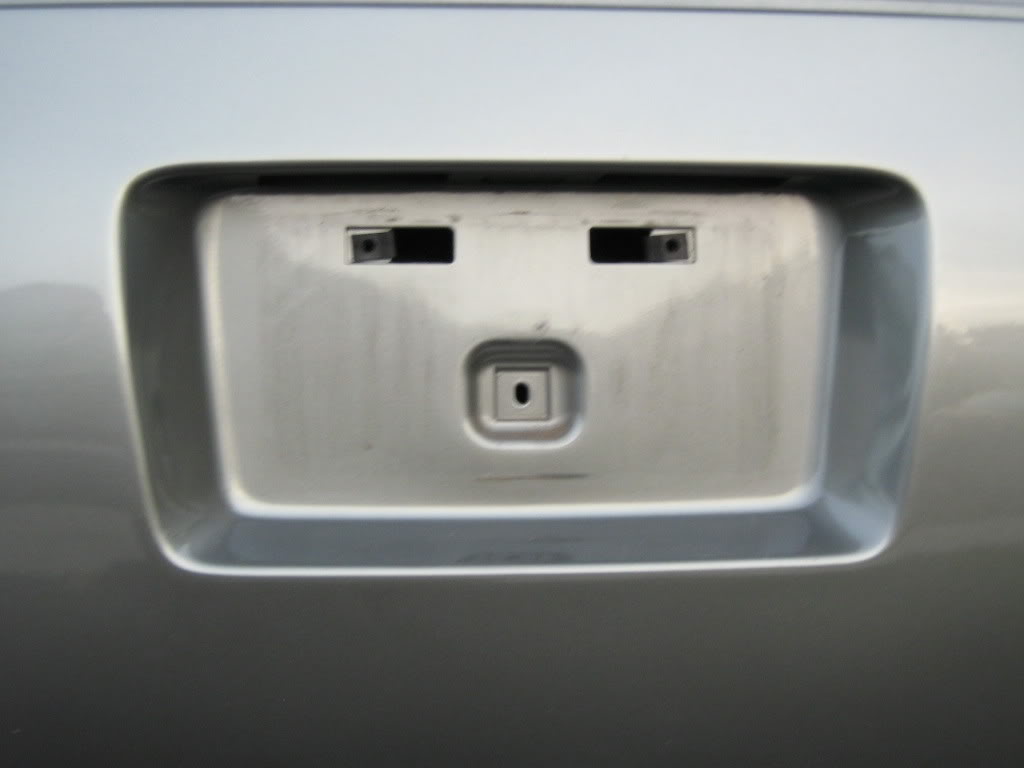
4. Removed plate and old license plate holder
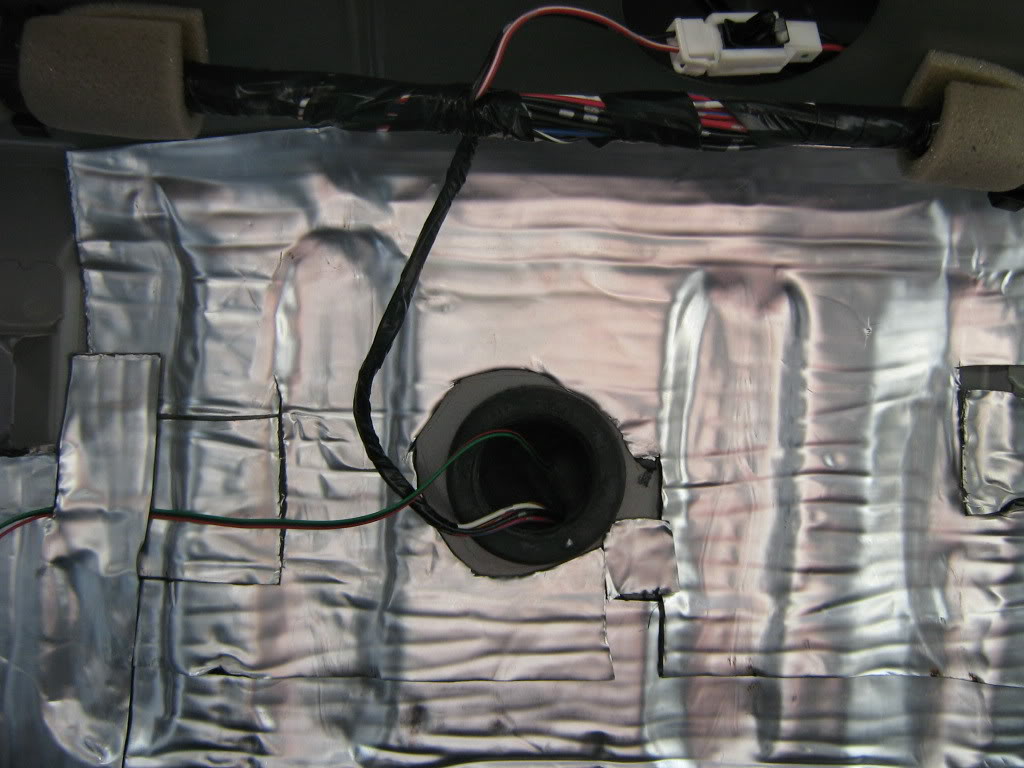
5. The inside of the rear, notice the large grommit in the center. This is where I ran the wire inside the car
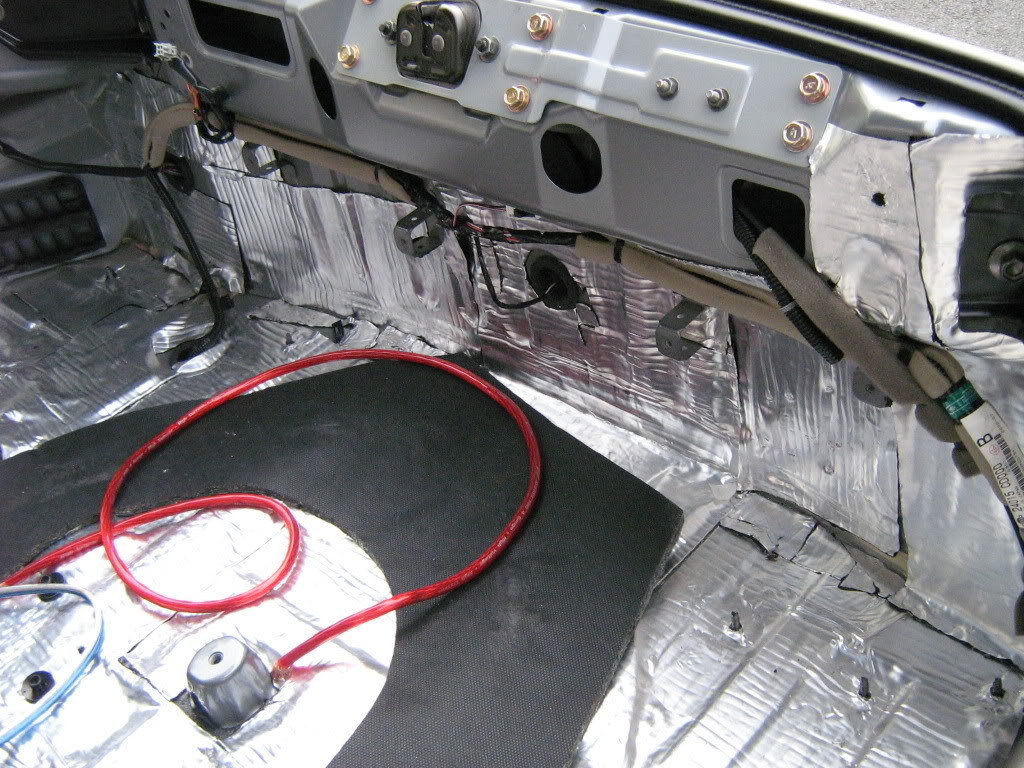
6. Once the grommit is removed, you can cut a small slice in it to run the wires through
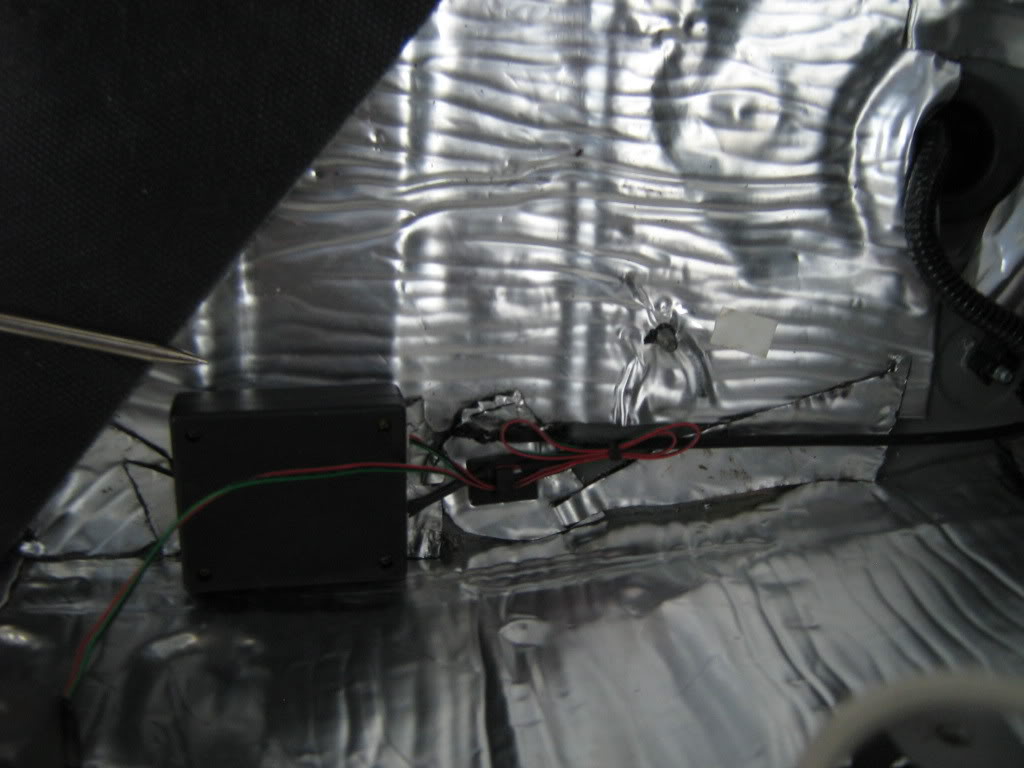
7. Once the wire from the frame is inside the car, it must be connected to a small box that was included with the frame. the image processing is done inside this box and then images are sent from the box to your headunit. Be sure to tuck it away so it doesn't get crushed.
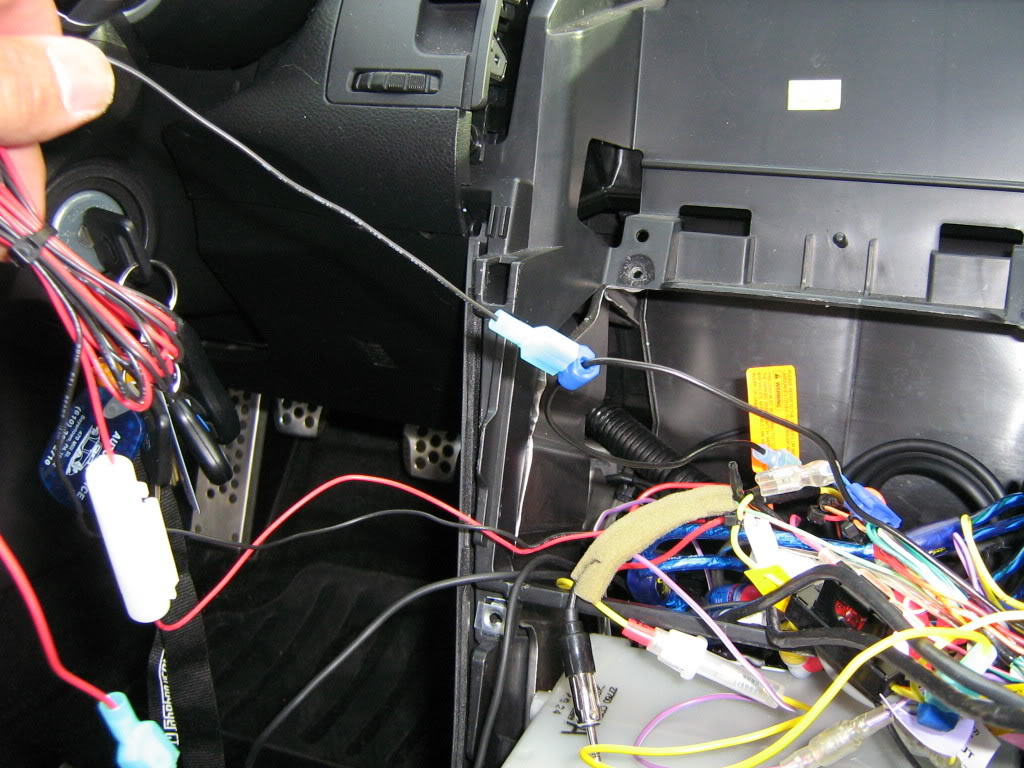
8. Reverse wire. Dont forget the reverse wire. Without this connection the Avic Z1 wont switch to rear camera when you shift into reverse. Pioneer included a specific wire for this connection so I tapped into the reverse light in the rear as opposed to finding the wire up front.
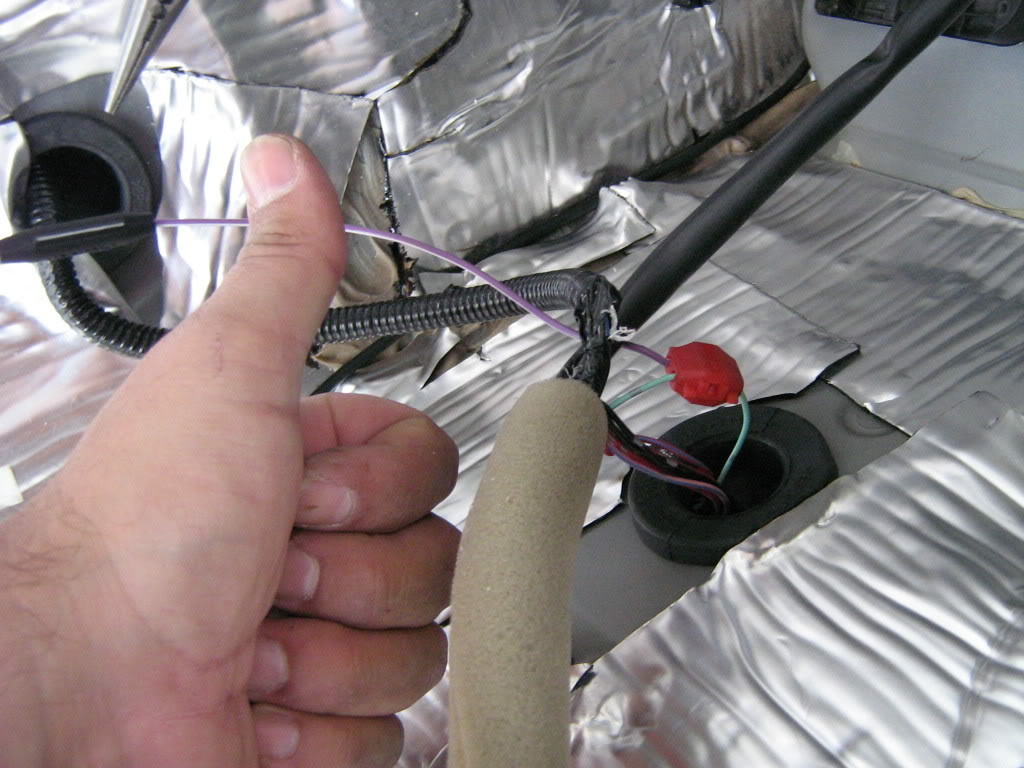
9. Once the wires is tapped it's time for a little wire management.
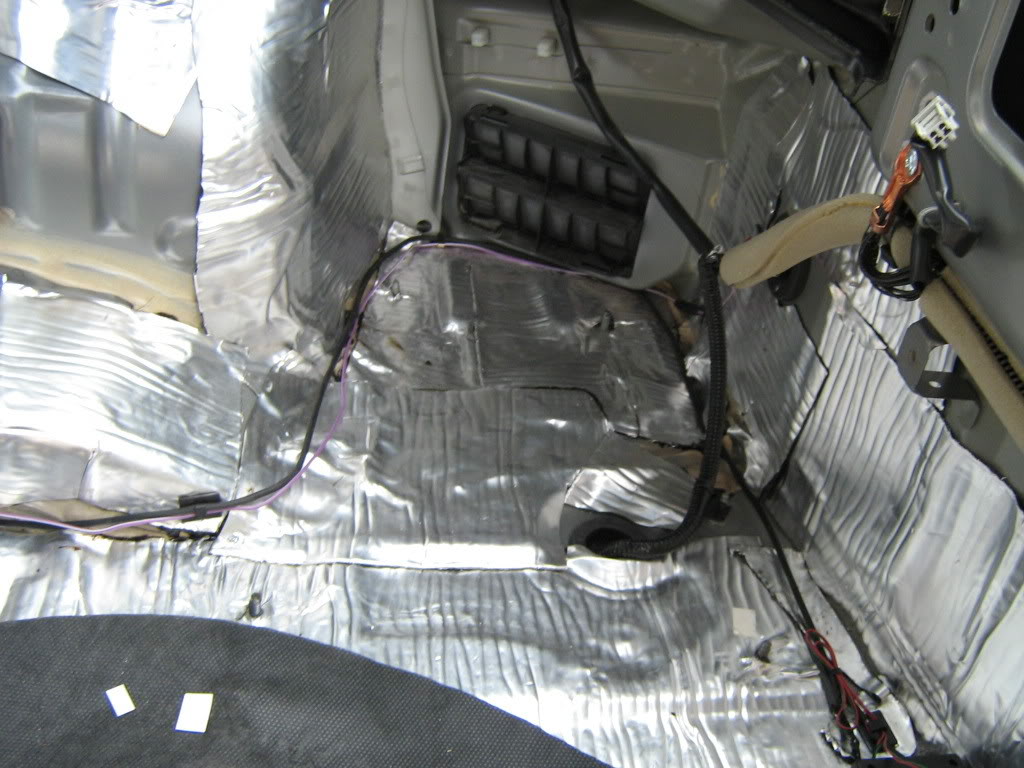
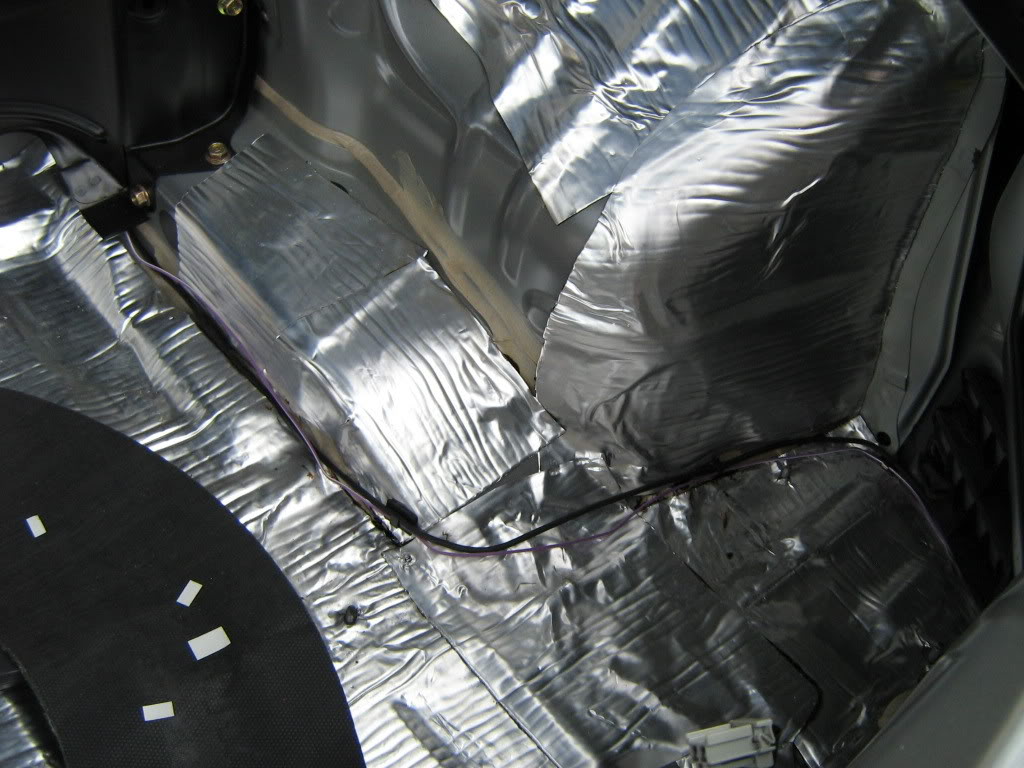
10. Through the rear strut bar and out the compartment behind the passenger seat.
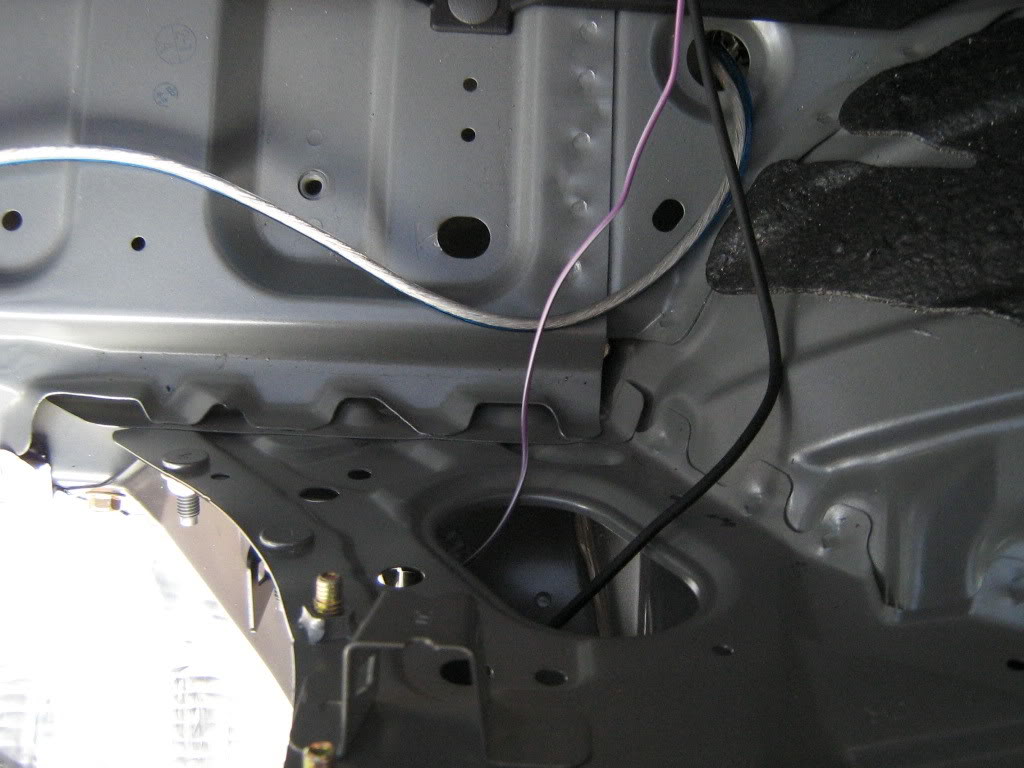
11. I ran the wires down the center, its a lot easier then pulling up the carpet. Time for the Z1 to come out again.
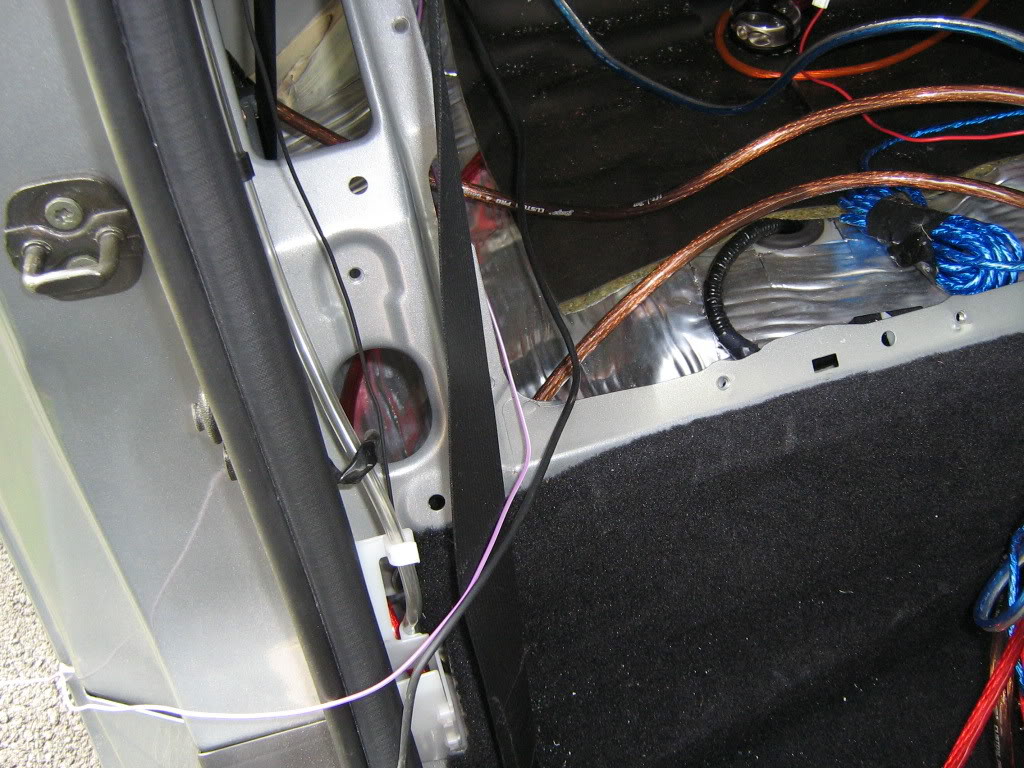
12. Find the wire for the reverse gear input and connect it to the wire that you tapped into the reverse light in the back.

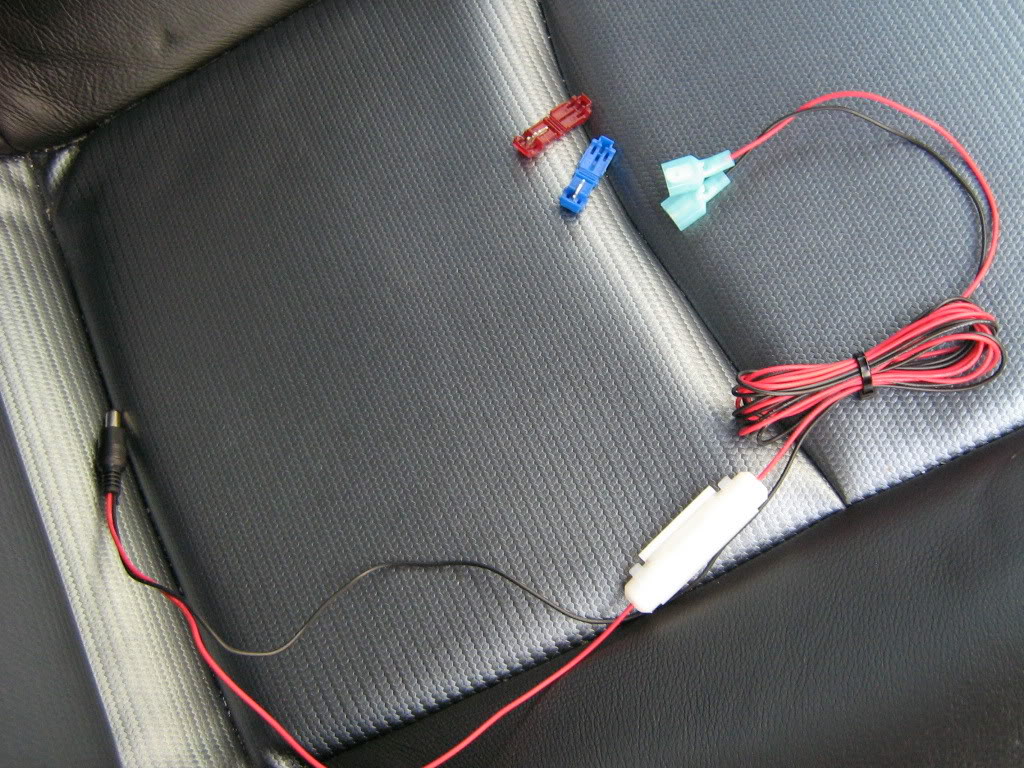
13. Time to tap into some power for the camera. It doesnt really matter where you tap into the power, but since this camera has the power wires attached on the end of the cables that get attached to the head unit, I tapped the constant power from the head unit and the oem ground. The headunit has its own separate ground now. Here is a shot of the power wire prepped for install
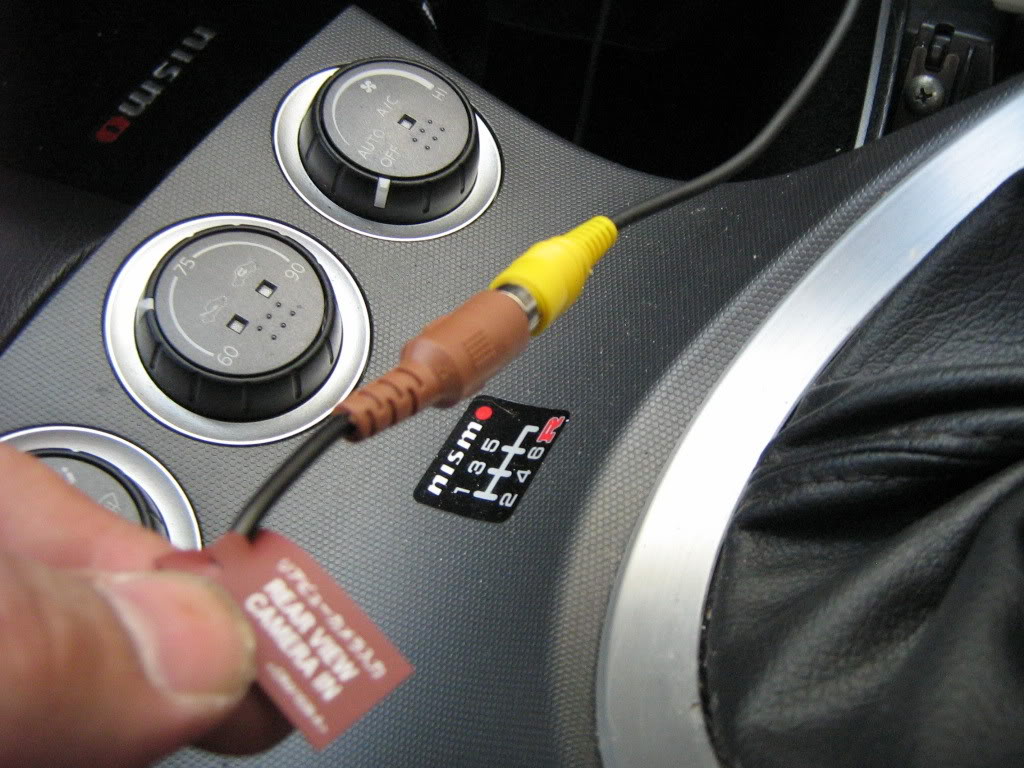
14. The last connection, the actual video feed from the box mounted in the rear.
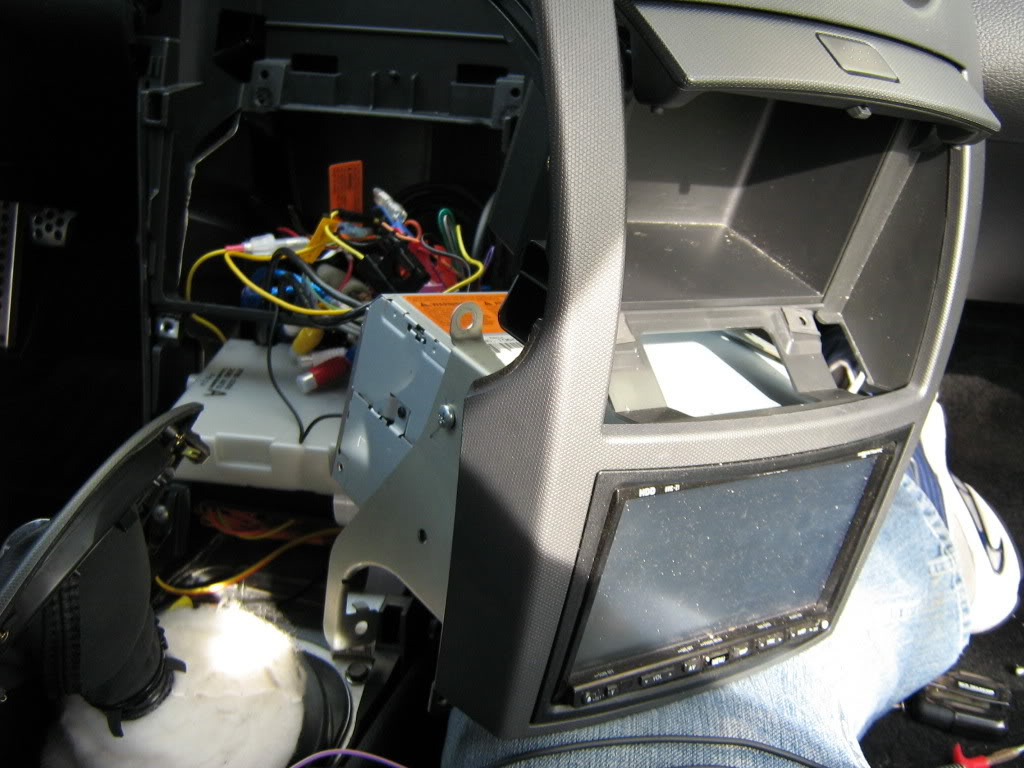
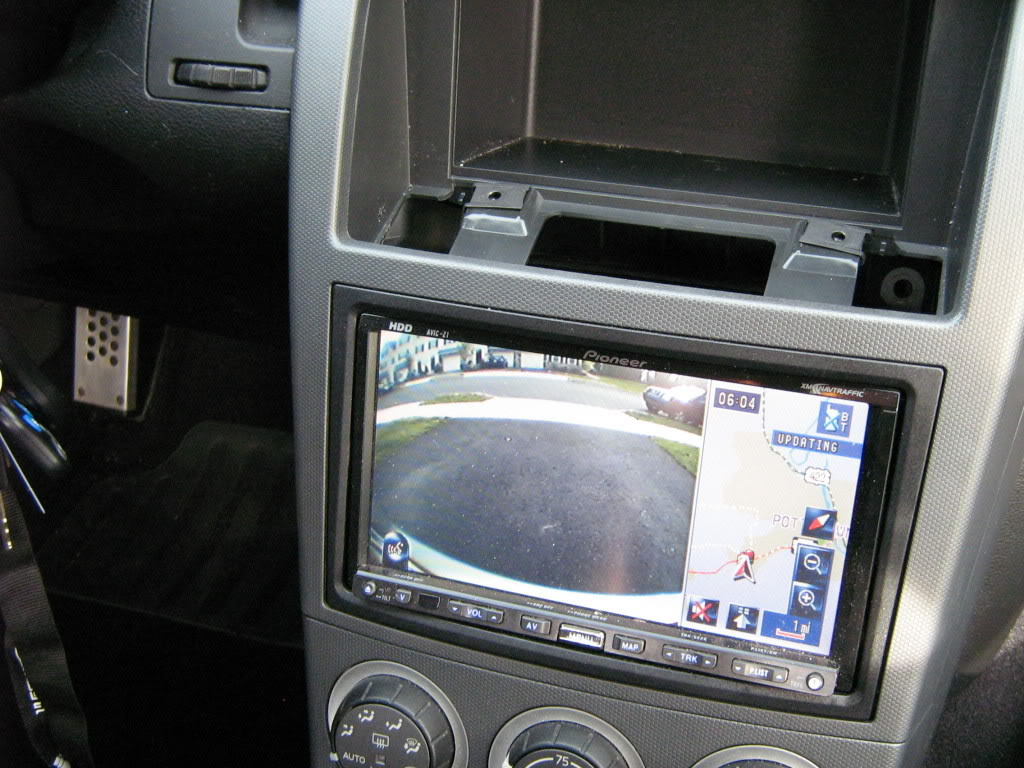
15. Turn on the car and test it out before securing down the head unit. Make sure all of your speakers and devices attached to the radio are functioning. It gets really tight behind the head unit and its easy to disconnect wires when reassembling. I had to change a setting on the headunit to accept camera feed for the rear.
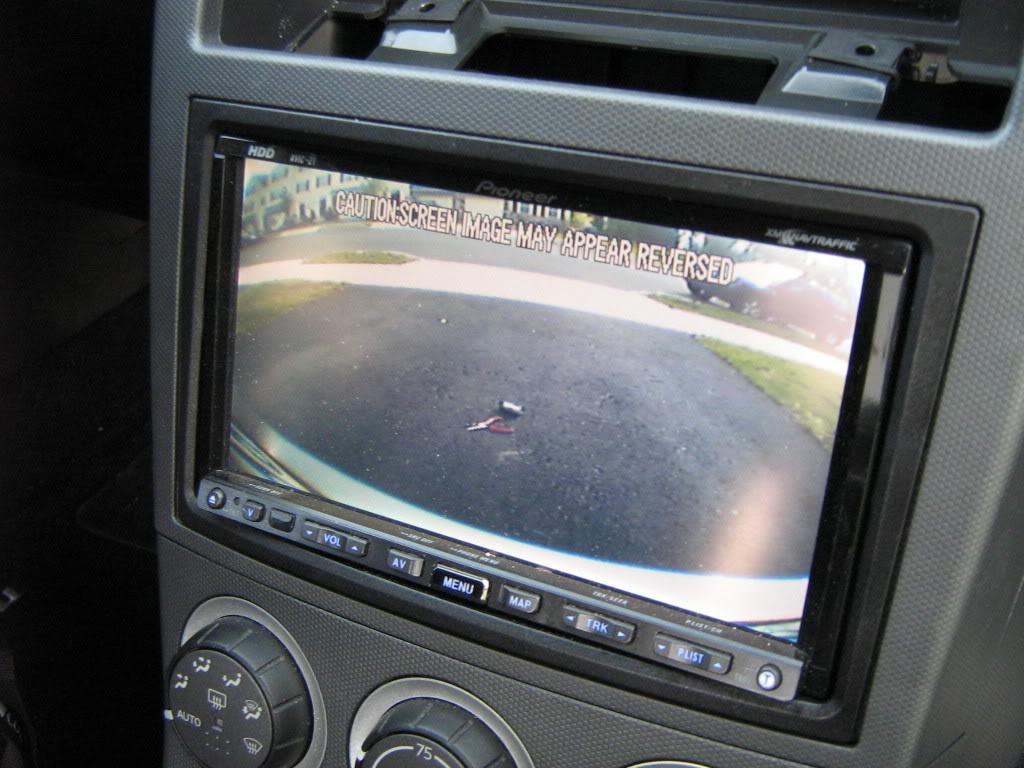
Here are some pics of the images from the camera
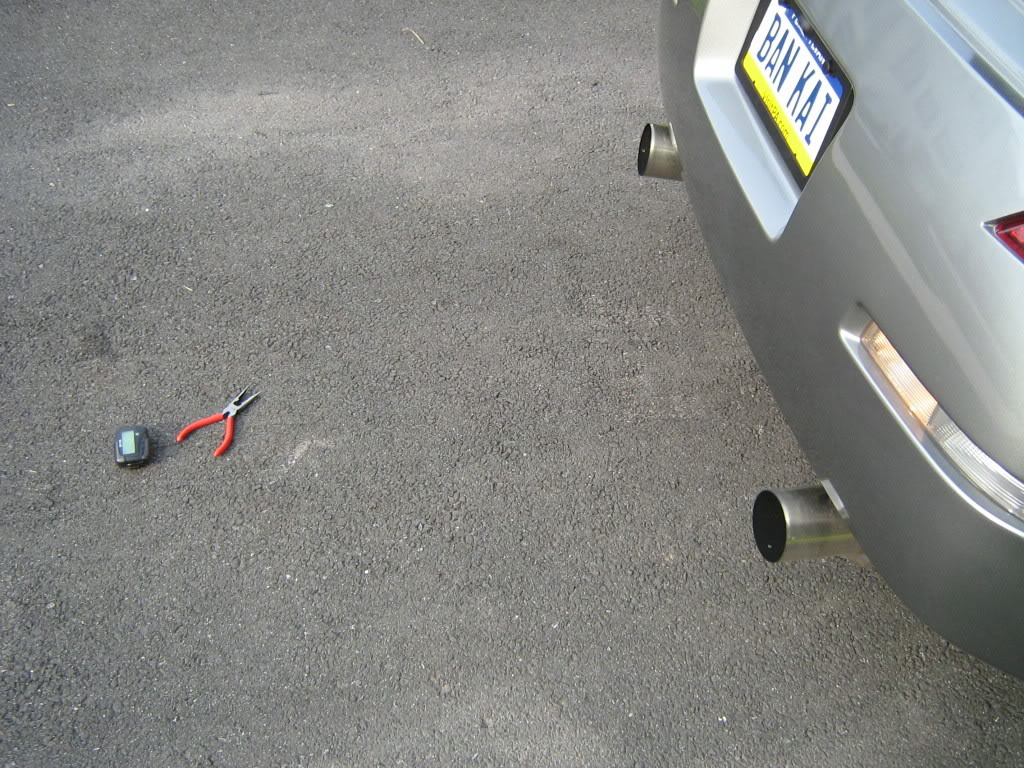
With old school cheap a$$ pager on the ground for scale

with some needle nose pliers
From the side
The finished product

Enjoy.
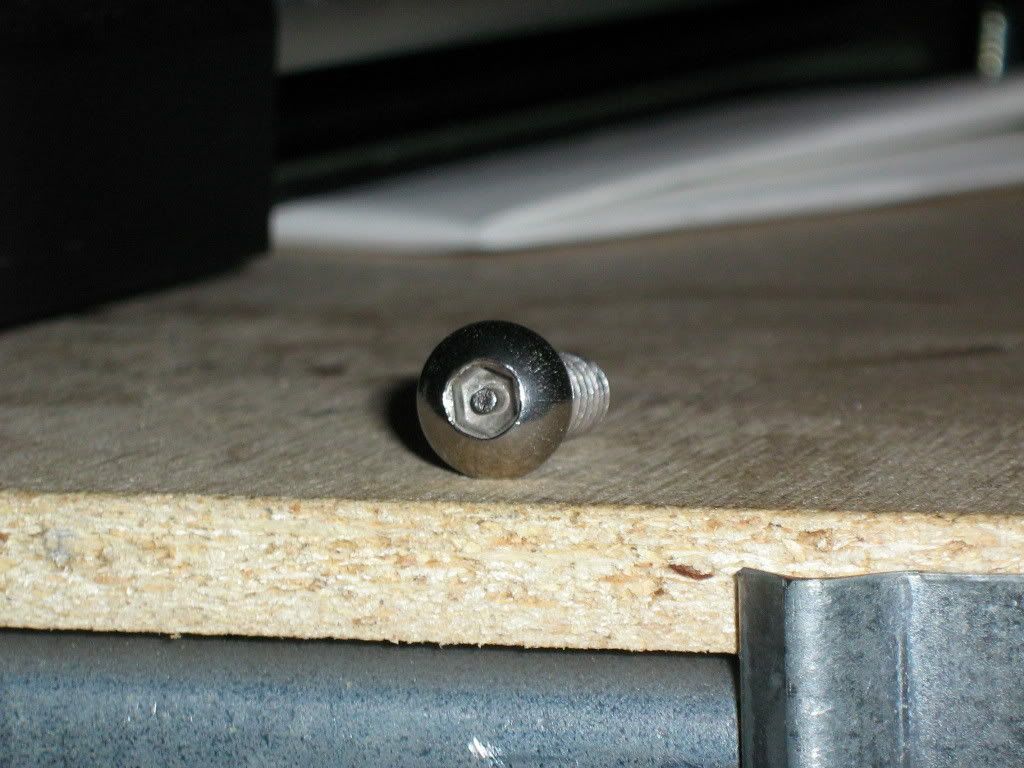
BTW since the license plate camera frame is substantially thicker then your average frame, I had to replace the screws and the mounting clips. When I bought the car the stealership used some horrible little screws that stripped the nuts inside the oem clips. A quick trip to lowes for two new coarse thread phillips head bolts, two body clips and two plastic black screw caps did the trick.
*ADDED - Camera model # - Farenheit LP-1CA
- The rear view view camera -itself
2. The contents of the box
3. The contents sorted on the floor
4. Removed plate and old license plate holder
5. The inside of the rear, notice the large grommit in the center. This is where I ran the wire inside the car
6. Once the grommit is removed, you can cut a small slice in it to run the wires through
7. Once the wire from the frame is inside the car, it must be connected to a small box that was included with the frame. the image processing is done inside this box and then images are sent from the box to your headunit. Be sure to tuck it away so it doesn't get crushed.
8. Reverse wire. Dont forget the reverse wire. Without this connection the Avic Z1 wont switch to rear camera when you shift into reverse. Pioneer included a specific wire for this connection so I tapped into the reverse light in the rear as opposed to finding the wire up front.
9. Once the wires is tapped it's time for a little wire management.
10. Through the rear strut bar and out the compartment behind the passenger seat.
11. I ran the wires down the center, its a lot easier then pulling up the carpet. Time for the Z1 to come out again.
12. Find the wire for the reverse gear input and connect it to the wire that you tapped into the reverse light in the back.
13. Time to tap into some power for the camera. It doesnt really matter where you tap into the power, but since this camera has the power wires attached on the end of the cables that get attached to the head unit, I tapped the constant power from the head unit and the oem ground. The headunit has its own separate ground now. Here is a shot of the power wire prepped for install
14. The last connection, the actual video feed from the box mounted in the rear.
15. Turn on the car and test it out before securing down the head unit. Make sure all of your speakers and devices attached to the radio are functioning. It gets really tight behind the head unit and its easy to disconnect wires when reassembling. I had to change a setting on the headunit to accept camera feed for the rear.
Here are some pics of the images from the camera
With old school cheap a$$ pager on the ground for scale
with some needle nose pliers
From the side
The finished product
Enjoy.
BTW since the license plate camera frame is substantially thicker then your average frame, I had to replace the screws and the mounting clips. When I bought the car the stealership used some horrible little screws that stripped the nuts inside the oem clips. A quick trip to lowes for two new coarse thread phillips head bolts, two body clips and two plastic black screw caps did the trick.
Last edited by JasonZ-YA; Dec 3, 2009 at 05:58 AM.

 I've been looking for a clean license plate rear view camera but the ones on ebay are fugly.
Agreed, I really liked the idea of a frame mounted camera, but most of the ones I've seen are plasti-chrome.
Here's a link if you want one:
http://cgi.ebay.com/ws/eBayISAPI.dll...ype=osi_widget
Here's a link if you want one:
http://cgi.ebay.com/ws/eBayISAPI.dll...ype=osi_widget
Last edited by Ichigo; May 23, 2007 at 08:03 PM.


Could you also use different screws with an unique bolt patter to prevent theft? I'm sure most won't even notice your license plate bracket is also a camera but it's an idea.
I used these screws to secure my amps. You can get them in all shapes and sizes. Sure you can bust out the windows but the amps are screwed down to the frame. A phillips or flathead will not do the trick.

I used these screws to secure my amps. You can get them in all shapes and sizes. Sure you can bust out the windows but the amps are screwed down to the frame. A phillips or flathead will not do the trick.
Last edited by HitLines; May 29, 2007 at 11:21 AM.

Trending Topics

Originally Posted by HitLines
Could you also use different screws with an unique bolt patter to prevent theft? I'm sure most won't even notice your license plate bracket is also a camera but it's an idea.
I used these screws to secure my amps. You can get them in all shapes and sizes. Sure you can bust out the windows but the amps are screwed down to the frame. A phillips or flathead will not do the trick.
I used these screws to secure my amps. You can get them in all shapes and sizes. Sure you can bust out the windows but the amps are screwed down to the frame. A phillips or flathead will not do the trick.
Only problem was they were too short so I had to go with ones that would fit the body clips, I believe I looked at some like the ones you pictured but the they were for furniture and wouldn't fit the clips. Hell if they really wanted to be d1cks they could just tear the whole thing off.
 Next time the rear bumper is off I'll spot weld the rest of the screw thread, That'll fixem
If someone steps up to the plate to jack my stuff, I'll be happy if all they take is the camera.

Registered User
Joined: Mar 2005
Posts: 3,234
Likes: 0
From: Dallas Texas
Is there a way to make my screen switch to the camera when I throw it in reverse with my JVC KD-DV5100 it has alot of inputs? and or a direct link to the screen with a toggle switch mounted some where to swtich on the fly?
See sig for my stuff.
See sig for my stuff.
Last edited by HockeyZ39; Jun 21, 2007 at 05:27 PM.


Originally Posted by IDriveRealSLow
any1 kno if it works with stock navi
Originally Posted by HockeyZ39
Is there a way to make my screen switch to the camera when I throw it in reverse with my JVC KD-DV5100 it has alot of inputs? and or a direct link to the screen with a toggle switch mounted some where to swtich on the fly?
See sig for my stuff.
See sig for my stuff.
Registered User
Joined: Mar 2005
Posts: 3,234
Likes: 0
From: Dallas Texas
Originally Posted by usmanasif
Check its specs for reverse camera input. If it has it, then yes; just follow directions above on the reverse wire tap.

does it only work during reverse?
the reason i ask is because my rearview mirror broke off due to my loud subs. i have a monitor in the center front console, but i don't use it at all anymore. it came with the car and it's aftermarket.
i was thinking of using the monitor as a rearview mirror at all times. will it work?
the reason i ask is because my rearview mirror broke off due to my loud subs. i have a monitor in the center front console, but i don't use it at all anymore. it came with the car and it's aftermarket.
i was thinking of using the monitor as a rearview mirror at all times. will it work?

Originally Posted by DIMERYDER
does it only work during reverse?
the reason i ask is because my rearview mirror broke off due to my loud subs. i have a monitor in the center front console, but i don't use it at all anymore. it came with the car and it's aftermarket.
i was thinking of using the monitor as a rearview mirror at all times. will it work?
the reason i ask is because my rearview mirror broke off due to my loud subs. i have a monitor in the center front console, but i don't use it at all anymore. it came with the car and it's aftermarket.
i was thinking of using the monitor as a rearview mirror at all times. will it work?