
Installing your CF hatch

OK Boys and Girls. Today we figure out how to install a CF hatch.
Disclaimer: By attempting this task I take no responsibility if you break or bust your a$$ attempting this install. That being said, lets get started.
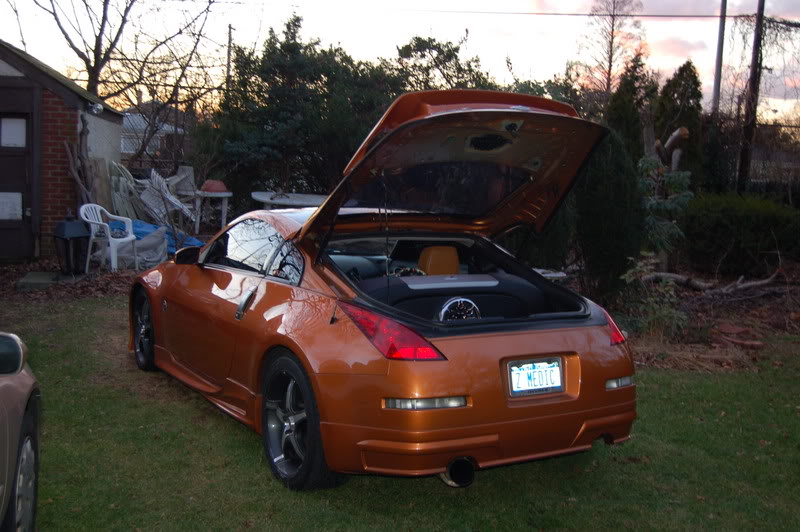
Start by opening up your hatch and saying good bye to the ole' girl.
I then moved on to removing the rear wiper assembly. The very end of the wiper arm has a plastic cap covering the one nut that holds the wiper arm to the wiper motor assembly. Very simply snap off the plastic cover and remove the nut. I think it is a 12mm nut. Then pull off the wiper arm. Giggle it if necessary. Done.
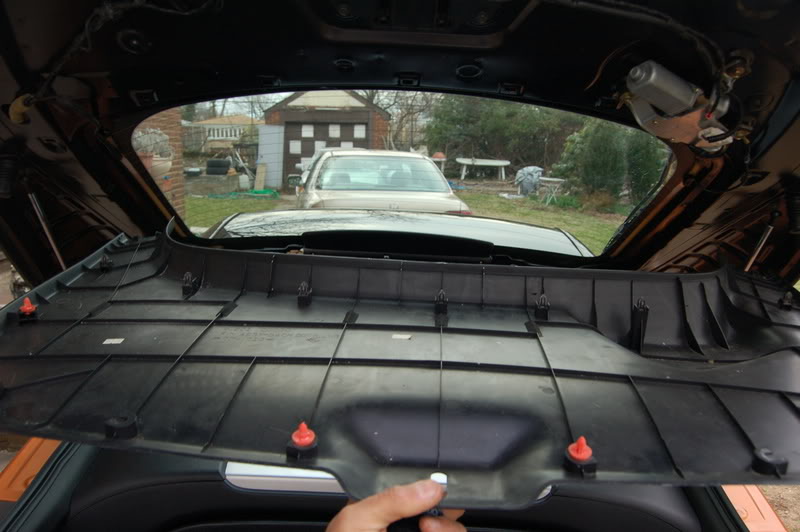
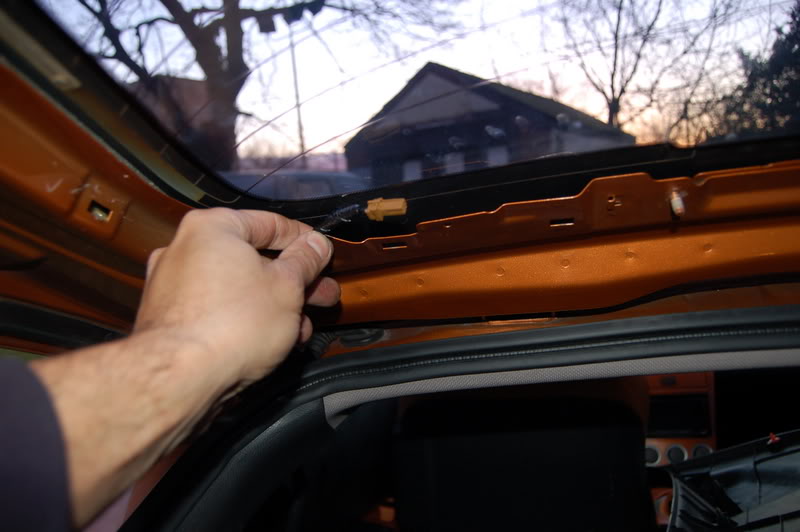
Next open up your hatch and remove the inner plastic trimmings to expose the wiper motor and harness.
To accomplish this you could use a flat screwdriver or a pry tool. The latter is better. You will find altogether about 12 or so snap buttons holding the wide lower end of the trim to the actual hatch body.
Once the widest and largest piece is removed, you will be left with 3 small thin trim pieces to remove. There are 2 (middle) pieces...One on each side of the glass...BE CAREFUL to pull them inwards as to avoid breaking them, I tried pulling them in the direction of the rear bumper and almost broke them. They must be pulled in the direction of the glass.
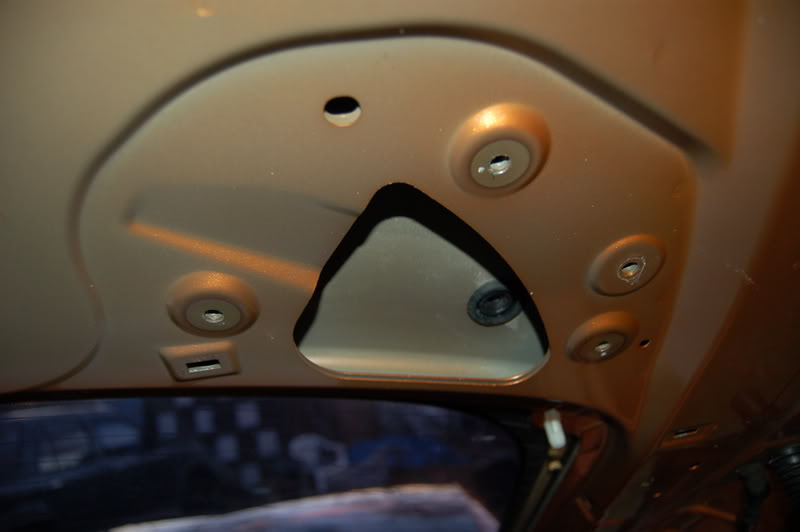
The final top trim piece just clips out of the way, revealing the third brake light. There are about 4 small screws holding a black plastic shroud that covers the actual light assembly. Remove the 4 screws. See here:
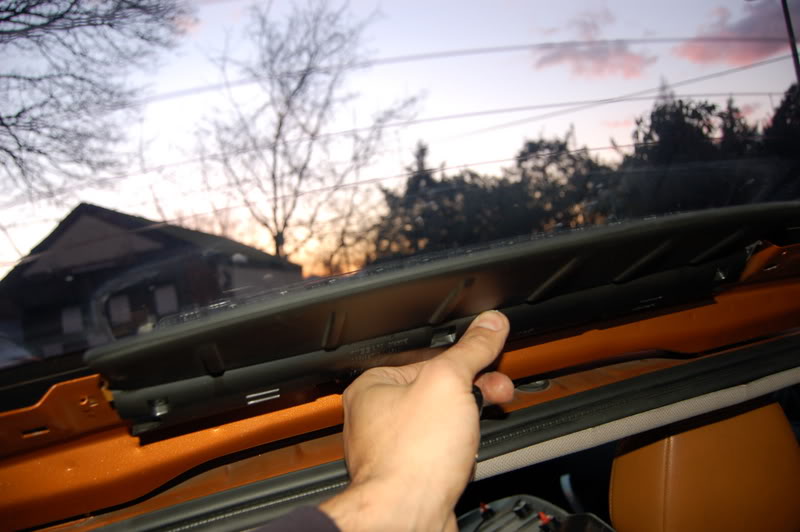
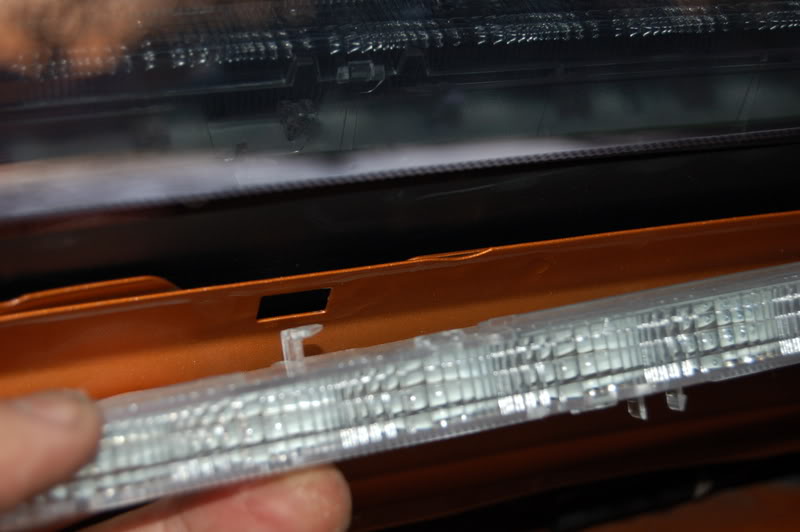
And here is the third brake light:
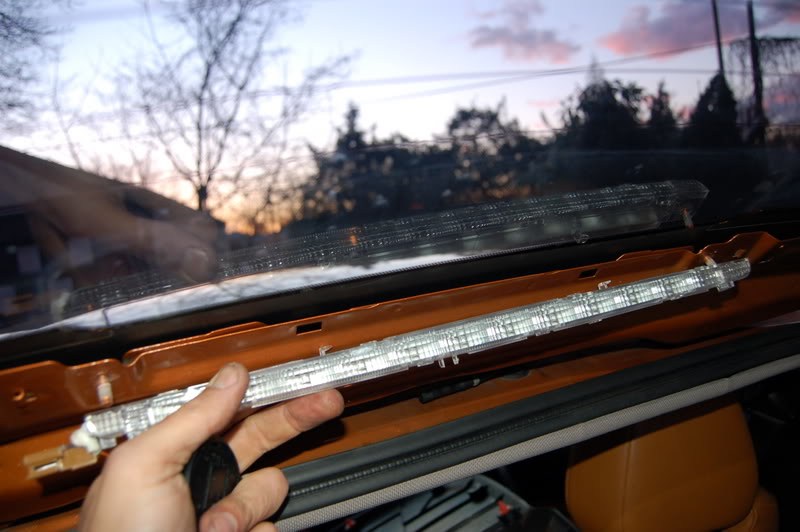
PAY ATTENTION TO THESE TABS, YOU DON'T WANT TO BREAK THEM BE GENTLE WHEN TRYING TO REMOVE THE BRAKE LIGHT!!!!!
Once you have removed all of the trim pieces, you will find the wiper motor to the right side. Remove the 3 bolts holding it in place and get it out.
It looks like this:
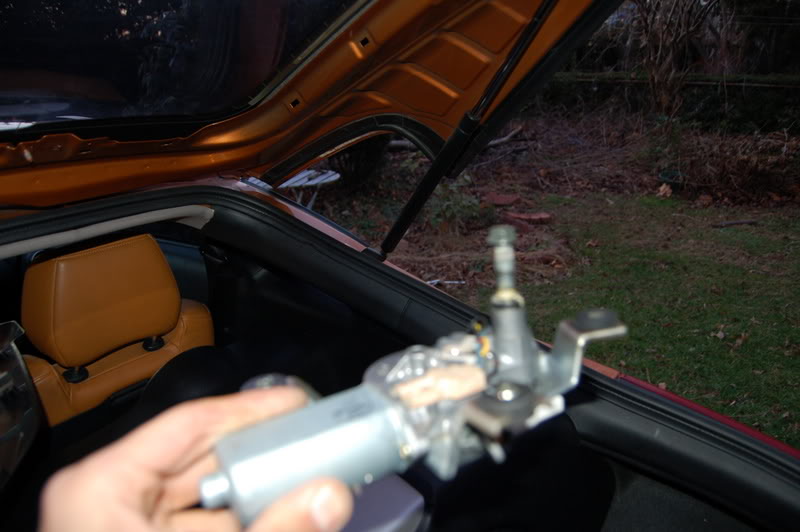
And with it removed looks like this;
What is left is the wiring harness see here:
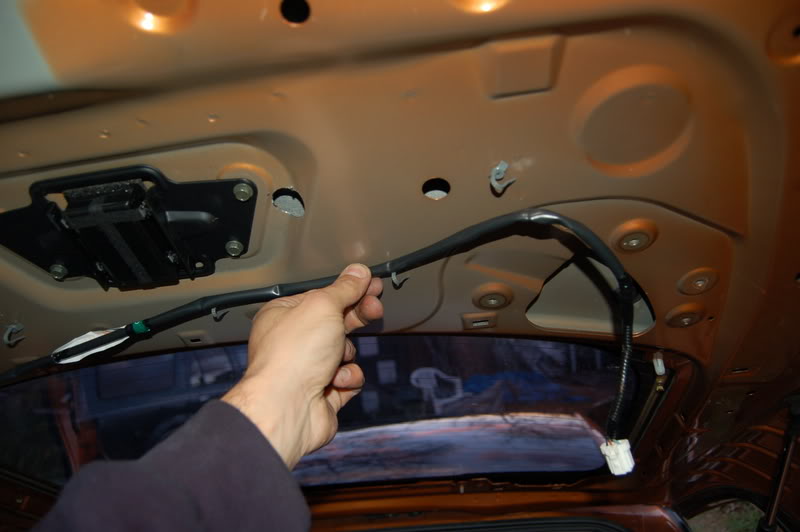
Pay attention to the harness and how it is routed. It passes inside the hatch on the left (driver) side, through an inner sleeve or hollow passage way.
Most of the wire harness anchors will not be re-used, simply because the Seibon hatch does not have all of the necessary pre-drilled holes, but if you are inclined to drill them to make everything perfect, feel free. I just used zip ties to secure the harness through whatever holes were available in the CF hatch.
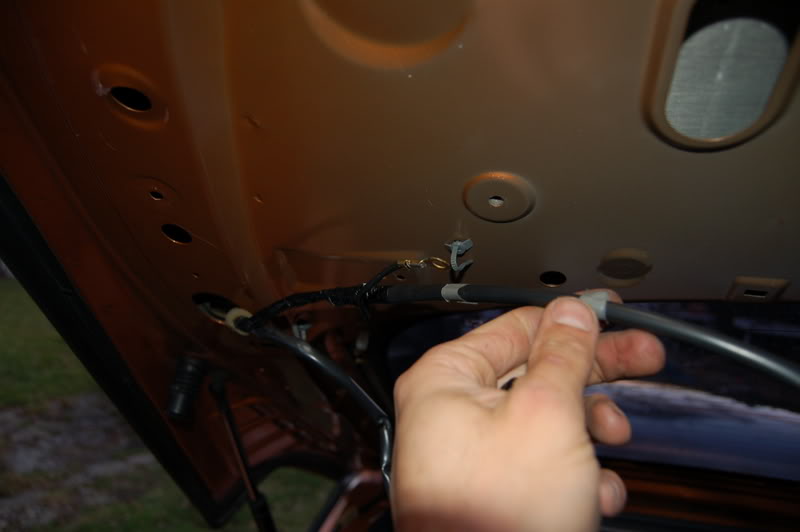
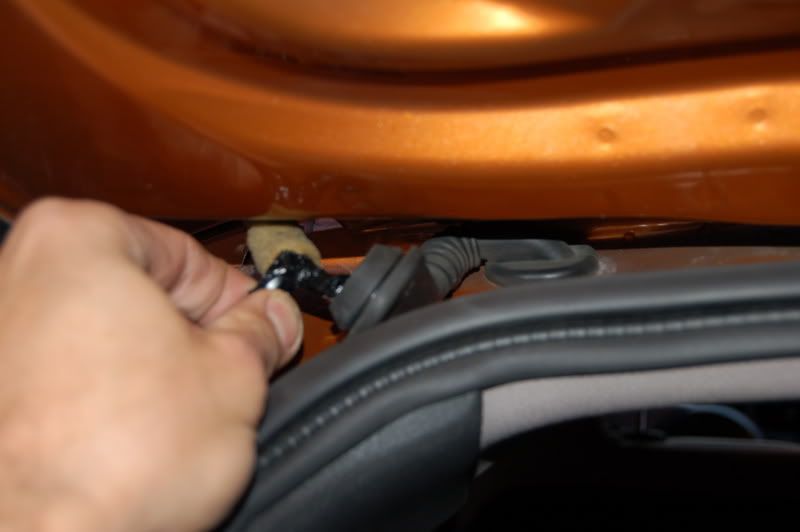
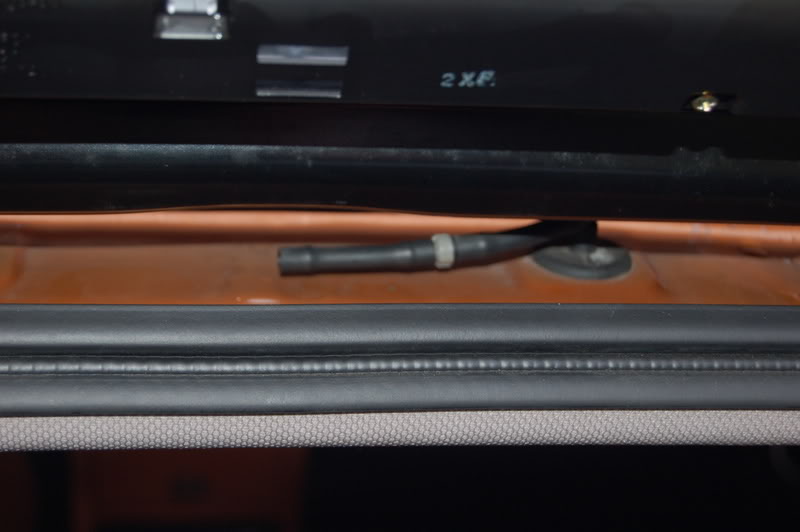
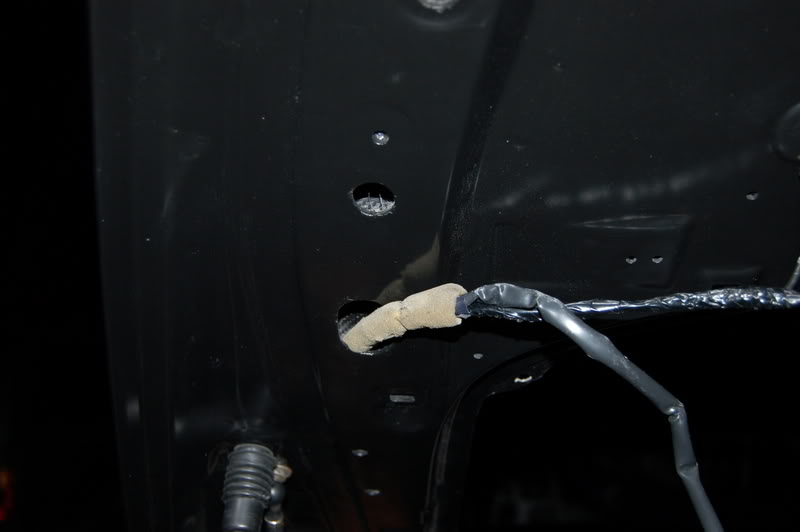
Here is the harness that leads to the third brake light. There will be 2 similar looking connectors that activate the rear defroster. Simply disconnect them as seen here:
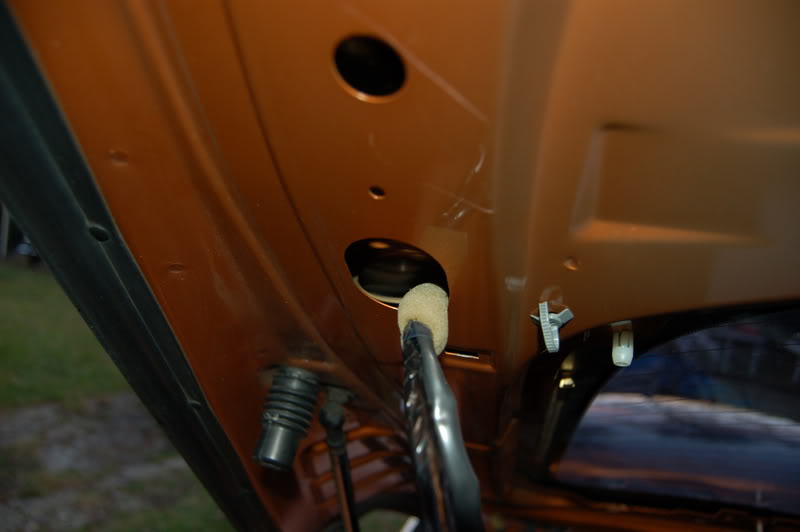
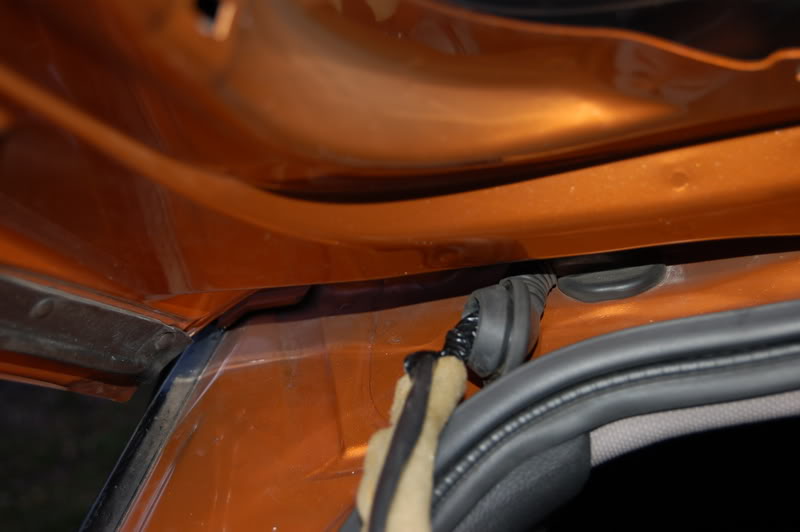
Pull the harness out of the original hatch to the edge as seen here;
Until it is completely out and free of the actual hatch:
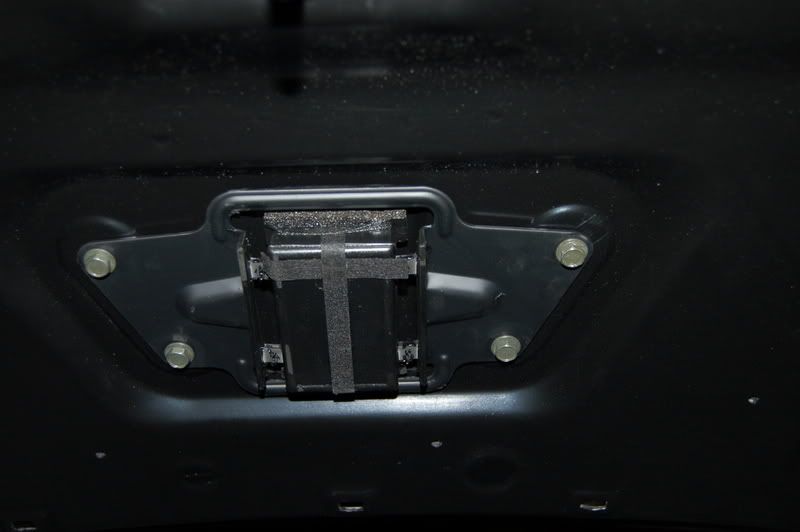
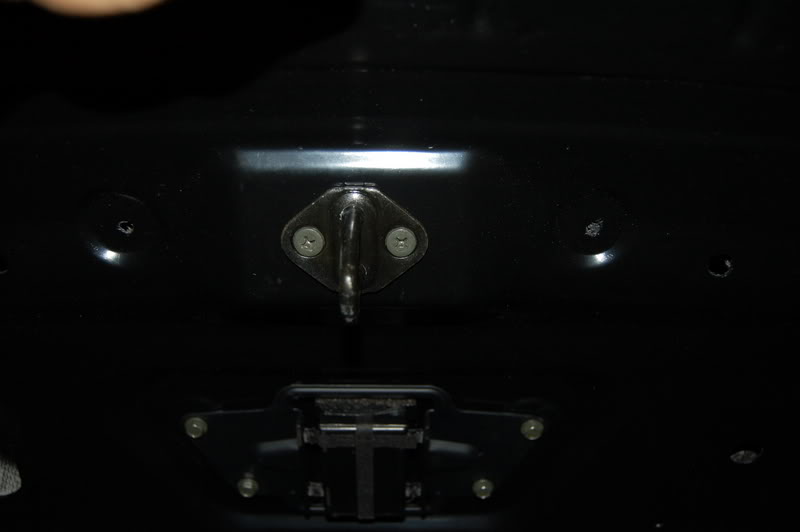
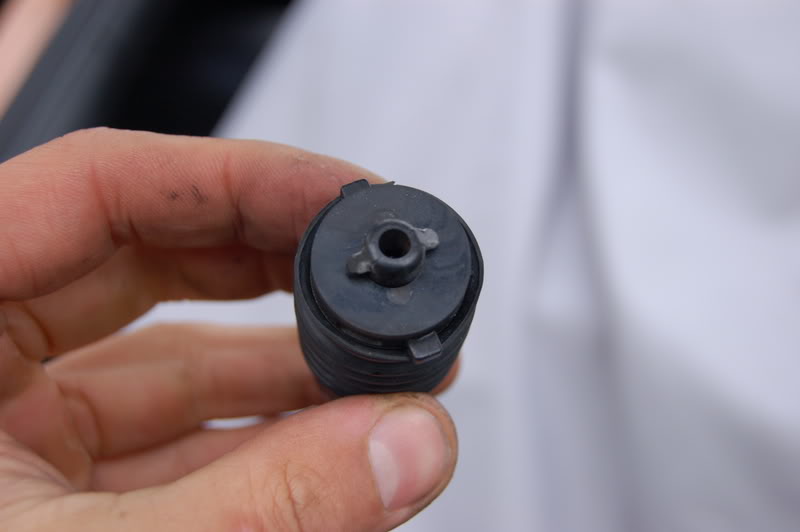
This odd looking piece is a weight that gets transferred:
Don't forget the latch to lock also gets transferred:
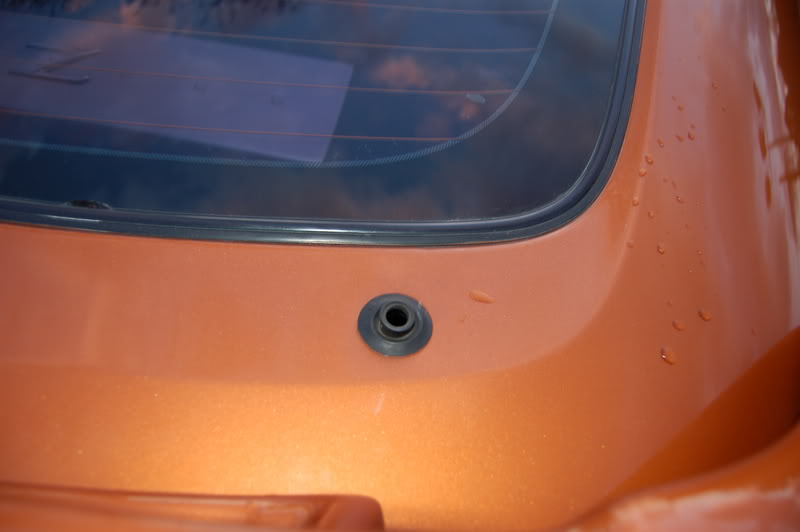
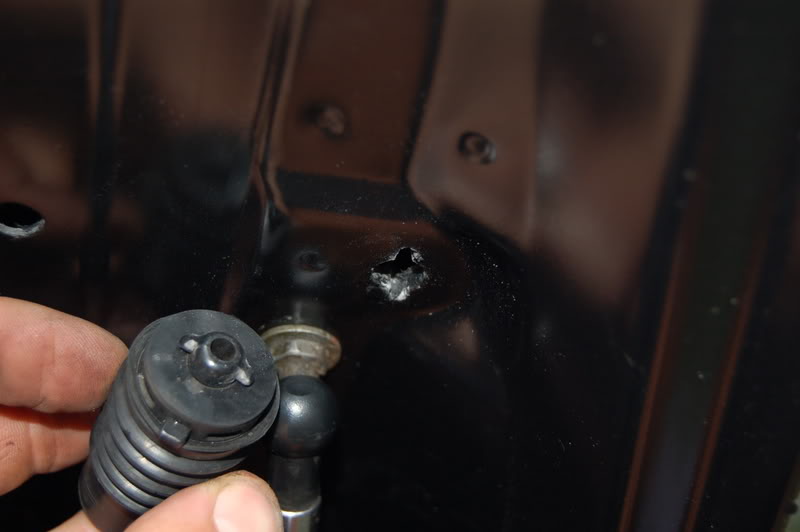
Don't forget to disconnect the hose for the water jets that wash the rear window...see below:
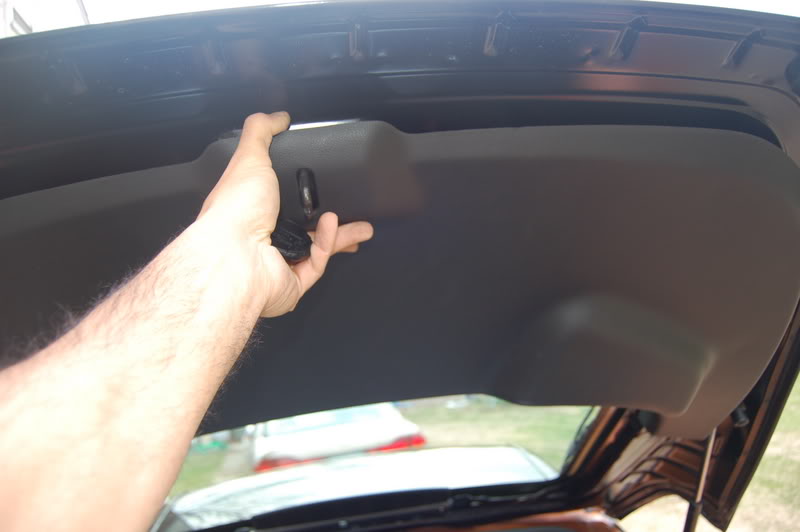
Before we can let go of the old hatch, you have to go inside the car, towards the rear and look for 4 plugs in the roof liner that hold the liner up. Remove all 4 plugs. After doing so, you will more easily be able to pull the liner down a bit from the rear of the car to make room for a ratchet. You will need this extra space to fit you hand and a ratchet to remove the 4 nuts that hold the hatch to the roof of the car. Before just hacking at it, I would suggest some tape and something to protect your roof from any mishaps and scratches.
Trust me on this one!
Now that the roof is protected and you can access the 4 nuts, you may want some assistance in holding up the hatch while you unfasten it, or else it will come off at an awkward angle and tilt and crack the glass. Remember the glass has to be kept straight or any stress could easily crack it...It is not made to flex much at all.
OFF WITH THE OLD HATCH!
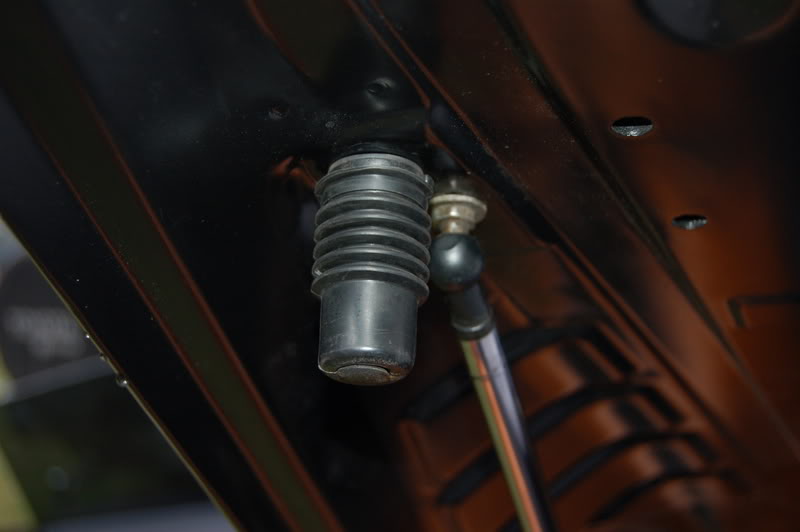
Also VERY IMPORTANT IS THE ORIENTATION OF THE SHOCKS. Please note that the bracket is curved down, making it look like it is upside down. Remember this, when you fasten the new CF hatch to the car.
If you mount it incorrectly the hatch will not close properly and you could damage the CF.
In the photo below you should note that the pop up "doohicky's" that prop the hatch up when you hit the release are twist on devices. Also it is easier to fasten the shocks to the new CF Hatch when it is OFF of the car. This is to avoid stripping the CF side. You don't want to strip the CF or its finished.
You fit the bumpers in the slot seen in the pic below and twist them off/on.
Feed the wire harness through the new hatch as seen here:
You also have to transfer the water jet nozzle. Before mounting any glass, try to make sure that the water jet fits properly or else it could lead to leaks or other problems.
Then, just do everything in reverse. The only thing I can remember doing differently is the fact that the old hatch served as a ground for the rear defroster and the wiper motor. Without a metal hatch to ground to, I had to improvise a metal ground, by attaching the rear defroster and the wiper motor to the metal of the wiper assembly. It was the only metal available in the trunk.
That is about it.
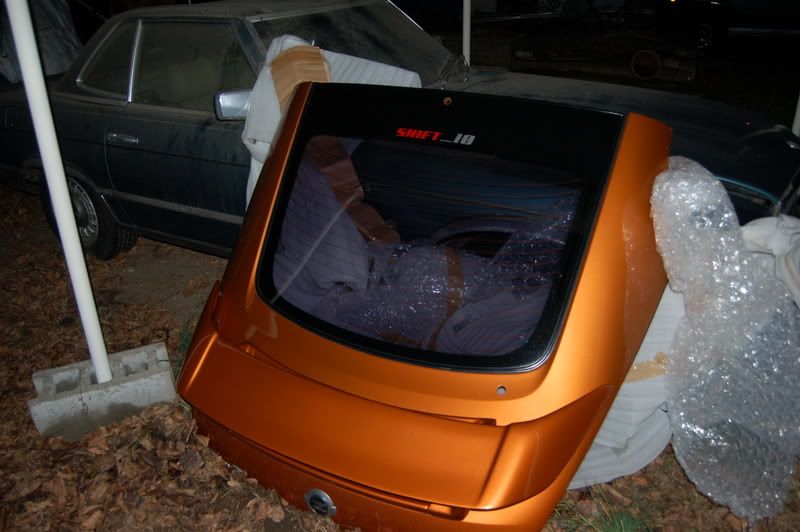
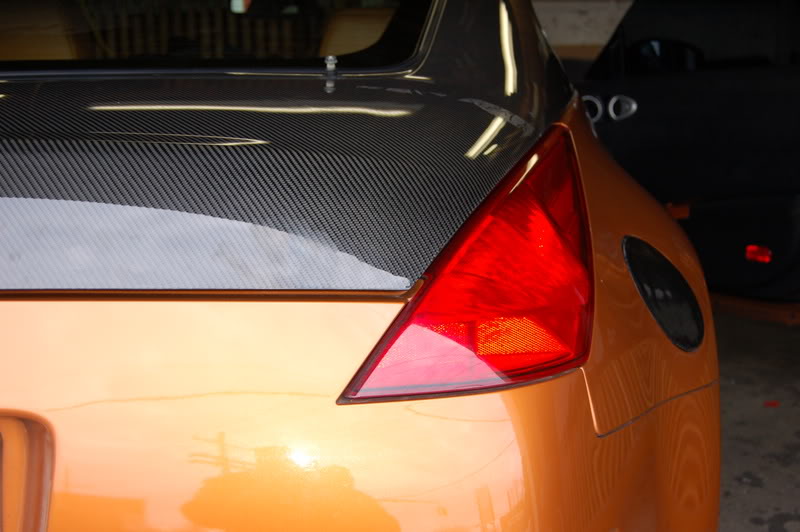
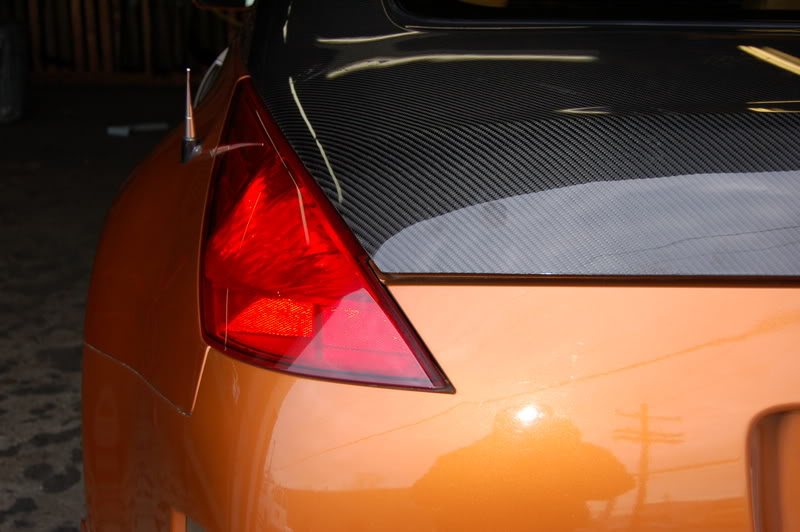
Finished product:
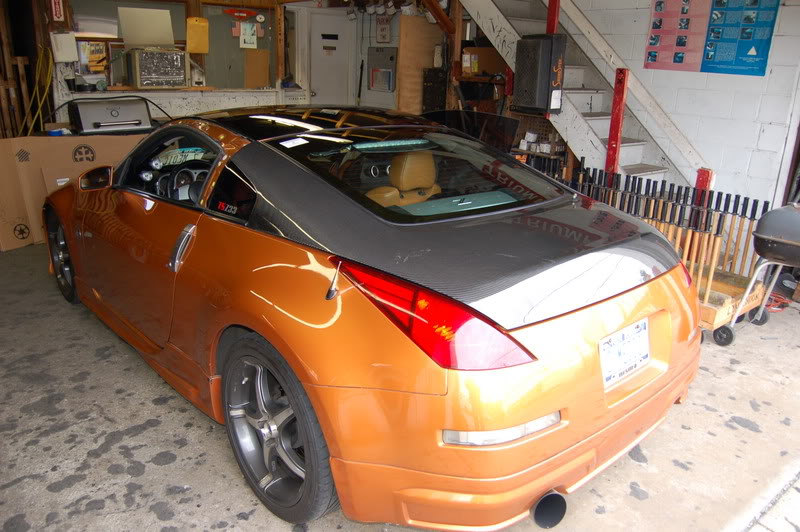
Perfect fitment:
Good Luck.
ZMedic
Disclaimer: By attempting this task I take no responsibility if you break or bust your a$$ attempting this install. That being said, lets get started.
Start by opening up your hatch and saying good bye to the ole' girl.
I then moved on to removing the rear wiper assembly. The very end of the wiper arm has a plastic cap covering the one nut that holds the wiper arm to the wiper motor assembly. Very simply snap off the plastic cover and remove the nut. I think it is a 12mm nut. Then pull off the wiper arm. Giggle it if necessary. Done.
Next open up your hatch and remove the inner plastic trimmings to expose the wiper motor and harness.
To accomplish this you could use a flat screwdriver or a pry tool. The latter is better. You will find altogether about 12 or so snap buttons holding the wide lower end of the trim to the actual hatch body.
Once the widest and largest piece is removed, you will be left with 3 small thin trim pieces to remove. There are 2 (middle) pieces...One on each side of the glass...BE CAREFUL to pull them inwards as to avoid breaking them, I tried pulling them in the direction of the rear bumper and almost broke them. They must be pulled in the direction of the glass.
The final top trim piece just clips out of the way, revealing the third brake light. There are about 4 small screws holding a black plastic shroud that covers the actual light assembly. Remove the 4 screws. See here:
And here is the third brake light:
PAY ATTENTION TO THESE TABS, YOU DON'T WANT TO BREAK THEM BE GENTLE WHEN TRYING TO REMOVE THE BRAKE LIGHT!!!!!
Once you have removed all of the trim pieces, you will find the wiper motor to the right side. Remove the 3 bolts holding it in place and get it out.
It looks like this:
And with it removed looks like this;
What is left is the wiring harness see here:
Pay attention to the harness and how it is routed. It passes inside the hatch on the left (driver) side, through an inner sleeve or hollow passage way.
Most of the wire harness anchors will not be re-used, simply because the Seibon hatch does not have all of the necessary pre-drilled holes, but if you are inclined to drill them to make everything perfect, feel free. I just used zip ties to secure the harness through whatever holes were available in the CF hatch.
Here is the harness that leads to the third brake light. There will be 2 similar looking connectors that activate the rear defroster. Simply disconnect them as seen here:
Pull the harness out of the original hatch to the edge as seen here;
Until it is completely out and free of the actual hatch:
This odd looking piece is a weight that gets transferred:
Don't forget the latch to lock also gets transferred:
Don't forget to disconnect the hose for the water jets that wash the rear window...see below:
Before we can let go of the old hatch, you have to go inside the car, towards the rear and look for 4 plugs in the roof liner that hold the liner up. Remove all 4 plugs. After doing so, you will more easily be able to pull the liner down a bit from the rear of the car to make room for a ratchet. You will need this extra space to fit you hand and a ratchet to remove the 4 nuts that hold the hatch to the roof of the car. Before just hacking at it, I would suggest some tape and something to protect your roof from any mishaps and scratches.
Trust me on this one!
Now that the roof is protected and you can access the 4 nuts, you may want some assistance in holding up the hatch while you unfasten it, or else it will come off at an awkward angle and tilt and crack the glass. Remember the glass has to be kept straight or any stress could easily crack it...It is not made to flex much at all.
OFF WITH THE OLD HATCH!
Also VERY IMPORTANT IS THE ORIENTATION OF THE SHOCKS. Please note that the bracket is curved down, making it look like it is upside down. Remember this, when you fasten the new CF hatch to the car.
If you mount it incorrectly the hatch will not close properly and you could damage the CF.
In the photo below you should note that the pop up "doohicky's" that prop the hatch up when you hit the release are twist on devices. Also it is easier to fasten the shocks to the new CF Hatch when it is OFF of the car. This is to avoid stripping the CF side. You don't want to strip the CF or its finished.
You fit the bumpers in the slot seen in the pic below and twist them off/on.
Feed the wire harness through the new hatch as seen here:
You also have to transfer the water jet nozzle. Before mounting any glass, try to make sure that the water jet fits properly or else it could lead to leaks or other problems.
Then, just do everything in reverse. The only thing I can remember doing differently is the fact that the old hatch served as a ground for the rear defroster and the wiper motor. Without a metal hatch to ground to, I had to improvise a metal ground, by attaching the rear defroster and the wiper motor to the metal of the wiper assembly. It was the only metal available in the trunk.
That is about it.
Finished product:
Perfect fitment:
Good Luck.
ZMedic
Last edited by rrmedicx; Feb 22, 2008 at 11:12 PM.


I had to dig up some of these pics from my install last year on request from a fellow forum member who just purchased a CF hatch. My CF hatch has come and gone. Glad I held on to my stocker.
Thanks for the props.
I've got plenty of pics to share on many different DIY projects. Engine assembly, disassembly, twin turbo build, and soon, I'll be adding a Turbonetics to my library. Once completed, I'll add it to the DIY section.
Thanks for the props.
I've got plenty of pics to share on many different DIY projects. Engine assembly, disassembly, twin turbo build, and soon, I'll be adding a Turbonetics to my library. Once completed, I'll add it to the DIY section.
Trending Topics
Originally Posted by rrmedicx
I had to dig up some of these pics from my install last year on request from a fellow forum member who just purchased a CF hatch. My CF hatch has come and gone. Glad I held on to my stocker.
Thanks for the props.
I've got plenty of pics to share on many different DIY projects. Engine assembly, disassembly, twin turbo build, and soon, I'll be adding a Turbonetics to my library. Once completed, I'll add it to the DIY section.
Thanks for the props.
I've got plenty of pics to share on many different DIY projects. Engine assembly, disassembly, twin turbo build, and soon, I'll be adding a Turbonetics to my library. Once completed, I'll add it to the DIY section.
I'm coming soon

Originally Posted by 04LIQUIDSILVER
Did U say a turbonetics? or 2 turbonetics kits?
I'm coming soon
I'm coming soon
Meanwhile enjoy the pics. in this DIY.
Originally Posted by rrmedicx
Don't get your panties up in a bunch...thats right, I'll be installing 2 turbonetics kits very soon. One is yours, and the other is a friend of mine as well going turbonetics...just a little more custom, with open dumps and such...Just waiting for you guys to get your parts together and then we can get started.
Meanwhile enjoy the pics. in this DIY.
Meanwhile enjoy the pics. in this DIY.
the oil pan spacer? dont know I Ordered last week...?
and the Turbonetics early next week
I'm on the hunt for a clutch and flywheel
thanks and keep up the good work!!!


Originally Posted by rrmedicx
I've got plenty of pics to share on many different DIY projects. Engine assembly, disassembly, twin turbo build, and soon, I'll be adding a Turbonetics to my library. Once completed, I'll add it to the DIY section.
You rock, thanks for inspiring some of us to try some new projects.
Originally Posted by 350ZTheStandard
You rock, thanks for inspiring some of us to try some new projects.
Good Luck.

Originally Posted by Musto
what do you do about the glass? all of the hatchs ive seen on ebay dont come with glass in it...maybe i missed something?
You have to get a shop to swap it over or get a lexan rear window kit. Please save yourself the hassle and don't buy the garbage on Ebay. You have a nice car, don't put cheap low quality parts on it.
