
DIY- APR convex mirror install (GLASS ONLY)

Thread Starter
Registered User
iTrader: (15)
Joined: Nov 2003
Posts: 6,612
Likes: 1
From: Clarksville, Tennessee
Ok, I had a couple people ask me how I installed the APR convex lens into the OEM mirror spot. It was a bit tricky but when i received the mirrors, i saw that they were exactly the same size as the OEM and that the OEm mirror basically just sat in a frame. I decided that instead of just sticking the mirror on, i woudl replace them totally for a cleaner more factory look. One note: your OEm mirrors might not survive the actual removal part. That is because of the adhesive used to keep them inside the frame.
ok, on to the removal. I followed the steps in the service manual on how to pop the mirror frame out of the housing:
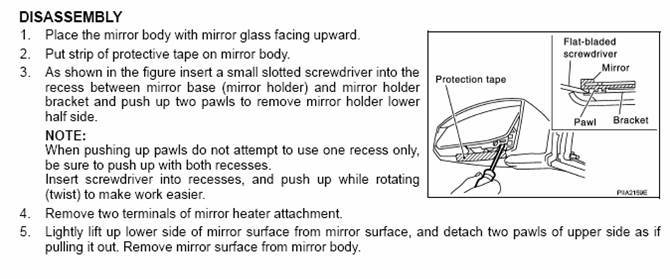
1. Place the mirror body with mirror glass facing upward.
2. Put strip of protective tape on mirror body.
3. As shown in the figure insert a small slotted screwdriver into the
recess between mirror base (mirror holder) and mirror holder
bracket and push up two pawls to remove mirror holder lower
half side.
NOTE:
When pushing up pawls do not attempt to use one recess only,
be sure to push up with both recesses.
Insert screwdriver into recesses, and push up while rotating
(twist) to make work easier.
4. Remove two terminals of mirror heater attachment.
5. Lightly lift up lower side of mirror surface from mirror surface, and detach two pawls of upper side as if
pulling it out. Remove mirror surface from mirror body.
ok, once the frame for the mirror is out thsi is the tricky part. you need a very small screwdriver, preferably one used for glasses or similar, to slowly work aroudn the edges of the mirror. you can also work at the adhesive that hold it in but this really can be a pain. i found that the mirror will crack no matter how careful you are, and that seemed to actually come out easier. once the OEM mirror is out you have a empty frame. reinstall the APR convex mirror into the frame. To secure the mirror properly you should pick up some silicone adhesive(window & door silicone sealant from GE is what I used). the clear stuff is the best rather than the white. tape the mirror to the frame and allow the silicone to dry.
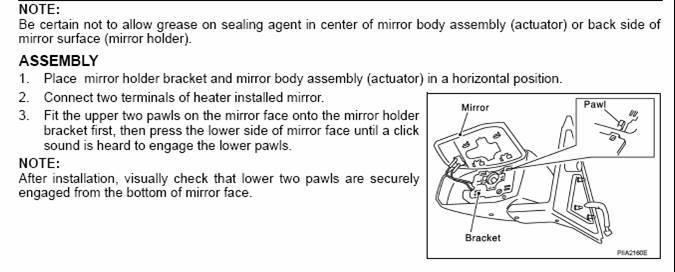
once dried, reassembly is the reverse of the removal. big thing to remember is to line the tabs up properly otherwise they may break. also make sure it snaps fully into the housing. you will hear a click if this is done right.
adjust the mirrors to your preferences, and enjoy. the completed install should look like a OEM mirror, just with a pretty blue tint and better side angle view.
ok, on to the removal. I followed the steps in the service manual on how to pop the mirror frame out of the housing:
1. Place the mirror body with mirror glass facing upward.
2. Put strip of protective tape on mirror body.
3. As shown in the figure insert a small slotted screwdriver into the
recess between mirror base (mirror holder) and mirror holder
bracket and push up two pawls to remove mirror holder lower
half side.
NOTE:
When pushing up pawls do not attempt to use one recess only,
be sure to push up with both recesses.
Insert screwdriver into recesses, and push up while rotating
(twist) to make work easier.
4. Remove two terminals of mirror heater attachment.
5. Lightly lift up lower side of mirror surface from mirror surface, and detach two pawls of upper side as if
pulling it out. Remove mirror surface from mirror body.
ok, once the frame for the mirror is out thsi is the tricky part. you need a very small screwdriver, preferably one used for glasses or similar, to slowly work aroudn the edges of the mirror. you can also work at the adhesive that hold it in but this really can be a pain. i found that the mirror will crack no matter how careful you are, and that seemed to actually come out easier. once the OEM mirror is out you have a empty frame. reinstall the APR convex mirror into the frame. To secure the mirror properly you should pick up some silicone adhesive(window & door silicone sealant from GE is what I used). the clear stuff is the best rather than the white. tape the mirror to the frame and allow the silicone to dry.
once dried, reassembly is the reverse of the removal. big thing to remember is to line the tabs up properly otherwise they may break. also make sure it snaps fully into the housing. you will hear a click if this is done right.
adjust the mirrors to your preferences, and enjoy. the completed install should look like a OEM mirror, just with a pretty blue tint and better side angle view.
Thread Starter
Registered User
iTrader: (15)
Joined: Nov 2003
Posts: 6,612
Likes: 1
From: Clarksville, Tennessee
had these on a few months already. night driving is a lot more enjoyable now. you still got visibility but glare is reduced big time. it is comparable to the auto-dim mirror, just not as dark.


Trending Topics


Thread
Thread Starter
Forum
Replies
Last Post
Gruppe-S
Body Interior
13
May 16, 2016 10:42 PM