
DIY: repairing faded/foggy headlights


searched through the forum, but couldn't find one. so i thought i'd share..
What you need:
-Sanding papers (1500 and 2000 grit).
-Zymol Cleaner Wax (or any wax/polish you trust to be good).
-Microfiber towel.
-A buffer (optional)
On with the (easy) process..
1- wash the headlights with water and soap then rinse it with a towel.
2- with water running over the headlight, start sanding (with light to no pressure) the foggy area (with 1500 grit) for at least 3 minutes. *make sure the headlight is always wet while sanding*
3- once you're done, do the same thing using the 2000 grit paper.
4- rinse the headlight and apply Zymol Wax (or the one you prefer). since i don't own a buffer, i used my fingers to spread the wax all over the sanded area. (wait for it till it dries *approx. 3-5mins*)
5- wipe the headlight with the microfiber towel.
wallaa, you should be done. but if need be, you might wanna have another go with the wax/polish to achieve a better result. tho applying it 10 times won't make it new
on with the pics.. (phone cam)
Before

After

Before

After

What you need:
-Sanding papers (1500 and 2000 grit).
-Zymol Cleaner Wax (or any wax/polish you trust to be good).
-Microfiber towel.
-A buffer (optional)
On with the (easy) process..
1- wash the headlights with water and soap then rinse it with a towel.
2- with water running over the headlight, start sanding (with light to no pressure) the foggy area (with 1500 grit) for at least 3 minutes. *make sure the headlight is always wet while sanding*
3- once you're done, do the same thing using the 2000 grit paper.
4- rinse the headlight and apply Zymol Wax (or the one you prefer). since i don't own a buffer, i used my fingers to spread the wax all over the sanded area. (wait for it till it dries *approx. 3-5mins*)
5- wipe the headlight with the microfiber towel.
wallaa, you should be done. but if need be, you might wanna have another go with the wax/polish to achieve a better result. tho applying it 10 times won't make it new
on with the pics.. (phone cam)
Before
After
Before
After
Last edited by maXmood; Apr 5, 2009 at 03:29 AM.

nice job but what you need is polish, not wax.
wax does not have any abbrassive properties and will only cover up the 2000 sanding scratches temporarily. your after pictures are still hazy.
get yourself some polish and a machine if you can and it will look brand new.
wax does not have any abbrassive properties and will only cover up the 2000 sanding scratches temporarily. your after pictures are still hazy.
get yourself some polish and a machine if you can and it will look brand new.
^that what i was going to do..but at the time i didn't have anything but Zymol, so i thought i'd give it a try.
i'm getting Megs PlastX. i'll post updated pics once done.
i'm getting Megs PlastX. i'll post updated pics once done.

I love the plastX, it works really well. I find I need to reapply about every other month or so, but that may be because I'm picky...!
Good job on the sanding part, I had a set of '05 lights that were bad enough for wetsanding too.
WOW that Bahrain sun really cooked those lenses fast!
I love the plastX, it works really well. I find I need to reapply about every other month or so, but that may be because I'm picky...!
Good job on the sanding part, I had a set of '05 lights that were bad enough for wetsanding too.
I love the plastX, it works really well. I find I need to reapply about every other month or so, but that may be because I'm picky...!
Good job on the sanding part, I had a set of '05 lights that were bad enough for wetsanding too.
so, the current ones were foggy too?? if so, then how about you share a pic of how PlastX treatment looks like?
thnx for the input
I'll have to get pics of my lights tomorrow, Its dark here in CA right now.

Trending Topics
 ?
?
I painted my lights and did the demon eye mod. Its fairly easy, the hardest part is getting the lens off, then back on and sealed correctly. Heres my DIY on adding the demon eye, and there are countless threads on how to black them out. Enjoy!
https://my350z.com/forum/body-interi...eadlights.html
Also, if you decide to blackout your headlights the lenses really need to be clean, every little speck will show up X10 once the lens is on a black background.
Last edited by AstroZombie; Mar 26, 2009 at 08:20 AM. Reason: Added link

3m has a kit with 500 grit 800 grit and a 300 grit pad, come with 3m polishing compound and polishing pad, attach to a drill and your golden, i charge peeps 50 bux all the time around town, it works really well. i just did mine, i shoulda done a before and after


After painting headlight black, scratches become REALLY apparent. I tried Powerball and Mother's PowerPlastic today. Huge improvement, but I would say took care of 98% of the problem. Pics below:
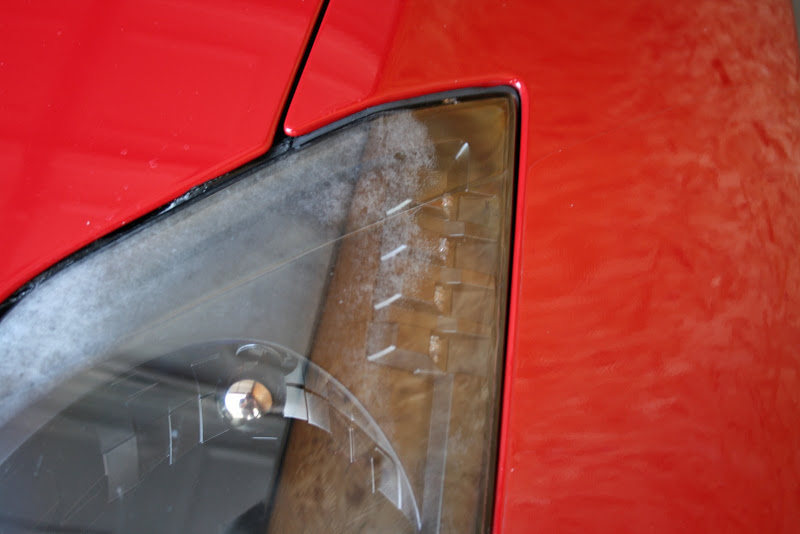
Fig 1: Before Shot, Driver's Side.
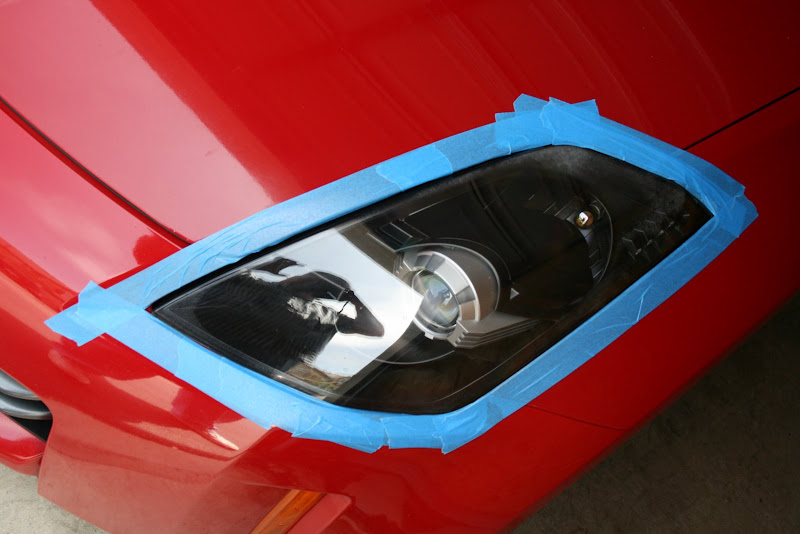
Fig 2: Some prep work.

Fig 3: In progress... go easy with application of polish, as you can see once the powerball spins it will splatter. I found it best to apply a little to the ball, then rub it onto the surface of the headlight to spread it around first. Then spin up the drill slowly.
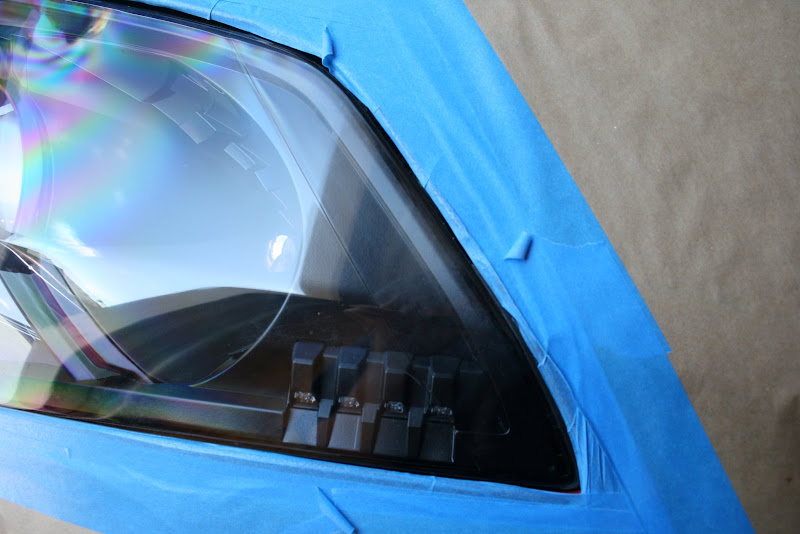
Fig 4: After buffing.

Fig 5: Close-up After shot. As you can see, some scratches are still apparent but very subdued. This was as good as I could get it, but unless you are this close you will not see it.
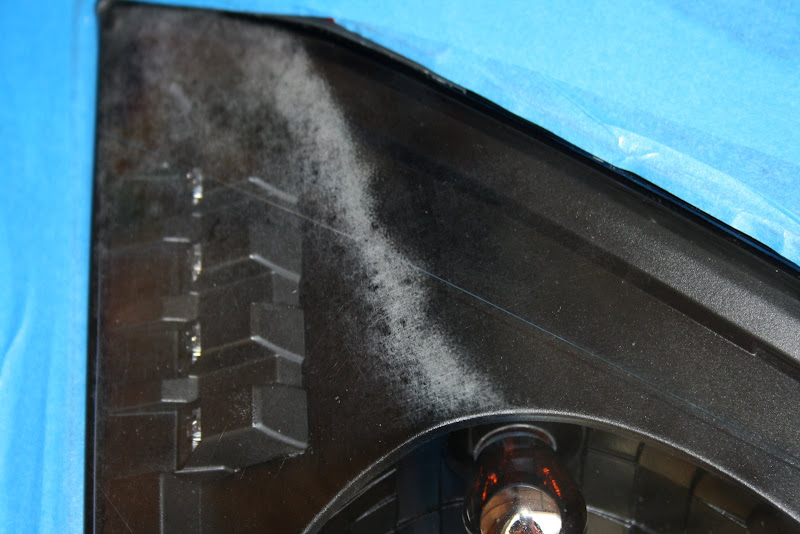
Fig 6: Passenger side appeared worse...
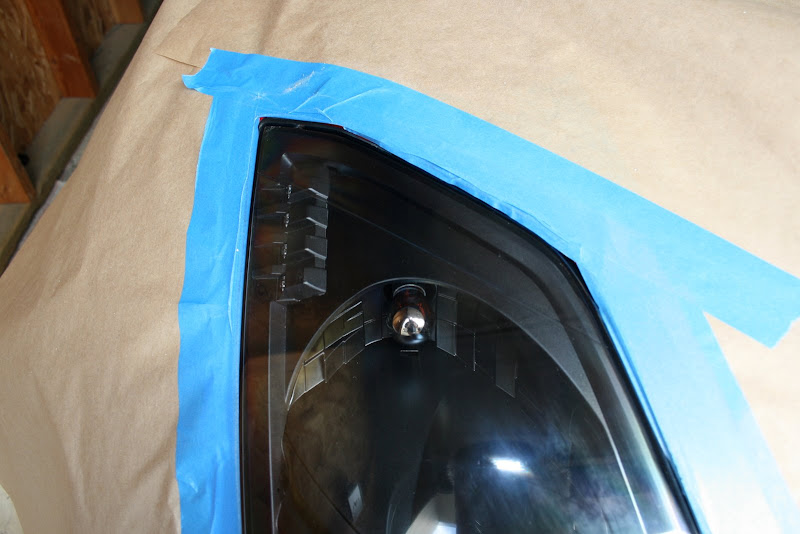
Fig 7: ...but cleaned up better. I would say 99% gone on this side.

Fig 8: Driver's side after in direct sun.
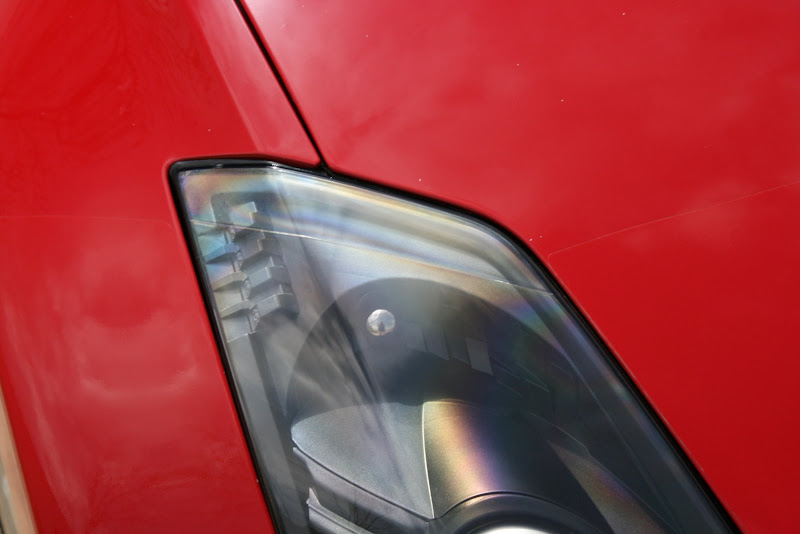
Fig 9: Passenger side after, direct sun.
Fig 1: Before Shot, Driver's Side.
Fig 2: Some prep work.
Fig 3: In progress... go easy with application of polish, as you can see once the powerball spins it will splatter. I found it best to apply a little to the ball, then rub it onto the surface of the headlight to spread it around first. Then spin up the drill slowly.
Fig 4: After buffing.
Fig 5: Close-up After shot. As you can see, some scratches are still apparent but very subdued. This was as good as I could get it, but unless you are this close you will not see it.
Fig 6: Passenger side appeared worse...
Fig 7: ...but cleaned up better. I would say 99% gone on this side.
Fig 8: Driver's side after in direct sun.
Fig 9: Passenger side after, direct sun.

Damn, these headlights look like they're brand new.
Are you guys saying to sand them down first, and then use Megs PlastX? My headlights are hazy and i've been looking to get rid of the haze...
Are you guys saying to sand them down first, and then use Megs PlastX? My headlights are hazy and i've been looking to get rid of the haze...
just go with 2000 grit sanding paper.. i noticed that 1500grit shaves off a little from that clear coat on the headlights. and make sure water is running while u're sanding (wet sanding).
tomorrow *hopefully*, i'll take pics of how do they look like after 1 month (since i started this thread), and other pics of redoing them again, but this time with PlastX and maybe a buffer..