
DIY: Restoring Headlights with New UV coating


Well worth the time, no regrets, not that big of a deal. Try this site:
https://my350z.com/forum/body-interi...dlights-2.html
1000 wet sand by hand (used spray bottle with couple drops of Joy dish soap)
2000 wet sand by hand
3000 wet sand by hand... and dry of course.
Apply PlasticX by fingers, buff out by cord or cordless drill, wax and wax again...turned out like new! Sorry no before pics.


Last edited by T'S 350Z; May 10, 2012 at 06:11 PM.


Registered User
Joined: Apr 2009
Posts: 128
Likes: 0
From: miami
Just tried it... Took me a little less than 30 minutes to do both headlights, and WOW they look amazing!!!
Honestly the headlights look much better now than when they were new! I'm too lazy to take pics, but there are plenty of pictures already on previous pages. The results are the same! I am very impressed and very happy for this useful DIY.
Thanks alot OP!
Honestly the headlights look much better now than when they were new! I'm too lazy to take pics, but there are plenty of pictures already on previous pages. The results are the same! I am very impressed and very happy for this useful DIY.
Thanks alot OP!
Did mine on Jan. 30th and it still looks great.
Use to have to polish about every three weeks so I couldn't be happier that I haven't had to touch them since.
Car was dirty at time of these pics


Use to have to polish about every three weeks so I couldn't be happier that I haven't had to touch them since.
Car was dirty at time of these pics

^^ Indoor, outdoor non issue...only smell comes from what ever you mix in ur water bottle ( Joy, Dawn, etc...)! PlastX may have a little smell but thats it

Last edited by T'S 350Z; May 23, 2012 at 03:05 PM.


Registered User
Joined: May 2011
Posts: 335
Likes: 1
From: Tampa, FL

Alright guys, this thread deserves a sticky..this **** is amazing. Lenses look brand spanking new. I went 300-400-800-1000 grit...buff with plastic-x. Clean with alcahol. Mixed a small cup up of the varnish and euthrane and wow. And no you shouldn't do it indoors, stinks like hell lol


Registered User
Joined: May 2011
Posts: 335
Likes: 1
From: Tampa, FL


Registered User
Joined: Jul 2011
Posts: 82
Likes: 0
From: Tennessee
I have actually done this method described on my 03 headlights. I had a little oxidation and a little peeling it looked like.
I grabbed a kit from auto zone/ advance auto which came with a 500, 800, 3000 grit and then buff pad with rub.compound..
yes i know the grit numbers are crazy..but it worked very well.
Now i was actually surprised because i did the kit, and then i was like if i didnt know about the two chemicals. id be pissed..because the kit alone doesnt do a great job. but it does a good job. mixing the two chemicals and applying them was NIGHT AND DAY difference. It is the UV coating your needing, and it was like wiping on the new film.
This is an easy job, even for a noob. All you need is a cordless drill. the kit. the chemicals. a bowl. and a 1 inch paint brush. (the sponge kind, NOT the ones with the bristles!!!!!!!!!!!!!!!!)
ALSO. when you mix the chemicals. its a 1:1 mix and make sure you add good layers. wipe from top to bottom. watch for runs and such.
MY ADVICE NOW THAT IVE DONE THIS:
wait for that first layer to dry. Go over the lights again a 2nd time.
I did it the first time (yes ive done it twice now because of this reason) only one layer..and with it being summer time i think the heat got to it cuz it started peeling the coating back off. so i sanded it all back down and did a couple good thick layers.
I like this method. Even when im up close looking at the lights. It looks about 99% perfectly clear. You will barely barely be able to see something left in the lense....and thats looking up close at it...from 5-10 ft back..they look perfectly new!
Enjoy
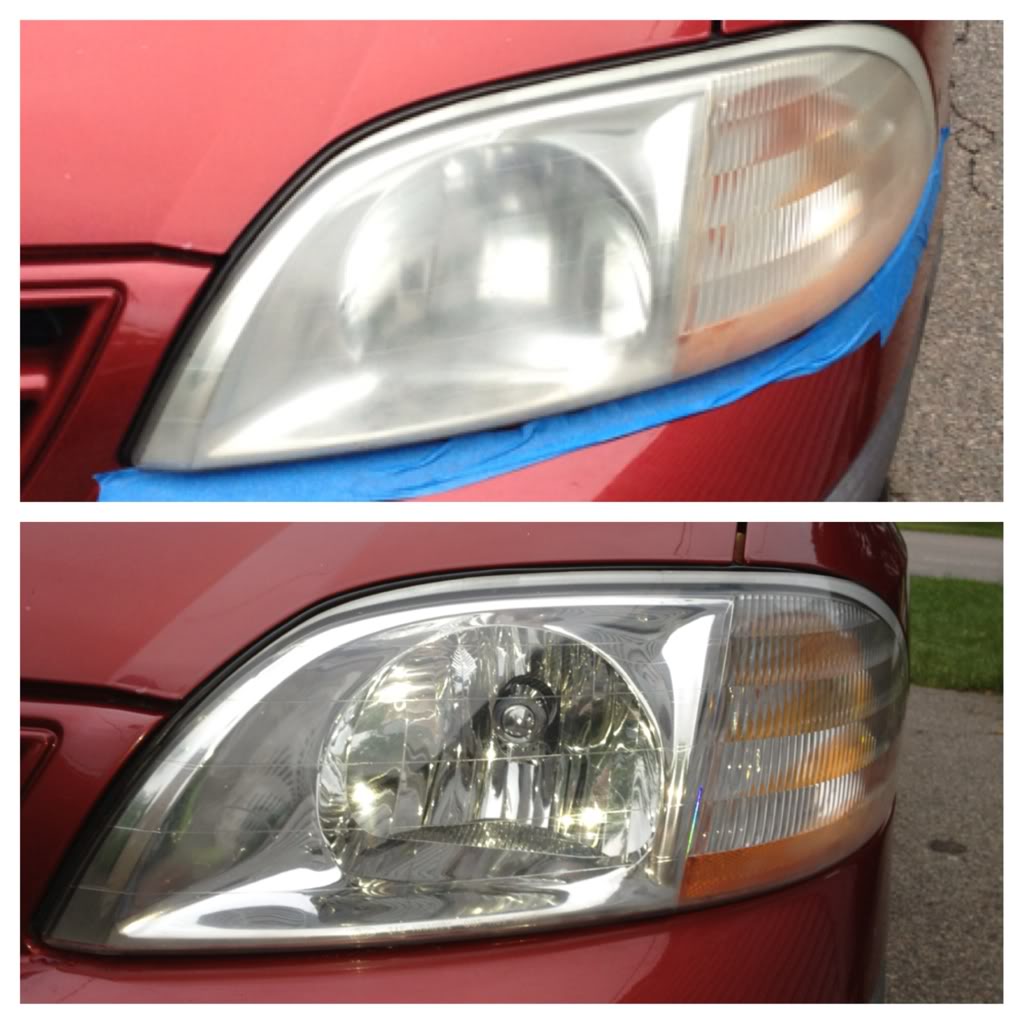
I tested my skills on my mothers headlights.
All I used was 1000, 1500, 2000, 3000. But she also had tried one of those kits and that is the before picture. I have heard opticoat will last much longer then this method but unless you plan on doing a bunch and charging for it I don't see it being worth it.
All I used was 1000, 1500, 2000, 3000. But she also had tried one of those kits and that is the before picture. I have heard opticoat will last much longer then this method but unless you plan on doing a bunch and charging for it I don't see it being worth it.