
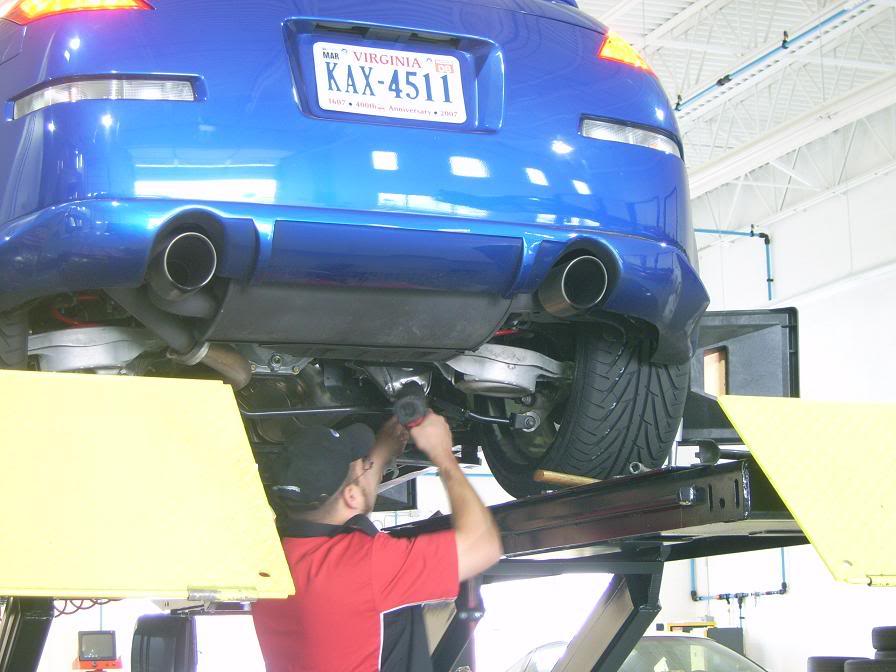
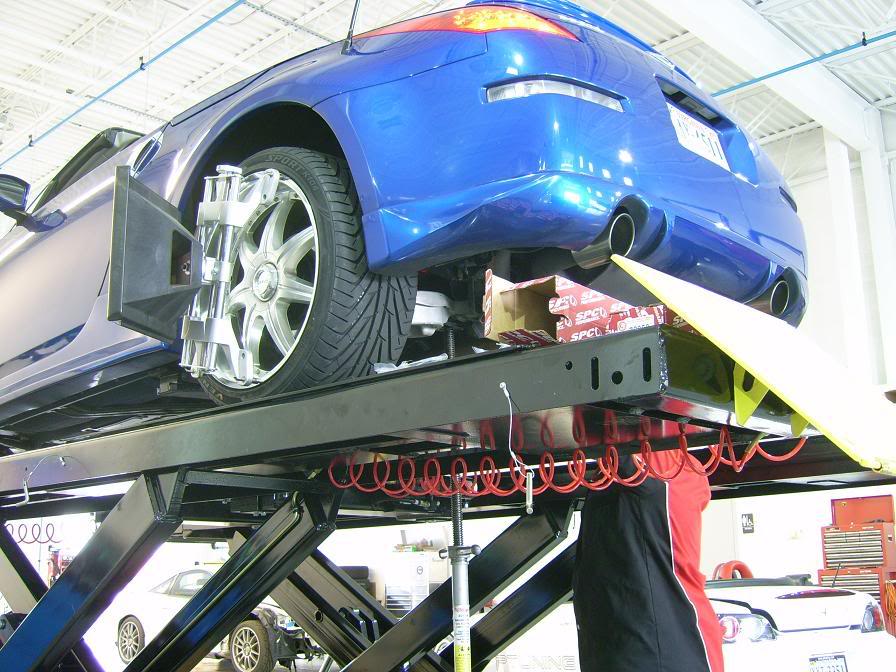
SPC Toe Bolt install write up with pics courtesy of Protocav.

Originally Posted by redlude97
Whats the point though, they only cost like $40 now, the savings couldn't be that significant
...anyway the size would make it a little easier to maybe put something together...anybody know ?

Registered User
Joined: Dec 2002
Posts: 151
Likes: 0
From: CALI
Originally Posted by MIAPLAYA
BTW he is more then happy to install these for you if you live in Socal 
Mods can I get a sticky for this thread and a cookie for protocav?
http://members.***.net/turbonetics35...oltinstall.pdf
Mods can I get a sticky for this thread and a cookie for protocav?
http://members.***.net/turbonetics35...oltinstall.pdf
The link is dead. Anybody have a copy saved? Thanks.


Originally Posted by Super Avan Z33
someone said the 04 up Z's toe bolt slot is already big enough to fit the SPC toe bolt in, has anyone done install the SPC toe bolt by themselves?
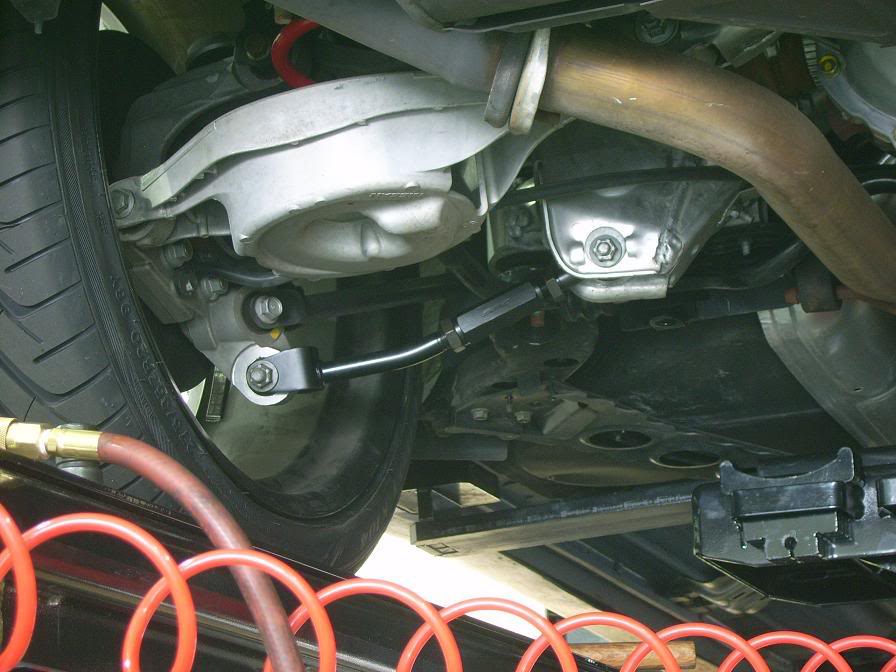
Ideally, this is job for a lift. Once you do first hole, you'll realize you don't need the template. A tip would be to keep the aluminum lubricated while grinding. It is literaly a 15 minute job per side with a dremel, the extention piece and a grinding stone.
Last edited by Theatrix; May 24, 2007 at 05:02 PM.


wait so the camber bolt doesnt really do anything anymore right? Camber is adjusted by the arm itself. Also, the toe adjustment bolt is on the spring bucket and NOT the bolt holding the camber arm? Im almost 100% sure but just want to be REALLY be 100% sure.
finally, will you need a spring compressor when for when you remove the stock toe bolt/spring bucket?
Last edited by litlechina; Jul 18, 2007 at 10:41 AM.


I can't understand one thing. If you drill out the whole to a larger size, what will stop the bolt from sliding around in it or moving side to side over time ? Can someone explain ?
Thanks,
Mario
Thanks,
Mario

Originally Posted by Row2K
I can't understand one thing. If you drill out the whole to a larger size, what will stop the bolt from sliding around in it or moving side to side over time ? Can someone explain ?
Thanks,
Mario
Thanks,
Mario

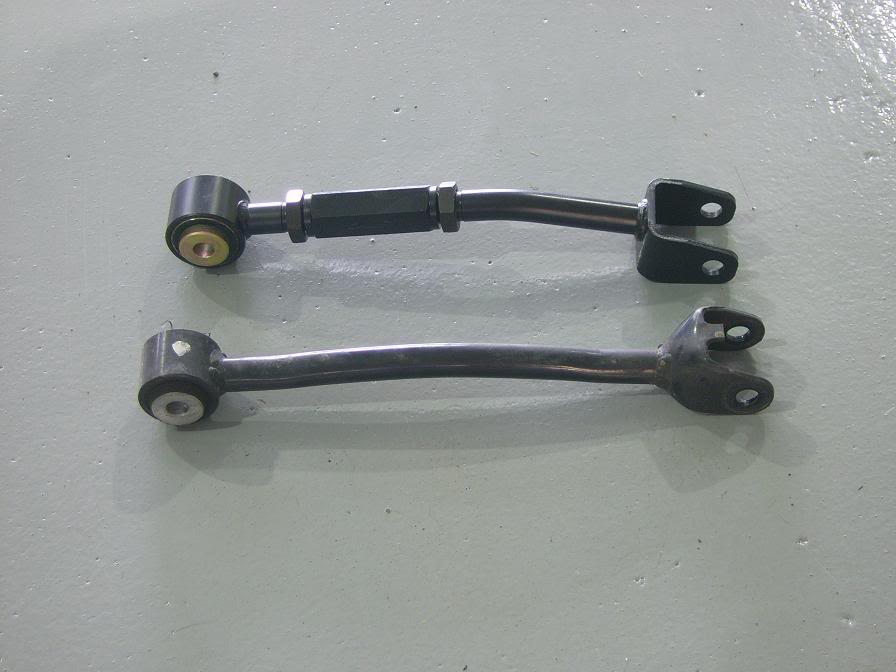
I already have the kinetix camber arms installed. But I cannot get the camber to a low setting because the facotry toe bolt does not give sufficient adjustment to bring the toe back to spec when the camber is where I would want it.
If I purchase the adjustable traction/toe rods they also sell (which the also sell together as a kit) I should be able to bring the toe into spec when I have the camber where I want it correct?
If I purchase the adjustable traction/toe rods they also sell (which the also sell together as a kit) I should be able to bring the toe into spec when I have the camber where I want it correct?
Originally Posted by trescincuenta
I already have the kinetix camber arms installed. But I cannot get the camber to a low setting because the facotry toe bolt does not give sufficient adjustment to bring the toe back to spec when the camber is where I would want it.
If I purchase the adjustable traction/toe rods they also sell (which the also sell together as a kit) I should be able to bring the toe into spec when I have the camber where I want it correct?
If I purchase the adjustable traction/toe rods they also sell (which the also sell together as a kit) I should be able to bring the toe into spec when I have the camber where I want it correct?
Originally Posted by drift_projekt_Z
there are 4 bolts. dont you only need 2?? and both sides of each spring bucket have to be dremeled out correct?