
SPC Toe Bolt install write up with pics courtesy of Protocav.


I just realized that the link on post #1 of this thread is dead - so i edited and added the link again.
HERE:
http://www.batit.com/forumpics/spctoeboltinstall.pdf
-J

Between the vid and this write up, you can't go wrong.
The 115 - Cutter bit was FAR better to use... The 9933 took 5 mins +, but generated very little (if any) mess. The 115 bit cut thru like butter, I was done it less than 1 min, and it has the durability to survive multiple cuttings. It produced the most mess, but I didn't care because I was done quickly. FWIW, I did use a drop of motor oil as lube with the 115.
I also found it easiest to remove the stock exhaust diffuser panel. 4 10mm bolts, very simple to remove.
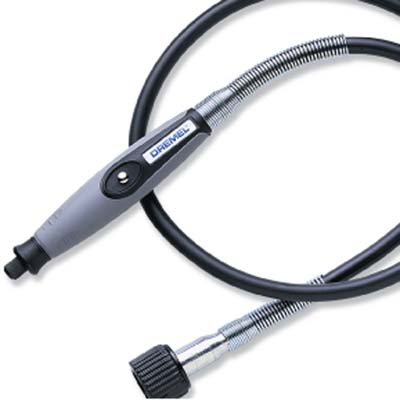
I used this, made the job SUPER easy, and I got really good cuts with it (it didn't look like a hack job when I was done):

It's a right-angle adapter, and I attached it directly to the Dremel.
Last edited by gr8scott_o; Jan 24, 2010 at 08:01 AM. Reason: added experiece with 115 bit


Thanks for the link to the write up. However, I must diagree with all of you. This is is NOT an easy job. I've done brakes, stainless lines, cat back, intake and tune ups and this is a much higher degree of difficulty. I just did it and it took me about 4 hours for the first side and 2 hours for the second. The lower control arm "camber arm" is not that bad but you will need to drop your sway bar to get to the bolt out. Be sure to loosen both ends of the camber arm before taking it out, you'll need a breaker bar because it's on tight. The Toe bolts suck, at least enlarging the holes sucks. Not only will you need a dremel, you should also get the flexible attatchment "flex shaft" to actually gain clearance. On the driver side I had a hell of a time getting a straight shot to elongate the holes. Be sure to wear eye protection, gloves and long sleeves. I ended up with metal shavings sticking out of my skin like splinters. The end result is that I got it done but am feeling a little ill at the fact my holes are not as nice as the ones in the picture(even thought i tried to follow the template). I'm hoping I haven't permantly damaged my cross member, which is factory welded by the way. Getting it aligned tommorow.
Last edited by dkorr; Jul 9, 2010 at 12:47 PM.

I just did this mod. It's hot as crap outside so I had to take my time and take brakes, so it took me a total of about 8 hours to install both the camber arms as well as the toe bolts. Dremeling is not easy but can be done. I got mine pretty much perfect but it took a lot of patience. It's very hard to get the tool in the space (and oriented correctly) on the slots closer to the front of the car. Expect to remove your exhaust as well as your rear sway bar mounts.
The camber arm install was very easy though.
I would definitely do it to save a couple hundred bucks, but $ is different to everyone. It's definitely one of the more involved things I've done to my car. Simple but tedious.. especially if you're on jack stands.
The camber arm install was very easy though.
I would definitely do it to save a couple hundred bucks, but $ is different to everyone. It's definitely one of the more involved things I've done to my car. Simple but tedious.. especially if you're on jack stands.
Do you recommend this as a DIY? I just called my mechanic and he quoted $465 to get both camber control arms done. I'll have to supply him with the template for the slot elongation though. I also had to pay for the Kinetix control arm out of pocket. For $465 it might be worth it because of peace-of-mind. I don't want to damage any cross members...
It's really not that hard to elongate the holes, just take your time and be tedious about the job (the step by step guide will work wonders for you). However, the right-angle adapter that gr8scott_o linked a few posts above would probably make the job 100% easier. That's the only annoyance of the job - getting the dremel in the tight space with the proper angle.
I think you'll be alright doing it - just follow the steps carefully and if you run into a problem you don't know about - ask on here! When it comes down to it, almost $500 is a damn lot of money to have something done that you could complete on your own (but that's just my opinion of course, I understand everyone is different..). Cheers!
I agree that doing this job is a pain in the butt......its messy, tedious and despite how overly simple it is to just grind out a lil aluminum, its a weird angle to do this laying down on the ground with the rear on jack stands............
I must say though, it should only be done for the two TOE locations only! the spring bucket to subframe slots only.
camber slots shouldnt be touched and a camber arm purchased to handle camber changes - done and done!
-J
I must say though, it should only be done for the two TOE locations only! the spring bucket to subframe slots only.
camber slots shouldnt be touched and a camber arm purchased to handle camber changes - done and done!
-J
I just did this mod. It's hot as crap outside so I had to take my time and take brakes, so it took me a total of about 8 hours to install both the camber arms as well as the toe bolts. Dremeling is not easy but can be done. I got mine pretty much perfect but it took a lot of patience. It's very hard to get the tool in the space (and oriented correctly) on the slots closer to the front of the car. Expect to remove your exhaust as well as your rear sway bar mounts.
The camber arm install was very easy though.
I would definitely do it to save a couple hundred bucks, but $ is different to everyone. It's definitely one of the more involved things I've done to my car. Simple but tedious.. especially if you're on jack stands.
The camber arm install was very easy though.
I would definitely do it to save a couple hundred bucks, but $ is different to everyone. It's definitely one of the more involved things I've done to my car. Simple but tedious.. especially if you're on jack stands.
it took you 8hrs to do? how much of that was the dremel part?
^ ya that seems crazy....dremeling the two slots per side ( 4 total - as in front and back for TOE ONLY) at spring bucket to subframe location takes at most 30 minutes with dropping the oem exhaust for better clearance.
-J
-J

Yeah like I said, it took me 8 hours total to complete my project. It was 99 degrees here and I was in my apt. parking lot. I had to take a few 30 minute breaks to keep from getting a massive headache.. and when I was working I tried not to over exert myself.
The dremeling alone took a total of about 1 hour.. not kidding. But I got my holes just about perfect. I also did the project in two sessions so that means I had to jack the car up and remove the wheels twice. Getting my exhaust off was a huge PITA as well, those hangers were a b!tch! Then putting the exhaust back on by myself was no walk in the park either. Finally, don't forget that I also installed rear camber arms, but that was by far the easiest part.
If you rushed through this and made shitty cuts you could probably complete it in a few hours. Maybe it's just me but whenever I work on my car, it always takes wayyy longer than you would think.
The dremeling alone took a total of about 1 hour.. not kidding. But I got my holes just about perfect. I also did the project in two sessions so that means I had to jack the car up and remove the wheels twice. Getting my exhaust off was a huge PITA as well, those hangers were a b!tch! Then putting the exhaust back on by myself was no walk in the park either. Finally, don't forget that I also installed rear camber arms, but that was by far the easiest part.
If you rushed through this and made shitty cuts you could probably complete it in a few hours.
Maybe it's just me but whenever I work on my car, it always takes wayyy longer than you would think.

Registered User
Joined: Feb 2010
Posts: 3
Likes: 0
From: Sweden
I just did this mod myself (spc camber arm + toe bolts). I'm lucky enough to have this:
1. True coilovers (no need to support the spring bucket as there is no spring in it, just dropped the thing down and could push it up again with hand force)
2. Proper car lift in my garage (was an ease to do this while sitting upright in a chair)
3. Big Dremel package that came with this weird Dremel 194 bit:

..and this:
The 194 bit is highly recommended, it cut the holes as easy as butter and didn't wear down at all. I used 15k rpm on the dremel.
The job was done in under an hour, including fine tuning the ride height a bit. Thanks a lot for the writeup, I would have been really confused about the whole operation if it wasn't for the nice guys who made this thread 4 years ago.
1. True coilovers (no need to support the spring bucket as there is no spring in it, just dropped the thing down and could push it up again with hand force)
2. Proper car lift in my garage (was an ease to do this while sitting upright in a chair)
3. Big Dremel package that came with this weird Dremel 194 bit:
..and this:
The 194 bit is highly recommended, it cut the holes as easy as butter and didn't wear down at all. I used 15k rpm on the dremel.
The job was done in under an hour, including fine tuning the ride height a bit. Thanks a lot for the writeup, I would have been really confused about the whole operation if it wasn't for the nice guys who made this thread 4 years ago.