
DIY: Aftermarket Sway Bar Installation (HUGE pics)

Thread Starter
Retired Admin
iTrader: (95)
Joined: Dec 2000
Posts: 1,337,017,813
Likes: 78
From: Dallas / Chicago
I didn't see a working DIY for the sway bar install, so I figured I'd do a little write up. This isn't a hard DIY at all, so you should be able to do it even if you don't have much experience working on cars. It's pretty straight forward. Sorry for the huge pics, but I don't feel like resizing them. Plus, bigger the pics, the better.  Hope this helps some of you guys.
level of difficulty:
1.25 out of 5 (5 being hardest)
approximate install time:
about 60 minutes
tools:
jack and stands
socket wrench with extension
10, 14, 17mm sockets
wd-40/pb blaster
Rear Sway Bar:
*note: using pb blaster/wd-40 will help with the rusted bolts/nuts.
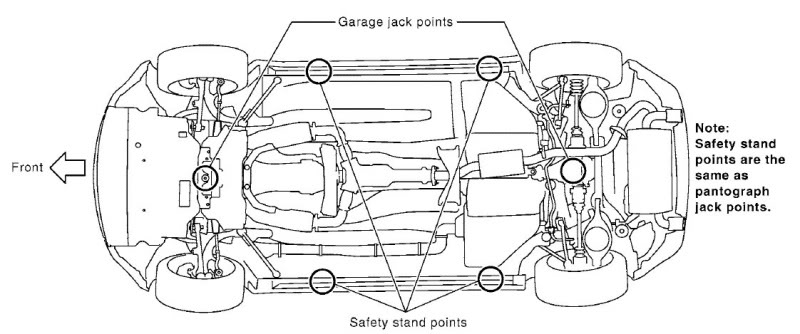
1. Jack up the car high enough using the standard jack points (or frame) so you can slide under the car easily.
2. Remove the rear right wheel for easier access to the sway bar. (I don't remember it really helping or not helping, but I remember reading it in one of the directions)
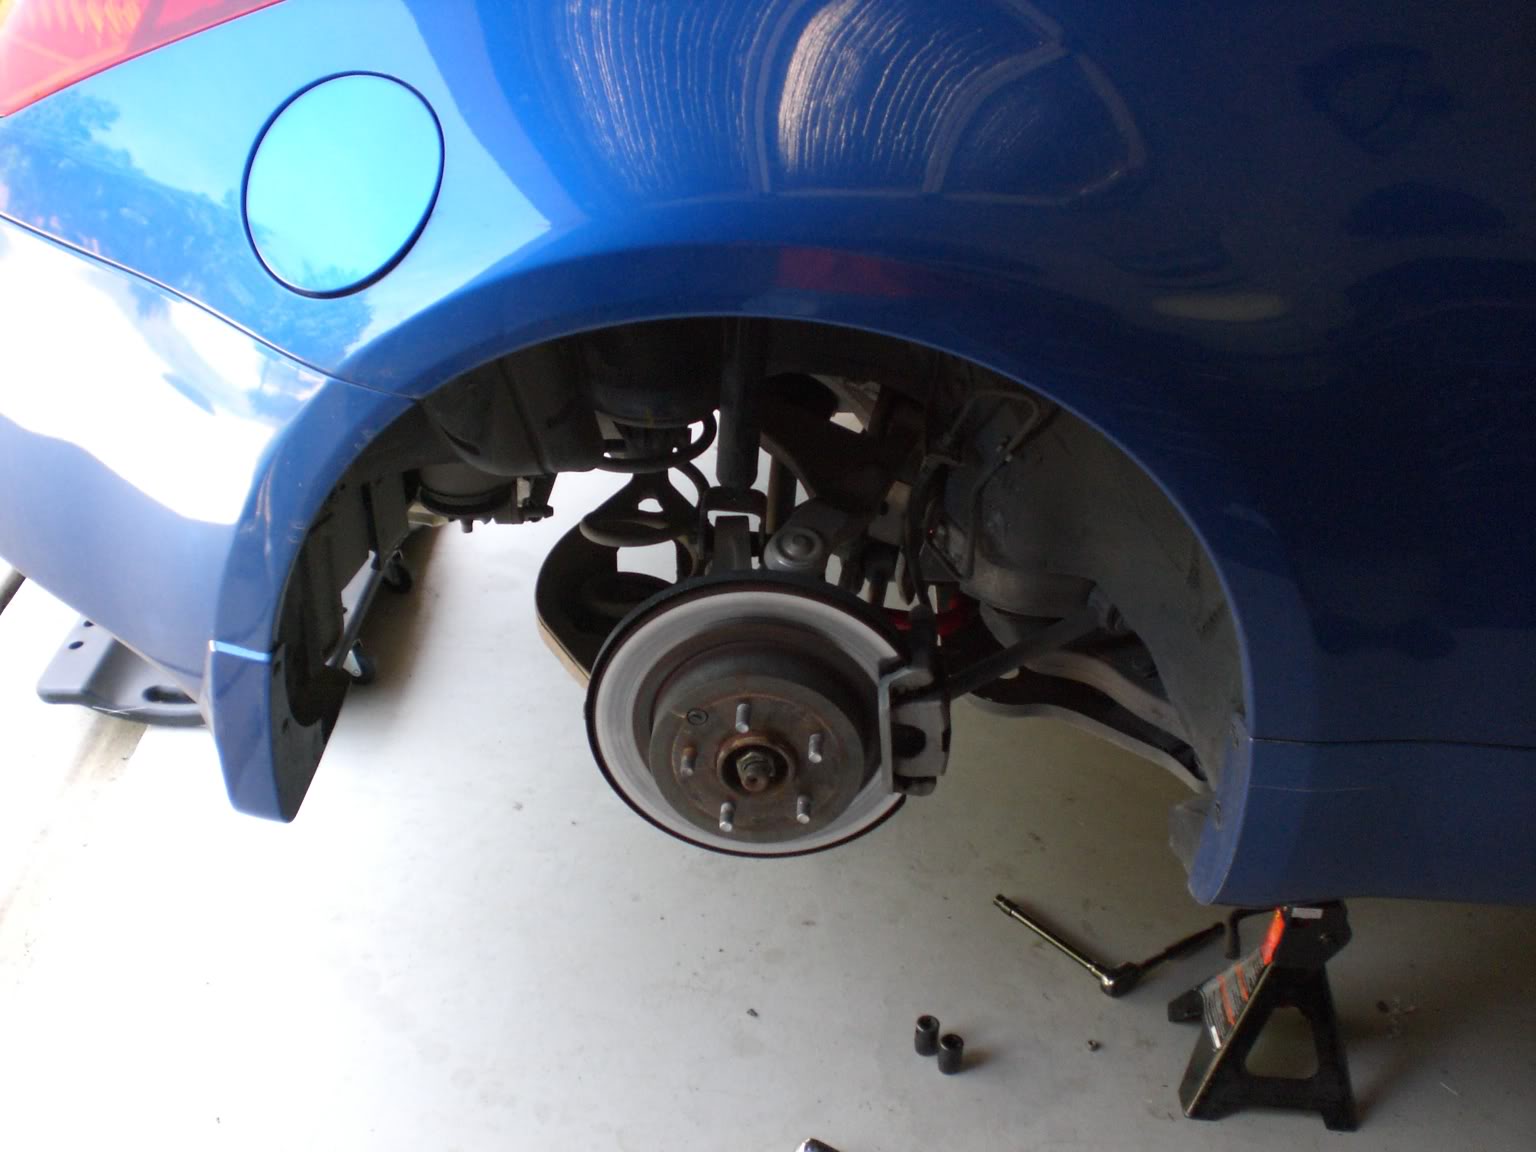
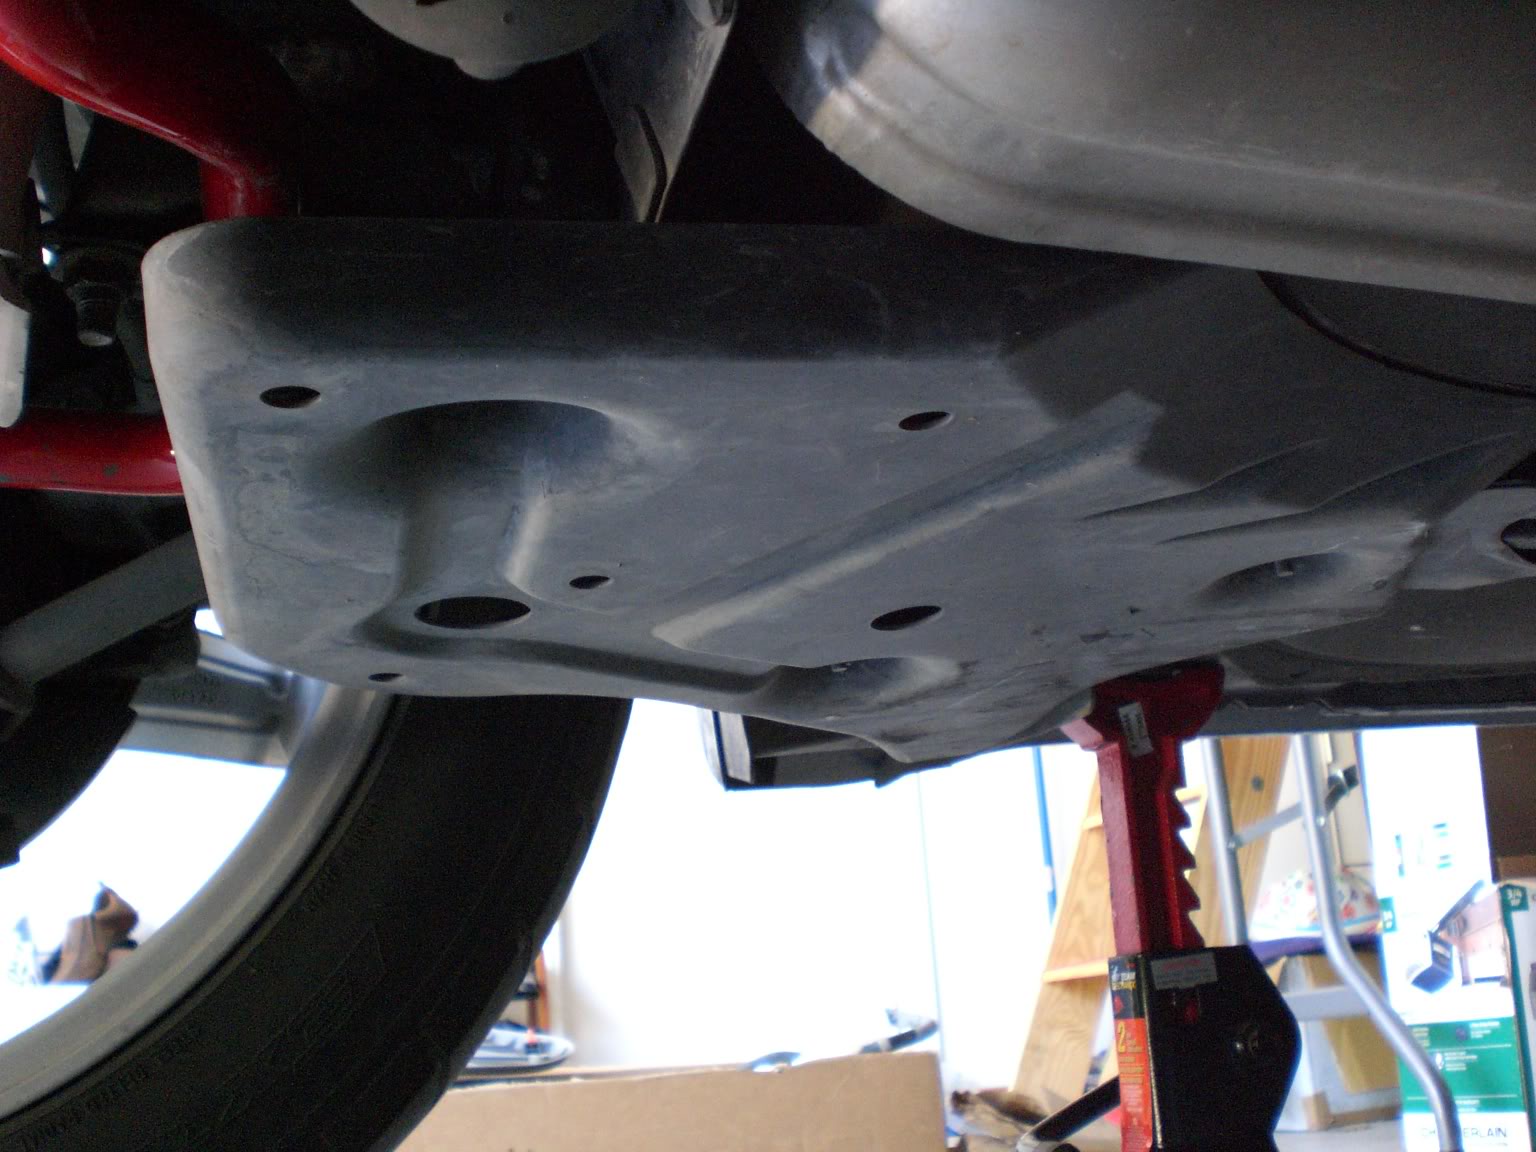
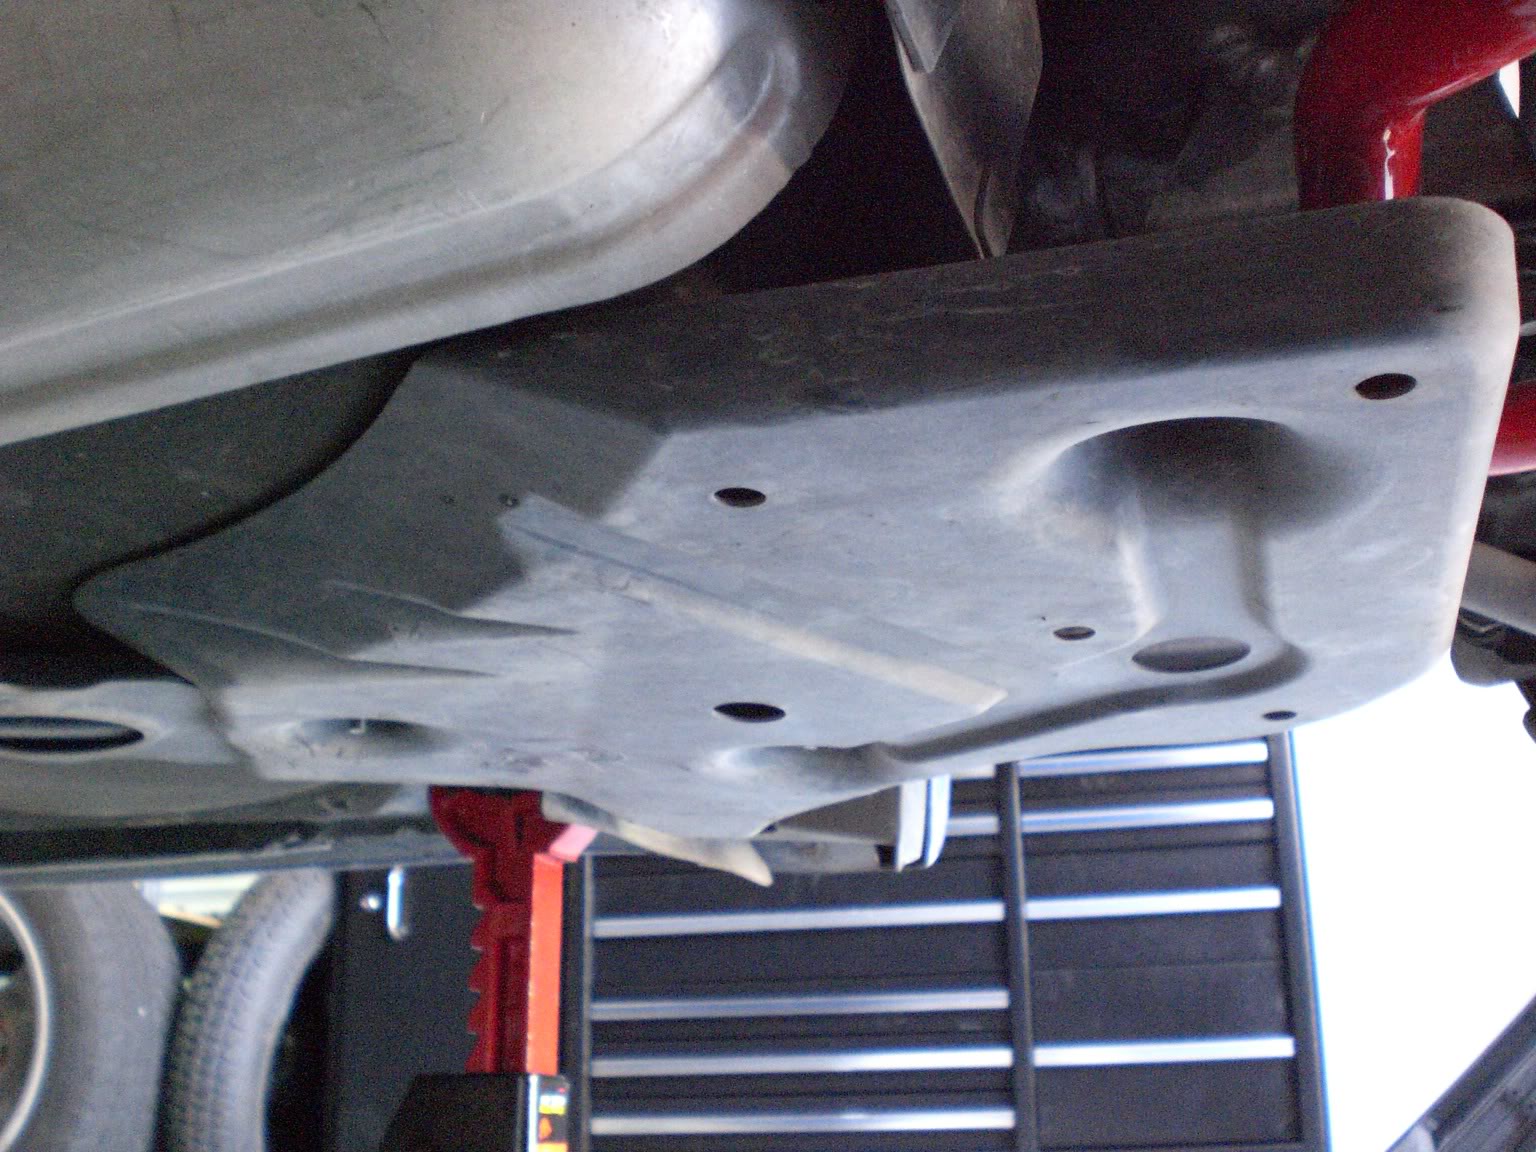
3. There are two plastic covers, each with three 10mm nuts/bolts, right under the rear sway bar ends. Remove them.
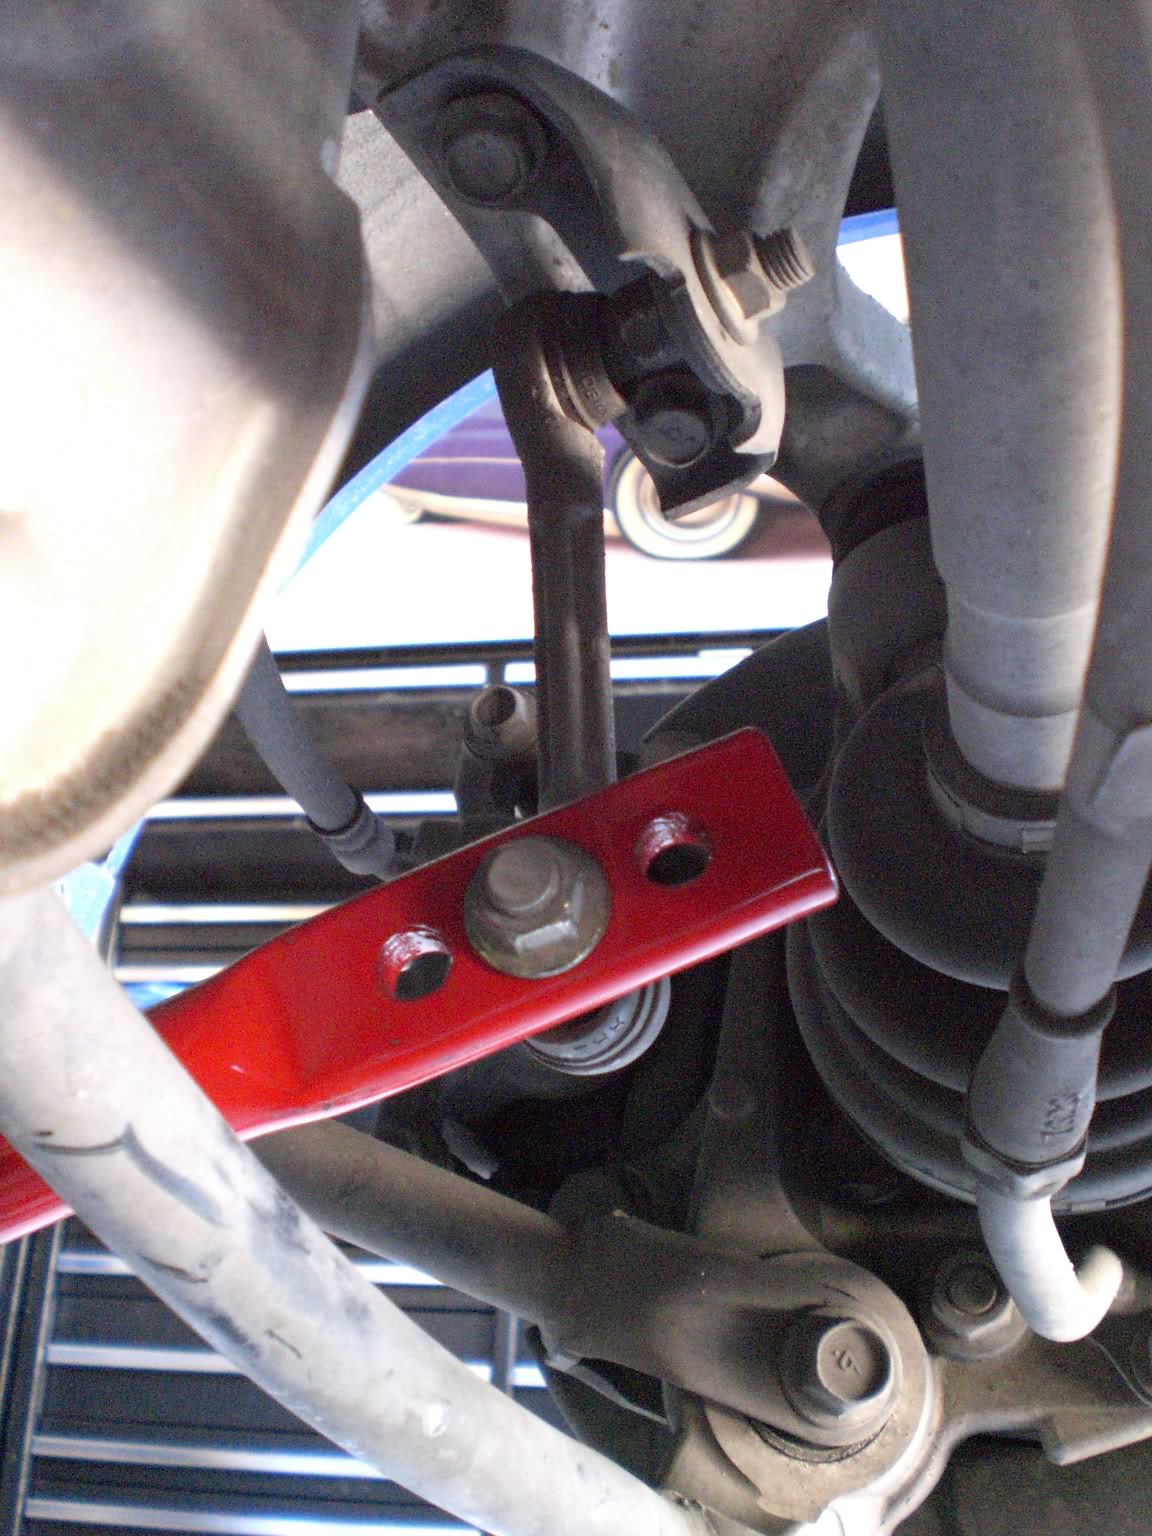
4. There is one nut at each end of the sway bar bolted to the end link, which you need to remove using a 14mm socket. "Unhook" the ends from the rear sway bar.
5. Remove the nuts that hold the mid-pipe and the muffler in place. It'll be easier to take out and put in the sway bar with them disconnected. It's also easier if you take the mid-pipe off the rubber mount as it will move more freely.

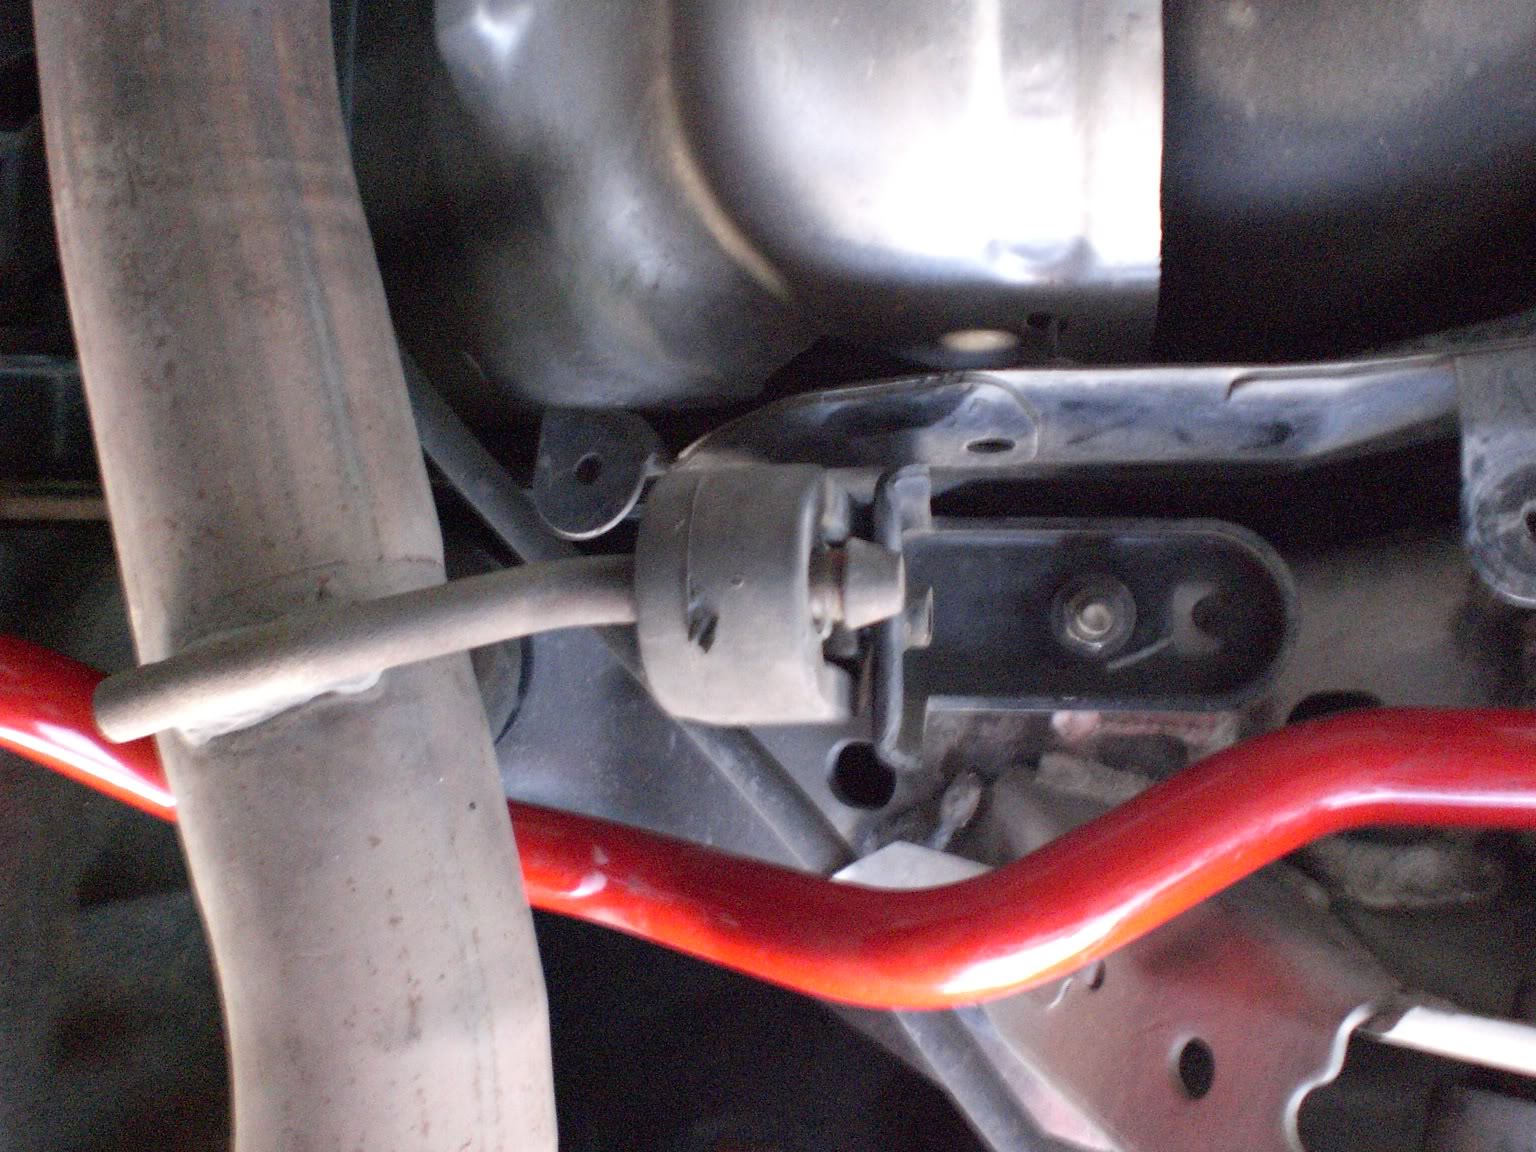
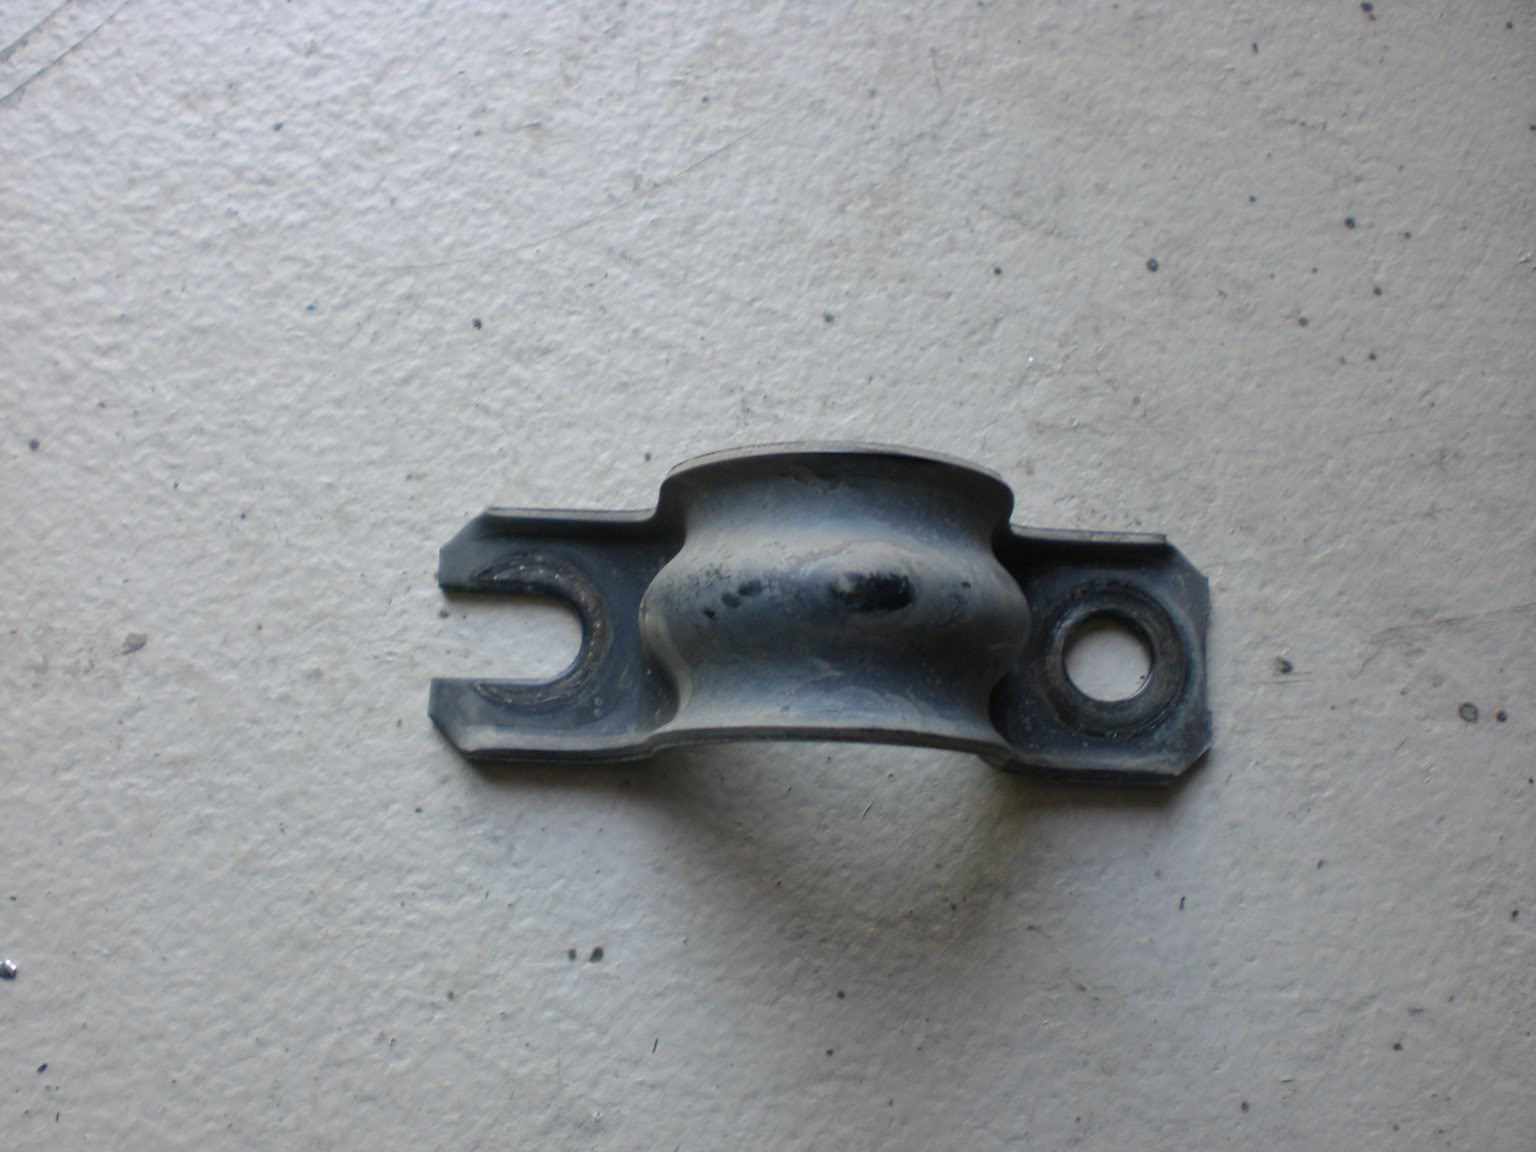
6. As you probably have seen, there is a metal bracket holding up the sway bar on each side. Remove them by taking off the two 14mm nuts holding each of them in place. (Be sure to re-use the stock rubber dampener that was fitted on your stock sway bars for the metal brackets, if your sways did not come with them)
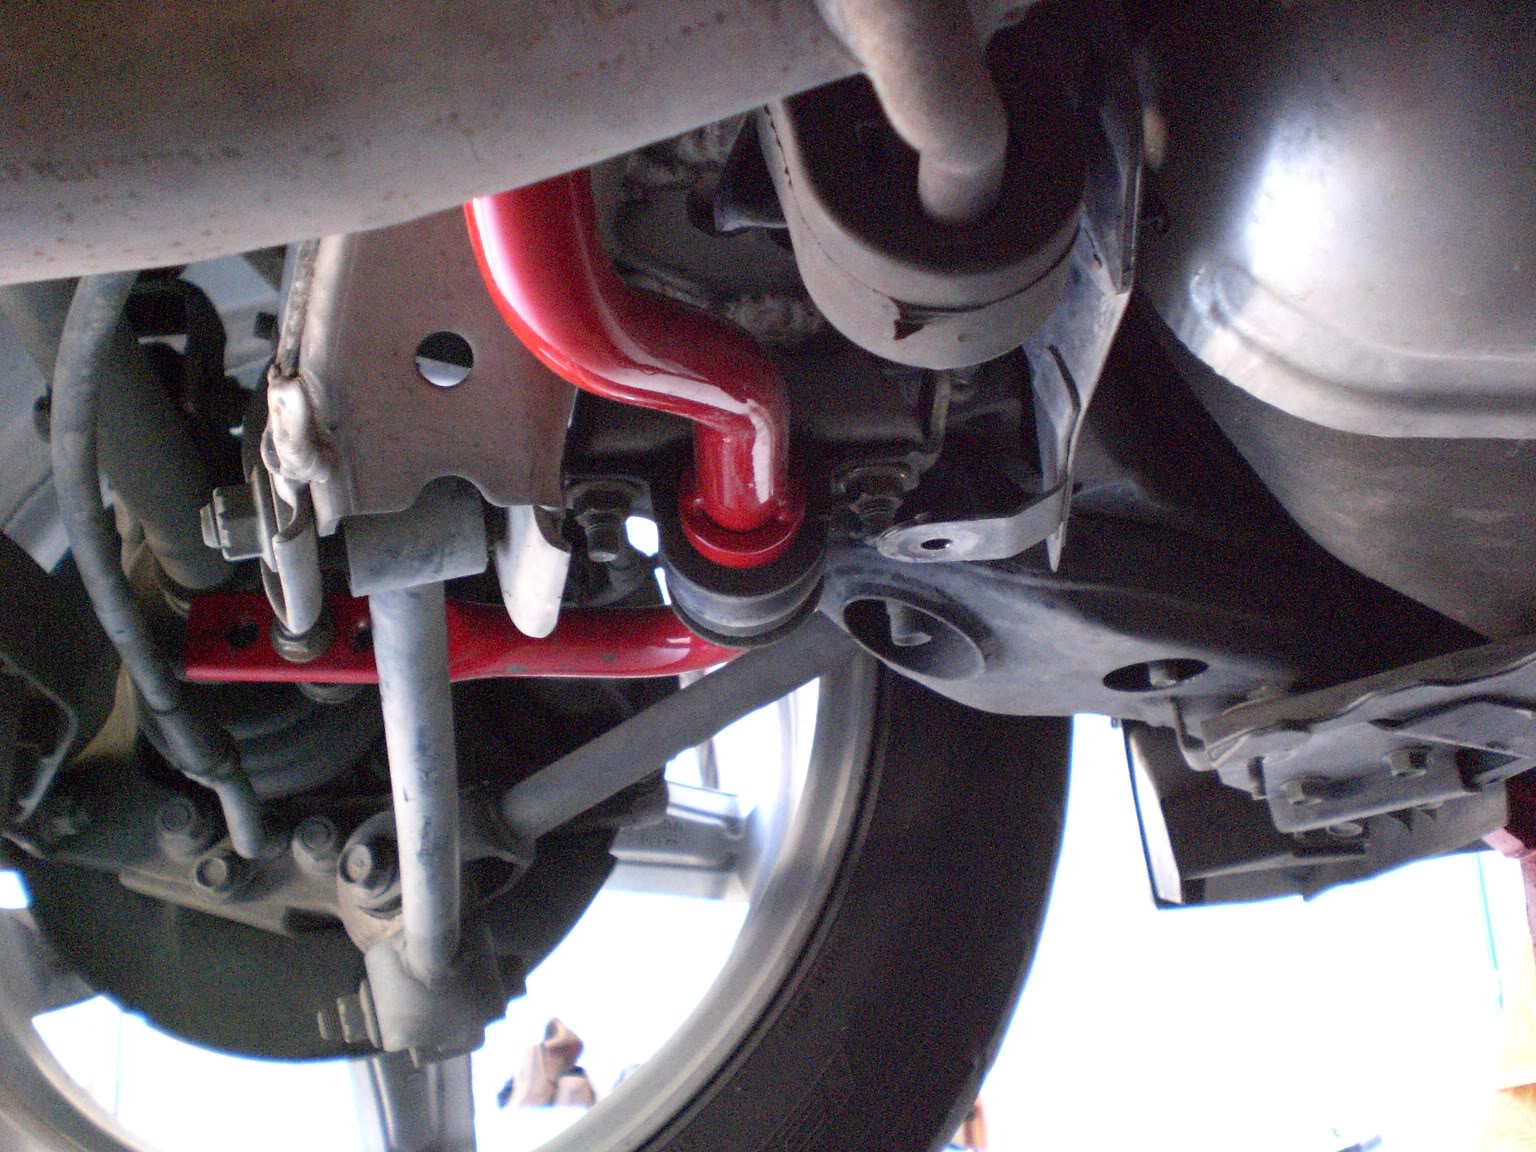
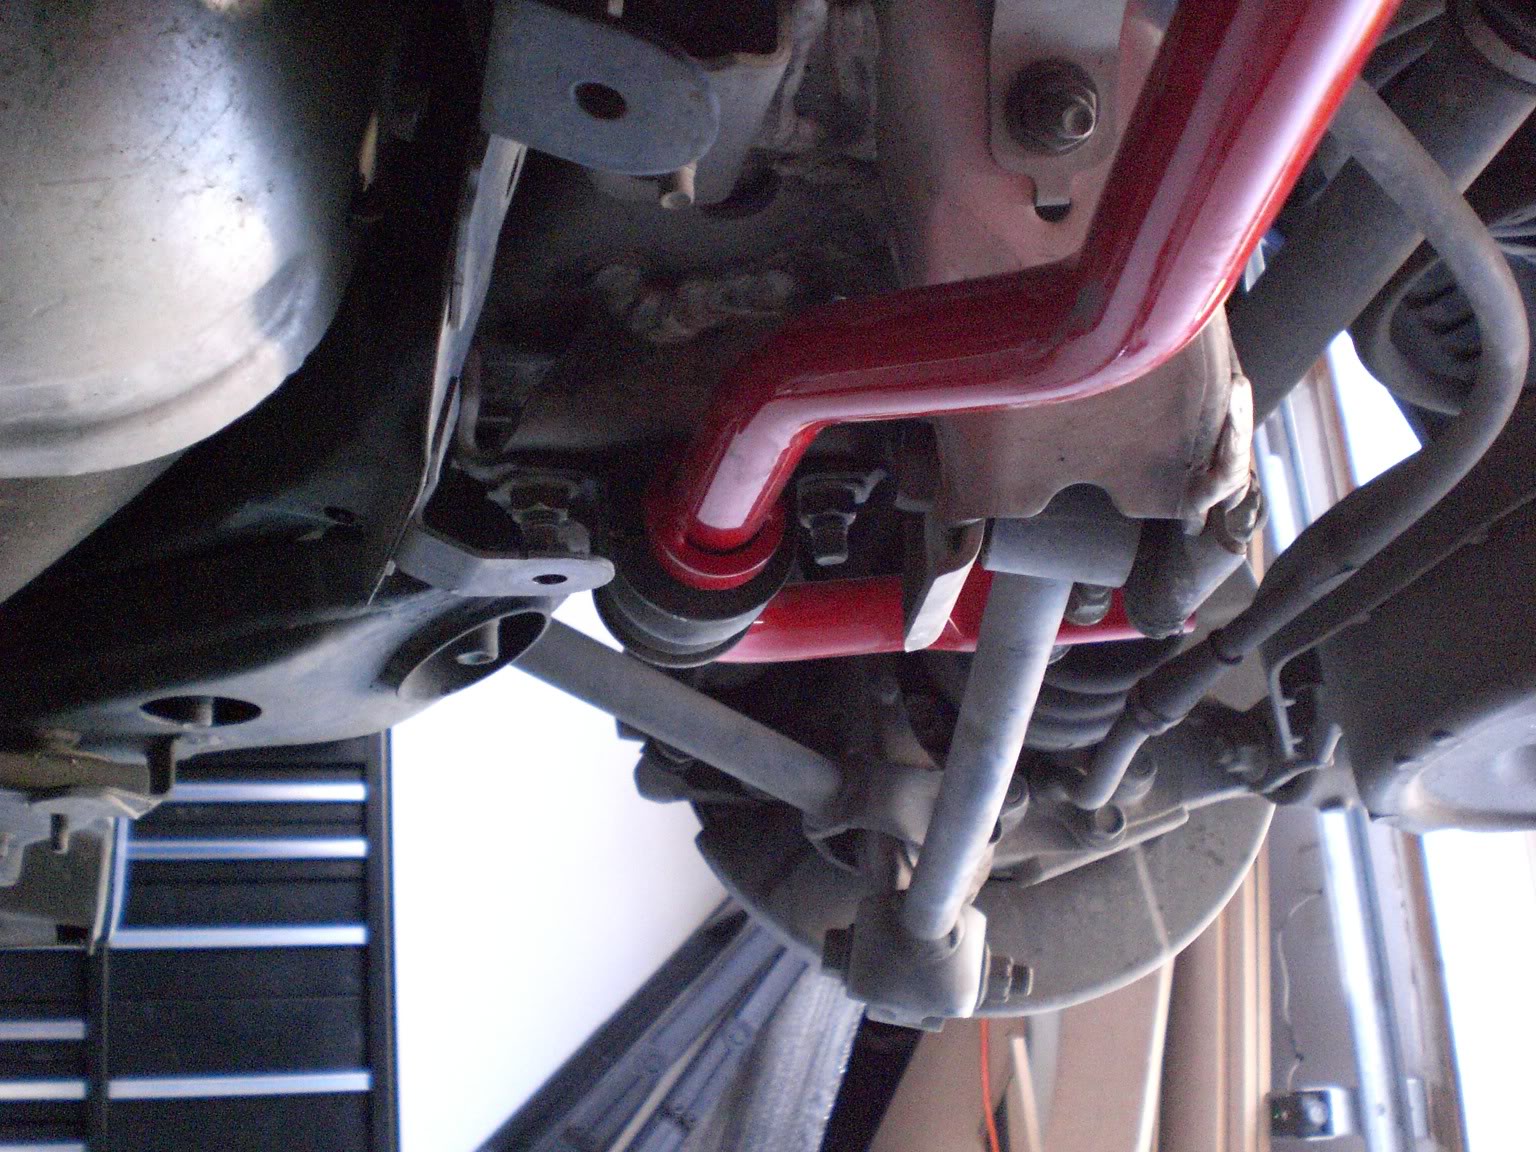
7. Take out the rear sway bar by sliding it out between the mid-pipe and muffler.
[no pic]
8. Now, with the new sway bar, just follow the above directions, but in reverse order.
[no pic]
Front Sway Bar: (directions are similar to the rears, so this'll be shorter with less pictures)
*note: using pb blaster/wd-40 will help with the rusted bolts/nuts.
1. Jack up the car high enough using the standard jack points (or frame) so you can slide under the car easily.
2. Remove the huge splash guard directly under the engine to gain access to the sway bar. These are plastic push clips and screws (10mm).
[no pic]
3. Remove the 17mm nut from each end of the front sway bar/end link and "unhook" the sway bar from the end link.
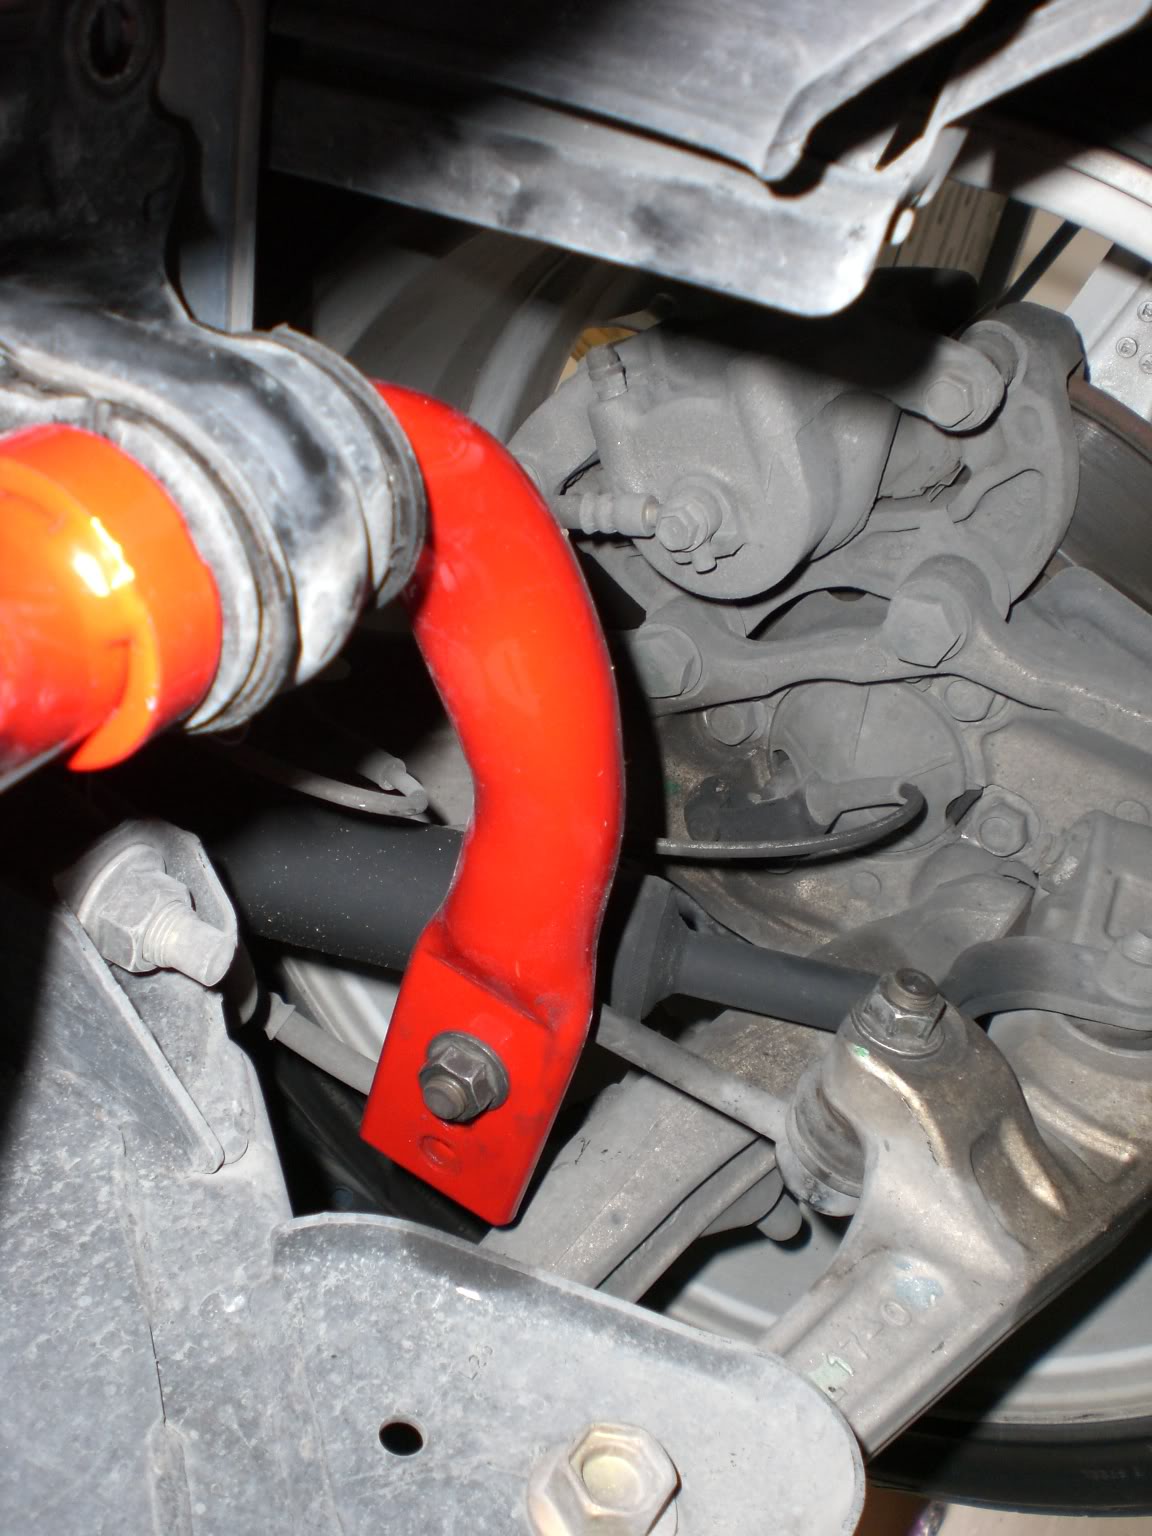
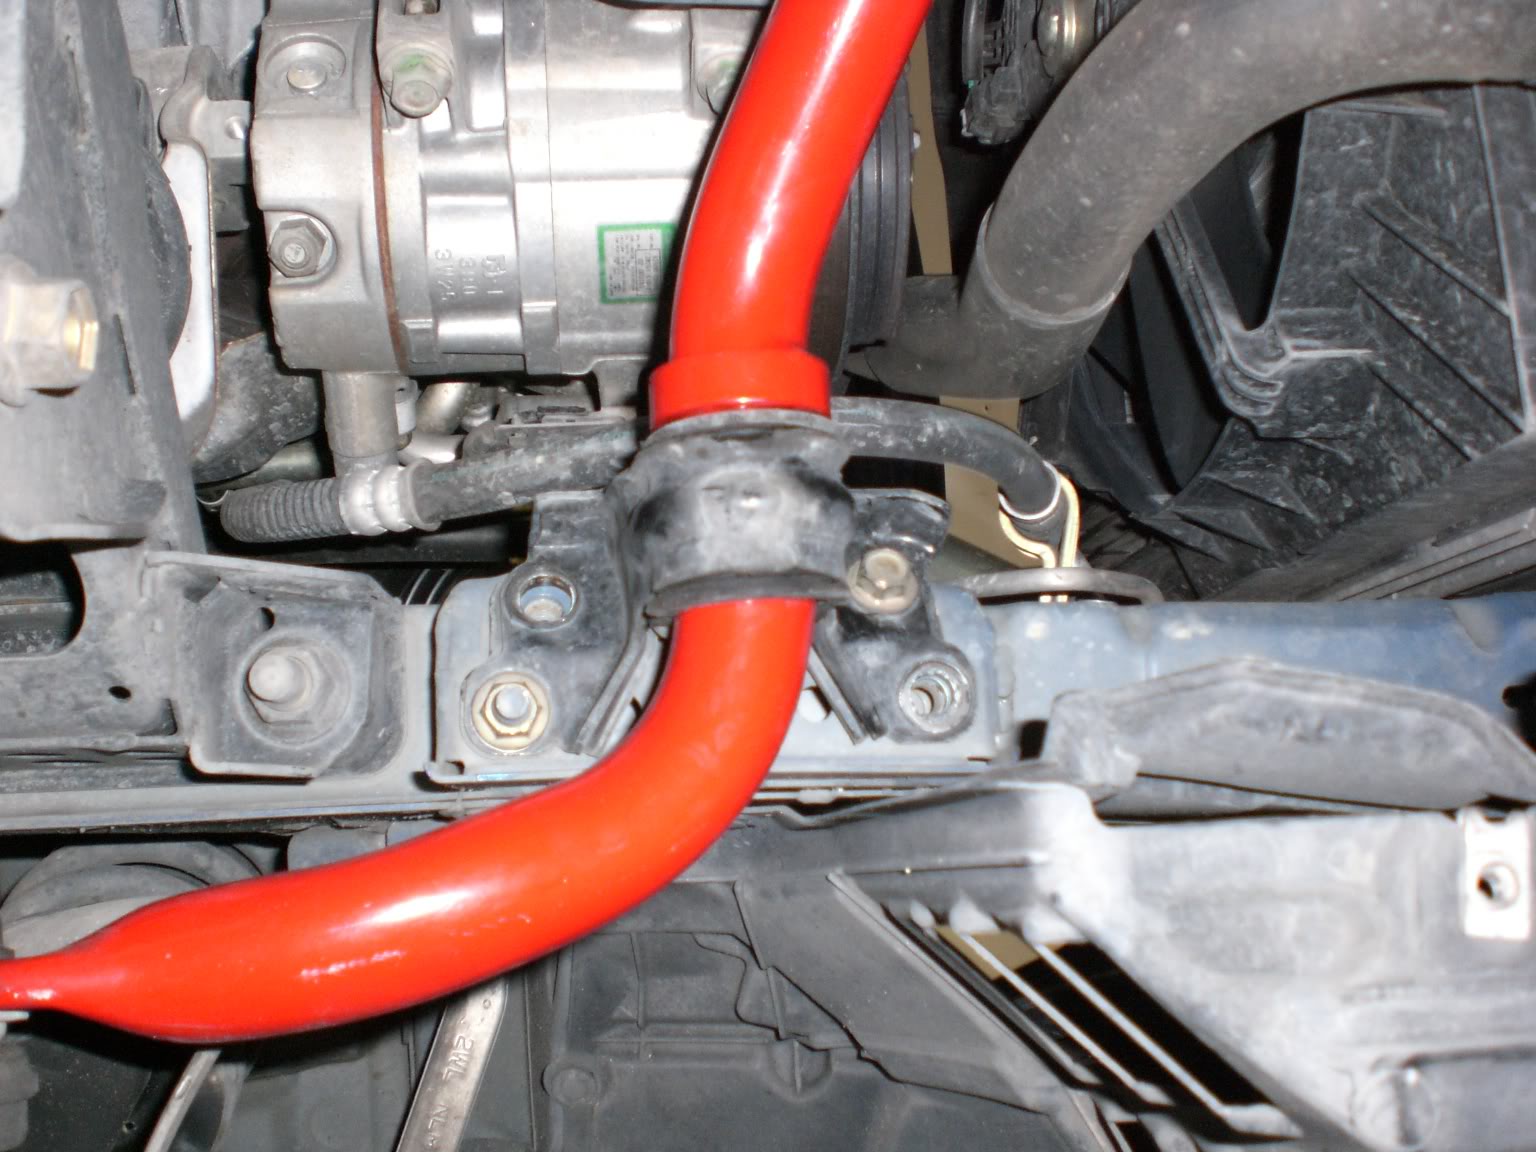
4. Again, you'll see a metal bracket holding up the sway bar in place. There are four 14mm bolts holding up the brakets in place. Remove them and then the brackets.
5. Remove the front sway bar. (Be sure to re-use the stock rubber dampener that was fitted on your stock sway bars for the metal brackets, if your sways did not come with them)
[no pic]
6. Now, with the new sway bar, just follow the above directions, but in reverse order. When bolting up the brackets, be sure to thread them all in first before tightening.
[no pic]
Hope this helps some of you guys.level of difficulty:
1.25 out of 5 (5 being hardest)
approximate install time:
about 60 minutes
tools:
jack and stands
socket wrench with extension
10, 14, 17mm sockets
wd-40/pb blaster
Rear Sway Bar:
*note: using pb blaster/wd-40 will help with the rusted bolts/nuts.
1. Jack up the car high enough using the standard jack points (or frame) so you can slide under the car easily.
2. Remove the rear right wheel for easier access to the sway bar. (I don't remember it really helping or not helping, but I remember reading it in one of the directions)
3. There are two plastic covers, each with three 10mm nuts/bolts, right under the rear sway bar ends. Remove them.
4. There is one nut at each end of the sway bar bolted to the end link, which you need to remove using a 14mm socket. "Unhook" the ends from the rear sway bar.
5. Remove the nuts that hold the mid-pipe and the muffler in place. It'll be easier to take out and put in the sway bar with them disconnected. It's also easier if you take the mid-pipe off the rubber mount as it will move more freely.
6. As you probably have seen, there is a metal bracket holding up the sway bar on each side. Remove them by taking off the two 14mm nuts holding each of them in place. (Be sure to re-use the stock rubber dampener that was fitted on your stock sway bars for the metal brackets, if your sways did not come with them)
7. Take out the rear sway bar by sliding it out between the mid-pipe and muffler.
[no pic]
8. Now, with the new sway bar, just follow the above directions, but in reverse order.
[no pic]
Front Sway Bar: (directions are similar to the rears, so this'll be shorter with less pictures)
*note: using pb blaster/wd-40 will help with the rusted bolts/nuts.
1. Jack up the car high enough using the standard jack points (or frame) so you can slide under the car easily.
2. Remove the huge splash guard directly under the engine to gain access to the sway bar. These are plastic push clips and screws (10mm).
[no pic]
3. Remove the 17mm nut from each end of the front sway bar/end link and "unhook" the sway bar from the end link.
4. Again, you'll see a metal bracket holding up the sway bar in place. There are four 14mm bolts holding up the brakets in place. Remove them and then the brackets.
5. Remove the front sway bar. (Be sure to re-use the stock rubber dampener that was fitted on your stock sway bars for the metal brackets, if your sways did not come with them)
[no pic]
6. Now, with the new sway bar, just follow the above directions, but in reverse order. When bolting up the brackets, be sure to thread them all in first before tightening.
[no pic]


Thread Starter
Retired Admin
iTrader: (95)
Joined: Dec 2000
Posts: 1,337,017,813
Likes: 78
From: Dallas / Chicago
Photobucket is down for site maintenance. If you need the pics before they're back up, then just let me know and I can email them to you.
edit-
The site is back up and the pictures are working fine.
edit-
The site is back up and the pictures are working fine.
Last edited by 3hree5ive0ero; Apr 26, 2007 at 01:37 AM.

Thread Starter
Retired Admin
iTrader: (95)
Joined: Dec 2000
Posts: 1,337,017,813
Likes: 78
From: Dallas / Chicago
Originally Posted by 350Z84
Thanks for the write-up. I'll be doing this install next week.

I will be there for the drag day. I got off all day that day! I will hopefully be putting the sways in tomorrow after Fedex drops them off.
Quick question did you separate the exhaust muffler and pipe connecting up to it to remove the swaybar, and if so did you have to put a new exhaust gasket in when you put the exhaust back together? Or, did you just take off the bracket and pull the sway bars over the top and towards the rear of the vehicle.
Thanks,
Last edited by 350Z84; Aug 6, 2007 at 08:07 PM.
Trending Topics
Thread Starter
Retired Admin
iTrader: (95)
Joined: Dec 2000
Posts: 1,337,017,813
Likes: 78
From: Dallas / Chicago
As stated above, it's easier if you disconnect the mid-pipe from the muffler. I think it's possible to do it without unbolting the muffler, but why make it harder on yourself? And if you're using the stock exhaust, Nismo, or Fujitsubo exhaust, there's no gasket between the muffler and the mid-pipe. It's an O-ring, which is made of rubber. And it does not need to be replaced.

Very nice, just as easy as when i did it on my 98 cavalier heh. I didnt have front or rear sways, just imagine.... I winded up totaling that car a few weeks after the install. The car oversteered real bad as hard to beleive as that is in a cavalier lol. Someone someone stopped short and i swurved around them and fishtailed and hit grass and slid into a tree sideways.... ugh lol, imagine the Z with no sways..... oh wow.
EDIT: meant to add, i had only installed a rear, thats why it oversteered bad. I was uneducated at the time =(
EDIT: meant to add, i had only installed a rear, thats why it oversteered bad. I was uneducated at the time =(

Thread Starter
Retired Admin
iTrader: (95)
Joined: Dec 2000
Posts: 1,337,017,813
Likes: 78
From: Dallas / Chicago
I didn't grease them and there's no clunking whatsoever.
Nice writeup. Thanks for taking the time.
I should be tackling this install on Labor Day. Any tips on the difference with me installing Hotchkis sways with my Borla TD? I'd prefer to not touch the Borla at all (if possible) since I'm leak and rattle free at the moment.
And I need to pick up some new jacks/ramps. Any recommendations?
I should be tackling this install on Labor Day. Any tips on the difference with me installing Hotchkis sways with my Borla TD? I'd prefer to not touch the Borla at all (if possible) since I'm leak and rattle free at the moment.
And I need to pick up some new jacks/ramps. Any recommendations?
Thread Starter
Retired Admin
iTrader: (95)
Joined: Dec 2000
Posts: 1,337,017,813
Likes: 78
From: Dallas / Chicago
Originally Posted by ANXIOUZ
Nice writeup. Thanks for taking the time.
I should be tackling this install on Labor Day. Any tips on the difference with me installing Hotchkis sways with my Borla TD? I'd prefer to not touch the Borla at all (if possible) since I'm leak and rattle free at the moment.
And I need to pick up some new jacks/ramps. Any recommendations?
I should be tackling this install on Labor Day. Any tips on the difference with me installing Hotchkis sways with my Borla TD? I'd prefer to not touch the Borla at all (if possible) since I'm leak and rattle free at the moment.
And I need to pick up some new jacks/ramps. Any recommendations?
Just be sure to use floor jacks and not the scissor jacks (oem-like) and you should be good. Also, I heard that the Rhino(?) ramps from Wal-Mart are pretty good, especially considering its price. You may want to look into that.

I took at quick glance at this write-up and got to work today.
Piece-O-Cake
You definitely do not have to take the rear wheel off to do the rear sway bar.
Just take your time and when you are under the car, swivel the passenger side towards the rear of the car and slowly start getting the curve over the exhaust pipe. Once you get a little ways over, it comes out just fine.
Putting the new rear sway bar in is just reversing the steps
The install notes for the Hotchkis front sway says to use a 14mm socket to take off the nuts for the endlinks, mine were 17mm (2007 350z) just as the OP noted.
I set the front at full stiff and the rear in the medium (middle hole) setting. You can definitely notice a difference in the (lack of) body roll in the corners now. I'm going to have to go corner carving tomorrow and see how well it tracks in longer and tighter corners
As far as ramps go, you don't need any for the rear, just jack it up from the pumpkin and then put your jack stands at the jack points.
For the front however, you would need a looong jack to reach the jack point.
So I drove up on my ghettos ramps (3 1x4's, staggered and nailed together) and then I could get the jack far enough under to reach the jack point.
I have Rhino ramps, but they don't work once your car is lowered, so I may have to try this next time so I don't look so ghetto
http://www.z1auto.com/prodmore.asp?m...ng&prodid=2346
Last edited by Bahnzii; Sep 2, 2007 at 12:58 AM.
07's seems to have 17mm whereas all previous models use 14mm or 10mm for the endlinks. I forget which.
FWIW I couldn't get my **** up my Rhino Ramps...the ramps kept sliding forward. But even with a 1/2" drop you're dealing with clearance issues.
FWIW I couldn't get my **** up my Rhino Ramps...the ramps kept sliding forward.
But even with a 1/2" drop you're dealing with clearance issues.
Originally Posted by ANXIOUZ
07's seems to have 17mm whereas all previous models use 14mm or 10mm for the endlinks. I forget which.
FWIW I couldn't get my **** up my Rhino Ramps...the ramps kept sliding forward. But even with a 1/2" drop you're dealing with clearance issues.
FWIW I couldn't get my **** up my Rhino Ramps...the ramps kept sliding forward.
But even with a 1/2" drop you're dealing with clearance issues.As for the Rhino ramps, I had the same problem when I first got them with my other car. What I ended up using was one of those roll-up oil drip mats, it was wide enough to space out the ramps far enough drive up on and then the rubber backing on the mat kept them from sliding.
You could also try even something simple like a towel or some of that rubbery shelf liner (for the kitchen) to give them something "sticky" to grab on to the cement...
How did you like the mod?
I can totally feel the difference in the faster or tighter corners, nice cheap but totally must-do handling mod!!

i just did this yesterday & you don't have to take off your wheel or unbolt your exhaust.
If you're good at taking your time you can manipulate the rear bar parallel to the car it'll slide out that way.
edit: it'll slide out to the rear of the diff.

If you're good at taking your time you can manipulate the rear bar parallel to the car it'll slide out that way.
edit: it'll slide out to the rear of the diff.
Last edited by sofa king; Apr 3, 2011 at 05:38 AM.

Thread
Thread Starter
Forum
Replies
Last Post
350Z_Al
Exterior & Interior
133
Oct 29, 2020 07:44 PM