
DIY - SPL Compression Rod Bushing Install
 01-08-2011, 09:20 AM
#41
350Z-holic

Thread Starter
iTrader: (60)
Join Date: Jan 2006
Location: San Antonio/I miss DFW, TX
Posts: 11,204
Likes: 0
Received 29 Likes
on
20 Posts
oh ya....that requires dropping the sub frame as a whole unit...sorry for my confusion...
https://my350z.com/forum/8879429-post23.html
-J
https://my350z.com/forum/8879429-post23.html
-J

 01-10-2011, 10:38 PM
#43
Super Moderator
MY350Z.COM
MY350Z.COM

iTrader: (8)
oh ya....that requires dropping the sub frame as a whole unit...sorry for my confusion...
https://my350z.com/forum/8879429-post23.html
-J
https://my350z.com/forum/8879429-post23.html
-J
01-20-2011, 07:44 PM
#45

My car front end has been squirming and going over potholes with great discomforts. There's no vibration or rattle, but it just feels loose over bumpy roads. It's not the shocks because the damping and rebound are very tight. The rear is fine, only the front feels weird.
I will be replacing my compression bushings with SPL and my front lower control arm bushings with whiteline.
I will also replace my 70,000 miles front lower ball joints with cheap aftermarket stock replacements. I remember seeing a DIY guide somewhere just yesterday. I can't find it today. I frequent between G35driver and My350Z. I can't seem to find it on either forum!!! If you have the URL favorited, please show me the link! Thanks.
01-30-2011, 09:01 AM
#48
Registered User
iTrader: (10)
Join Date: Mar 2007
Location: West Coast
Posts: 609
Likes: 0
Received 0 Likes
on
0 Posts
J,
Im planning to do the translink bushings and then this..i know whiteline has bushing for the translink. Do they have bushing for the compression arm??..spl is kinda pricey for me..last, what do you recommend doing first?
man, you just dont know how you help us out with this "Sick" Diy of yours!!..
thanks,
-C
01-31-2011, 04:16 AM
#49
350Z-holic
Thread Starter
iTrader: (60)
Join Date: Jan 2006
Location: San Antonio/I miss DFW, TX
Posts: 11,204
Likes: 0
Received 29 Likes
on
20 Posts
J,
Im planning to do the translink bushings and then this..i know whiteline has bushing for the translink. Do they have bushing for the compression arm??..spl is kinda pricey for me..last, what do you recommend doing first?
man, you just dont know how you help us out with this "Sick" Diy of yours!!..
thanks,
-C
Im planning to do the translink bushings and then this..i know whiteline has bushing for the translink. Do they have bushing for the compression arm??..spl is kinda pricey for me..last, what do you recommend doing first?
man, you just dont know how you help us out with this "Sick" Diy of yours!!..
thanks,
-C
SPL did great here......I walked into tons of machine shops looking to have some make and always got way high quotes for a pair of "specific peices that were a one time job" so it wasnt worth their while or mine for the price needed to make it worth it...
honestly, i would pay the spl price quick........as i did and drove to Austin to pick up 3 sets for me and friends i "coherest" into buying them...! lol..
I'm an engineer and do actual hands on problem solving everyday.....then I actually work at designing ways to fix, repair, etc.....so doing DIY's on my hobby is fun............glad it helps out everyone...

-J
Last edited by JasonZ-YA; 01-31-2011 at 04:17 AM.
04-29-2011, 07:20 AM
#50
Registered User
iTrader: (10)
Join Date: Mar 2007
Location: West Coast
Posts: 609
Likes: 0
Received 0 Likes
on
0 Posts
No NVH problems on SPL? How is it on yours?..I bought the Energy Susp front arm kit from one of the vendors here. Hopefully it last longer than the stock ones. Both of my bushings are torn up. No wonder i get a 'Nervous front end' (steering wheel shakes when hits a bump)....
04-30-2011, 09:28 AM
#51
Registered User
iTrader: (10)
Join Date: Mar 2007
Location: West Coast
Posts: 609
Likes: 0
Received 0 Likes
on
0 Posts
J- I bought ENERGY FRONT ARM KIT..Bushing for LCA,CA,UCA..deal to good to pass up!!..
Replaced the LCA bushings (still in good condition when i took it out but i replaced it anyway), Replaced CA bushing (both are shot!!!<--- my problem for jarring steering wheel during bumps)...UCA bushing to follow, soon!..
I used the press to put in the bushing on LCA. The press broke on my last set of CA bushing. I have to take it to NAPA Auto Parts (Vacaville,$24.00) to press it in for me. I did not know that some Napa Auto Parts have machine shops!!..
After re-installing both LCA and CA , did a figure 8 couple times, car tracks better specially on bumps, NO more vibration issue. Steering wheel jarring is gone..the car feels stable!!!!...
BY THE WAY, the bushing that is supposed to go on the NON tapered end of the arm will not go in. I ended up putting the bushing (RUBBER IN HEAT =EXPAND, IN COLD= SHRINKage..hahaha..thats sounds funny!!) in the freezer for an 1hr..then it became an easy put in!!!!..I hardly used any grease to push in...
I havent done the Upper Control Arm bushing yet...
here are the CA bushing installed..
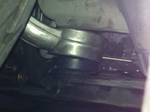
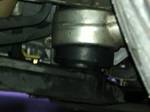
-C
Replaced the LCA bushings (still in good condition when i took it out but i replaced it anyway), Replaced CA bushing (both are shot!!!<--- my problem for jarring steering wheel during bumps)...UCA bushing to follow, soon!..
I used the press to put in the bushing on LCA. The press broke on my last set of CA bushing. I have to take it to NAPA Auto Parts (Vacaville,$24.00) to press it in for me. I did not know that some Napa Auto Parts have machine shops!!..
After re-installing both LCA and CA , did a figure 8 couple times, car tracks better specially on bumps, NO more vibration issue. Steering wheel jarring is gone..the car feels stable!!!!...
BY THE WAY, the bushing that is supposed to go on the NON tapered end of the arm will not go in. I ended up putting the bushing (RUBBER IN HEAT =EXPAND, IN COLD= SHRINKage..hahaha..thats sounds funny!!) in the freezer for an 1hr..then it became an easy put in!!!!..I hardly used any grease to push in...
I havent done the Upper Control Arm bushing yet...
here are the CA bushing installed..
-C
Last edited by SlipZ; 05-04-2011 at 06:48 AM.
07-03-2011, 11:28 PM
#52
New Member
iTrader: (12)

Join Date: Jun 2010
Location: ATX
Posts: 238
Likes: 0
Received 0 Likes
on
0 Posts
if its ok id like to share my experience with changing these out. this is for all the people who dont have a sears, scrap yard or napa who will touch bushings nearby. i decided to go with the energy bushings by the way.
first of all pb blaster is a must! its my first time using it and i sprayed all the bolts several times for a day or so. but i accidentally overlooked two bolts for the brace and its usefulness immediately became apparent haha.
another must is an impact, it makes life so much easier, especially for those 19mm compression bolts! i cannot emphasize that enough!
since i plan on putting energy bushings on the rear eventually and almost all the shops are closed on weekends i bought this press from harbor freight.
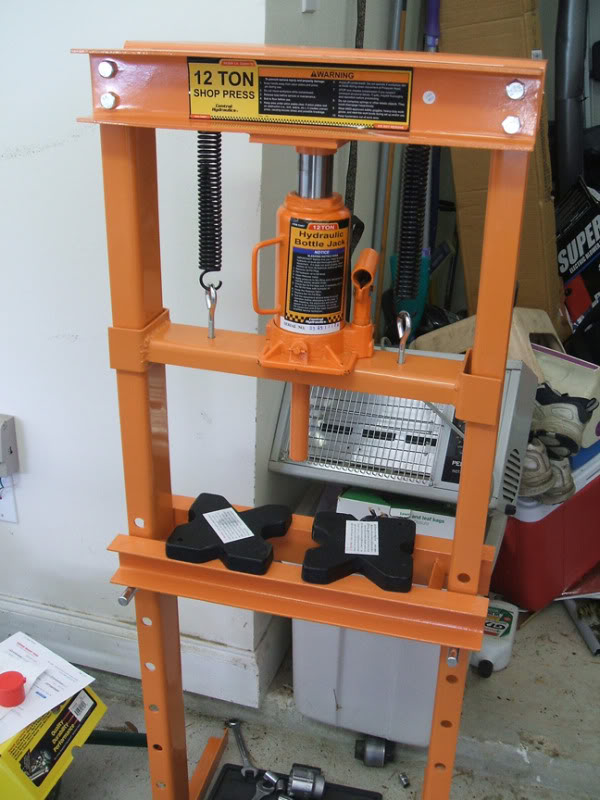
but be warned its kinda ghetto and if u look closely at the top left it got crooked and the metal bent a little bit. but it worked! here's the sockets i used from autozone to press the stock bushings out.
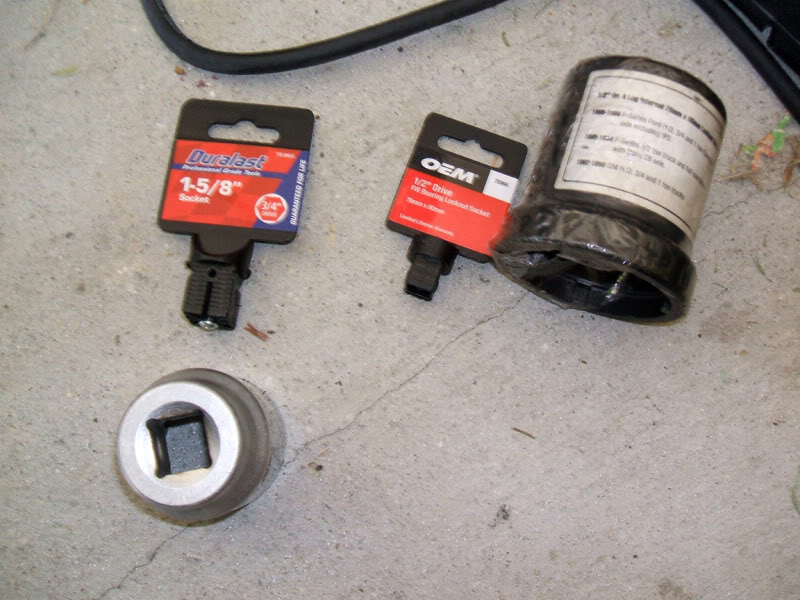
i used the 1-5/8" for bushings and the 76mm bearing socket as a receiver to get it started. only use this to get it started cuz there r tabs on the inside of the big socket that will catch the old bushing (which i think might be why the press bent?). once u get it started just use the arbor plates (as pictured) to press it the rest of the way out. after that i only used the press to put in the bushings that had to go into the non tapered side of the arm. but it was easy. with a little finesse everything was back in and torqued to spec.
i gotta say my stock bushings didnt look too bad even tho i knew they were torn but i was pleasantly surprised by much i noticed a difference with the energy ones! and i already have the whiteline translink and shock bushings done. no more steering wheel jiggle and it feels much tighter, def worth it!
first of all pb blaster is a must! its my first time using it and i sprayed all the bolts several times for a day or so. but i accidentally overlooked two bolts for the brace and its usefulness immediately became apparent haha.
another must is an impact, it makes life so much easier, especially for those 19mm compression bolts! i cannot emphasize that enough!
since i plan on putting energy bushings on the rear eventually and almost all the shops are closed on weekends i bought this press from harbor freight.
but be warned its kinda ghetto and if u look closely at the top left it got crooked and the metal bent a little bit. but it worked! here's the sockets i used from autozone to press the stock bushings out.
i used the 1-5/8" for bushings and the 76mm bearing socket as a receiver to get it started. only use this to get it started cuz there r tabs on the inside of the big socket that will catch the old bushing (which i think might be why the press bent?). once u get it started just use the arbor plates (as pictured) to press it the rest of the way out. after that i only used the press to put in the bushings that had to go into the non tapered side of the arm. but it was easy. with a little finesse everything was back in and torqued to spec.
i gotta say my stock bushings didnt look too bad even tho i knew they were torn but i was pleasantly surprised by much i noticed a difference with the energy ones! and i already have the whiteline translink and shock bushings done. no more steering wheel jiggle and it feels much tighter, def worth it!
09-06-2011, 02:32 PM
#53
Registered User

Join Date: Aug 2011
Location: Canada
Posts: 2
Likes: 0
Received 0 Likes
on
0 Posts
With all of the success stories posted I figured this install would be a piece of cake. Second day now and I have given up on the passenger side as I stripped the hell out of one of the bolts holding on the underbrace (still need to get that off).
Moving on to the left wheel I was able to remove the underbrace, generously spraying each bolt with pb blaster. However I am stuck once again and this time I think its a big problem. I have a very heavy duty impact driver that I used on the main bolt and things went fine, but after removing the cotter pin from the other bolt and using the driver both the nut and the bolt spin together.. does that mean the bolt (that I believe is supposed to be part of the actual rod) has broken? Only reason I am thinking that may not be the case is that the rod is still firmly attached.
I am thinking of putting everything back together and taking it in as things just keep going wrong for me.
Any explanation to help me out would be GREATLY appreciated.
09-06-2011, 04:04 PM
#54
New Member
iTrader: (12)
Join Date: Jun 2010
Location: ATX
Posts: 238
Likes: 0
Received 0 Likes
on
0 Posts
to keep the ball joint from spinning i put a jack underneath it and jacked it up about .25". that puts some pressure on it so it wont spin and u can get the ball joint nut off
09-06-2011, 06:27 PM
#55
Registered User
Join Date: Aug 2011
Location: Canada
Posts: 2
Likes: 0
Received 0 Likes
on
0 Posts
I tried doing that but didn't seem to stop the bolt from spinning. Was there a certain placement on the rod you placed the jack?

 09-07-2011, 10:01 AM
#58
New Member
iTrader: (12)
Join Date: Jun 2010
Location: ATX
Posts: 238
Likes: 0
Received 0 Likes
on
0 Posts
Last edited by go kart; 09-07-2011 at 10:09 AM.
10-03-2011, 07:02 AM
#59
350Z-holic
Thread Starter
iTrader: (60)
Join Date: Jan 2006
Location: San Antonio/I miss DFW, TX
Posts: 11,204
Likes: 0
Received 29 Likes
on
20 Posts
^ yes, that point works.....usually an impact spins the nut right off, but if you have too, jack up that point a bit to where it binds up the shaft in the ball joint to where only the nut spins free..
-J
-J
10-03-2011, 07:09 AM
#60
350Z-holic
Thread Starter
iTrader: (60)
Join Date: Jan 2006
Location: San Antonio/I miss DFW, TX
Posts: 11,204
Likes: 0
Received 29 Likes
on
20 Posts
The SPL bushing is hands down the best for the compression rod....
if your daily driving on a super lowered car or a car thats lowered slightly with huge 20 inch rims, then your gonna probably be hearing noise/clunks from when you hit bumps, etc...IMHO thats better than having torn oem bushings and crappy alignment causing crappy tire wear.....thus having to replace tires sooner..
the spl compression rod bushing is a friction free bushing, there is no oem rubber there to fight your steering inputs..
JUST FYI:
If your daily driving on a super lowered car = a car that's lowered slightly with huge 20 inch rims,
Those two are equal...they both equate to a compresson rod that is pointed UPWARDS due to the car being lowered....due to the suspension being altered with the configuration change combination of lowering and or bigger wheels..
This is hard to explain....
-J