Rambo's LS6 G35 Build


Thread Starter
Registered User
iTrader: (3)
Joined: Feb 2010
Posts: 100
Likes: 0
From: Cincinnati, OH
Well my engine is burning oil so I decided to replace it with a new one. I am building a 400+hp LS6. Had this on G35Driver for a while so I thought I would catch everyone up.
So far my build setup is as follows:
1. 01' LS1 Longblock ($650) - Just checked the casting numbers. I have an LS6 block!! About 15% of the blocks in 01 fbodies were ls6 castings. I am excited.
2. 243 heads ($350)
3. Mahle Power Piston Pack ($425 - new bought from someone on LS1TECH)
4. ARP Main Studs - $180
5. Clevite 77 Cam Bearings - $35
6. All block and head machine work, Rotating Assembly Balanced, Main Bearings, Rod Bearings, and ARP Rod Bolts - $1335 (Huck's Machine Shop in Cincinnati, OH - Highly Recommended)
7. ARP Balancer Bolt - $25
8. LS2 90MM TB - $125 new (best ebay find ever!)
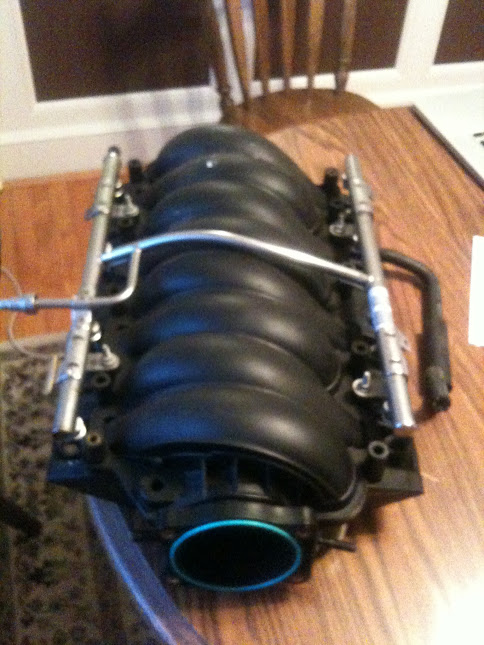
9. LS2 Intake and Fuel Rails - $250 (purchased from VAS_33 on LS1tech, going from Z to G)
10. EPS 226 INT./230 EXT. .600 lift custom cam - $400
Total so far: $3775
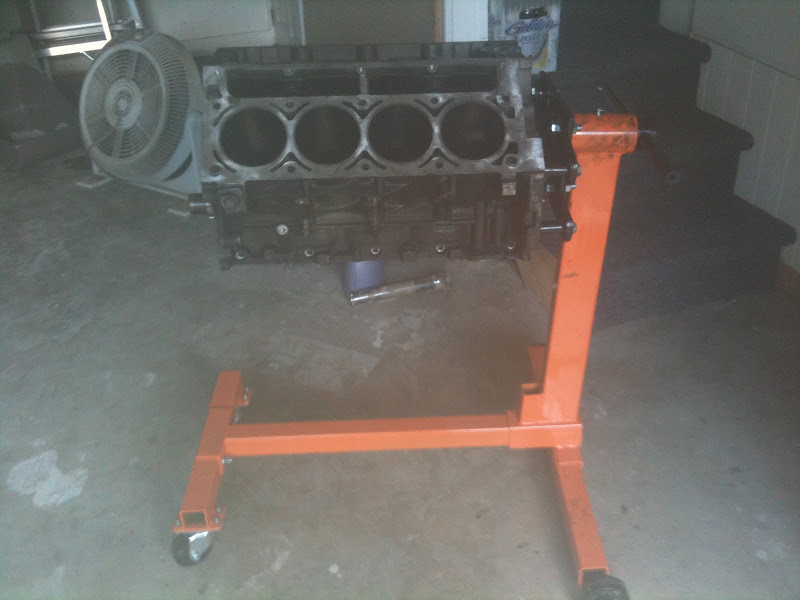
Just got it up on the engine stand today to inspect...

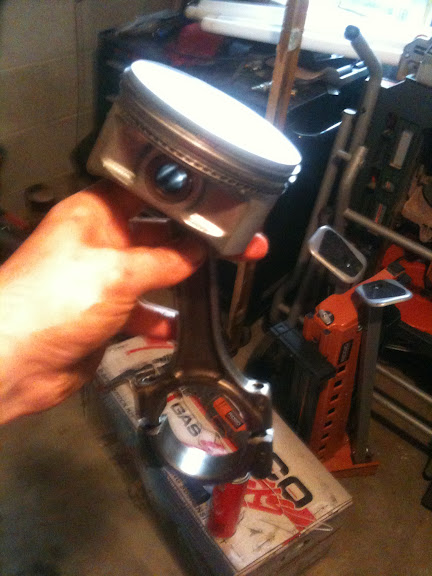
Dirty Pistons:

Clean Piston (4 down, 4 to go):
After I finish cleaning the last 4, next step is to press out the wrist pins. I am going to reuse the stock rods.
243 heads from an LS2. I am going to clean these up, polish, and put some high lift springs and comp cams trunion upgraded rockers. I think it will go nicely with a phat cam...

mmm....new pistons!!!!

Installed new ARP Main Studs today!
Old stock main bolts out.

Dropped in the new studs.

All done. Ready for the machine shop!!!

Time for an update.
Total list of things Huck's Machine Shop did for me:
1. Clean Block, Valves, Valve Covers, and Heads
2. Inspect and Deck heads flat
3. Magnaflux Crank, Grind, and polish
4. Inspect block
5. Bore, hone, and match block to pistons
6. Recondition stock rods with ARP bolts
7. Assemble rods and pistons with pressed in wrist pins (THEY DID IT FOR FREE!!)
8. Replace cam bearings
9. Full balance of rotating assembly
10. Ground flywheel (THEY DID IT FOR FREE!!)
11. Furnished Main and Rod bearings
Final machine shop cost with ARP rod bolt, main bearings, and rod bearings: $1335.41
Time for pics:
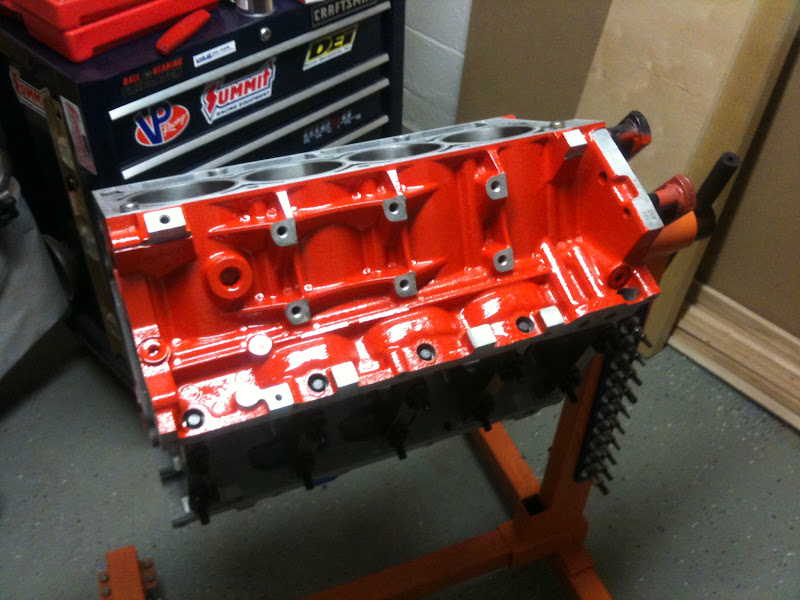
Freshly Cleaned, Bored, Honed Block:


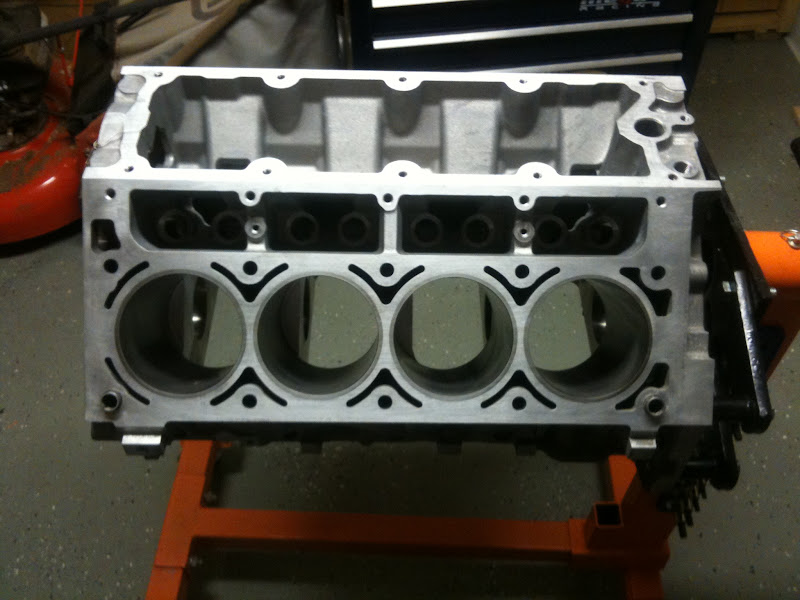
Is that Chevy Red-Orange I see:

Why yes, yes it is:


Fresh Parts!!!
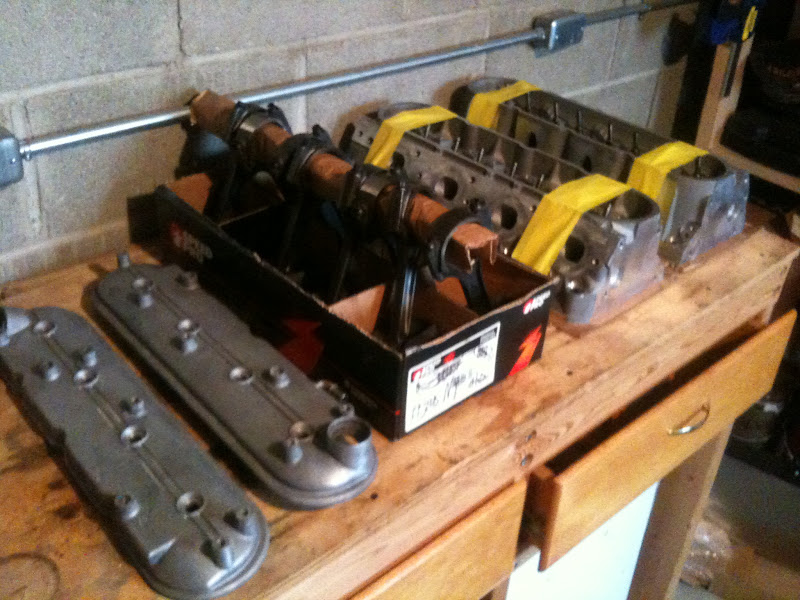
Piston Assemblies:
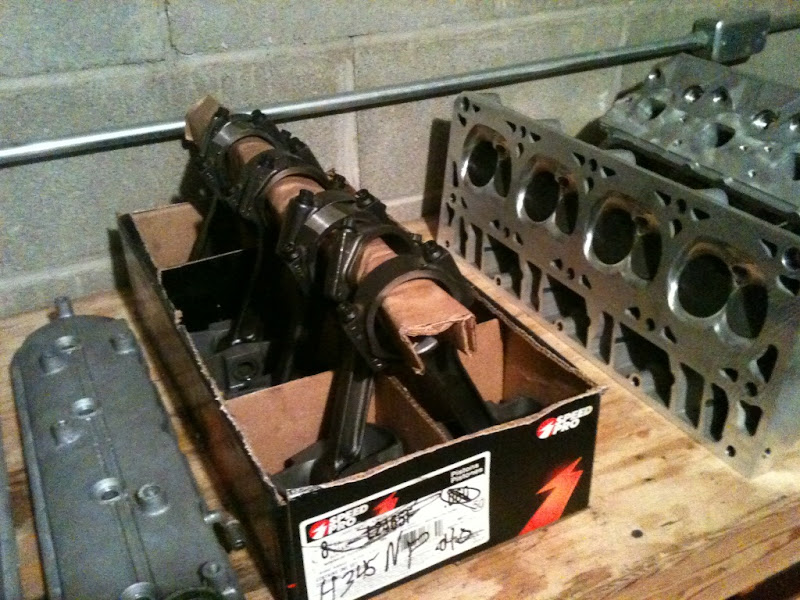
New Piston Assembly with ARP Rod bolts and MAHLE Pistons:

Freshly Ground and Balanced Crank:

Cleaned and decked heads:

I also got the fly wheel, rod, and main bearings. Time for short block assembly to begin....
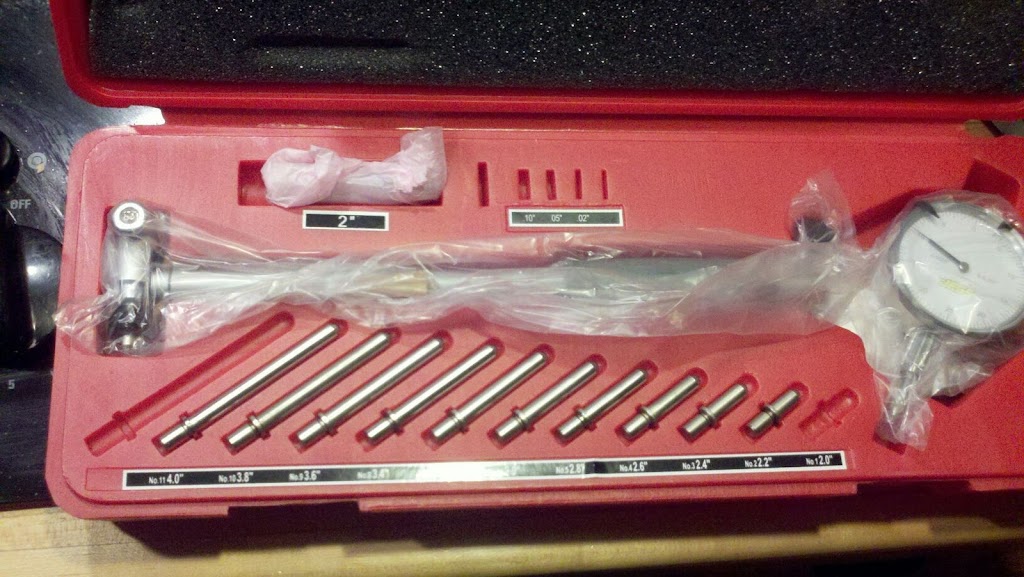
New micrometers for verifying clearances. New bore gauge is on the way!!
JEGS SENT ME THE BORE GAUGE WITH MISSING PARTS!!!! WTF!! (Finally got a new one)
Just bought a piston ring filer and a ring compressor tool. Lets see if they come in with all the pieces


Just picked up a new LS2 90mm TB for my build. I will be upgrading the LS6 to alot of the LS2 stuff. $125 bucks new - Ebay find of the century

OK. Time for an update.
Lower main bearings installed in the main caps.

Upper main bearings installed in the block.

Erica's first attempt at taking a picture of me micing in the main bearings, pretty cool shot though:

Me micing in the main bearings. .001"-.002" clearance all around. Yeah!!

All main bearings checked out to .001"-.002" clearance. She is ready for the crankshaft.

A little assembly lube on the upper main bearings.

A little more assembly lube on the lower main bearings.

Dropped the crankshaft in!!

Main caps installed and everything torqued down. She turns freely. Next step is to check end play.
[
Thats all for today. I am still waiting on my ring grinder and ring compressor. Should be here later this week.
New ARP Balancer Bolt is in!! Should be assembling the pistons in the short block this weekend.

Decided 50 bucks was way too much to spend for a piston ring squaring tool. So i made one. Turned out great, not bad for $FREE.99

Checked crankshaft end play. Looks good. I also finally got the piston rod bolts loosed up so I can start assembly of the bearings

Time for an update!!
The rod bearings and connecting rod/piston assembly.

Dropped in the rod bearings.

Bearings are ready for clearance inspection. Seven more to go...

All the Piston/Rod assemblies ready for rings.

My piston ring squaring tool works!!

Piston ring #3 all gapped up and ready to go.

The full piston assembly rings, rods, bearings, and pistons. The whole caboodle ready for assembly.

Piston rings installed.

After a ***** of time figuring out how to get my ring compressor working correctly (wouldnt close all the way) on piston #1 the rest dropped in nicely.


Bottom end all buttoned up!

ARP Rod bolt close up!


All Pistons In!!! Time to find a cam!!!

btw this build is sponsored by budwieser. 5 hrs of working on a motor cannot be had without a few cans of beer.
So far my build setup is as follows:
1. 01' LS1 Longblock ($650) - Just checked the casting numbers. I have an LS6 block!! About 15% of the blocks in 01 fbodies were ls6 castings. I am excited.
2. 243 heads ($350)
3. Mahle Power Piston Pack ($425 - new bought from someone on LS1TECH)
4. ARP Main Studs - $180
5. Clevite 77 Cam Bearings - $35
6. All block and head machine work, Rotating Assembly Balanced, Main Bearings, Rod Bearings, and ARP Rod Bolts - $1335 (Huck's Machine Shop in Cincinnati, OH - Highly Recommended)
7. ARP Balancer Bolt - $25
8. LS2 90MM TB - $125 new (best ebay find ever!)
9. LS2 Intake and Fuel Rails - $250 (purchased from VAS_33 on LS1tech, going from Z to G)
10. EPS 226 INT./230 EXT. .600 lift custom cam - $400
Total so far: $3775
Just got it up on the engine stand today to inspect...
Dirty Pistons:
Clean Piston (4 down, 4 to go):
After I finish cleaning the last 4, next step is to press out the wrist pins. I am going to reuse the stock rods.
243 heads from an LS2. I am going to clean these up, polish, and put some high lift springs and comp cams trunion upgraded rockers. I think it will go nicely with a phat cam...
mmm....new pistons!!!!
Installed new ARP Main Studs today!
Old stock main bolts out.
Dropped in the new studs.
All done. Ready for the machine shop!!!
Time for an update.
Total list of things Huck's Machine Shop did for me:
1. Clean Block, Valves, Valve Covers, and Heads
2. Inspect and Deck heads flat
3. Magnaflux Crank, Grind, and polish
4. Inspect block
5. Bore, hone, and match block to pistons
6. Recondition stock rods with ARP bolts
7. Assemble rods and pistons with pressed in wrist pins (THEY DID IT FOR FREE!!)
8. Replace cam bearings
9. Full balance of rotating assembly
10. Ground flywheel (THEY DID IT FOR FREE!!)
11. Furnished Main and Rod bearings
Final machine shop cost with ARP rod bolt, main bearings, and rod bearings: $1335.41
Time for pics:
Freshly Cleaned, Bored, Honed Block:
Is that Chevy Red-Orange I see:
Why yes, yes it is:
Fresh Parts!!!
Piston Assemblies:
New Piston Assembly with ARP Rod bolts and MAHLE Pistons:
Freshly Ground and Balanced Crank:
Cleaned and decked heads:
I also got the fly wheel, rod, and main bearings. Time for short block assembly to begin....
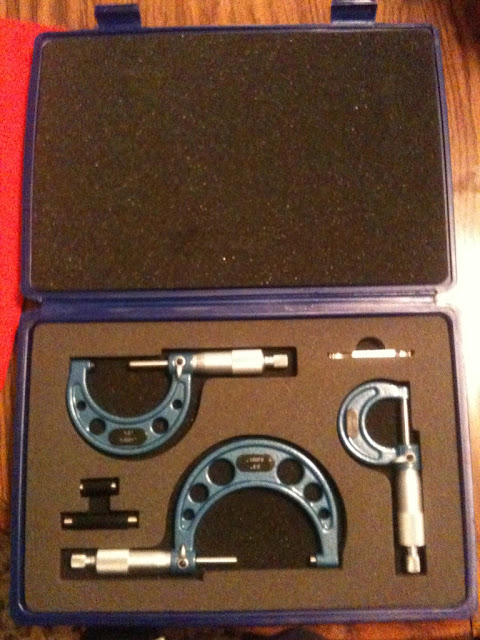
New micrometers for verifying clearances. New bore gauge is on the way!!
JEGS SENT ME THE BORE GAUGE WITH MISSING PARTS!!!! WTF!! (Finally got a new one)
Just bought a piston ring filer and a ring compressor tool. Lets see if they come in with all the pieces
Just picked up a new LS2 90mm TB for my build. I will be upgrading the LS6 to alot of the LS2 stuff. $125 bucks new - Ebay find of the century
OK. Time for an update.
Lower main bearings installed in the main caps.
Upper main bearings installed in the block.
Erica's first attempt at taking a picture of me micing in the main bearings, pretty cool shot though:
Me micing in the main bearings. .001"-.002" clearance all around. Yeah!!
All main bearings checked out to .001"-.002" clearance. She is ready for the crankshaft.
A little assembly lube on the upper main bearings.
A little more assembly lube on the lower main bearings.
Dropped the crankshaft in!!
Main caps installed and everything torqued down. She turns freely. Next step is to check end play.
[
Thats all for today. I am still waiting on my ring grinder and ring compressor. Should be here later this week.
New ARP Balancer Bolt is in!! Should be assembling the pistons in the short block this weekend.
Decided 50 bucks was way too much to spend for a piston ring squaring tool. So i made one. Turned out great, not bad for $FREE.99
Checked crankshaft end play. Looks good. I also finally got the piston rod bolts loosed up so I can start assembly of the bearings
Time for an update!!
The rod bearings and connecting rod/piston assembly.
Dropped in the rod bearings.
Bearings are ready for clearance inspection. Seven more to go...
All the Piston/Rod assemblies ready for rings.
My piston ring squaring tool works!!
Piston ring #3 all gapped up and ready to go.
The full piston assembly rings, rods, bearings, and pistons. The whole caboodle ready for assembly.
Piston rings installed.
After a ***** of time figuring out how to get my ring compressor working correctly (wouldnt close all the way) on piston #1 the rest dropped in nicely.
Bottom end all buttoned up!
ARP Rod bolt close up!
All Pistons In!!! Time to find a cam!!!
btw this build is sponsored by budwieser. 5 hrs of working on a motor cannot be had without a few cans of beer.
Last edited by Rambo; Feb 20, 2012 at 02:17 PM.


 very cool!


 subscribed

Trending Topics


Thread Starter
Registered User
iTrader: (3)
Joined: Feb 2010
Posts: 100
Likes: 0
From: Cincinnati, OH
Ditto that!! I have the 24X reluctor. I am going to run the E40 ECU so I can run LS2 sensors. I have spent alot of time reading about this.

Thread Starter
Registered User
iTrader: (3)
Joined: Feb 2010
Posts: 100
Likes: 0
From: Cincinnati, OH

Registered User
Joined: Feb 2010
Posts: 290
Likes: 0
From: alabama
If you have any questions prices on swap kits, wiring harnesses, and swap parts PM me. I have a build thread on g35 driver just search my user name. Iv been through the build and can tell you the easy way through it.
Thread Starter
Registered User
iTrader: (3)
Joined: Feb 2010
Posts: 100
Likes: 0
From: Cincinnati, OH
Just got an LS2 Intake manifold from Vas_33 (somehow randomly bought his on ls1tech) so I can use my 90mm Throttle body. I am going to port this one, then some day get a FAST set up down the road.