
DIY Cold Air Intake - CAI


This is primarily for fitting to a Vortech Supercharger, but I don't see why it can't be used for an N/A car. You would just need to adjust the pipe and tube sizes accordingly.
I've been meaning to get around to this for a long time now but had other priorities.
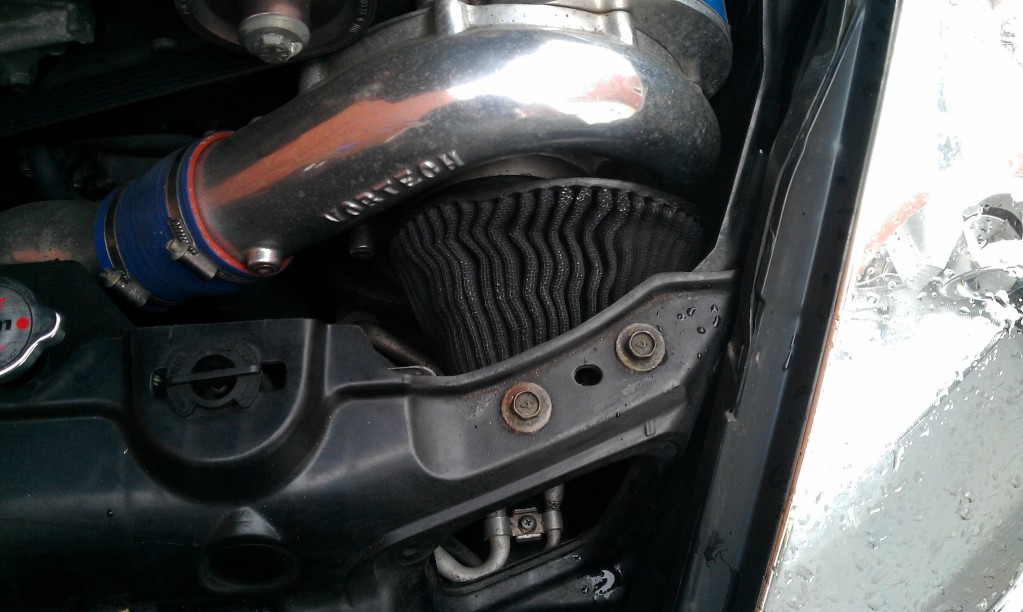
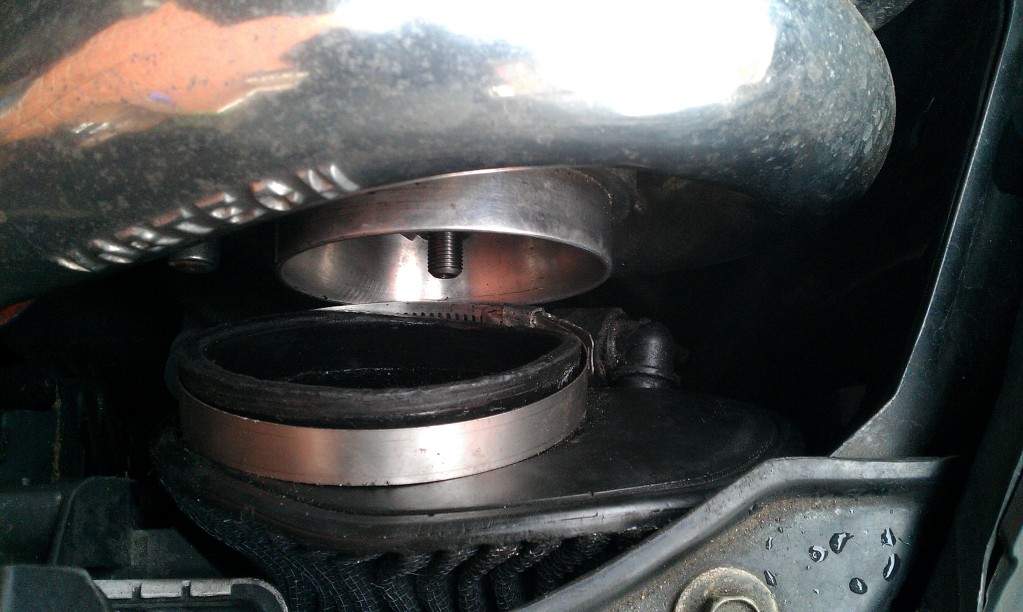
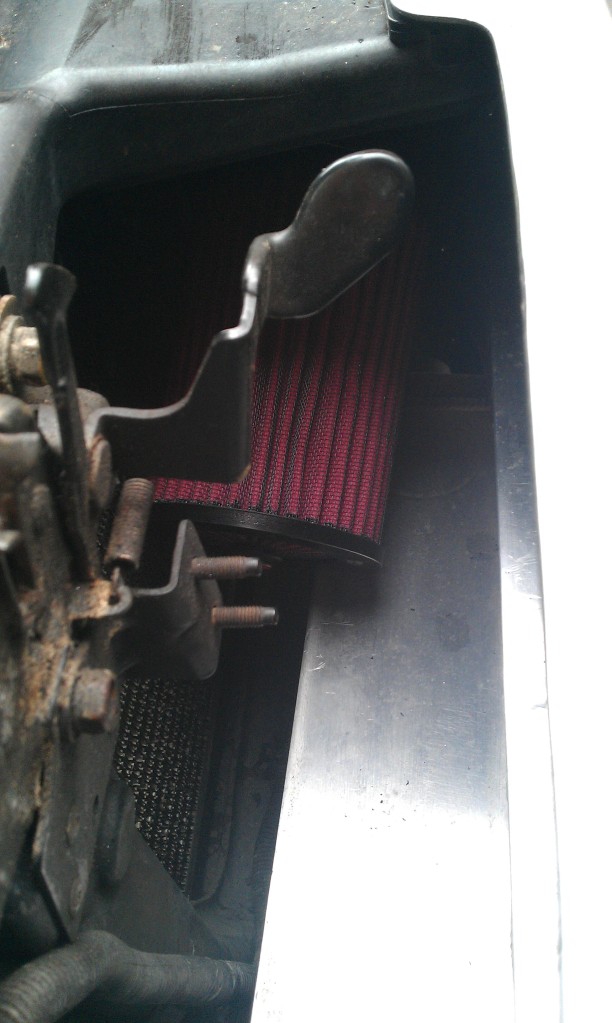
Standard Votech Intake setup sucking in lots of hot air from the engine bay :thumbdown: �
Parts needed �
http://www.ebay.co.uk/itm/2708675779...#ht_1126wt_905
http://www.ebay.co.uk/itm/3305782342...ht_1750wt_1037
http://www.ebay.co.uk/itm/3303825781...ht_1442wt_1037
http://www.ebay.co.uk/itm/2709253888...#ht_1102wt_905
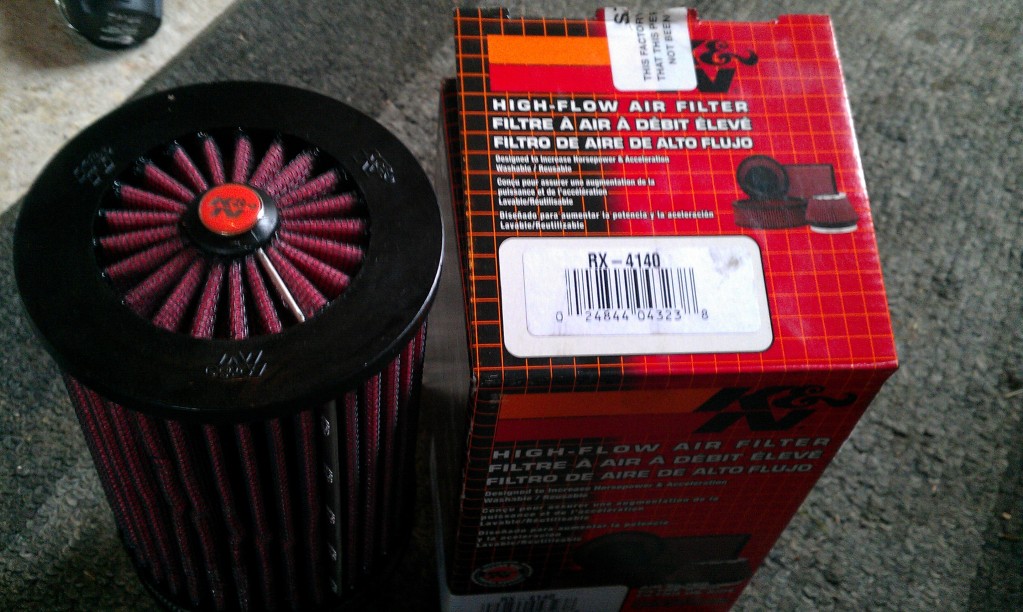
A suitable Air filter � I�ve used a K&N RX 4140 � Plenty of flow, quite narrow and has the same diameter as the Vortech intake. So if you ever remove the CAI you can fit the filter straight on the Supercharger.
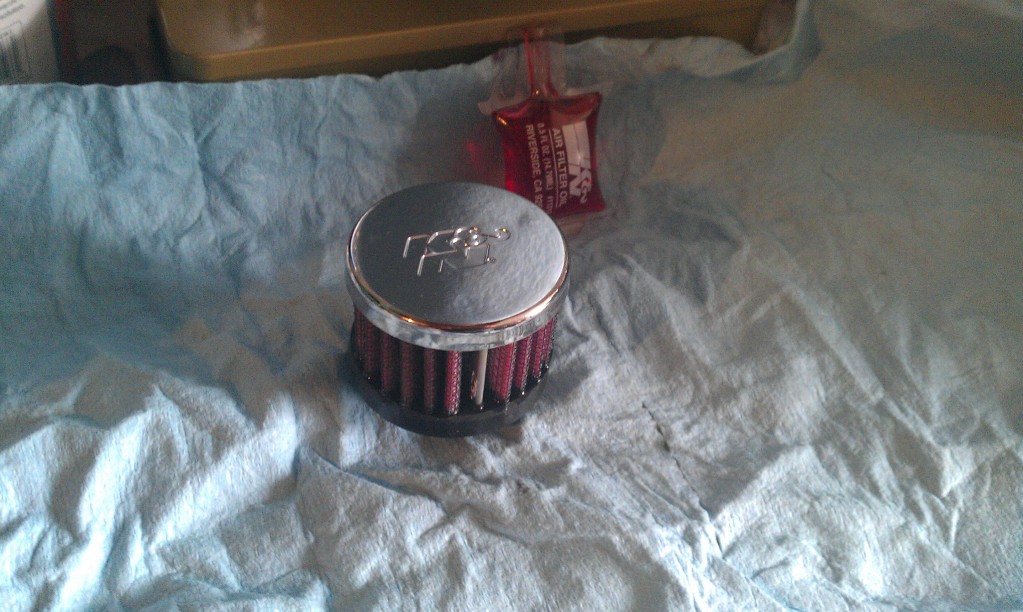
For the passenger side Cam cover vent (this usually goes into the Vortech filter) I�ve used a K&N 62-1340. Does the job and looks cool.
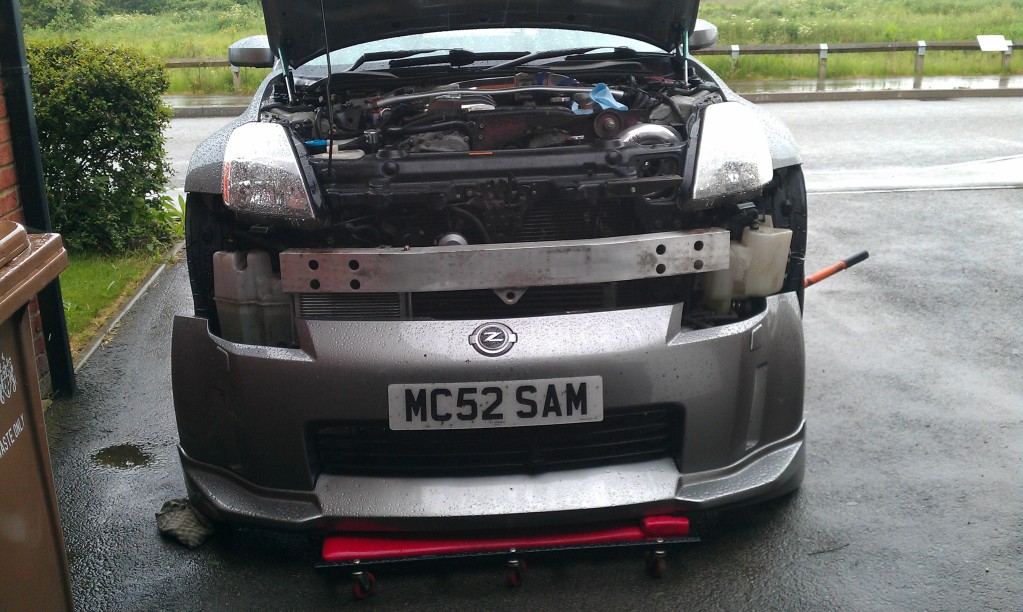
So first remove the Bumper using Slimjim�s guide here �
http://www.350z-uk.com/forum/viewtop...bumper+removal
It�s not necessary to go as far as removing the washer jets as you can just lower it down out the way and rest it on something suitable.
Remove the original filter from the Supercharger by removing the Jubilee clip. Pull out the Cam Cover Vent pipe from the filter. (can be seen on the lower right)
You then have to squash the filter enough to squeeze it out of the small gap above. Or you can remove the Supercharger if you don�t want to damage it! :wacko:
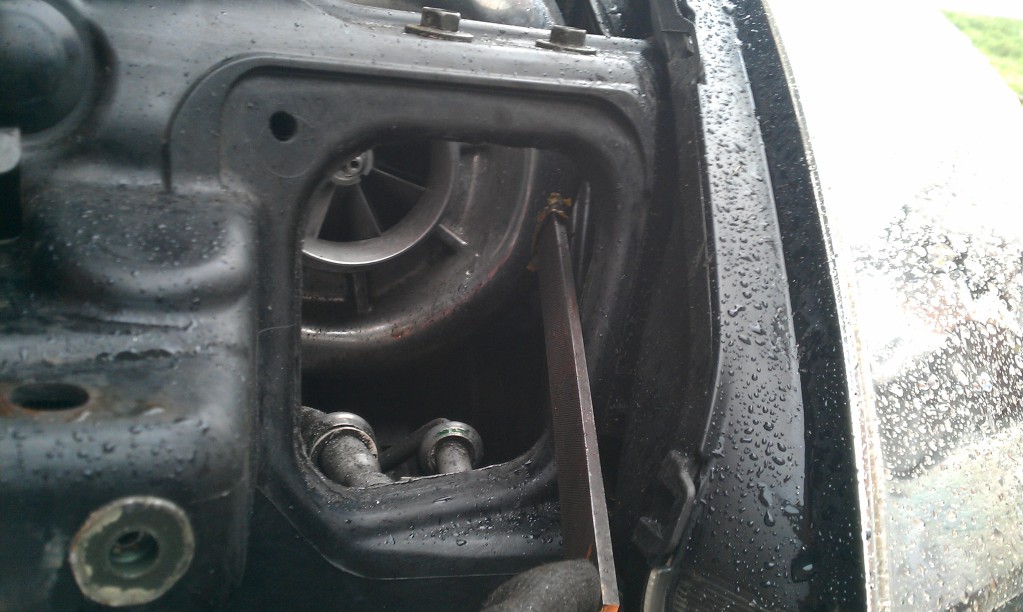
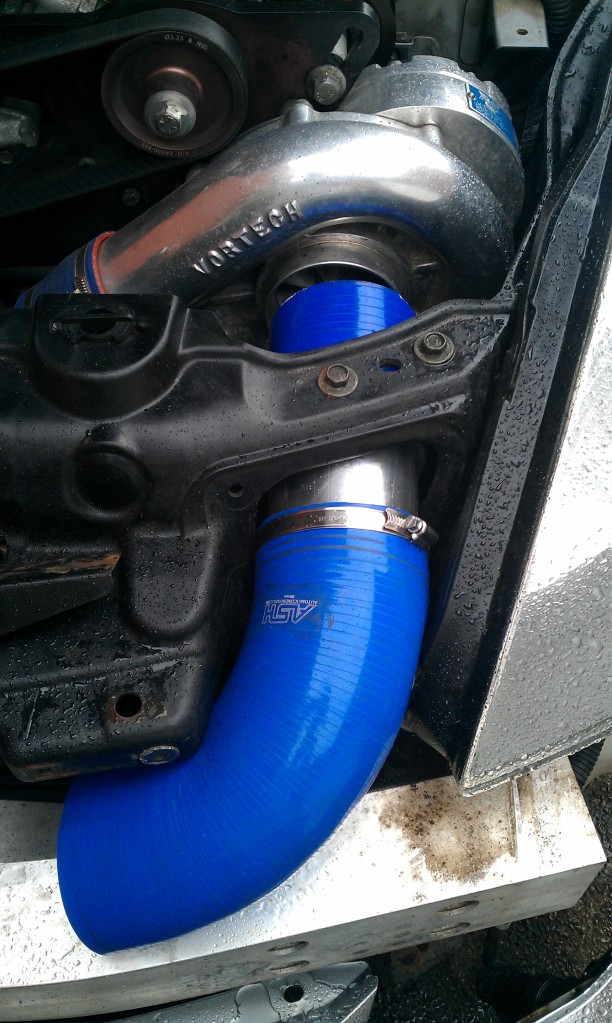
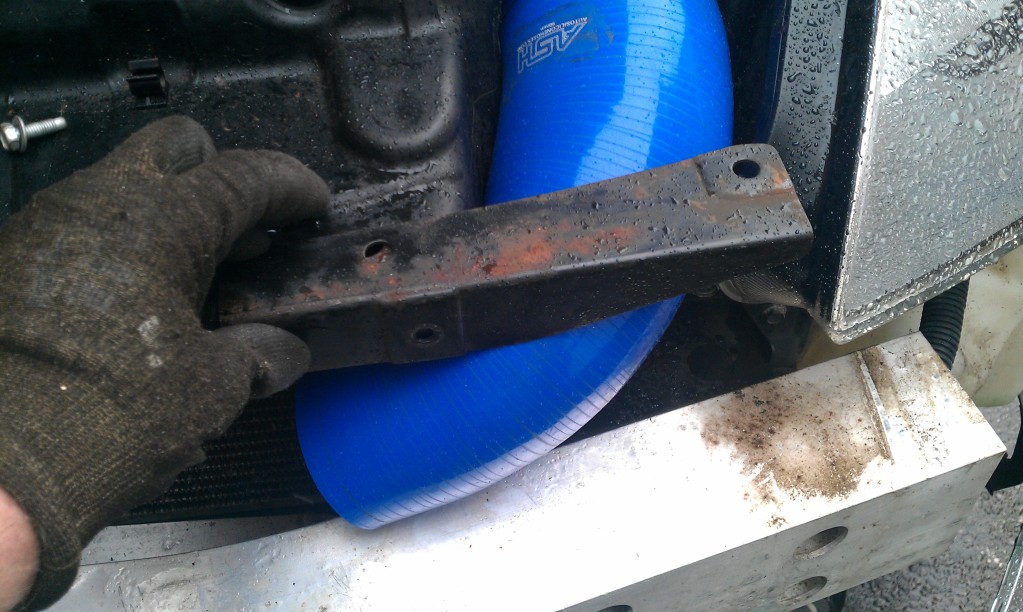
So this is the hole we are gonna put the piping through. As you can see, the top bumper mounting bracket will get in the way.
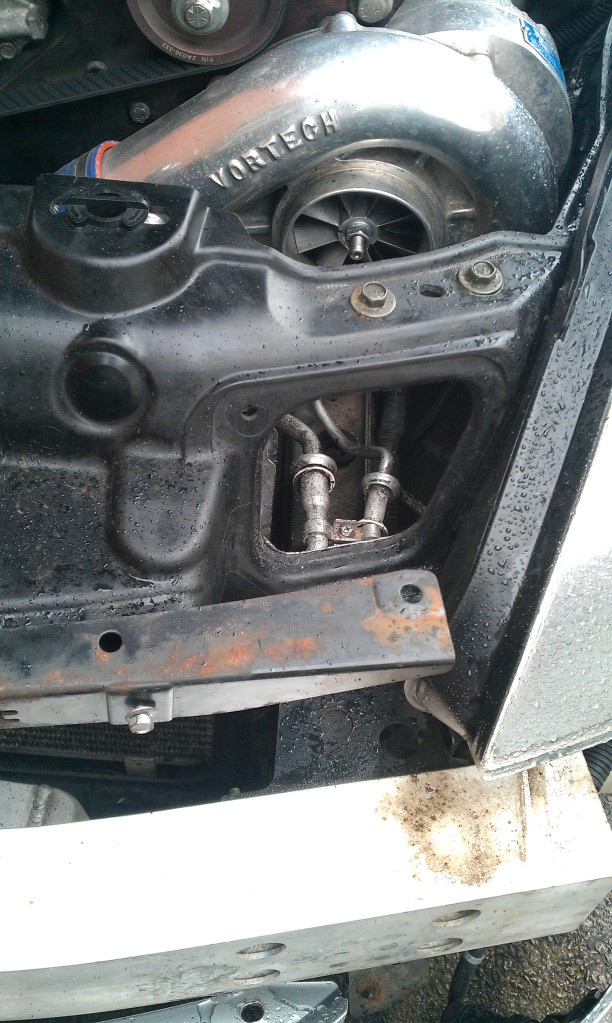
So remove that (10mm bolt) to give some more room.
You can see clearly now where it�s going to go.
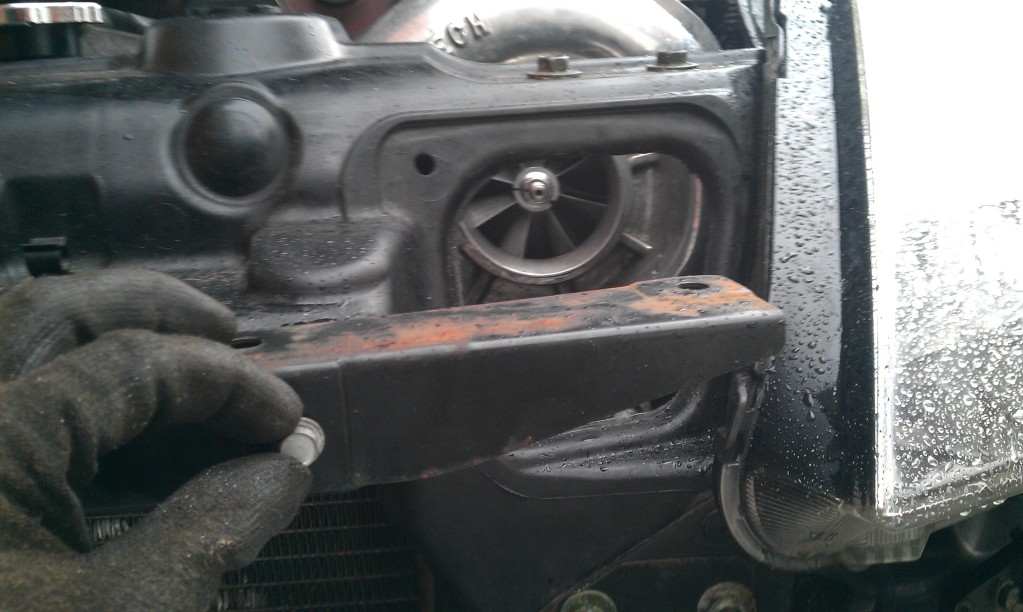
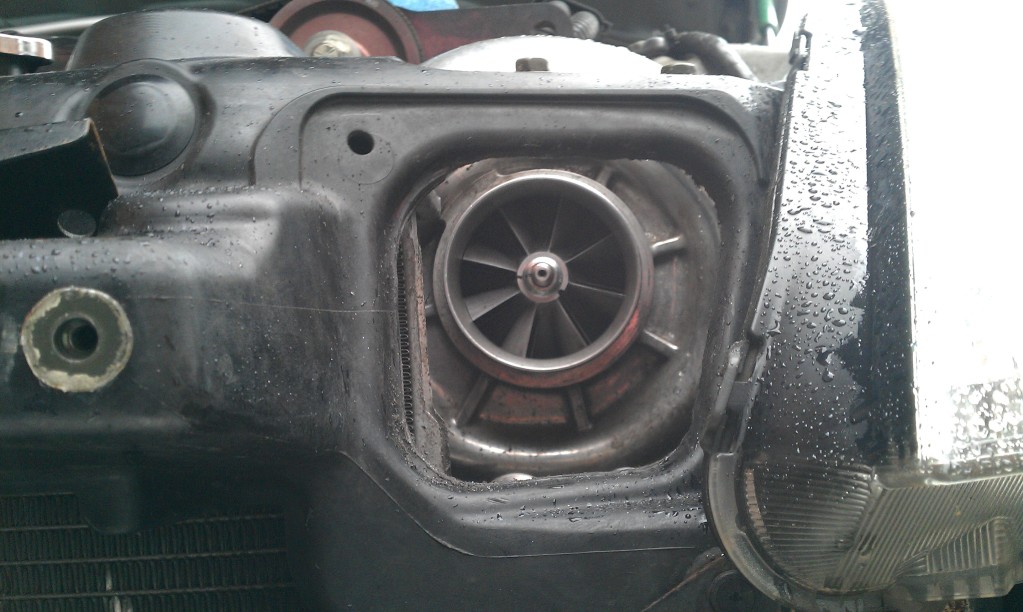
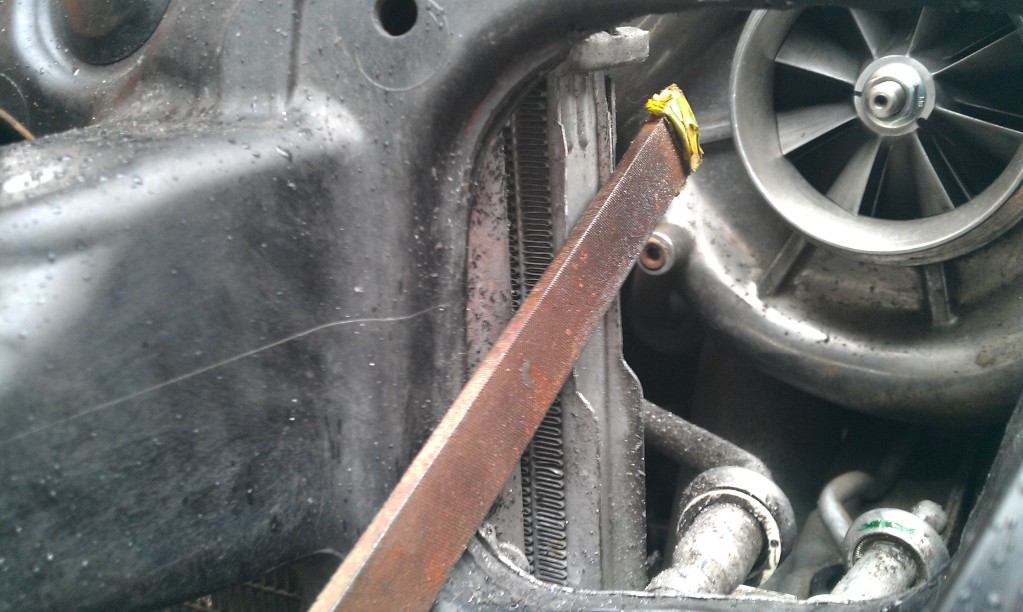
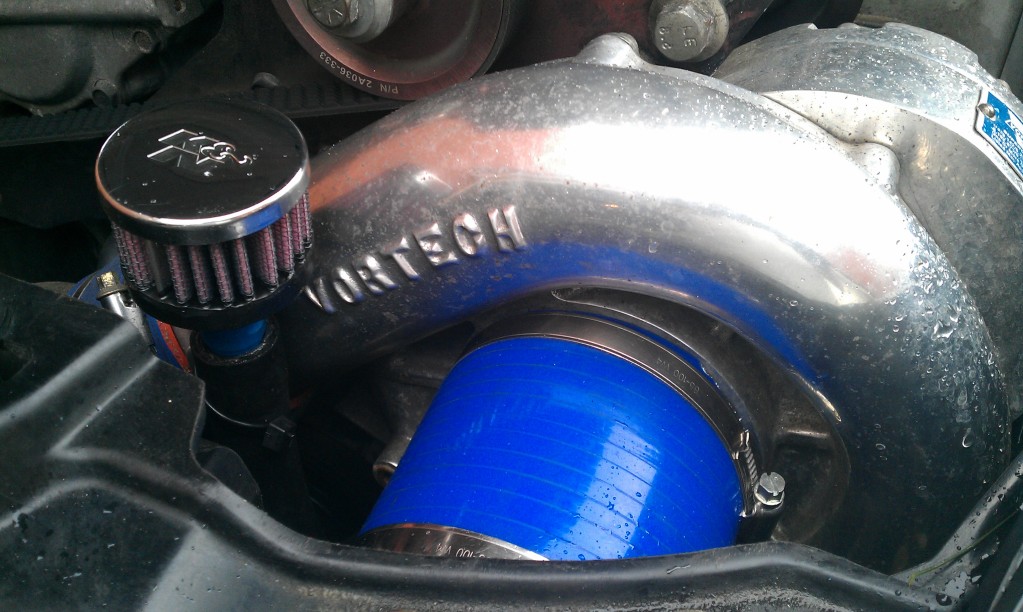
The Vortech doesn't line up exactly with the intake hole and the 90mm pipe is a very tight fit through the square hole so a little filing is needed to widen it up a few mm. Also take a couple of mm of the side of the radiator to make life a bit easier and stop the sharp edges cutting through your pipework.
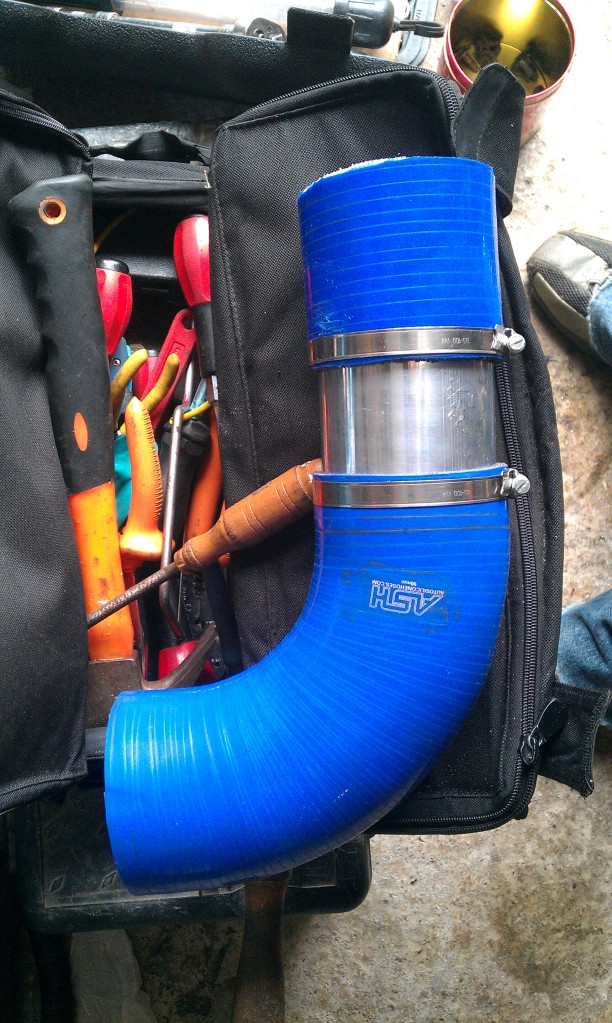
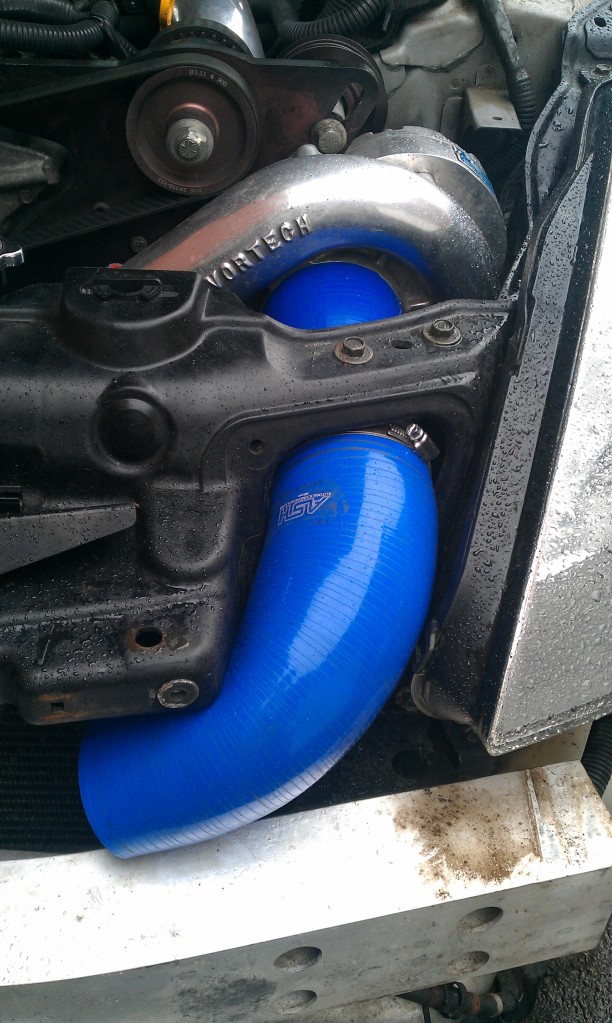
Right, the time consuming part of this was working out lengths to cut and trial fitting the hose and pipe so it fits well and still allows you to get to the jubilee clips for tightening once its all assembled.
So just for you - this is my *** packet sketch showing what lengths worked for me.
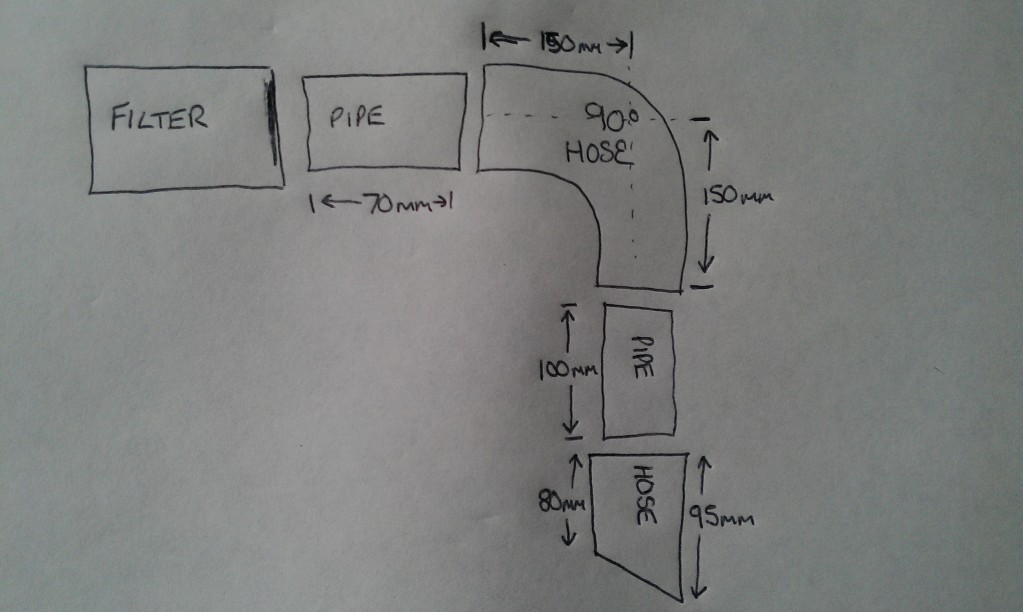
Note the angled cut on the hose that joins the Supercharger, this is to give the the right angle to still allow the hose to go on to the charger square.
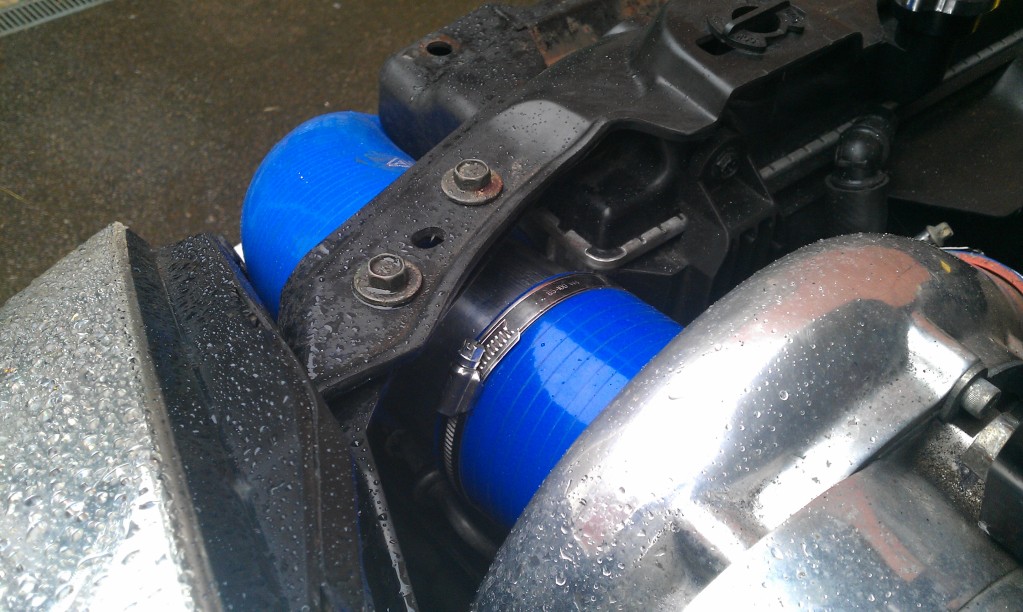
When fitting ensure the Jubilee clips are around the 2'o'clock position and facing upwards so you can slide them though the corner of the hole and still adjust them.
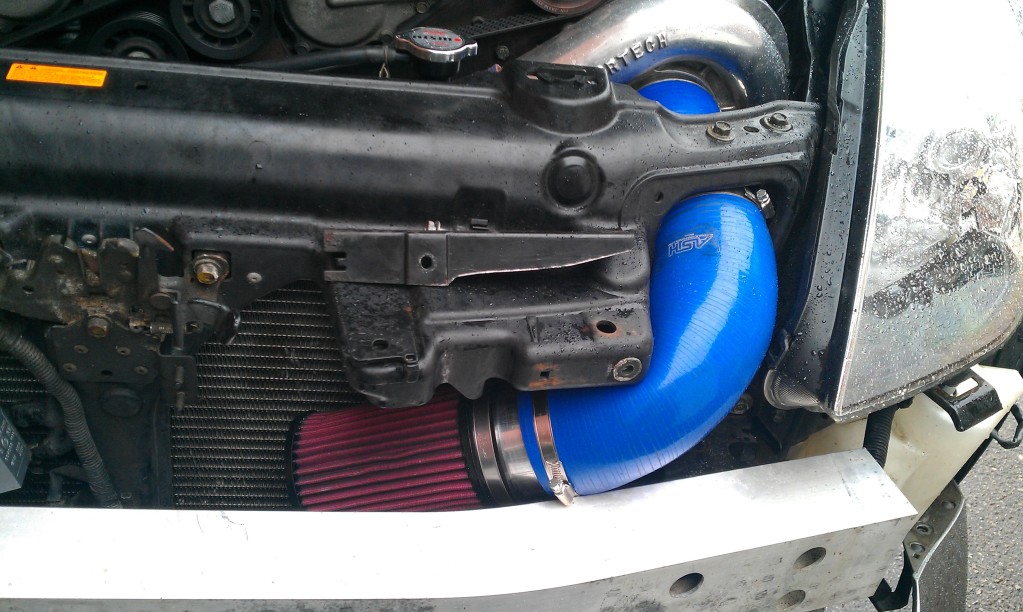
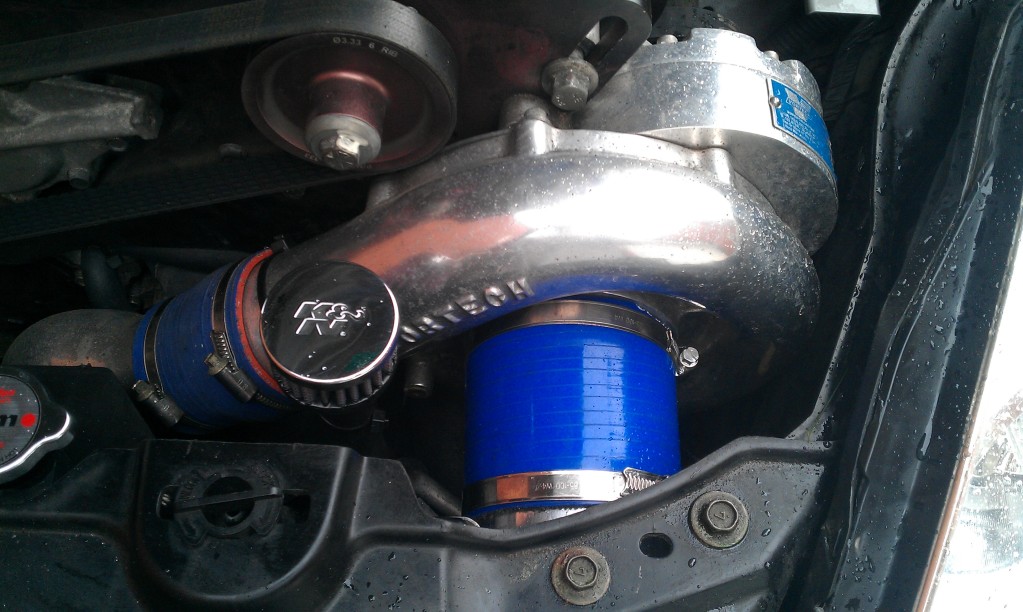
Filter attached -
The 90deg hose stopped the bumper bracket going back on without doing damage to the hose and rubbing through it. So it was offered up, marked and cut/filed to stop it rubbing when fitted.
Sorry no pics of the alterations. But here is once it was fitted back on.
Next was to fit and secure the breather filter to the hose removed earlier -
All done -
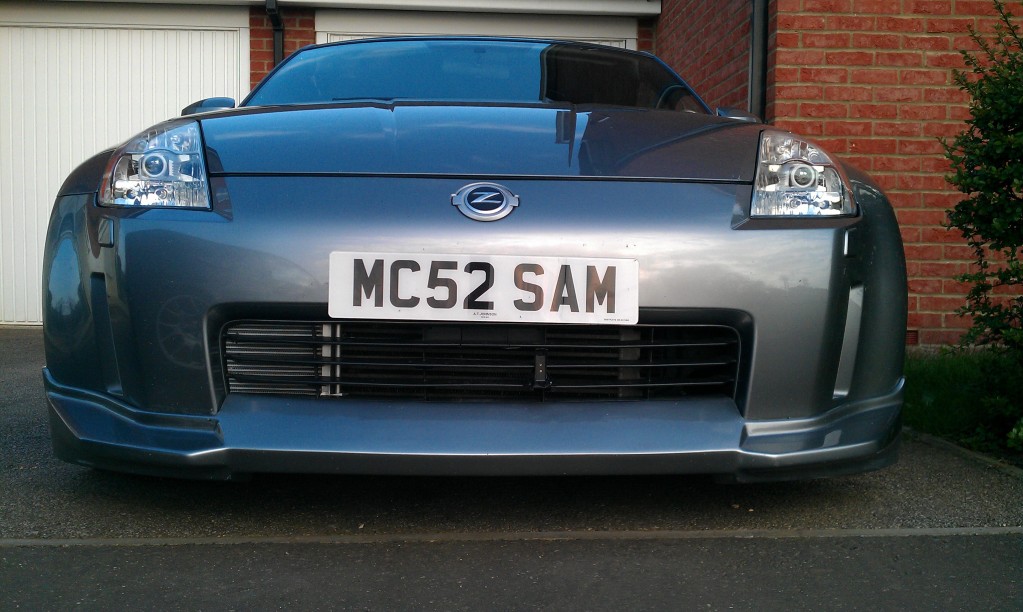
Fit bumper back on -
And cooling panel (if you have one)

All done. The filter sits above the intercooler, behind the crash bar so should stay out of the rain and spray but still suck in some nice cold air.

I've been meaning to get around to this for a long time now but had other priorities.
Standard Votech Intake setup sucking in lots of hot air from the engine bay :thumbdown: �
Parts needed �
http://www.ebay.co.uk/itm/2708675779...#ht_1126wt_905
http://www.ebay.co.uk/itm/3305782342...ht_1750wt_1037
http://www.ebay.co.uk/itm/3303825781...ht_1442wt_1037
http://www.ebay.co.uk/itm/2709253888...#ht_1102wt_905
A suitable Air filter � I�ve used a K&N RX 4140 � Plenty of flow, quite narrow and has the same diameter as the Vortech intake. So if you ever remove the CAI you can fit the filter straight on the Supercharger.
For the passenger side Cam cover vent (this usually goes into the Vortech filter) I�ve used a K&N 62-1340. Does the job and looks cool.
So first remove the Bumper using Slimjim�s guide here �
http://www.350z-uk.com/forum/viewtop...bumper+removal
It�s not necessary to go as far as removing the washer jets as you can just lower it down out the way and rest it on something suitable.
Remove the original filter from the Supercharger by removing the Jubilee clip. Pull out the Cam Cover Vent pipe from the filter. (can be seen on the lower right)
You then have to squash the filter enough to squeeze it out of the small gap above. Or you can remove the Supercharger if you don�t want to damage it! :wacko:
So this is the hole we are gonna put the piping through. As you can see, the top bumper mounting bracket will get in the way.
So remove that (10mm bolt) to give some more room.
You can see clearly now where it�s going to go.
The Vortech doesn't line up exactly with the intake hole and the 90mm pipe is a very tight fit through the square hole so a little filing is needed to widen it up a few mm. Also take a couple of mm of the side of the radiator to make life a bit easier and stop the sharp edges cutting through your pipework.
Right, the time consuming part of this was working out lengths to cut and trial fitting the hose and pipe so it fits well and still allows you to get to the jubilee clips for tightening once its all assembled.
So just for you - this is my *** packet sketch showing what lengths worked for me.
Note the angled cut on the hose that joins the Supercharger, this is to give the the right angle to still allow the hose to go on to the charger square.
When fitting ensure the Jubilee clips are around the 2'o'clock position and facing upwards so you can slide them though the corner of the hole and still adjust them.
Filter attached -
The 90deg hose stopped the bumper bracket going back on without doing damage to the hose and rubbing through it. So it was offered up, marked and cut/filed to stop it rubbing when fitted.
Sorry no pics of the alterations. But here is once it was fitted back on.
Next was to fit and secure the breather filter to the hose removed earlier -
All done -
Fit bumper back on -
And cooling panel (if you have one)
All done. The filter sits above the intercooler, behind the crash bar so should stay out of the rain and spray but still suck in some nice cold air.


 me gusta

Trending Topics


Thread
Thread Starter
Forum
Replies
Last Post
Gruppe-S
Body Interior
13
May 16, 2016 10:42 PM
ars88
Zs & Gs For Sale
18
Apr 4, 2016 07:52 AM