1999 BMW M3 RB26dett Conversion
 07-01-2016, 06:00 AM
#1
I know this is not a 350z, but I have been a member of this forum for quite some time, and thought you all might find my recent build interesting to read/follow
Hello fellow members. I am starting this thread to share and document my experience i have had and will have with this project of mine. After many other project cars in my past such as a Lotus Elise, Lotus Exige, Dodge viper, and Noble M400, I wanted to get my hands back on something that i could be a little more involved in. I enjoy tinkering and modifying cars of mine, and had the want to start a project that was unique and more challenging than the typical.
I'm sure its safe to say that a lot of people on here have the same love and desire to own an authentic GTR at some point in out lives. I decided to look around at the different options to swap an RB26, but as said before, didnt want to take the typical route of swapping an s13/s14/datsun cars. While on this search, I stumbled across a group named Dryden Motorsports that made a mount kit for the European E36 chassis and the RB26dett motor set. I picked up this kit first and then started my search of the perfect donor car for a new heart.
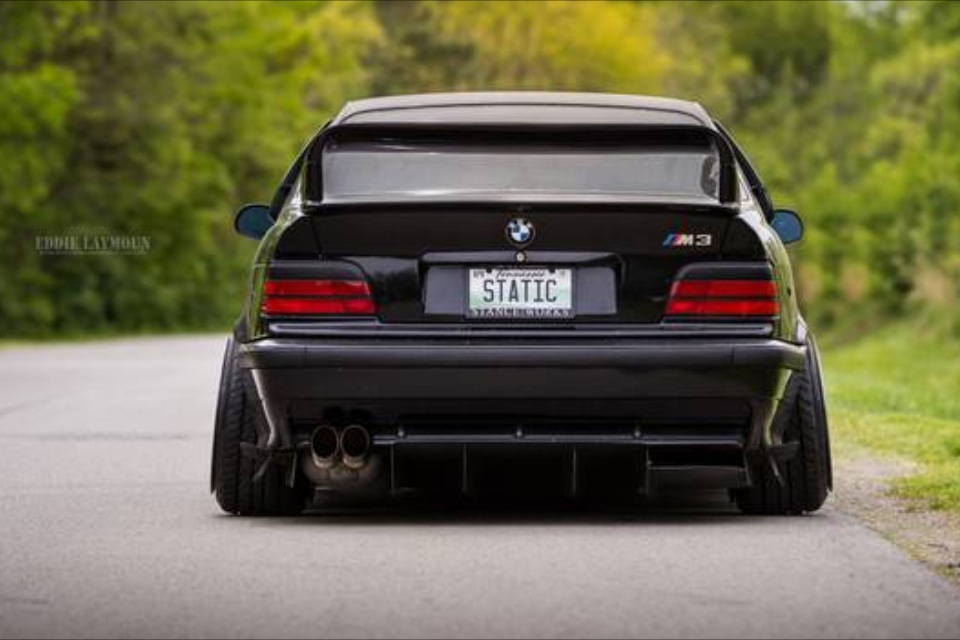
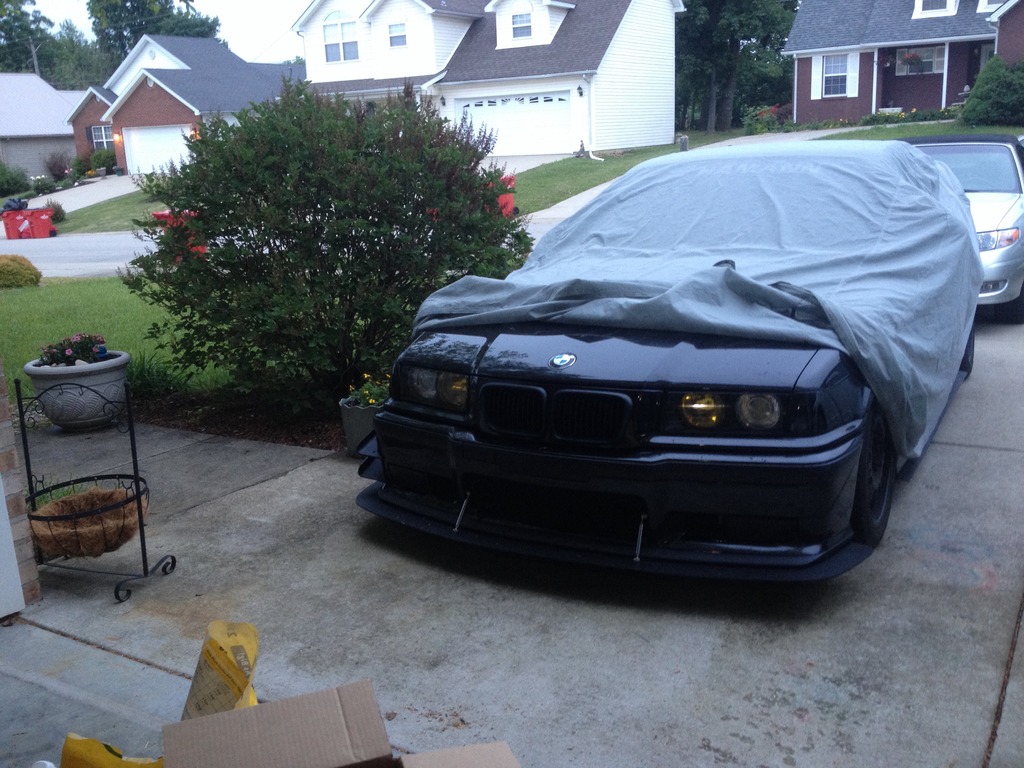
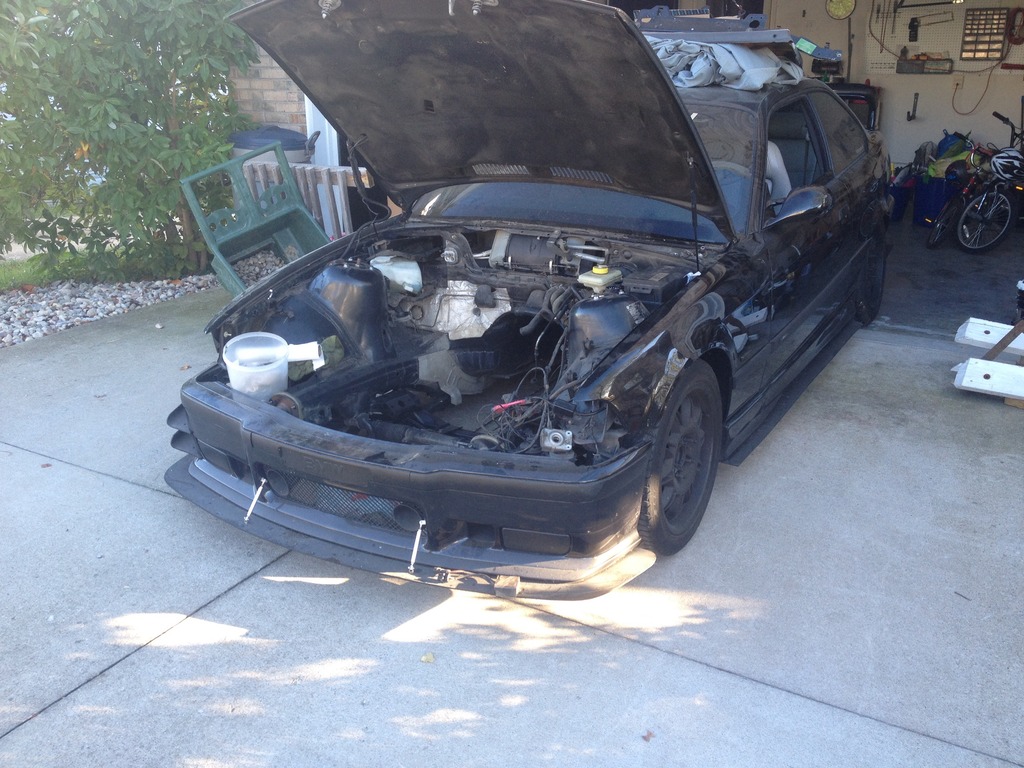
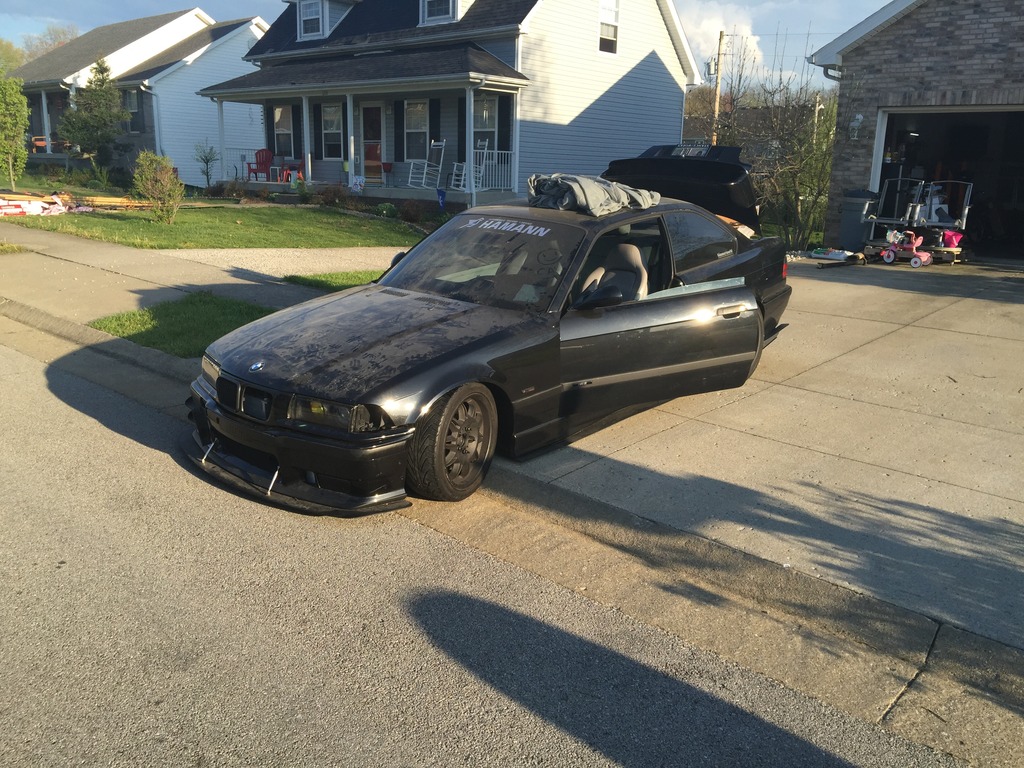
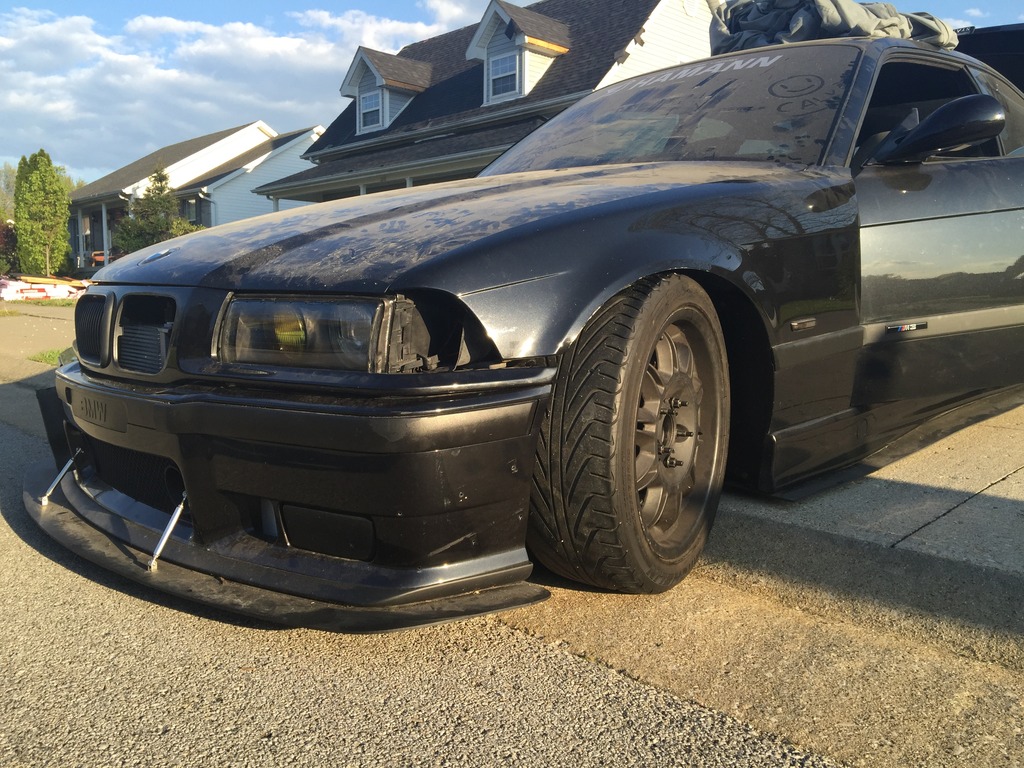
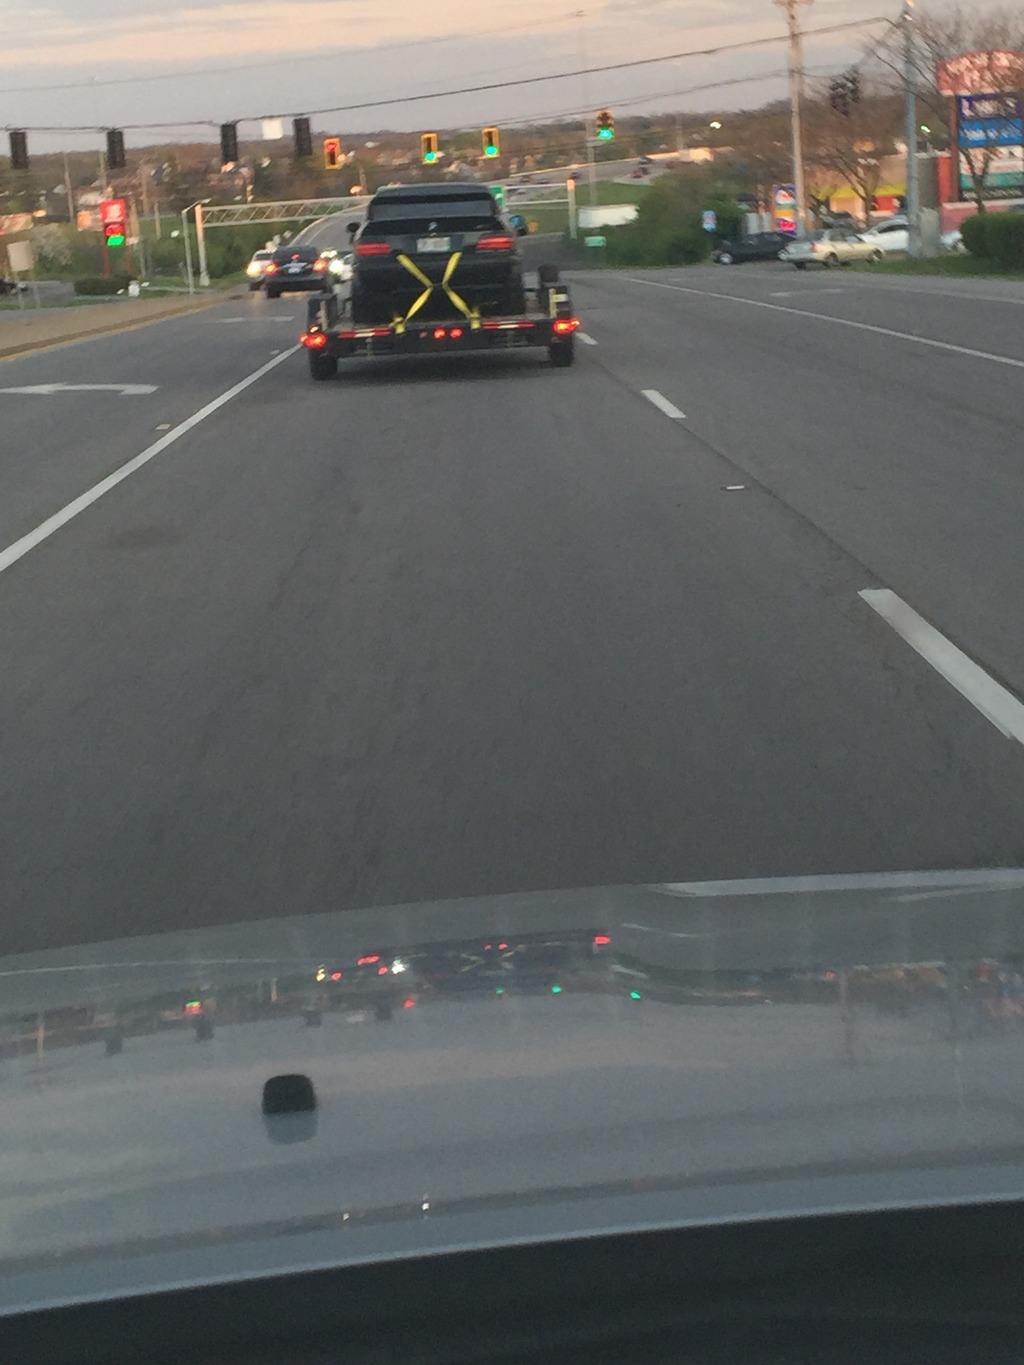
Before too long, I came across a 1999 M3 in Nashville Tennessee that i felt like I could not pass up. Alot of people said that spending the extra money to get a true M3 would be a waste of money as the sedan or more basic coupes could be had for a fraction of the price. This car just spoke to me though as it had little modifications and made a perfect blank canvas to start my journey. Without further a due, here is a couple pictures of the car as it was when i bought it and drove it back home to Kentucky.... I dont have many pictures of how it started, but you get the idea...
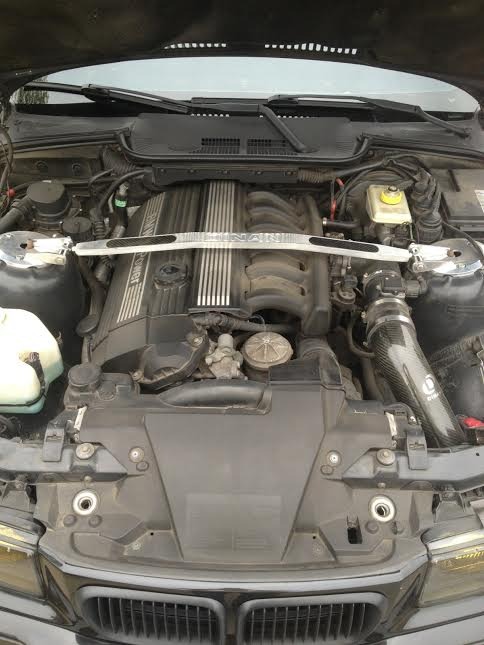

I also had the RB26 motor set shipped to me along with the mount kit and custom sump sitting and waiting for me when i got home with the car. here is a quick shot just for record as well.....

As i started I started to plan out my plan of action, I first convinced myself that I just wanted to freshen up the motor with oem parts and run the stock twins at stock boost. Then of course the modifying bug bit me. I convinced myself that I may as well go ***** out and do as much as I can, and should ever want to while the motor was out. After considering all options and contacting many different shops to handle the build of the longblock, I decided to trust the guys at Raw Brokerage with the build.
I sent them my long block along with a mess of goods to include:
Wiseco Forged pistons, Manley H-beam, ACL rod/main bearings, ARP rod bolts, ARP main studs, ARP head studs, Nitto crank extended crank collar, N1 oil pump, OEM water pump, Tomei MLS headgasket, Tomei Oil restrictor, Greddy timing belt and new tensioner/idler.
Along with this I sent a complete OEM gasket set. They worked their magic and did all the machine work to include the stage one short block, and the Stage one cylinder head.
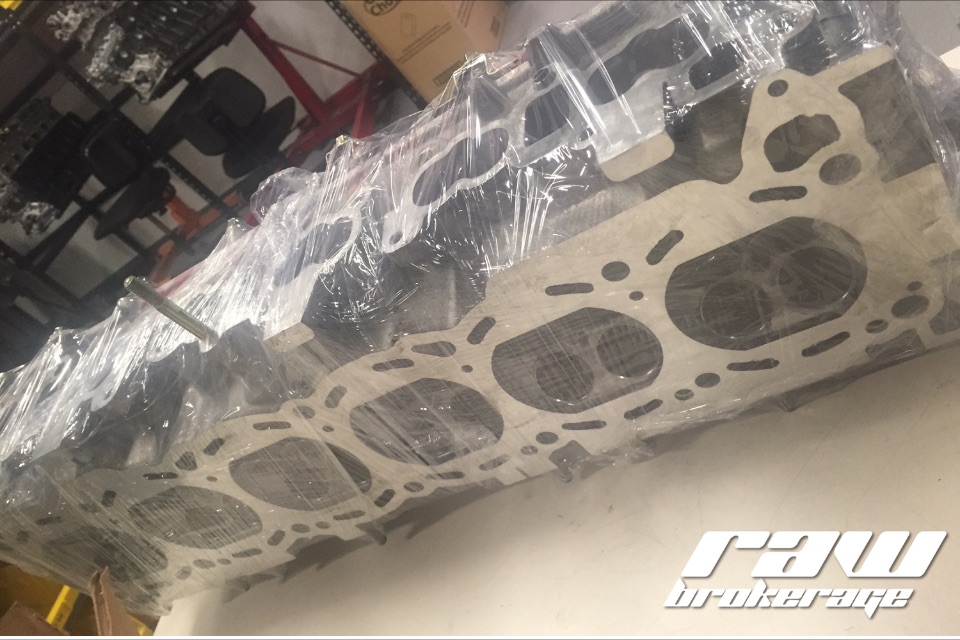
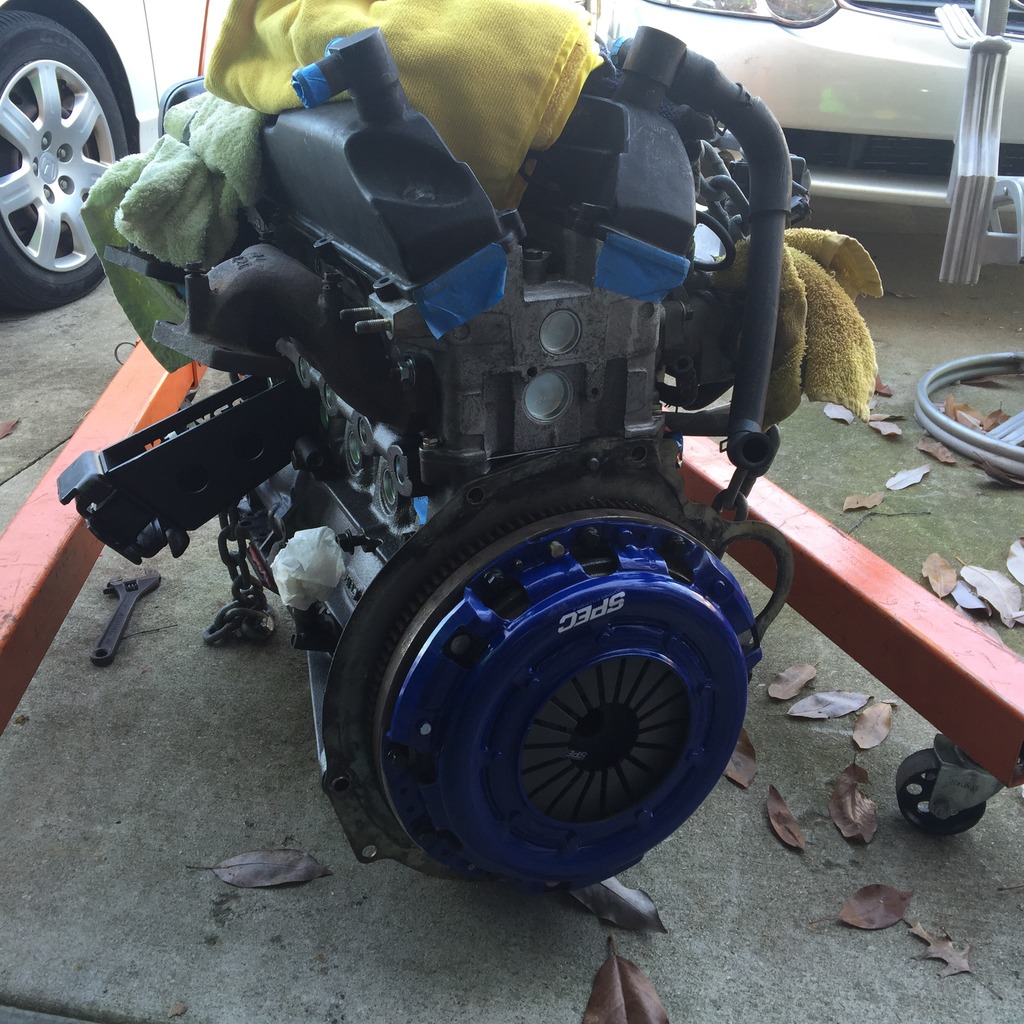
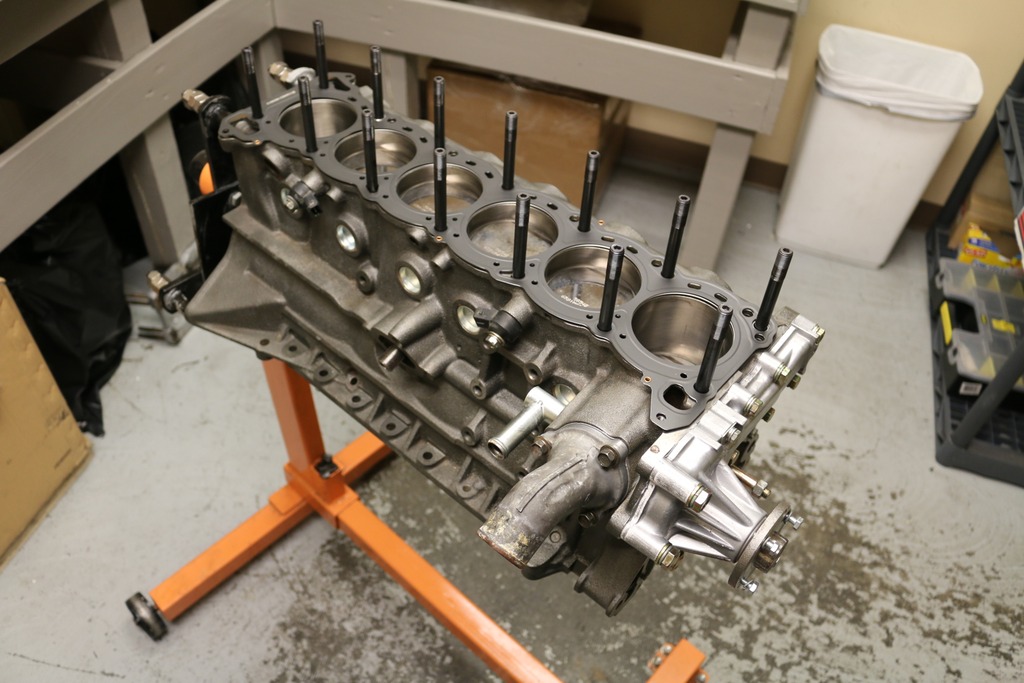
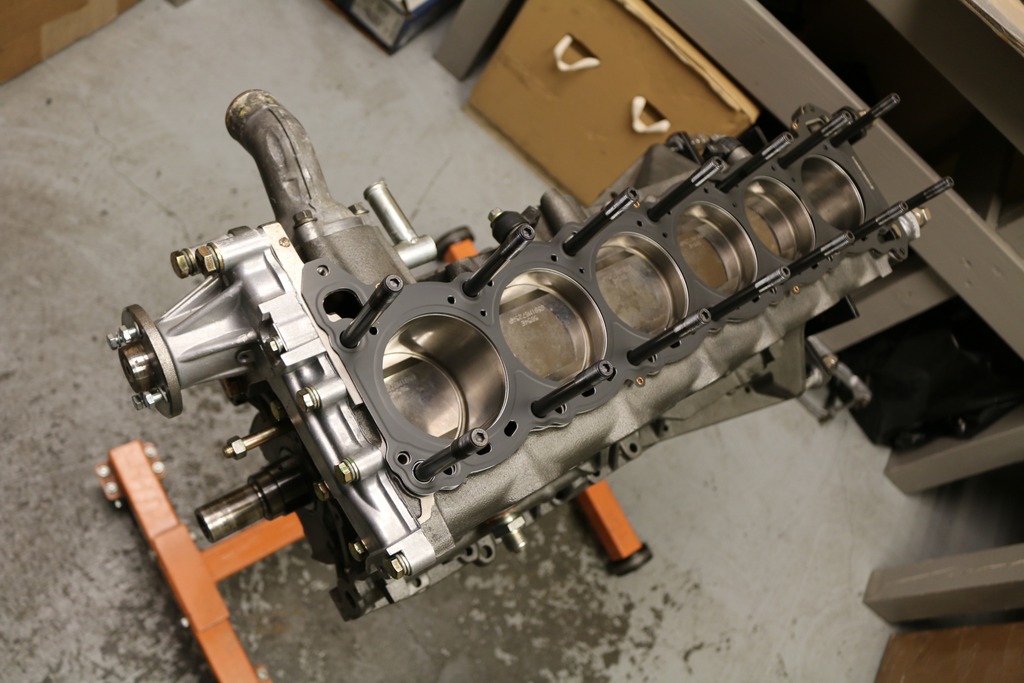
They bolted the long block back together to torque spec and i received this piece of art back on a pallet via UPS....
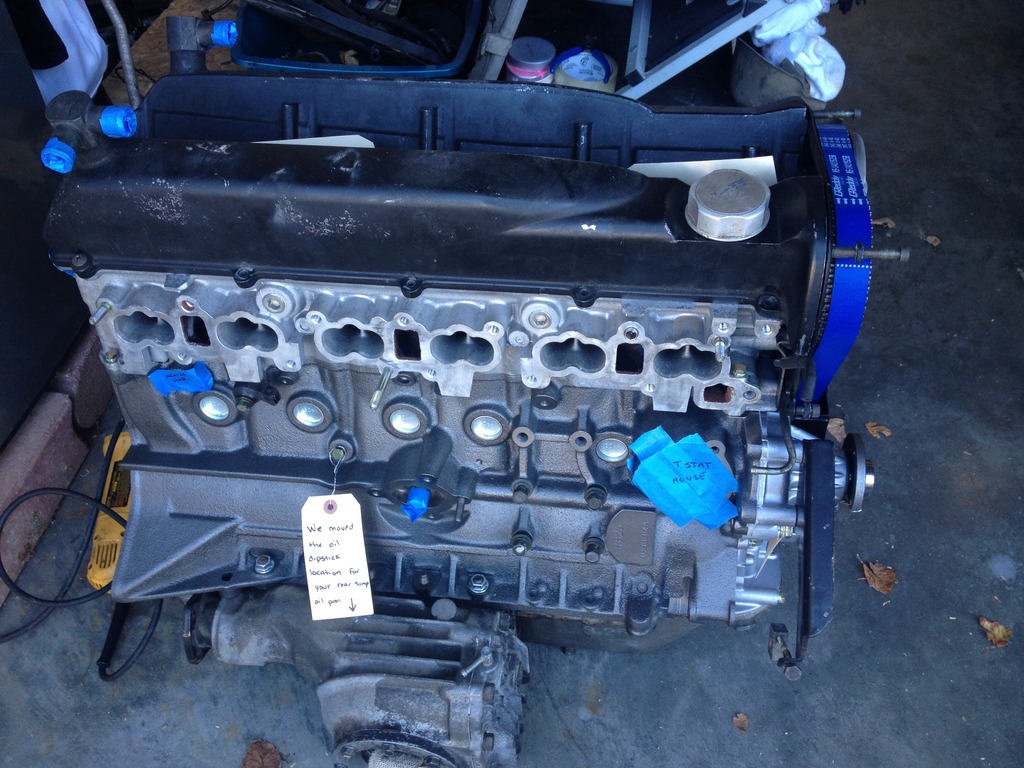
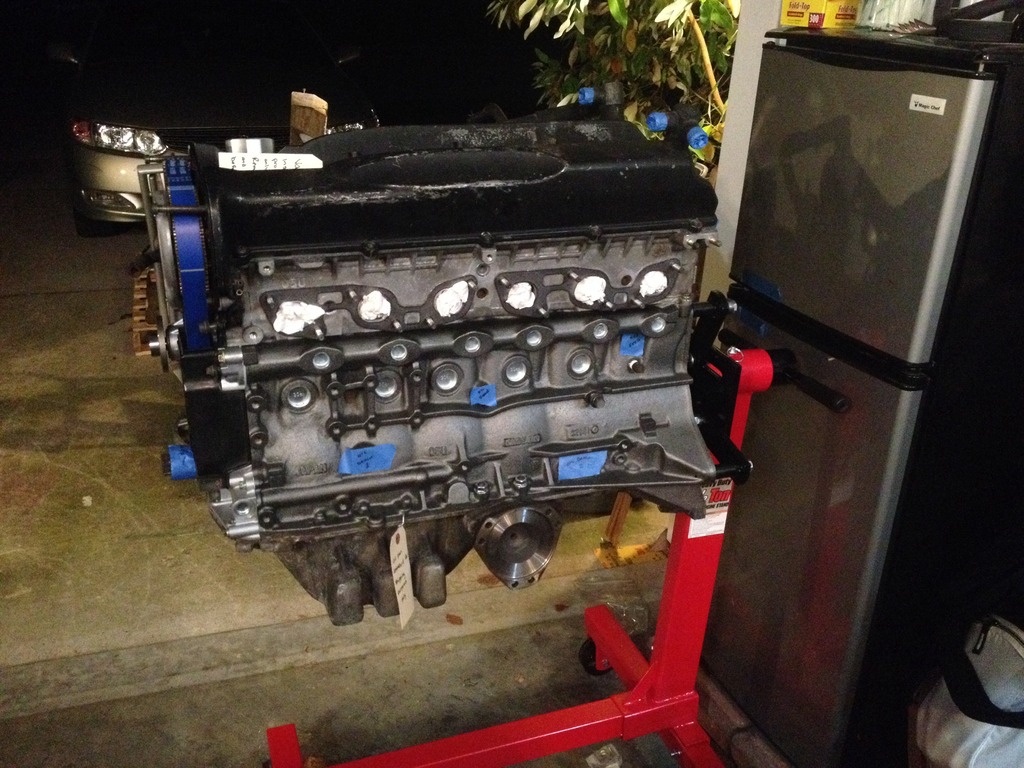
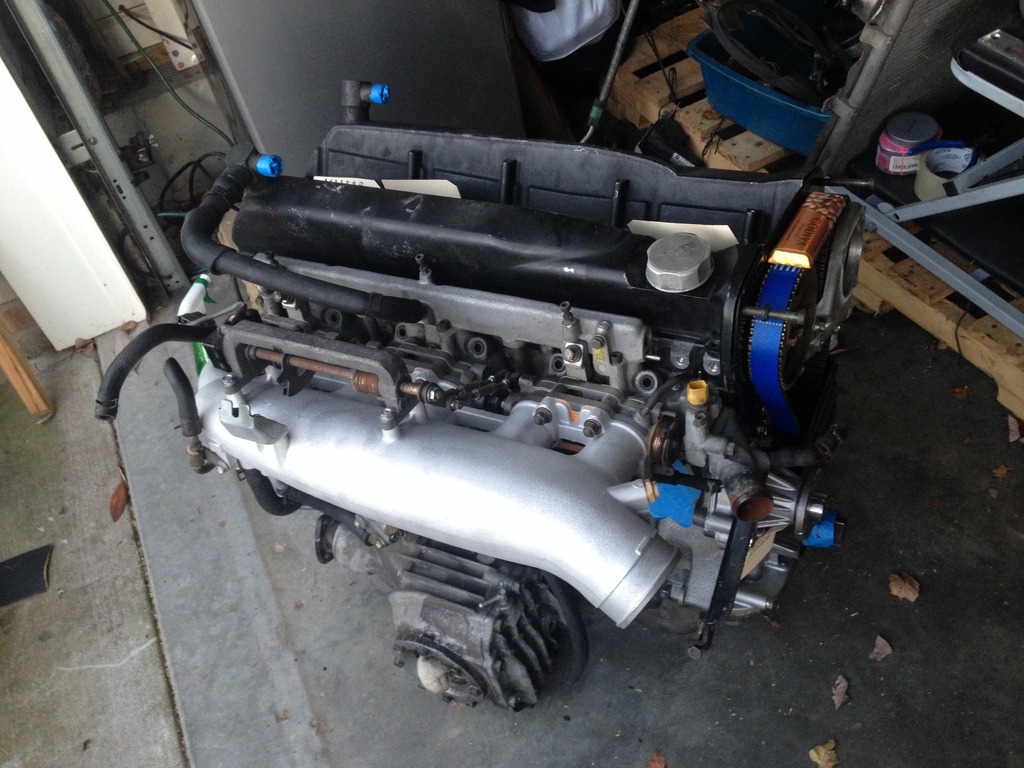
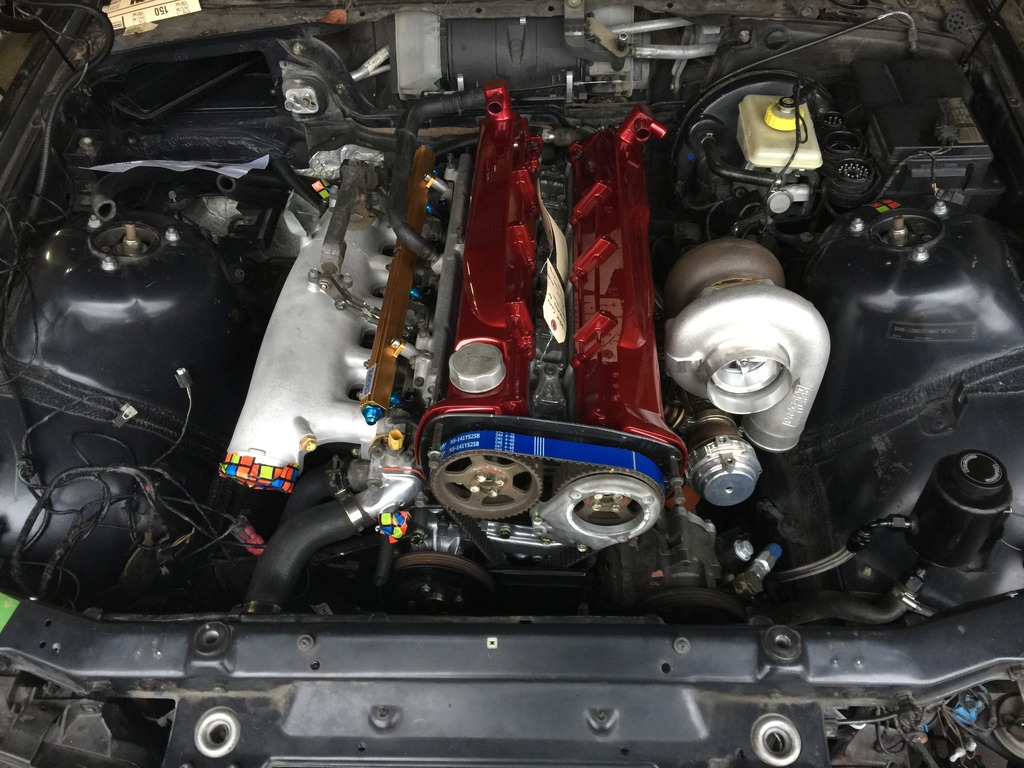
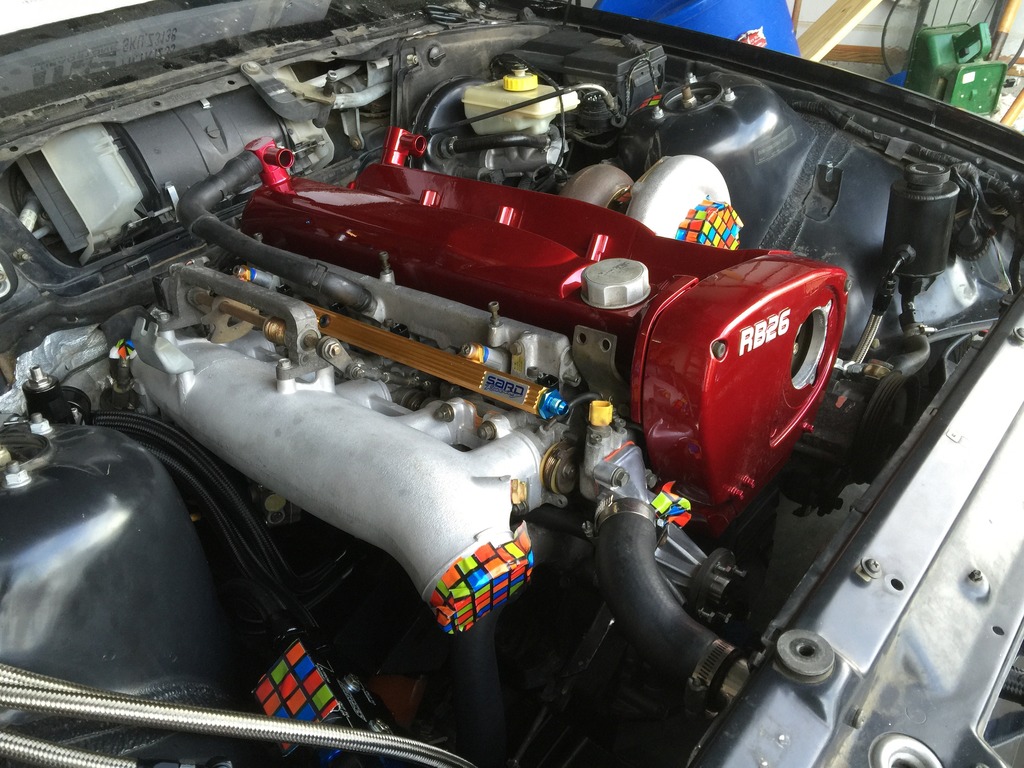
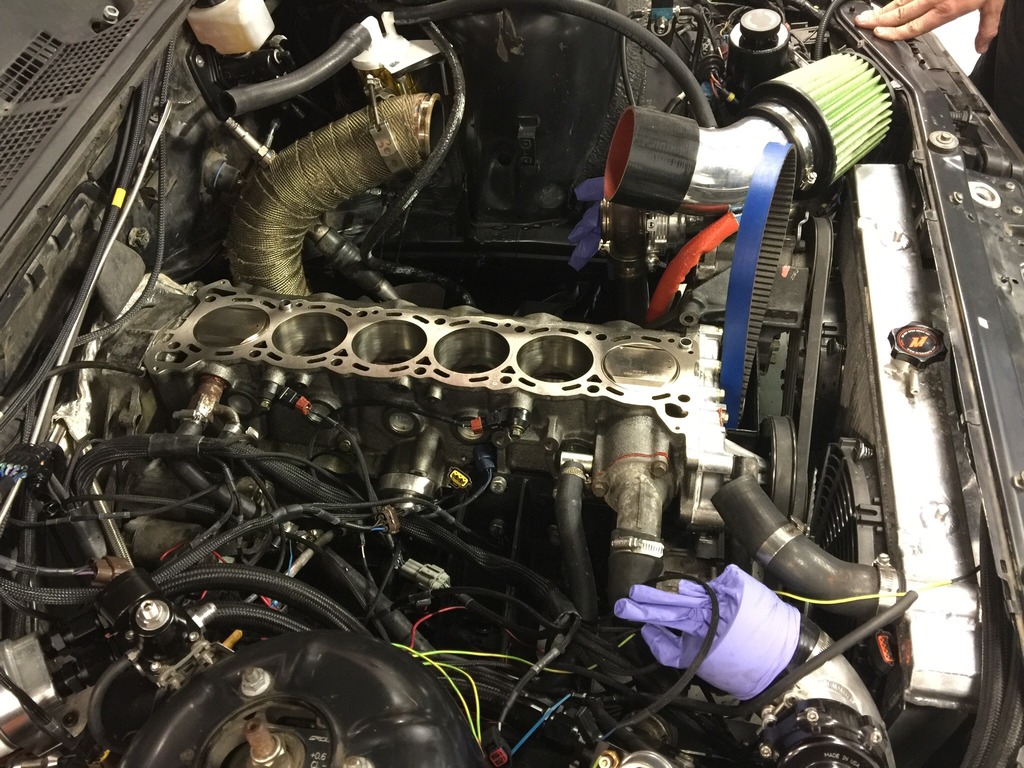
and here is the motor after i got to work installing the intake plenum back on, along with having the oem manifold sand blasted to a clean cast look....
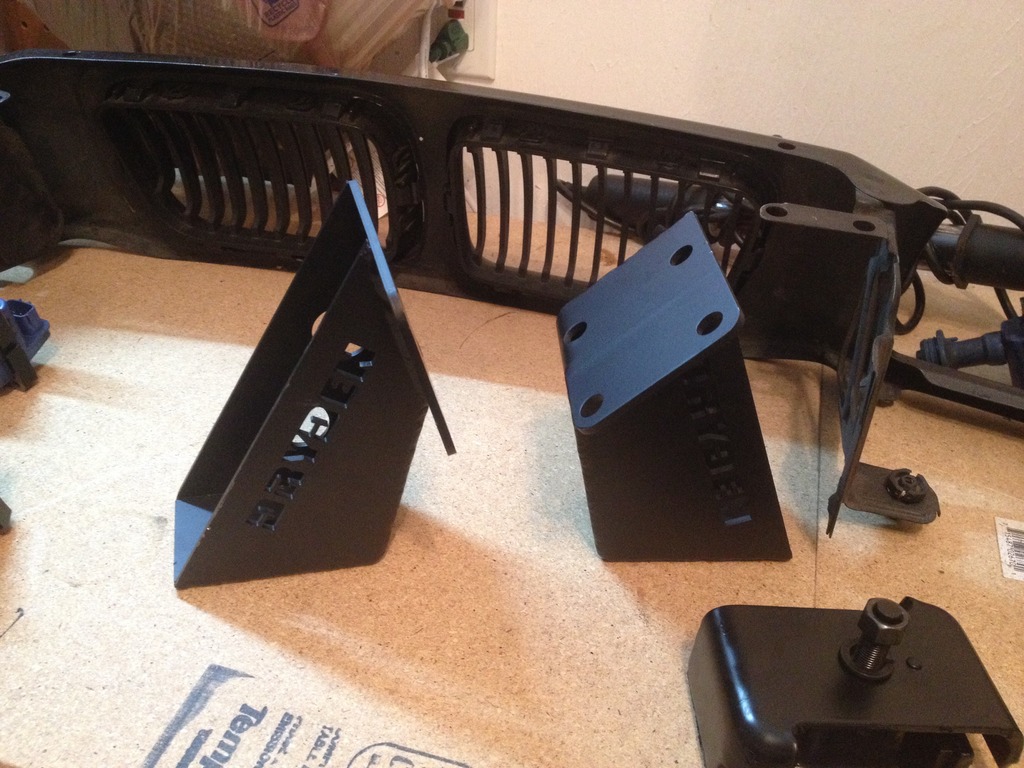
I will leave this post with a quick shot of the mounts that i received from Dryden Motorsports

I will continue to update this thread with my endeavors.....
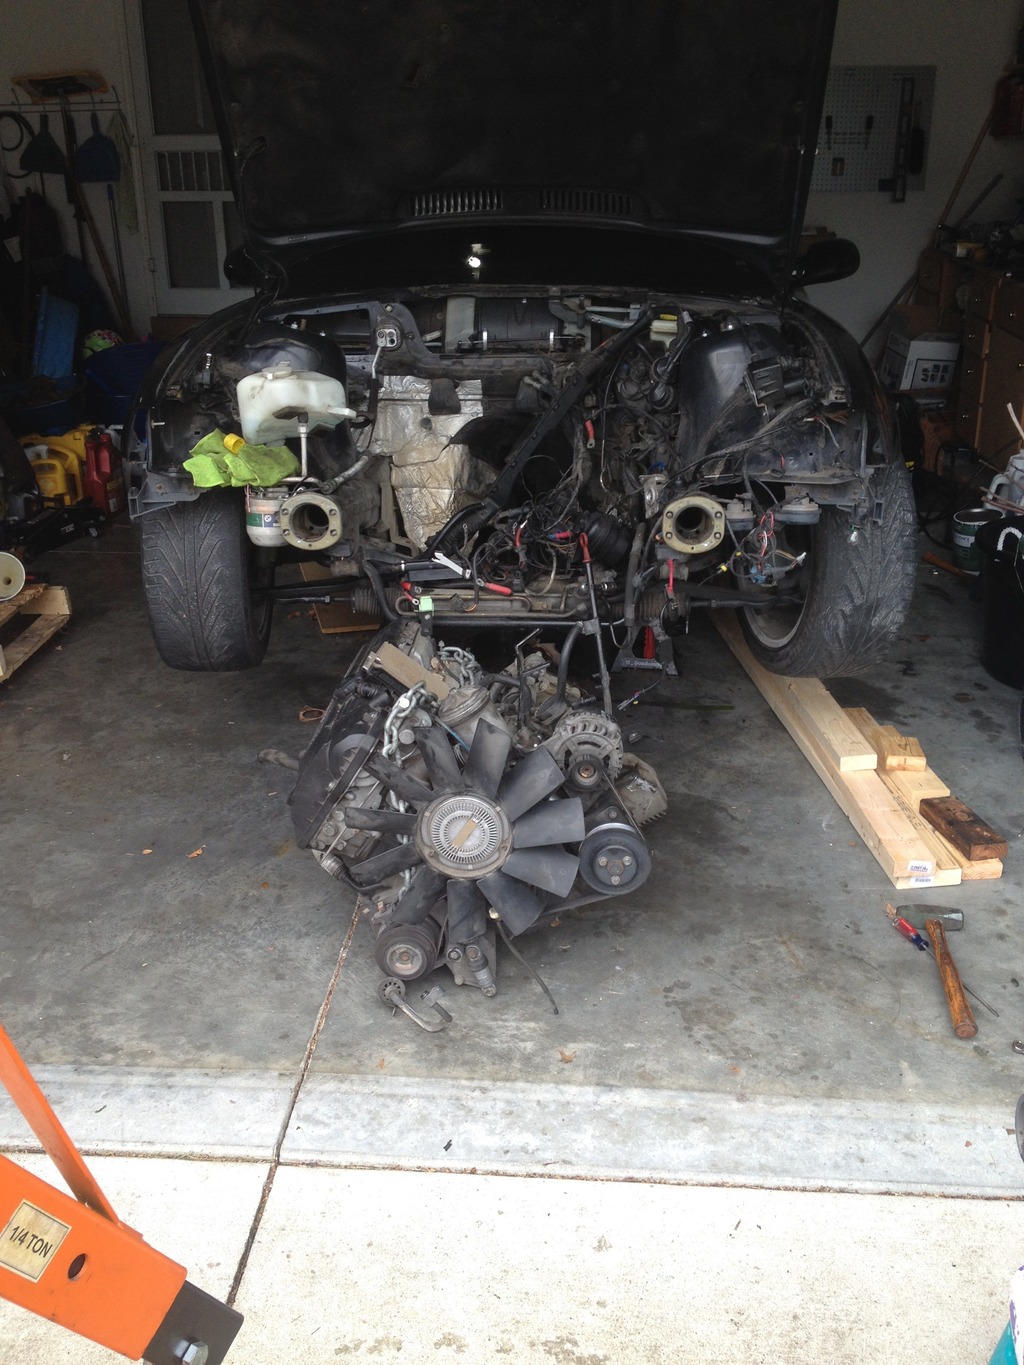
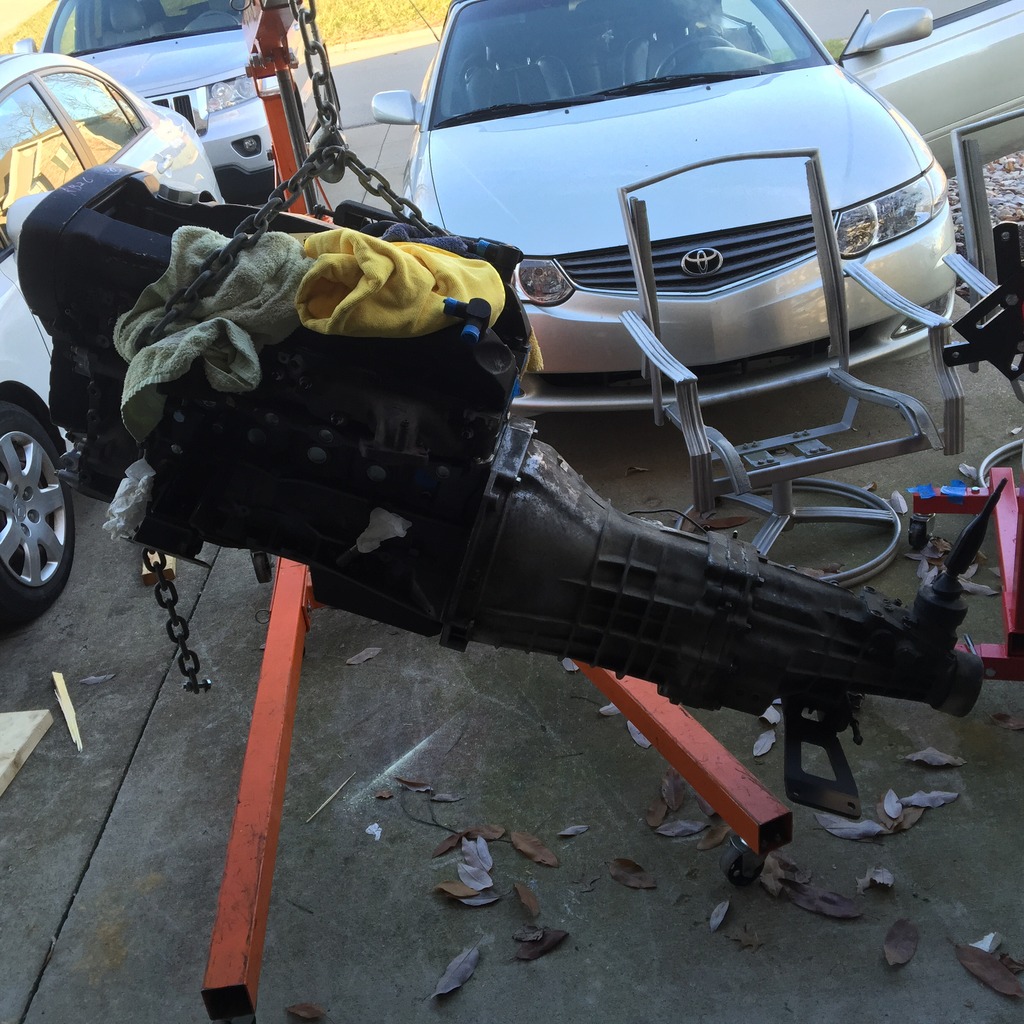
From here i was very quick to start pulling the BMW's drivetrain and came out with this.....
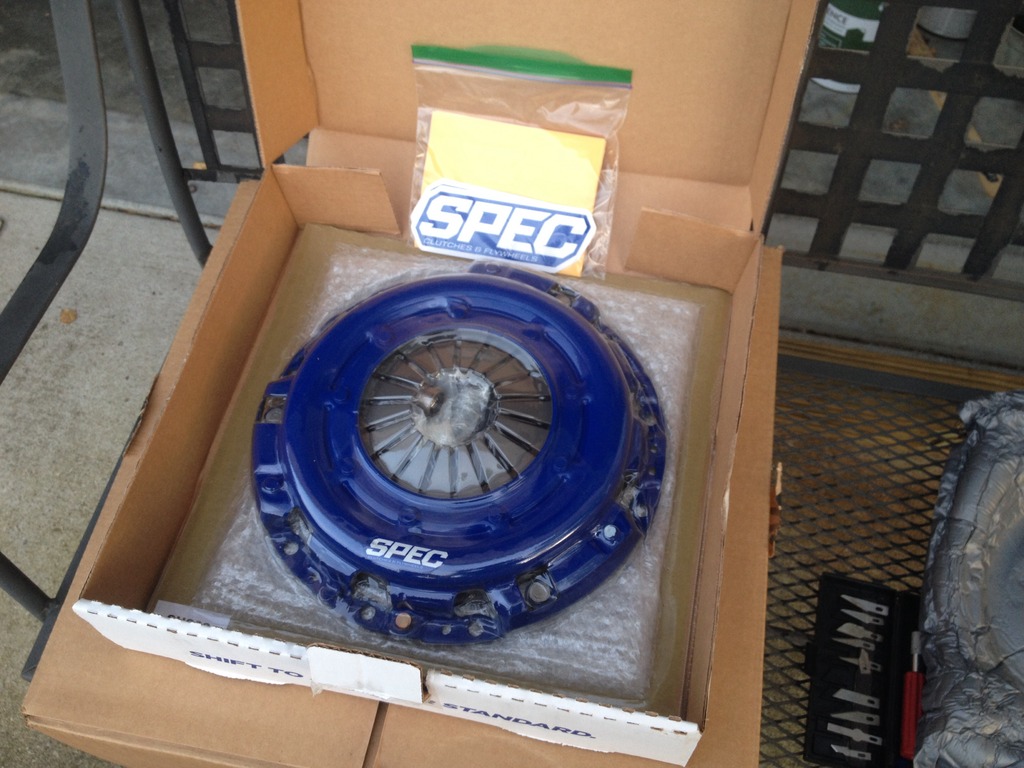
I also took this time to mate up my Spec stage 3 clutch the Raw Brokerage provided me. I also took my RB25det Transmission to a local shop here and had the dis-assemble and inspect. I was very relieved to hear that all was good to go internally. they actually told me they were quite surprised on how clean it was inside. I will also attach a picture of the first time I mated the tranny to the motor....
more later..... thanks for viewing
- - - Updated - - -
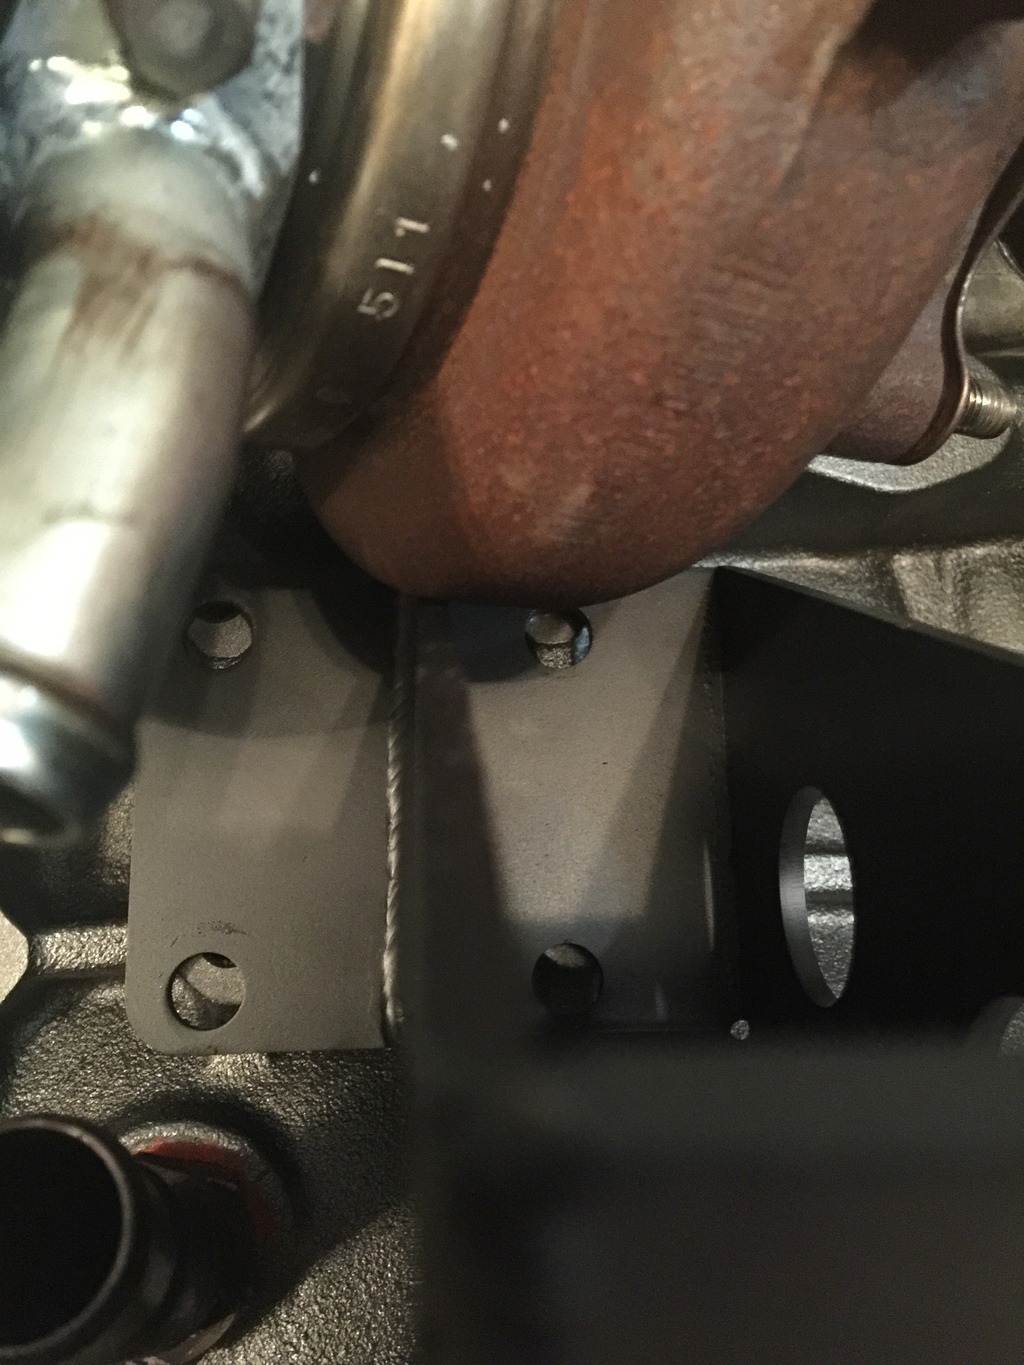
sooooooo, on my first attempt on placing the motor into its new home, I learned a few things that may need some minor tweaking. So when i mentioned earlier that i was planning a minor build, this eventually turned into this built motor idea, so of course we need more boost correct? lol. I decided to pick up a set of Greddy T517z's off an R32 in Australia. Man were these thing beautiful.... not to mention they have a $3000 plus price tag new......

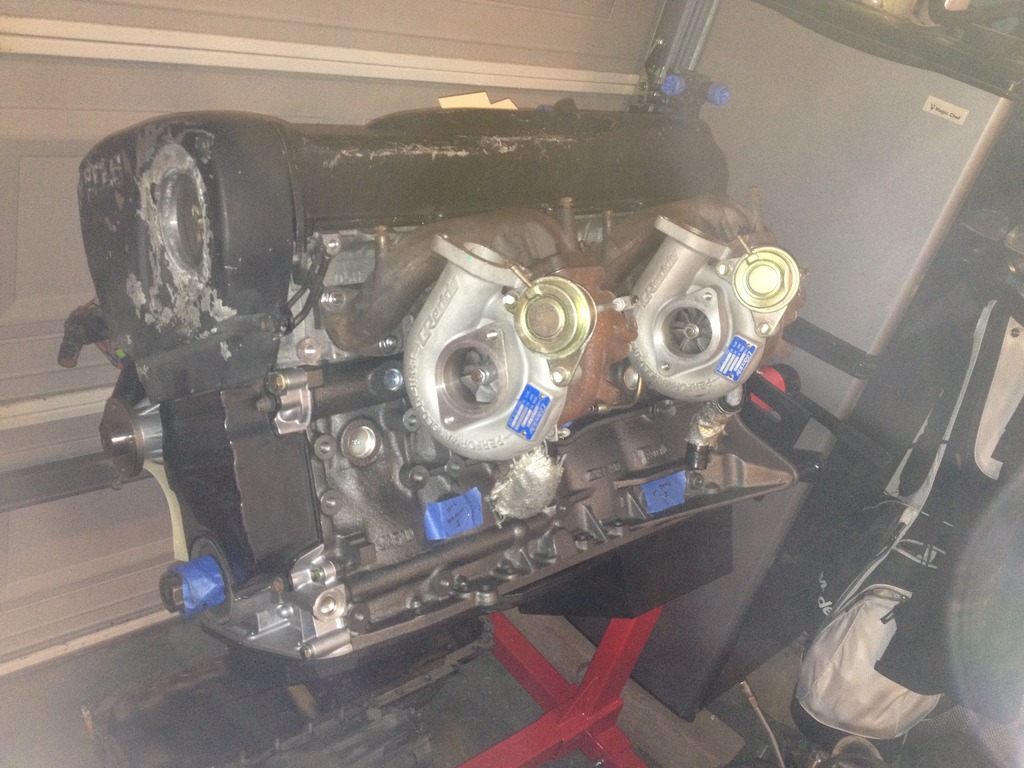
not all good things can be true though. I soon found out that these turbos would not work. First issue was that the mounts I planned on using was made for the oem size turbos and not a larger frame like the Greddy units. Once I tried to install the mounts, I found they came in contact with the exhaust housing and does not allows the mount arms to mount to the motor.... sad times.
so back to the drawing board in the forced induction side of things......... I decided it may be time to consider going to a large single
- - - Updated - - -
While cleaning up my tears on the turbo issues, I decided to make my first test run of installing the motor/tranny and moving forward from there. After the first attempt to install, It was not easy by any means. for some reason I could not get any of the holes to line up to where i was comfortable. I eventually decided to ditch the rubber mounts that came with the Dryden kit and source my own. I think that another member on this forum doing an RB25 swap had the same issues and correct the issue himself, so i decided to follow suit.
I found myself be be highly resourceful and made a set of 240sx poly mounts made by Circuit Sport work perfectly.
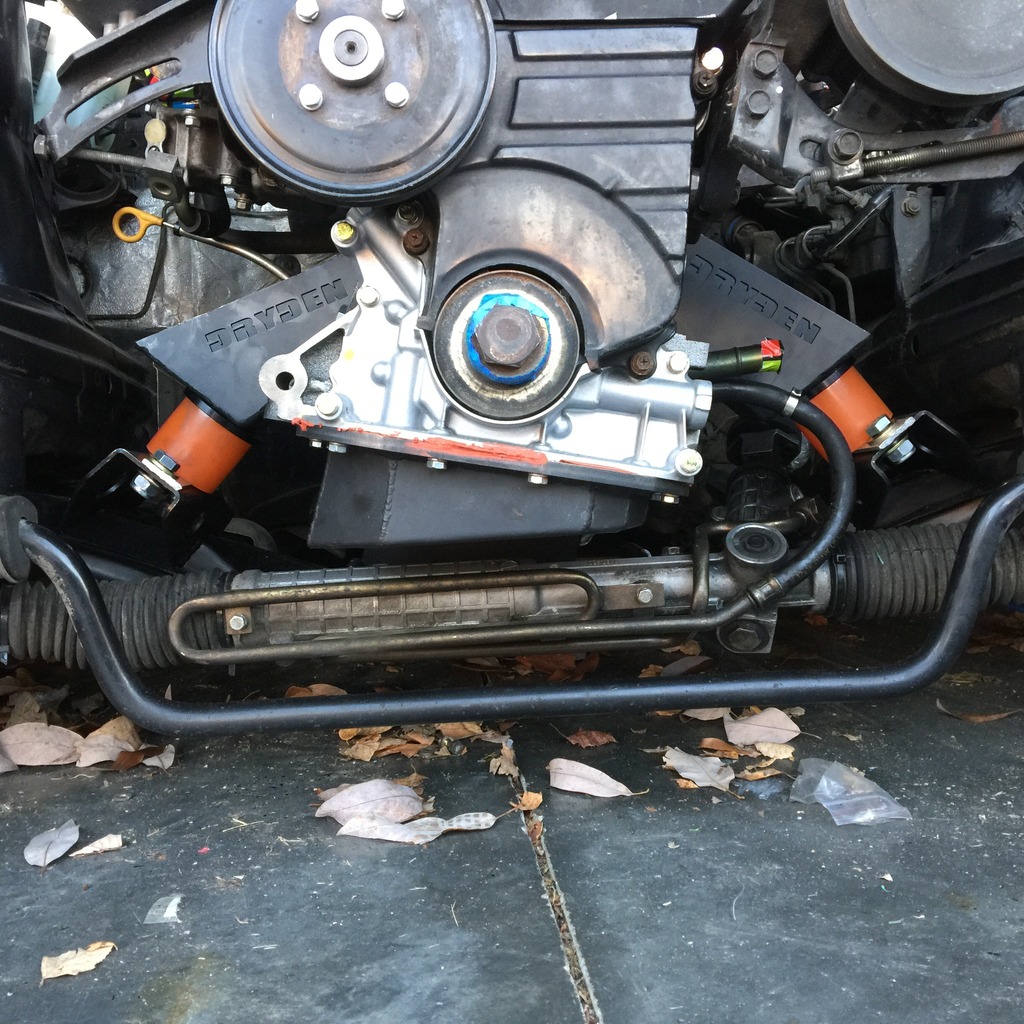
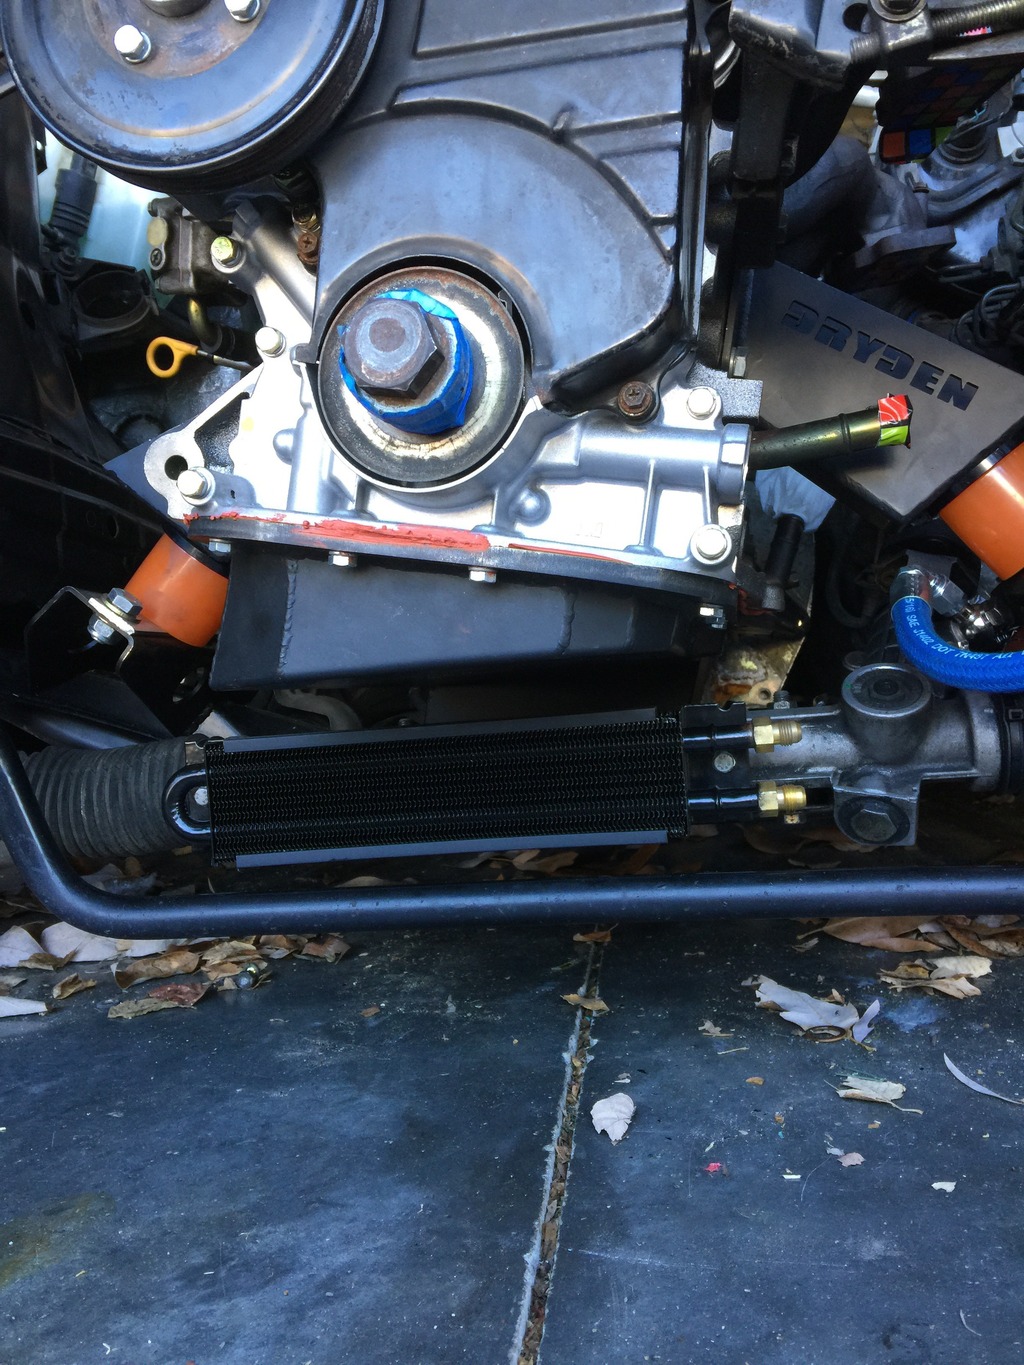
i will also use this post to explain how i made the power steering and the cooler work with this swap. I decided to use a Chasebays power steering reservoir, Earl's pwer steering braided lines, and found the perfect cooler made by Derale that mounted in the OEM location and had -6an fittings. I also had to use a couple an adaptors on the steering rack as well, but was very happy with the outcome....


- - - Updated - - -
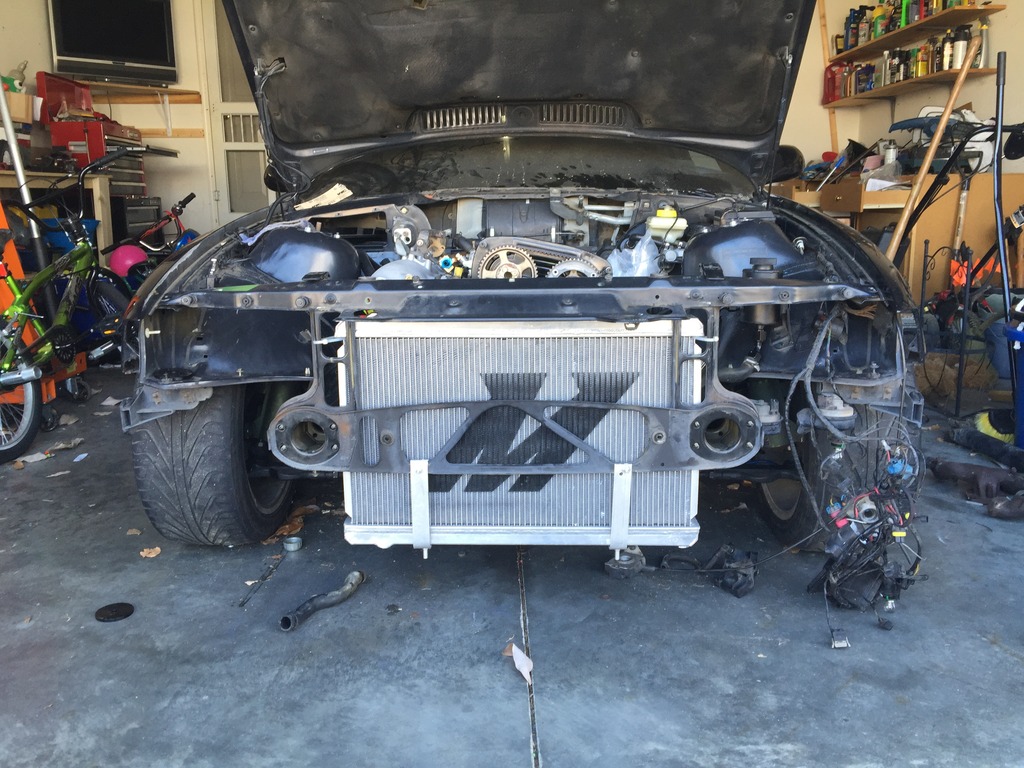
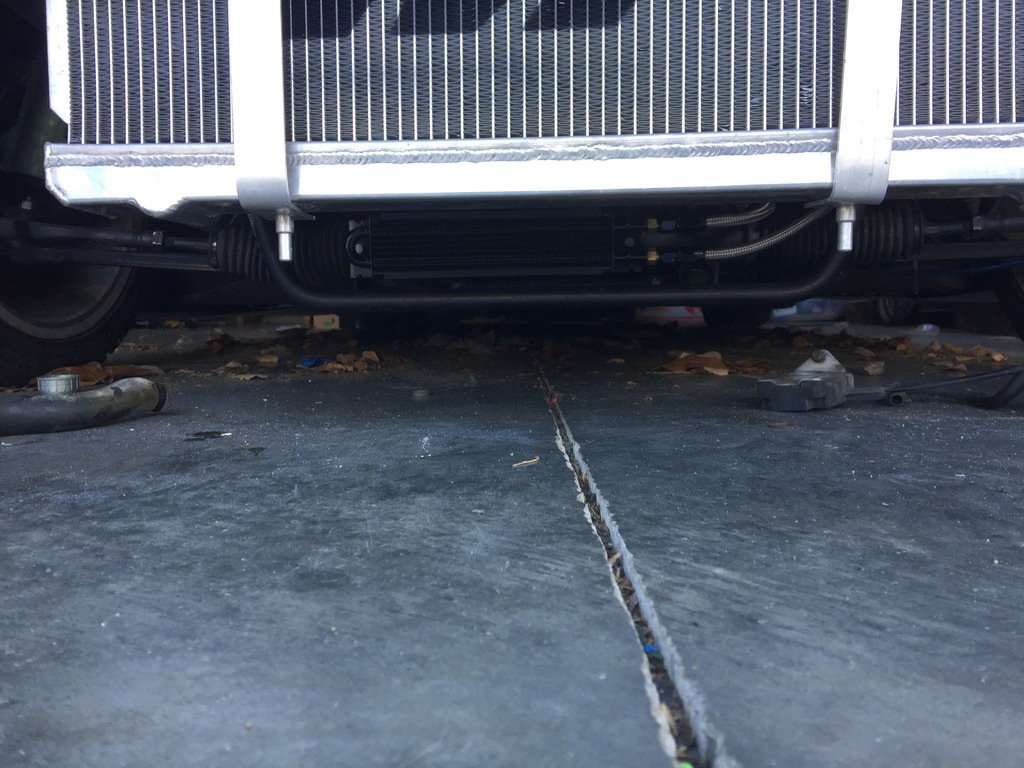
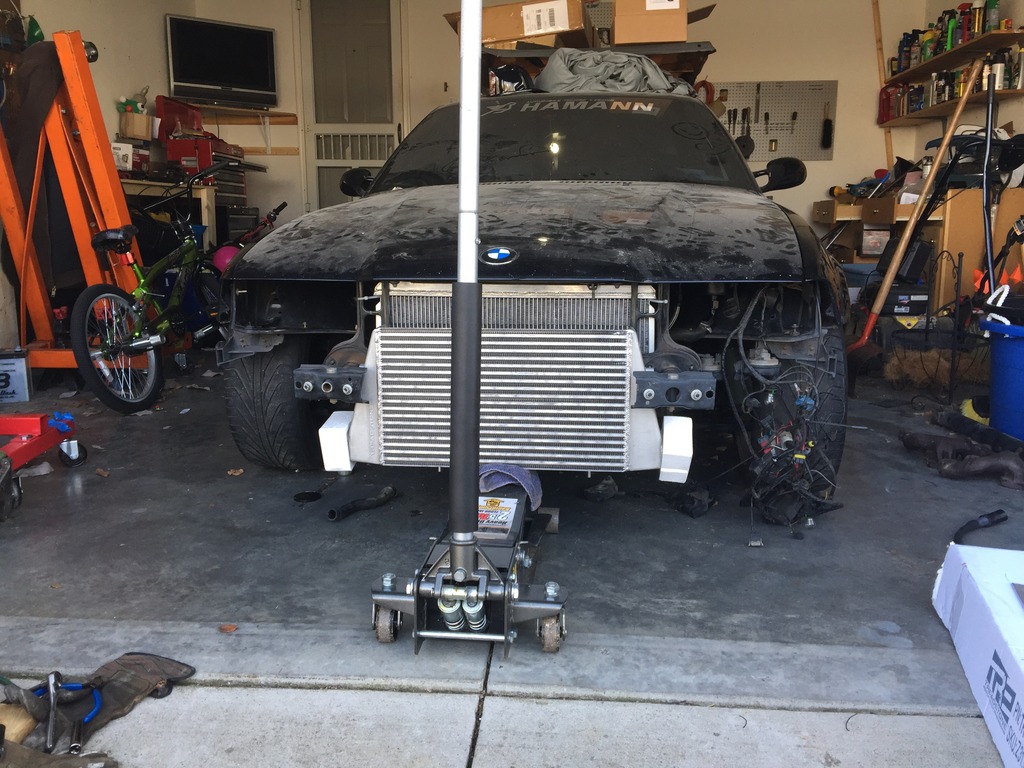
my next puzzle that I decided to tackle was going to be the radiator issue. The OEM BMW radiator caused its own set of issues. First issue was going to be the inlet was on the incorrect side for the RB motor. The second issue was how the OEM radiator mounted left ZERO clearance with the PS pump. They physically touched. From here, I knew that i would going to have to be resourceful on picking a radiator and tuck it under the radiator support. I decided to take a Mishimoto unit from an S14 and making my own brackets. I had to grind down the frame horns, and trim up the radiator support a little, but came out with this. I will attempt to get a picture soon of the clearance this game me and update this post
Next up was to decide what route I was going to take with the forced induction department. I decided that going to a larger single may be the way to go to utilize the space I have and to take full advantage of the motor that I have built from top to bottom to handle a fair amount of boost.
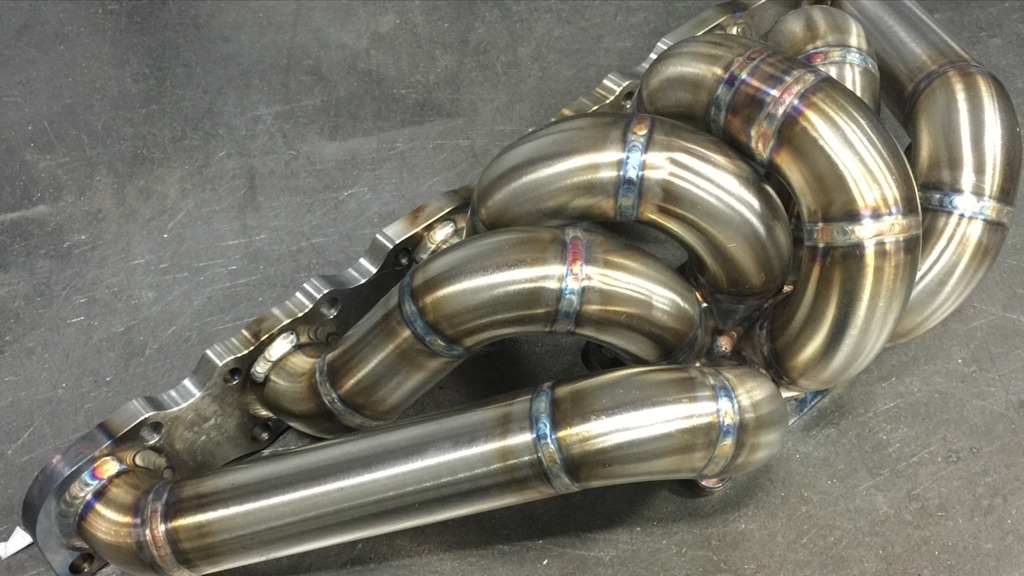
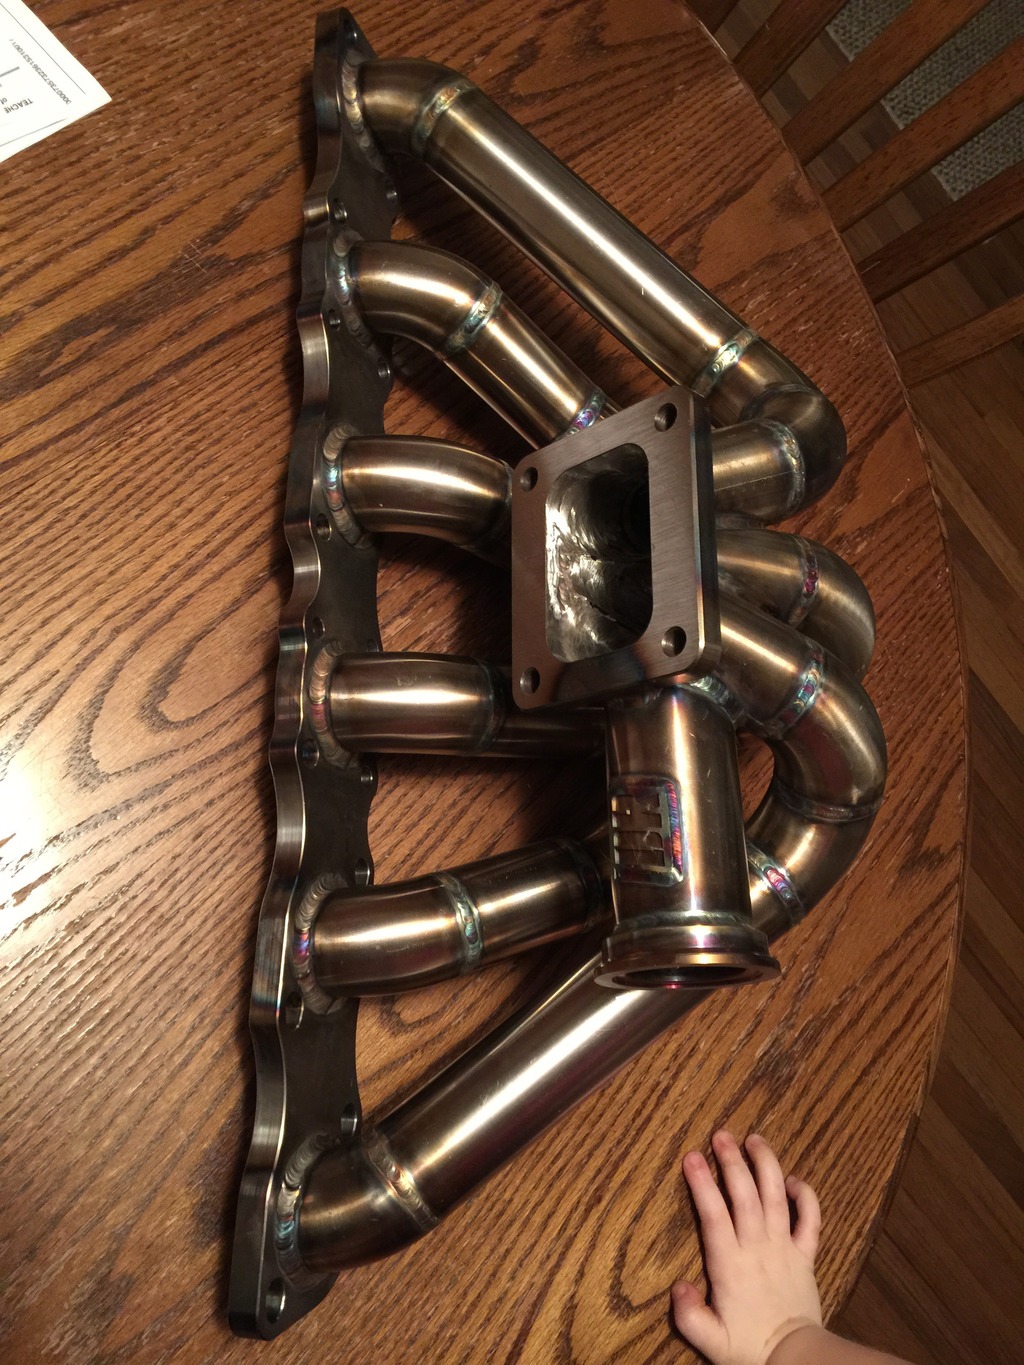
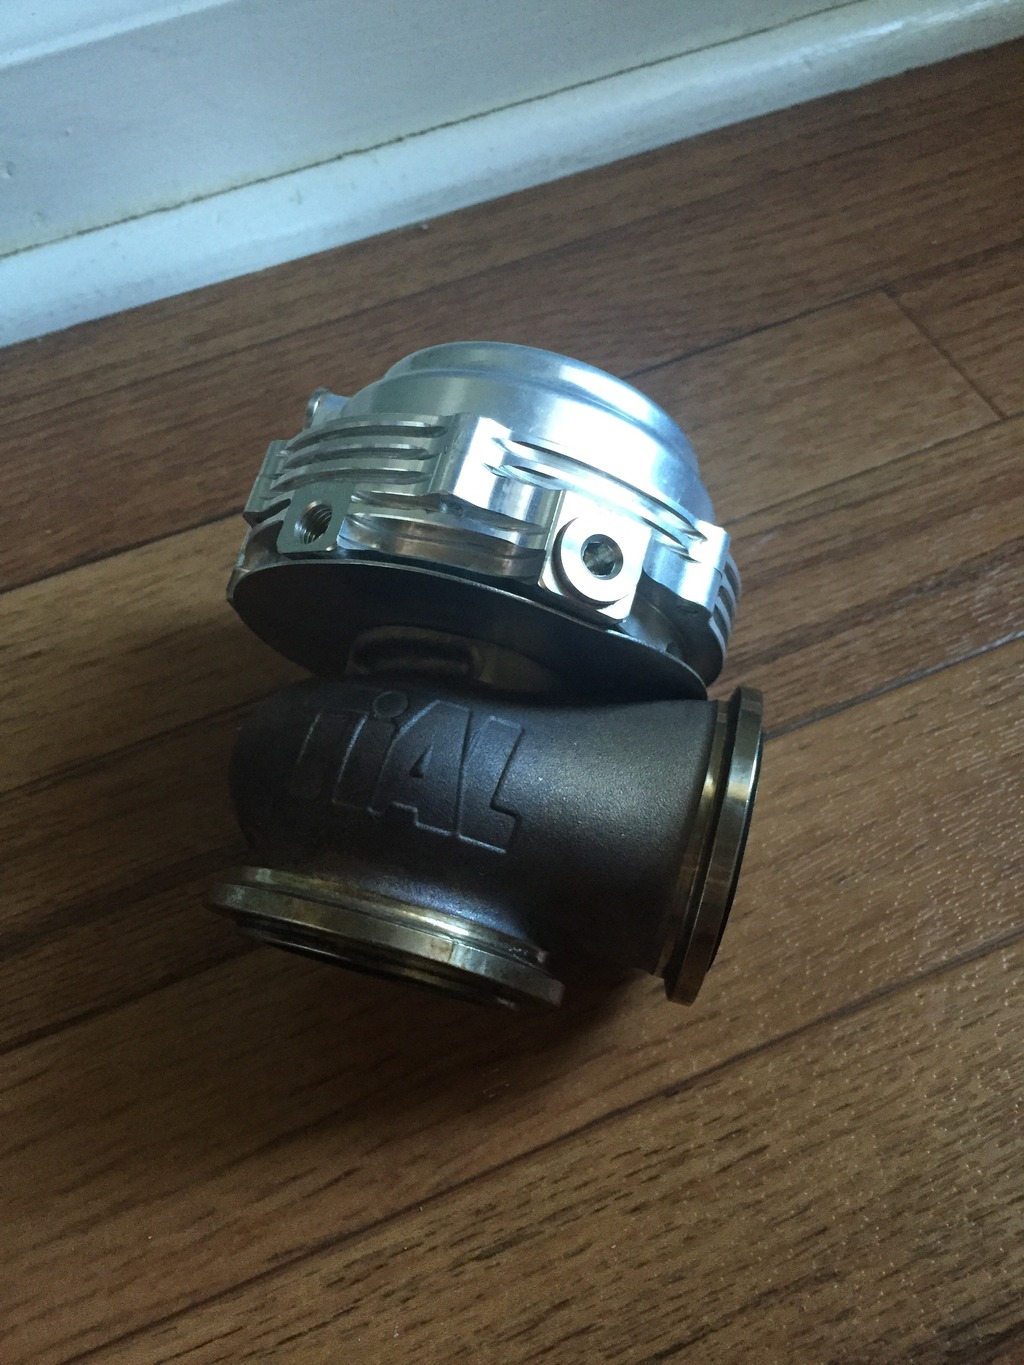
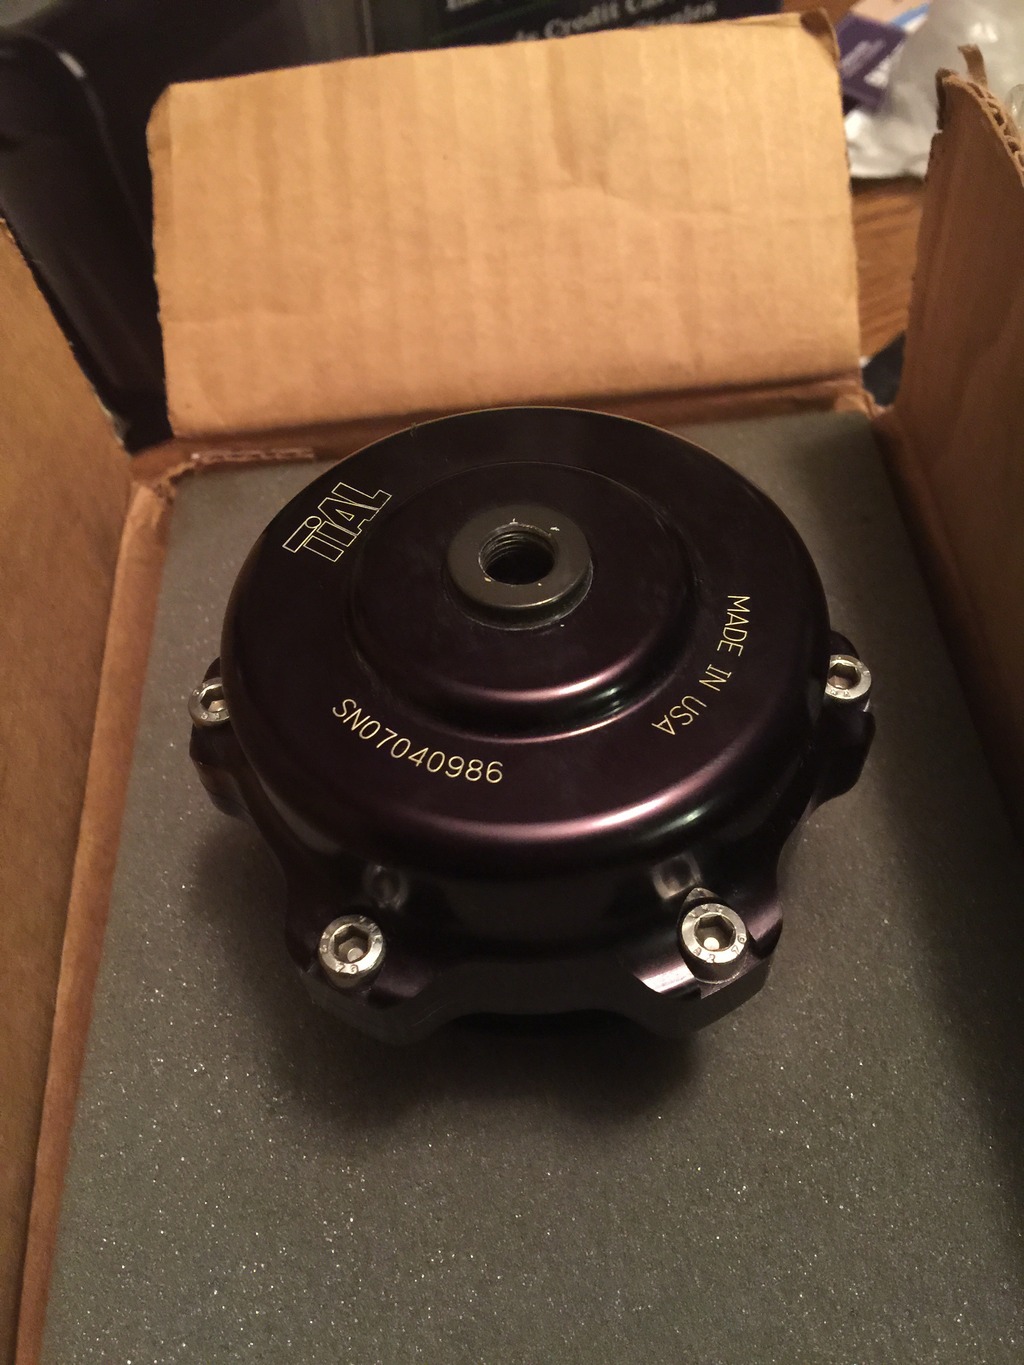
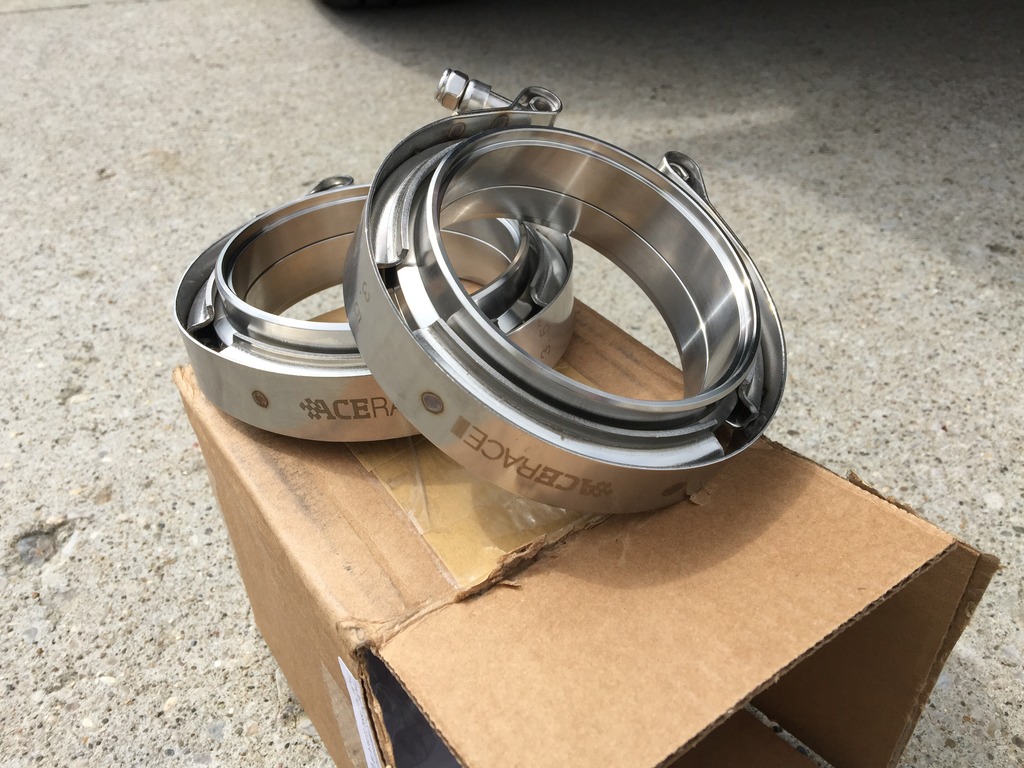
For the manifold, I turned to the guys over at DOC RACE to churn out a beautiful manifold for me. These pieces really are works of art. They hand weld all of their units and hand port them before shipping them out to customers. I decided to go with a single scroll with a Tial MVR wastegate flange. On a side note, I found a good deal on a Tial MVR and Tial blow off valve. I emailed back and forth with Tial and confirmed they were authentic. On to some pictures.
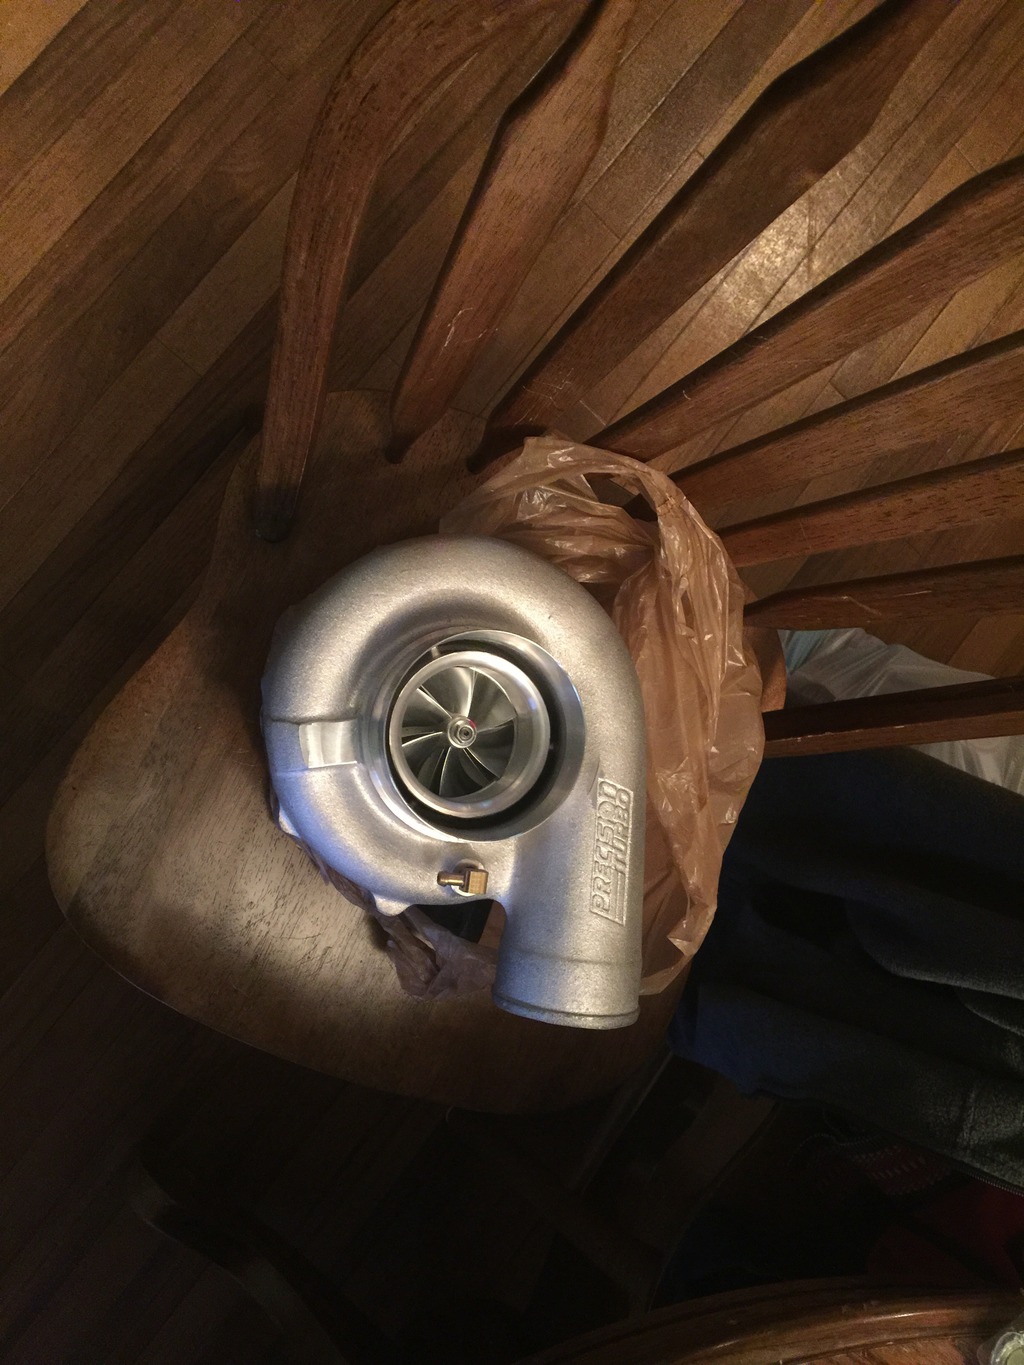
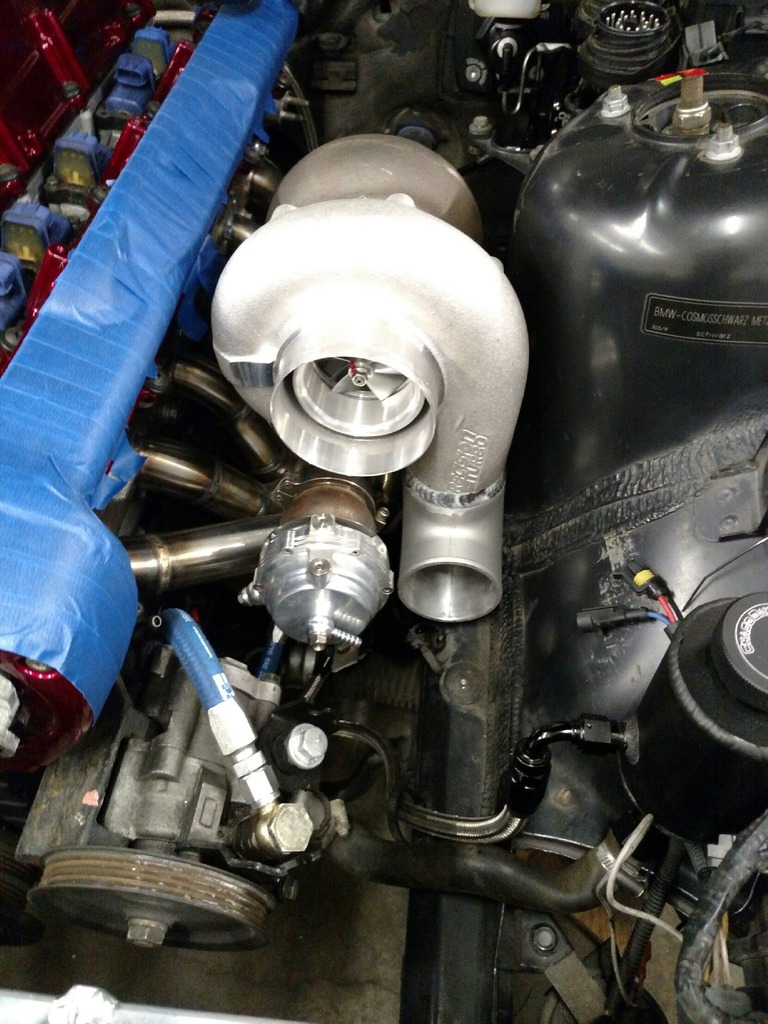
for the turbo, after much debate and searching I decided to settle on a brand new Precision 6766 with the posted H cover. I was surprised on how massive this thing was when i first held it in person..... I will put up a picture of the turbo by my daughter for reference. LOL
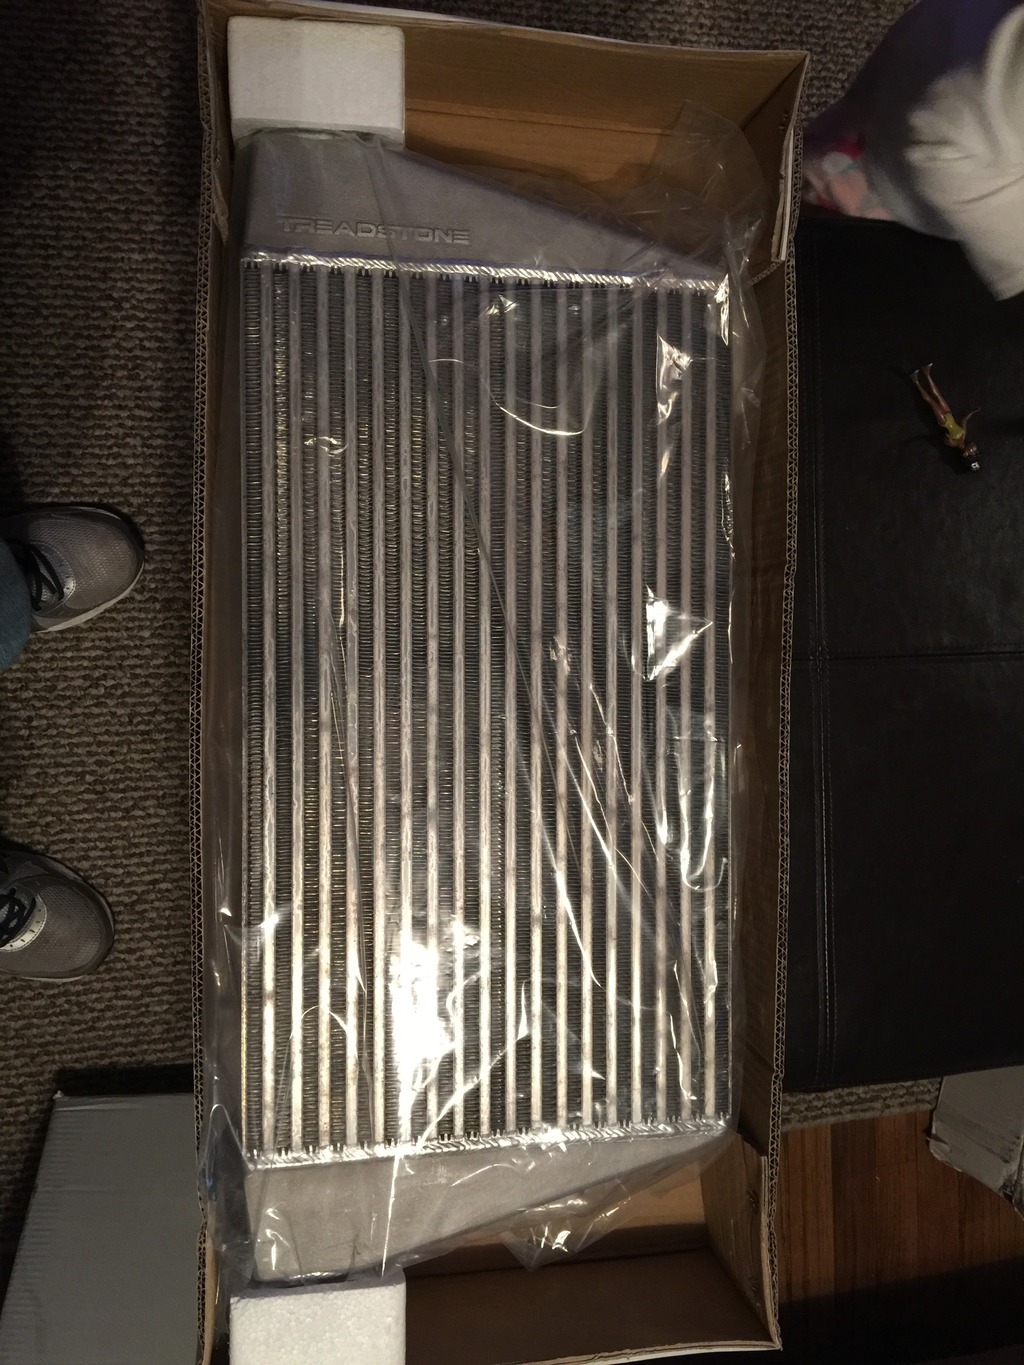
The intercooler, I decided to choose the Treadstone TR1235. I read many good things about this unit, and it actually is a very stout unit for the money. Very well built. The end tanks even have a baffle to divert air evenly throughout the core....
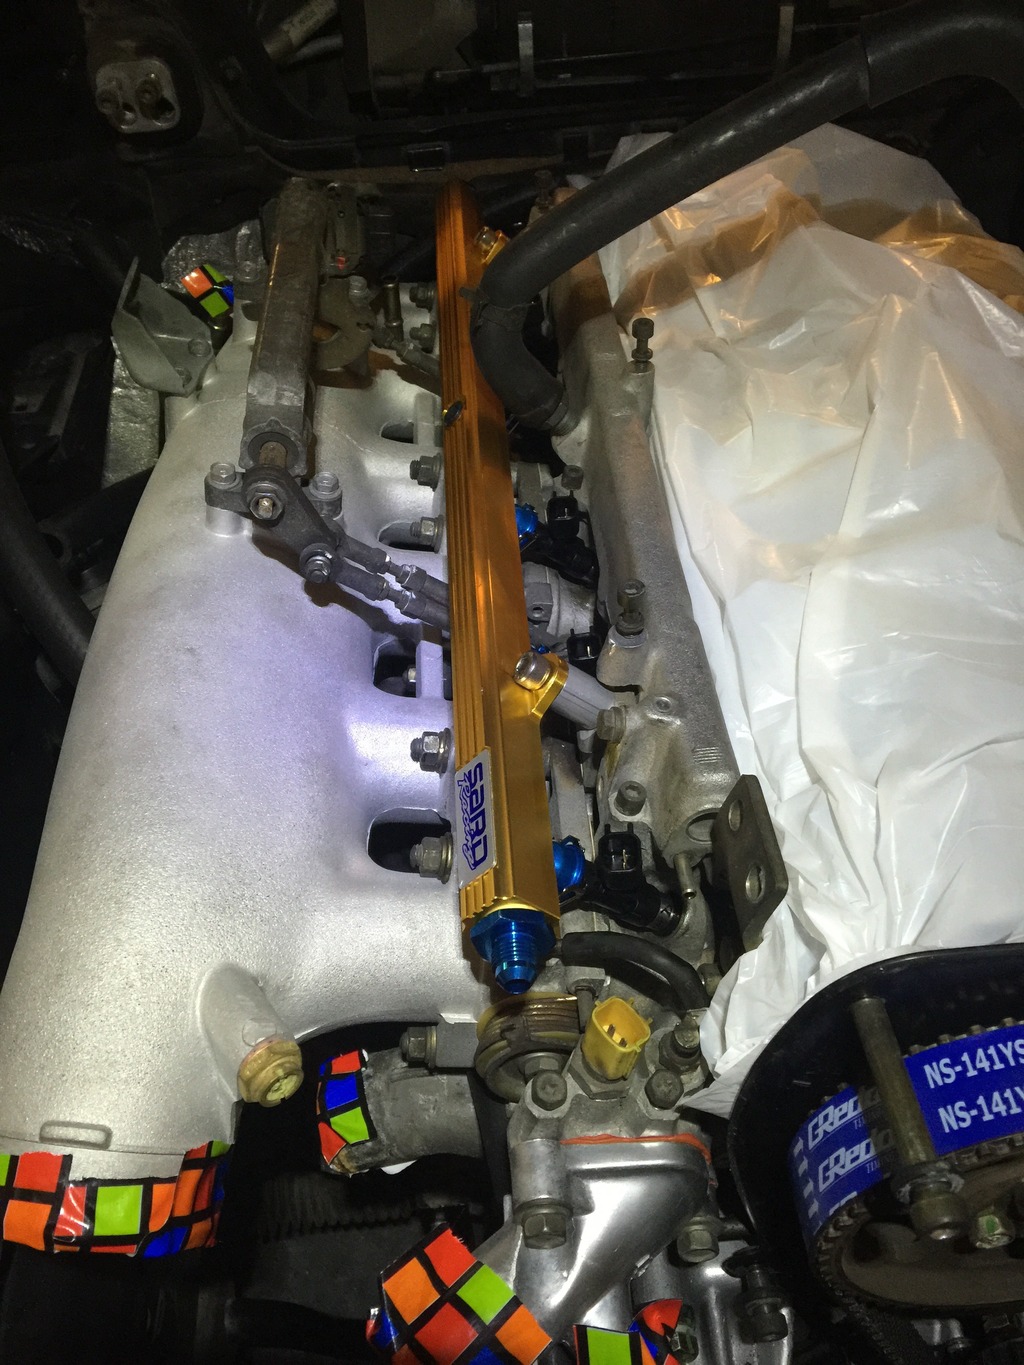
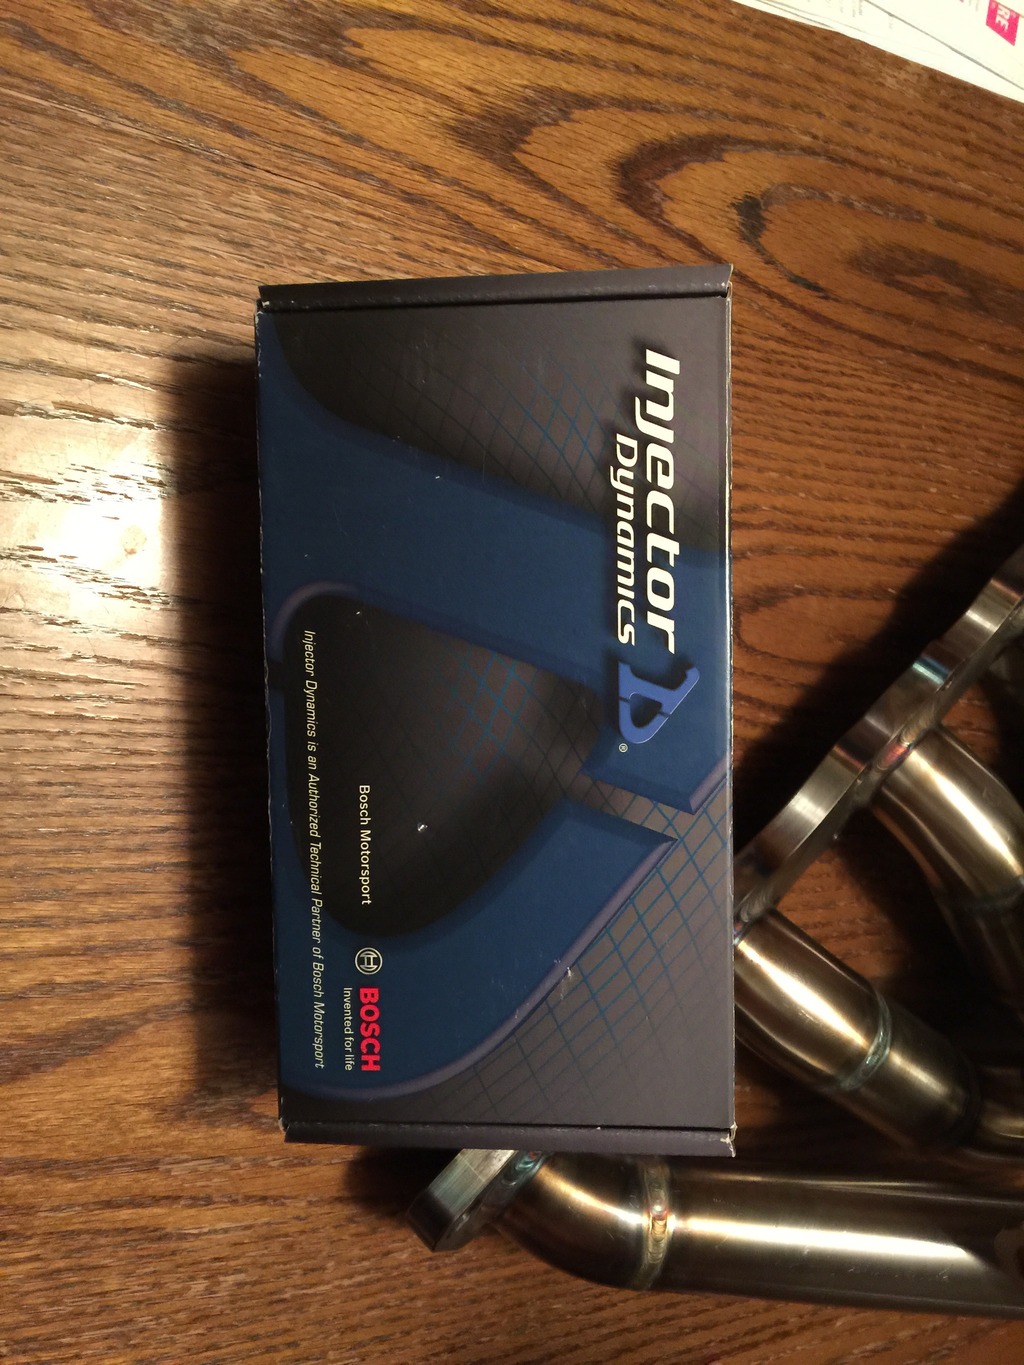
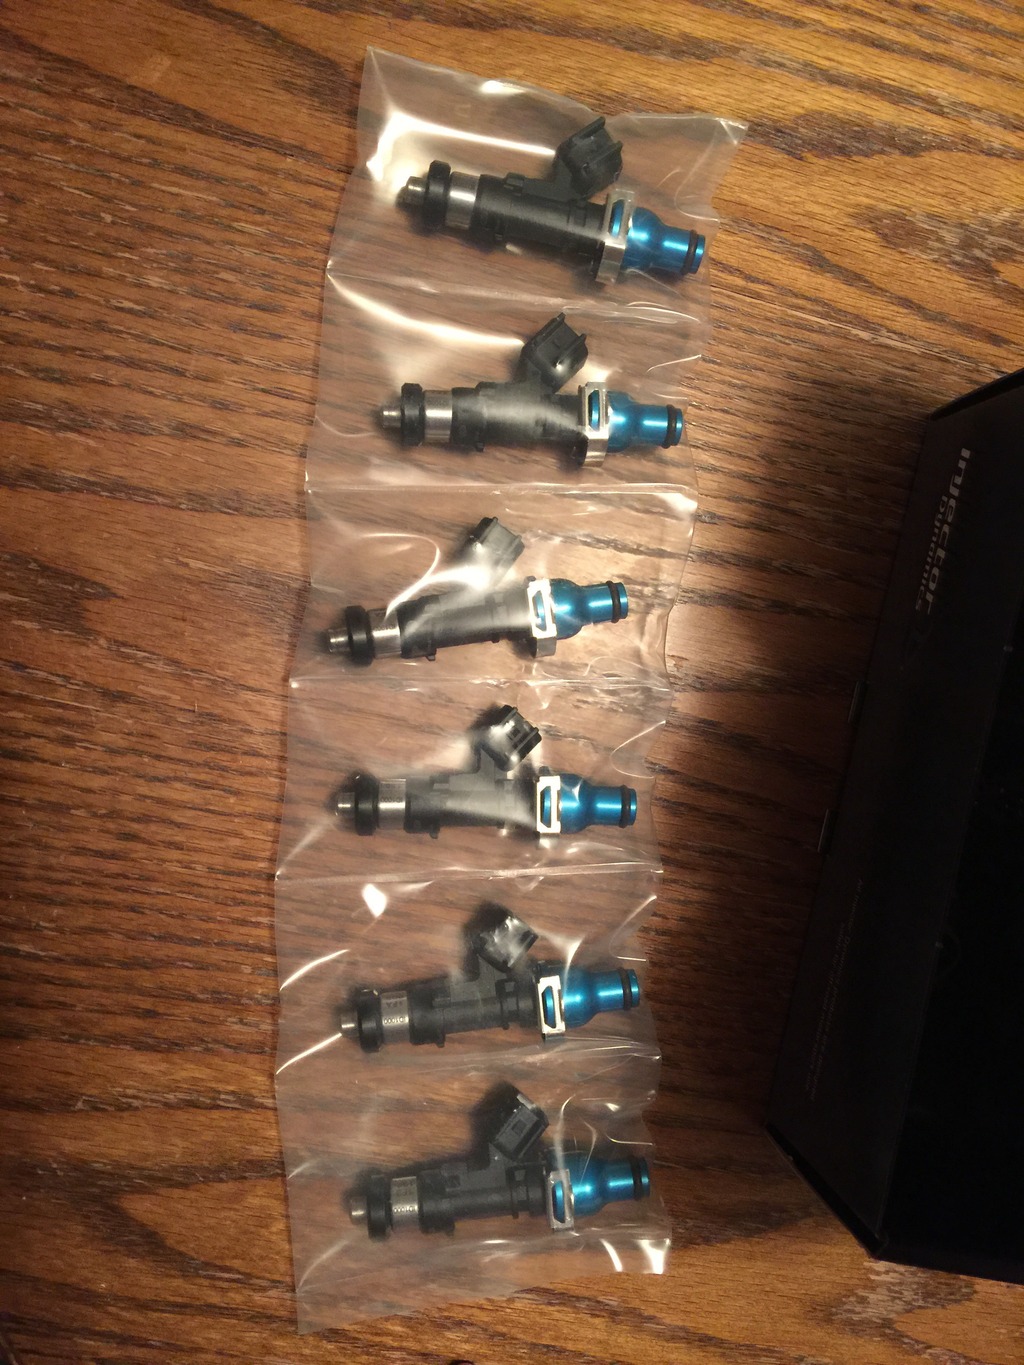
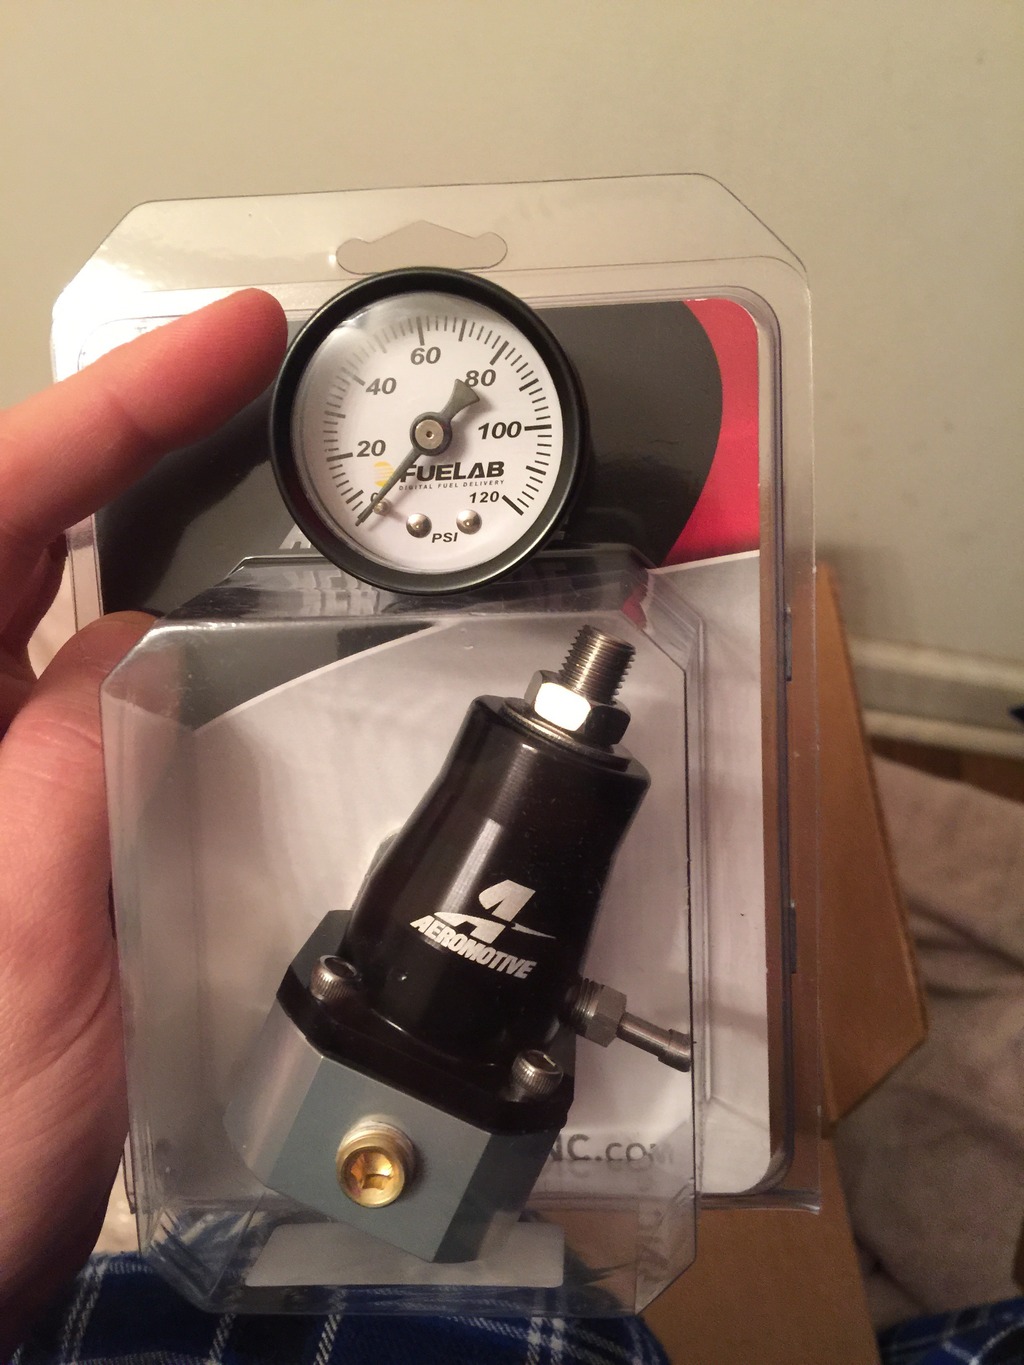
Fueling..... So far I have collected parts to include a Sard billet fuel rail, Injector Dynamics 1000cc injectors, Aeromotive adjustable fuel pressure regulator, and a Fuelab pressure gauge....
I am still debating on what route to take with the fuel pumps. I plan on making custom stainless steel braided lines. Here are some pictures.....
Hello fellow members. I am starting this thread to share and document my experience i have had and will have with this project of mine. After many other project cars in my past such as a Lotus Elise, Lotus Exige, Dodge viper, and Noble M400, I wanted to get my hands back on something that i could be a little more involved in. I enjoy tinkering and modifying cars of mine, and had the want to start a project that was unique and more challenging than the typical.
I'm sure its safe to say that a lot of people on here have the same love and desire to own an authentic GTR at some point in out lives. I decided to look around at the different options to swap an RB26, but as said before, didnt want to take the typical route of swapping an s13/s14/datsun cars. While on this search, I stumbled across a group named Dryden Motorsports that made a mount kit for the European E36 chassis and the RB26dett motor set. I picked up this kit first and then started my search of the perfect donor car for a new heart.
Before too long, I came across a 1999 M3 in Nashville Tennessee that i felt like I could not pass up. Alot of people said that spending the extra money to get a true M3 would be a waste of money as the sedan or more basic coupes could be had for a fraction of the price. This car just spoke to me though as it had little modifications and made a perfect blank canvas to start my journey. Without further a due, here is a couple pictures of the car as it was when i bought it and drove it back home to Kentucky.... I dont have many pictures of how it started, but you get the idea...


I also had the RB26 motor set shipped to me along with the mount kit and custom sump sitting and waiting for me when i got home with the car. here is a quick shot just for record as well.....

As i started I started to plan out my plan of action, I first convinced myself that I just wanted to freshen up the motor with oem parts and run the stock twins at stock boost. Then of course the modifying bug bit me. I convinced myself that I may as well go ***** out and do as much as I can, and should ever want to while the motor was out. After considering all options and contacting many different shops to handle the build of the longblock, I decided to trust the guys at Raw Brokerage with the build.
I sent them my long block along with a mess of goods to include:
Wiseco Forged pistons, Manley H-beam, ACL rod/main bearings, ARP rod bolts, ARP main studs, ARP head studs, Nitto crank extended crank collar, N1 oil pump, OEM water pump, Tomei MLS headgasket, Tomei Oil restrictor, Greddy timing belt and new tensioner/idler.
Along with this I sent a complete OEM gasket set. They worked their magic and did all the machine work to include the stage one short block, and the Stage one cylinder head.
They bolted the long block back together to torque spec and i received this piece of art back on a pallet via UPS....


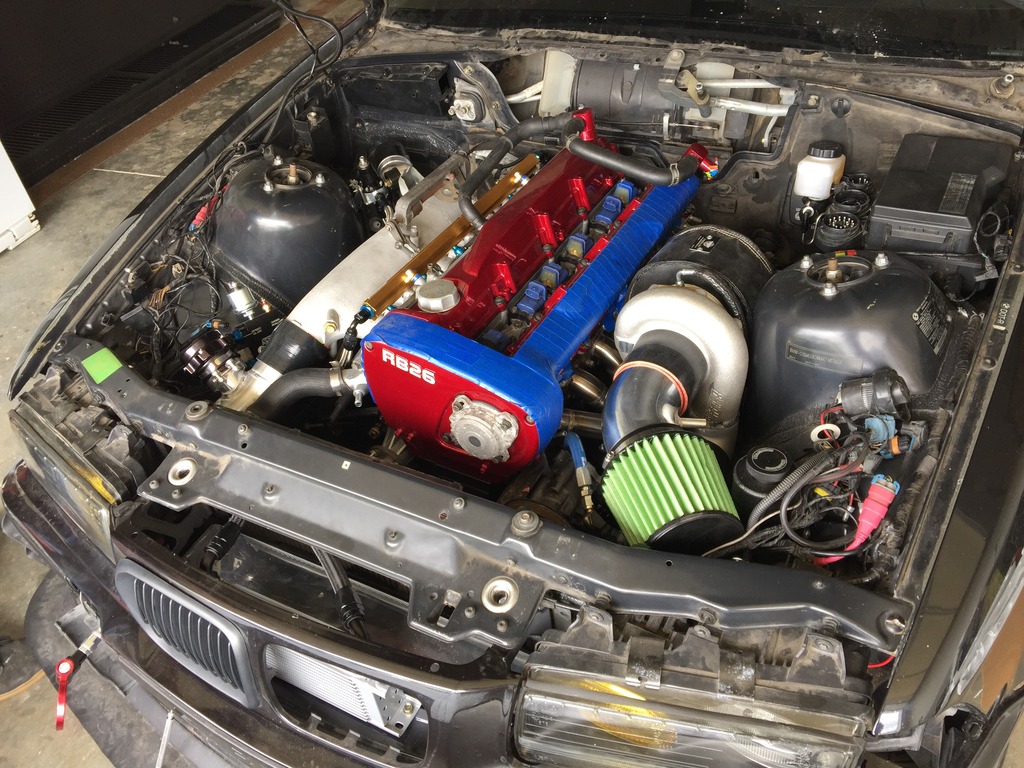
and here is the motor after i got to work installing the intake plenum back on, along with having the oem manifold sand blasted to a clean cast look....

I will leave this post with a quick shot of the mounts that i received from Dryden Motorsports


I will continue to update this thread with my endeavors.....
From here i was very quick to start pulling the BMW's drivetrain and came out with this.....


I also took this time to mate up my Spec stage 3 clutch the Raw Brokerage provided me. I also took my RB25det Transmission to a local shop here and had the dis-assemble and inspect. I was very relieved to hear that all was good to go internally. they actually told me they were quite surprised on how clean it was inside. I will also attach a picture of the first time I mated the tranny to the motor....


more later..... thanks for viewing
- - - Updated - - -
sooooooo, on my first attempt on placing the motor into its new home, I learned a few things that may need some minor tweaking. So when i mentioned earlier that i was planning a minor build, this eventually turned into this built motor idea, so of course we need more boost correct? lol. I decided to pick up a set of Greddy T517z's off an R32 in Australia. Man were these thing beautiful.... not to mention they have a $3000 plus price tag new......


not all good things can be true though. I soon found out that these turbos would not work. First issue was that the mounts I planned on using was made for the oem size turbos and not a larger frame like the Greddy units. Once I tried to install the mounts, I found they came in contact with the exhaust housing and does not allows the mount arms to mount to the motor.... sad times.

so back to the drawing board in the forced induction side of things......... I decided it may be time to consider going to a large single
- - - Updated - - -
While cleaning up my tears on the turbo issues, I decided to make my first test run of installing the motor/tranny and moving forward from there. After the first attempt to install, It was not easy by any means. for some reason I could not get any of the holes to line up to where i was comfortable. I eventually decided to ditch the rubber mounts that came with the Dryden kit and source my own. I think that another member on this forum doing an RB25 swap had the same issues and correct the issue himself, so i decided to follow suit.
I found myself be be highly resourceful and made a set of 240sx poly mounts made by Circuit Sport work perfectly.

i will also use this post to explain how i made the power steering and the cooler work with this swap. I decided to use a Chasebays power steering reservoir, Earl's pwer steering braided lines, and found the perfect cooler made by Derale that mounted in the OEM location and had -6an fittings. I also had to use a couple an adaptors on the steering rack as well, but was very happy with the outcome....


- - - Updated - - -
my next puzzle that I decided to tackle was going to be the radiator issue. The OEM BMW radiator caused its own set of issues. First issue was going to be the inlet was on the incorrect side for the RB motor. The second issue was how the OEM radiator mounted left ZERO clearance with the PS pump. They physically touched. From here, I knew that i would going to have to be resourceful on picking a radiator and tuck it under the radiator support. I decided to take a Mishimoto unit from an S14 and making my own brackets. I had to grind down the frame horns, and trim up the radiator support a little, but came out with this. I will attempt to get a picture soon of the clearance this game me and update this post


Next up was to decide what route I was going to take with the forced induction department. I decided that going to a larger single may be the way to go to utilize the space I have and to take full advantage of the motor that I have built from top to bottom to handle a fair amount of boost.
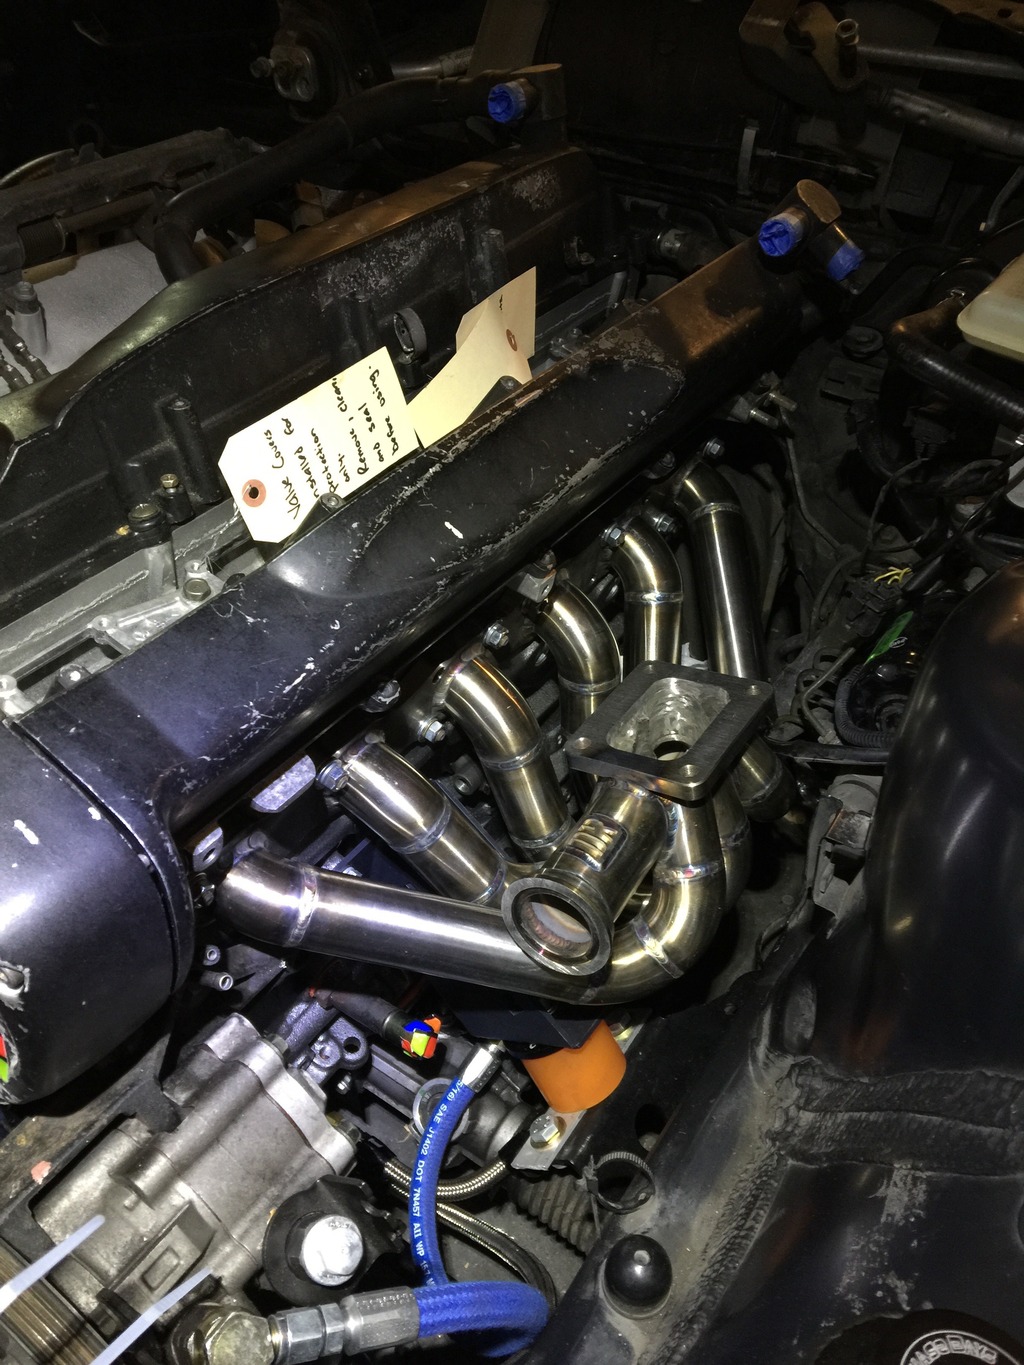
For the manifold, I turned to the guys over at DOC RACE to churn out a beautiful manifold for me. These pieces really are works of art. They hand weld all of their units and hand port them before shipping them out to customers. I decided to go with a single scroll with a Tial MVR wastegate flange. On a side note, I found a good deal on a Tial MVR and Tial blow off valve. I emailed back and forth with Tial and confirmed they were authentic. On to some pictures.


for the turbo, after much debate and searching I decided to settle on a brand new Precision 6766 with the posted H cover. I was surprised on how massive this thing was when i first held it in person..... I will put up a picture of the turbo by my daughter for reference. LOL

The intercooler, I decided to choose the Treadstone TR1235. I read many good things about this unit, and it actually is a very stout unit for the money. Very well built. The end tanks even have a baffle to divert air evenly throughout the core....


Fueling..... So far I have collected parts to include a Sard billet fuel rail, Injector Dynamics 1000cc injectors, Aeromotive adjustable fuel pressure regulator, and a Fuelab pressure gauge....
I am still debating on what route to take with the fuel pumps. I plan on making custom stainless steel braided lines. Here are some pictures.....


 07-01-2016, 06:15 AM
#2
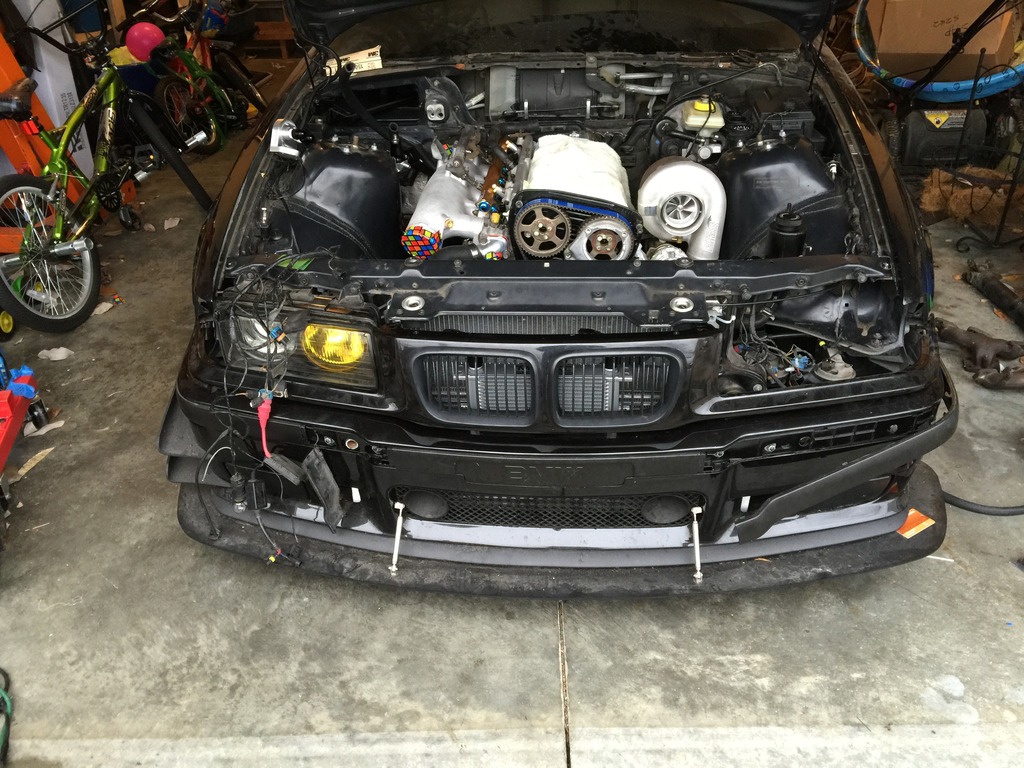
Last couple updates for you all. I took some time to get the turbo mounted where it is going to be. Man will it be a tight squeeze, but i think I can make it work. I am leaning towards purchasing the Chase Bays ABS delete, and maybe the booster delete from them as well to make more room for the downpipe.
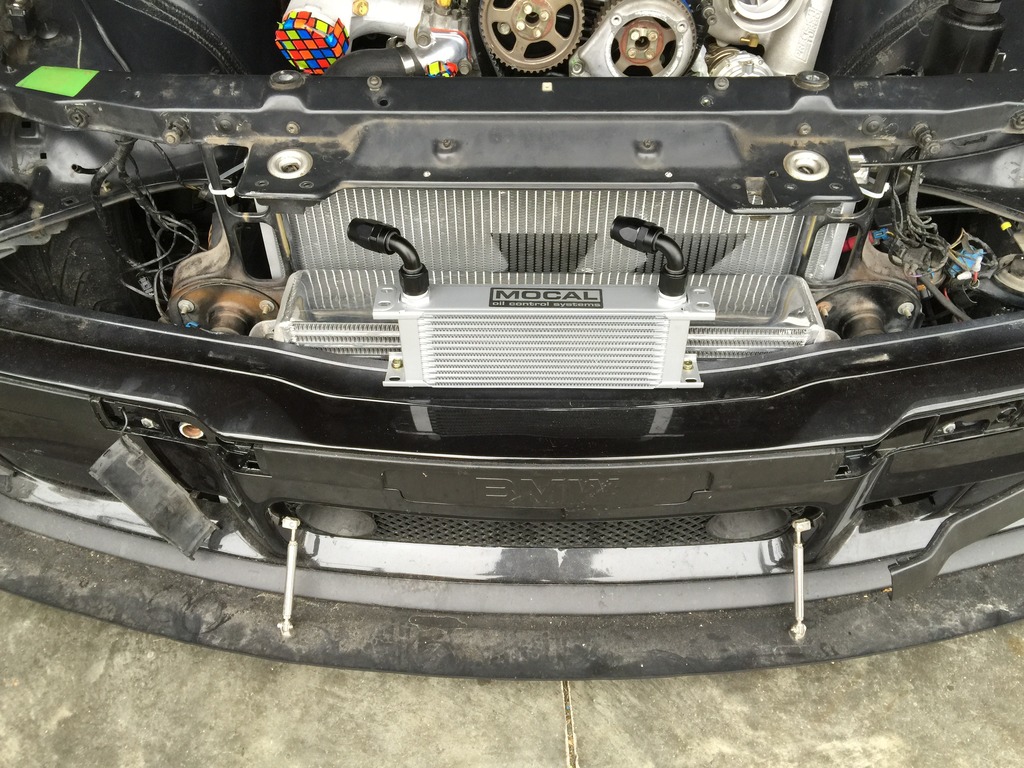
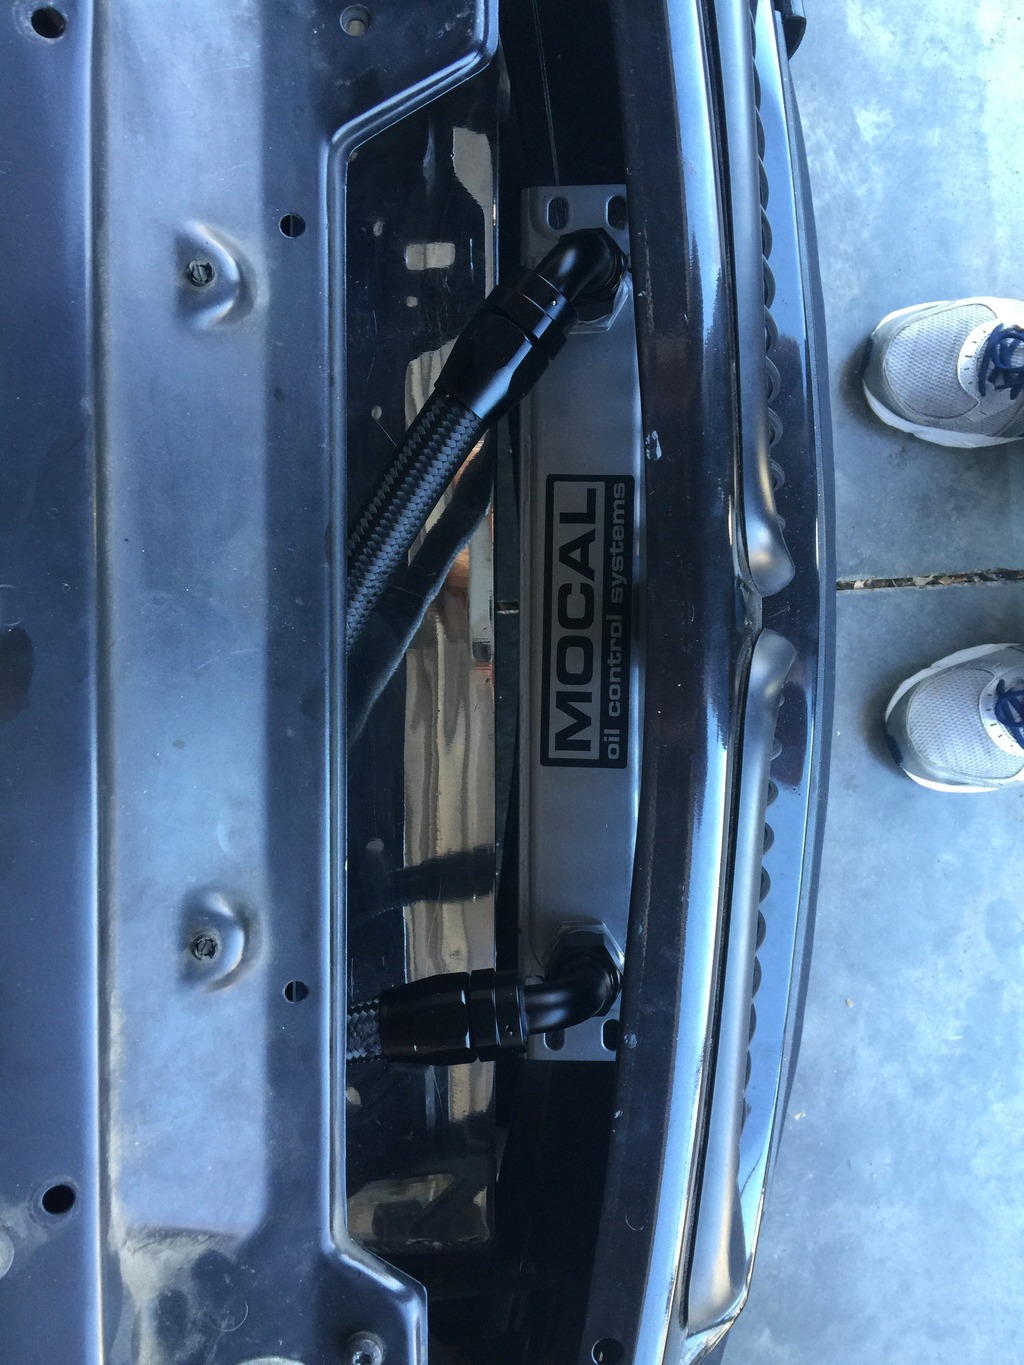
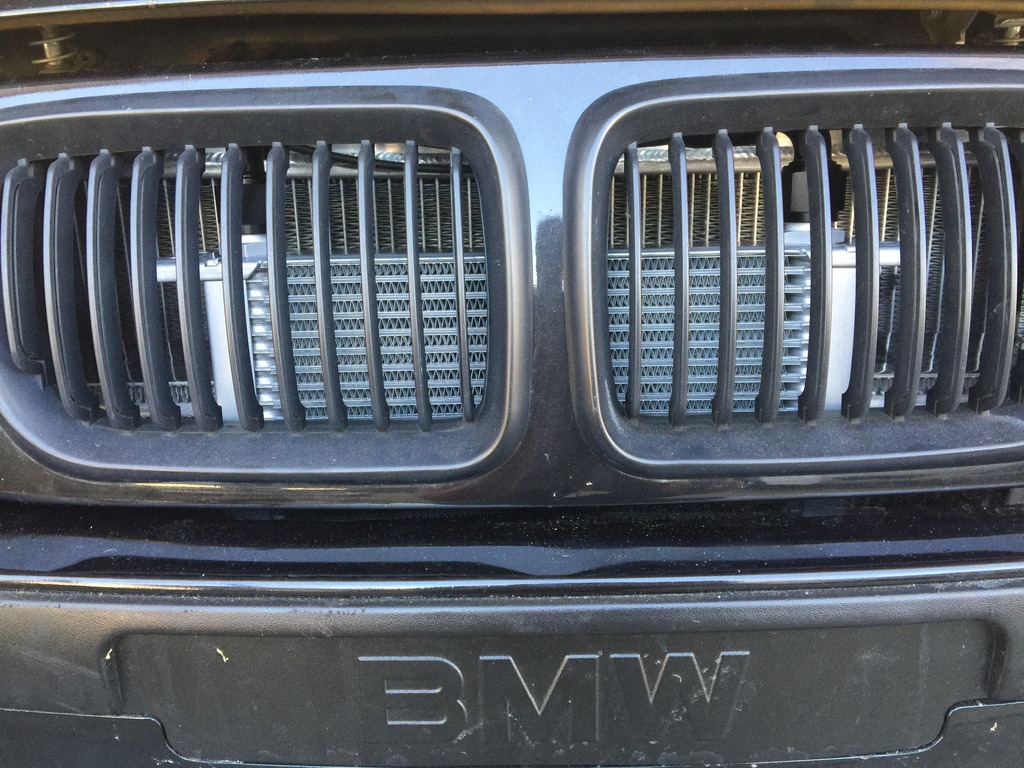
I also spent some time finding a solution to mounting the oil cooler. I knew i was going to put it in the kidney bean grills, and ended up just bolting it down to the bumper beam. I will post a picture to explain. I'm not sure of how to route the lines though as it is a tight fit in there. The whole oil cooler set up consists of Earls spin on adapter, Earls Billet remote filter mount, Earls remote oil thermostat, and a Mocal 10 row oil cooler.
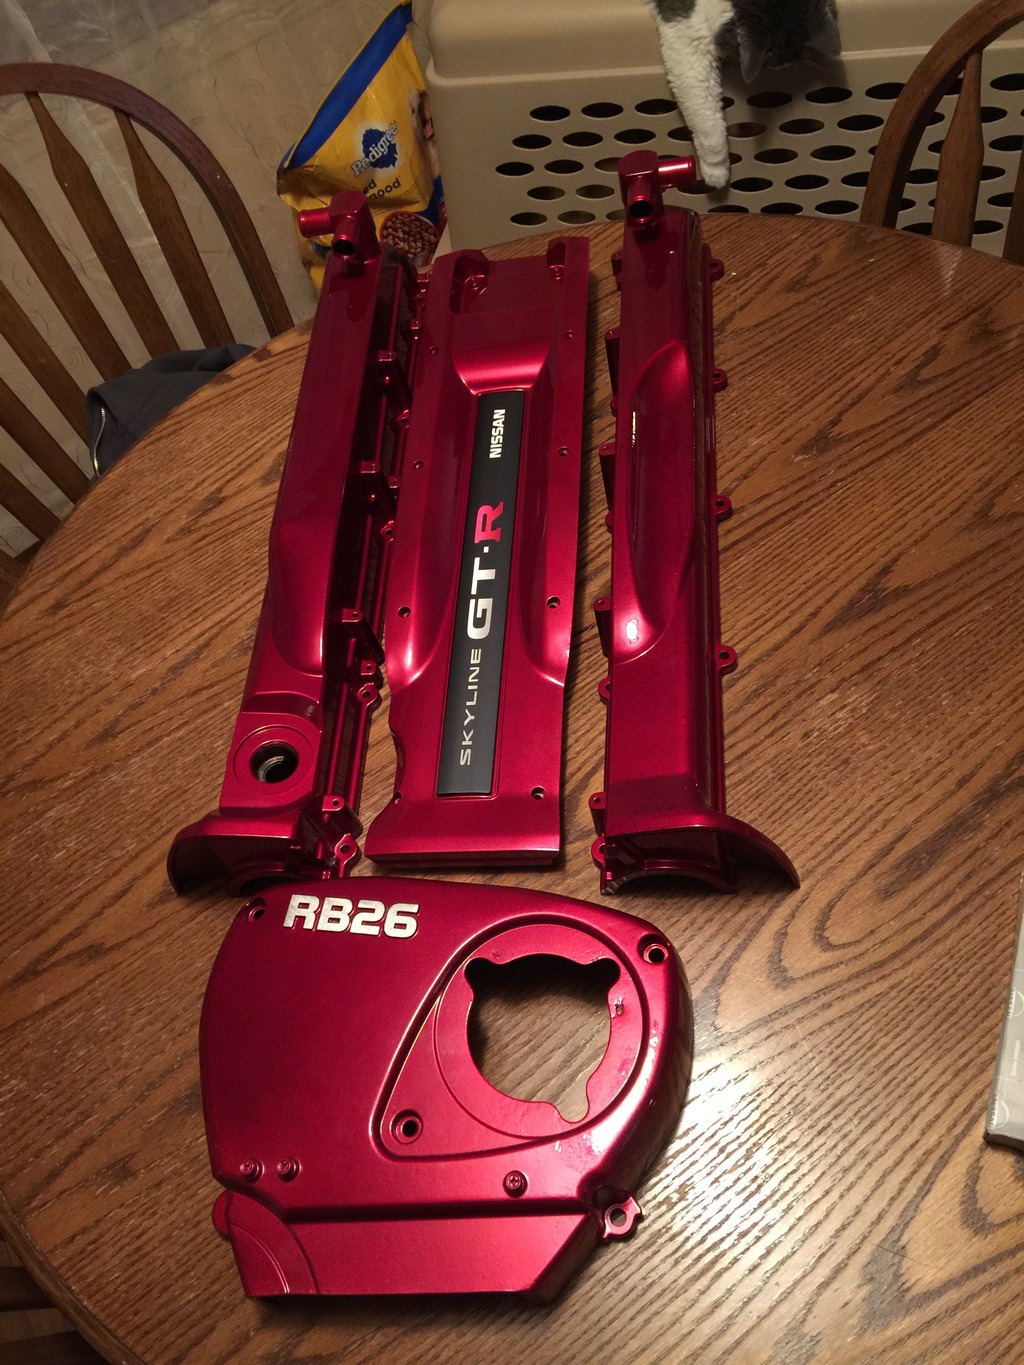
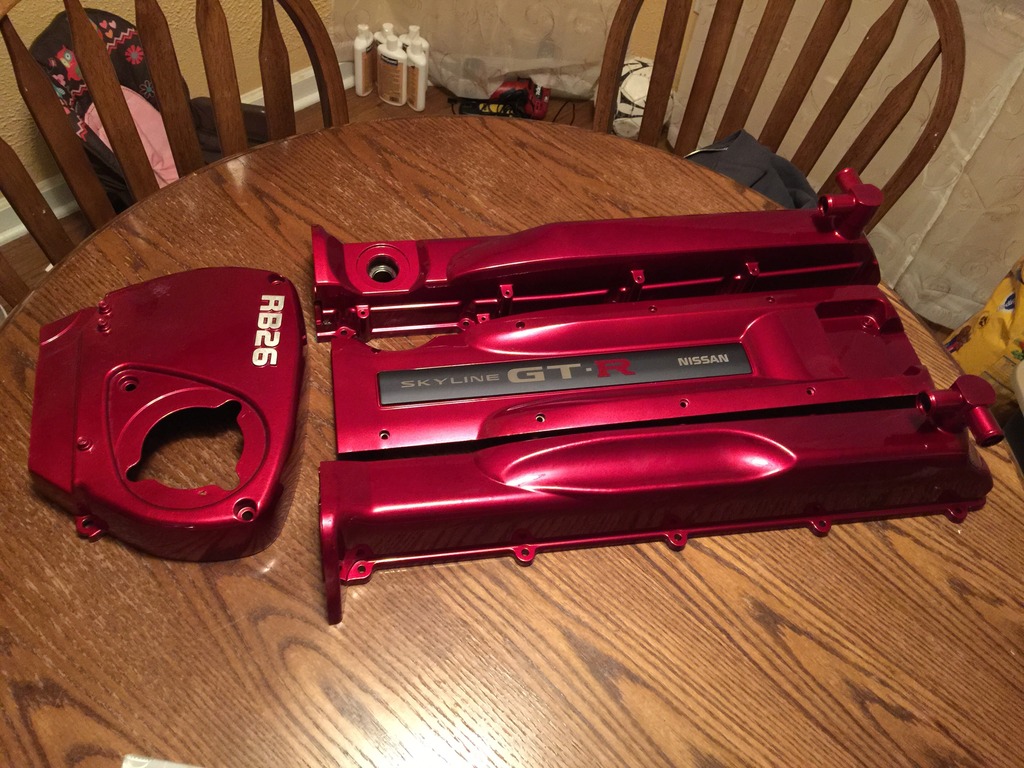
I also found a local group here to me that does some nice work. I will let the pictures speak for themselves on the before and after...
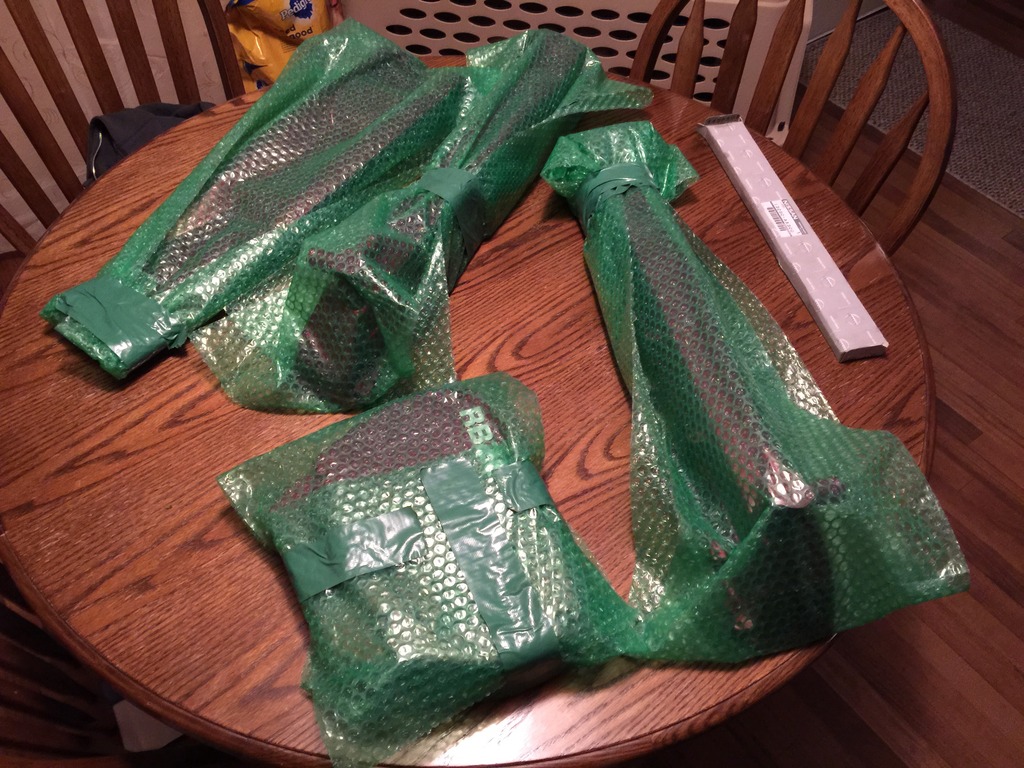
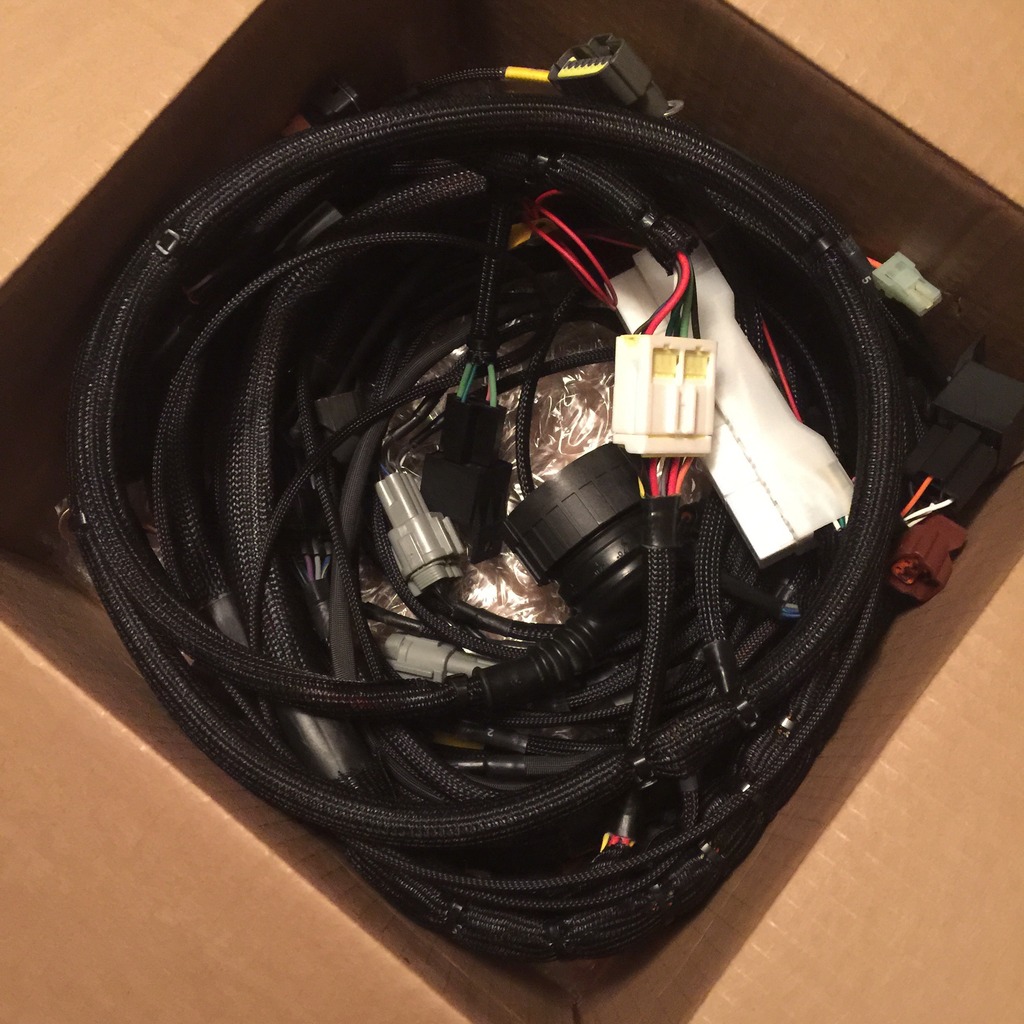
I also received a nice package from Wiring Specialties. They are also a nice group of guys that do good work...
Hello again friends. Just a small update. Had time lastnight to fit the new valve cover gaskets, new half moon seals in the rear of the heads, and clean up the pcv baffles a little bit. I loosely placed the covers back on the head and stood back to take a glance.
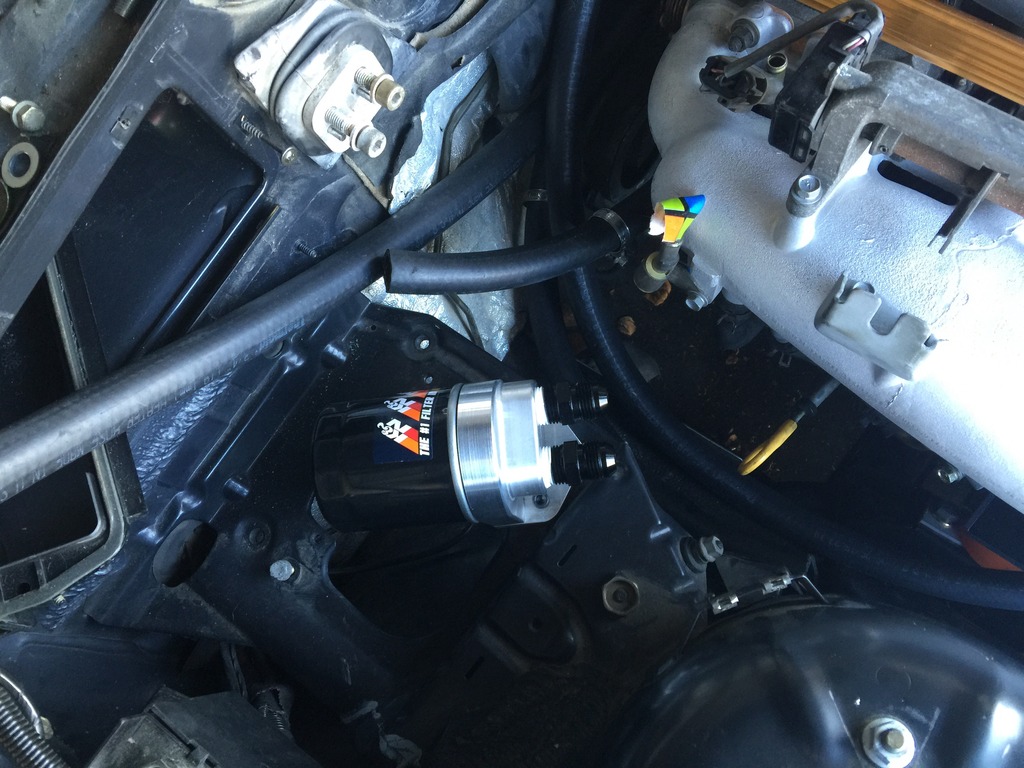
Ok, I had just a little time to work on the car this weekend. I decided to tackle the oil cooler issue. I listed in a previous thread the parts I was planning on using, but had spent that last week or so deciding where to mount the remote filter mount and where to mount the remote thermostat block. I bought most of the goods from Summit Racing, and chose the brand of Vibrant racing for the fitting and hoses. After dealing with these and Fragola, I would have to say that the Fragola was easier to assemble. After mounting the filter mount, I had to go find a filter that was a good fit for it. I brought the Earls part with me to walmart and tried many different filters, but ended up going with the K&N PS1002. I know that i will have to drop the oil and change this filter after running the motor for the first time. Anyway, On to a couple pictures. The black lines are a little tough to see, but I think you will get the point....
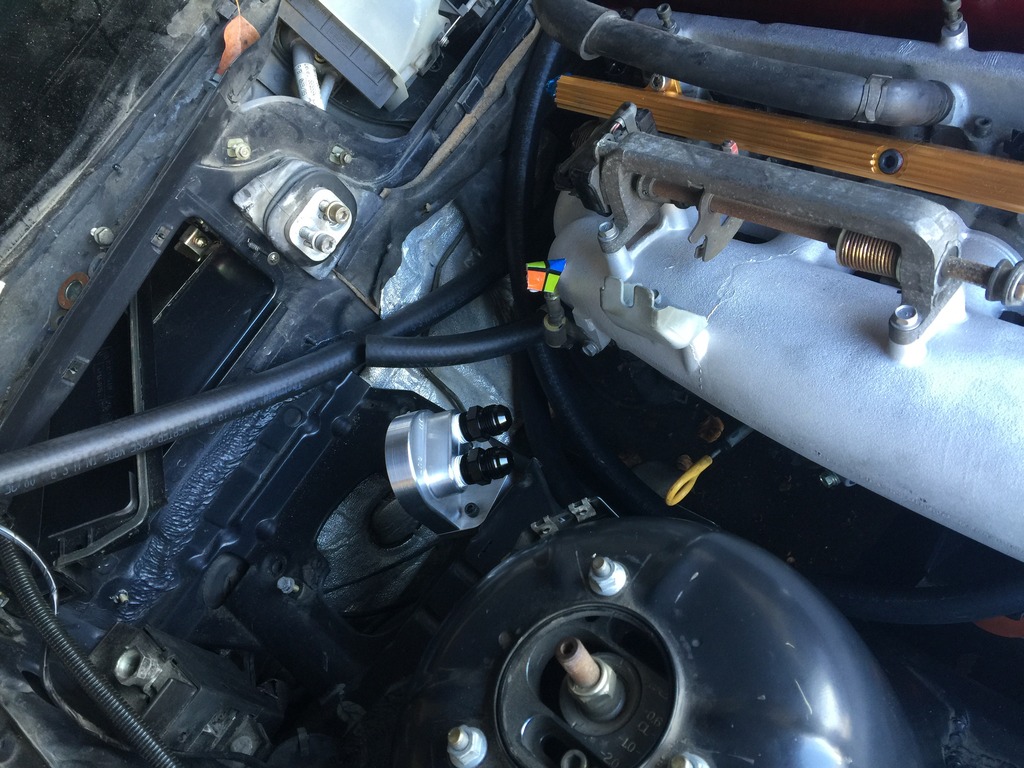
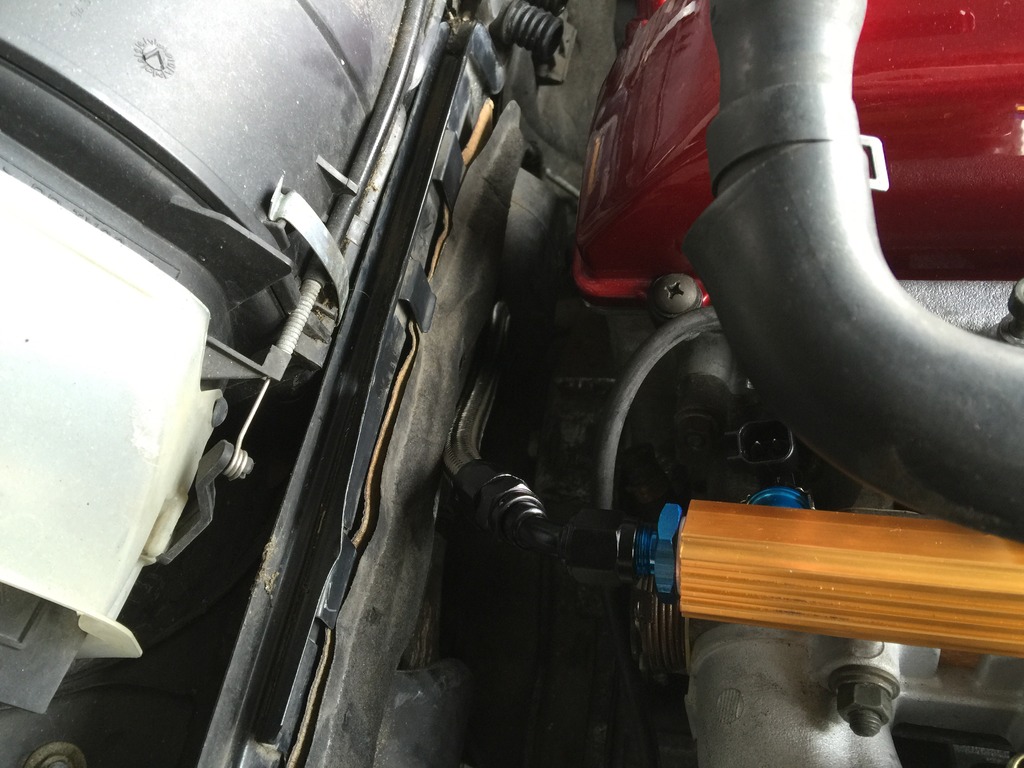
I also spent just a little time trying a location for the FPR and ran my first line from the rail. I ran out of daylight and had to stop before making any more progress....
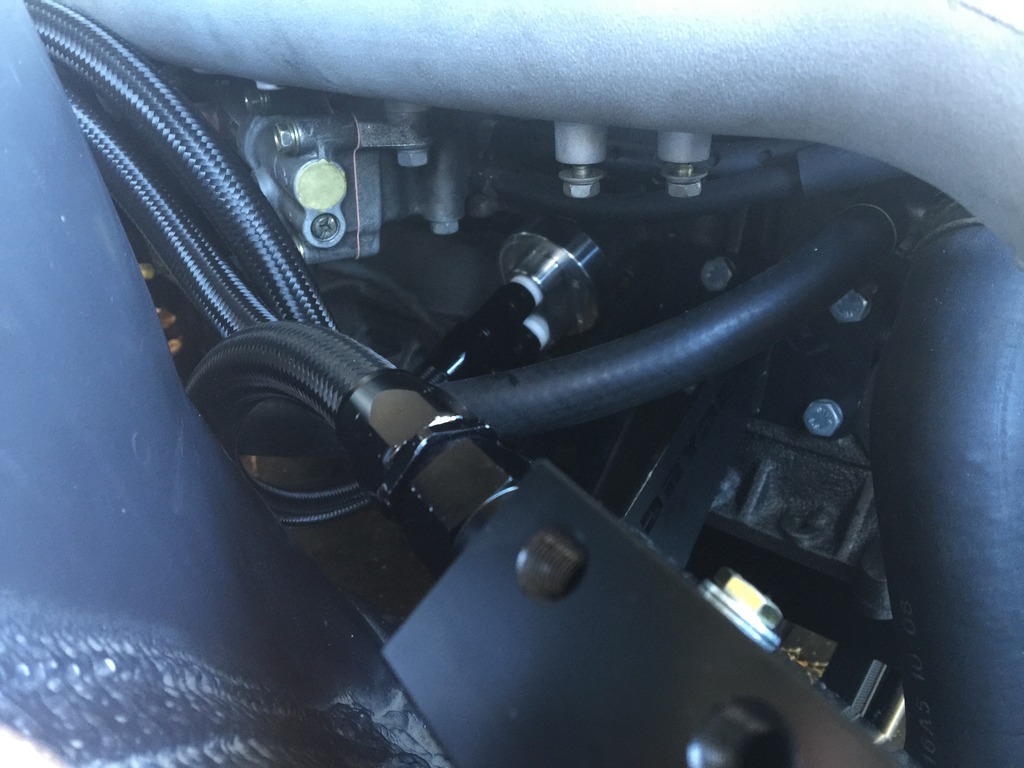
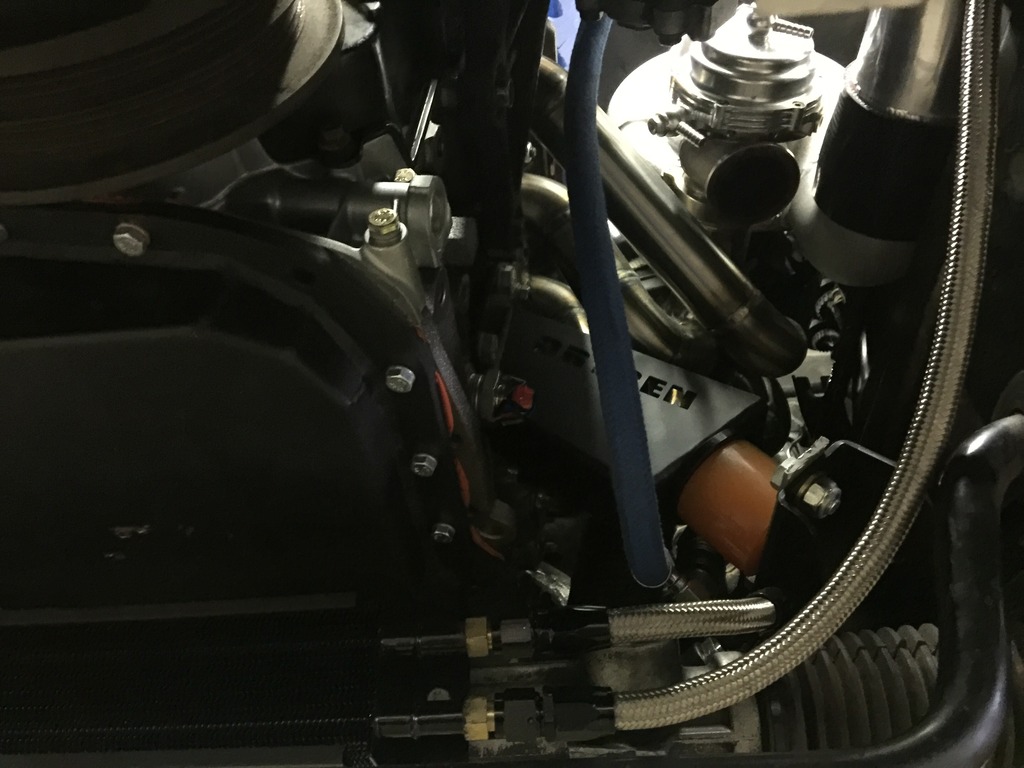
Hello again all. Long time no see. Today was one of those days for me that I am sure we all have had. Ever had one of those work days where you are in the garage all day, but you feel like you got not much done at all? In all reality, alot got done, but not as much as I had wanted. I decided to spend some time on the fuel lines.
I went back and forth on the idea of keeping rubber fuel lines, with barbed fitting on the rail and the FPR. At the end of the day, I decided to go with stainless braided lines due to the Sard rail coming with 6an fittings, and the Fuelab filter having -6an fittings on the ends. So then I came to the problem of how and at what point I should convert from the hardlines to the braided lines. On previous builds I cut, and double flared the hardline to convert. I have read now there are compression fitting for this job. I decided to give them a shot. Worst case would be to take them off if they do not work, then flare the old way.
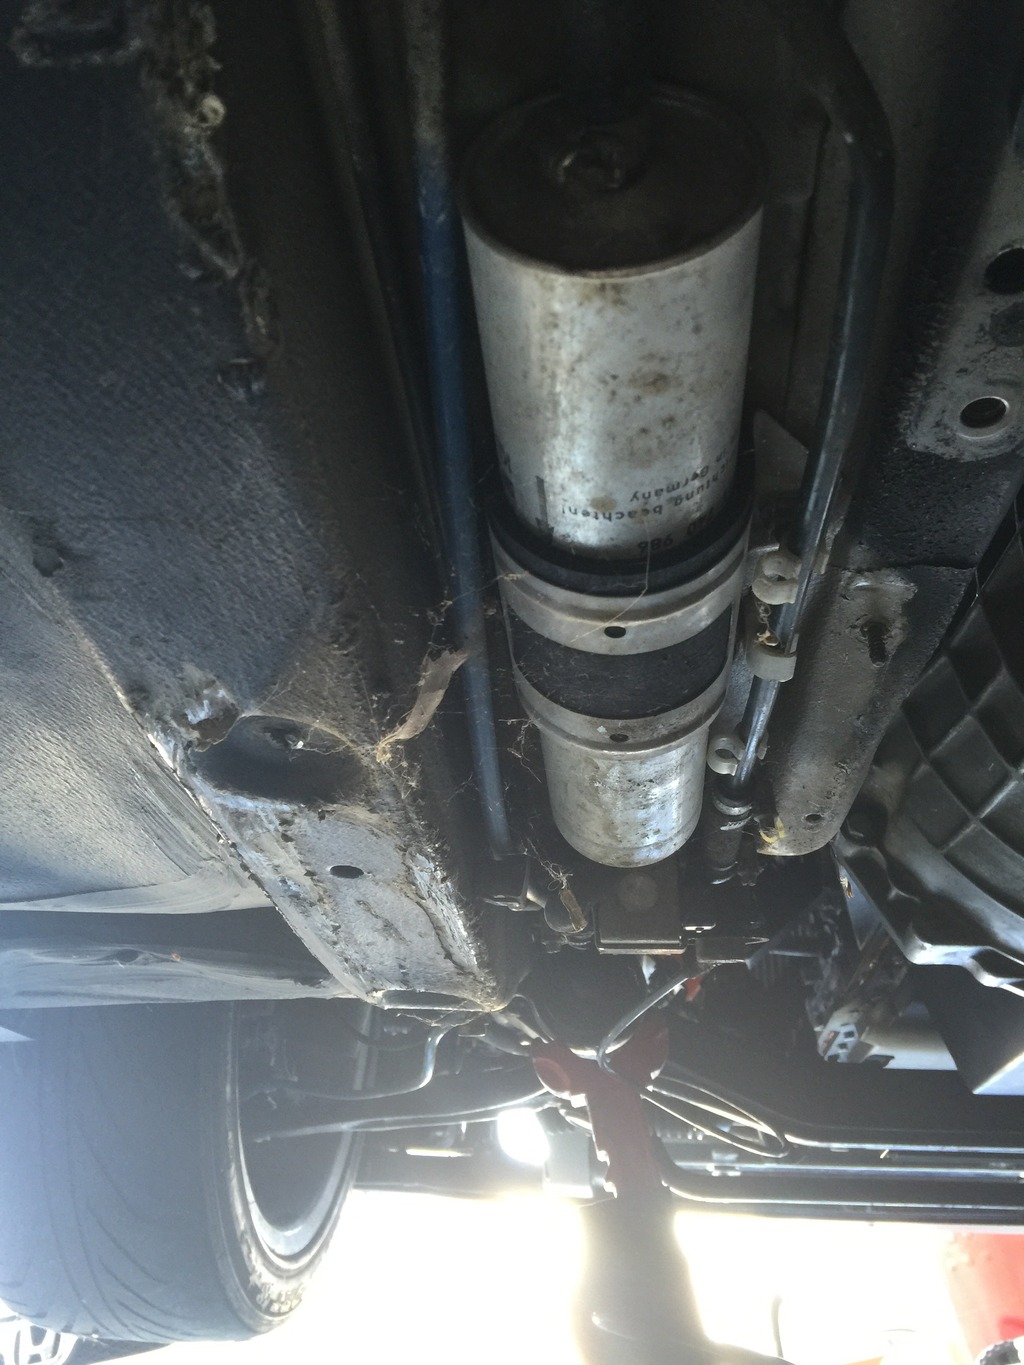
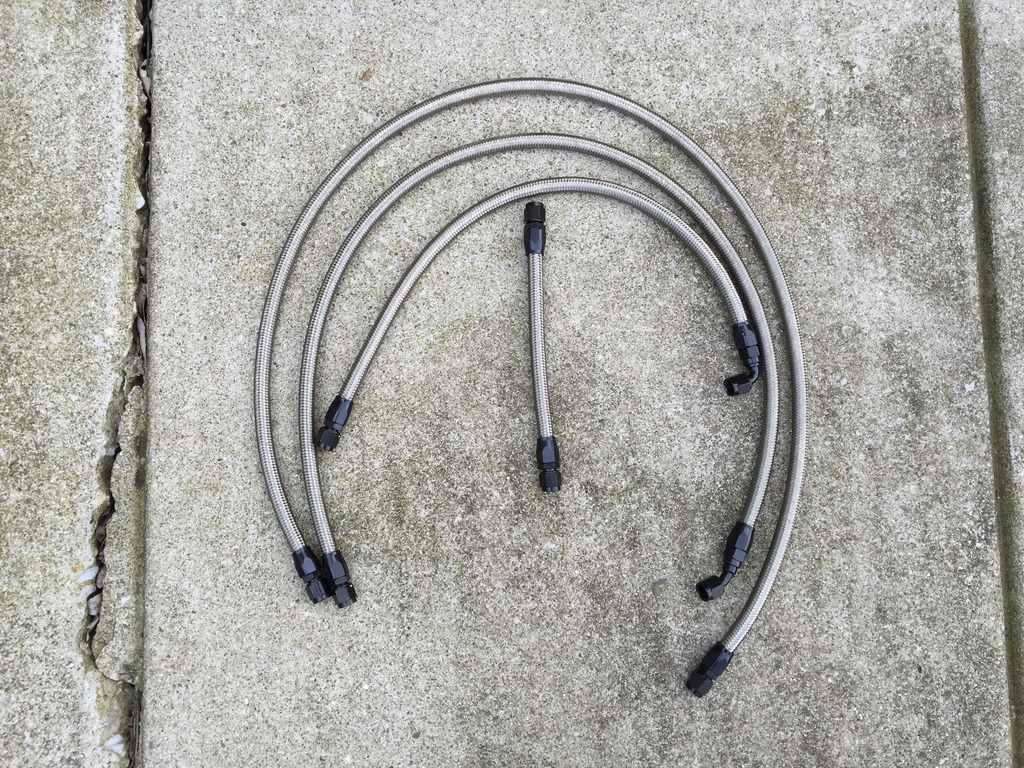
Will start the picture by showing what I started with....
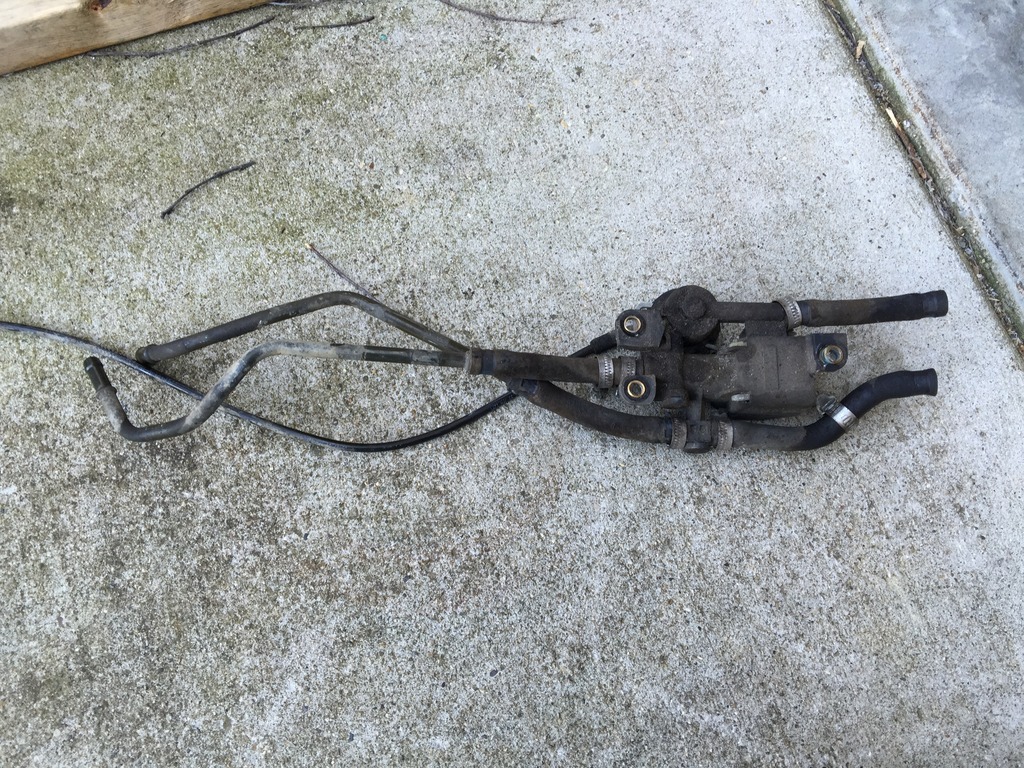
And here is the OEM BMW FPR set up.....
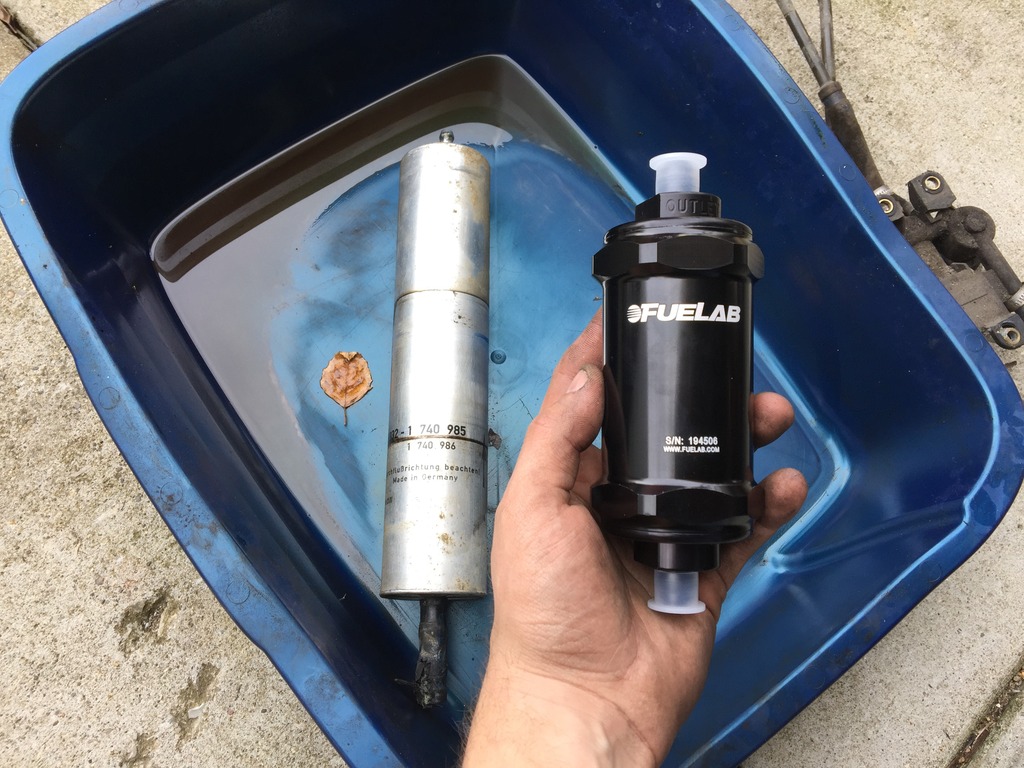
Here is a side by side of the OEM filter and the Fuelab.....
Here is the first compression fitting I attempted to install. Keep in mind the picture does not show the finished product. I will still find a way to mount the line in the OEM bracket.....

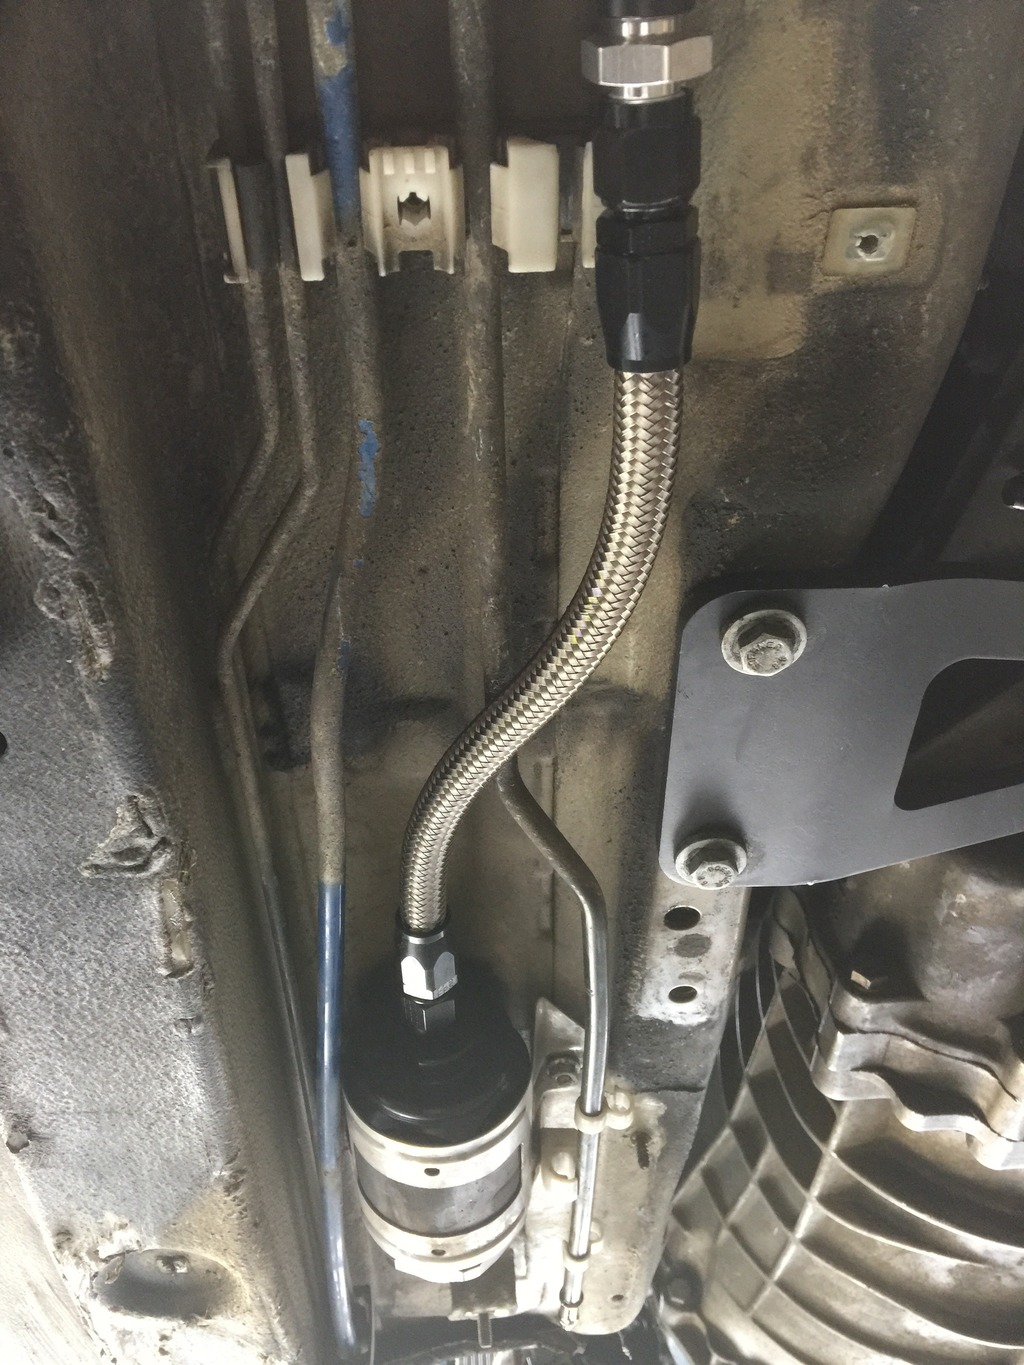
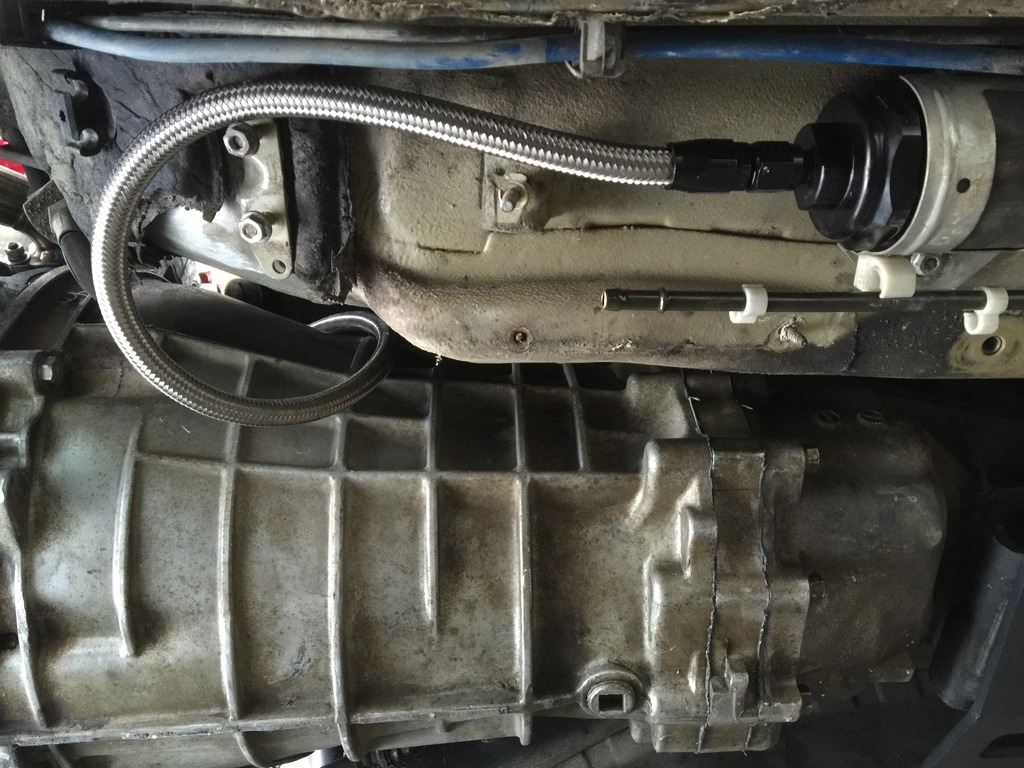
I didnt have much time to run the return line from the regulator. I actually realized that I was missing one more fitting. I need one more -6an hose union to finish the fuel return..... but will show off the lines i did have time to assemble
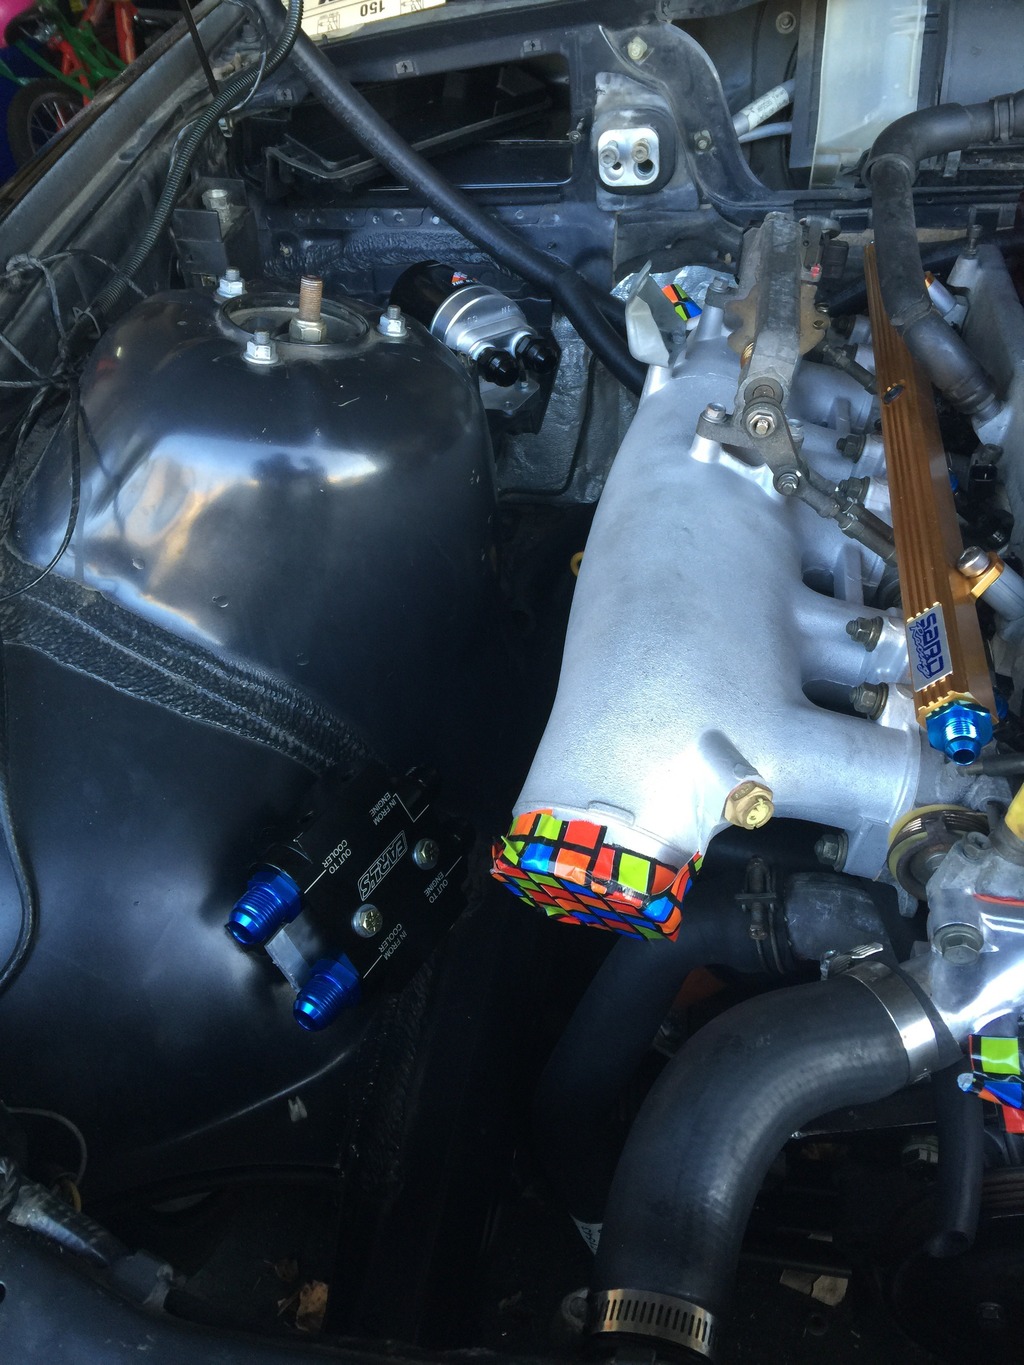
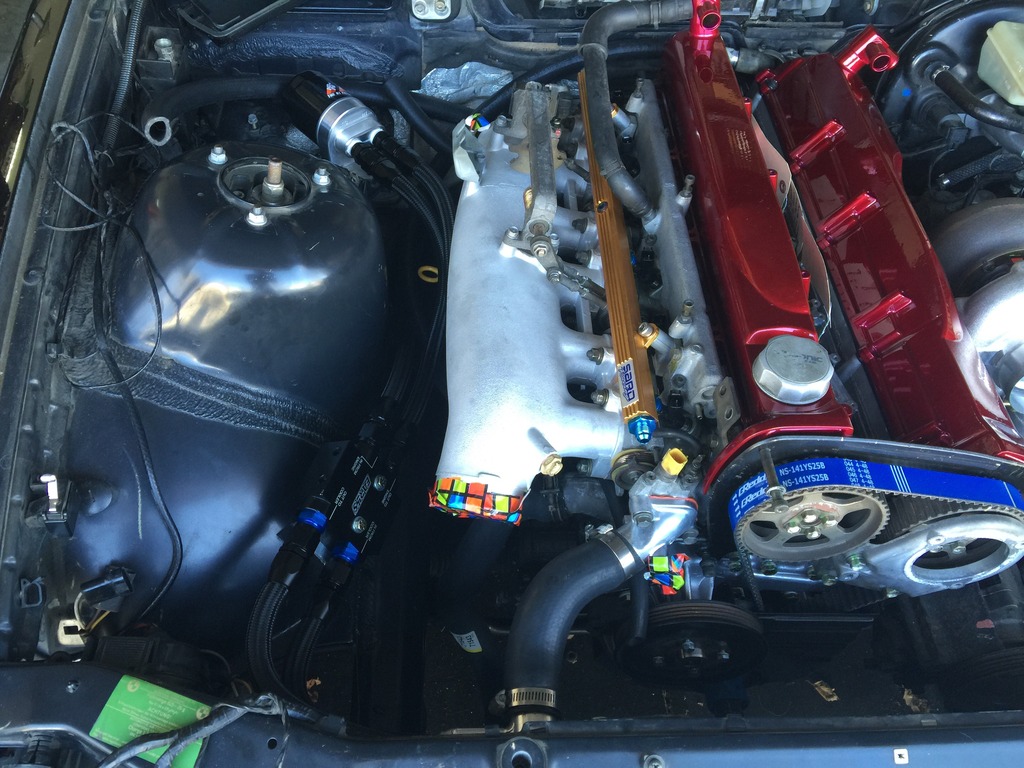
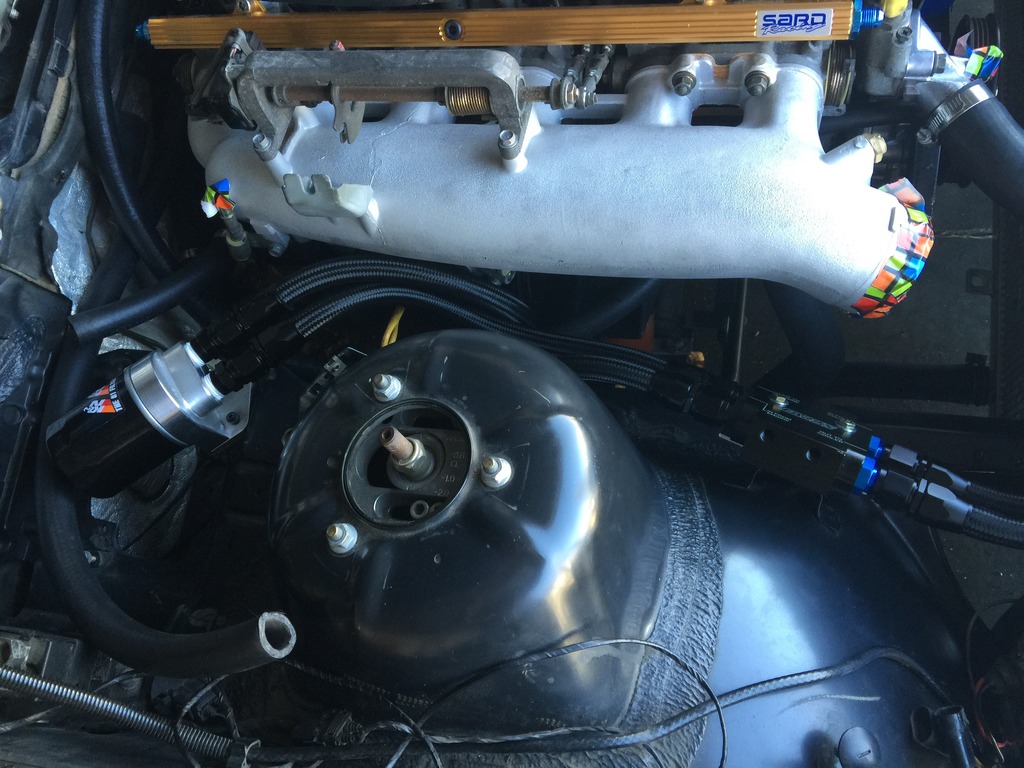
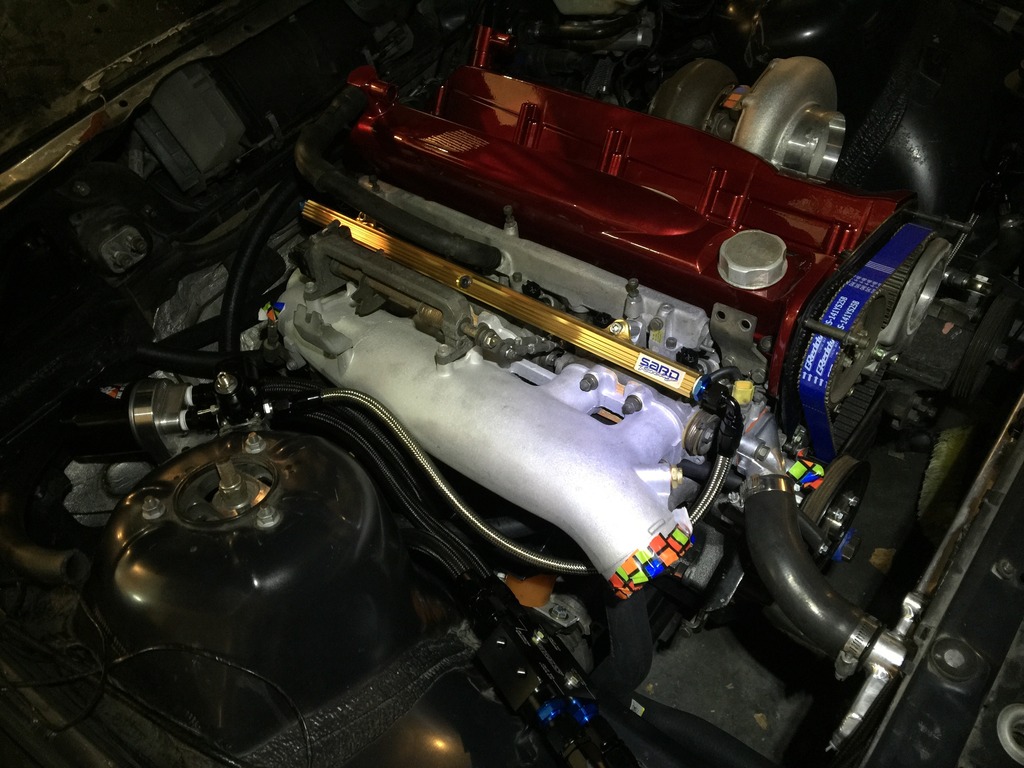
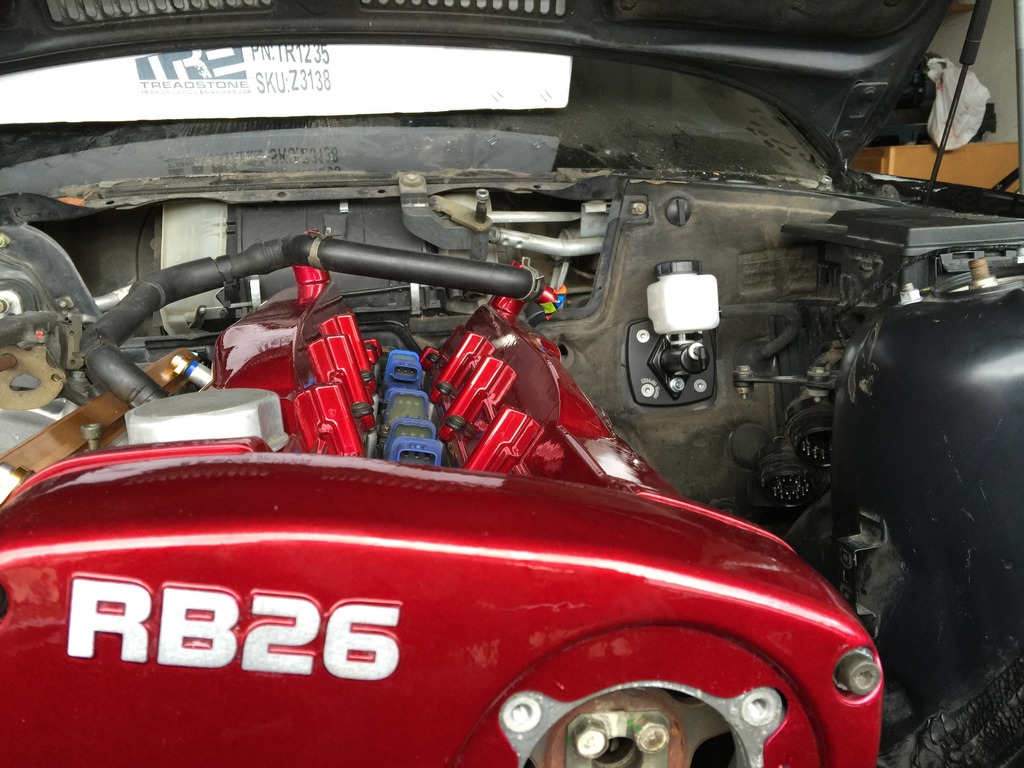
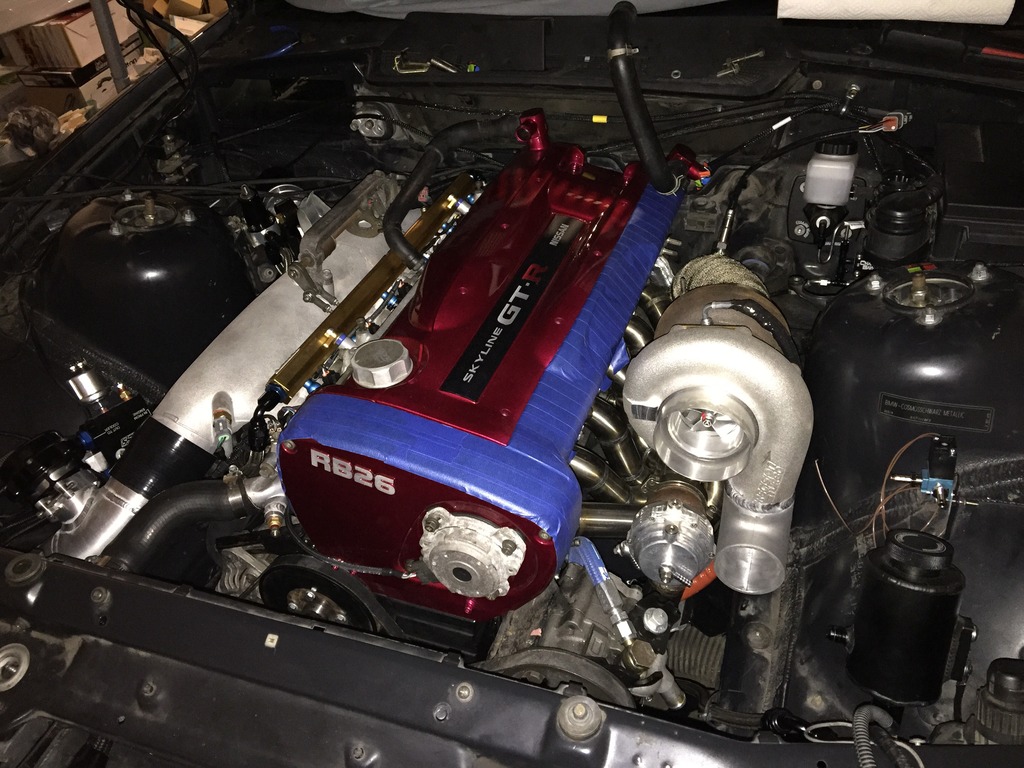
I will post one more engine bay picture for good measure:angel:
I also spent some time finding a solution to mounting the oil cooler. I knew i was going to put it in the kidney bean grills, and ended up just bolting it down to the bumper beam. I will post a picture to explain. I'm not sure of how to route the lines though as it is a tight fit in there. The whole oil cooler set up consists of Earls spin on adapter, Earls Billet remote filter mount, Earls remote oil thermostat, and a Mocal 10 row oil cooler.


I also found a local group here to me that does some nice work. I will let the pictures speak for themselves on the before and after...


I also received a nice package from Wiring Specialties. They are also a nice group of guys that do good work...

Hello again friends. Just a small update. Had time lastnight to fit the new valve cover gaskets, new half moon seals in the rear of the heads, and clean up the pcv baffles a little bit. I loosely placed the covers back on the head and stood back to take a glance.

Ok, I had just a little time to work on the car this weekend. I decided to tackle the oil cooler issue. I listed in a previous thread the parts I was planning on using, but had spent that last week or so deciding where to mount the remote filter mount and where to mount the remote thermostat block. I bought most of the goods from Summit Racing, and chose the brand of Vibrant racing for the fitting and hoses. After dealing with these and Fragola, I would have to say that the Fragola was easier to assemble. After mounting the filter mount, I had to go find a filter that was a good fit for it. I brought the Earls part with me to walmart and tried many different filters, but ended up going with the K&N PS1002. I know that i will have to drop the oil and change this filter after running the motor for the first time. Anyway, On to a couple pictures. The black lines are a little tough to see, but I think you will get the point....


I also spent just a little time trying a location for the FPR and ran my first line from the rail. I ran out of daylight and had to stop before making any more progress....

Hello again all. Long time no see. Today was one of those days for me that I am sure we all have had. Ever had one of those work days where you are in the garage all day, but you feel like you got not much done at all? In all reality, alot got done, but not as much as I had wanted. I decided to spend some time on the fuel lines.
I went back and forth on the idea of keeping rubber fuel lines, with barbed fitting on the rail and the FPR. At the end of the day, I decided to go with stainless braided lines due to the Sard rail coming with 6an fittings, and the Fuelab filter having -6an fittings on the ends. So then I came to the problem of how and at what point I should convert from the hardlines to the braided lines. On previous builds I cut, and double flared the hardline to convert. I have read now there are compression fitting for this job. I decided to give them a shot. Worst case would be to take them off if they do not work, then flare the old way.
Will start the picture by showing what I started with....

And here is the OEM BMW FPR set up.....

Here is a side by side of the OEM filter and the Fuelab.....

Here is the first compression fitting I attempted to install. Keep in mind the picture does not show the finished product. I will still find a way to mount the line in the OEM bracket.....


I didnt have much time to run the return line from the regulator. I actually realized that I was missing one more fitting. I need one more -6an hose union to finish the fuel return..... but will show off the lines i did have time to assemble

I will post one more engine bay picture for good measure:angel:
 07-01-2016, 06:17 AM
#3
Another very small update for you all this past weekend. I have not been able to make a ton of good progress due to unfortunately coming down with an illness, and waiting on some packages.
I did get a Small package from Japan though. Nothing that was a huge surprise, but still took forever to get here.
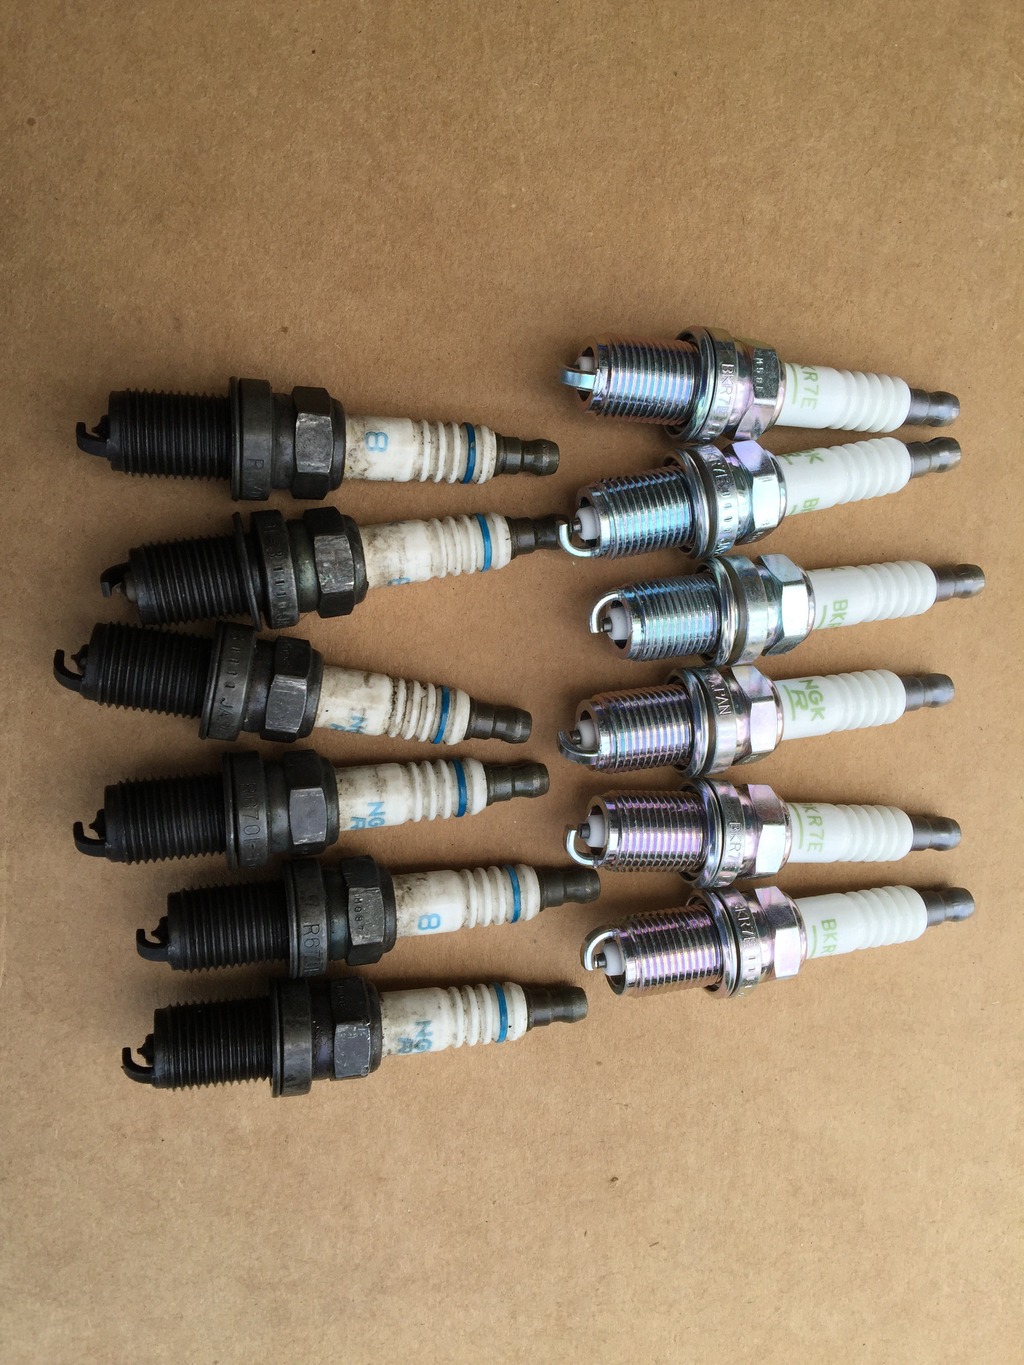
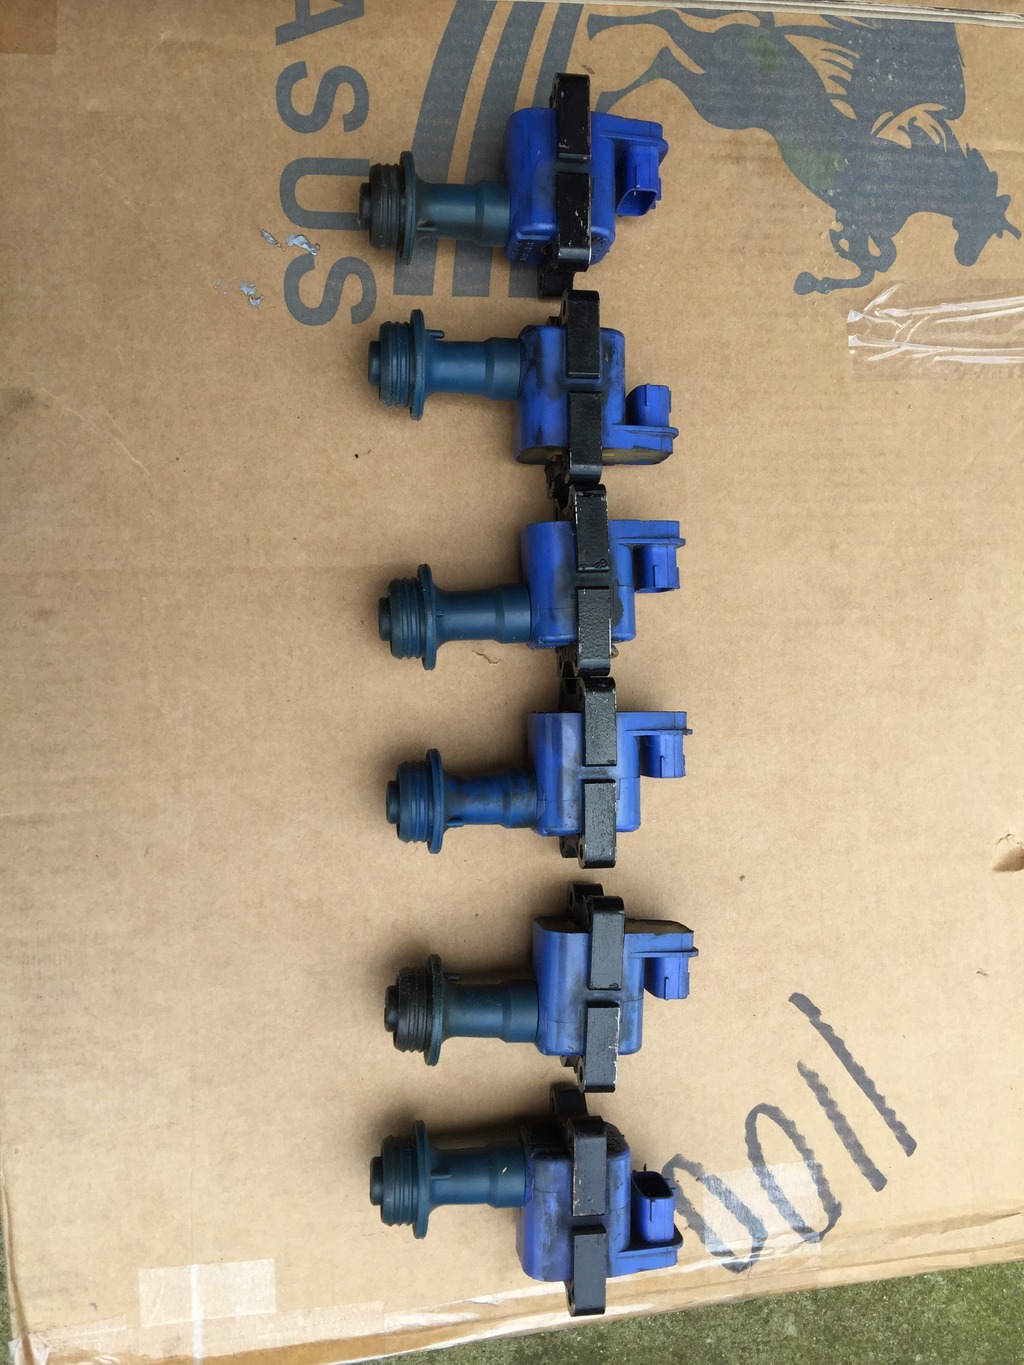
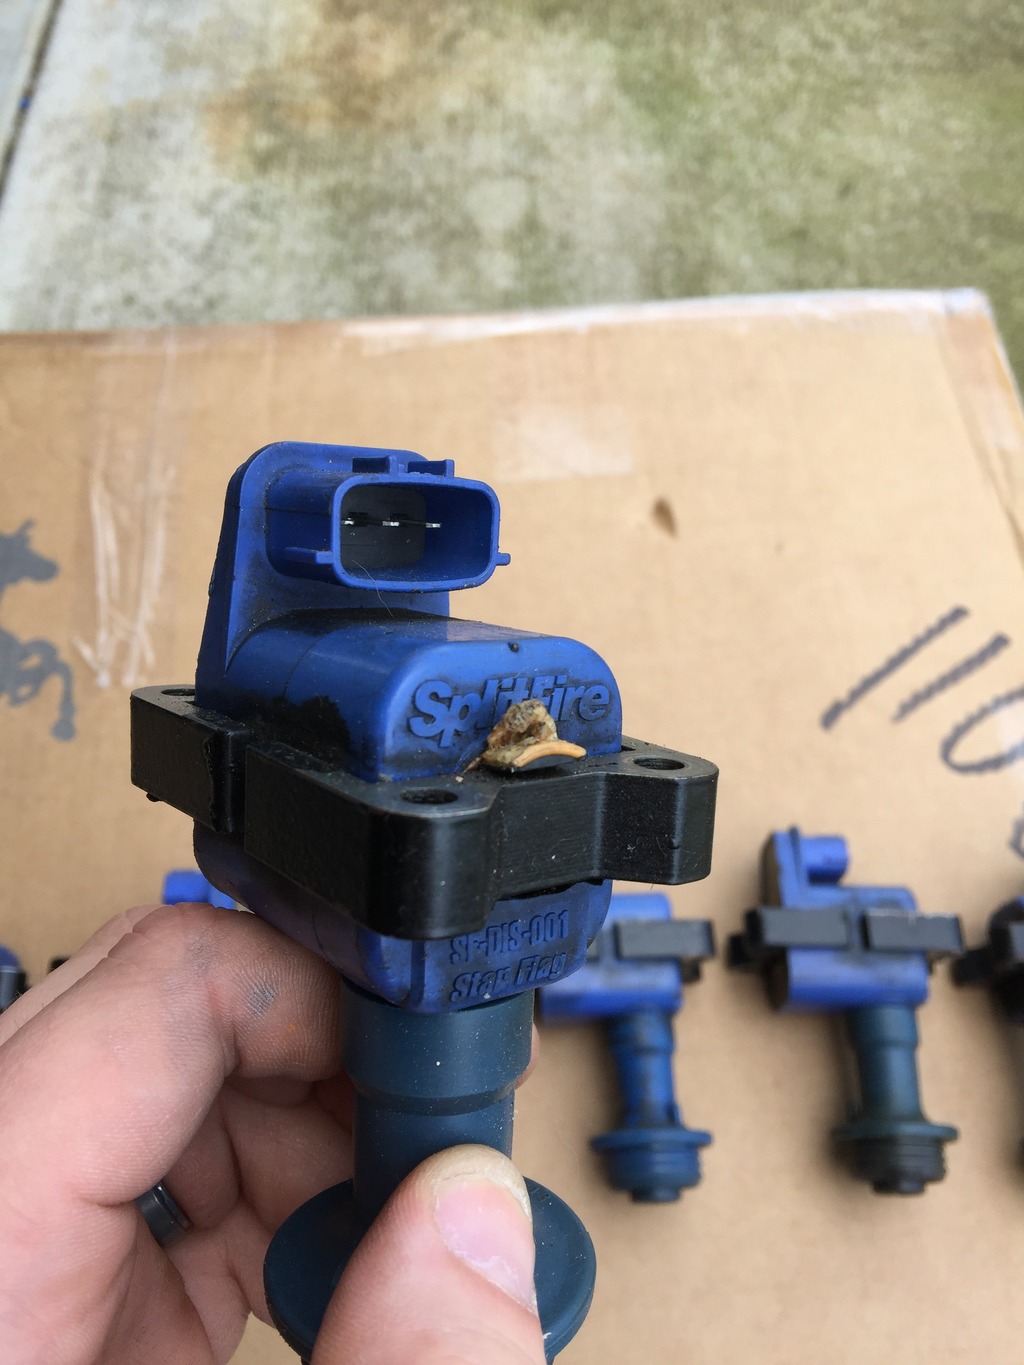
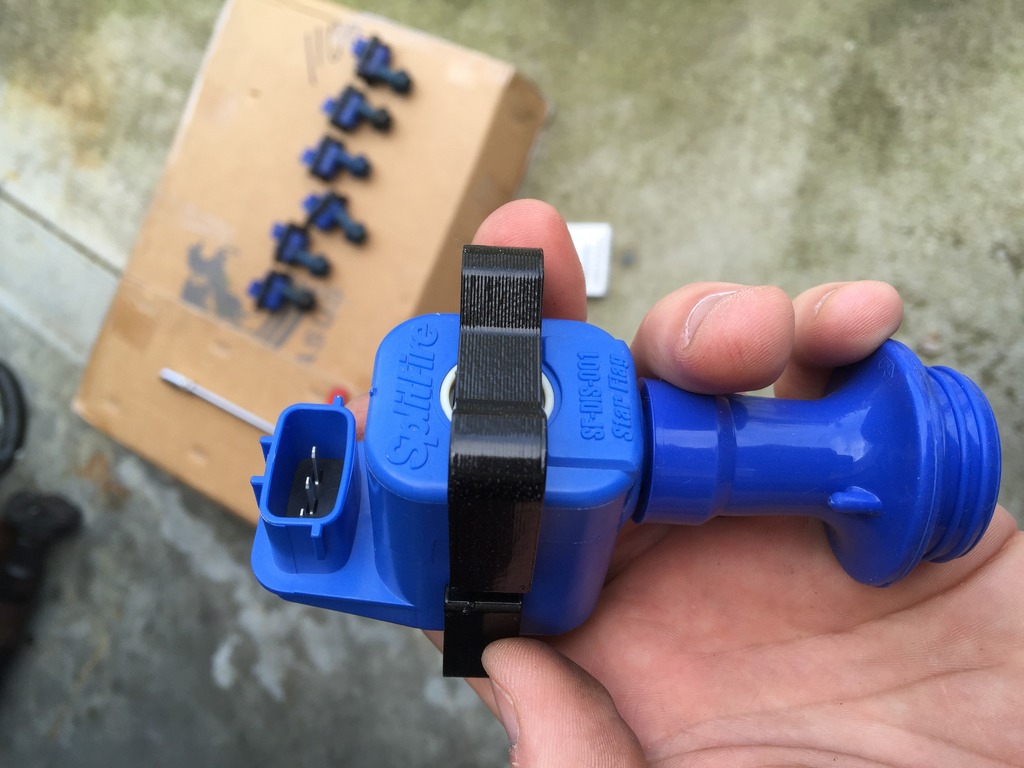
When I bought my swap, it came with a set of Splitfire coilpacks. I was pretty pumped as it was a surprise under the coil cover. upon inspection though, I found that one of the **** out its guts and was of no use. This left me with 5 that were still usable. there were only a couple companies that sold a single pack and cost an arm and a leg, but didnt see another option, unless I wanted to go back to 20 year old OEM coils. I also decided to take the time to put fresh NGK sparkplugs in. I went to a plug that was one step colder for future goals.....
Will update again once packages start arriving this week.
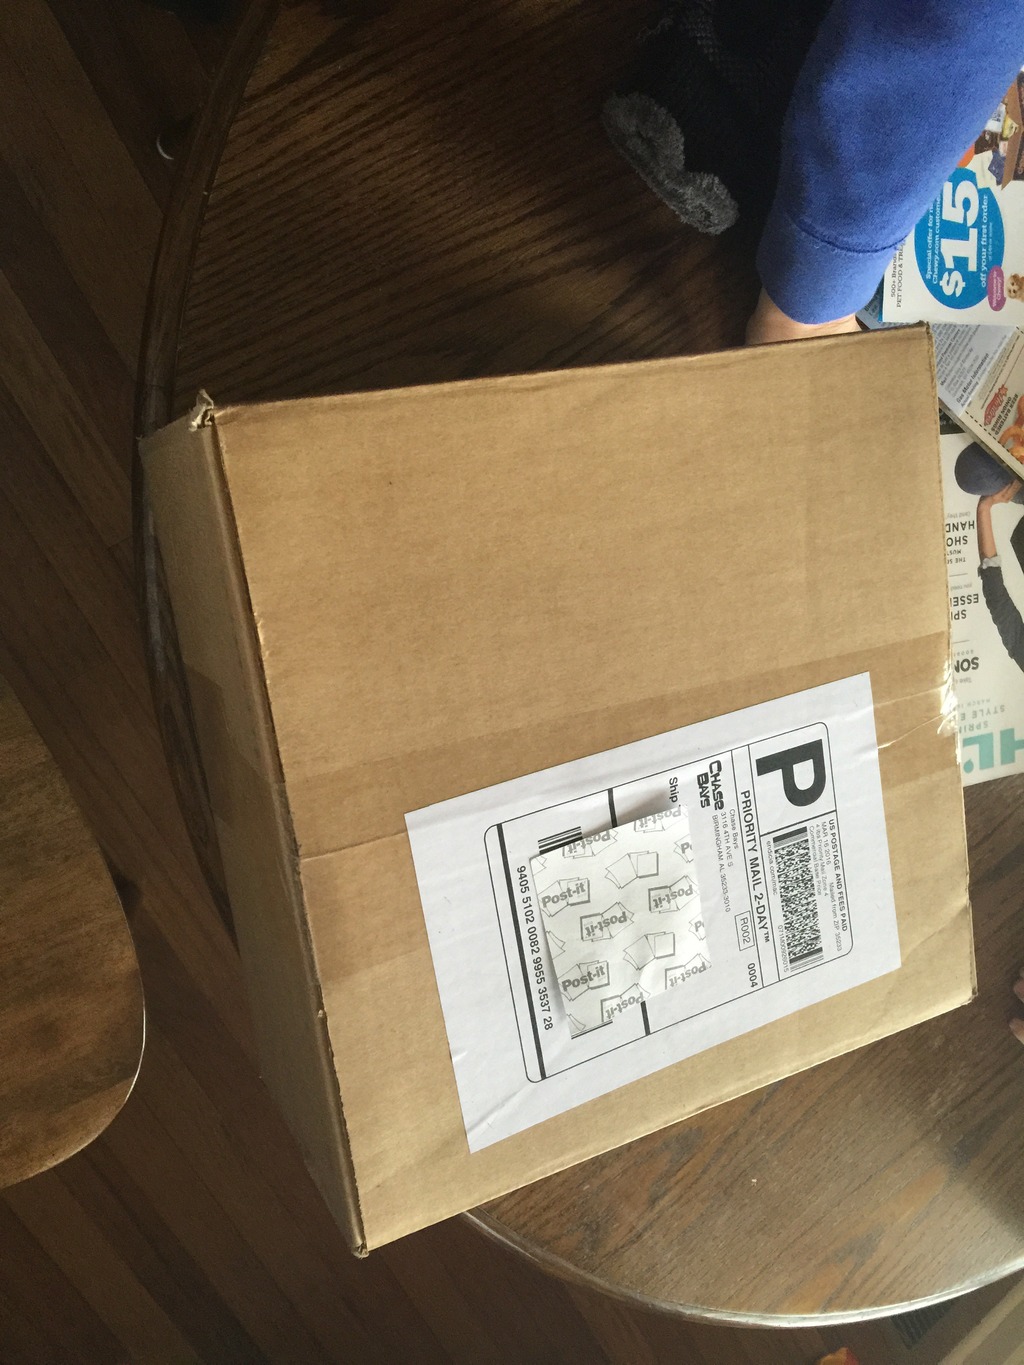
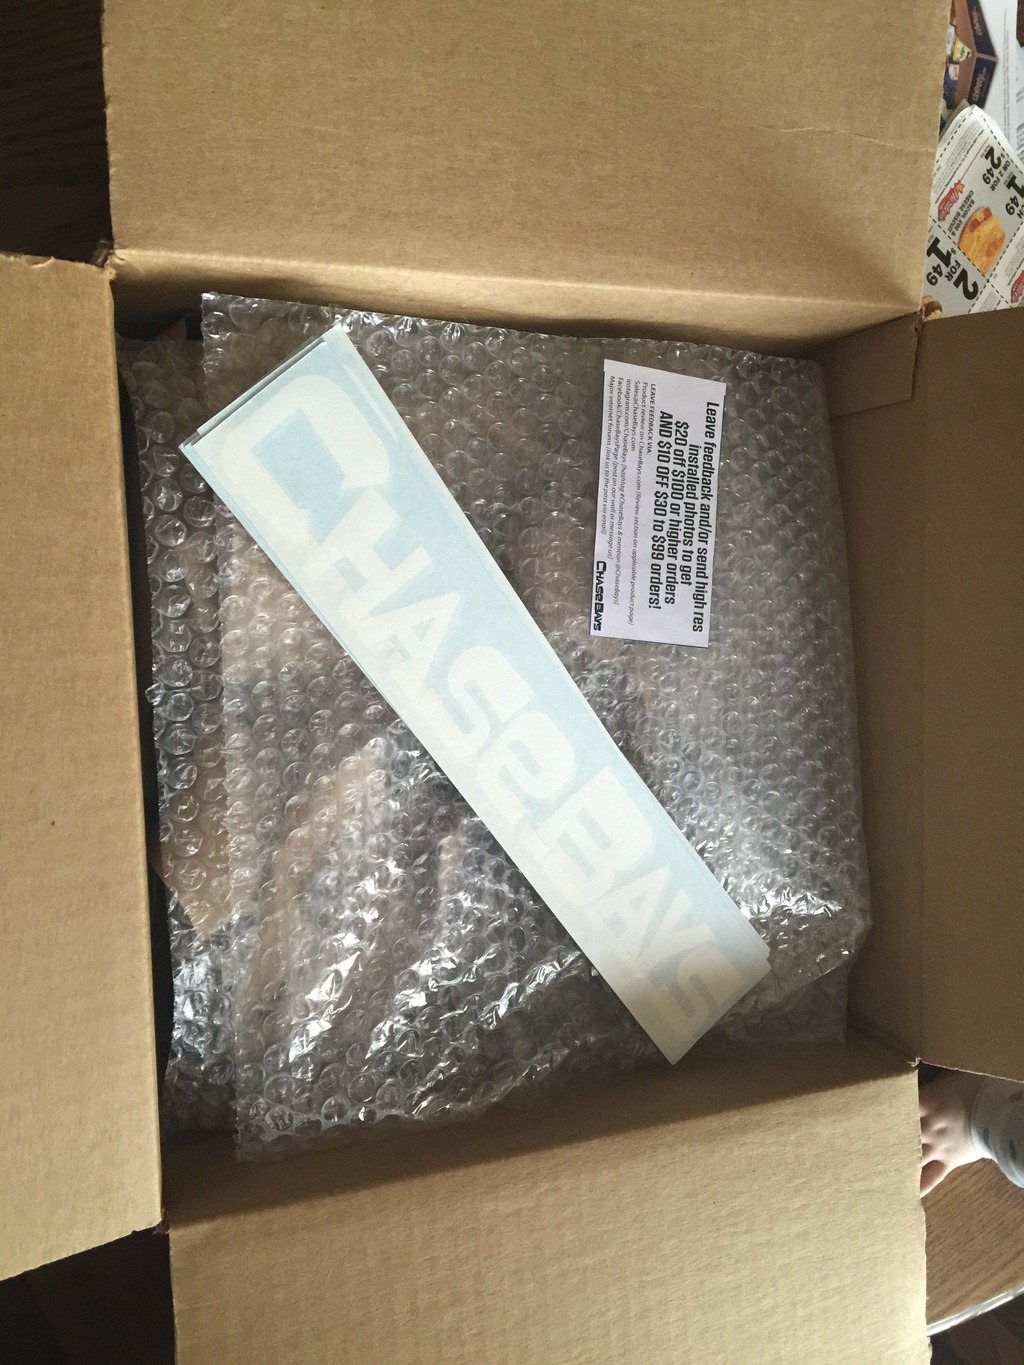
Hello again guys. I received another package in the mail today, this time being from the great guys at Chase bays..... :2f2f:
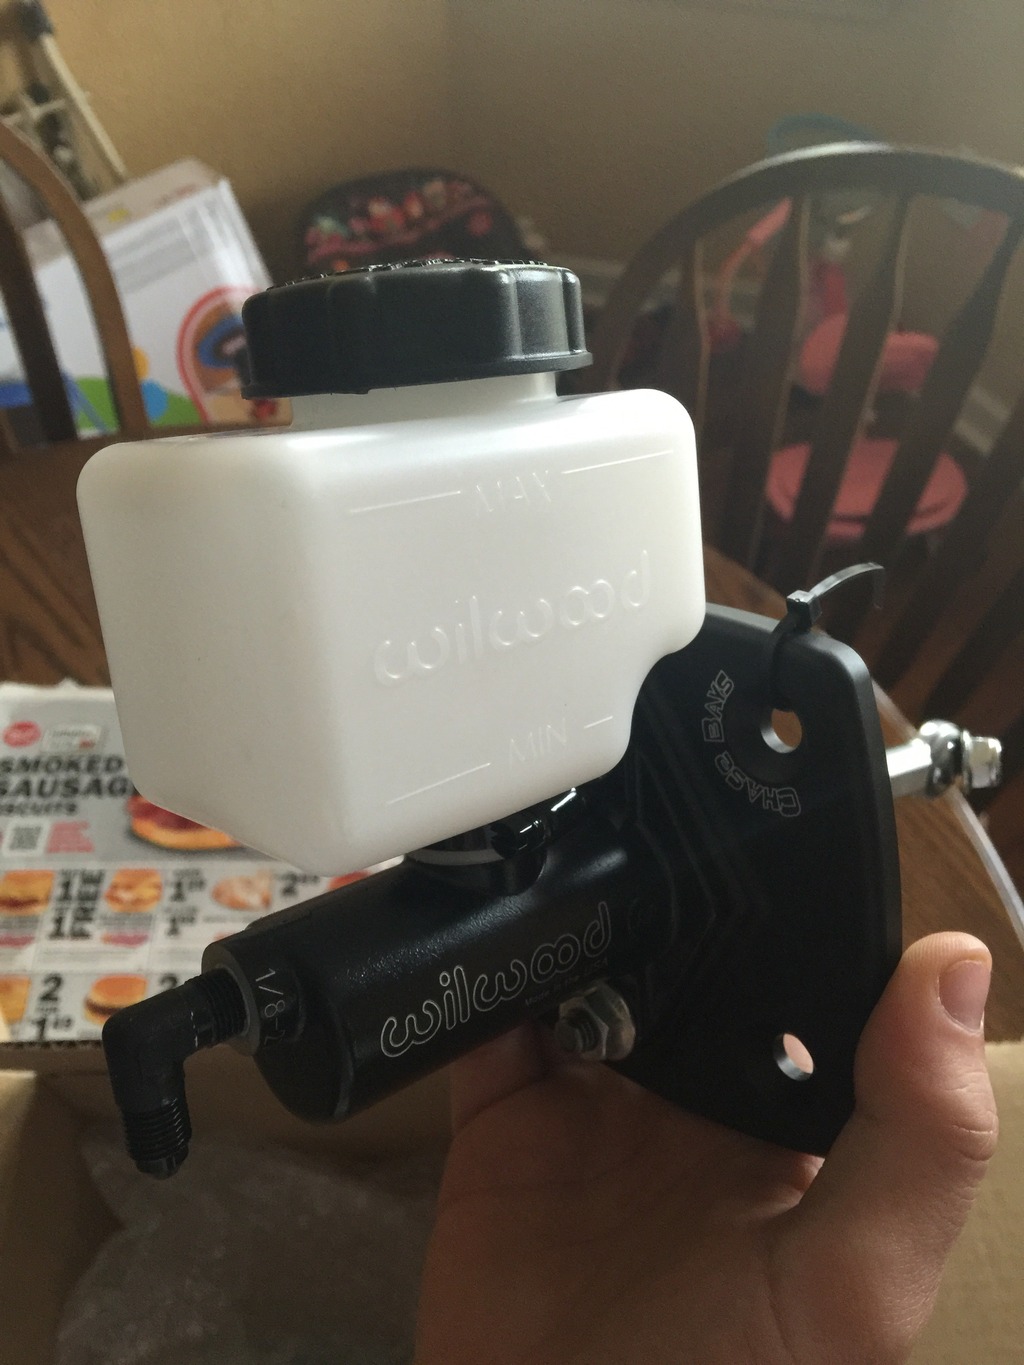
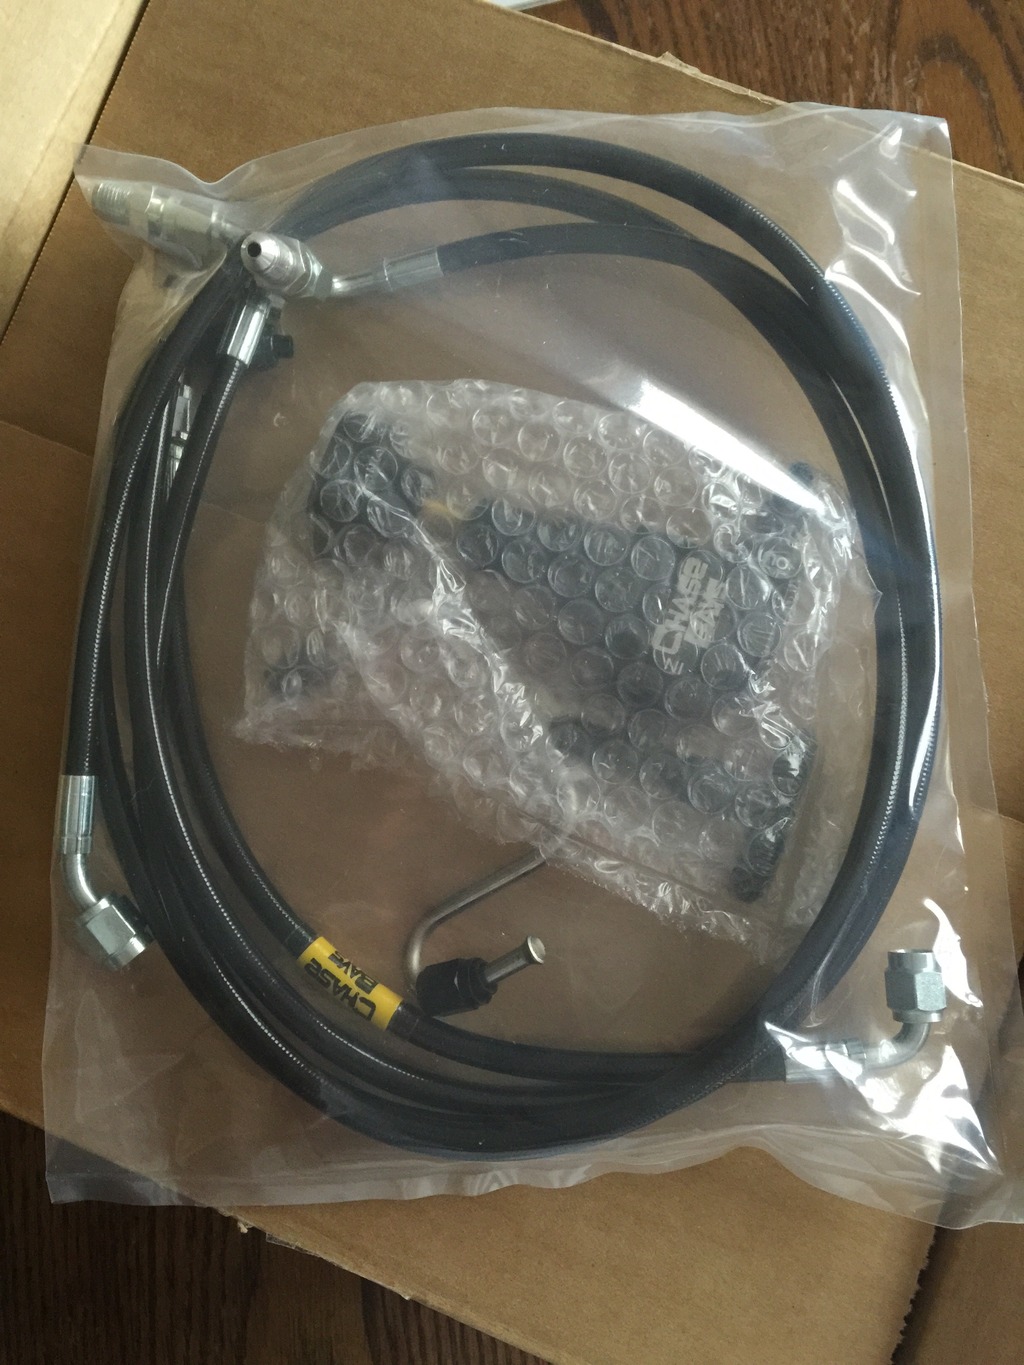
You might be asking, what might this be?...... I chose to purchase an item that seems to be seen as skeptical in the BMW world. I decide to purchase the entire ABS/brake booster delete from this group. A lot of people question this modification due to the effect it will have on braking performance, but Chase Bays claims to have sized the Wilwood Master cylinder just right to not have much difference in braking performance. I decided to go with this modification for the sole purpose of space needed to generate a down pipe for my swap. I also purchased the bias valve and brake lines to make it a complete package....
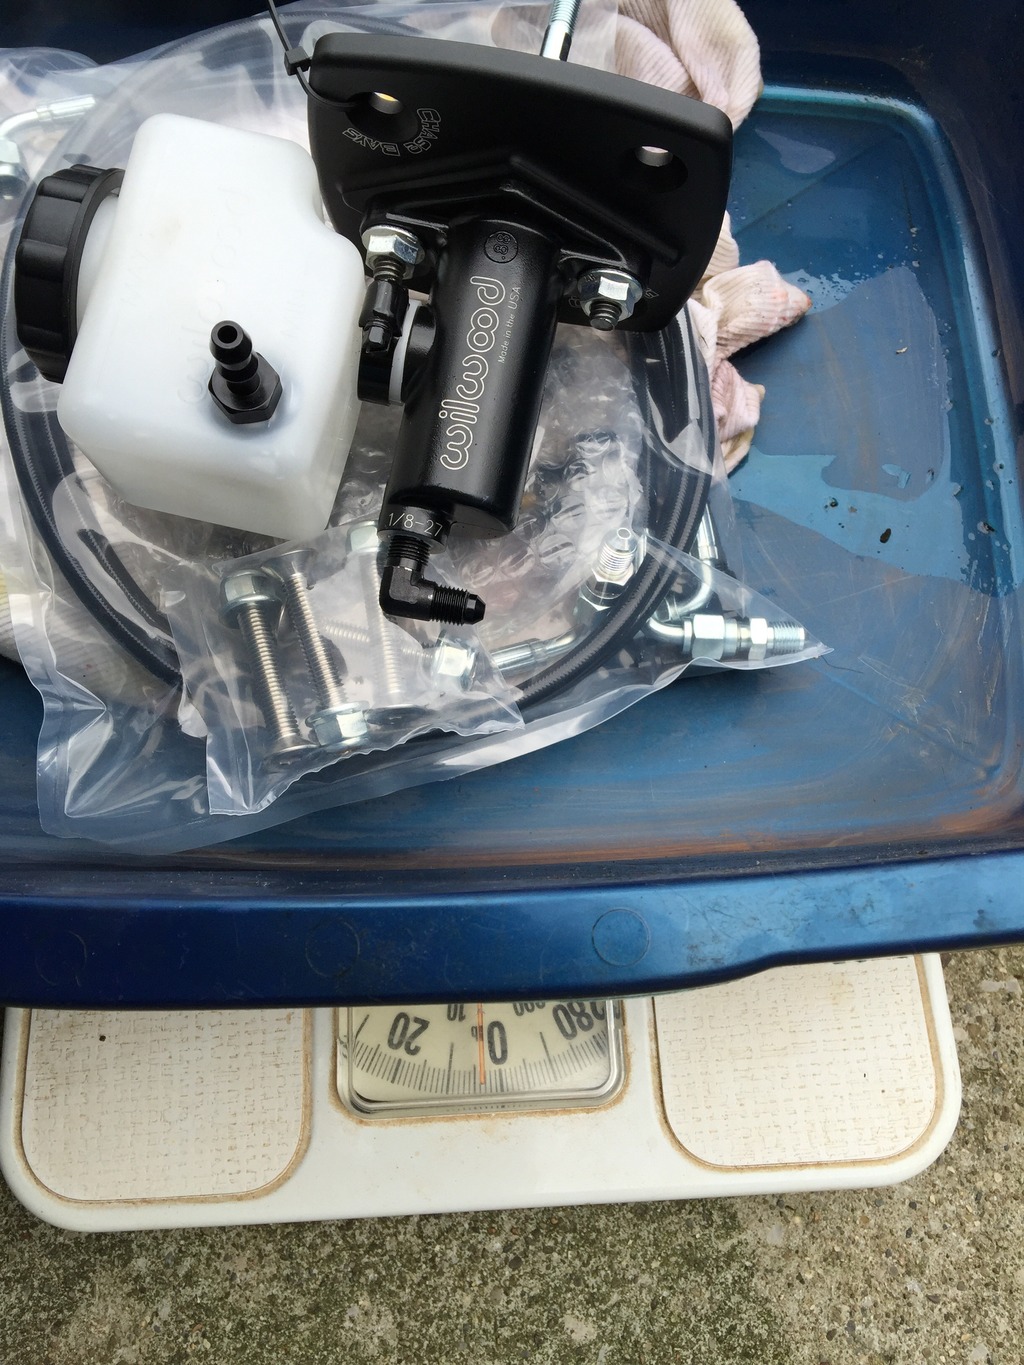
I also decided to weigh in the difference between the setups just for reference for anyone that may be interested. Along with the space this kit saves, and the visual appearance, It also saves around 16 pounds for those hardcore weight savings people out there.... Pictures for proof.....
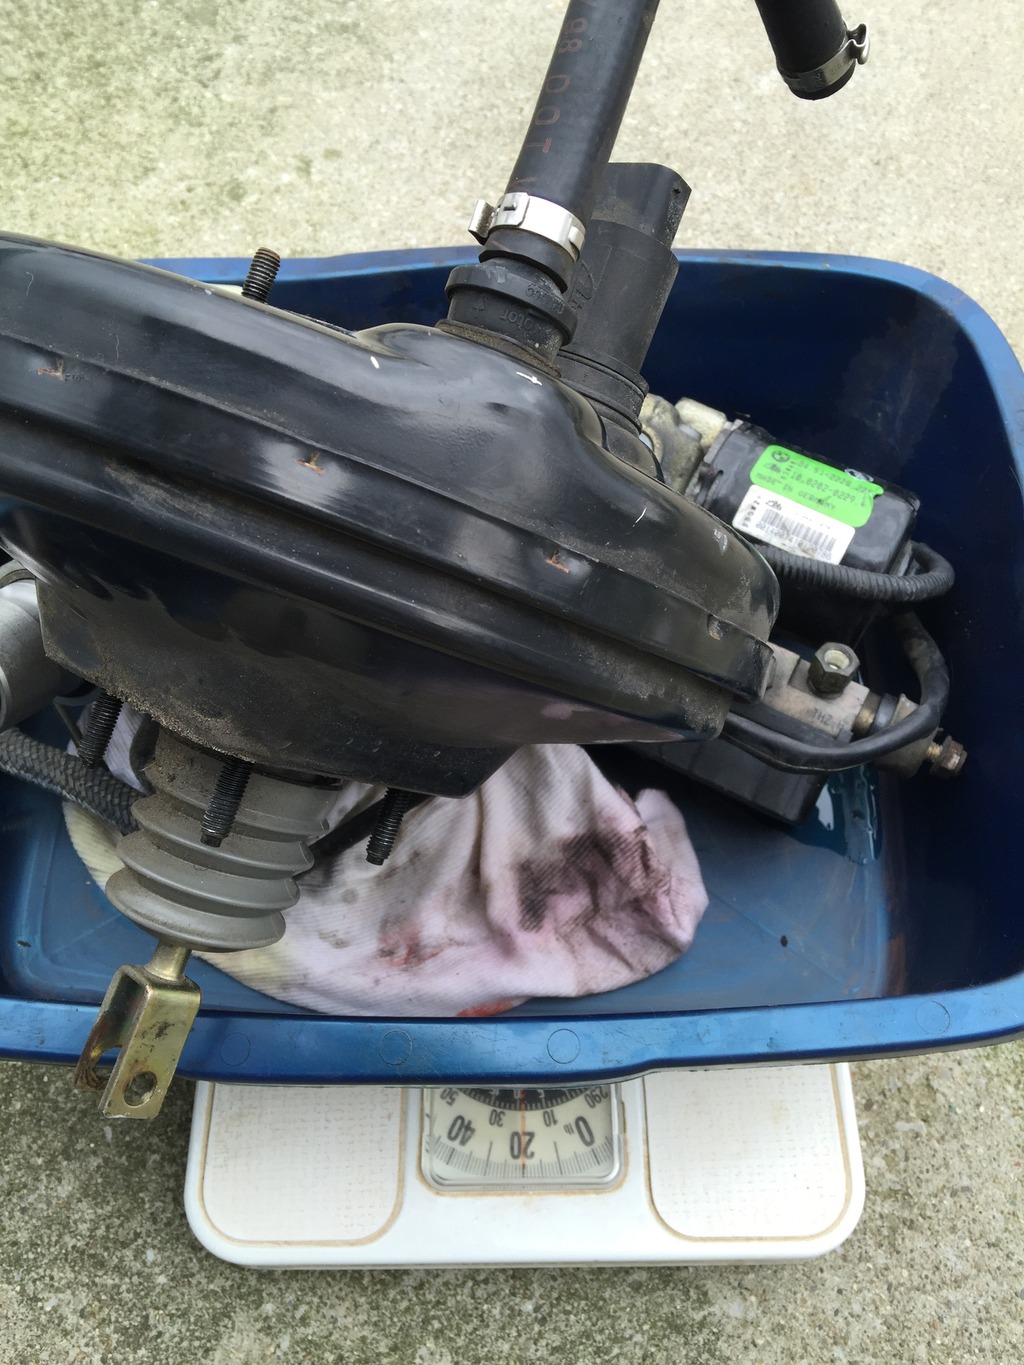
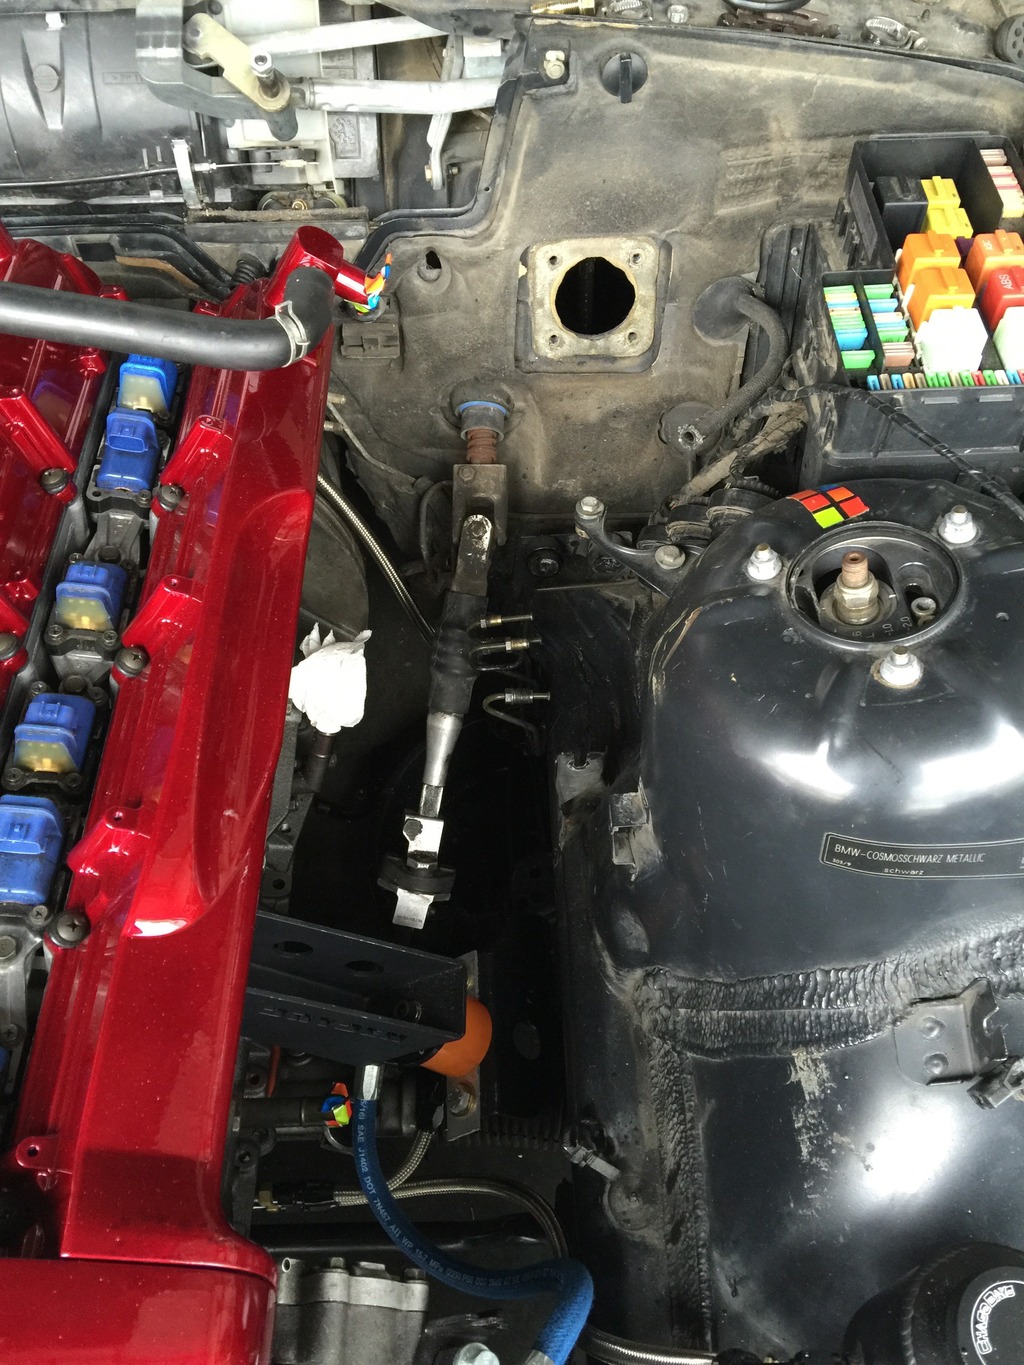
I have posted pictures previously of what the OEM setup looked like and how crowded it made the drivers side engine bay look. Here is a picture of what that area looks like with the OEM setup taken out. BTW, it was a BI@$% to lay under the dash on the interior and work to remove connections.....
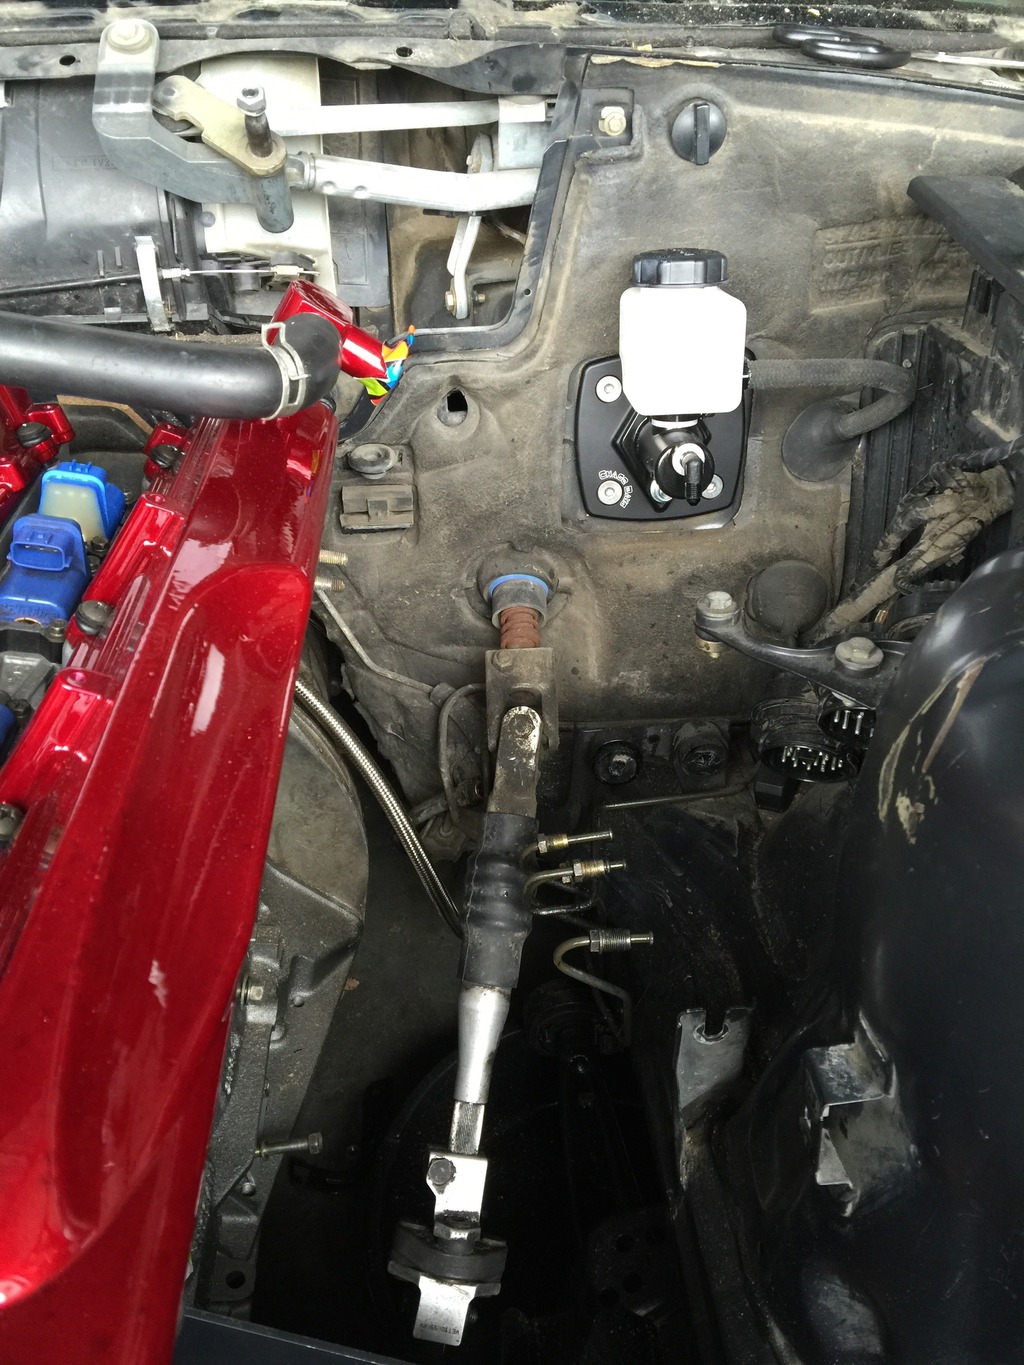
I got as far as I could with the install today. I came to a stopping point as the package i received from Chase Bays did not include a small bracket that it should have so that I could connect the Bias valve to the master cylinder. So I only got a chance to mount the booster delete plate and the master cylinder today.
The kit i purchased also came with a new feed hose for the OEM clutch master cylinder. I decided to use the OEM feed line as it fit perfect on the bulkhead fitting i attached to the Wilwood reservoir. I also came to this conclusion due to having to remove the entire pedal assembly just to get to the clutch master cylinder. A lot of work saved just by using the OEM feed line. Anyway, here are some pictures....
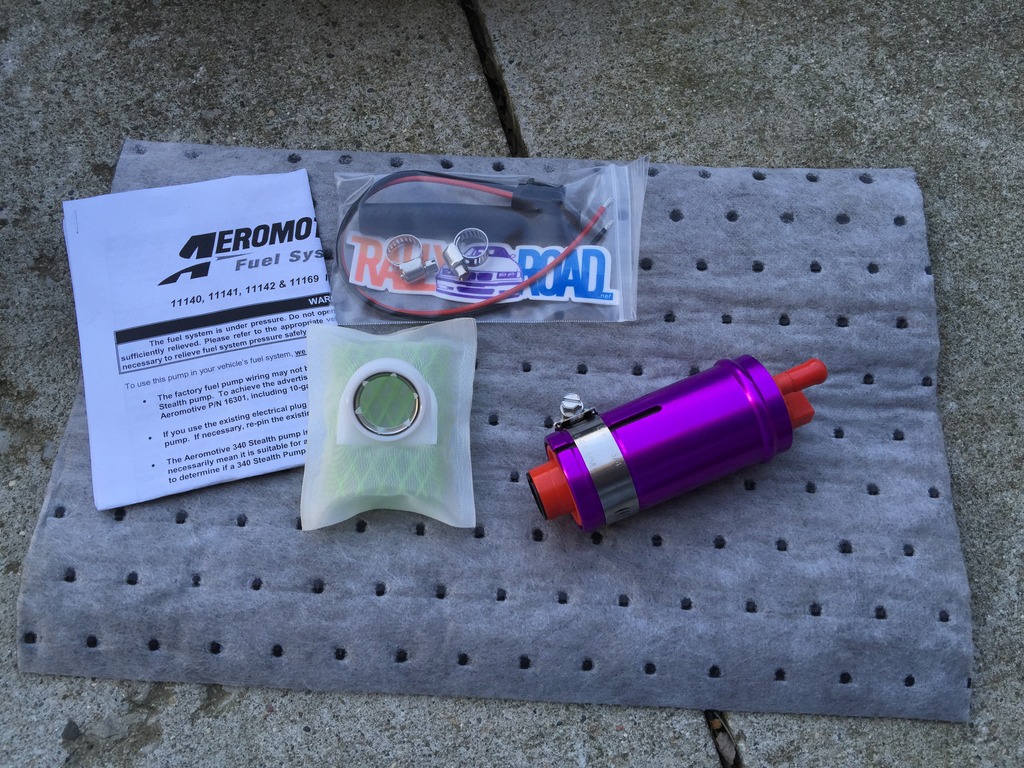
Another small update for you all. I finally decided to take some time to tackle the fuel pump. I knew the OEM BMW pump would not support my goals using the 1000cc injectors and planning for around 20psi. I also didn't want to do anything crazy like a standalone fuel cell.
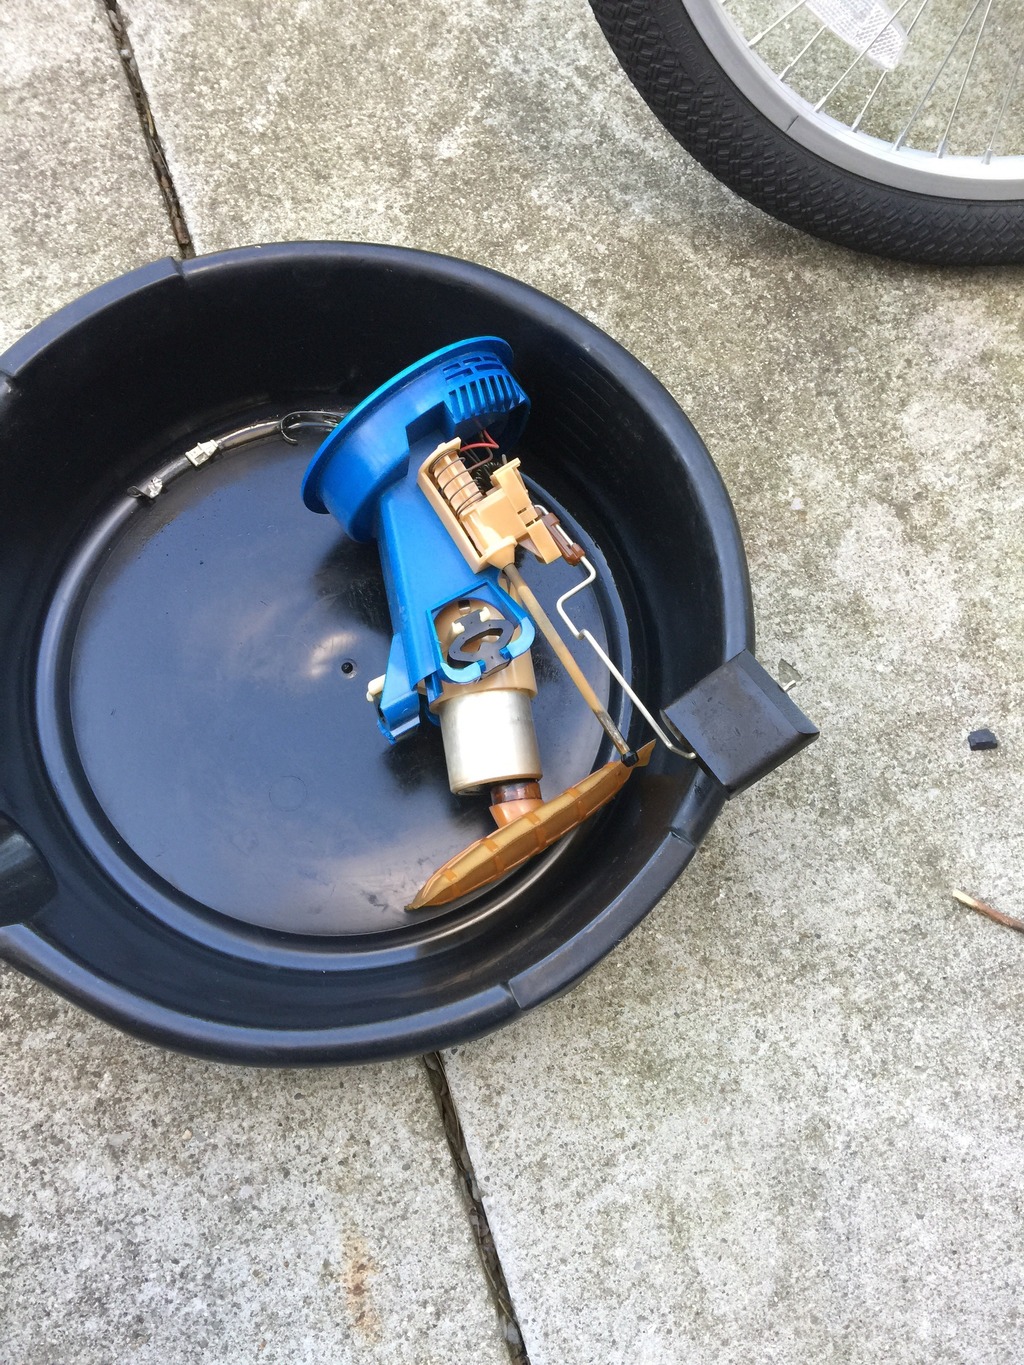
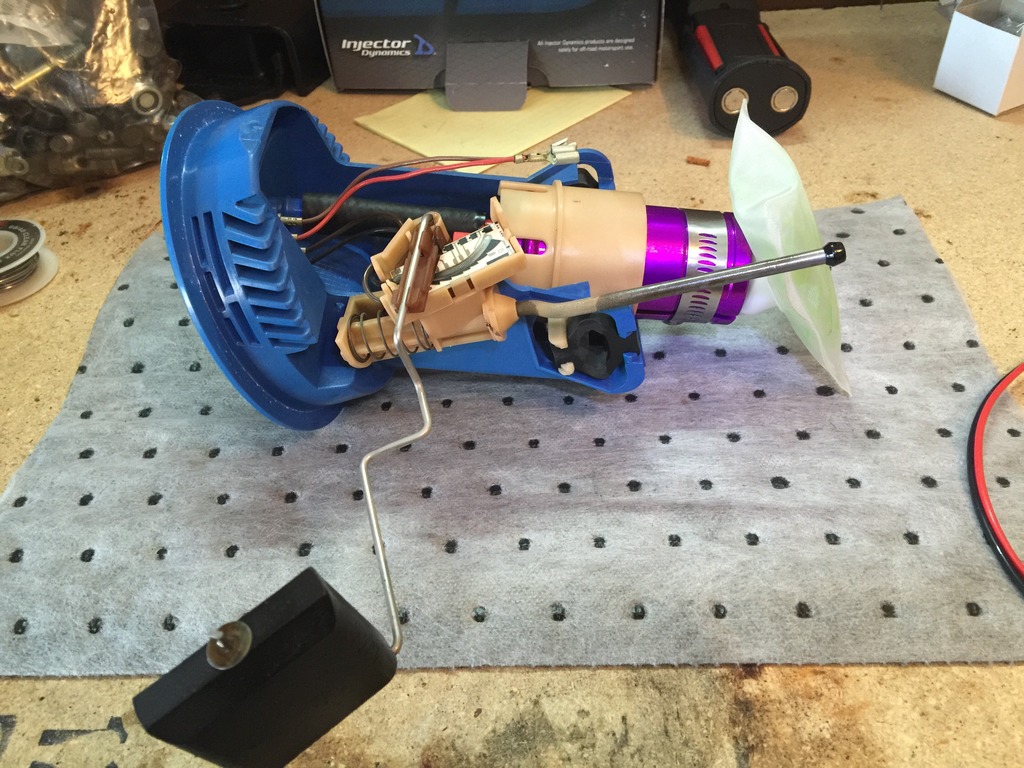
I decided to call upon a group called Rally Road that machined and install sleeve to make many after market pumps a drop in affair. I opted to pay a little more money and got the Aeromotive 345lph. I have read these pumps can support pretty big numbers when using 93 octane. Here is what the kit came with.....
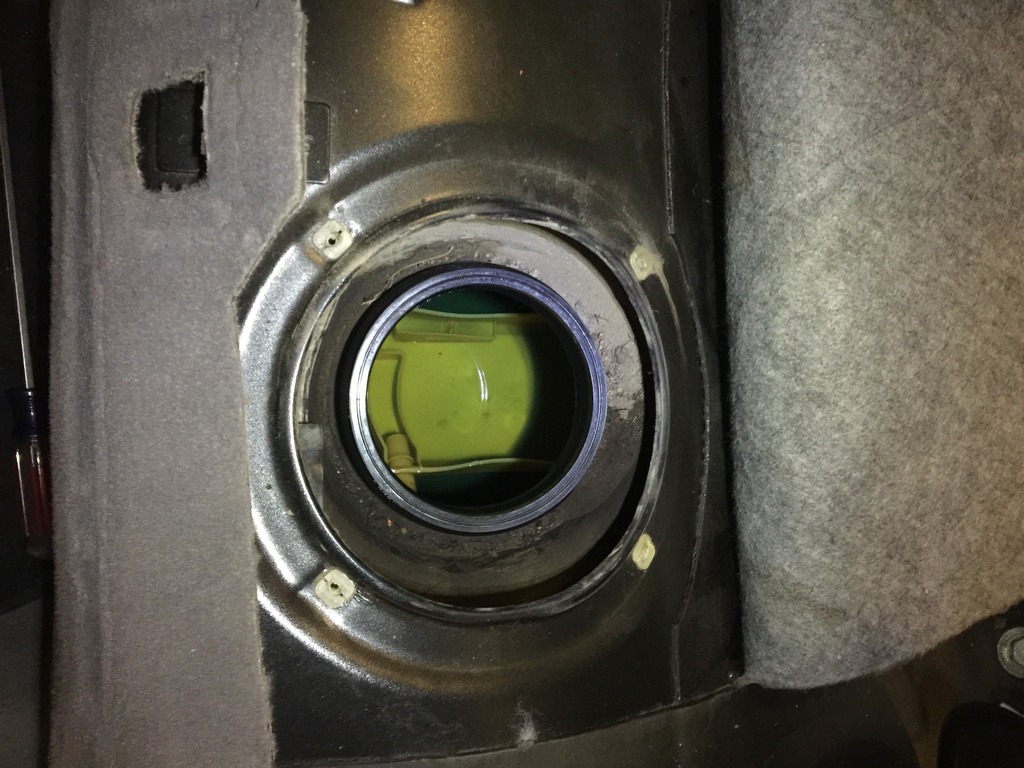
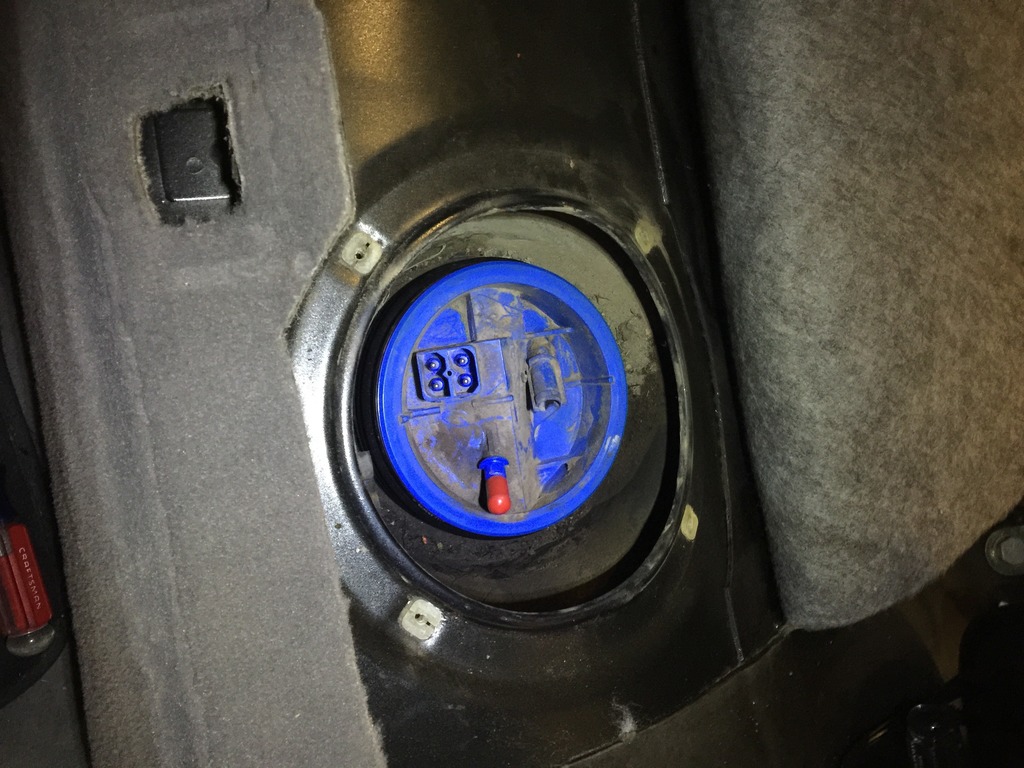
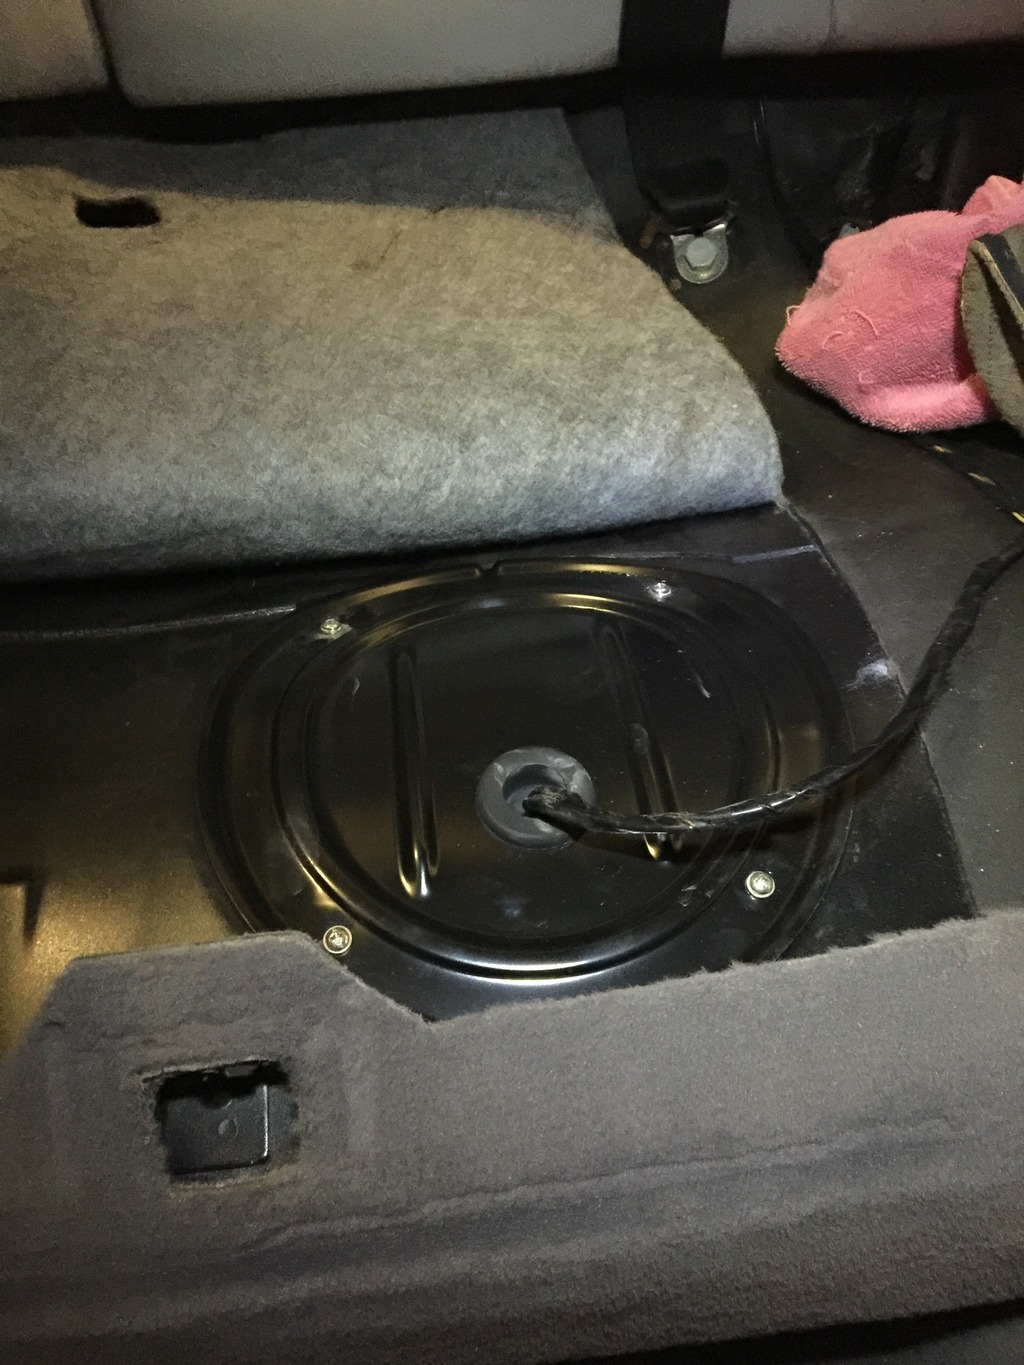
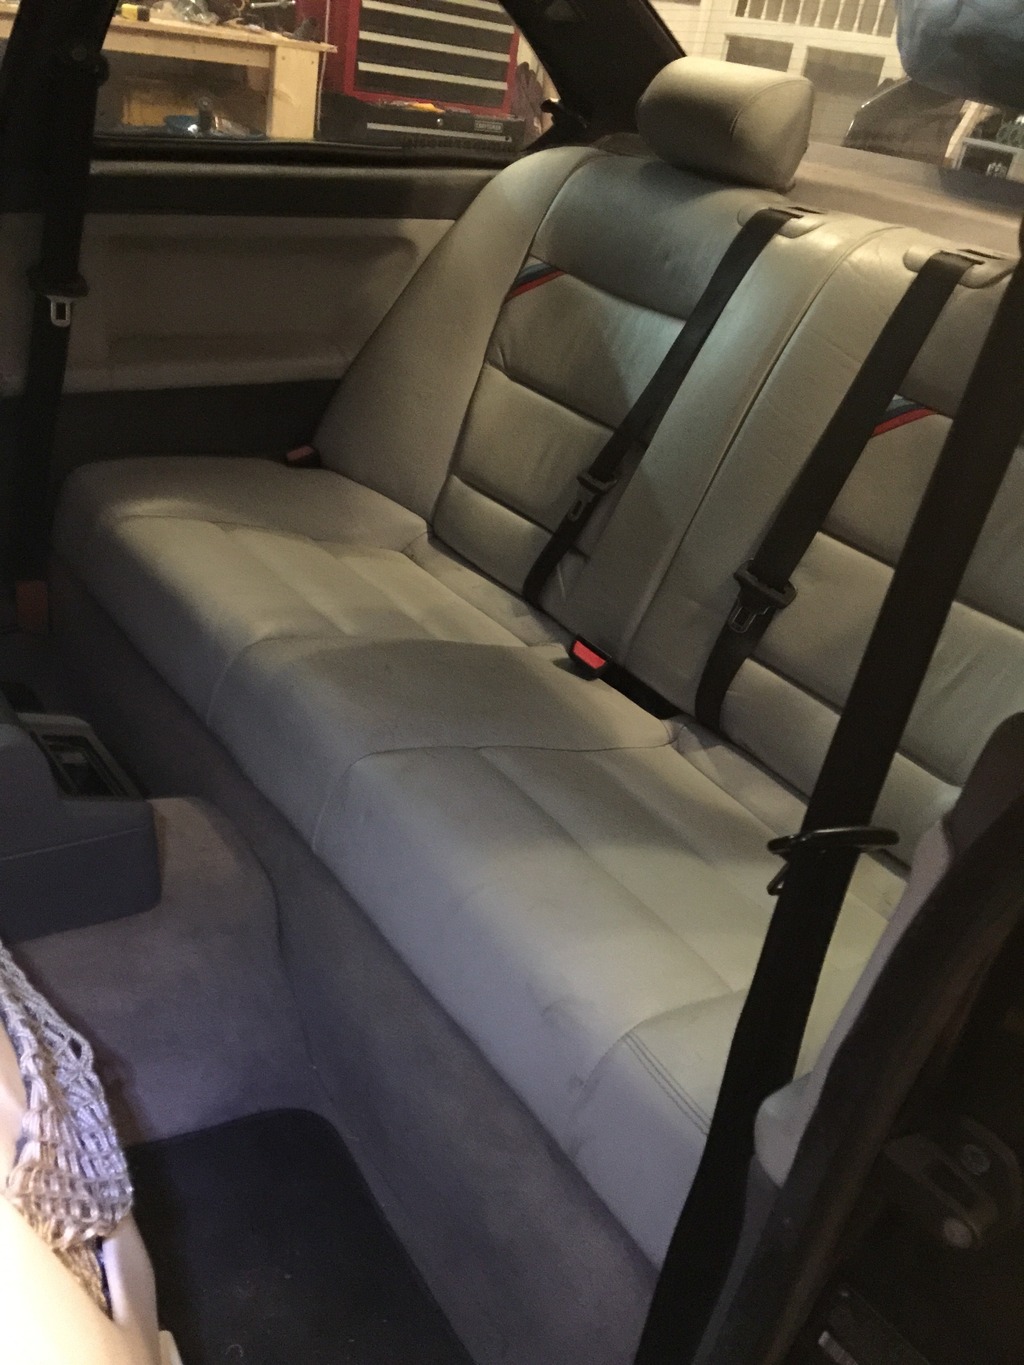
I didn't get alot of picture when taking it apart, but its pretty straight forward. I was actually surprised how easy it was to remove the rear seat and gain access to the fuel pump assembly. I did take some pictures as I put it back together. I did make sure to shop vac alot of gunk that had built up on top of the assemblies. I also would like to note, I opted to connect the wiring the correct way by soldering and heat shrink the connections. You can see this if you look at the pictures close.

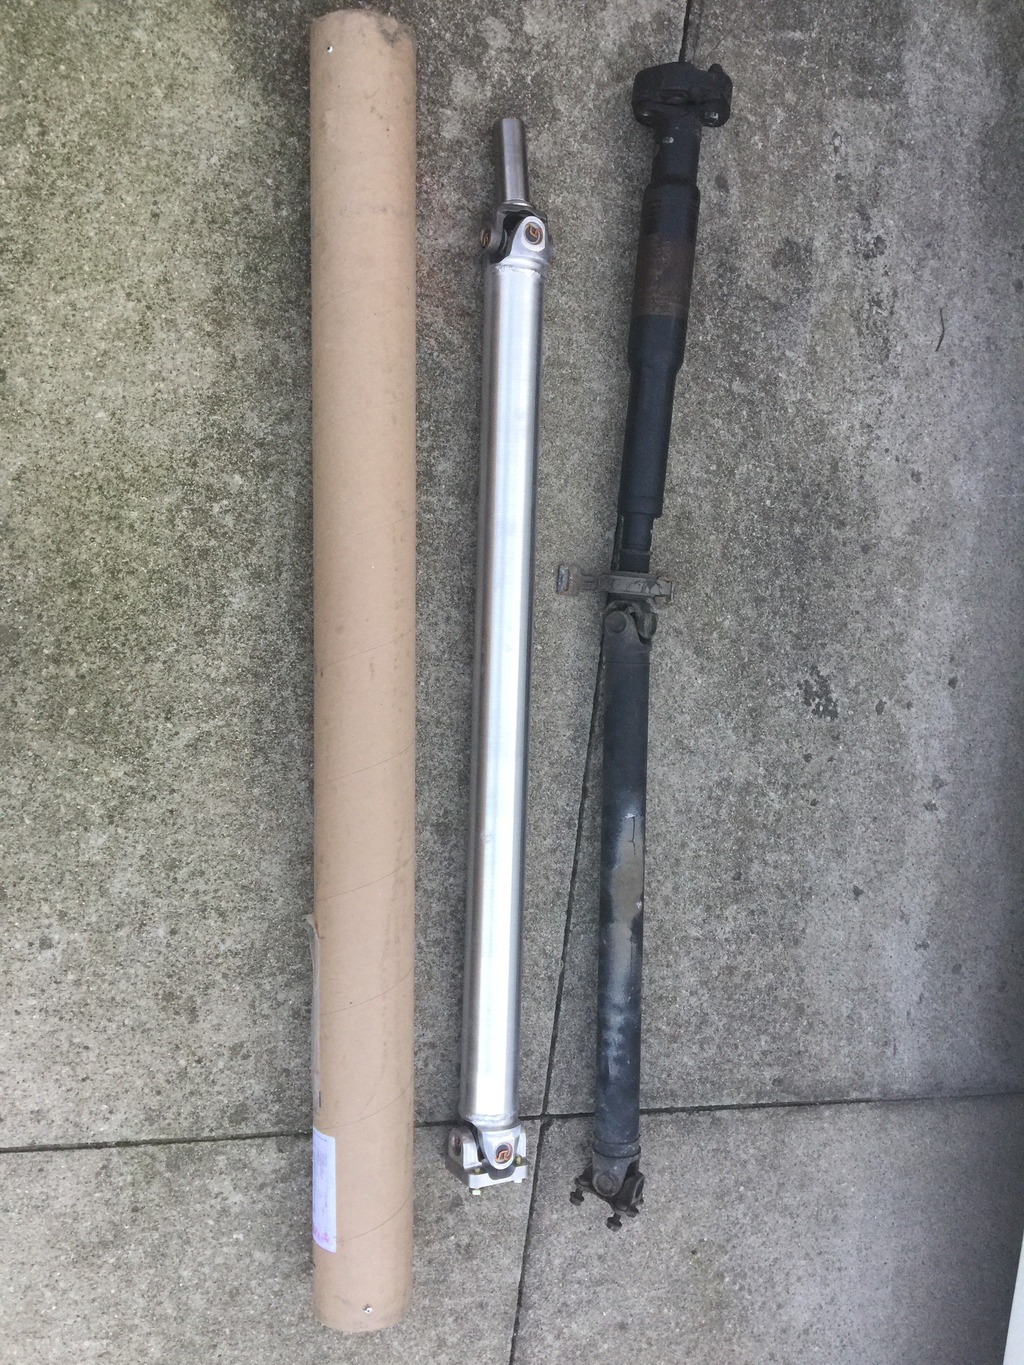
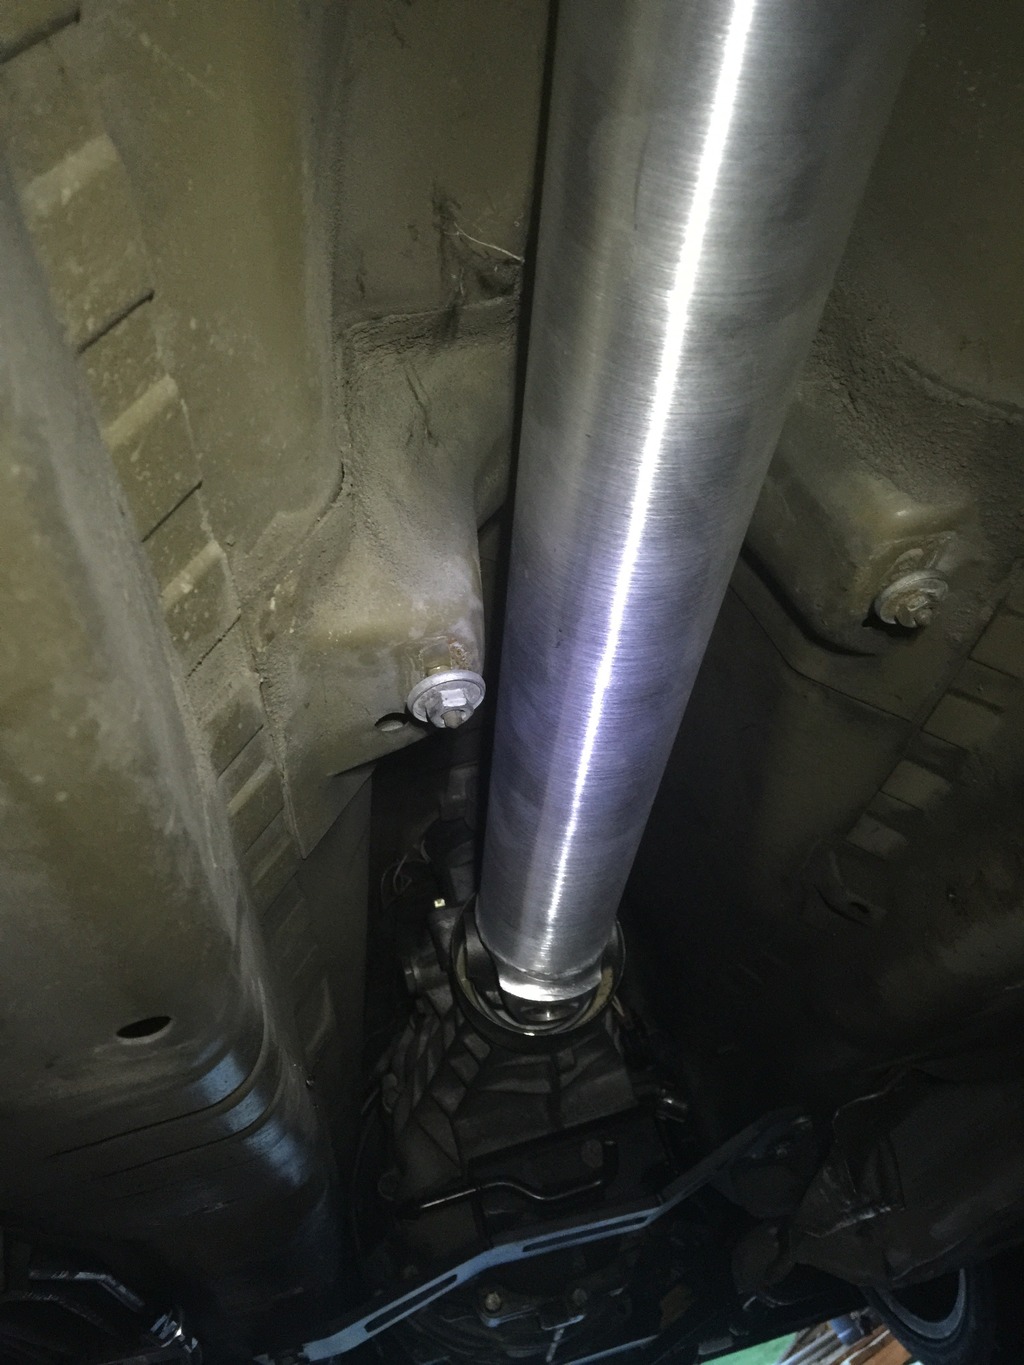
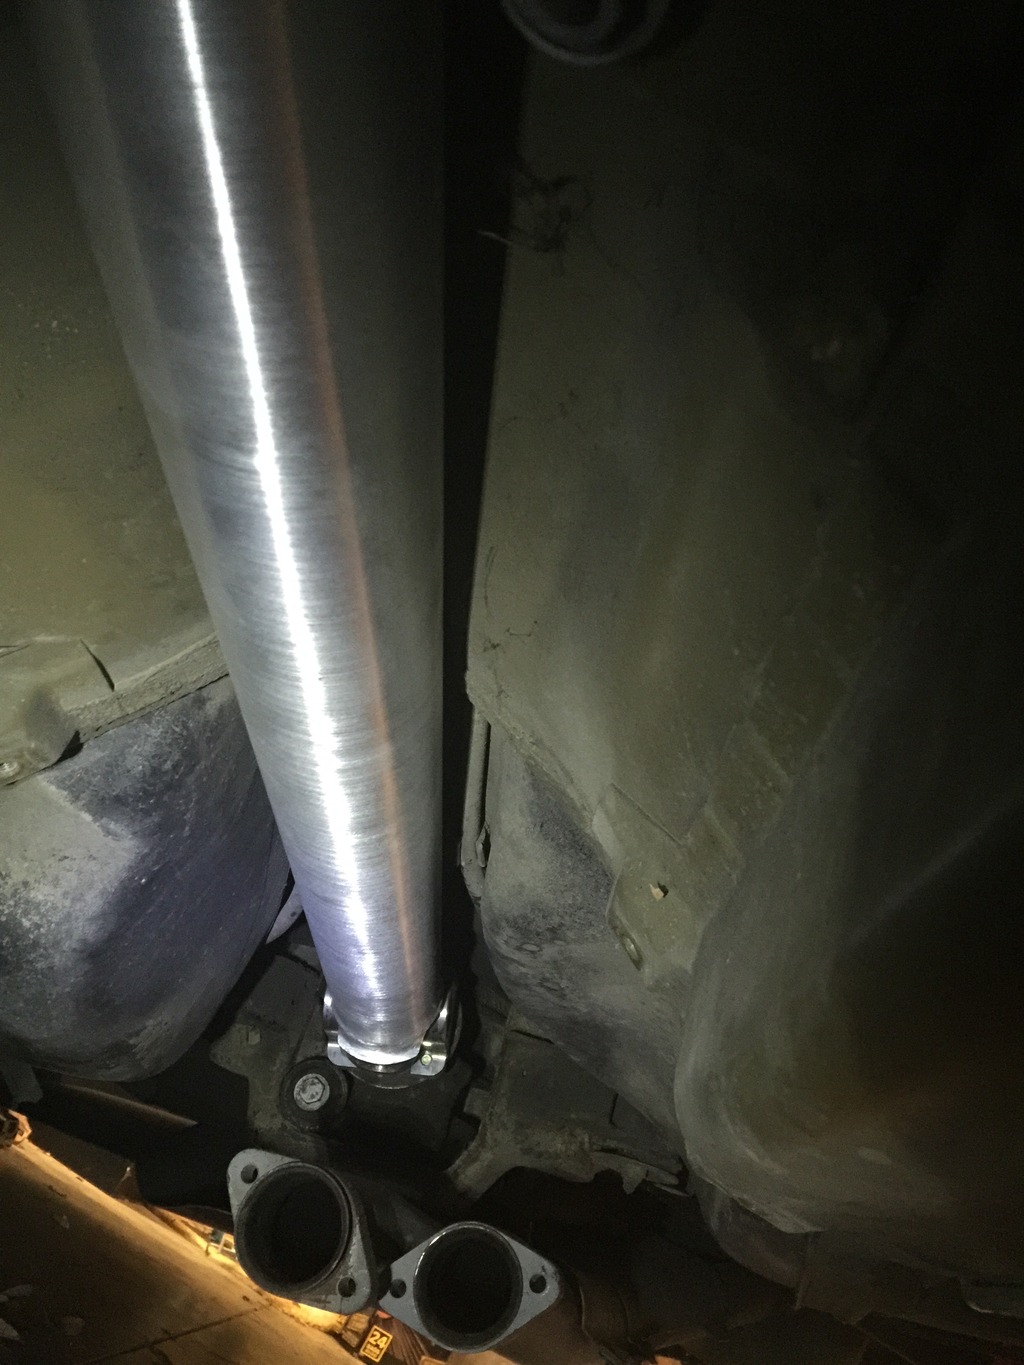
Another small update. Actually it was a large key to finishing up the build, but not alot to report. My custom driveshaft came in from Shaftmasters. I decided to go with the aluminum 3 inch variation. I was for sure a tight fit under the car but does fit. Here are a couple pictures for records. Sorry for the crappy pictures under the car. I dont have a lift at my disposal. I tried to get shots of both ends....

I did get a Small package from Japan though. Nothing that was a huge surprise, but still took forever to get here.
When I bought my swap, it came with a set of Splitfire coilpacks. I was pretty pumped as it was a surprise under the coil cover. upon inspection though, I found that one of the **** out its guts and was of no use. This left me with 5 that were still usable. there were only a couple companies that sold a single pack and cost an arm and a leg, but didnt see another option, unless I wanted to go back to 20 year old OEM coils. I also decided to take the time to put fresh NGK sparkplugs in. I went to a plug that was one step colder for future goals.....
Will update again once packages start arriving this week.


Hello again guys. I received another package in the mail today, this time being from the great guys at Chase bays..... :2f2f:


You might be asking, what might this be?...... I chose to purchase an item that seems to be seen as skeptical in the BMW world. I decide to purchase the entire ABS/brake booster delete from this group. A lot of people question this modification due to the effect it will have on braking performance, but Chase Bays claims to have sized the Wilwood Master cylinder just right to not have much difference in braking performance. I decided to go with this modification for the sole purpose of space needed to generate a down pipe for my swap. I also purchased the bias valve and brake lines to make it a complete package....


I also decided to weigh in the difference between the setups just for reference for anyone that may be interested. Along with the space this kit saves, and the visual appearance, It also saves around 16 pounds for those hardcore weight savings people out there.... Pictures for proof.....


I have posted pictures previously of what the OEM setup looked like and how crowded it made the drivers side engine bay look. Here is a picture of what that area looks like with the OEM setup taken out. BTW, it was a BI@$% to lay under the dash on the interior and work to remove connections.....

I got as far as I could with the install today. I came to a stopping point as the package i received from Chase Bays did not include a small bracket that it should have so that I could connect the Bias valve to the master cylinder. So I only got a chance to mount the booster delete plate and the master cylinder today.
The kit i purchased also came with a new feed hose for the OEM clutch master cylinder. I decided to use the OEM feed line as it fit perfect on the bulkhead fitting i attached to the Wilwood reservoir. I also came to this conclusion due to having to remove the entire pedal assembly just to get to the clutch master cylinder. A lot of work saved just by using the OEM feed line. Anyway, here are some pictures....


Another small update for you all. I finally decided to take some time to tackle the fuel pump. I knew the OEM BMW pump would not support my goals using the 1000cc injectors and planning for around 20psi. I also didn't want to do anything crazy like a standalone fuel cell.
I decided to call upon a group called Rally Road that machined and install sleeve to make many after market pumps a drop in affair. I opted to pay a little more money and got the Aeromotive 345lph. I have read these pumps can support pretty big numbers when using 93 octane. Here is what the kit came with.....

I didn't get alot of picture when taking it apart, but its pretty straight forward. I was actually surprised how easy it was to remove the rear seat and gain access to the fuel pump assembly. I did take some pictures as I put it back together. I did make sure to shop vac alot of gunk that had built up on top of the assemblies. I also would like to note, I opted to connect the wiring the correct way by soldering and heat shrink the connections. You can see this if you look at the pictures close.


Another small update. Actually it was a large key to finishing up the build, but not alot to report. My custom driveshaft came in from Shaftmasters. I decided to go with the aluminum 3 inch variation. I was for sure a tight fit under the car but does fit. Here are a couple pictures for records. Sorry for the crappy pictures under the car. I dont have a lift at my disposal. I tried to get shots of both ends....


 07-01-2016, 06:18 AM
#4
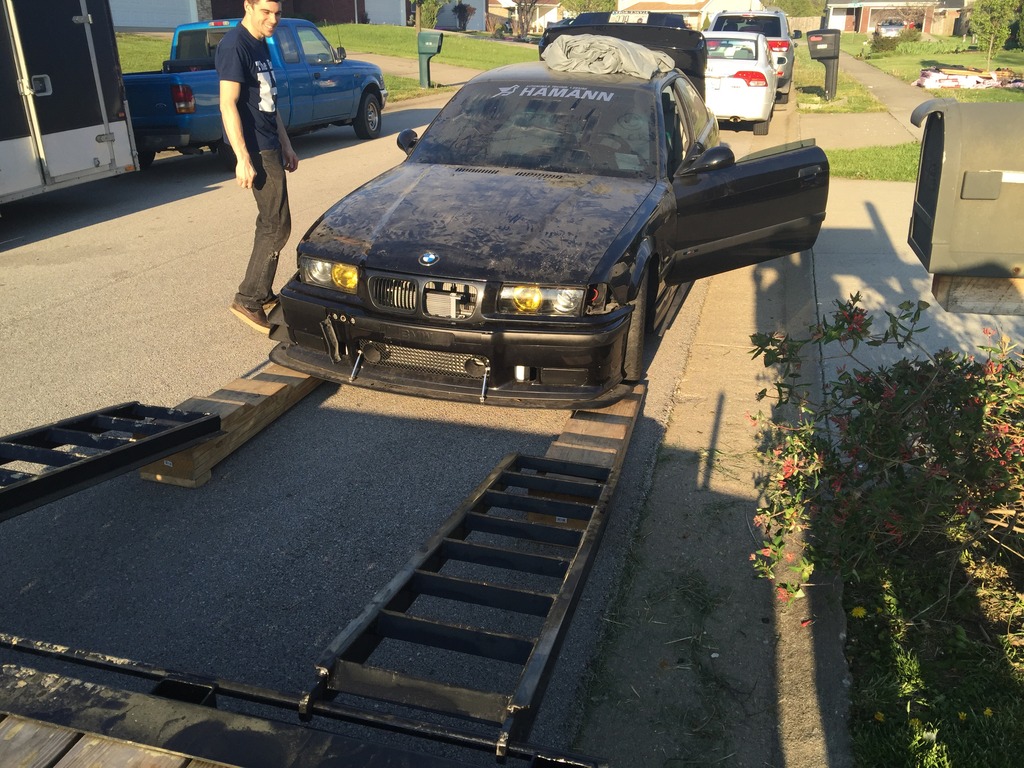
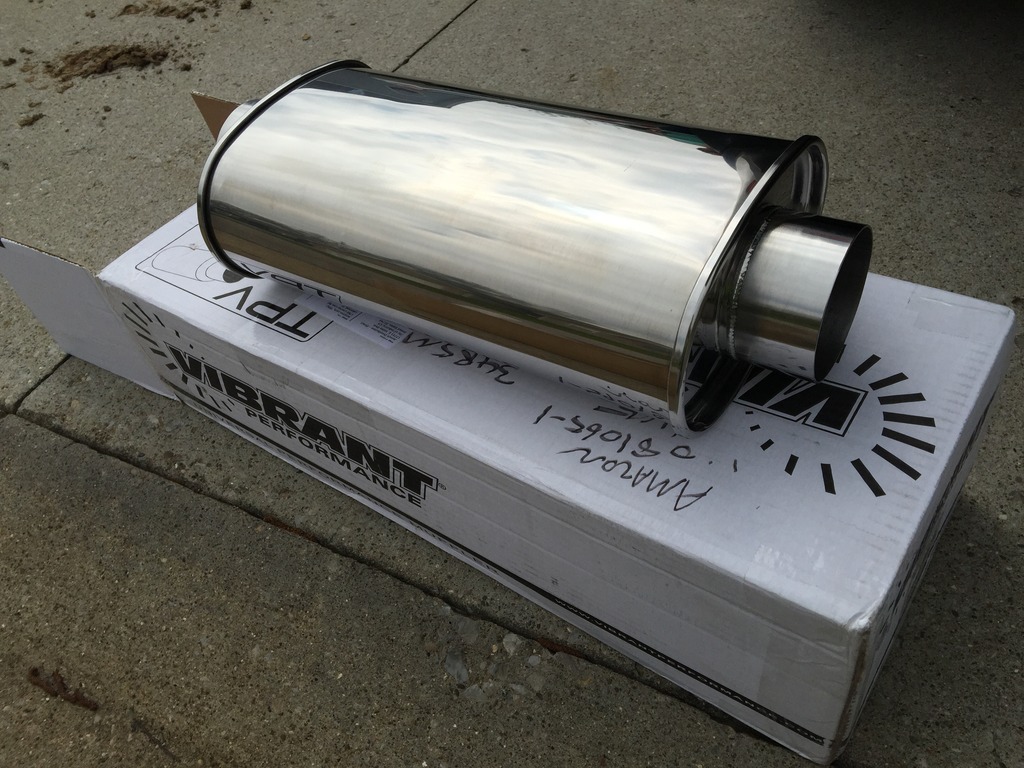
Hello again everybody. I wanted to post real quick since i have not in a while. I am in the process of purchasing my first home. Not a whole lot has happened with the car since I last posted. I am having Saikou Michi build me a custom catch can with my build. I have alos been gathering more and more parts to complete the downpipe, Exhaust, and charge piping (thanks to Treadstone and Vibrant Performance). The car will be running a 3.5" downpipe and keep that same size all the way to the rear of the car. I also plan to utilize 3" charge pipes from turbo the intake manifold. I did take the car to my Fab guy, which it is where it sits now to get all this done. I will post updates as he sends them to me.....
I can not believe how dirty the car got over the winter in the garage. It was the first time it saw daylight since the BMW motor was pulled....
Here are the first small updates I received from my car away from home.....
Ok guys, Just a small update with the car in the shop still getting some fabrication work done.
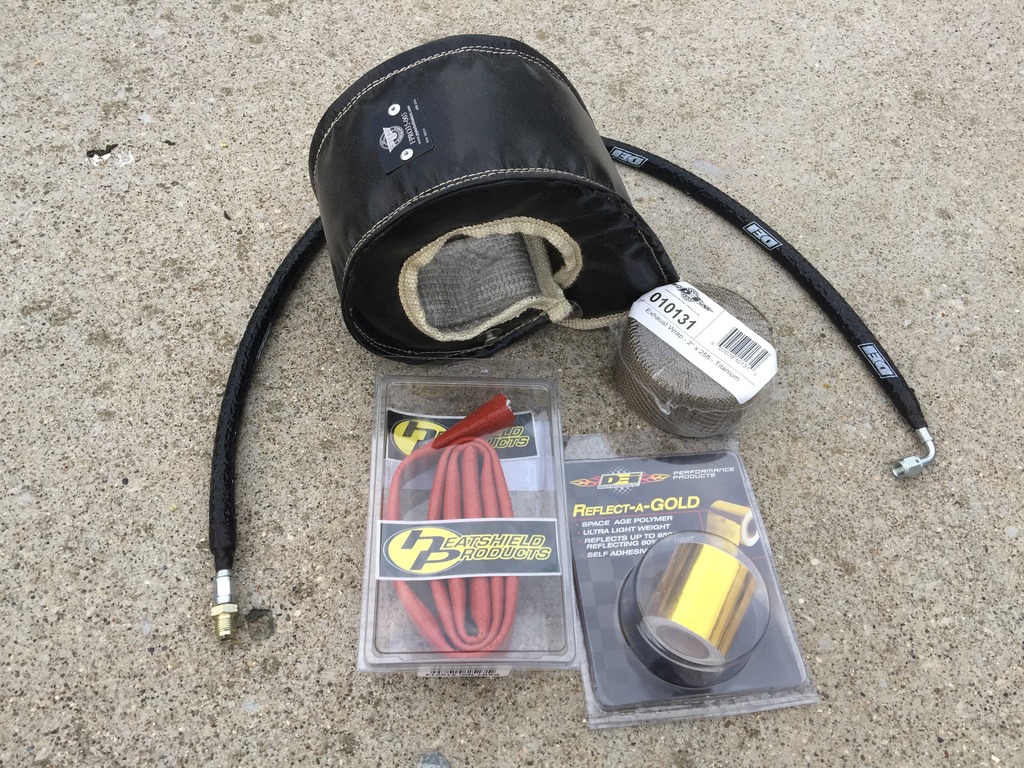
While the car has been at the shop I have decided to consider some heat management around the turbo and the manifold. I picked up a PTP turbo blanket, DEI fire sleeve for the turbo oil feed, A fire sleeve from Heatshield Products to protect the -10an turbo drain, some DEI titanium wrap for the down pipe, and some DEI gold tape that I plan on placing on the turbo intake and the cold side of the charge pipes. I also have picked up some Aluminum sheath from DEI that has yet to come in, for the protection on the fuel lines. I wont bore you all with much pictures on this post.
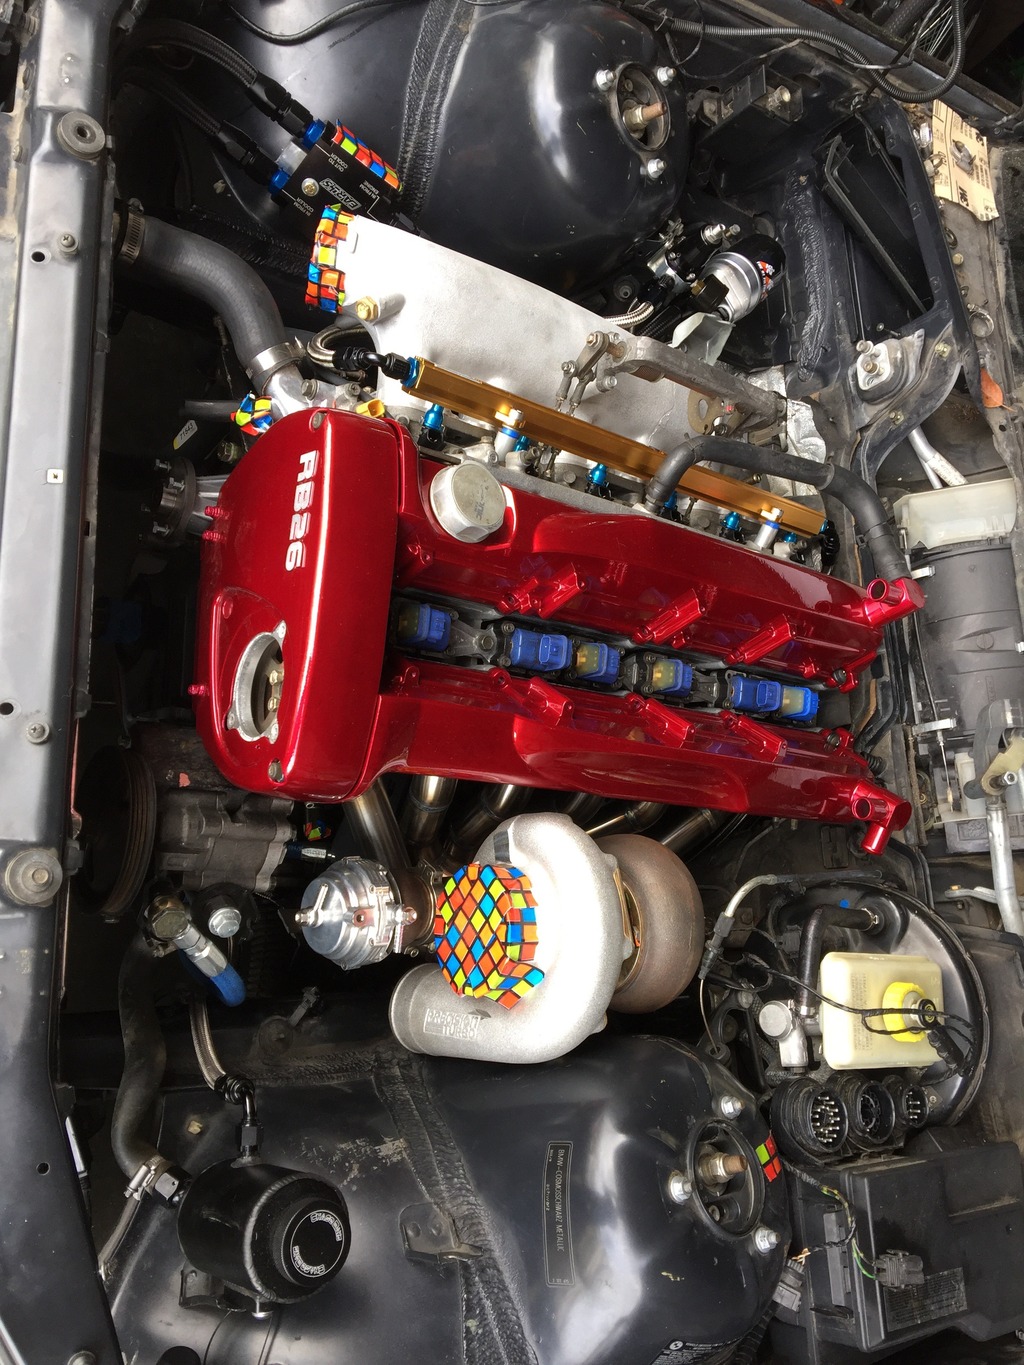
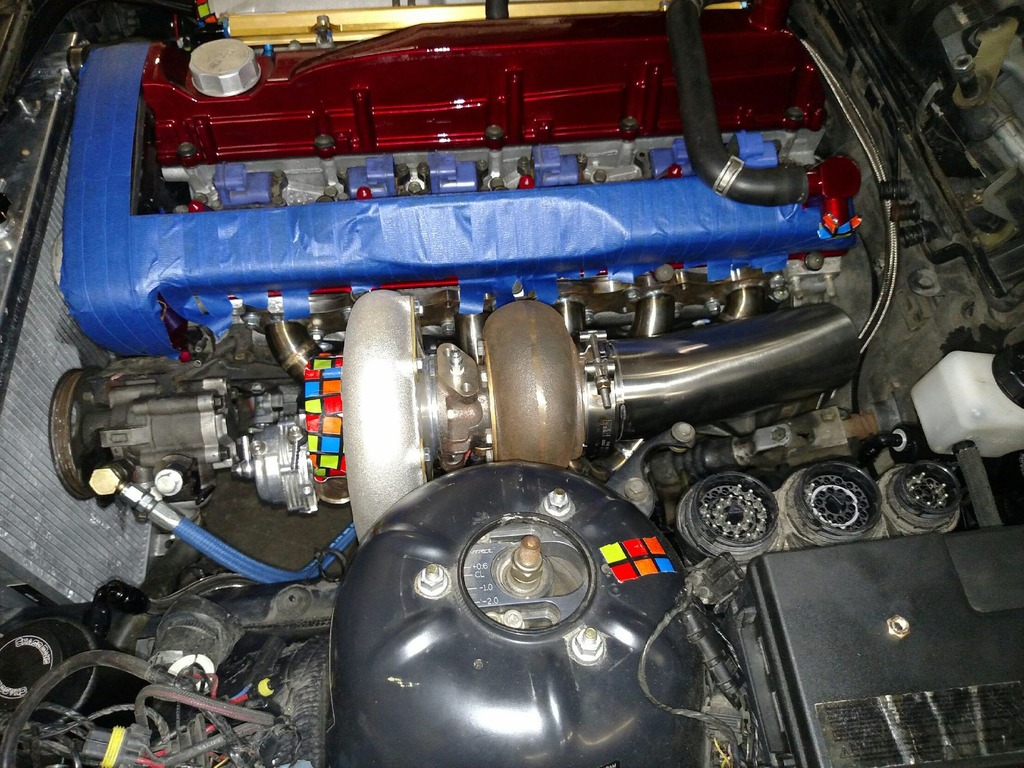
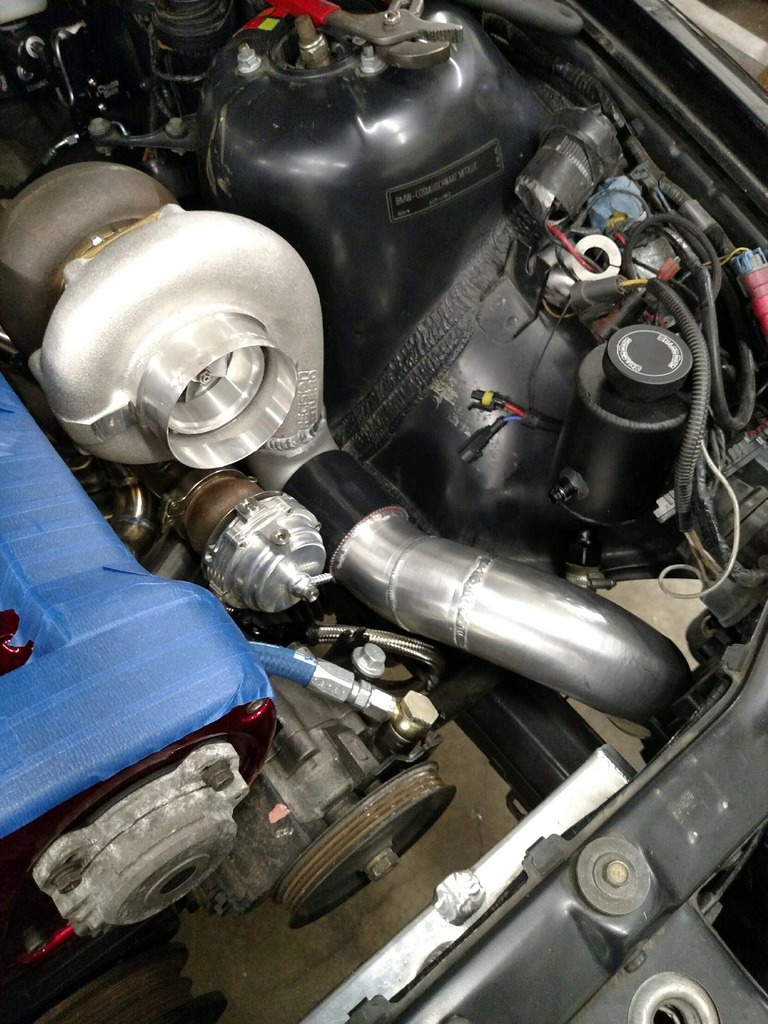
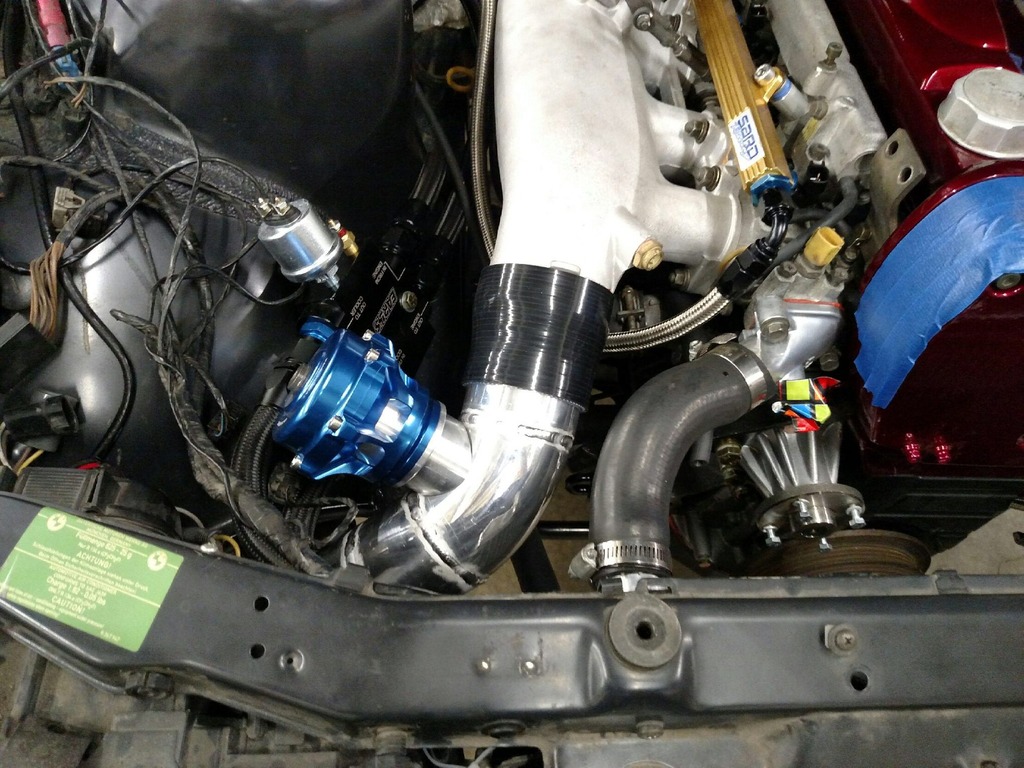
Most of the charge pipes were completed today. It is straight 3" aluminum from the turbo to the opening of the inlet manifold. I This the placement of the Tial BOV is ideal as close to the Throttle bodies as I could get. The one in the picture was just used for mock up. It was a spare the shop had laying. Mine will be in black.
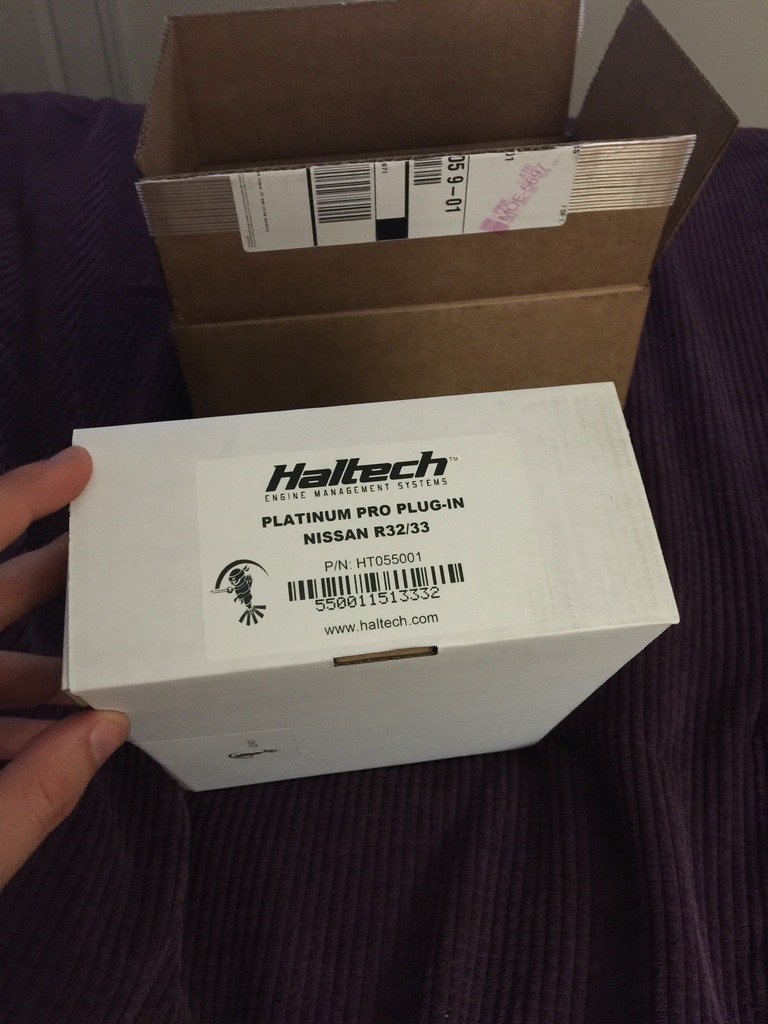
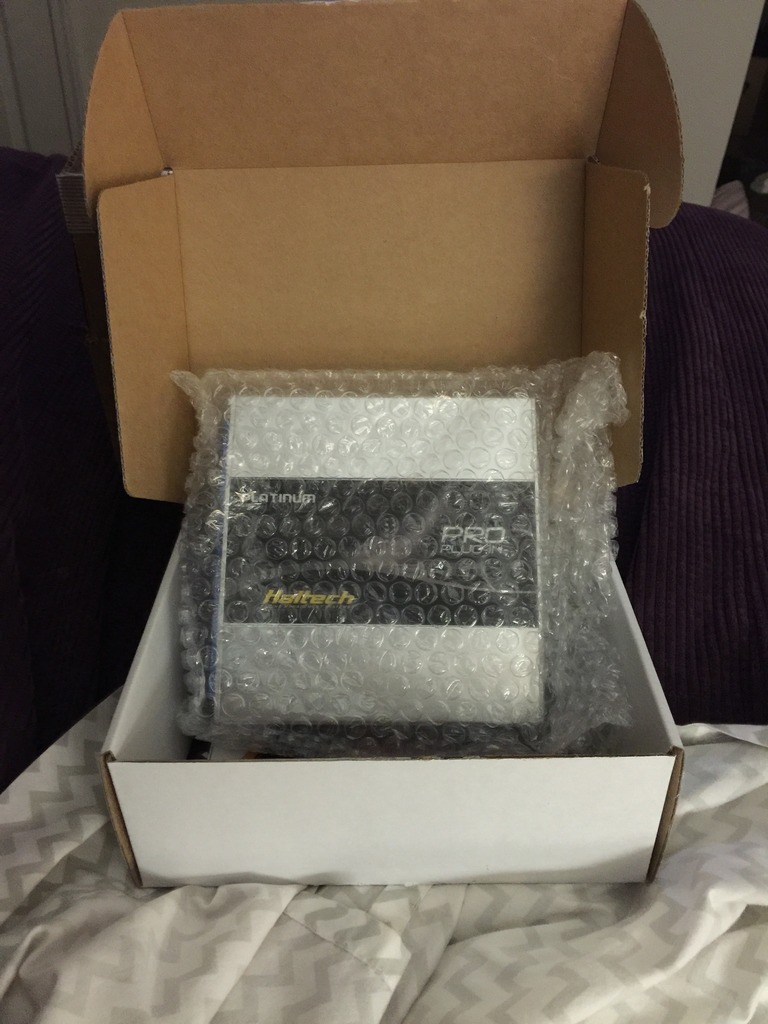
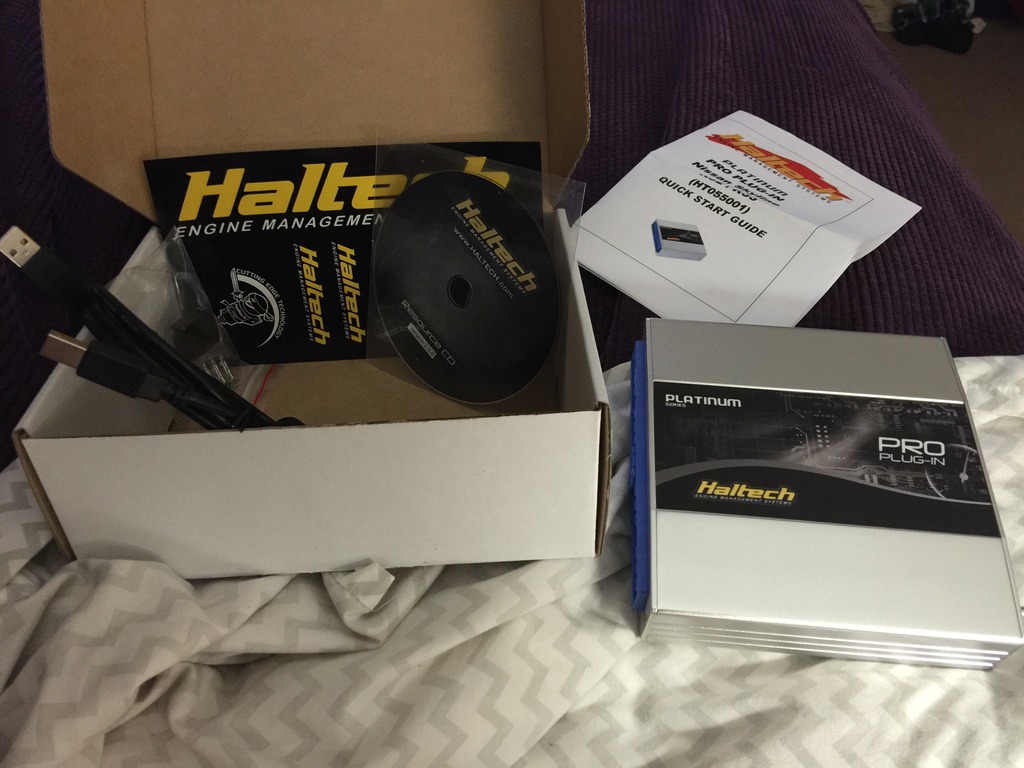
On a side note, I hope to pick up my Haltech ECU this next week...... Cheers until next time....:2f2f:
Just a small update. I know I posted already today, but just got an update from my fabrication guy. He was able to totally finish up the charge pipes. He sent me some pictures of the lower portion of them that attach to the intercooler. Just thought I would share.
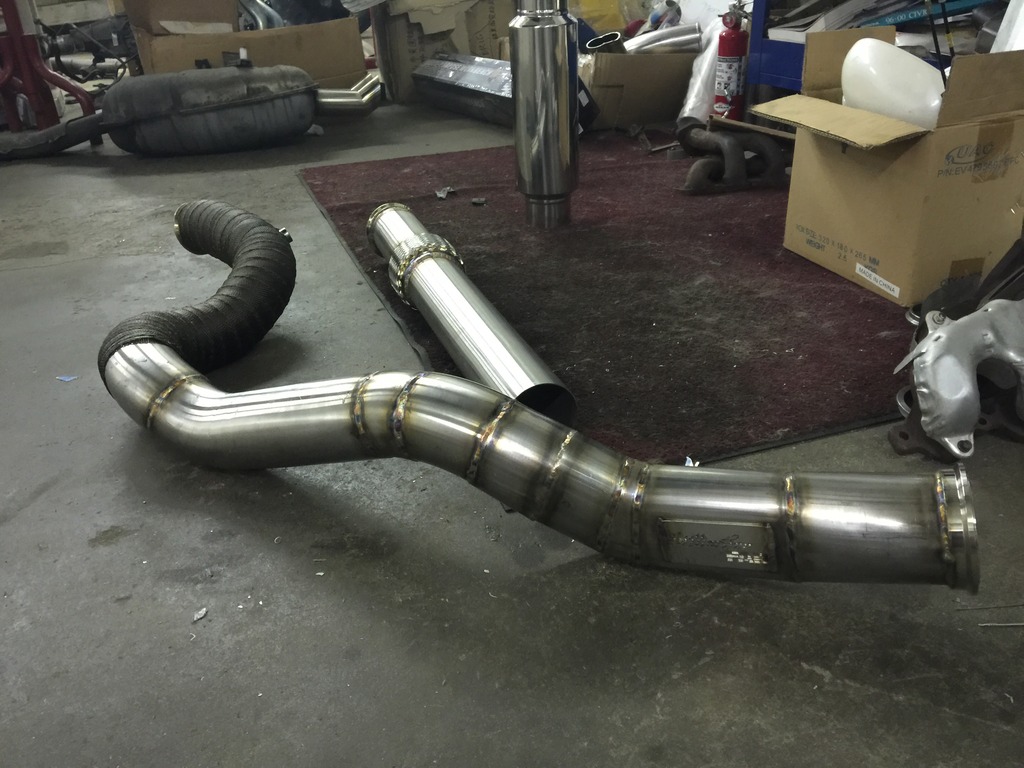
And an update on the downpipe.
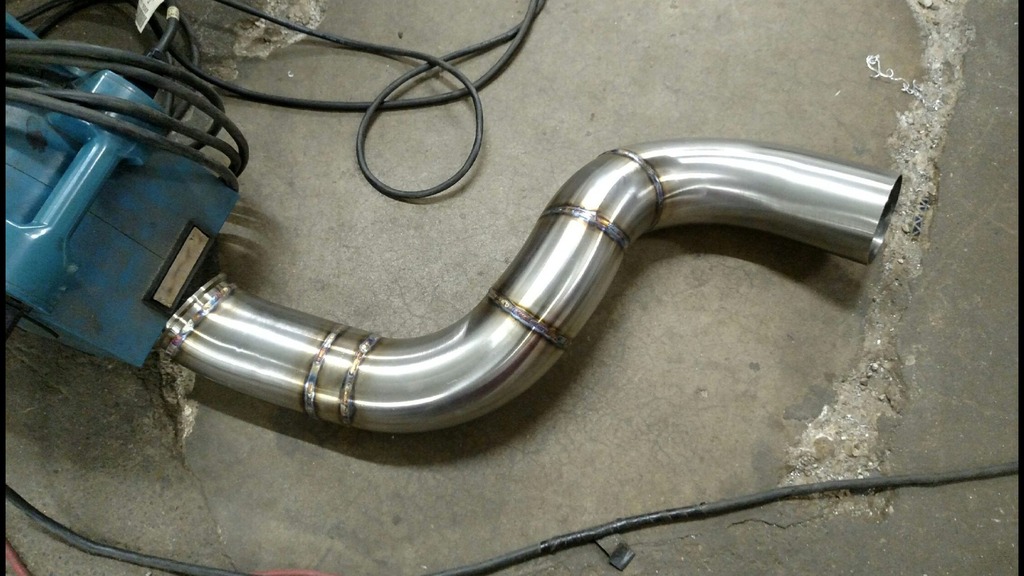
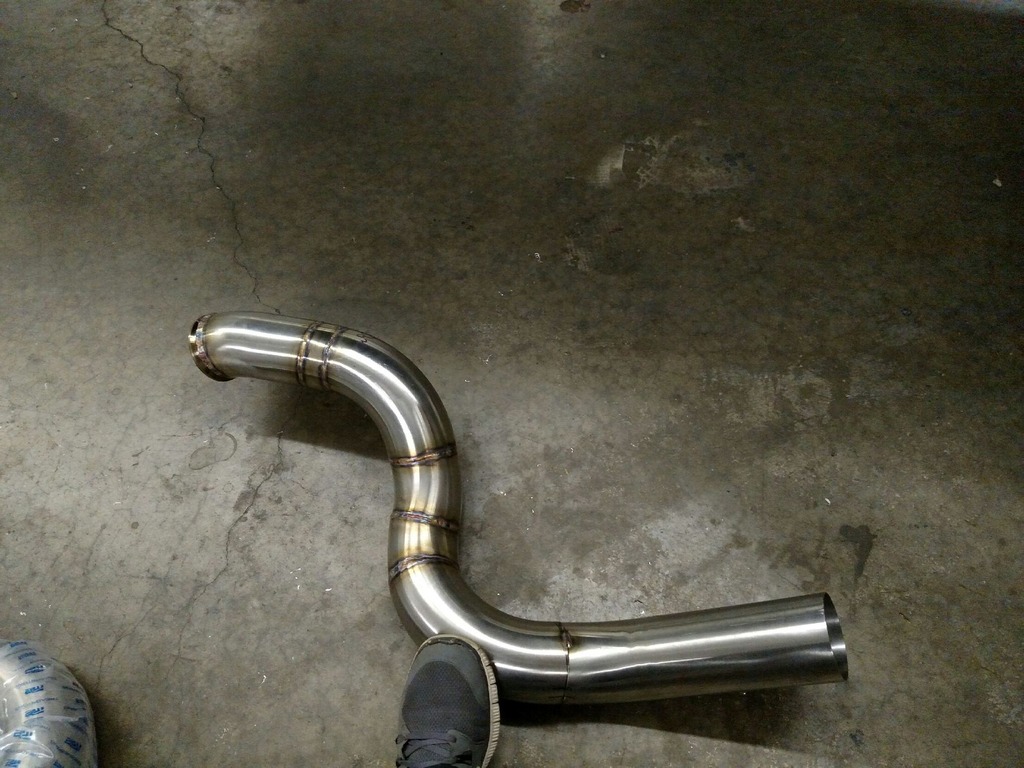
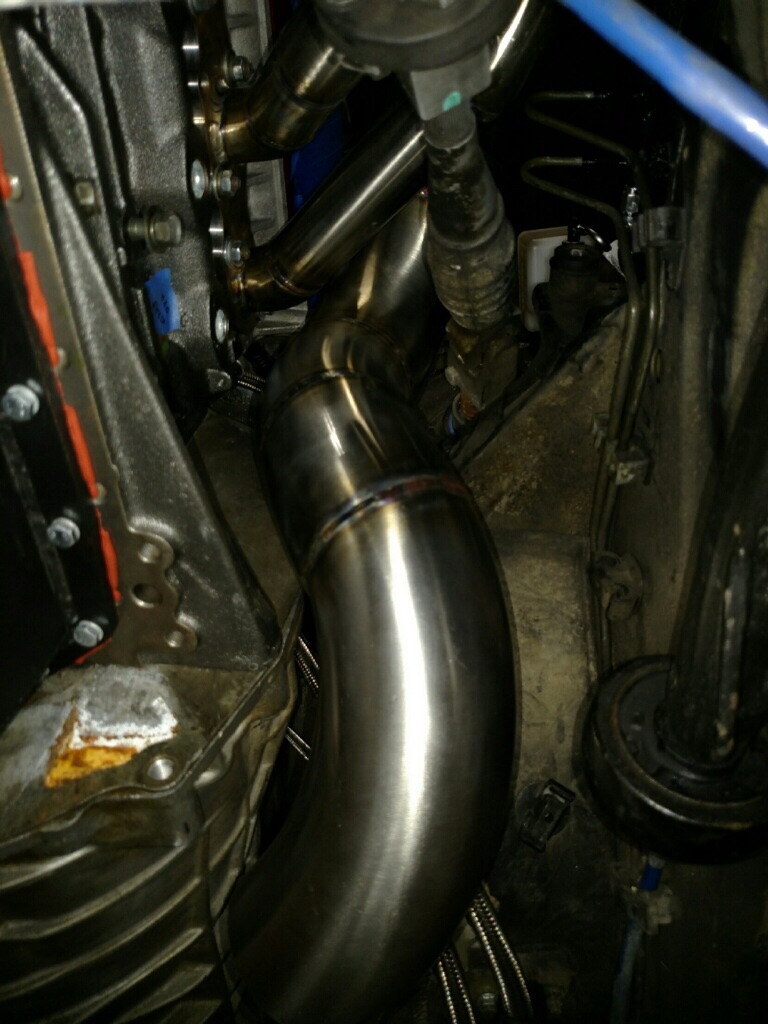
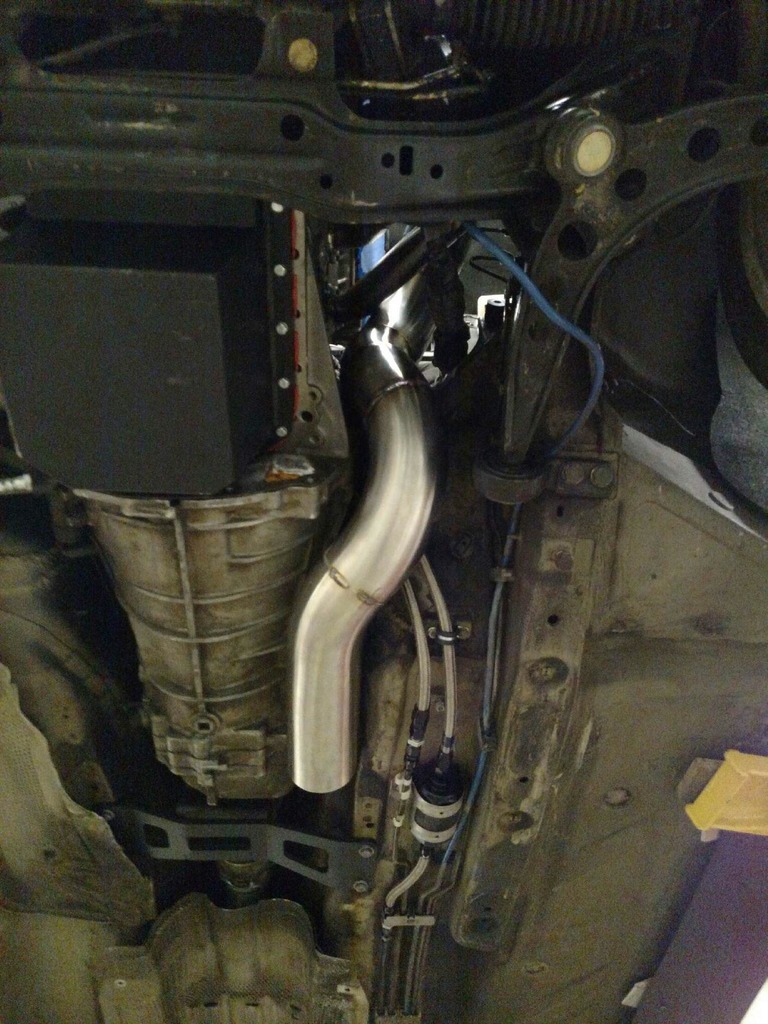
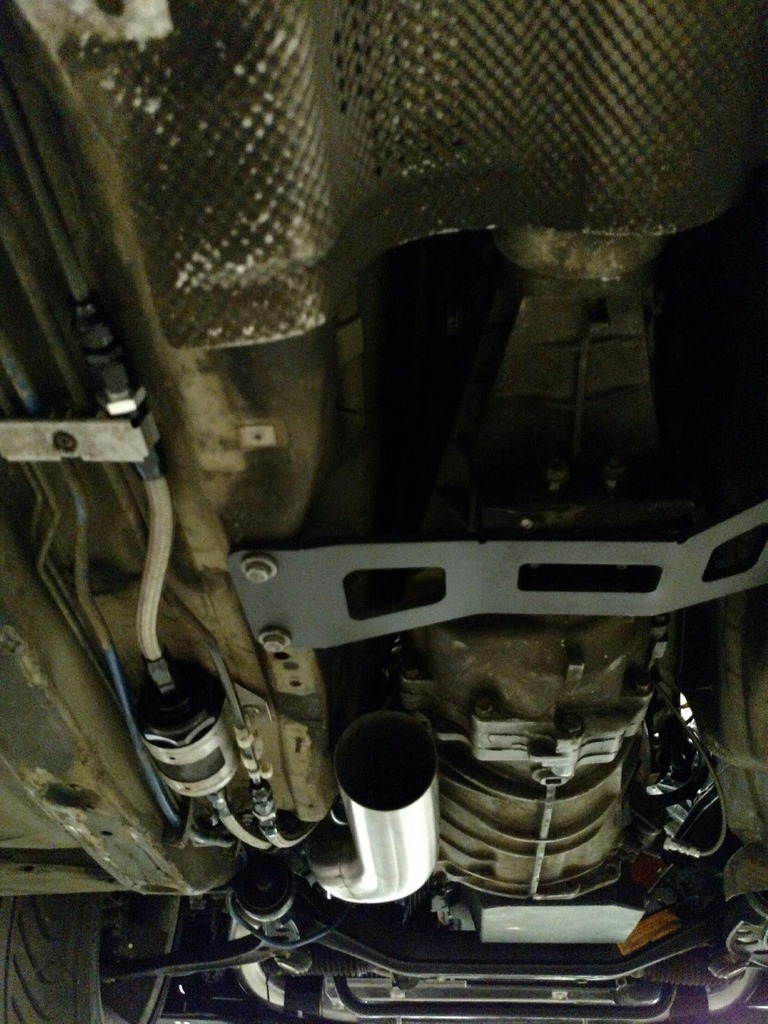
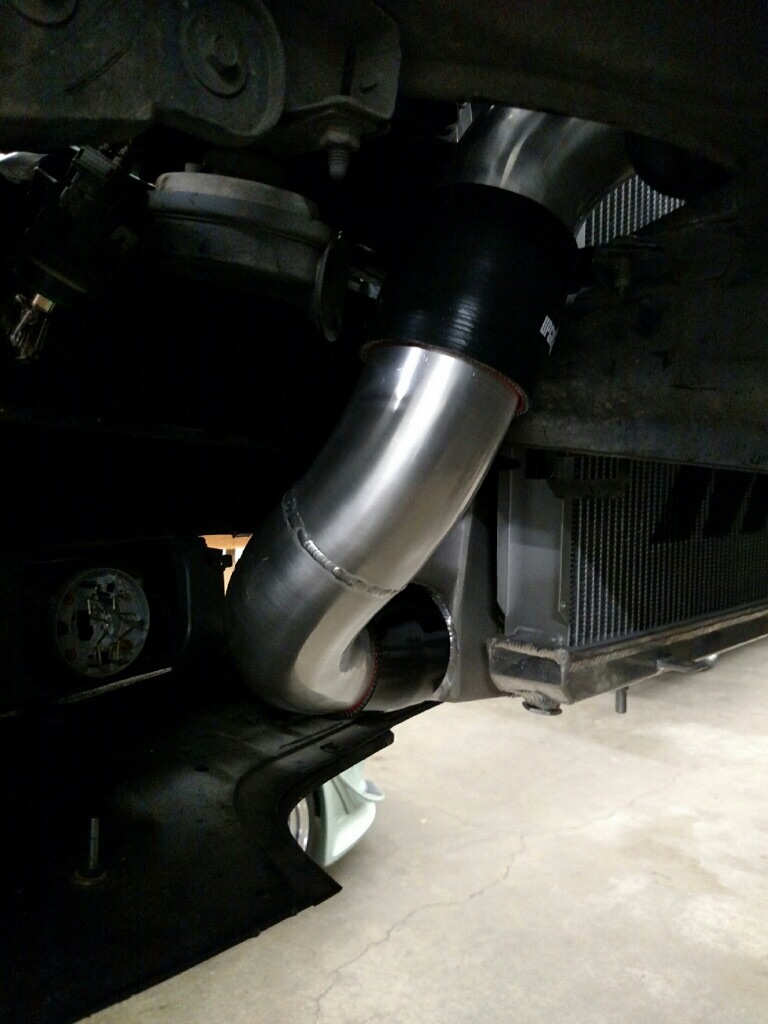
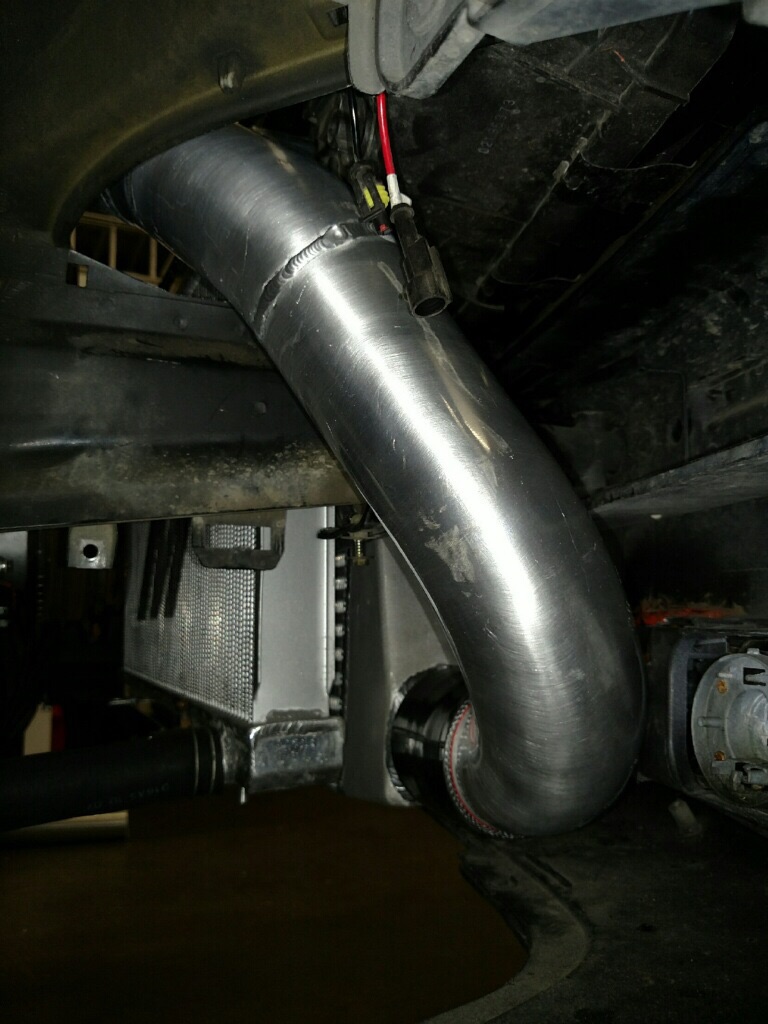
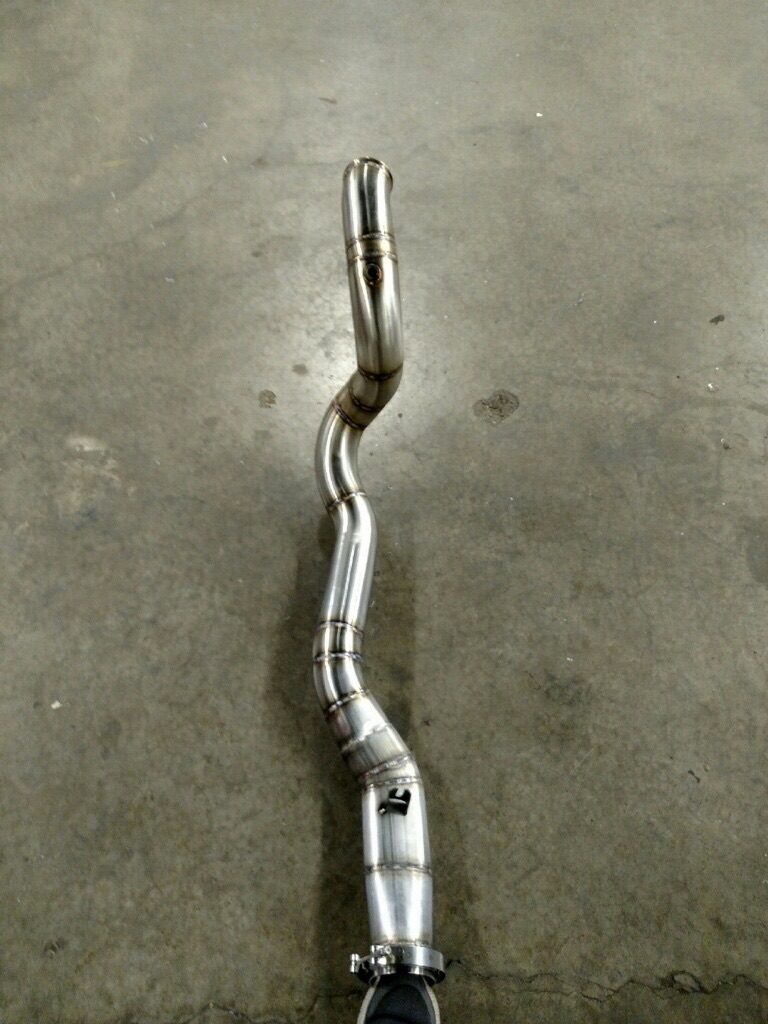
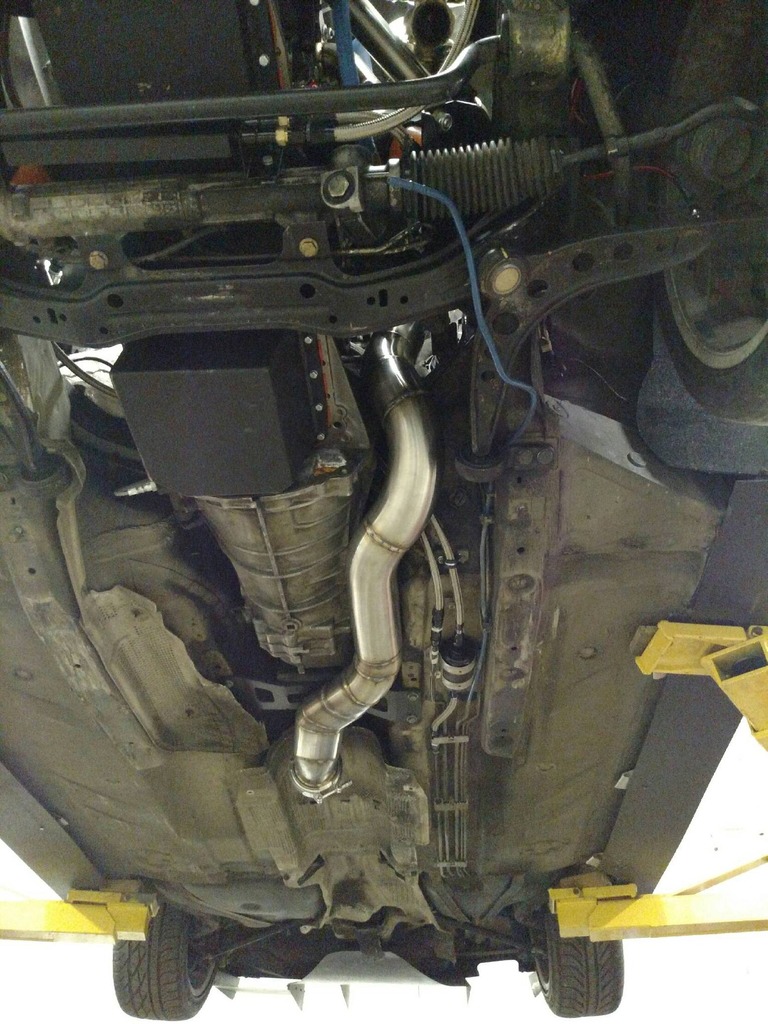
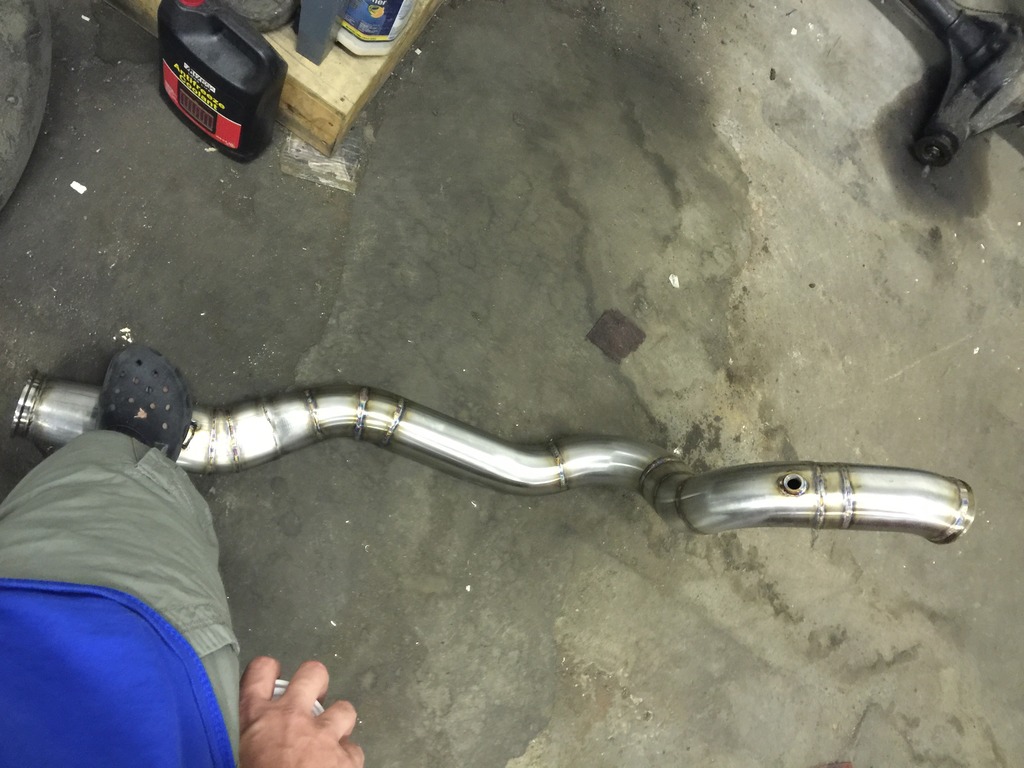
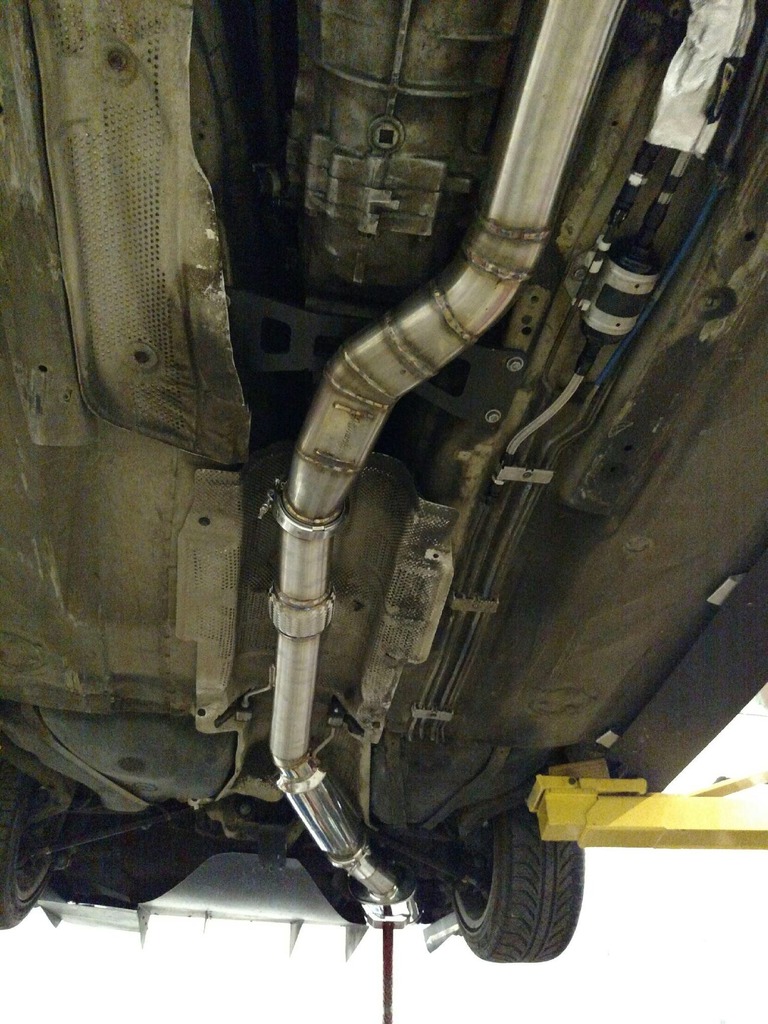
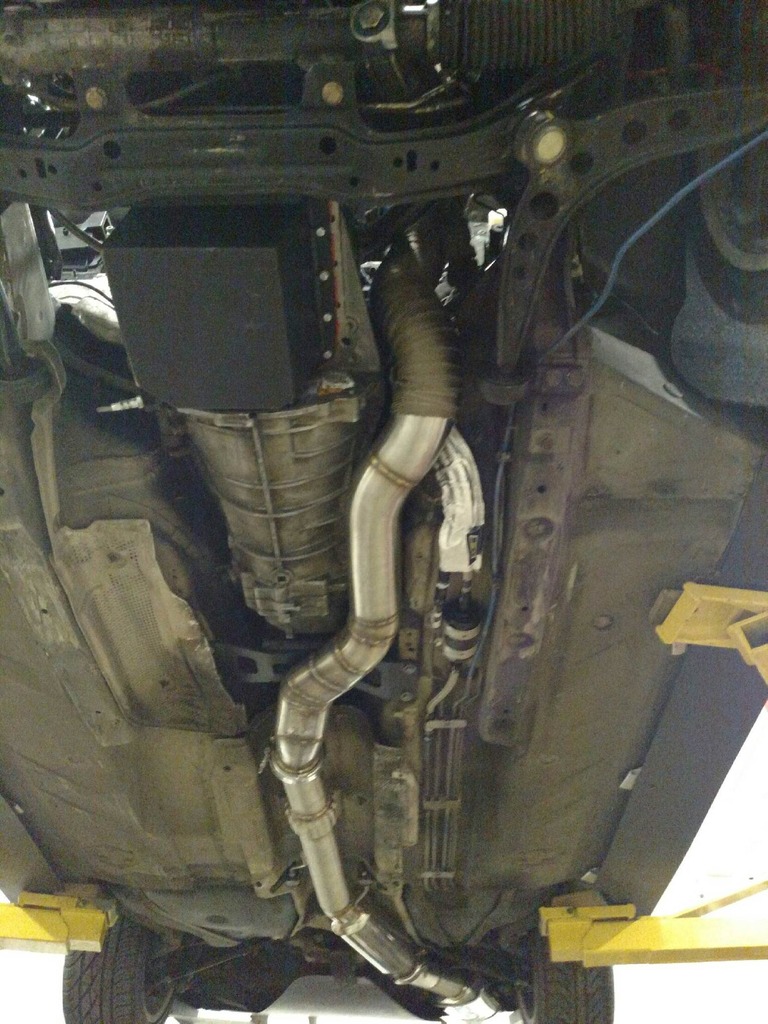
Ok, got another update from my fab guy today. he was able to get the majority of the downpipe finished up. The piece really had to snake quite a bit to get around everything on its way down to the ground. Quite a few hours went into this piece. Once under the car, we still had some concerns on ground clearance using 3.5 pipe. Especially going under the transmission crossmember. Andrew, my fab guy suggested we use a small transition to an oval stainless steel portion go travel under said crossmember. I think the piece cam out great, and looks really good in person. The last picture makes the outlet of the downpipe look a little off center, but its just an illusion. The heat shield above the pipe is not secured and is a little offcenter causing this...... anyway.... :2f2f:
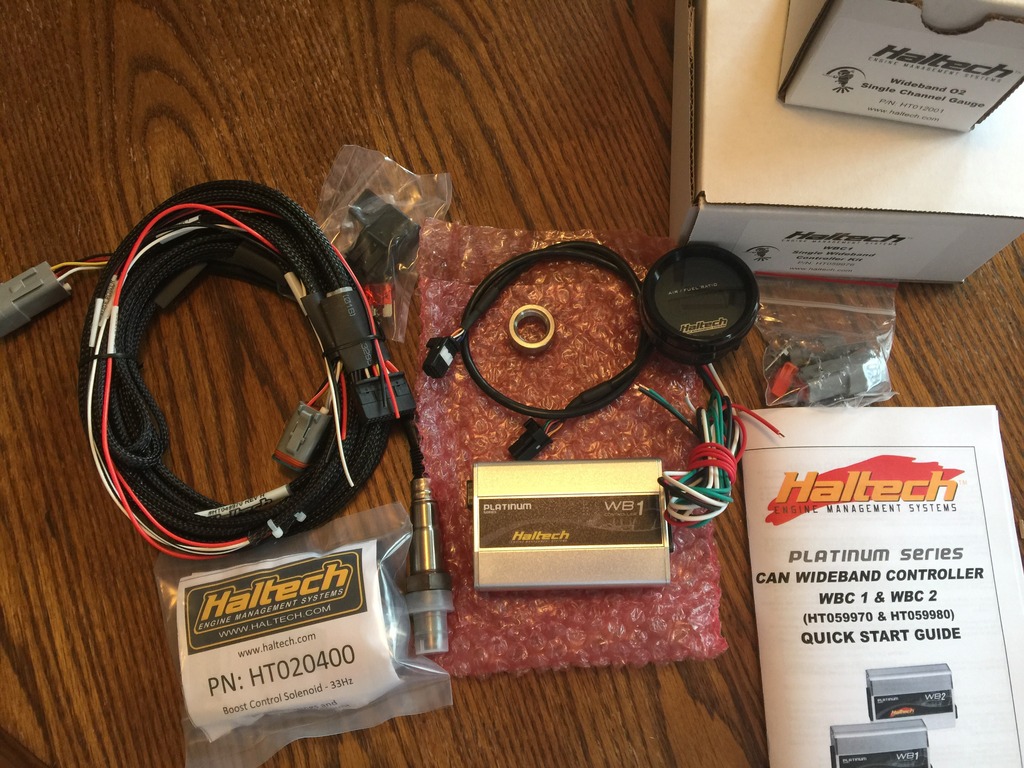
Just a small update. Stopped by the Haltech location close to me (My fab guy actually is an employee there) to talk about my build and ended up paying them a ton of money..... Keep in mind my actual ECU from Haltech is still in transit from Australia. I ended up picking up the WBC1 kit while I was there along with the display gauge that apparently is a newer release. They also convinced me to go ahead and get a boost control solenoid and a good IAT sensor since I will convert to MAP on the tune..... Anyway, just a quick shot.
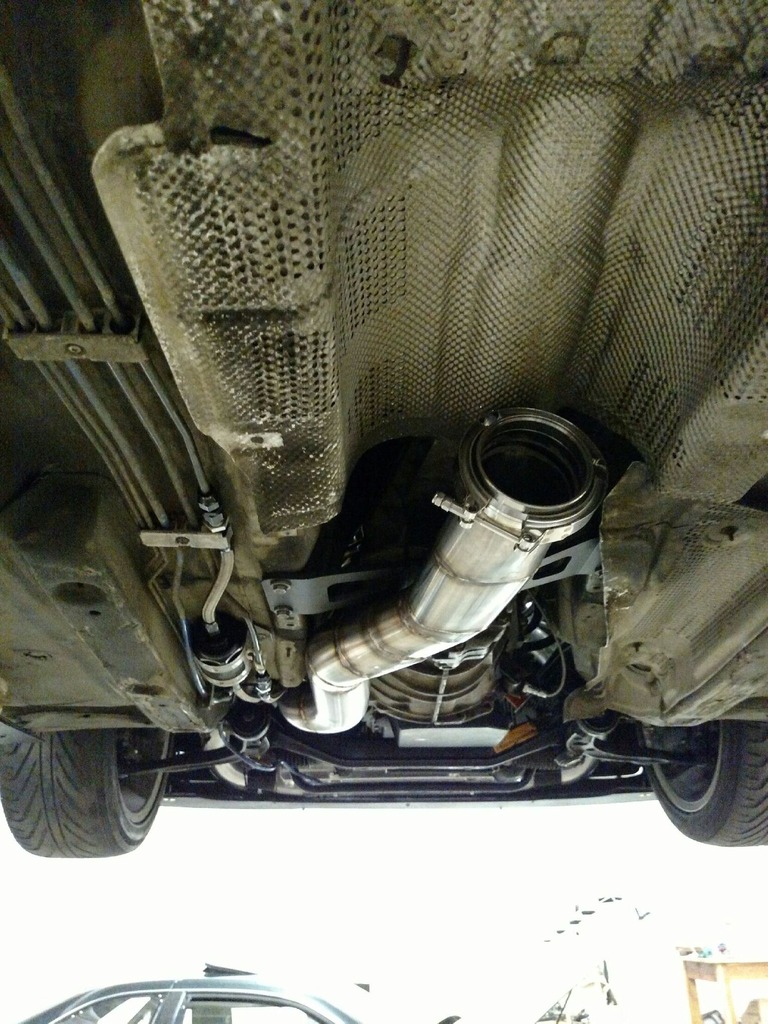
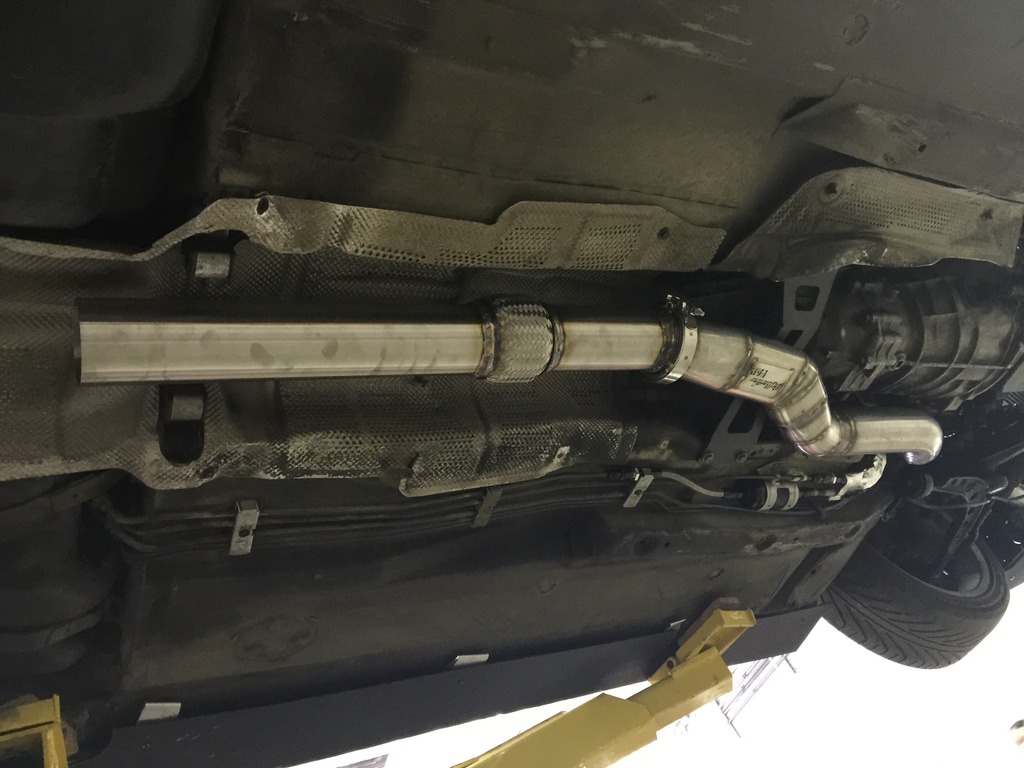
Went by the Fab shop this morning to bring some exhaust wrap to throw on the downpipe before we bolted it in for good. He hopes to finish the exhaust this afternoon, but I snapped a few pictures while I was there....
A better shot of the Charge pipes from underneath
And a good underneath shot of how the wastegate will be placed
ETA will be this Saturday June 4th. My fab guy will be crossing his t's and dotting his I's and hope to get my car loaded up and back home Saturday. He did snap a couple quick pictures of his progress on the tail end of the exhaust.
I can not believe how dirty the car got over the winter in the garage. It was the first time it saw daylight since the BMW motor was pulled....


Here are the first small updates I received from my car away from home.....


Ok guys, Just a small update with the car in the shop still getting some fabrication work done.
While the car has been at the shop I have decided to consider some heat management around the turbo and the manifold. I picked up a PTP turbo blanket, DEI fire sleeve for the turbo oil feed, A fire sleeve from Heatshield Products to protect the -10an turbo drain, some DEI titanium wrap for the down pipe, and some DEI gold tape that I plan on placing on the turbo intake and the cold side of the charge pipes. I also have picked up some Aluminum sheath from DEI that has yet to come in, for the protection on the fuel lines. I wont bore you all with much pictures on this post.
Most of the charge pipes were completed today. It is straight 3" aluminum from the turbo to the opening of the inlet manifold. I This the placement of the Tial BOV is ideal as close to the Throttle bodies as I could get. The one in the picture was just used for mock up. It was a spare the shop had laying. Mine will be in black.
On a side note, I hope to pick up my Haltech ECU this next week...... Cheers until next time....:2f2f:


Just a small update. I know I posted already today, but just got an update from my fabrication guy. He was able to totally finish up the charge pipes. He sent me some pictures of the lower portion of them that attach to the intercooler. Just thought I would share.


And an update on the downpipe.


Ok, got another update from my fab guy today. he was able to get the majority of the downpipe finished up. The piece really had to snake quite a bit to get around everything on its way down to the ground. Quite a few hours went into this piece. Once under the car, we still had some concerns on ground clearance using 3.5 pipe. Especially going under the transmission crossmember. Andrew, my fab guy suggested we use a small transition to an oval stainless steel portion go travel under said crossmember. I think the piece cam out great, and looks really good in person. The last picture makes the outlet of the downpipe look a little off center, but its just an illusion. The heat shield above the pipe is not secured and is a little offcenter causing this...... anyway.... :2f2f:


Just a small update. Stopped by the Haltech location close to me (My fab guy actually is an employee there) to talk about my build and ended up paying them a ton of money.....
Keep in mind my actual ECU from Haltech is still in transit from Australia. I ended up picking up the WBC1 kit while I was there along with the display gauge that apparently is a newer release. They also convinced me to go ahead and get a boost control solenoid and a good IAT sensor since I will convert to MAP on the tune..... Anyway, just a quick shot. 
Went by the Fab shop this morning to bring some exhaust wrap to throw on the downpipe before we bolted it in for good. He hopes to finish the exhaust this afternoon, but I snapped a few pictures while I was there....


A better shot of the Charge pipes from underneath

And a good underneath shot of how the wastegate will be placed

ETA will be this Saturday June 4th. My fab guy will be crossing his t's and dotting his I's and hope to get my car loaded up and back home Saturday. He did snap a couple quick pictures of his progress on the tail end of the exhaust.

 07-01-2016, 06:18 AM
#5
Good evening all. Very exciting day for me. Spent all day at work bored as hell, and the. Got to come home to my new house and install an over the range microwave. Finally got time to sit down and open a package I got today. It made me very happy to say the least. These puppy's are on a 2 month back order at the moment. Will get the car back this Saturday and get to wire it all in.
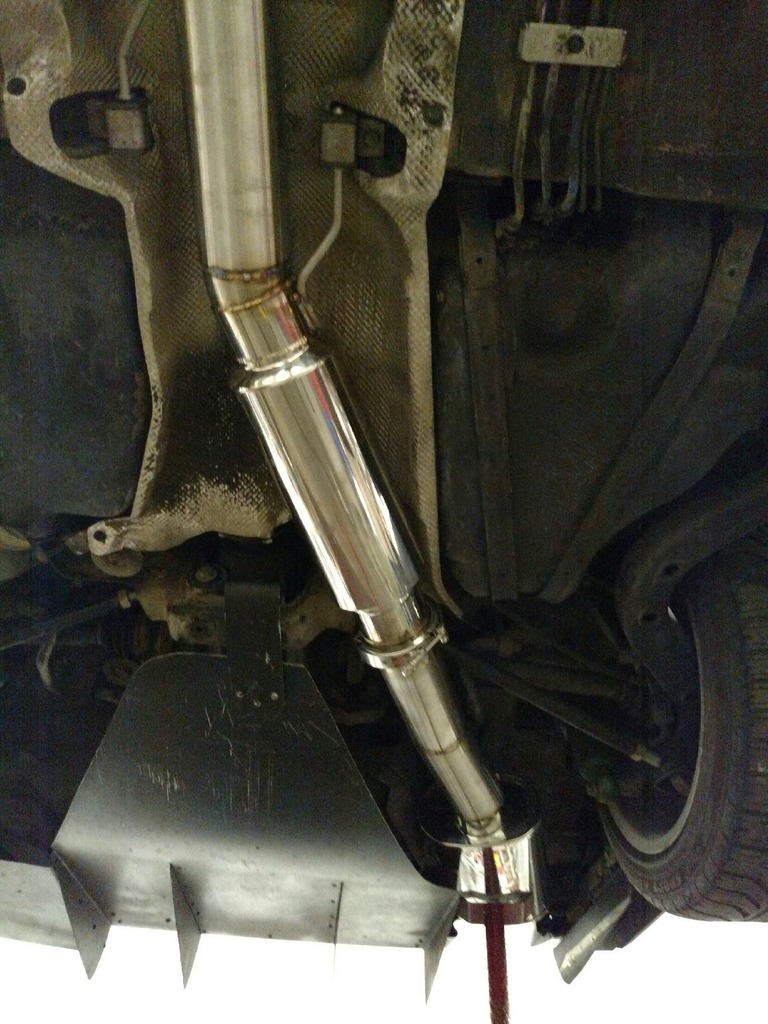
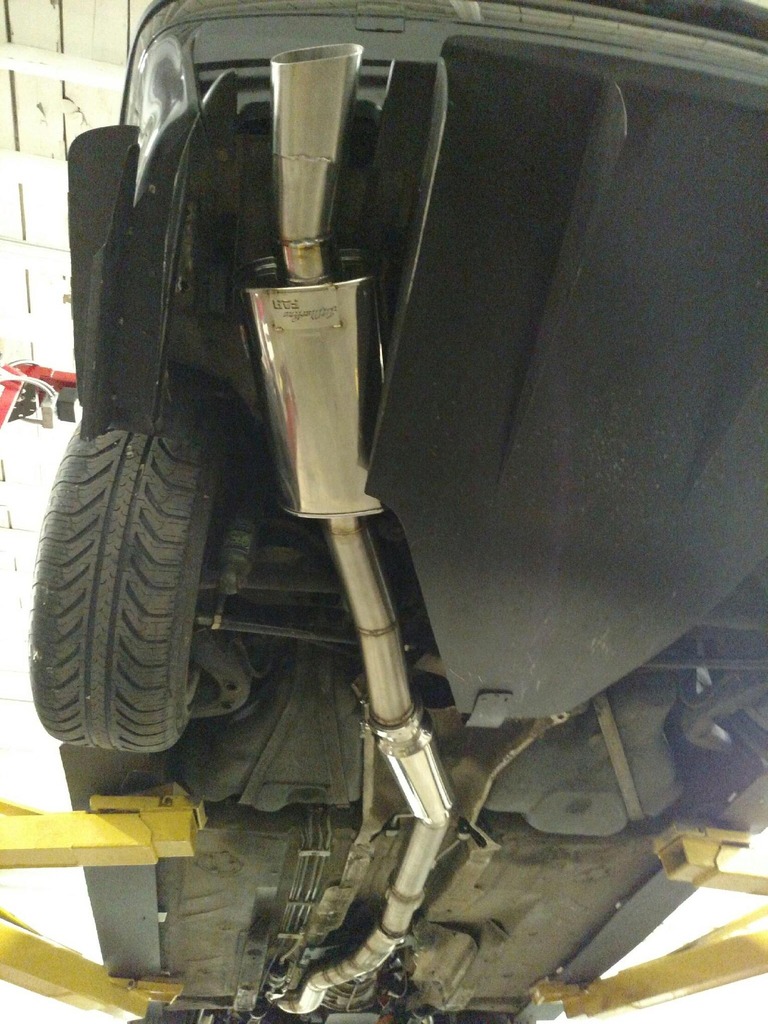
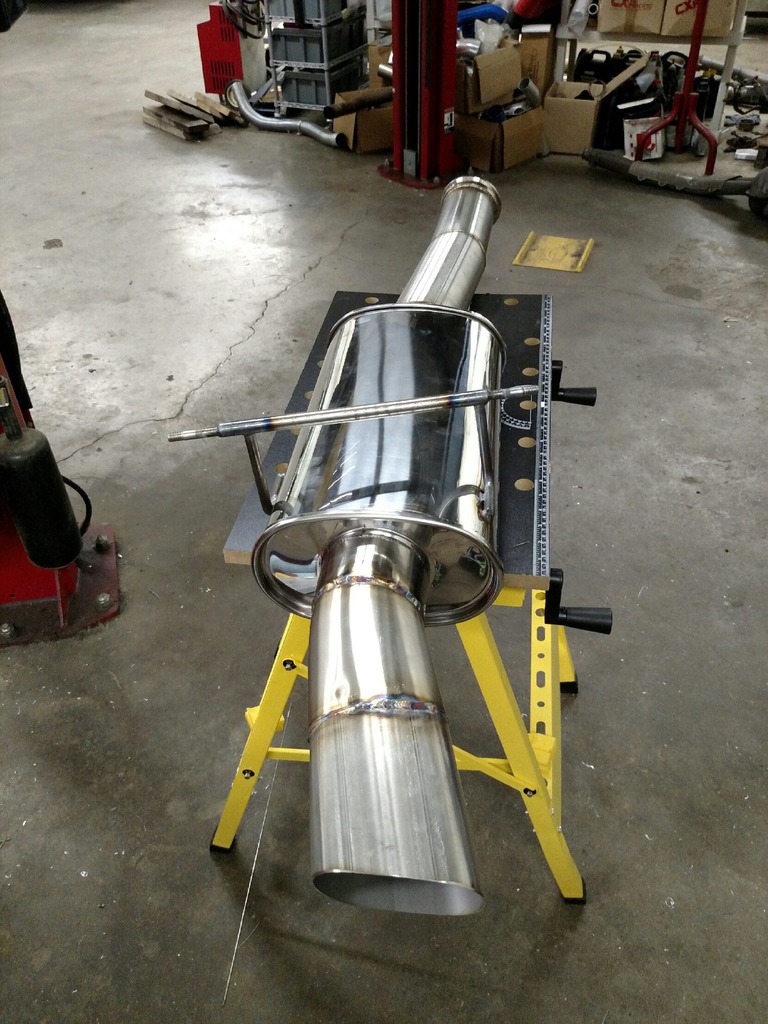
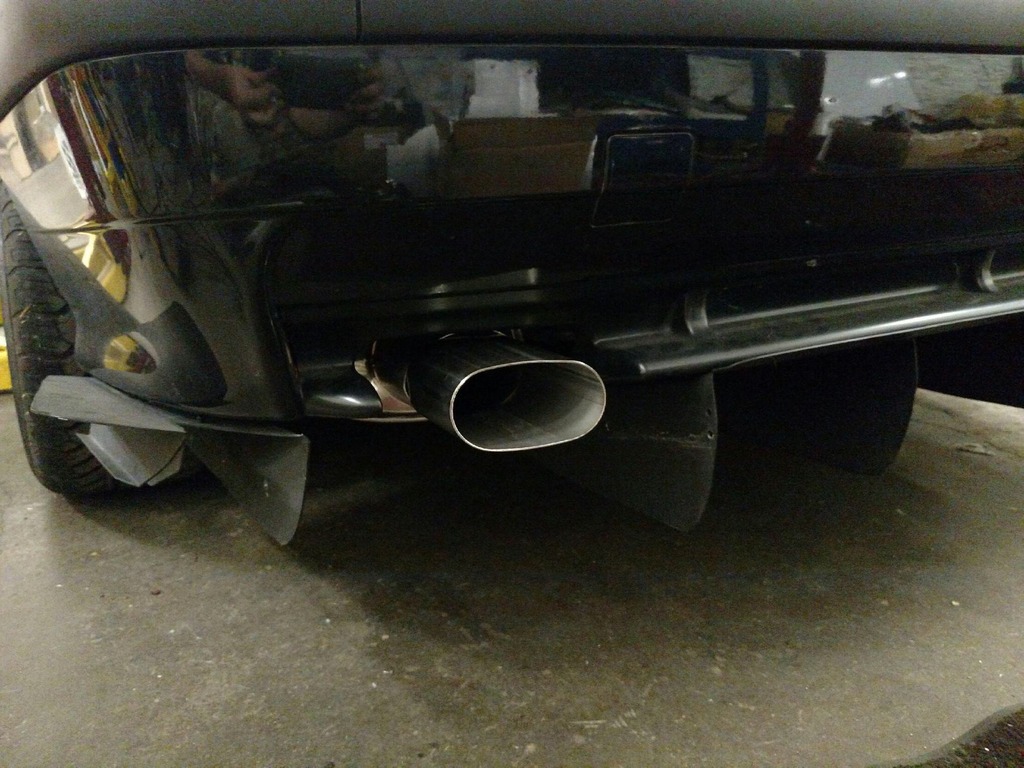
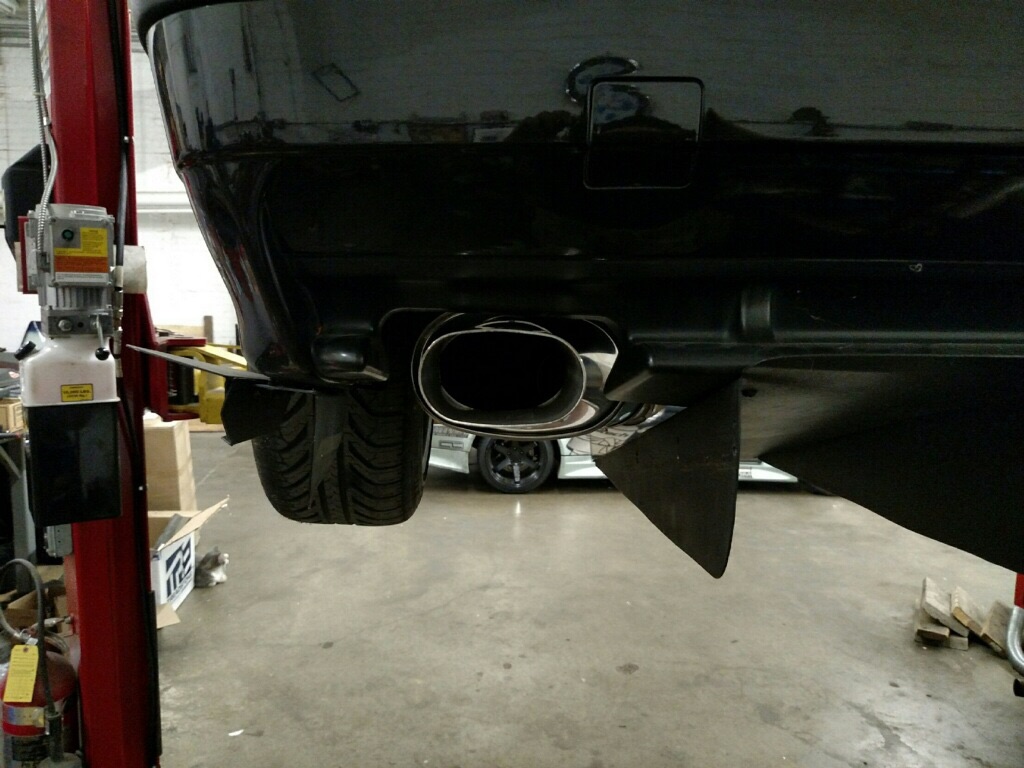
Exhaust got finished and buttoned up tonight and I am pretty pumped. I will let the pictures speak for themselves. We did decide to use an oval tip on the rear to avoid giving the car a huge cannon exhaust look.
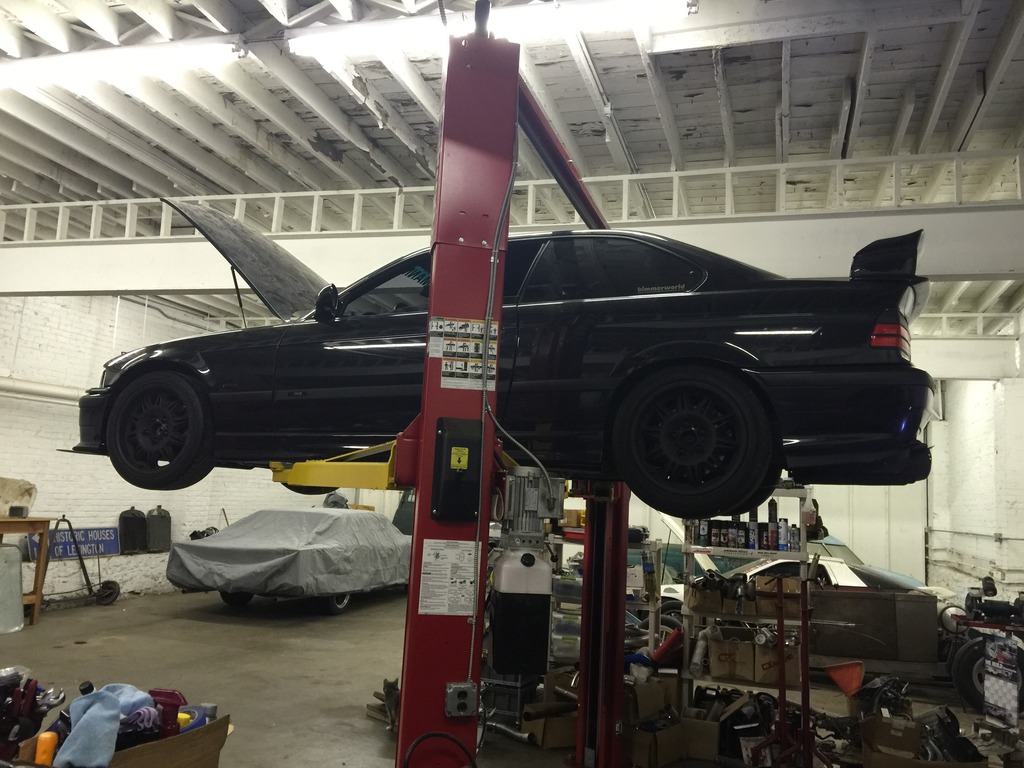
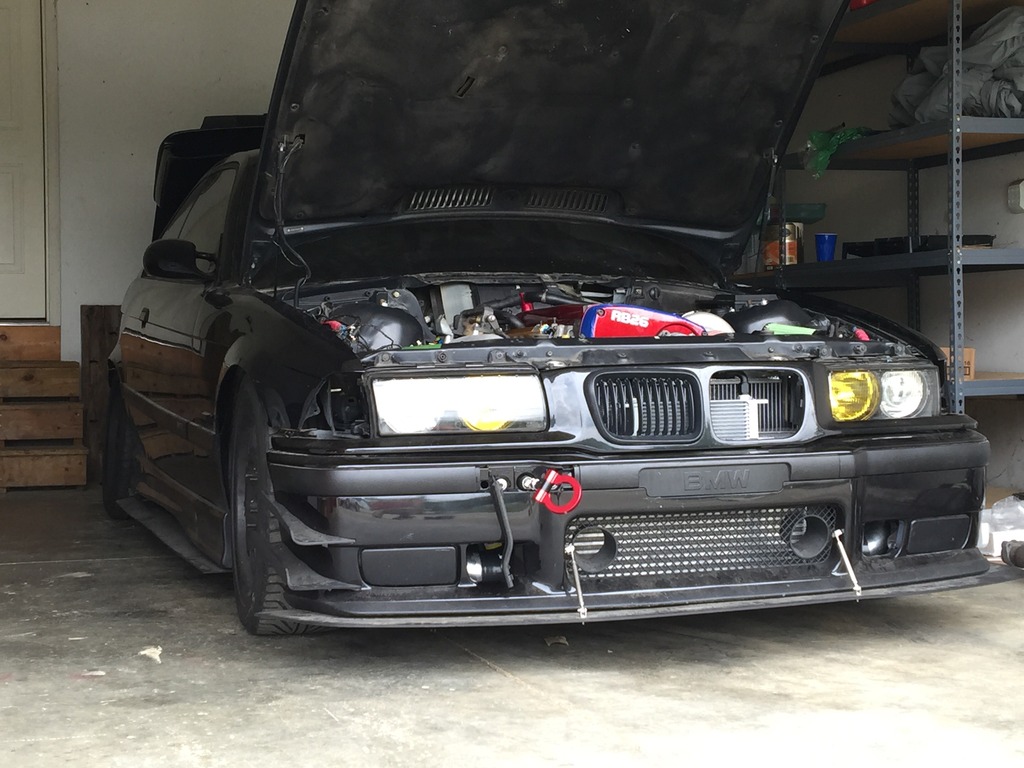
The car got to come back home to its new home today. Still moving into the new house, and the garage was quite empty without the car. Just a couple new pictures for you all.
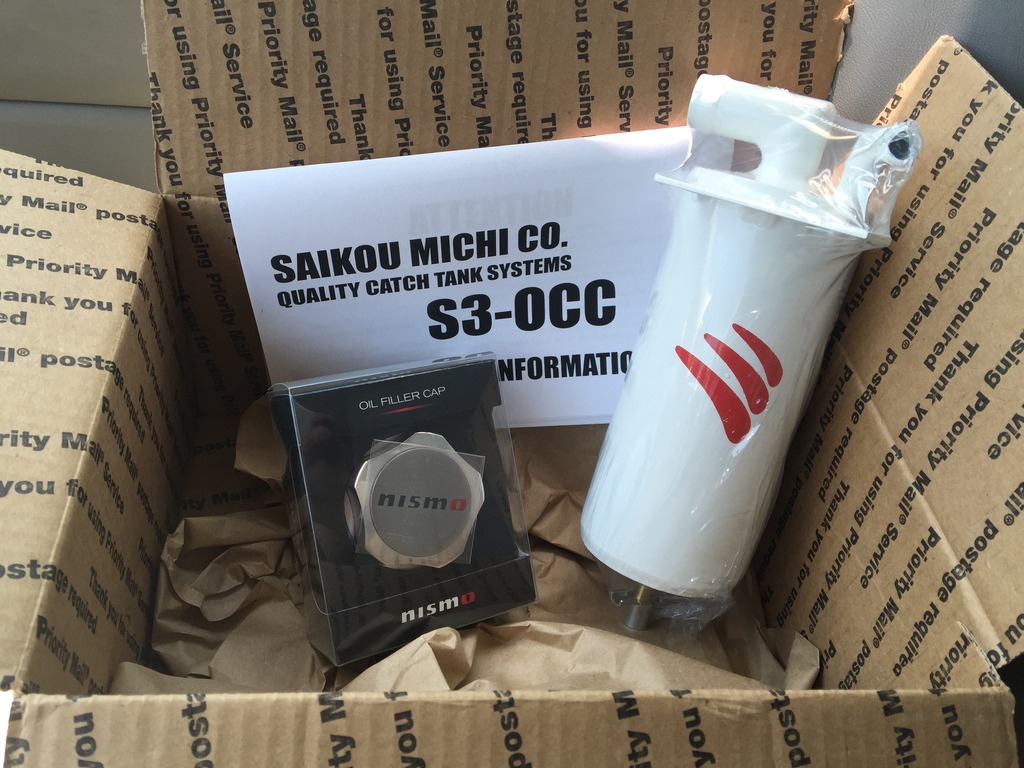
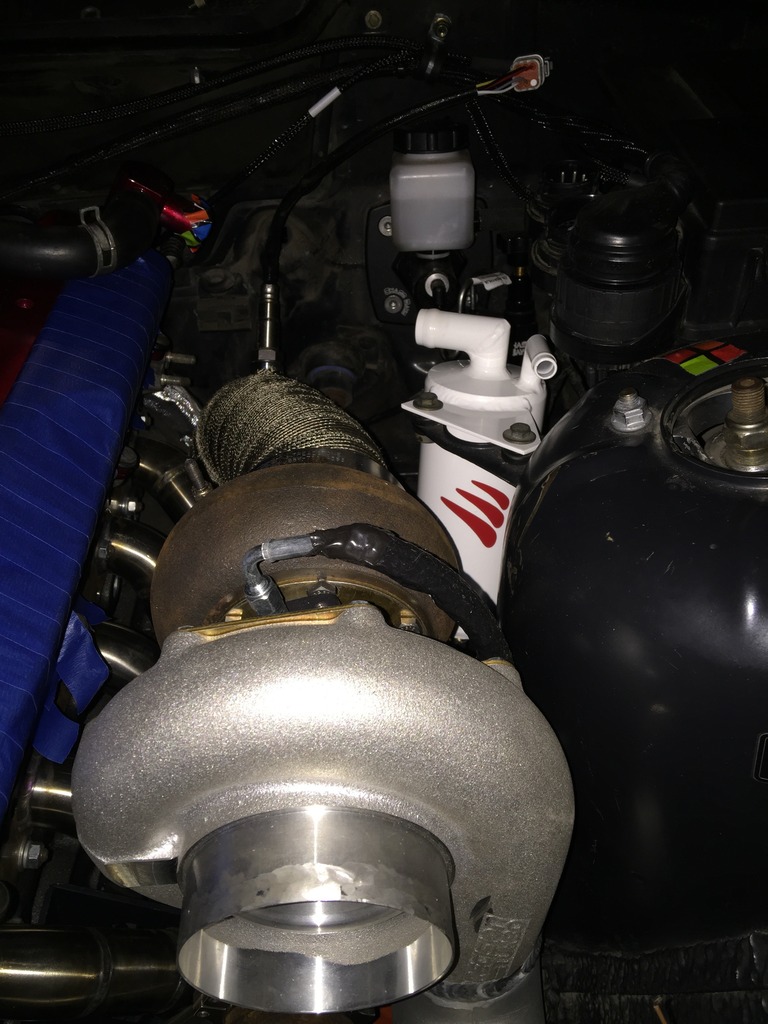
Sorry everyone for the sparce updates here as of late. I have been overwhelmed with trying to move into this new house. I have spent some time with the car though. Nothing too impressive to post pictures on. I have been working with the wiring specalties harness and the haltech wideband wiring. I will be sure to post pictures of finished products for sure. I did get a couple goodies in the mail as well to include a custom Saikou Michi catch can. These things are legit, and are commonly used in the lotus community. I had mr. Michi make a custom one for me to use in my situation. Also requested it be powder coated white. I decided to use a closed loop system so that the system will still have vacuum unlike an atmosphere setup. More pictures of it installed shortly.
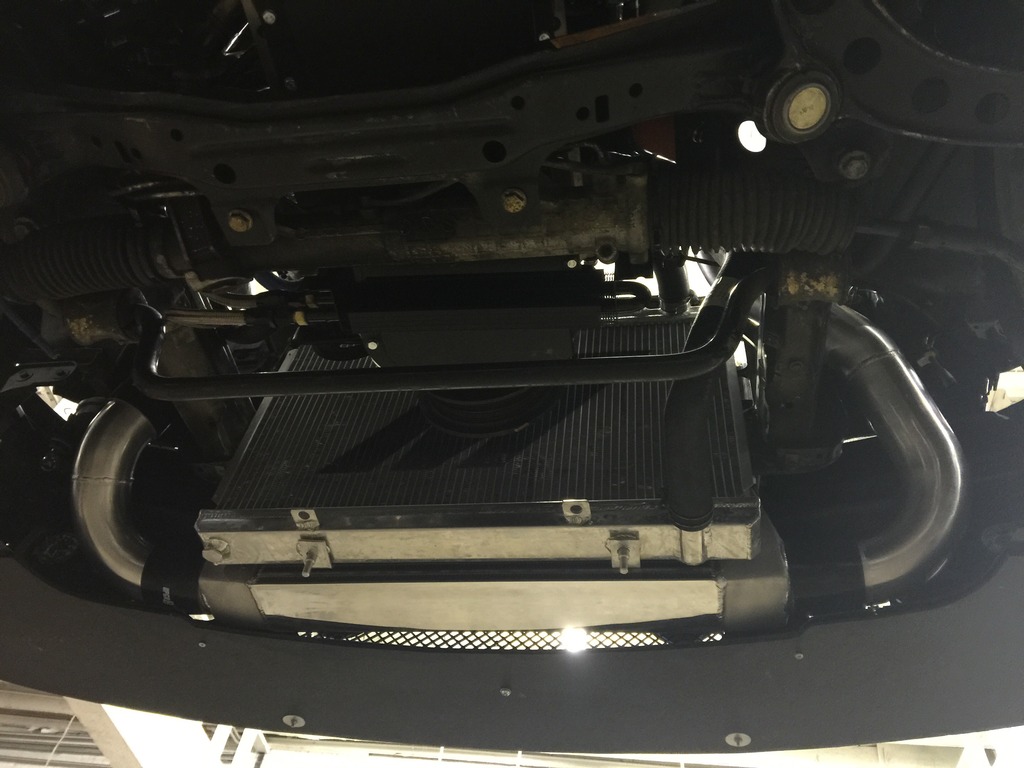
I also spent a little time working on fans. I ordered a total of 2 12" spal fans that flow 1200cfm each. Come to find out, it's a very tight fit. One of these will work on the passenger side of the radiator, but in no way will fit on the drivers side with power steering. My plan as of now is to use the one 12" fan as a primary cooking source powered by the haltech and then install a smaller 9 inch fan on the other side as a secondary also run by the haltech. Smaller one will kick on if water temps get to high. Anyway...... More later. CHEERS!
Snapped a couple more quick pictures for you all tonight to explain some things I was trying to discuss earlier. Sorry for the crappy pictures. Did the best I could do with my cell phone at 11:30 at night.
Here is a quick picture of where I am wanting the catch can to be placed at home. This picture doesn't show it bolted down, but close to where I want it. Bigger barb obviously will go to valve cover breather, and smaller barb will go to the vacuum source on turbo intake.
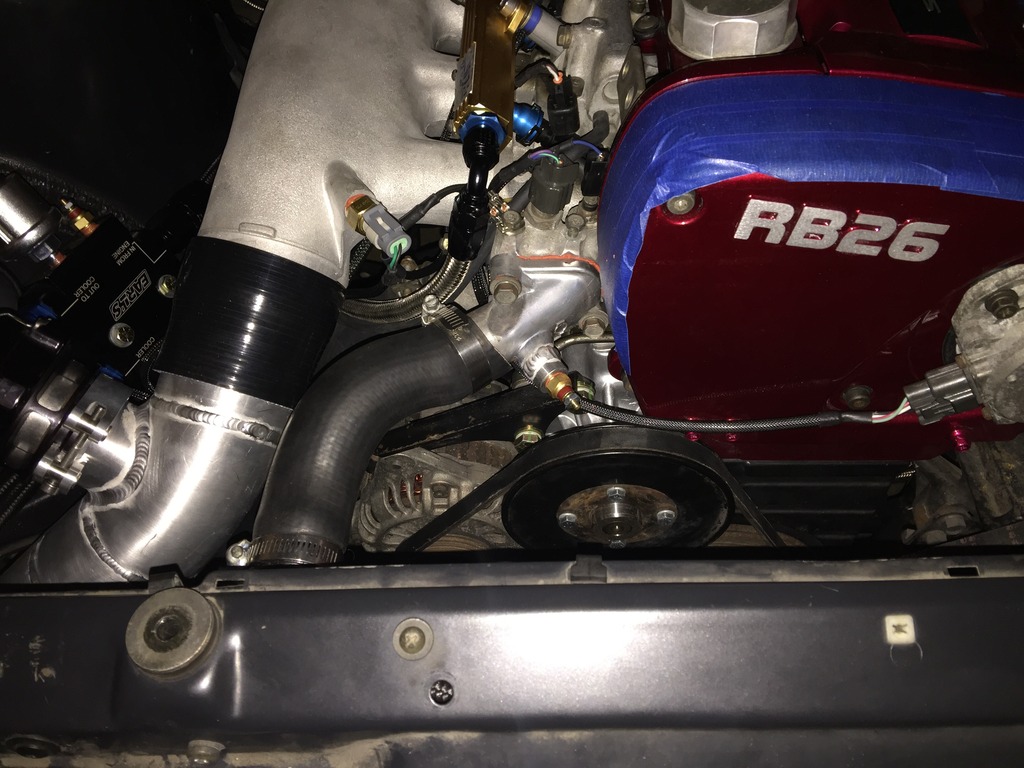
Here is a quick picture showing the Haltech IAT sensor I installed. I had to tap and retread the OEM location to fit this better sensor. We all know the Nissan ones are junk basically the same sensor as the water temp sensor. The picture also shows where I installed the water temp sensor on the water outlet. This will send to my aftermarket gauge in the cabin.
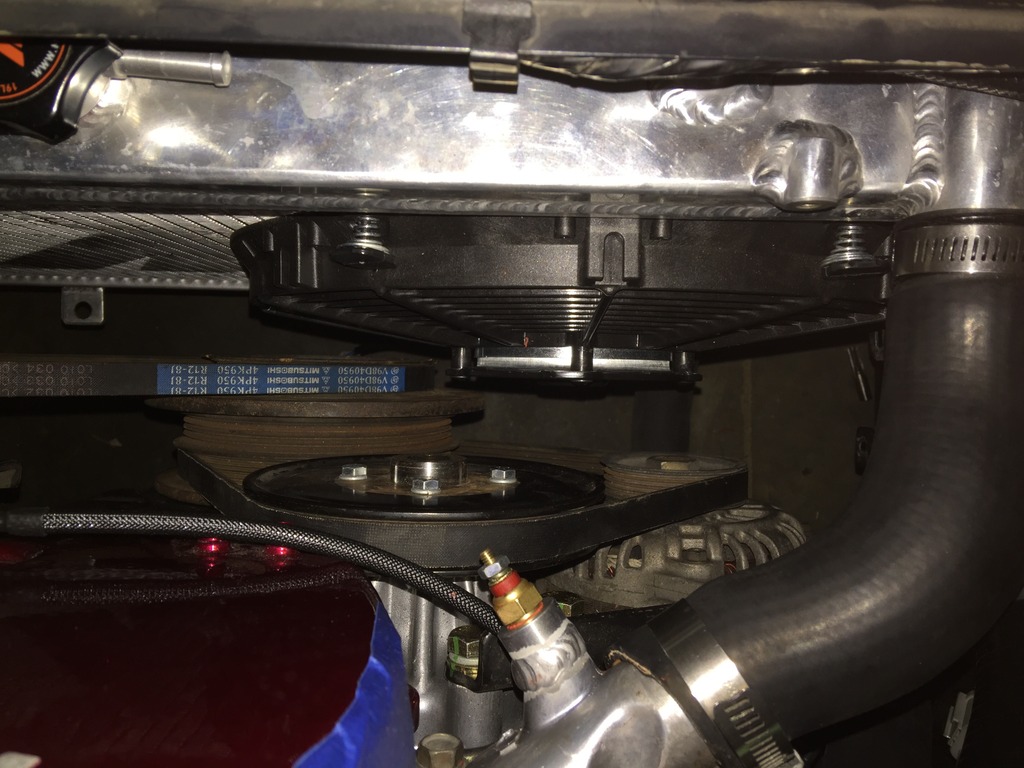
And last but not least, a quick couple pictures that show my space delimma I am having with the radiator fans and my belt drive system. The picture shows my 12 inch spal installed on the passenger side of the radiator. It's a tight squeeze, but works.
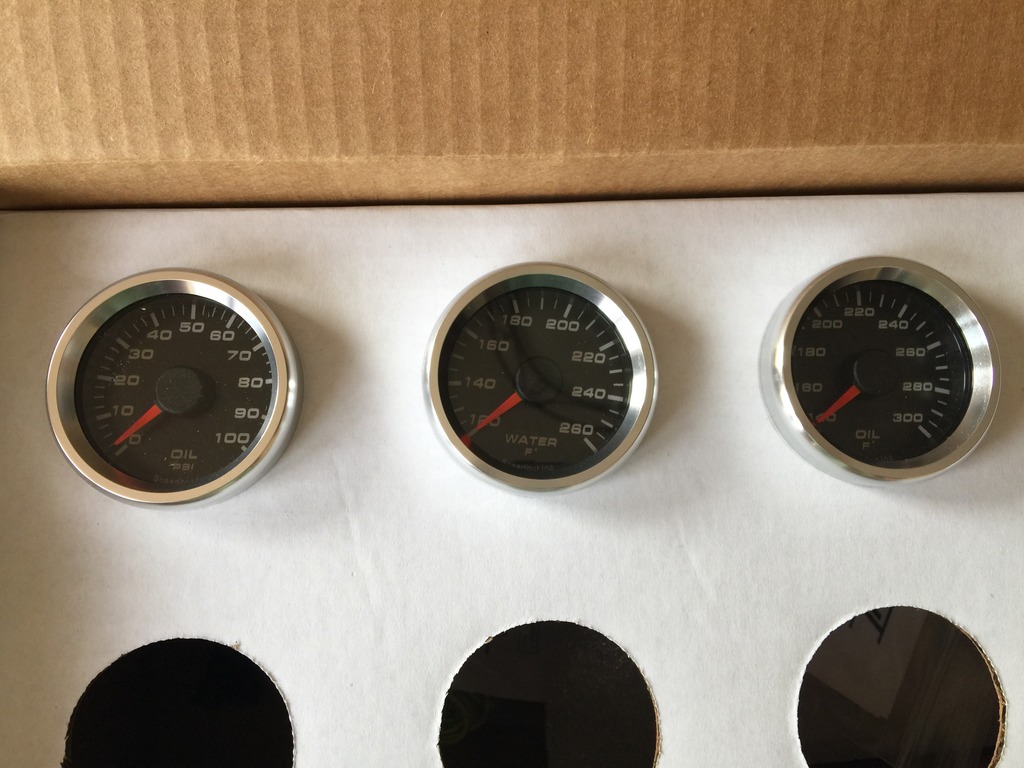
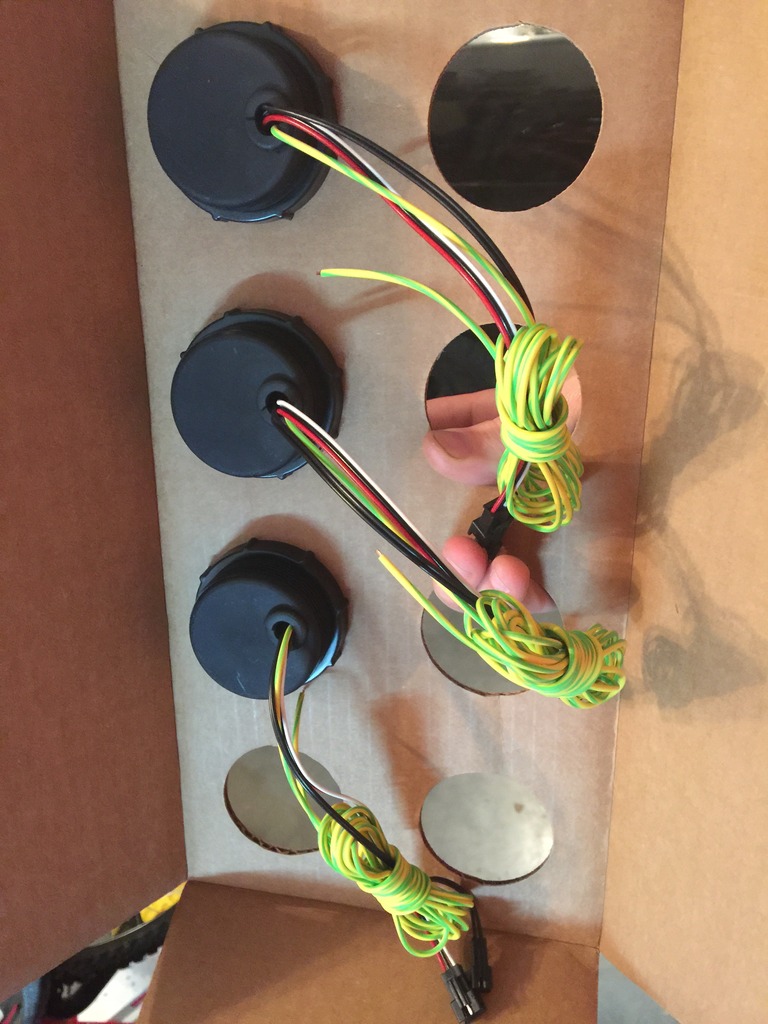
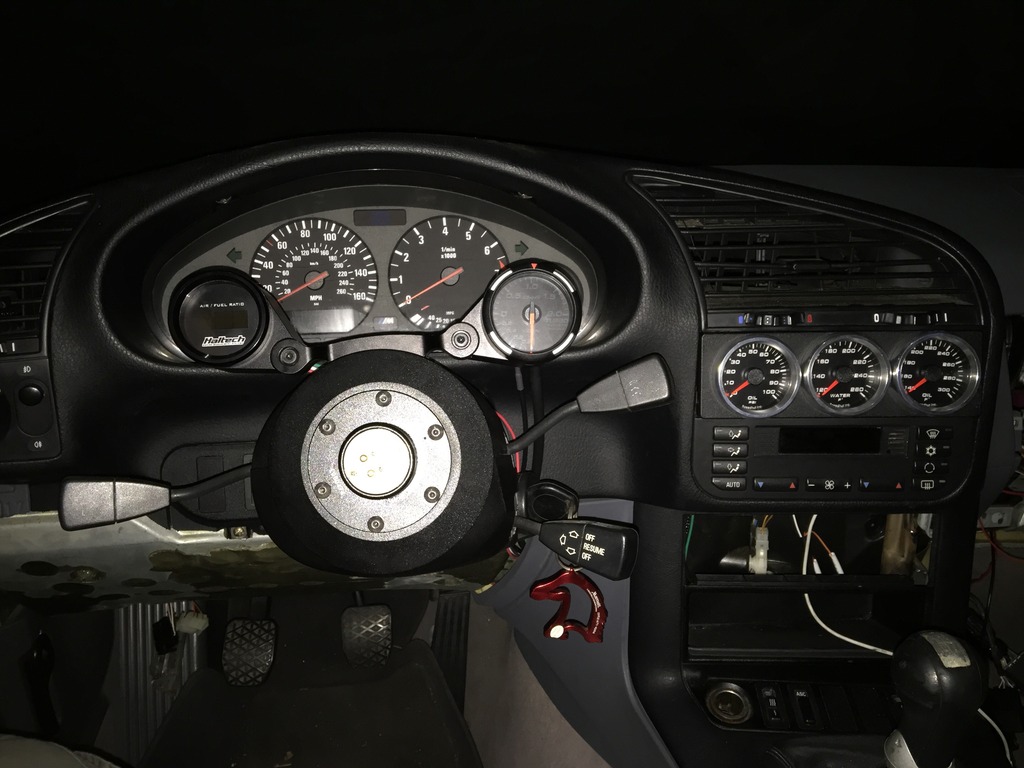
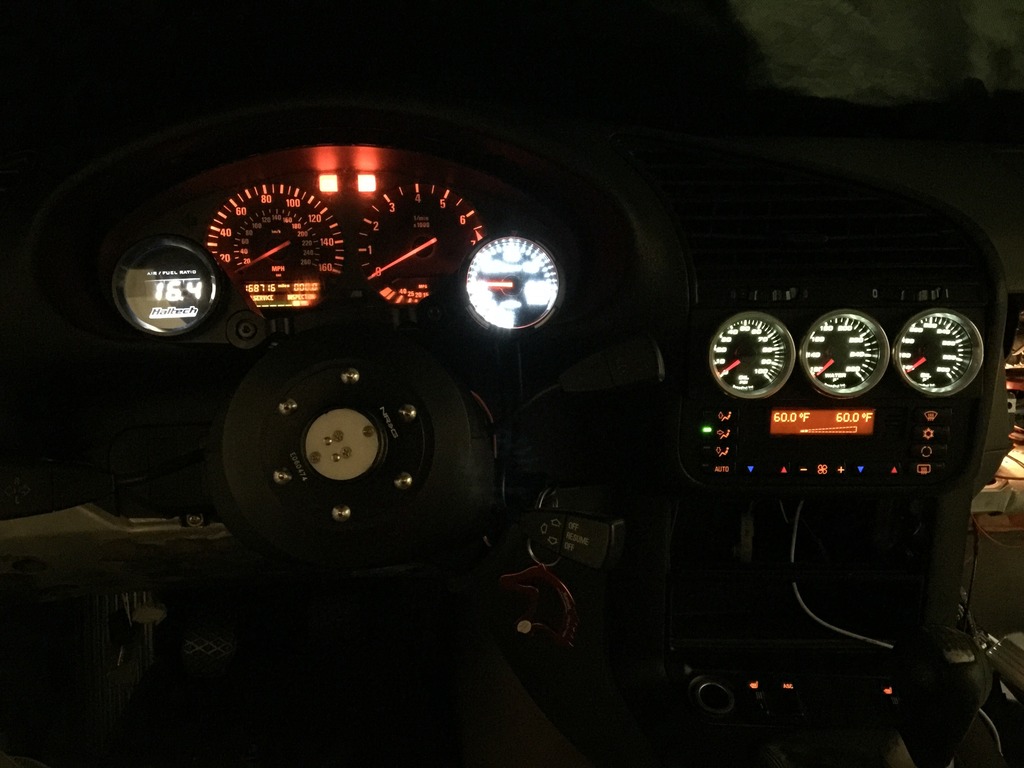
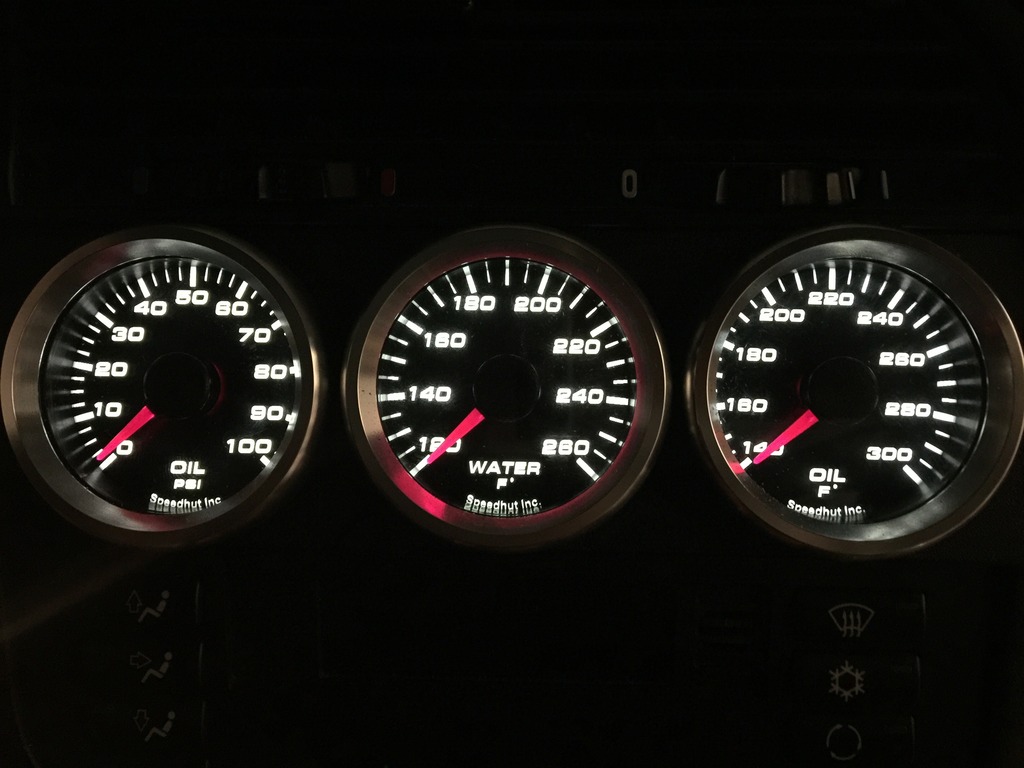
Ok you all. I have slowly been making progress with the car. This weekend I attempted to battle all of the gauges in the car to include the Haltech wideband, the Defi boost gauge, and the speedhut oil pressure, water temp, and oil temp gauges. For the three speedhut gauges, I decided to purchase a BMW radio delete panel and cur three 52mm holes. The boost gauge and the wideband, I picked up a gauge pod from a place called rally road productions. Here are a couple pictures. Sorry the Defi is blurry in the picture, it is really bright. Lol.
I have also been spending a ton of time wiring the whole damn project. Not much to show for it, but sure does take lots of time. Lol. 95 degree temps don't help either.
Last bit of the puzzle I have yet to solve is the throttle cable.....
Roadblock!!!!!
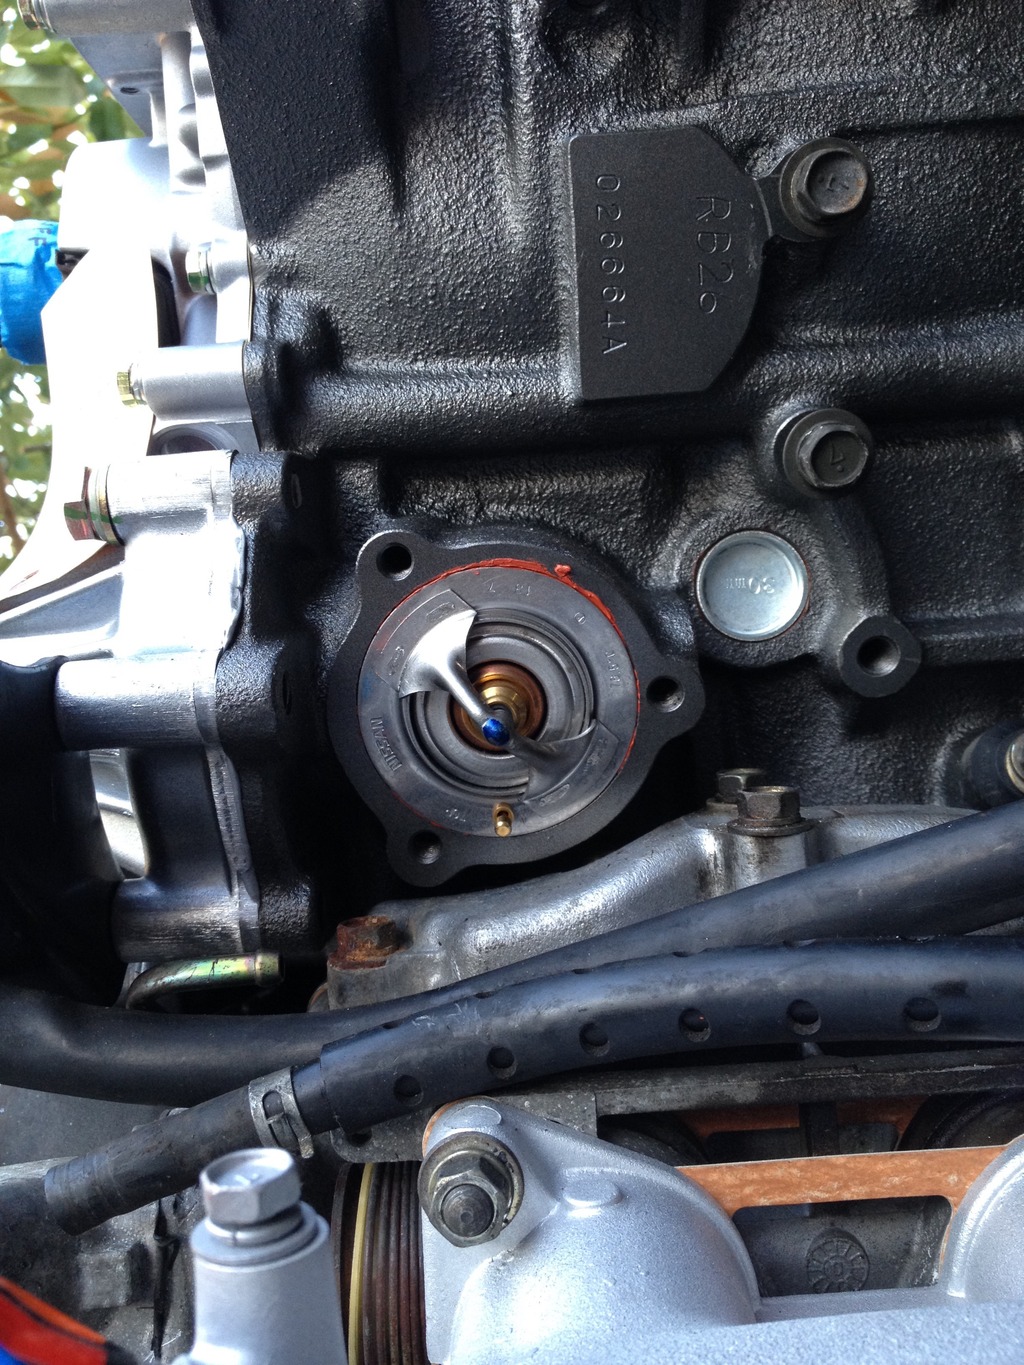
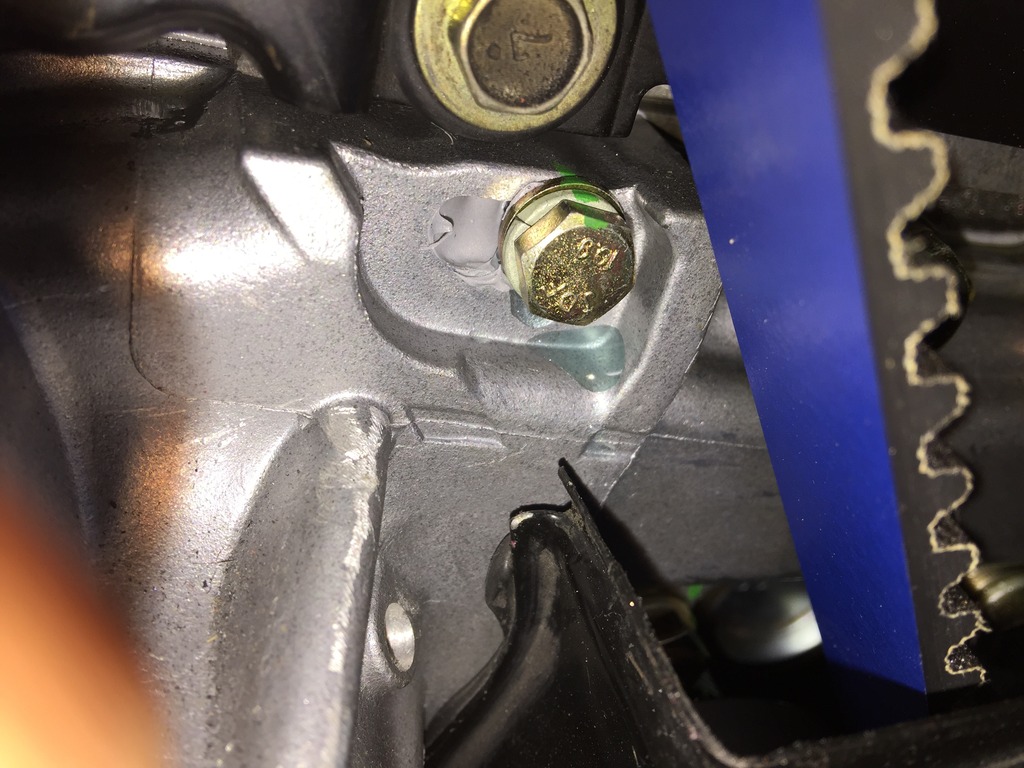
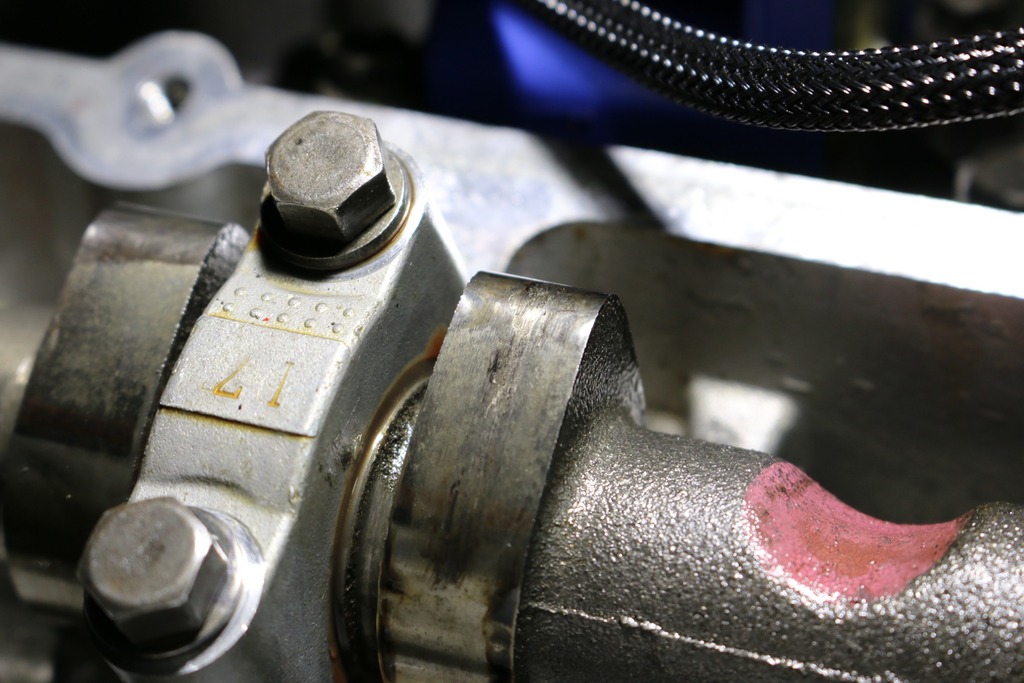
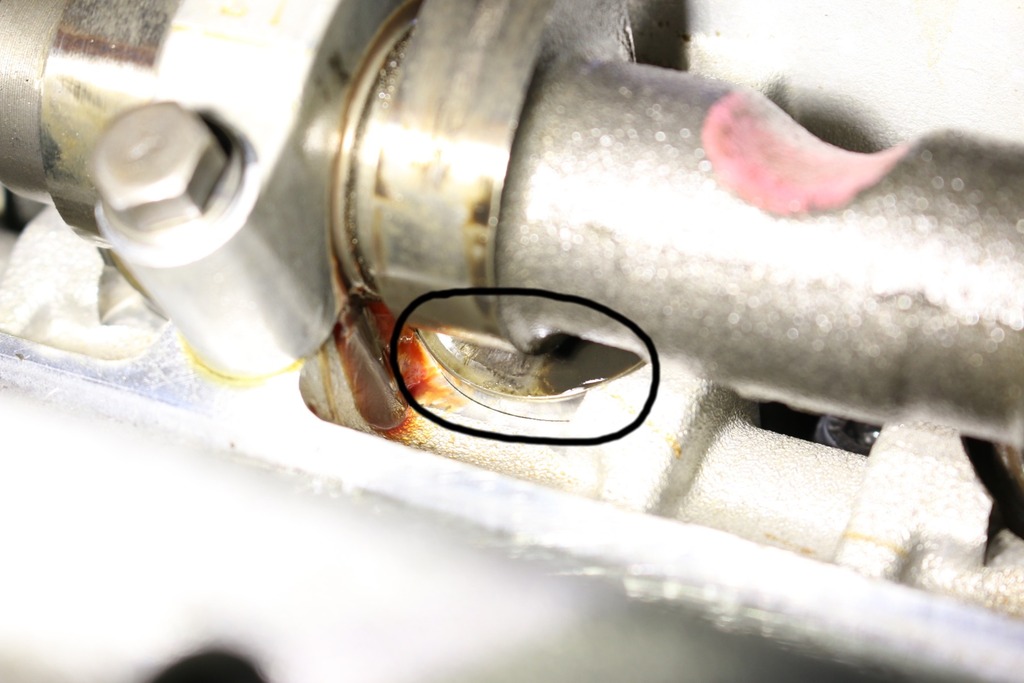
So I have a date to take my car to my tuner on this upcoming Monday. I decided to spend this weekend getting the car ready with fluids and such. I got to a point where I felt comfortable to fill with coolant. I started to fill with a mix and started to hear water hit the ground. It makes me very angry and sick to my stomach that coolant is leaking from the water pump. I'm stalking a stream, not a slow drip. If you remember from my previous posts, this motor was built and assembled by Raw Brokerage, to include install of this water pump. I'm not happy to say the least. Quite disappointed. I chose to spend the extra money to have a very reputable group build this motor, and this just seems silly. I have sent an email their way in hopes they will make it right. Keep your fingers crossed for me.
There she blows!!!!!
It was the bolt hole I suspected it to be. I'm sure you Rb guys are aware of the genius engineering behind Nissan when they decided to make a single bolt hole oval shaped instead of the standard bolt circle. I think it was to make the pump more of a cross reference piece between all Rb motors. Anyway, it was not sealed up properly from Raw Brokerage. Luckily an easy fix, but still out me behind schedule. Will try and remedy today and start the car tonight.
Ok, I have had another road block. The car is in good hands at Dynosty. These guys do good work. Building 1300hp gtr's like its a simple job. Anyway, the owner/tuner Hal got the baseman modified and the car running. We are in a holding pattern due to another issue from the Raw Brokerage build. I'm not going to go into detail until I figure out how much Raw Brokerage is willing to help to rectify the situation. Keep checking back for updates.
The exhaust sounds great by the way. Lol.


Exhaust got finished and buttoned up tonight and I am pretty pumped. I will let the pictures speak for themselves. We did decide to use an oval tip on the rear to avoid giving the car a huge cannon exhaust look.


The car got to come back home to its new home today. Still moving into the new house, and the garage was quite empty without the car. Just a couple new pictures for you all.


Sorry everyone for the sparce updates here as of late. I have been overwhelmed with trying to move into this new house. I have spent some time with the car though. Nothing too impressive to post pictures on. I have been working with the wiring specalties harness and the haltech wideband wiring. I will be sure to post pictures of finished products for sure. I did get a couple goodies in the mail as well to include a custom Saikou Michi catch can. These things are legit, and are commonly used in the lotus community. I had mr. Michi make a custom one for me to use in my situation. Also requested it be powder coated white. I decided to use a closed loop system so that the system will still have vacuum unlike an atmosphere setup. More pictures of it installed shortly.
I also spent a little time working on fans. I ordered a total of 2 12" spal fans that flow 1200cfm each. Come to find out, it's a very tight fit. One of these will work on the passenger side of the radiator, but in no way will fit on the drivers side with power steering. My plan as of now is to use the one 12" fan as a primary cooking source powered by the haltech and then install a smaller 9 inch fan on the other side as a secondary also run by the haltech. Smaller one will kick on if water temps get to high. Anyway...... More later. CHEERS!

Snapped a couple more quick pictures for you all tonight to explain some things I was trying to discuss earlier. Sorry for the crappy pictures. Did the best I could do with my cell phone at 11:30 at night.

Here is a quick picture of where I am wanting the catch can to be placed at home. This picture doesn't show it bolted down, but close to where I want it. Bigger barb obviously will go to valve cover breather, and smaller barb will go to the vacuum source on turbo intake.

Here is a quick picture showing the Haltech IAT sensor I installed. I had to tap and retread the OEM location to fit this better sensor. We all know the Nissan ones are junk basically the same sensor as the water temp sensor. The picture also shows where I installed the water temp sensor on the water outlet. This will send to my aftermarket gauge in the cabin.

And last but not least, a quick couple pictures that show my space delimma I am having with the radiator fans and my belt drive system. The picture shows my 12 inch spal installed on the passenger side of the radiator. It's a tight squeeze, but works.

Ok you all. I have slowly been making progress with the car. This weekend I attempted to battle all of the gauges in the car to include the Haltech wideband, the Defi boost gauge, and the speedhut oil pressure, water temp, and oil temp gauges. For the three speedhut gauges, I decided to purchase a BMW radio delete panel and cur three 52mm holes. The boost gauge and the wideband, I picked up a gauge pod from a place called rally road productions. Here are a couple pictures. Sorry the Defi is blurry in the picture, it is really bright. Lol.
I have also been spending a ton of time wiring the whole damn project. Not much to show for it, but sure does take lots of time. Lol. 95 degree temps don't help either.
Last bit of the puzzle I have yet to solve is the throttle cable.....


Roadblock!!!!!
So I have a date to take my car to my tuner on this upcoming Monday. I decided to spend this weekend getting the car ready with fluids and such. I got to a point where I felt comfortable to fill with coolant. I started to fill with a mix and started to hear water hit the ground. It makes me very angry and sick to my stomach that coolant is leaking from the water pump. I'm stalking a stream, not a slow drip. If you remember from my previous posts, this motor was built and assembled by Raw Brokerage, to include install of this water pump. I'm not happy to say the least. Quite disappointed. I chose to spend the extra money to have a very reputable group build this motor, and this just seems silly. I have sent an email their way in hopes they will make it right. Keep your fingers crossed for me.
There she blows!!!!!
It was the bolt hole I suspected it to be. I'm sure you Rb guys are aware of the genius engineering behind Nissan when they decided to make a single bolt hole oval shaped instead of the standard bolt circle. I think it was to make the pump more of a cross reference piece between all Rb motors. Anyway, it was not sealed up properly from Raw Brokerage. Luckily an easy fix, but still out me behind schedule. Will try and remedy today and start the car tonight.

Ok, I have had another road block. The car is in good hands at Dynosty. These guys do good work. Building 1300hp gtr's like its a simple job. Anyway, the owner/tuner Hal got the baseman modified and the car running. We are in a holding pattern due to another issue from the Raw Brokerage build. I'm not going to go into detail until I figure out how much Raw Brokerage is willing to help to rectify the situation. Keep checking back for updates.
The exhaust sounds great by the way. Lol.
The following users liked this post:
rustyschopshop (08-09-2016)

Trending Topics
07-02-2016, 07:11 PM
#8
New Member

Been following on Zilvia
 08-01-2016, 01:52 PM
#10
Amazing build - congrats. You are lucky you are so close to Dynosty. Sorry to hear of built motor woes though. Dynosty builds great motors. It may seem cheaper to send it back to the old place, but I highly recommend letting Dynosty take care of it for you.
Last edited by rcdash; 08-01-2016 at 01:53 PM.


 12-31-2016, 07:48 PM
#14
Ok. This is a sad/frustrating update for me. I have to say I normally don't post things like this, but my frustration with Raw Brokerage is pretty high at the moment. Ricky has been great with trying to resolve some issues, but I keep revealing more and more. The story goes something like this......
I took the car to Hal at Dynosty in Louisville (could speak highly enough about this group) a couple weeks ago to get the initial startup, break in tune and dyno completed. I ended up having to leave the car with them due to some punctuality issues on my end.
So later that next day I get a call from the guys at Dynosty and they have some good news and some bad news. They tell me that they got the car turned over, idles well, but the valve train was really noisy. They have a guy with some RB experience and guessed it sounded like valve lash clearance issues. They sent me a video and suggested that I have them pull the cam covers and measure out the clearances. Keep in mind this car has only idled and got up to operating temps two times total before this. There was even still assembly lube in the head when they pulled the covers. I mean we are talking still really fresh from Raw Brokerage's build.
After I give the ok to measure out the clearances, they give me a call and a couple emails with what they found. They advised that every one of the lash measured between .019"-.022". They even sent pictures showing that this error on the build did damage to my camshafts and lifter buckets. Will attach pictures. Nothing that was detrimental by any means, but still frustrating to drop a huge coin on a build to only have these issues.
After finding this, the guys at Dynosty suggested the whole head needed to be removed and gone through again just to make sure everything else was kosher. Not to mention took the opportunity to order a fresh set of Tomei poncams from Japan. This is where we contacted Ricky at Raw Brokerage. Great guy and was more than willing to try and figure out the issue. Raw Brokerage wants the head shipped back to them down in Florida to go over. Understandable, but geez. Now Dynosty has to get paid to remove and reinstall the cylinder head. Not to mention the headgasket and other associated cylinder head gasket would need to be replaced.
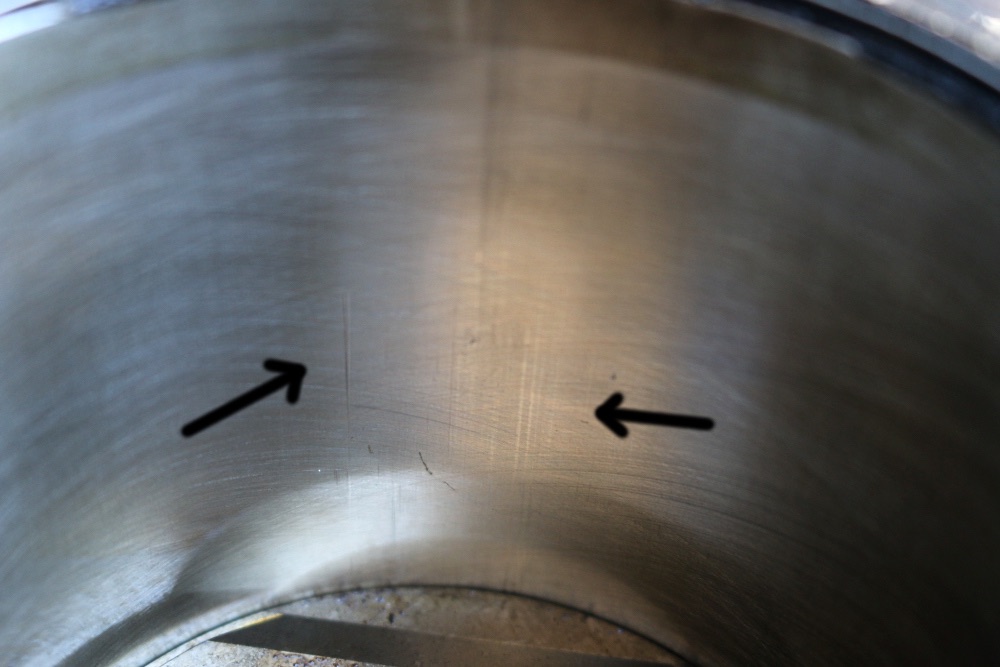
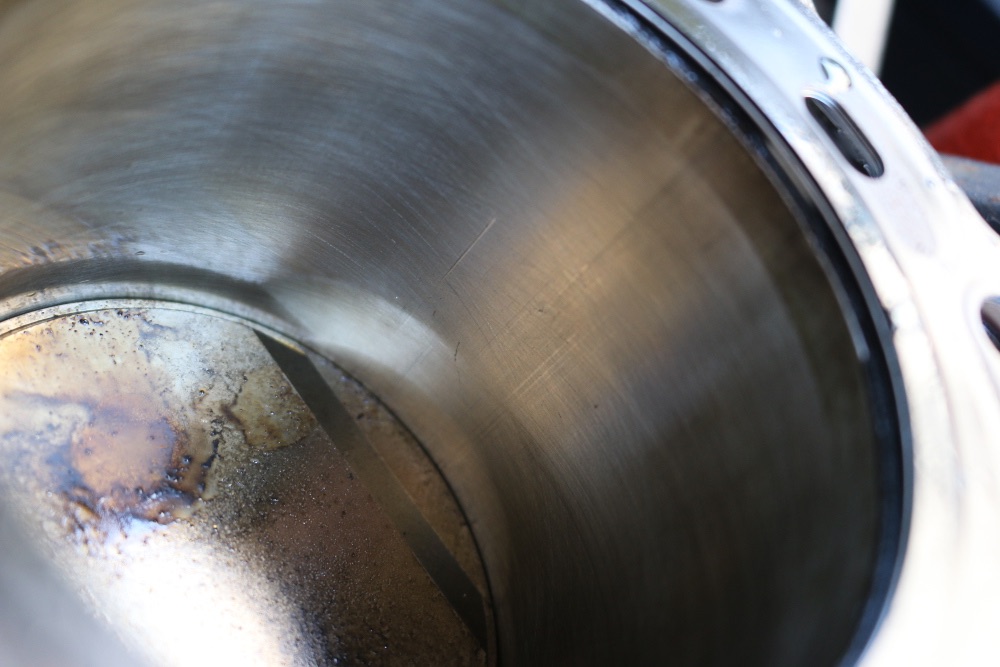
Dynosty officially removed the Cylinder head this morning to prepare for shipment and found a couple more issues. First being the headgasket. This was supposed to be a brand new Tomei gasket. Clearly it was already failing after two short idle periods on the motor. The second issue being small scratches found in cylinder wall number one from the oil control ring. Again nothing that would cause the motor to crash and burn, but still unacceptable when dropping such large coin on a fresh build top to bottom.
Bottom line frustrated and a major set back.
I took the car to Hal at Dynosty in Louisville (could speak highly enough about this group) a couple weeks ago to get the initial startup, break in tune and dyno completed. I ended up having to leave the car with them due to some punctuality issues on my end.
So later that next day I get a call from the guys at Dynosty and they have some good news and some bad news. They tell me that they got the car turned over, idles well, but the valve train was really noisy. They have a guy with some RB experience and guessed it sounded like valve lash clearance issues. They sent me a video and suggested that I have them pull the cam covers and measure out the clearances. Keep in mind this car has only idled and got up to operating temps two times total before this. There was even still assembly lube in the head when they pulled the covers. I mean we are talking still really fresh from Raw Brokerage's build.
After I give the ok to measure out the clearances, they give me a call and a couple emails with what they found. They advised that every one of the lash measured between .019"-.022". They even sent pictures showing that this error on the build did damage to my camshafts and lifter buckets. Will attach pictures. Nothing that was detrimental by any means, but still frustrating to drop a huge coin on a build to only have these issues.


After finding this, the guys at Dynosty suggested the whole head needed to be removed and gone through again just to make sure everything else was kosher. Not to mention took the opportunity to order a fresh set of Tomei poncams from Japan. This is where we contacted Ricky at Raw Brokerage. Great guy and was more than willing to try and figure out the issue. Raw Brokerage wants the head shipped back to them down in Florida to go over. Understandable, but geez. Now Dynosty has to get paid to remove and reinstall the cylinder head. Not to mention the headgasket and other associated cylinder head gasket would need to be replaced.
Dynosty officially removed the Cylinder head this morning to prepare for shipment and found a couple more issues. First being the headgasket. This was supposed to be a brand new Tomei gasket. Clearly it was already failing after two short idle periods on the motor. The second issue being small scratches found in cylinder wall number one from the oil control ring. Again nothing that would cause the motor to crash and burn, but still unacceptable when dropping such large coin on a fresh build top to bottom.


Bottom line frustrated and a major set back.
12-31-2016, 07:50 PM
#15
Ok guys...... Sorry this thread has not been updated in such a long time. Long story short, they car is still at Dynosty in pieces. #HATEMYLIFE. Here goes my long sob story. I would like to state for the record the purpose of this post is not to bash on Raw Brokerage by any means, but just to document my build and share my experience with others.
So we last left off with my cylinder head being shipped back to Raw Brokerage to get looked over to find out what exactly happened. While at Raw Brokerage Ricky and company turned my Cylinder head around very quickly and I was grateful for that. While it was back apart we went ahead and has some Brian Crower Valve Springs installed along with some Brian Crower bronze valve guides for good measure. After about 3-4 weeks time, a box ended back up on the door step of Dynosty. Raw Brokerage even sent a brand new Tomei headgasket back with the second attempt on the Cylinder head. Needless to say I was feeling pretty good about this time around.....
The RB tech at Dynosty made sure all deck surfaces were clean enough to eat off of, and torqued down the RAW Brokerage pre-assembled cylinder head to factory spec.......
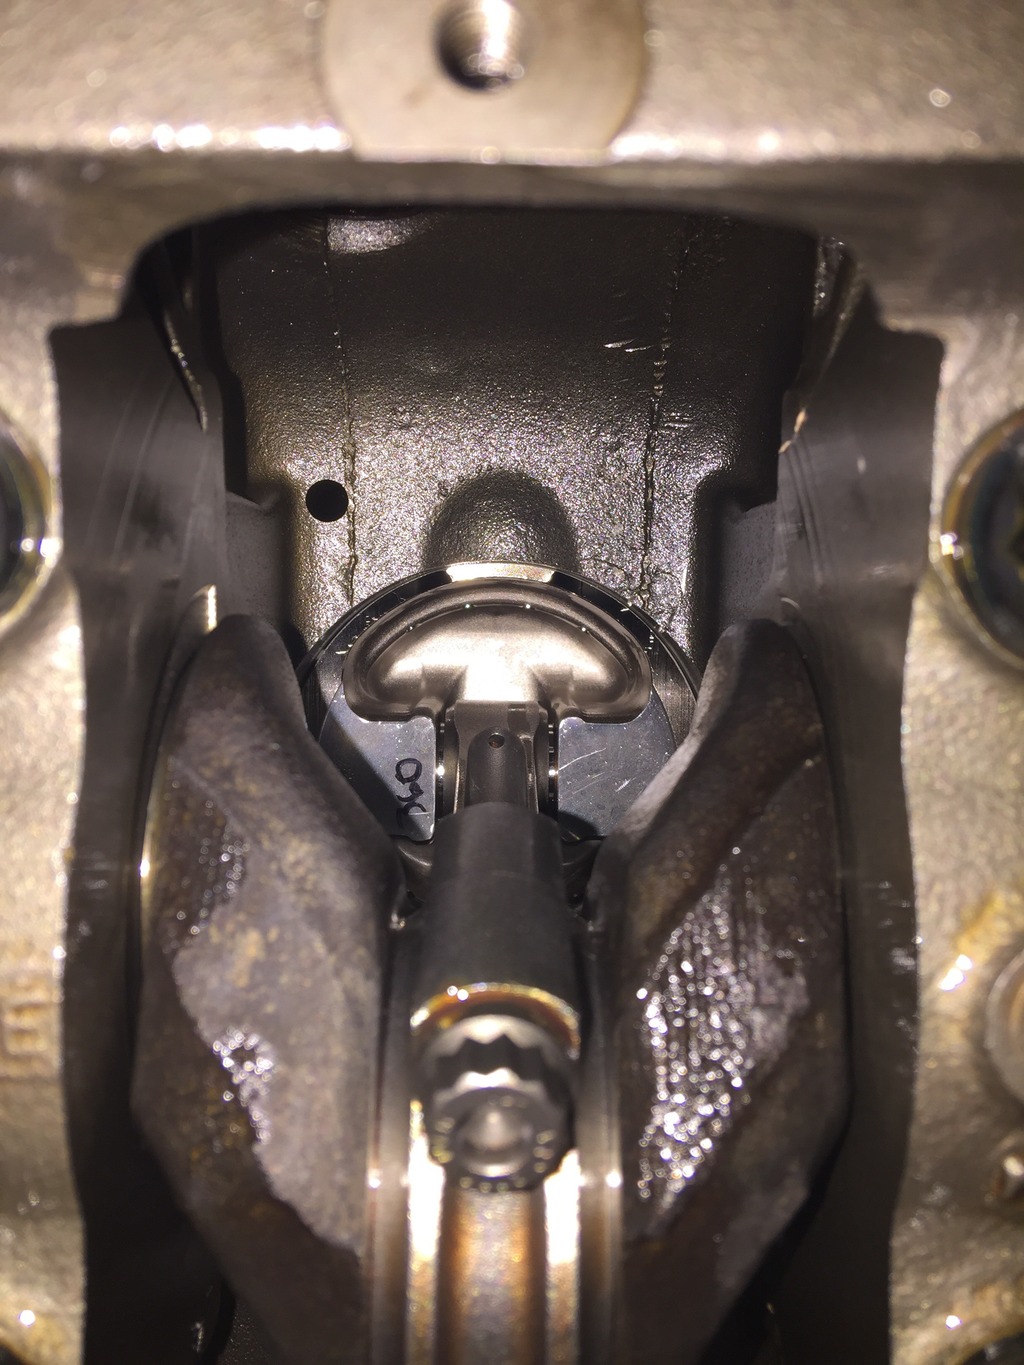
Ready for the kicker on this story?...... I get a call from Dynosty the day i knew they were going to start it again. I knew this couldn't be good.. icardfp: The crew at Dynosty advised that the initial start up went much better than before and the valve lash sounded to be in spec compared to the prior attempt..... They left it to idle on the dyno so that it could get up to operating temp. They said within 5 minutes of idle the whole shop echoed with a loud screech that made everyone stop what there were doing. I was advised that following the noise the motor locked up.... SMH SMH FML!!!!!!!!!!!! They had me drive up to look at the carnage for myself. They pulled the exhaust side rocker cover and found that the mechanical timing was off by 3 or so teeth and found the following under the rocker cover......
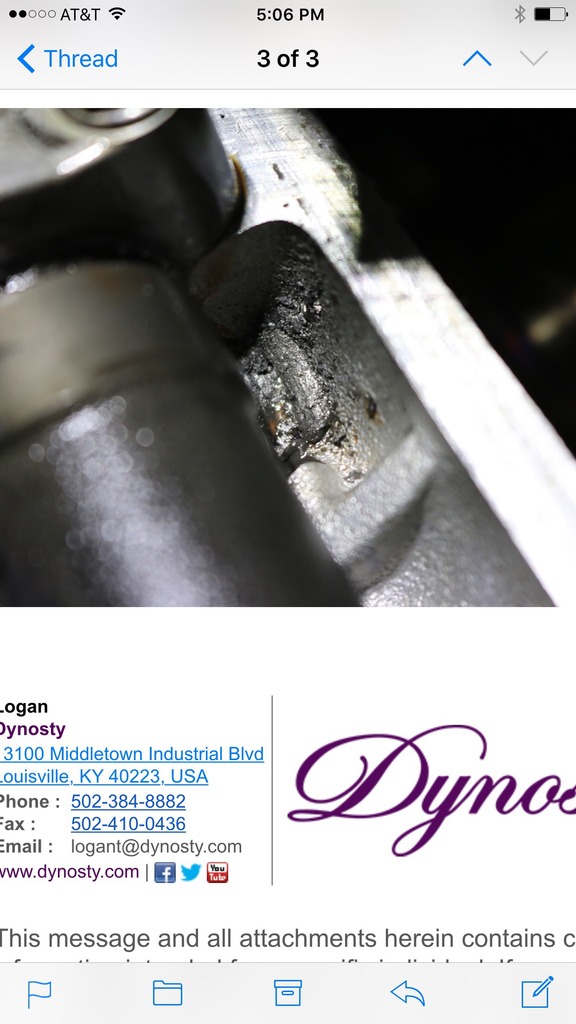
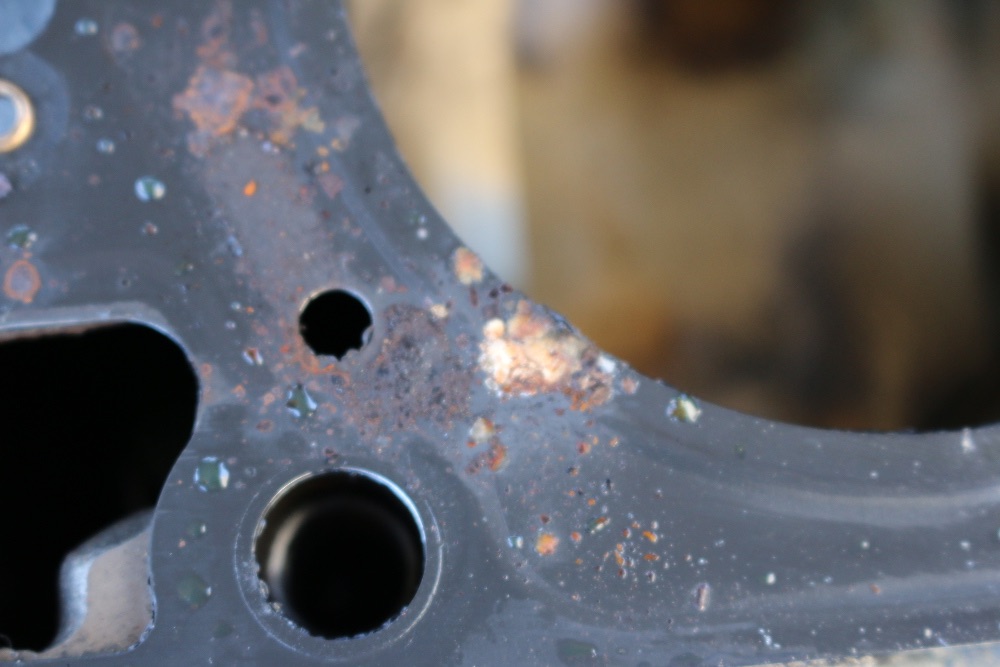
They found metal shavings all around a lifter bucket. Brock the RB tech advised that they believe that a lifter bucket tolerance was not in spec and was too tight. So when the motor started to warm up it caused interference. They actually came to the conclusion the head at this point was trash due to the damage in the casting around the lifter buckets. I had them to go ahead and disassemble further to asses the destruction and found the following....
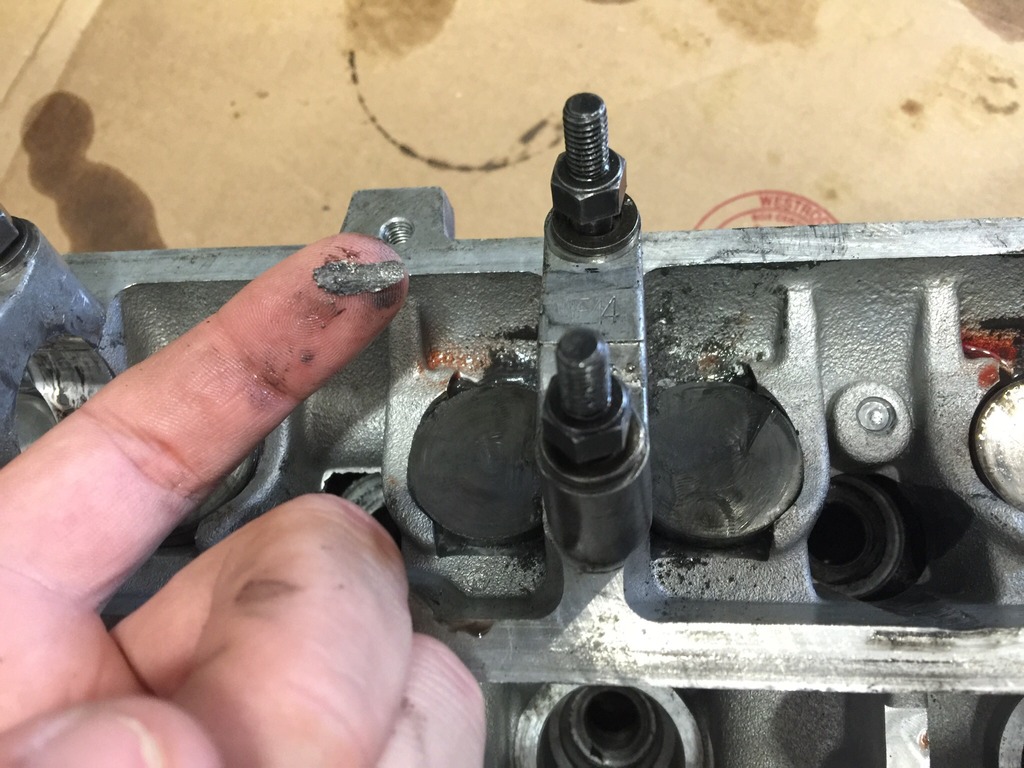
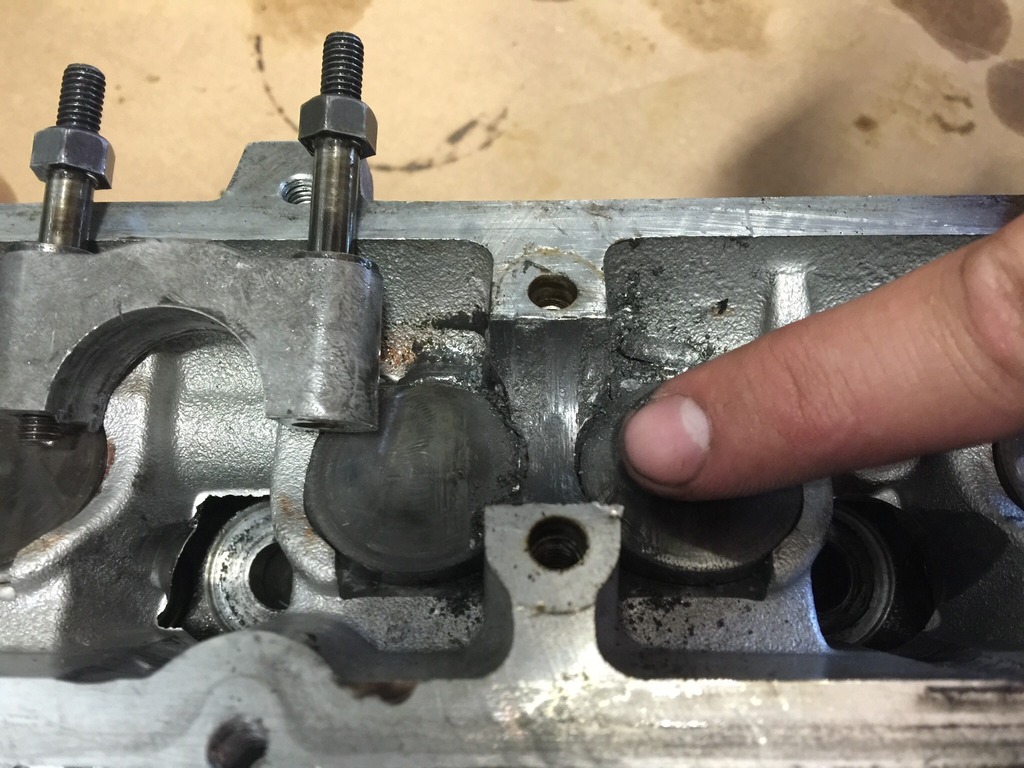


 So here I was feeling like I had been bent over as I was out a Cylinder head (not the easiest and cheapest to find a replacement), out a brand new set of $550 Tomei camshafts, and the new headgasket. Not to mention all those metal shavings would have been ingested by the bottom end as well. As much as I hated to do so, I had Dynosty schedule to pull the head yet again, and advised i was going to have them make this problem right as RAW brokerage couldn't seem to get the job done and was just costing me money. Needless to say I was left with this
I went ahead and made the call to Raw Brokerage to see how they wanted to proceed in resolving this. Keep in mind the second cylinder head that failed was fully assembled by Raw Brokerage and was just set on the block and torqued to spec by Dynosty.
Raw Brokerage asked me how I would like to proceed and came to the conclusion they would source me a brand new OEM casting, one more Tomei headgasket (they wanted the old one back?????), a partial refund on the machine work and assembly of the cylinder head, and asked to shake hands and part ways. I agreed to this knowing I wanted Dynosty to do all the work from here. 2 weeks later the box landed on the steps of dynosty. I was grateful that Ricky was able to source me a brand new OEM casting, due to them being on a backorder currently and may be harder and harder to get.
I gave dynosty the go ahead and pull the rest of the motor so that they could go over every bolt and bearing to insure all was correct. I didnt want to take a risk of something else going wrong having this brand new head. Not to mention the track record with the assembly from Raw Brokerage has not had the best track record
So here is where I am at to this date..... The motor is totally torn down. The machinist recieved the new cylinder head and the old one to trasfer all usable parts over along with getting a valve job done. I was advised the OEM valance had been cut past spec and could not be used again, so I was force to purchase all new Supertech valves to go with the prior installed Brian Crower goods.
Another thing I should note, upon the careful disassembly of the short block, Brock took note that all the pitons rights were clocked incorrectly. ALL SIX pistons had the ring gaps stacked right over top of the ones below it. This would have cause major issues with blow by and compression. Brock advised that there was no way with 10 minutes total of idle time that all six cylinders would have coincidentally aligned that way. Another incorrect assembly point from the original build by Raw Brokerage.
Anyway.... The block has been sent to get hot tanked to make sure all metal has been removed. New ACL bearing have been ordered and brand new piston rings are on order as well.....
I promise to keep this updated from here forward as i will receive periodic pictures of the third and final build attempt. I feel that every single part at this point has been upgraded and replaced at this point. I have been assured by Dynosty this will be down hill from here and this motor will be able to support 750hp plus.
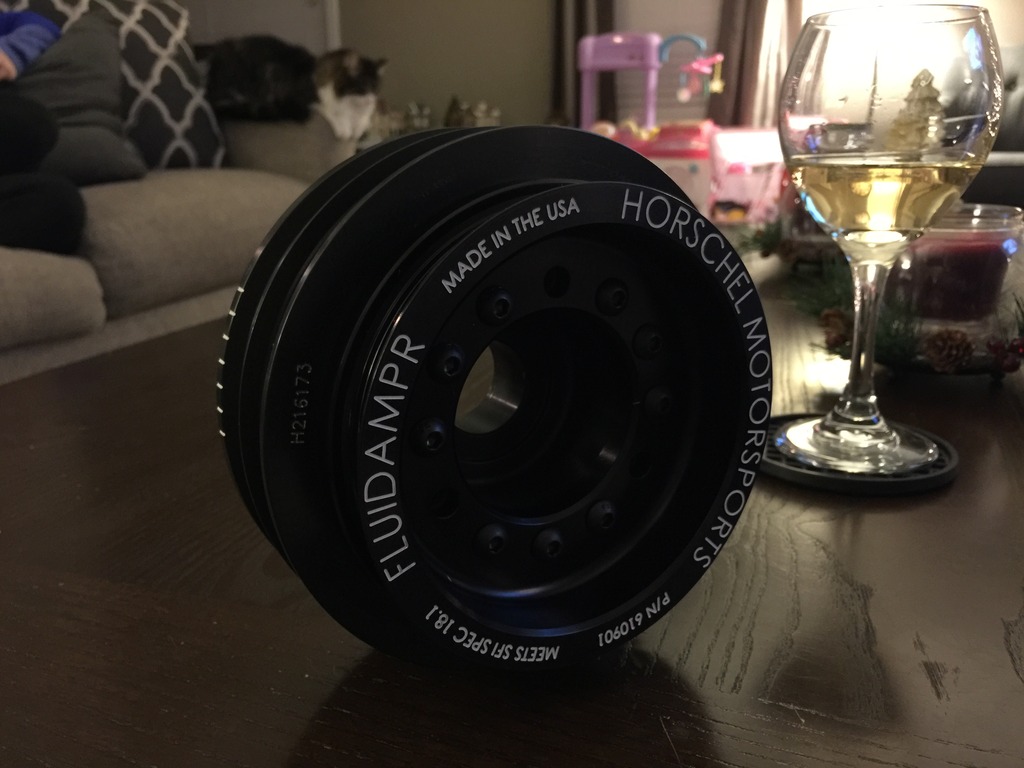
I did decide to also purchase a Fluidampr to be installed upon reassmbly and TOMEI metal intake manifold and exhaust manifold gaskets...:2f2f:
Just because Im excited about this piece..... Ignore the cat in the background and my new years eve beverage... LOL
So we last left off with my cylinder head being shipped back to Raw Brokerage to get looked over to find out what exactly happened. While at Raw Brokerage Ricky and company turned my Cylinder head around very quickly and I was grateful for that. While it was back apart we went ahead and has some Brian Crower Valve Springs installed along with some Brian Crower bronze valve guides for good measure. After about 3-4 weeks time, a box ended back up on the door step of Dynosty. Raw Brokerage even sent a brand new Tomei headgasket back with the second attempt on the Cylinder head. Needless to say I was feeling pretty good about this time around.....
The RB tech at Dynosty made sure all deck surfaces were clean enough to eat off of, and torqued down the RAW Brokerage pre-assembled cylinder head to factory spec.......
Ready for the kicker on this story?...... I get a call from Dynosty the day i knew they were going to start it again. I knew this couldn't be good..
icardfp: The crew at Dynosty advised that the initial start up went much better than before and the valve lash sounded to be in spec compared to the prior attempt..... They left it to idle on the dyno so that it could get up to operating temp. They said within 5 minutes of idle the whole shop echoed with a loud screech that made everyone stop what there were doing. I was advised that following the noise the motor locked up.... SMH SMH FML!!!!!!!!!!!! They had me drive up to look at the carnage for myself. They pulled the exhaust side rocker cover and found that the mechanical timing was off by 3 or so teeth and found the following under the rocker cover......
They found metal shavings all around a lifter bucket. Brock the RB tech advised that they believe that a lifter bucket tolerance was not in spec and was too tight. So when the motor started to warm up it caused interference. They actually came to the conclusion the head at this point was trash due to the damage in the casting around the lifter buckets. I had them to go ahead and disassemble further to asses the destruction and found the following....


 So here I was feeling like I had been bent over as I was out a Cylinder head (not the easiest and cheapest to find a replacement), out a brand new set of $550 Tomei camshafts, and the new headgasket. Not to mention all those metal shavings would have been ingested by the bottom end as well. As much as I hated to do so, I had Dynosty schedule to pull the head yet again, and advised i was going to have them make this problem right as RAW brokerage couldn't seem to get the job done and was just costing me money. Needless to say I was left with this
I went ahead and made the call to Raw Brokerage to see how they wanted to proceed in resolving this. Keep in mind the second cylinder head that failed was fully assembled by Raw Brokerage and was just set on the block and torqued to spec by Dynosty.
Raw Brokerage asked me how I would like to proceed and came to the conclusion they would source me a brand new OEM casting, one more Tomei headgasket (they wanted the old one back?????), a partial refund on the machine work and assembly of the cylinder head, and asked to shake hands and part ways. I agreed to this knowing I wanted Dynosty to do all the work from here. 2 weeks later the box landed on the steps of dynosty. I was grateful that Ricky was able to source me a brand new OEM casting, due to them being on a backorder currently and may be harder and harder to get.
I gave dynosty the go ahead and pull the rest of the motor so that they could go over every bolt and bearing to insure all was correct. I didnt want to take a risk of something else going wrong having this brand new head. Not to mention the track record with the assembly from Raw Brokerage has not had the best track record
So here is where I am at to this date..... The motor is totally torn down. The machinist recieved the new cylinder head and the old one to trasfer all usable parts over along with getting a valve job done. I was advised the OEM valance had been cut past spec and could not be used again, so I was force to purchase all new Supertech valves to go with the prior installed Brian Crower goods.
Another thing I should note, upon the careful disassembly of the short block, Brock took note that all the pitons rights were clocked incorrectly. ALL SIX pistons had the ring gaps stacked right over top of the ones below it. This would have cause major issues with blow by and compression. Brock advised that there was no way with 10 minutes total of idle time that all six cylinders would have coincidentally aligned that way. Another incorrect assembly point from the original build by Raw Brokerage.
Anyway.... The block has been sent to get hot tanked to make sure all metal has been removed. New ACL bearing have been ordered and brand new piston rings are on order as well.....
I promise to keep this updated from here forward as i will receive periodic pictures of the third and final build attempt. I feel that every single part at this point has been upgraded and replaced at this point. I have been assured by Dynosty this will be down hill from here and this motor will be able to support 750hp plus.
I did decide to also purchase a Fluidampr to be installed upon reassmbly and TOMEI metal intake manifold and exhaust manifold gaskets...:2f2f:
Just because Im excited about this piece..... Ignore the cat in the background and my new years eve beverage... LOL

 01-05-2017, 01:07 PM
#18
Registered User

Having dealt with this first hand(different company/shop) It amazes me that in this age of the Internet guys/shops still get away with this incompetence. If you can't do the work the right way.. Why take the money for the job. Just F@#king greed. It's way easier to say No then to have to back track and lie..
On a good note you probably have your car at 1 of the best places you can. Hal spent 20 minutes on the phone answer questions for just an 485wal install. And the place I have my car at now called Hal for pointers/help and he did, stand up shop.If I was closer my car would be there too.
On a good note you probably have your car at 1 of the best places you can. Hal spent 20 minutes on the phone answer questions for just an 485wal install. And the place I have my car at now called Hal for pointers/help and he did, stand up shop.If I was closer my car would be there too.
The following users liked this post:
Conway_160 (01-05-2017)
02-09-2017, 04:08 PM
#19
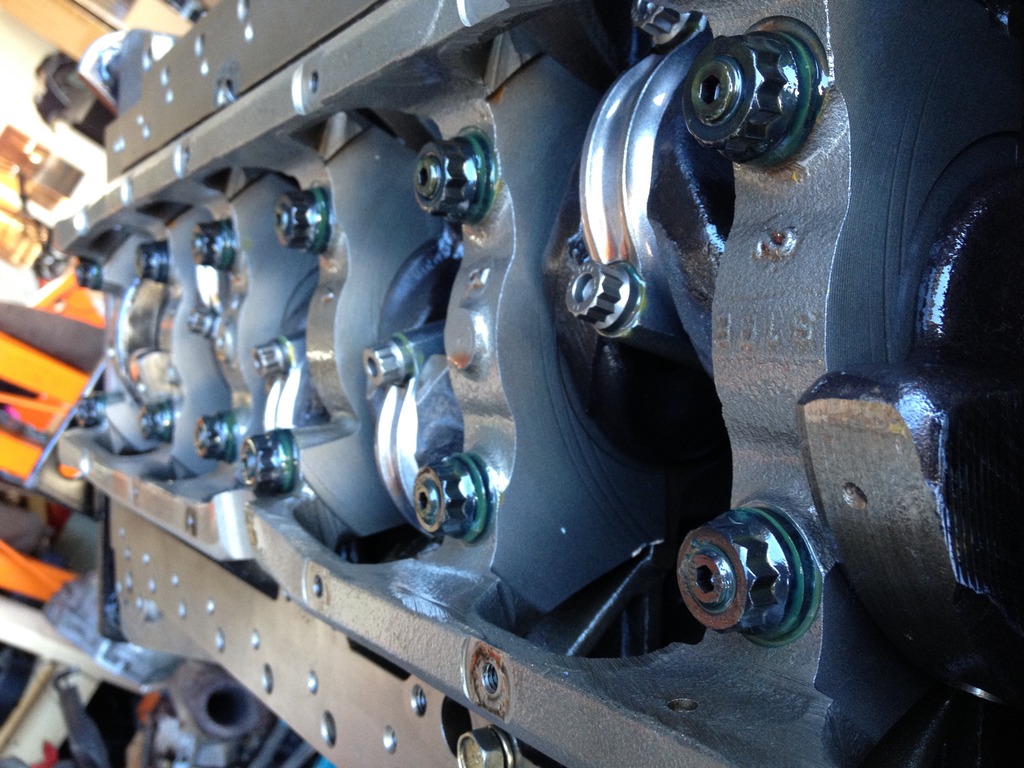
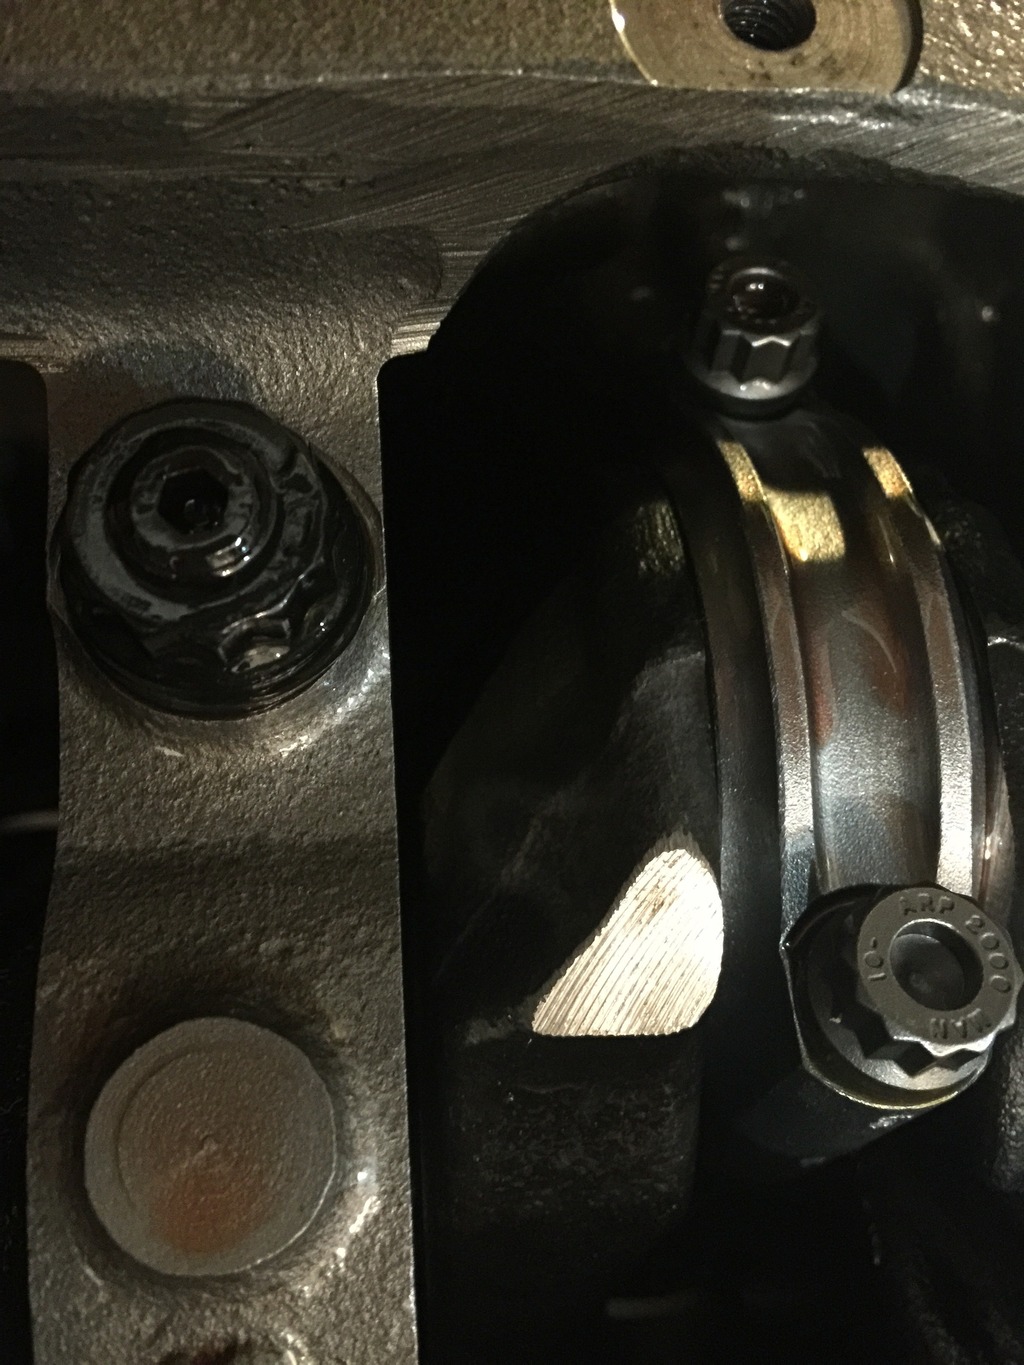
Got a quick picture from Dynosty yesterday of the completed short block.
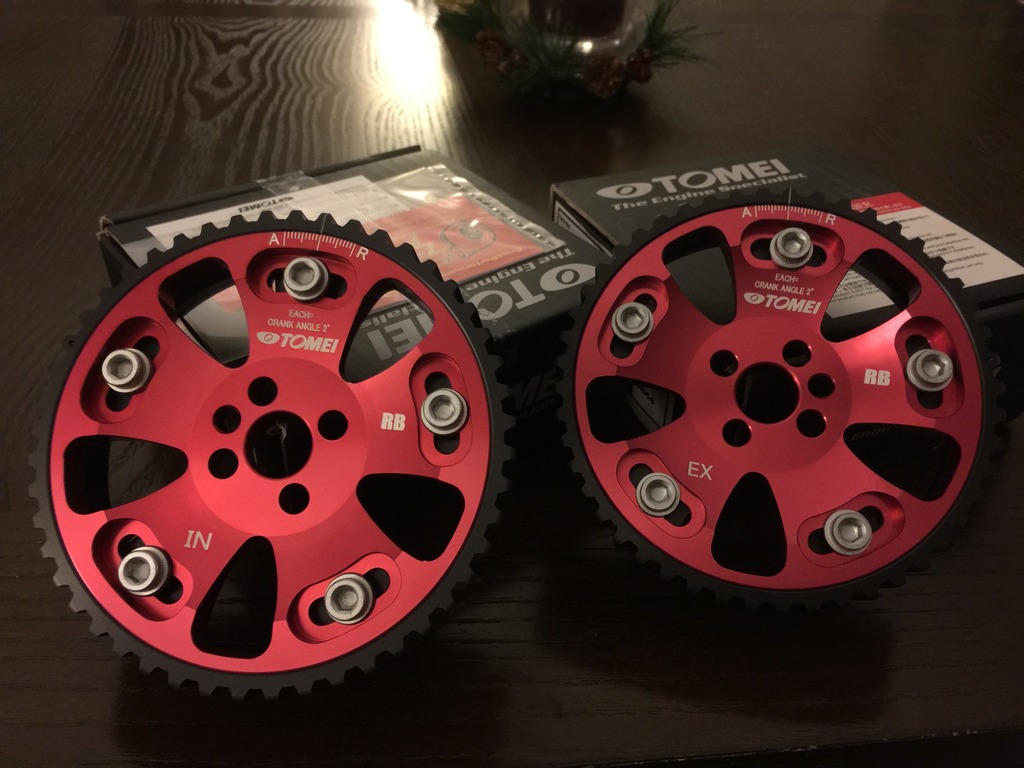
And also decided to pick up a set of Tomei Cam gears as well since the whole thing is apart.... I dont know if I will be able to force myself to put the front cover back on now


And also decided to pick up a set of Tomei Cam gears as well since the whole thing is apart.... I dont know if I will be able to force myself to put the front cover back on now
