
Central 20 Body Kit Fitment and Install


Hey guys,
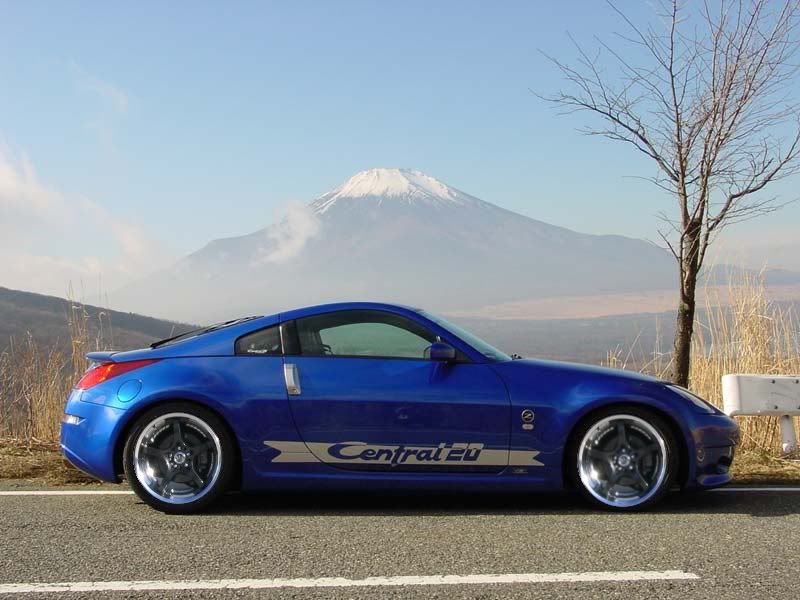
I thought it would be helpful to post a Central 20 fitment/gallery thread. I also wanted to get the word out on the vendor who made this kit - Shine Auto Project.
About Shine Auto - Best vendor I probably have ever dealt with. Answers all phone calls. Tackles all issues. No games, no BS - none whatsoever which is shocking. Great lead guy -Ken and great team over there in Ontario,CA. This is not an advertisement for them nor did anyone ask me to post about them. As an enthusiast, I wanted to get the word out for them. These guys are great vendors and will save you money on replica kits.
Kit Fitment - GREAT!
Kit Quality - GOOD (just needs a good body shop or your own prep work)
So far all the parts fit perfectly but my rear bumper has issues with all the light attachments that have to go on. None of the holes line up so I can't screw in the bumper lights and the license plate lights/hatch attachment.
Shine has vowed to fix it all for me and I know they'll rectify the problems going forward for everyone else.
Now onto the fitment pics:


Bubble -
I still have to put in the rear lights to see how they fit. The bumper lights look like they might have a bit too much gap though when I put em in there.
The way the hatch release/plate light unit attaches to the C20 replica kit compared to the OEM bumper is not as secure since it doesn't have a bracket on each end like the OEM. But hopefully once the holes are drilled in the right place, it'll hold in nicely with just the one bracket.


The way the hatch release/plate light unit attaches to the C20 replica kit compared to the OEM bumper is not as secure since it doesn't have a bracket on each end like the OEM.

Registered User
iTrader: (7)
Joined: Jan 2005
Posts: 1,514
Likes: 1
From: riverside/san Bernardino CA
I too say
Kit Fitment - GREAT!
Kit Quality - GOOD (just needs a good body shop or your own prep work)
Ken is a great lead guy and great team they have working on them.
Here are couple of my fitment pictures
Kit Fitment - GREAT!
Kit Quality - GOOD (just needs a good body shop or your own prep work)
Ken is a great lead guy and great team they have working on them.
Here are couple of my fitment pictures
Trending Topics
Registered User
iTrader: (7)
Joined: Jan 2005
Posts: 1,514
Likes: 1
From: riverside/san Bernardino CA
tekkensux, have you thought about what you might do with the two hole oon ether side? what are you going to do about a grill?
For the holes, im ether going todo drive lights or air dust for my front brakes.
For the holes, im ether going todo drive lights or air dust for my front brakes.

After playing more with the rear bumper and installing the rear tailights, I would give the rear bumper an A- or B+. The fitment is not quite as perfect as the sides or front. The bumper lines up well but there are a couple areas where the rear doesn't sit perfectly flush with the quarter panel. I don't think its a bad mold or anything. Its probably off 4-5mm. Also the top part of the bumper where it meets the tailights has a 1/4-1/2 inch gap or so. It doesn't seal up flush. I can post the pictures on that later. I think the very edge of my rear bumper where it sits under the hatch may need to be shaved down another 4-5 mm as well but I am not completely sure if that will make a difference.
Last edited by tekkensux; May 2, 2006 at 09:38 AM.
James - wow you are more ambitious than me. Haha I was going to leave the 2 holes as is. As far as a grill, I saw lots of JDM C20 cars with a thin black mesh grill. I think I am going to put on my front license plate so I won't get police harrassment or at least less reason for them to pull me over and that might cover up most of the hole. Still I think it would be ideal to get some sort of mesh grill.
 GAP
GAP


Part under hatch definitely needs to be shaved down about 1/4 inch or less.
I think it is causing gap between the tail lights and bumper hatch cover.
Its also causing gap between hatch itself and the rear bumper causing the famous replica rear bumper gap phenomenon.
Will show pictures with hatch completely closed. You will see rear bumper is not perfectly flush and also causing 1/2 gap. I also took pics of how bumper lines up with fender. It's off 2-5mm....It's a good fitment overall just not quite as good as the other parts.
I'll ask Shine to sand down the hatch cover on the bumper some more like 1/4 inch and hopefully that does the trick.
Haha I am wasting too much time...
Ok last pics I'm taking before kit is done hopefully.
I think Shine Auto checks their threads on here as well so this can
give Ken an idea of what's going on and maybe help him resolve it.
I might take pictures of the lights and brackets for you guys and Shine Auto too...


I think Shine Auto checks their threads on here as well so this can
give Ken an idea of what's going on and maybe help him resolve it.
I might take pictures of the lights and brackets for you guys and Shine Auto too...

I also hope it does end up looking good!
Bubble, if by signal light you are referring to the white bumper lights, I have to wait until Thursday to shoot on over to Shine and try to get the brackets fixed. The way it is now, none of the existing fixtures can screw into the replica bumper without more fabrication. I'm sure a body shop could work around it and make it work if necessary. BTW, I posted pics with the rear tail lights up above but I assume you are referring to the bumper lights.
The hatch/plate light unit fits well but the holes need to be realigned so it can also attach to the existing bracket.
As for Shine Auto, you can PM him here or check out shineautoproject.com.
So to recap, the front and sides fit like a 10/10. I think the rear bumper is currently like 9/10 for fitment. It is not perfectly flush with the fender but it's only off a few millimeters where the edges meet. You can see the side of my finger disappearing against the replica bumper vs where it is perfectly flush where you see my entire finger. Also I need to have the area that goes under the hatch shaved down so the bumper will sit closer to the car at the top where it meets the hatch. This will make the kit lean up closer to the hatch and reduce the gap there and also hopefully reduce the other gap between the tail lights and area under the hatch.
I think once we sand down that hatch lip, fitment for the rear will be like a 9.5 outta 10.
Ok update on rear bumper - part under hatch does not and should not be shaved down. I did it today and regret doing so. We test fit the actual real C20 rear and the fit was identical to it. My bumper actually was better off before it got sanded down under the hatch.
Signal lights fit perfectly. Shine had to adjust the brackets for me but they fit perfectly now.
Overall I am very happy with the kit. I am also very happy with Shine Auto and readily recommend them to anyone who is thinking about buying a kit from them. Ken really prides himself on the quality of the fitment on the kits he makes. He really did his best making sure I was happy with how my kit turned out and he didn't just collect my money and run. They were extremely helpful during this entire process and his whole team was just as good.
Now that I got the hatch release unit in, the 2 corners of the unit which sit agains the bumper is protruding out. YOu can see the bumper has 2 dimples.
It sucks...I may need to shave down the hatch release unit.
Other than that, this kit is ready to paint!
Registered User
iTrader: (7)
Joined: Jan 2005
Posts: 1,514
Likes: 1
From: riverside/san Bernardino CA
Looking good Tekkensux,
Here is a picture of were i am at so far. I am scheduled to take my car to the body shop tuesday. Oh sorry about the quality it was taken from my camera phone. I still have to do the finaly sanding, and the a Filler primer then a light sand of that.
Here is a picture of were i am at so far. I am scheduled to take my car to the body shop tuesday. Oh sorry about the quality it was taken from my camera phone. I still have to do the finaly sanding, and the a Filler primer then a light sand of that.