When you click on links to various merchants on this site and make a purchase, this can result in this site earning a commission. Affiliate programs and affiliations include, but are not limited to, the eBay Partner Network.
Is anyone aware if the silver trim on the main gauge cluster above the steering wheel is pop off-able without removing the whole cluster? I was thinking of spray painting it.
Just finished the conversion, I will refrain from posting pics because it looks just like others posted here. Thought I would leave a few impressions for anyone else looking to do this:
LEDs were super cheap, no need to buy a "kit". LighthouseLEDs had everything I needed, except for the big pre-wired LEDs for the cupholders, found those on Amazon.
If you have a 2006+, definitely do the cupholder LEDs, they look amazing.
Warnings:
The LEDs are much much smaller than the pictures let on. By the end of it, you will be getting the hang of it, but to start, it is pretty hard to work with such small pieces. Definitely suggest getting tweezers and a magnifying glass that you can clamp on the desk. You will really need an adjustable lamp as well.
Test often. Some of the LEDs appear to be wired in sequence, so if you solder a bunch of them on, and one isn't working, others may not light up, so you don't know which one to fix. By the end, I was testing after every single LED was soldered on.
Warning! For the 2006+ AC Control pointers, in my inexperience, I thought that if I messed this part up, I just wouldn't have lights in the pointers. Wrong! If you mess with those contacts, and they don't line up, your AC Controls won't work! Mine now only work when the dials are in a certain position, AND, the pointers don't light up. I am lucky I didn't totally ruin my AC controller.
If anyone has any questions for a newbie that has done this conversion, just send me a PM!
If you are looking for a one stop shopping supplier for Int. and Ext. LED's Diode Dynamics are very helpful and you can rely on them for after service . Their LED's are very good quality and if you have any issues they are quick to help .
Do you guys know if "reverse gullwing" SMDs will work? They are basically the same thing as PLCC2 but with the diodes flipped out. I'm worried they will stick out over the solder.....but the price is favorable...
How did you guys identify the positive vs the negative for the HUD gauges? There are four points and tbh this diagram doesn't explain it....
Where is the 'top' and where is the 'bottom'. Which angle are you looking from? I tried several positions and none worked. I tested the LEDs and they work. I don't want to f up the circuit board
Can one of you gents please point me in the right direction. I wish to solder a LED to the stock shift light of the Z cluster and have the RPM needle Light up white ( color of my LED) when the stock rpb bulb turns on.
Can one of you gents please point me in the right direction. I wish to solder a LED to the stock shift light of the Z cluster and have the RPM needle Light up white ( color of my LED) when the stock rpb bulb turns on.
I read the needles are forged from orange plastic. But if your put in a white LED on the bottom led, the needle should like up a different hue than the rest of the numbers
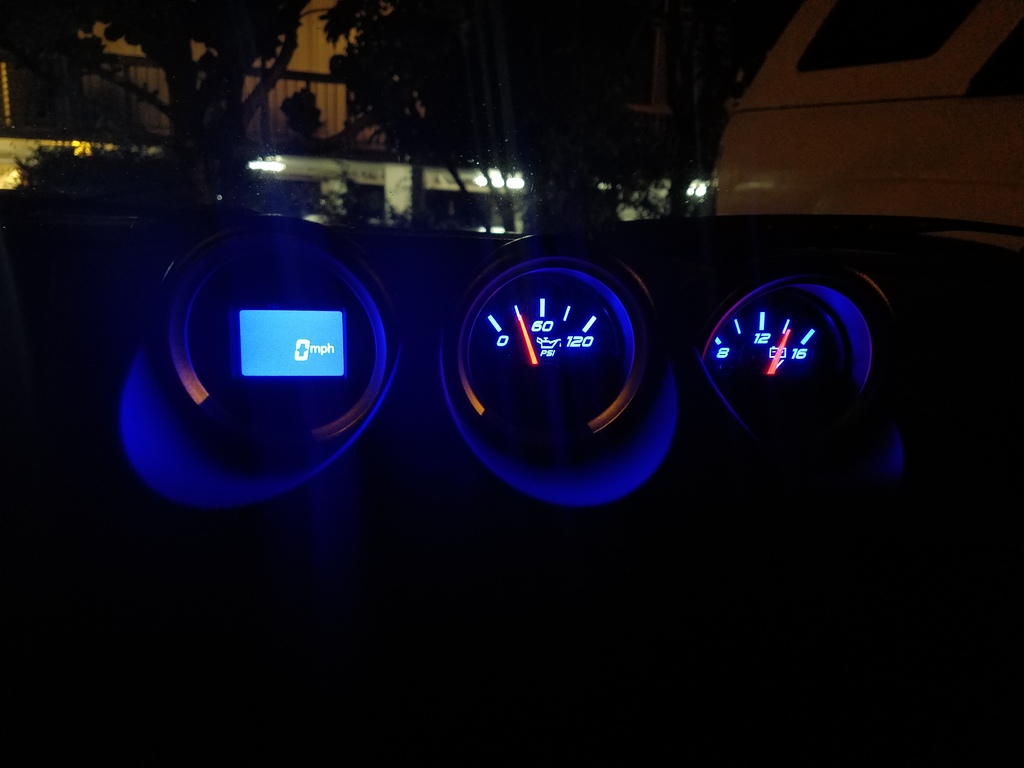
used this guide for my G. played with the polarizers to get a darker background instead of the light blue. still cant get a true black. stupid lcds have super low contrast
Need some help, I have a 2007 350Z and I'm thinking of converting all LED's to red and a white gauge face with the stock pointers, but I want the LCD's background black with red digits. Anybody done this? If so any pictures or tips for the LCD's to get them black
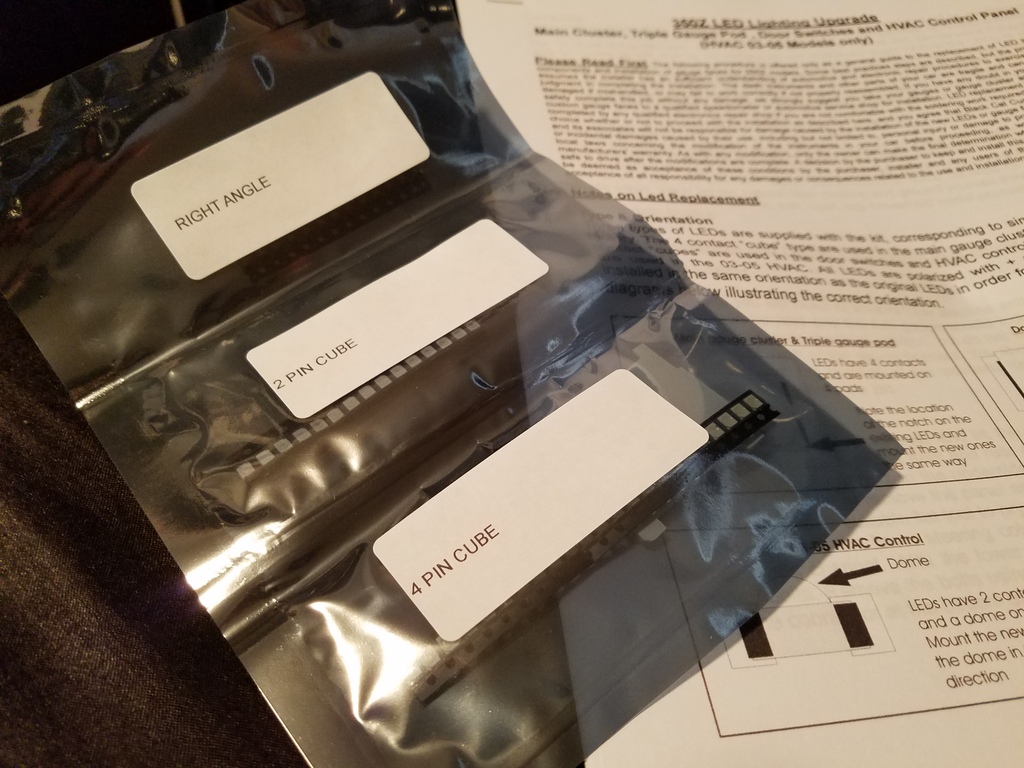
I'm about half way done with my conversion (just have the main cluster left). I ordered gauges from blackcat and decided to just order their LED kits instead of sourcing my own parts. It's a little pricey ($45 for dash/center gauges/doors/hvac) but includes everything and printed step by step guide.
Also a really nice feature is they include a white diffuser to replace the stock on in the center console gauge. It's perfectly cut to match the stock one and pops right in to place. I've never seen this sold individually anywhere so it's nice to not have to bother sanding the stock one down.
Also blackcat includes PLCC4 LEDs where appropriate (main cluster, center console gauges). I know no ones reported any problems with substituting PLCC2 LED's, but I imagine it's better to make use of the better heat dissipation and not have the PLCC2 anode floating above an open negative pad. Soldering the PLCC4 LEDs is definitely a bit more challenging though.
The only thing not included in the kit is the 4 3mm led's for the controls on the sides of the main cluster.
Overall, I thought it was worth paying for the kit since I was ordering gauge faces from blackcat anyways. I've never done this on a 350z before so it was nice having a guide and all the parts bundled together. If I had to do another cluster I'd probably just order the LED's off ebay. I'm not sure if black cat will sell their diffuser separately, but it'd be nice to have.

 10-14-2013, 02:19 PM