
Front Bumper Reflector


Thread Starter
Registered User
Joined: May 2012
Posts: 48
Likes: 9
From: Dallas, TX
Okay, I have search this forum many times, yet to seek my answer. How do I "open" my reflector? I've getting a flathead screw and peircing it between the pieces, still wont move. Anyone else got any suggestions?

Thread Starter
Registered User
Joined: May 2012
Posts: 48
Likes: 9
From: Dallas, TX
^ Uhmmmm okay lol....
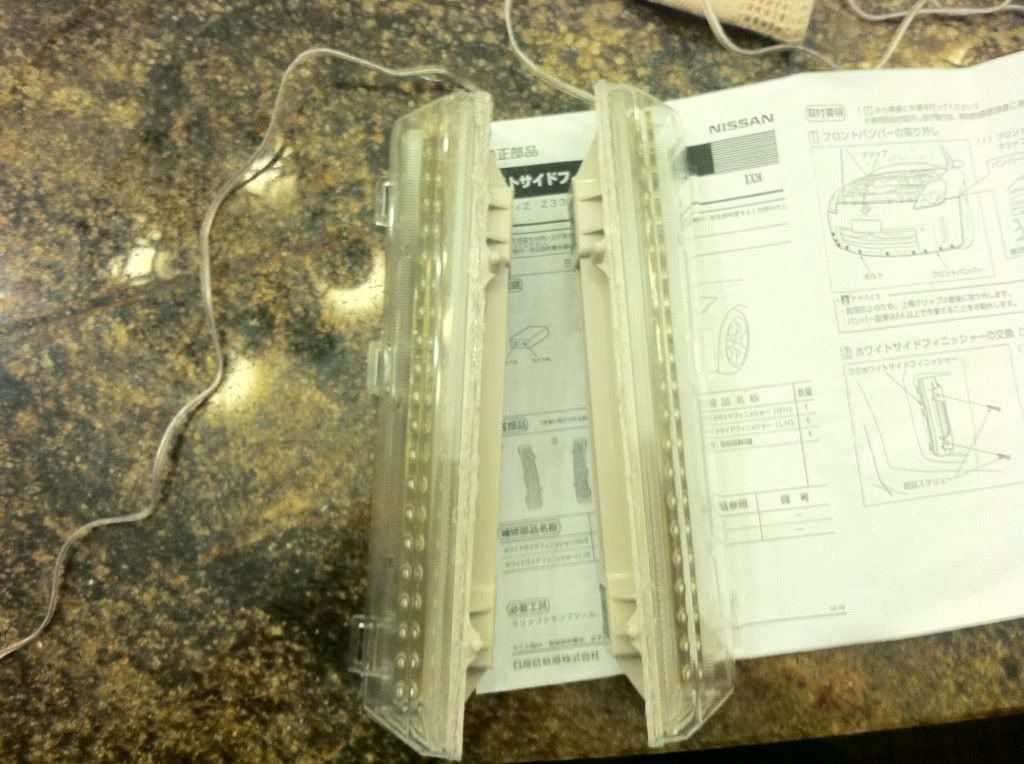
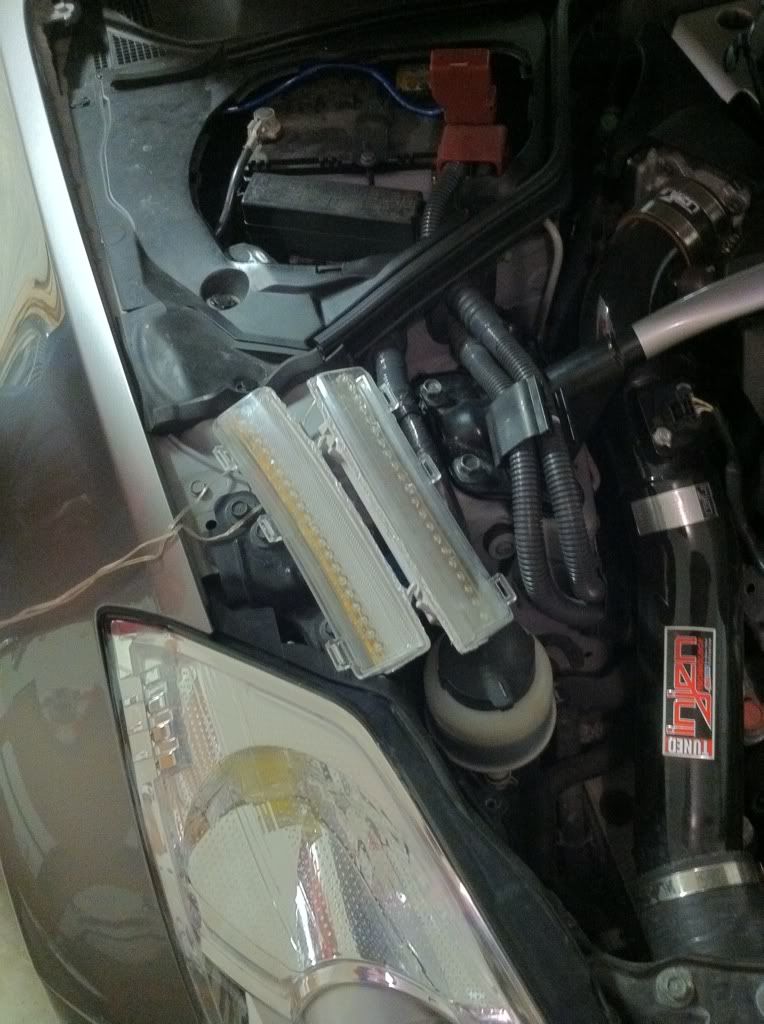
Anyhoo this is what I am trying to pop open
[IMG] Uploaded with ImageShack.us[/IMG]
[IMG] Uploaded with ImageShack.us[/IMG]
All I want to do is install some LED's inside them!!
Anyhoo this is what I am trying to pop open
[IMG]
 Uploaded with ImageShack.us[/IMG]
[IMG]
 Uploaded with ImageShack.us[/IMG]
All I want to do is install some LED's inside them!!


In all the ones I found, they did not open it apart as you want to do. Like this
https://my350z.com/forum/body-interi...eflectors.html
Can you post what it is that you are trying to do. There may be a better way
https://my350z.com/forum/body-interi...eflectors.html
Can you post what it is that you are trying to do. There may be a better way


Trending Topics

Thread Starter
Registered User
Joined: May 2012
Posts: 48
Likes: 9
From: Dallas, TX
@beezee
I've seen that before, but he didn't really open the reflectors.
@dcains
I just used a flat-head screwdriver, but it still won't open! You should try to make a video just how to open the reflectors haha! I guess I must put more elbow grease to make it pop open.
I've seen that before, but he didn't really open the reflectors.
@dcains
I just used a flat-head screwdriver, but it still won't open! You should try to make a video just how to open the reflectors haha! I guess I must put more elbow grease to make it pop open.
You do have to put some effort into it. Score the seam with the edge of the screwdriver, repeatedly, until it's grooved and almost all the way through. The screwdriver works better than a blade, IMO, because it takes off more plastic, but you need to go around all four edges of the reflector before trying to break it open. The lens is thin and will crack easily. I've seen postings which say to bake the reflectors in a an oven to soften the glue along the seam, but I don't think this is the sort of glue that method will work with (unlike the headlight housings). Could be wrong, but careful work with a small (3mm), sharp jeweler's screwdriver is what worked for me.

You do have to put some effort into it. Score the seam with the edge of the screwdriver, repeatedly, until it's grooved and almost all the way through. The screwdriver works better than a blade, IMO, because it takes off more plastic, but you need to go around all four edges of the reflector before trying to break it open. The lens is thin and will crack easily. I've seen postings which say to bake the reflectors in a an oven to soften the glue along the seam, but I don't think this is the sort of glue that method will work with (unlike the headlight housings). Could be wrong, but careful work with a small (3mm), sharp jeweler's screwdriver is what worked for me.
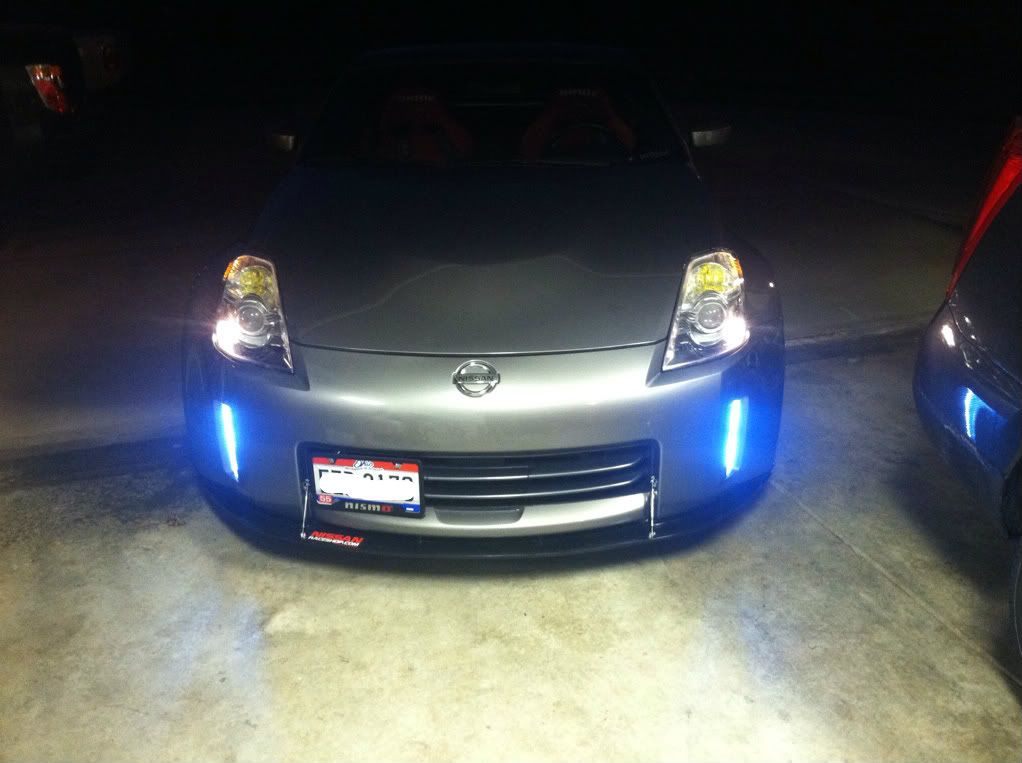

It's a real slick upgrade though, really changes the appearance of our cars! Good luck getting yours together OP.
OP, I will also tell you that I have found (as well as other members have commented on it) that the OEM ambers seem to be much harder to break open, especially without literally breaking them, than the clears. Definitely could be part of your problem!
It just gives it a cleaner break for whatever reason. I'm sure you've experiences the small hairline crack that can develop with just using the tiny screwdriver. I hit them with the heat, then go around with the screwdriver. I would also say it may help the tolerances between the parts expand. It just seems to help to leave em in the oven for around 5 minutes on 250, for whatever reason!
It just gives it a cleaner break for whatever reason. I'm sure you've experiences the small hairline crack that can develop with just using the tiny screwdriver. I hit them with the heat, then go around with the screwdriver. I would also say it may help the tolerances between the parts expand. It just seems to help to leave em in the oven for around 5 minutes on 250, for whatever reason!
Last edited by EmpireDude; May 15, 2012 at 11:15 AM.

Thread Starter
Registered User
Joined: May 2012
Posts: 48
Likes: 9
From: Dallas, TX
Sorry for asking lots of questions, but how long do you leave the reflectors in the oven without them melting off. And what is the temperature you set it on?
EDIT:
Nevermind, someone just answered. Ignore this
EDIT:
Nevermind, someone just answered. Ignore this
Last edited by Mikeyyy; May 15, 2012 at 12:00 PM.
There is already a DIY for this mod.
OP I would search/ask your questions there:
https://my350z.com/forum/body-interi...eflectors.html
OP I would search/ask your questions there:
https://my350z.com/forum/body-interi...eflectors.html

Thread
Thread Starter
Forum
Replies
Last Post
2003, 350z, bumper, bumperreflectorcom, chargespeed, conversion, cracking, front, led, my350z, oem, open, reflector, reflectors, working