When you click on links to various merchants on this site and make a purchase, this can result in this site earning a commission. Affiliate programs and affiliations include, but are not limited to, the eBay Partner Network.
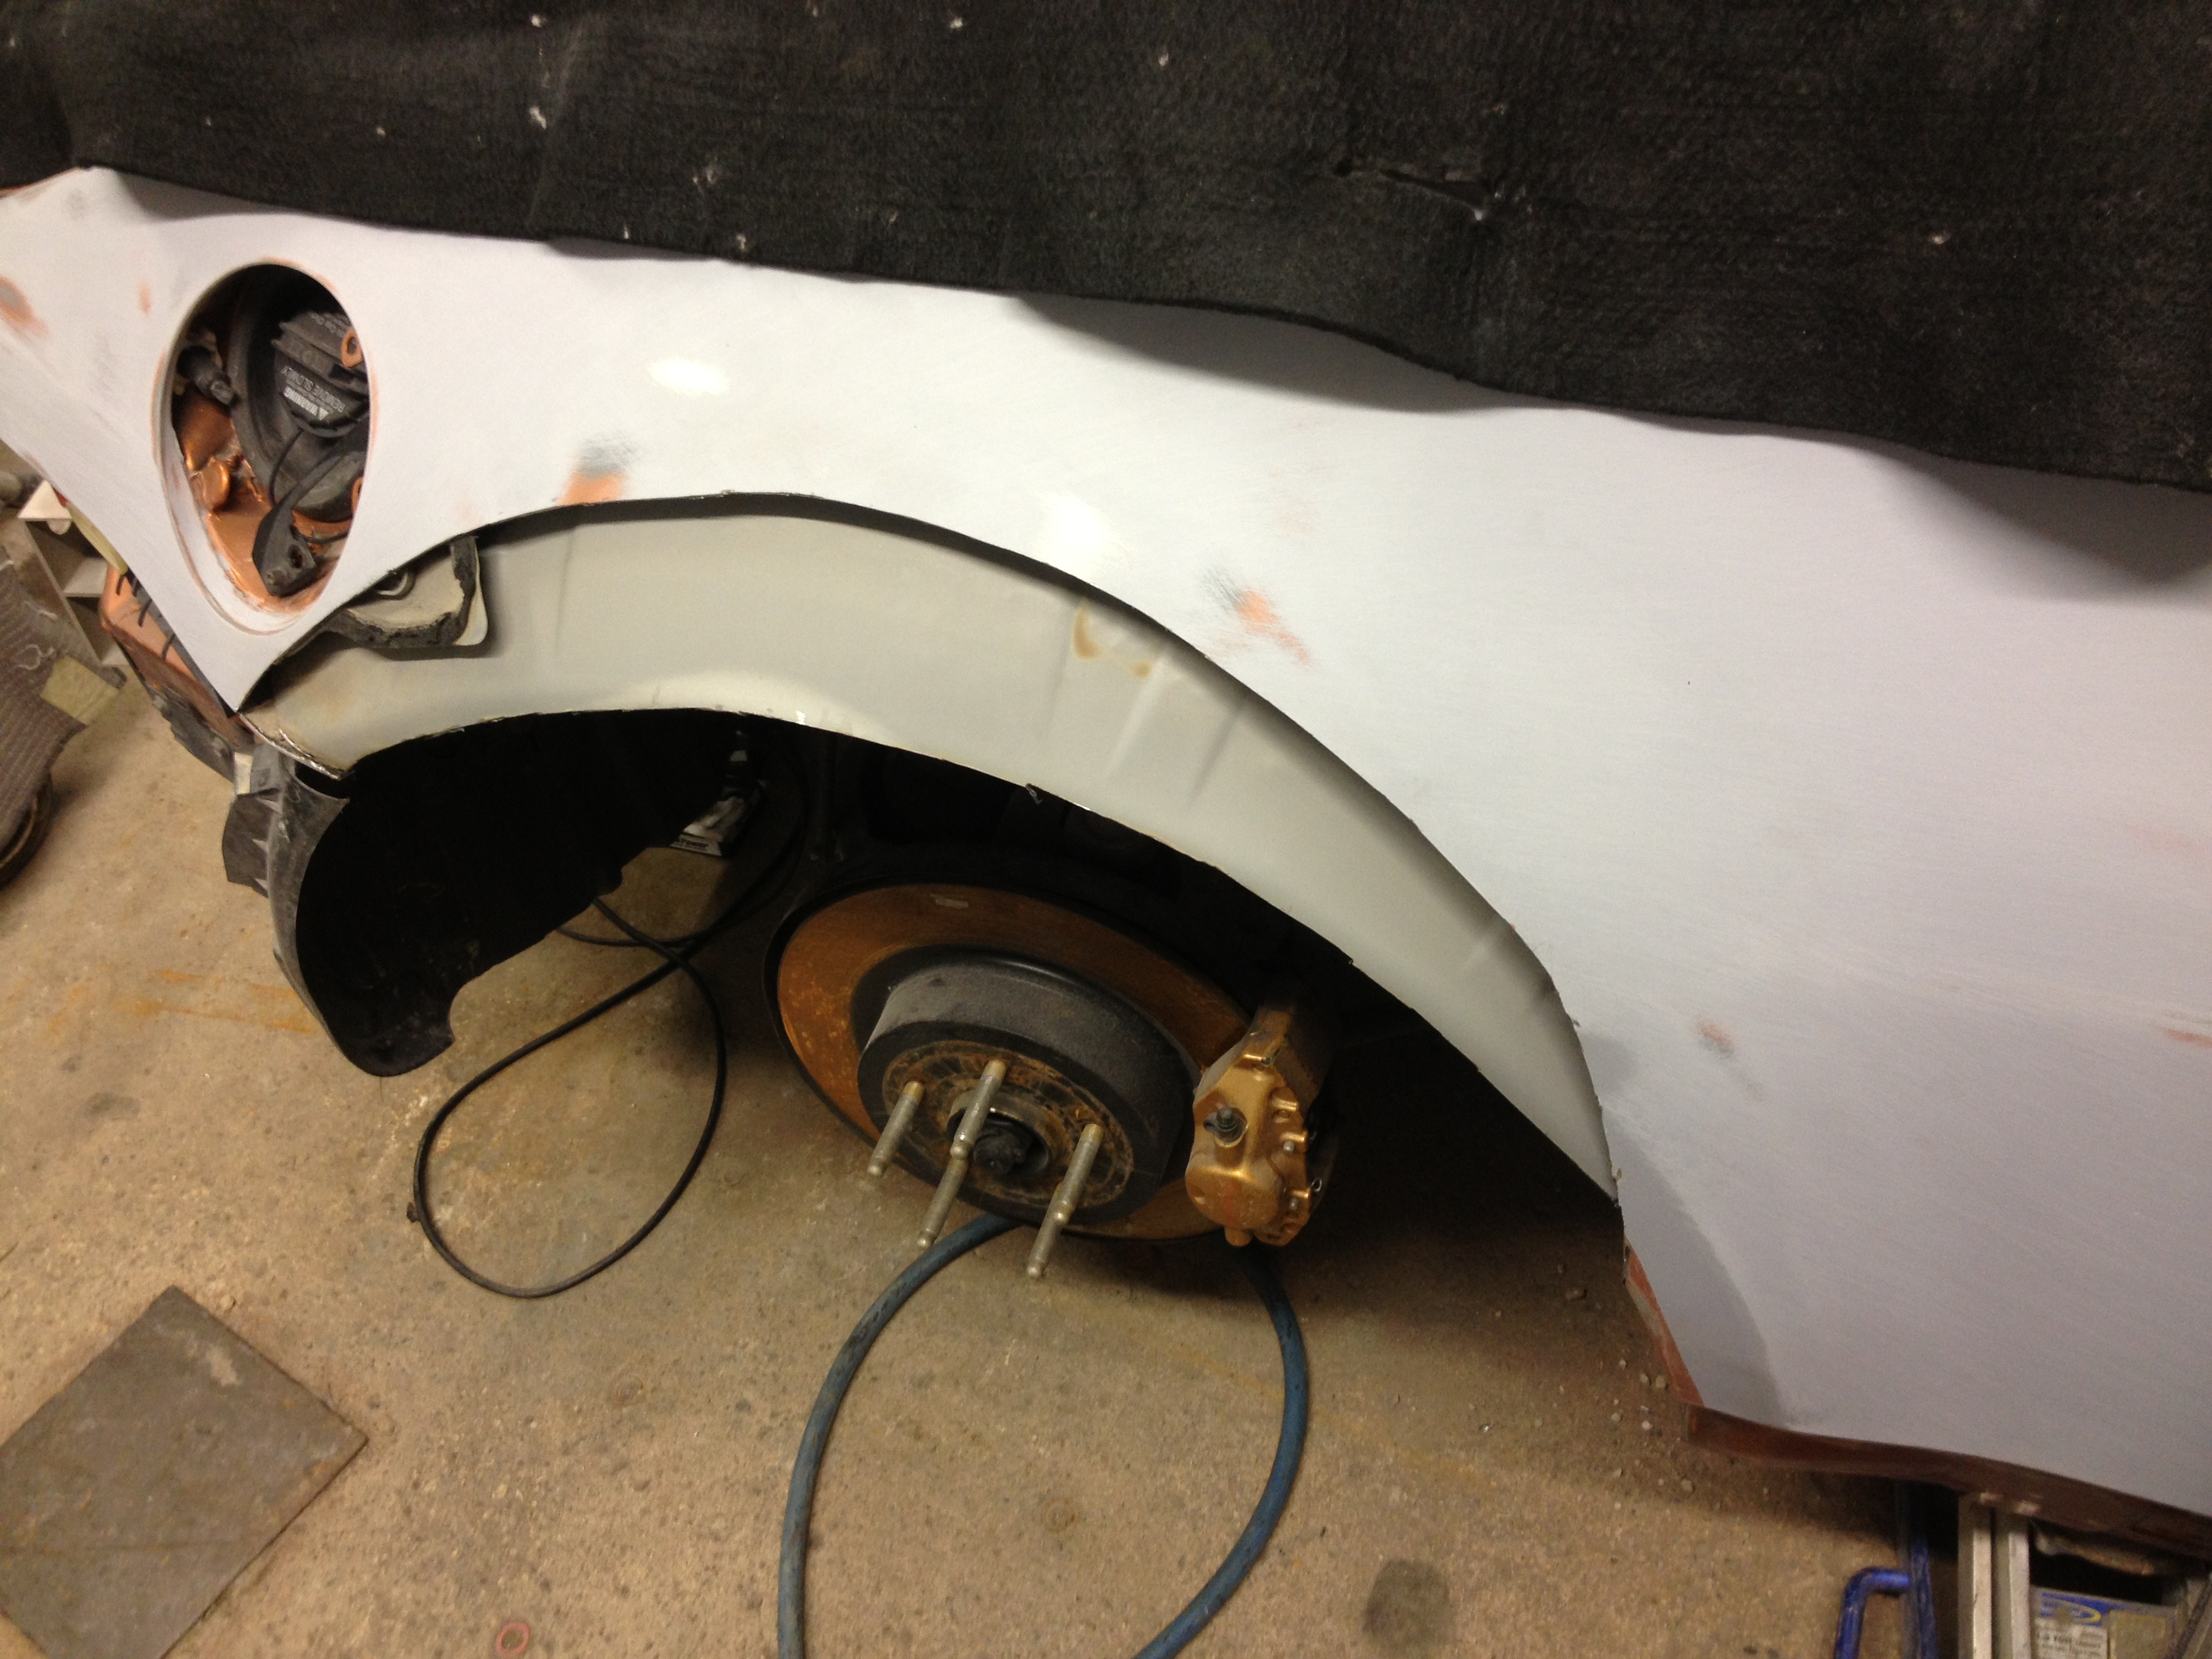
Here are a few pics of cutting up the passenger rear. I ended up taking reference measurements every 1" from the other side of the car that was done and transferring them to this side so the curves matched. I tweaked this side just a bit where the curve goes vertical because I ****ed the other side up and it was ugly lol.
First cut, separate the inner and outer, it's a bit wavy but that gets fixed up along the way.
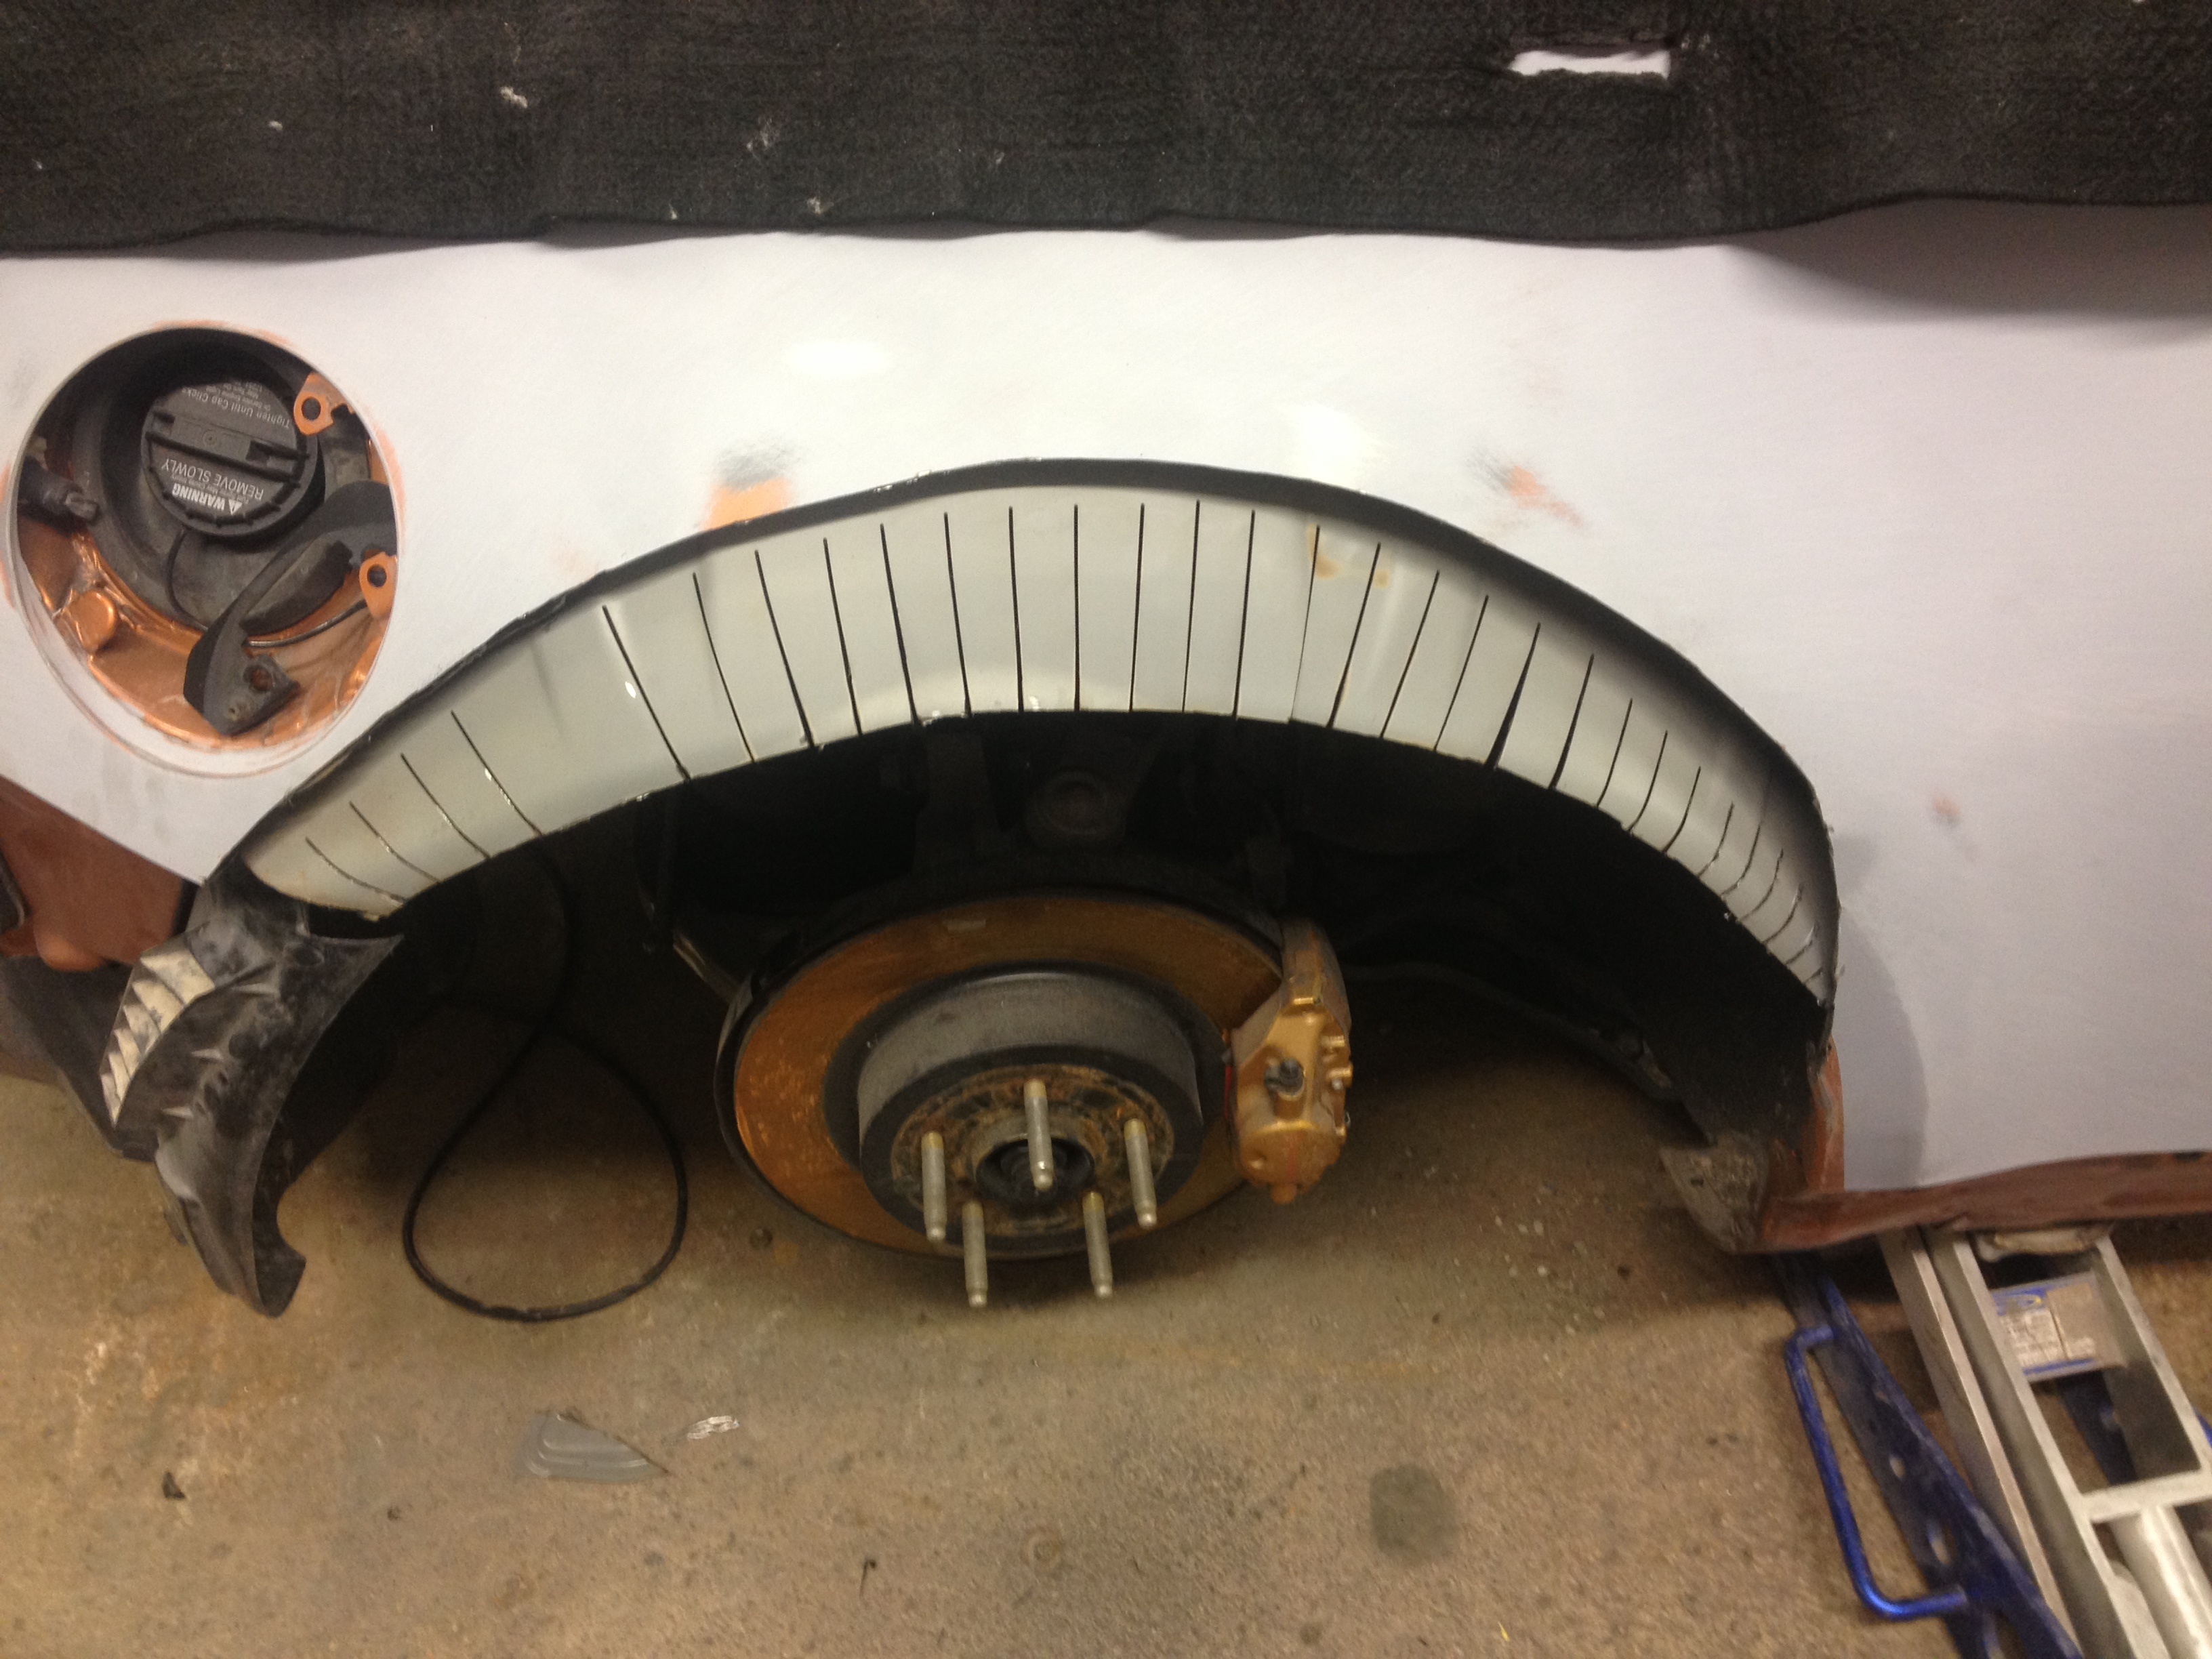
Second cut, pie cut the inner. I did more pie cuts this time so it would fold up nicer and have a nicer curve on the inside of the wheel well. First time doing this, so learning as I go.
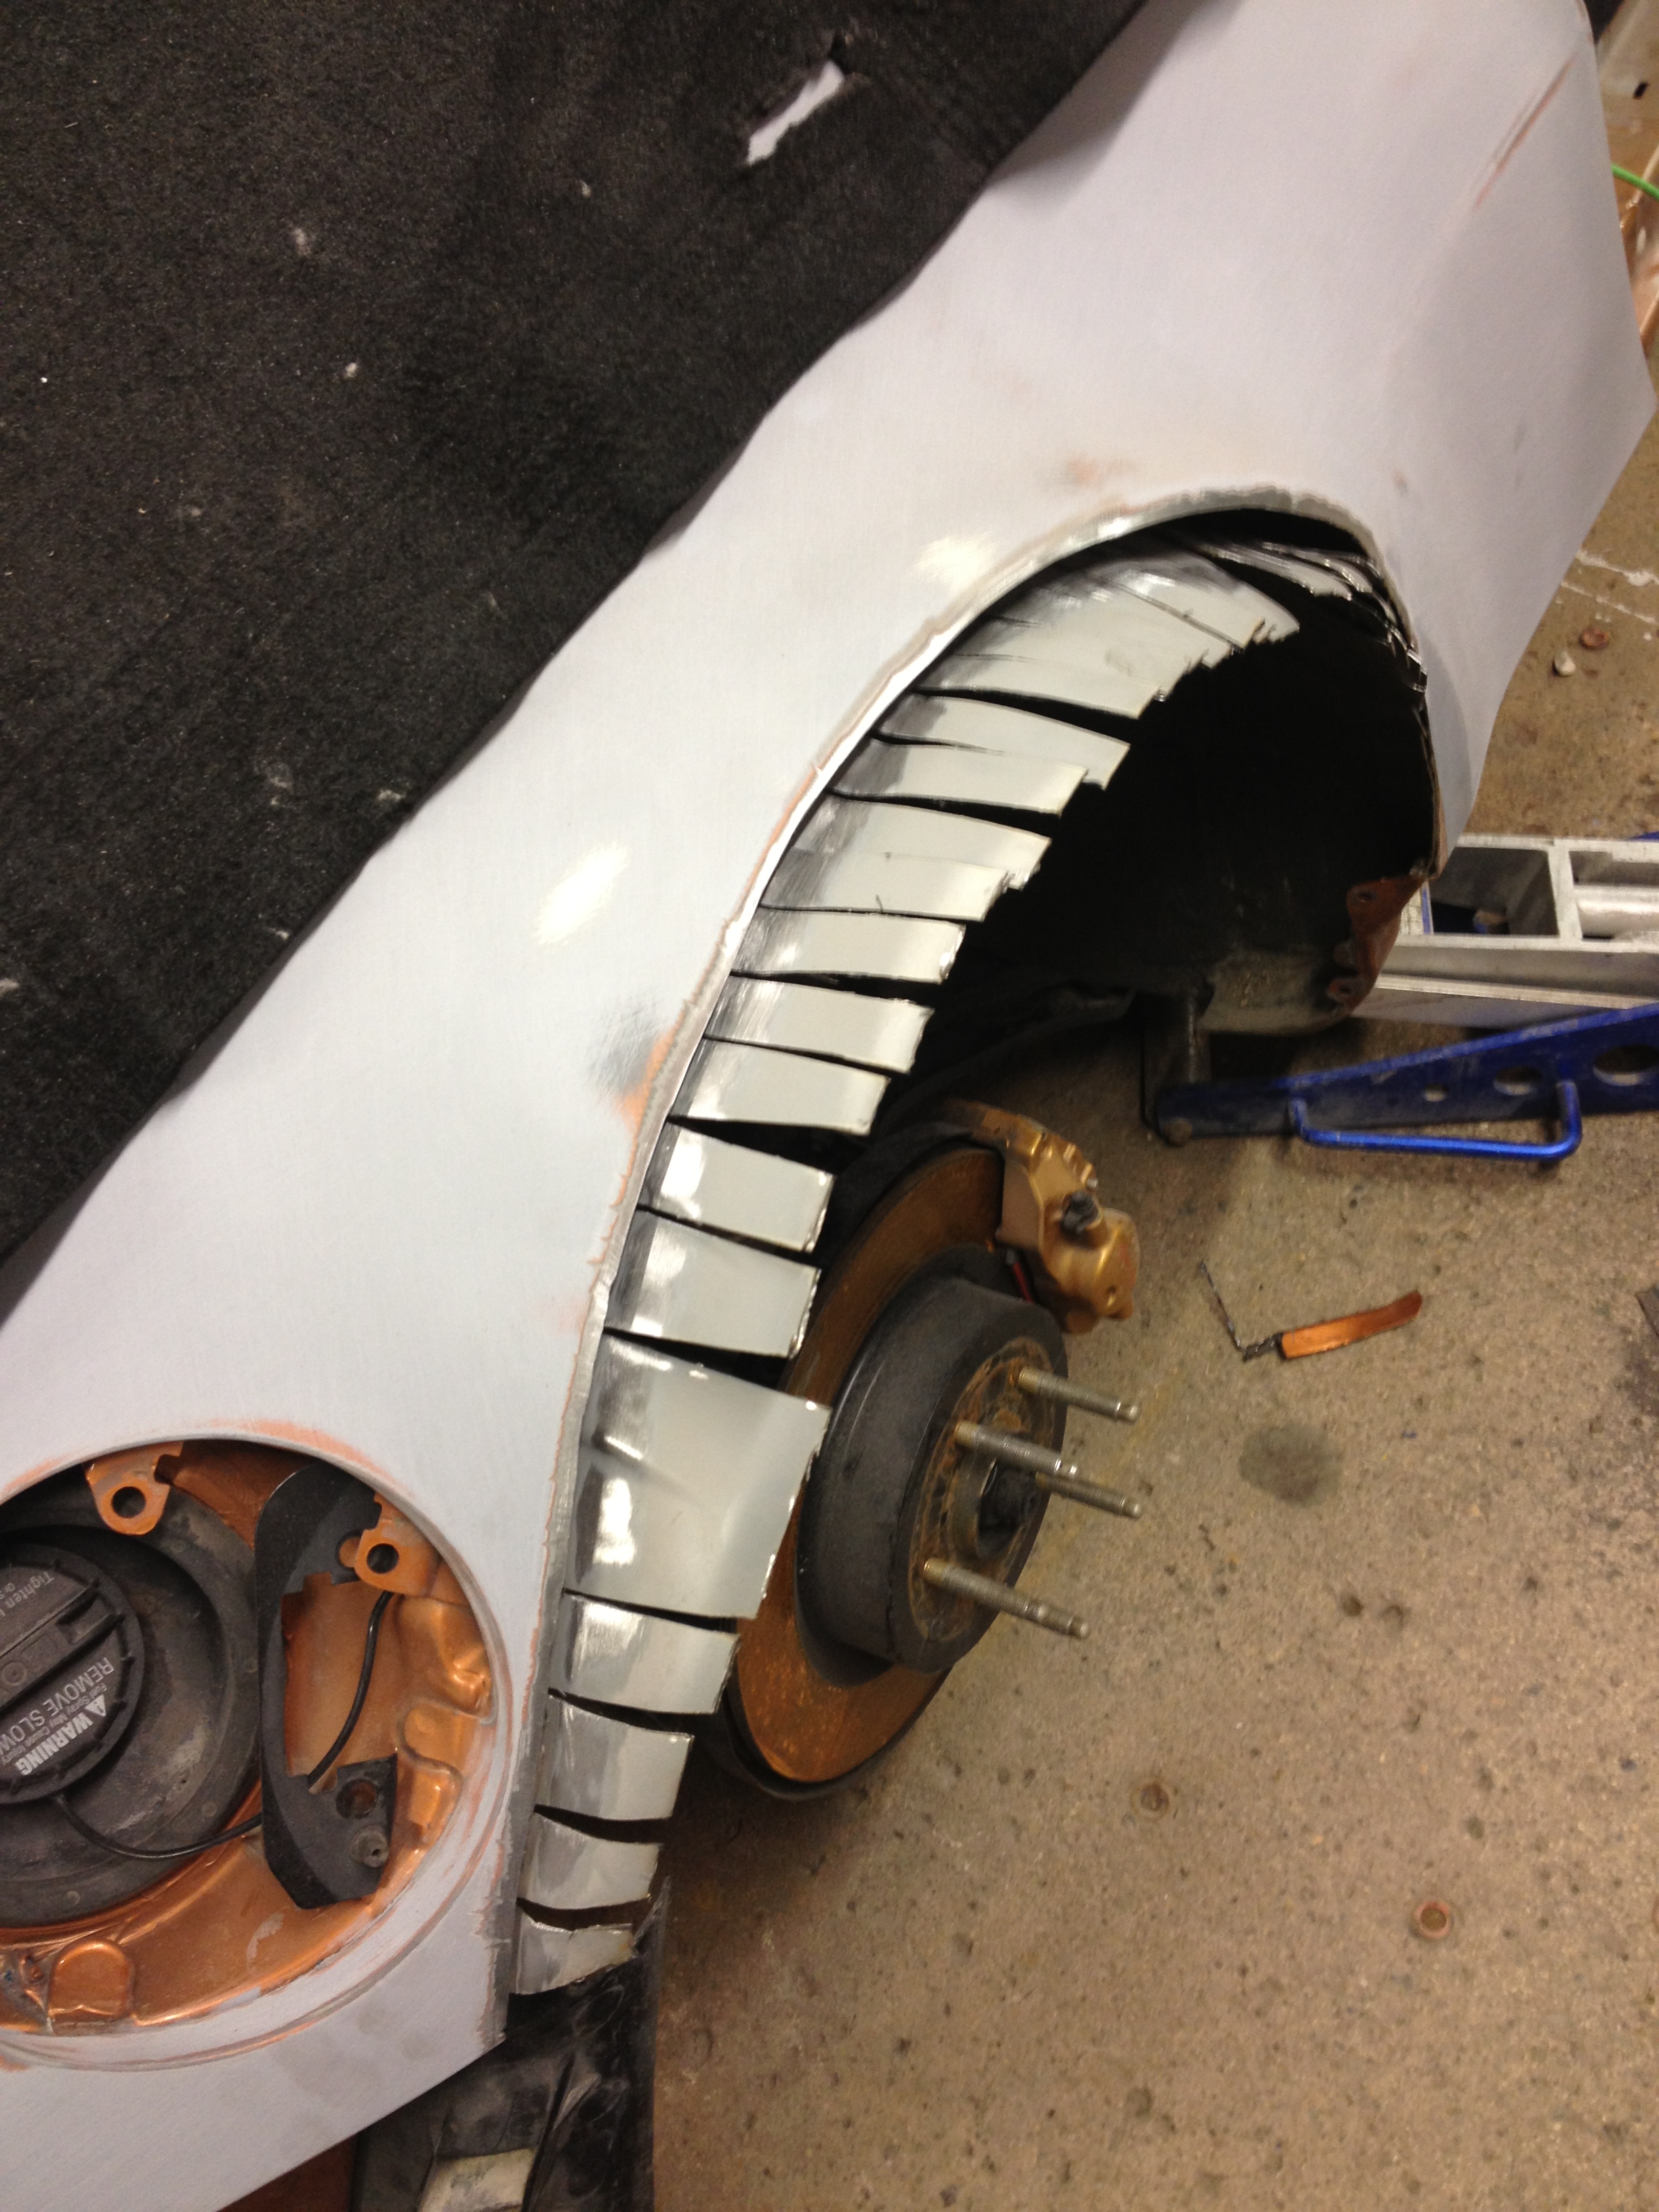
Clean up the edge and prep for welding:
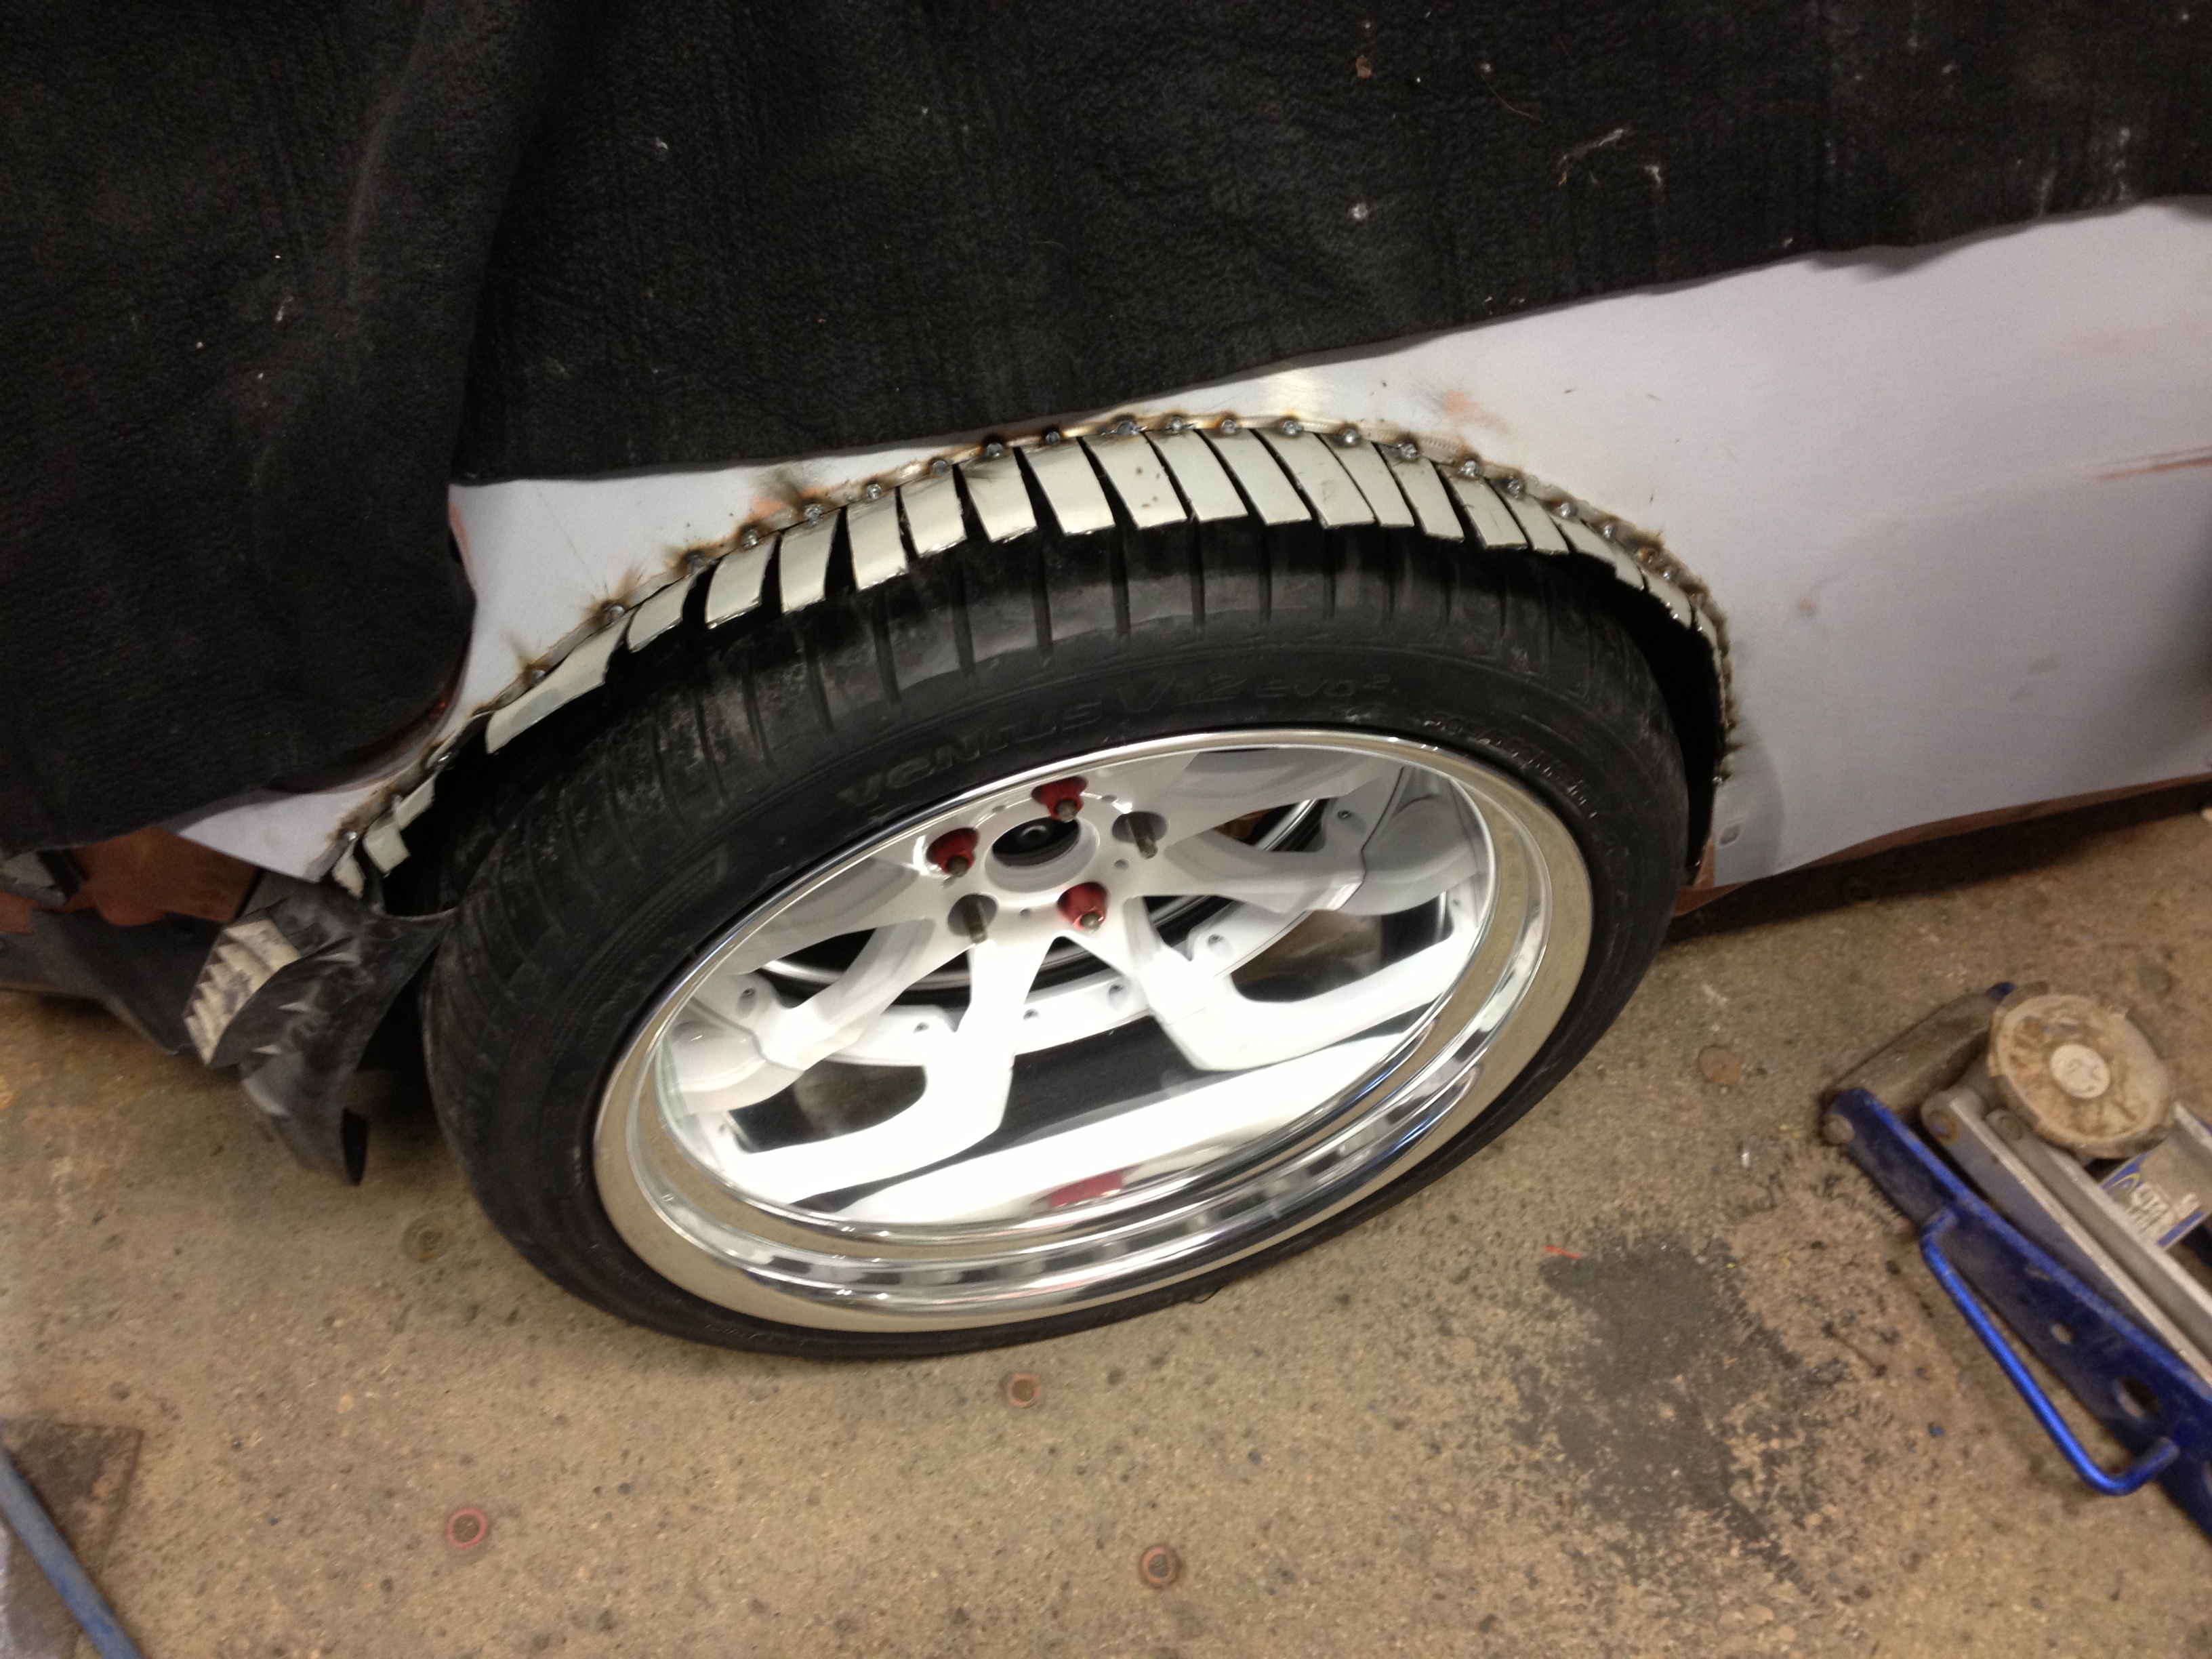
Tack welded & wheel put back on for some reason:
Welded the rest of the inner to the outer:
I'm proud to say I did about half the welding on this one so far with my buddy doing the other half. You can definitely see the difference between my welds and his, but I'm getting better lol
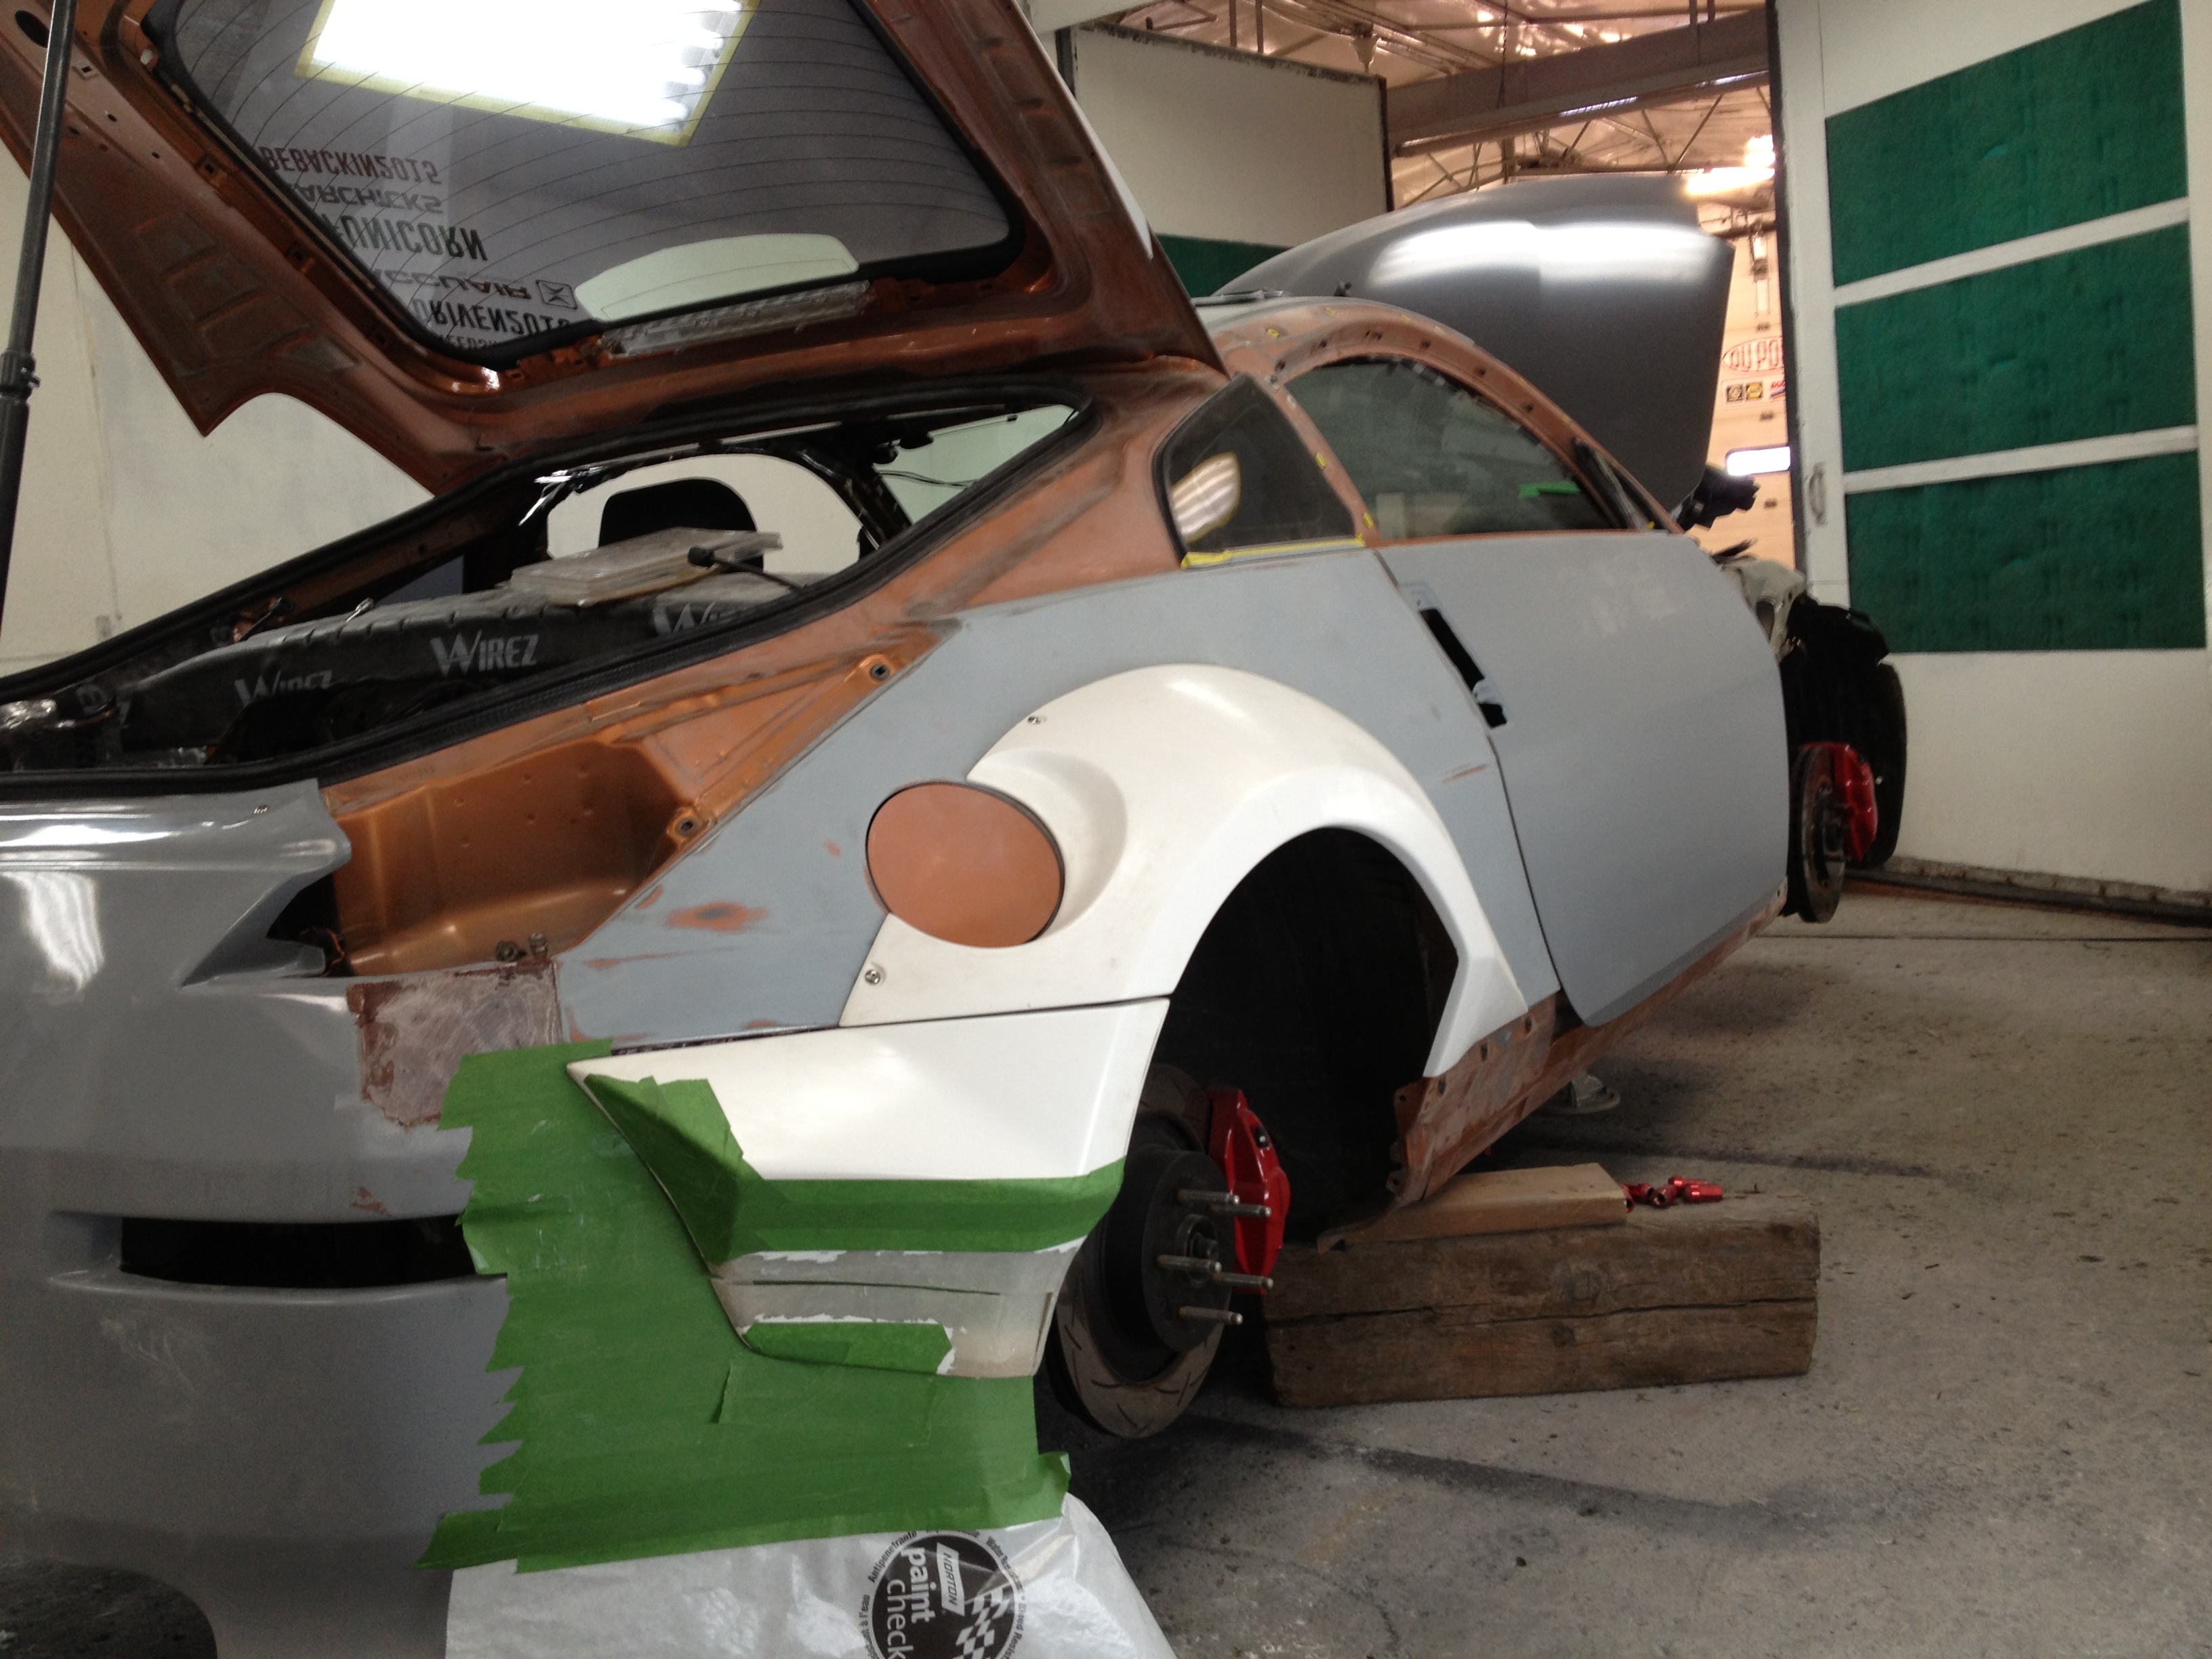
Rear bumper flare pieces were made for the stock bumper, not an aftermarket bumper so they didn't fit too great on my bumper:
The vertical body line between the rear bumper flare piece and the rear bumper also didn't match up.
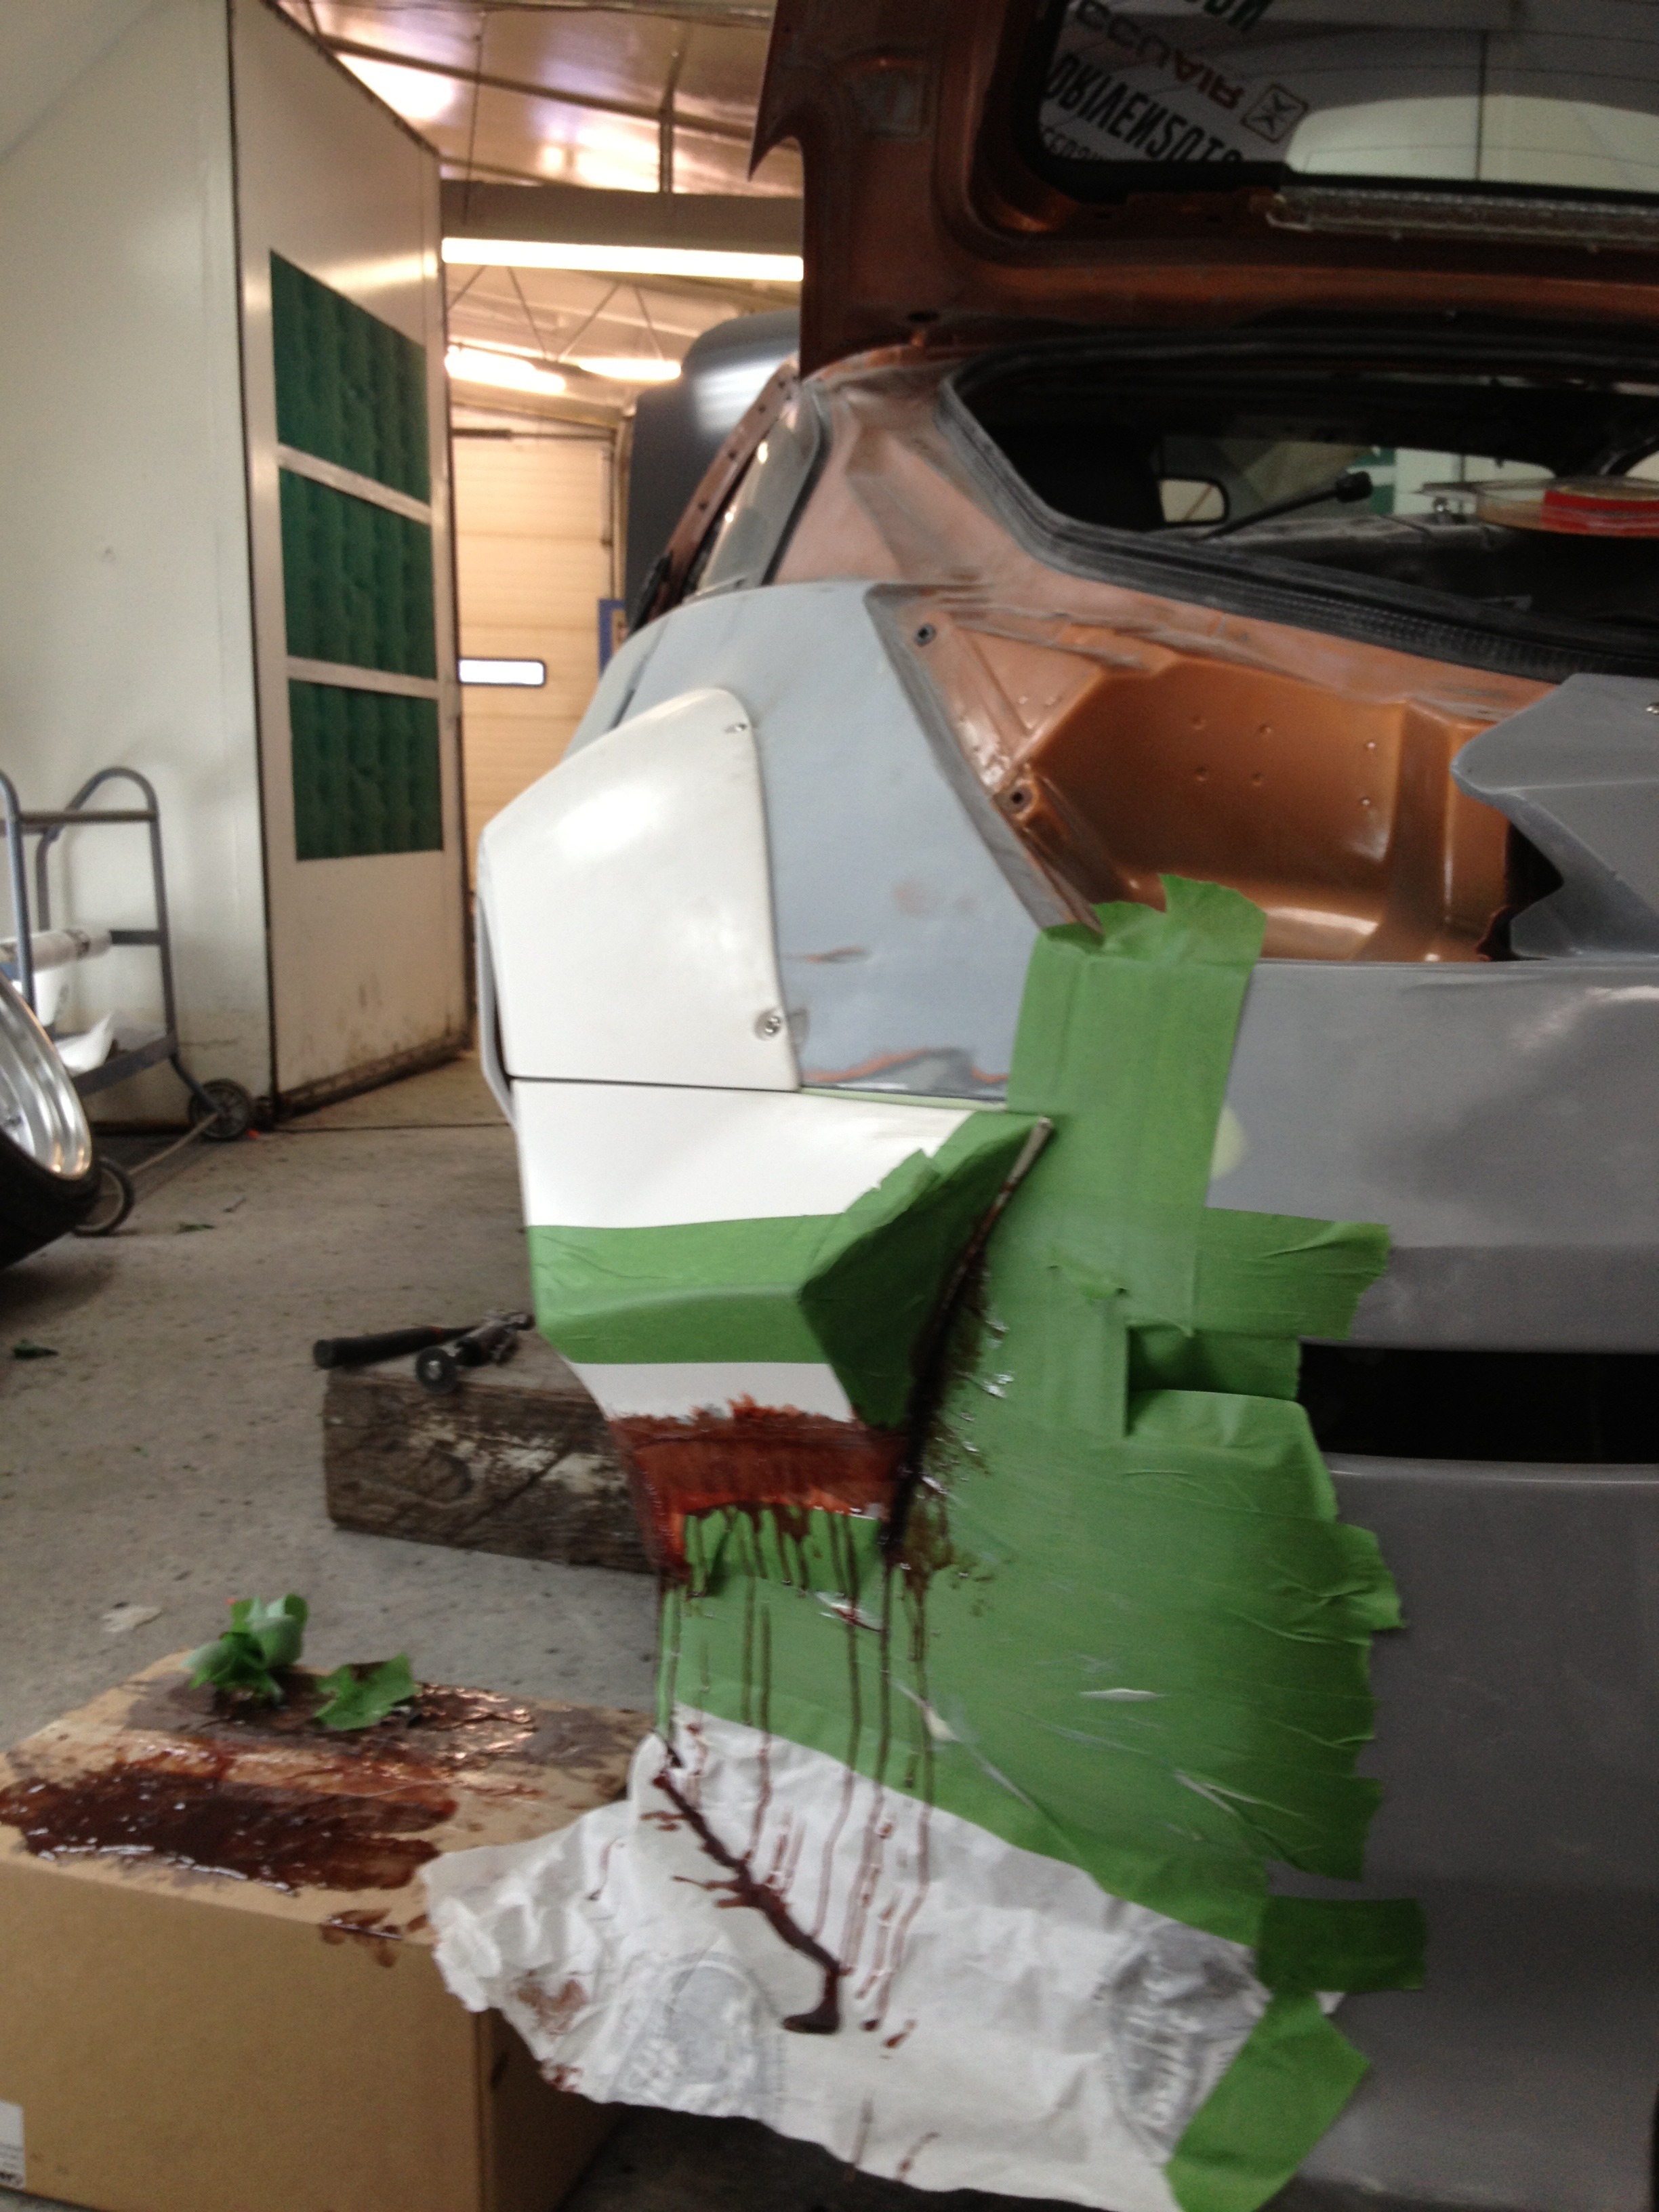
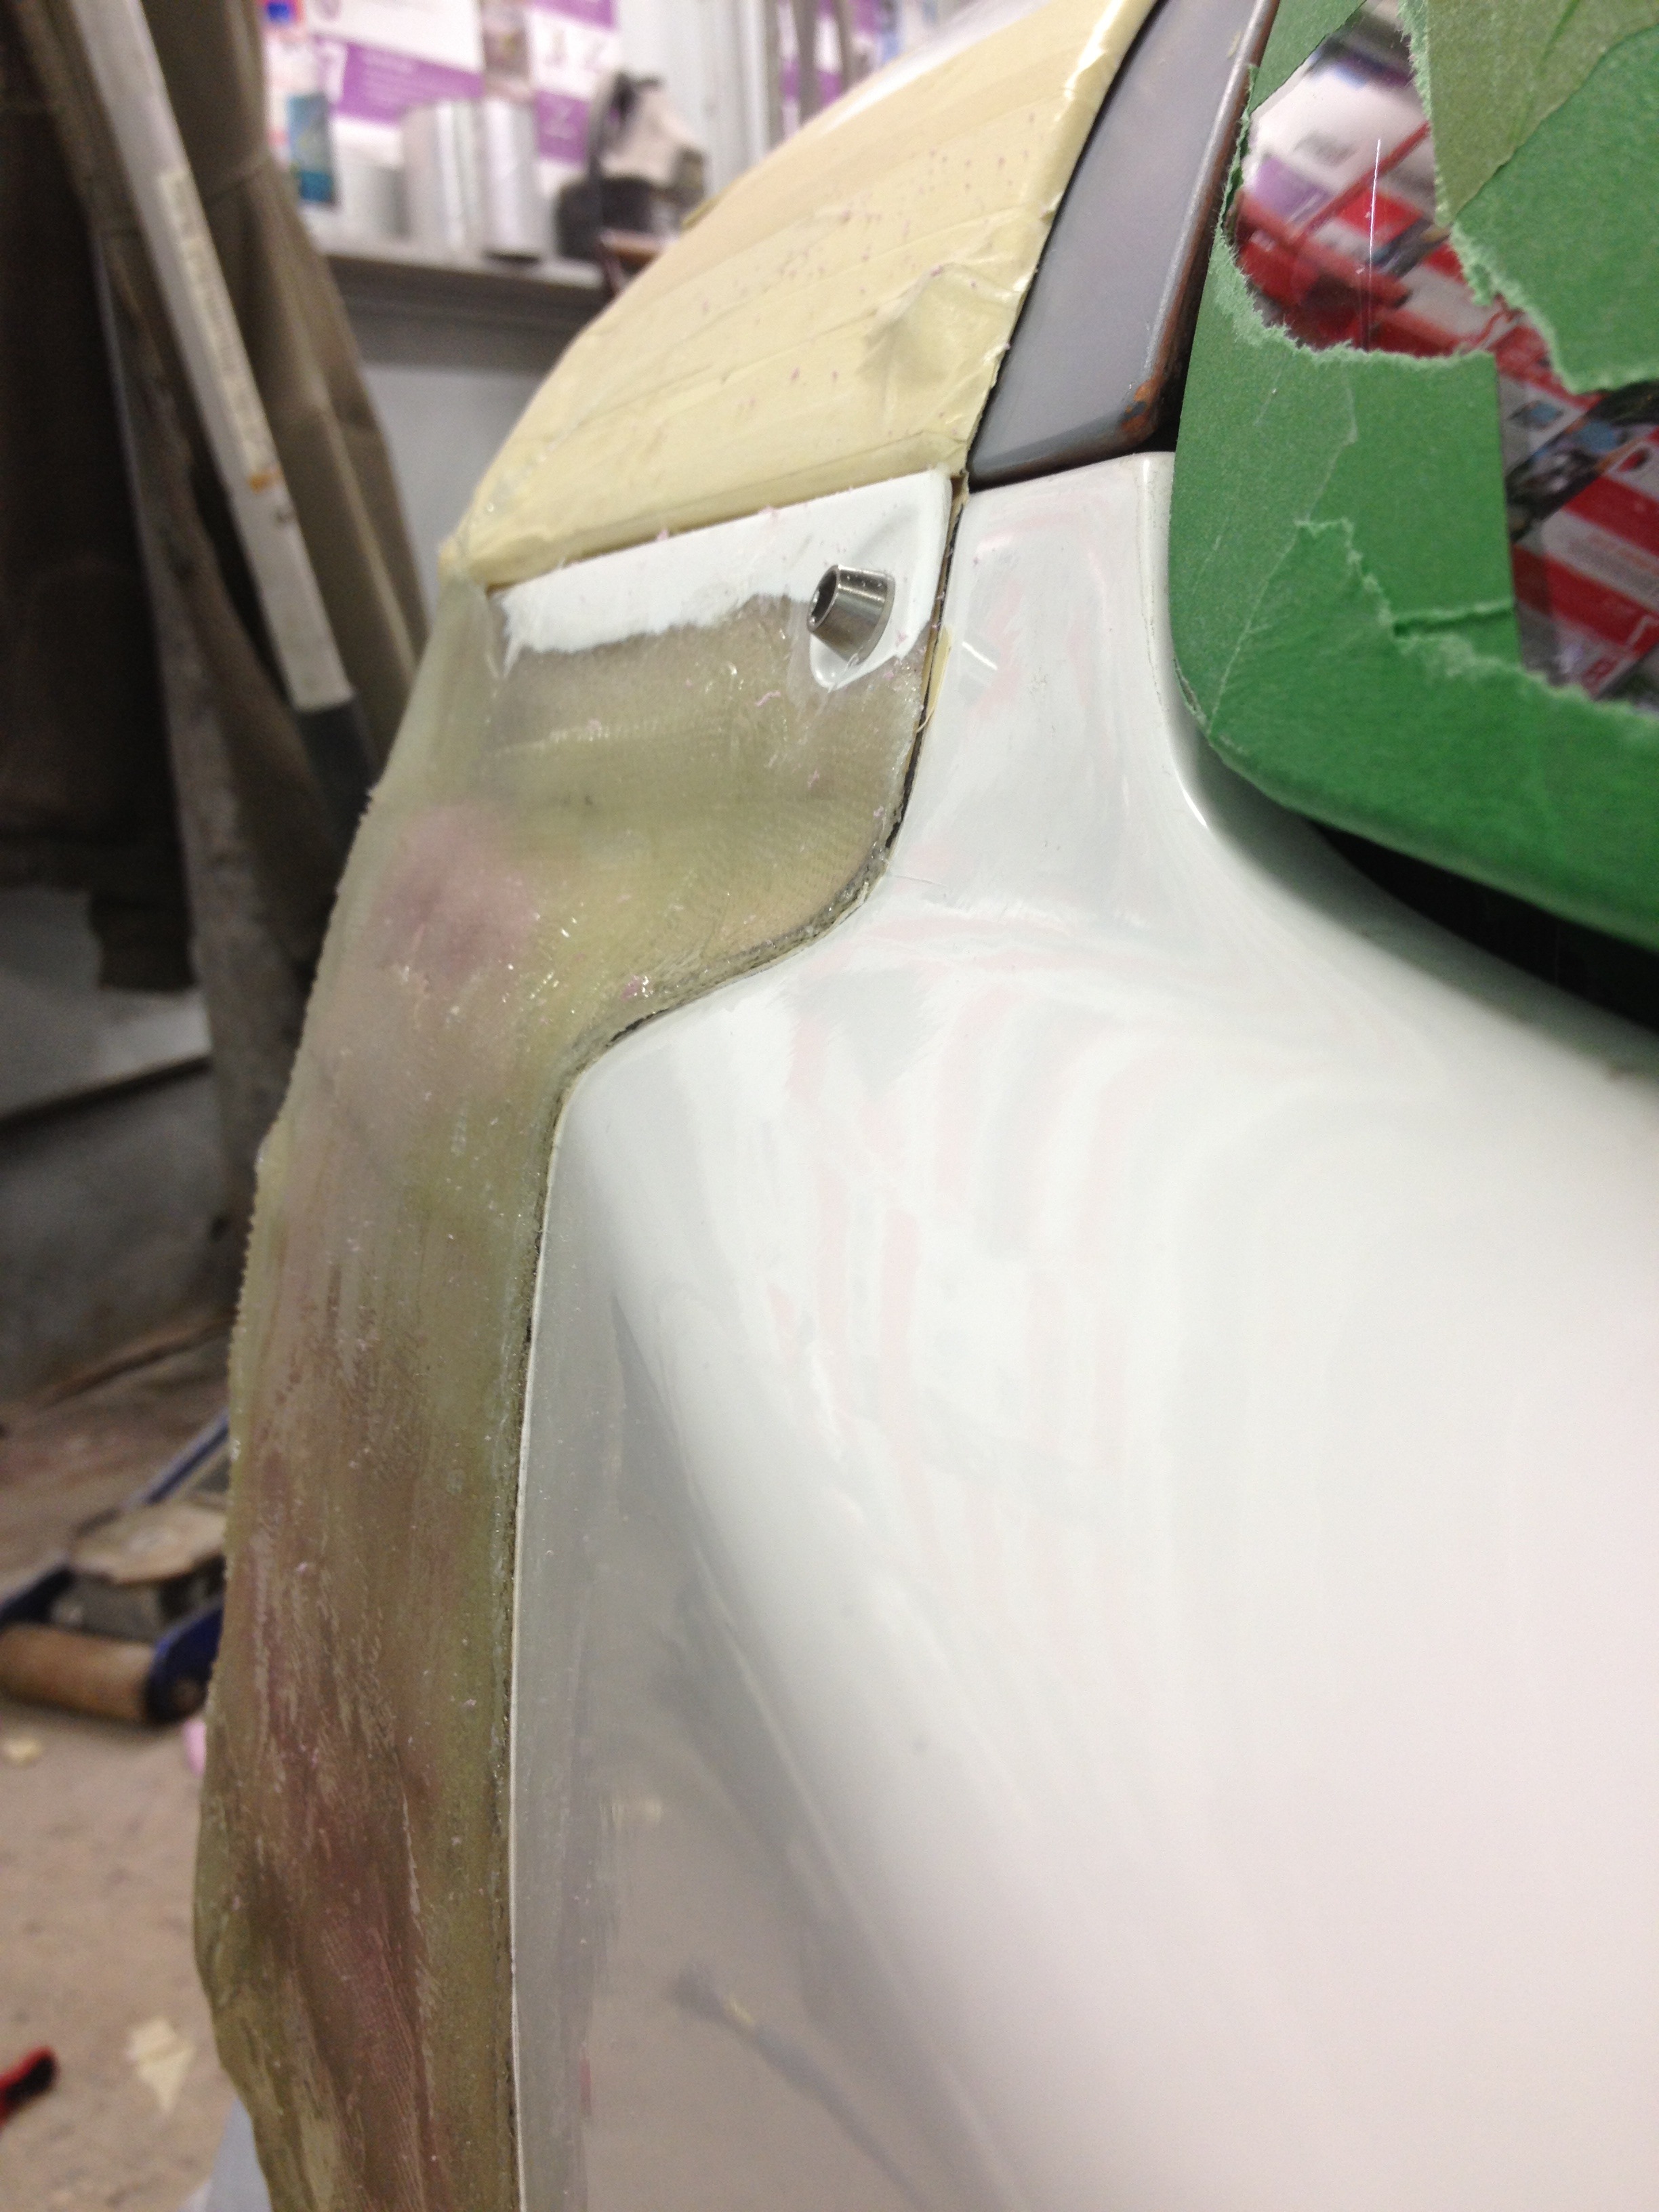
Solution? Cut them up and fiberglass them back together to fit.
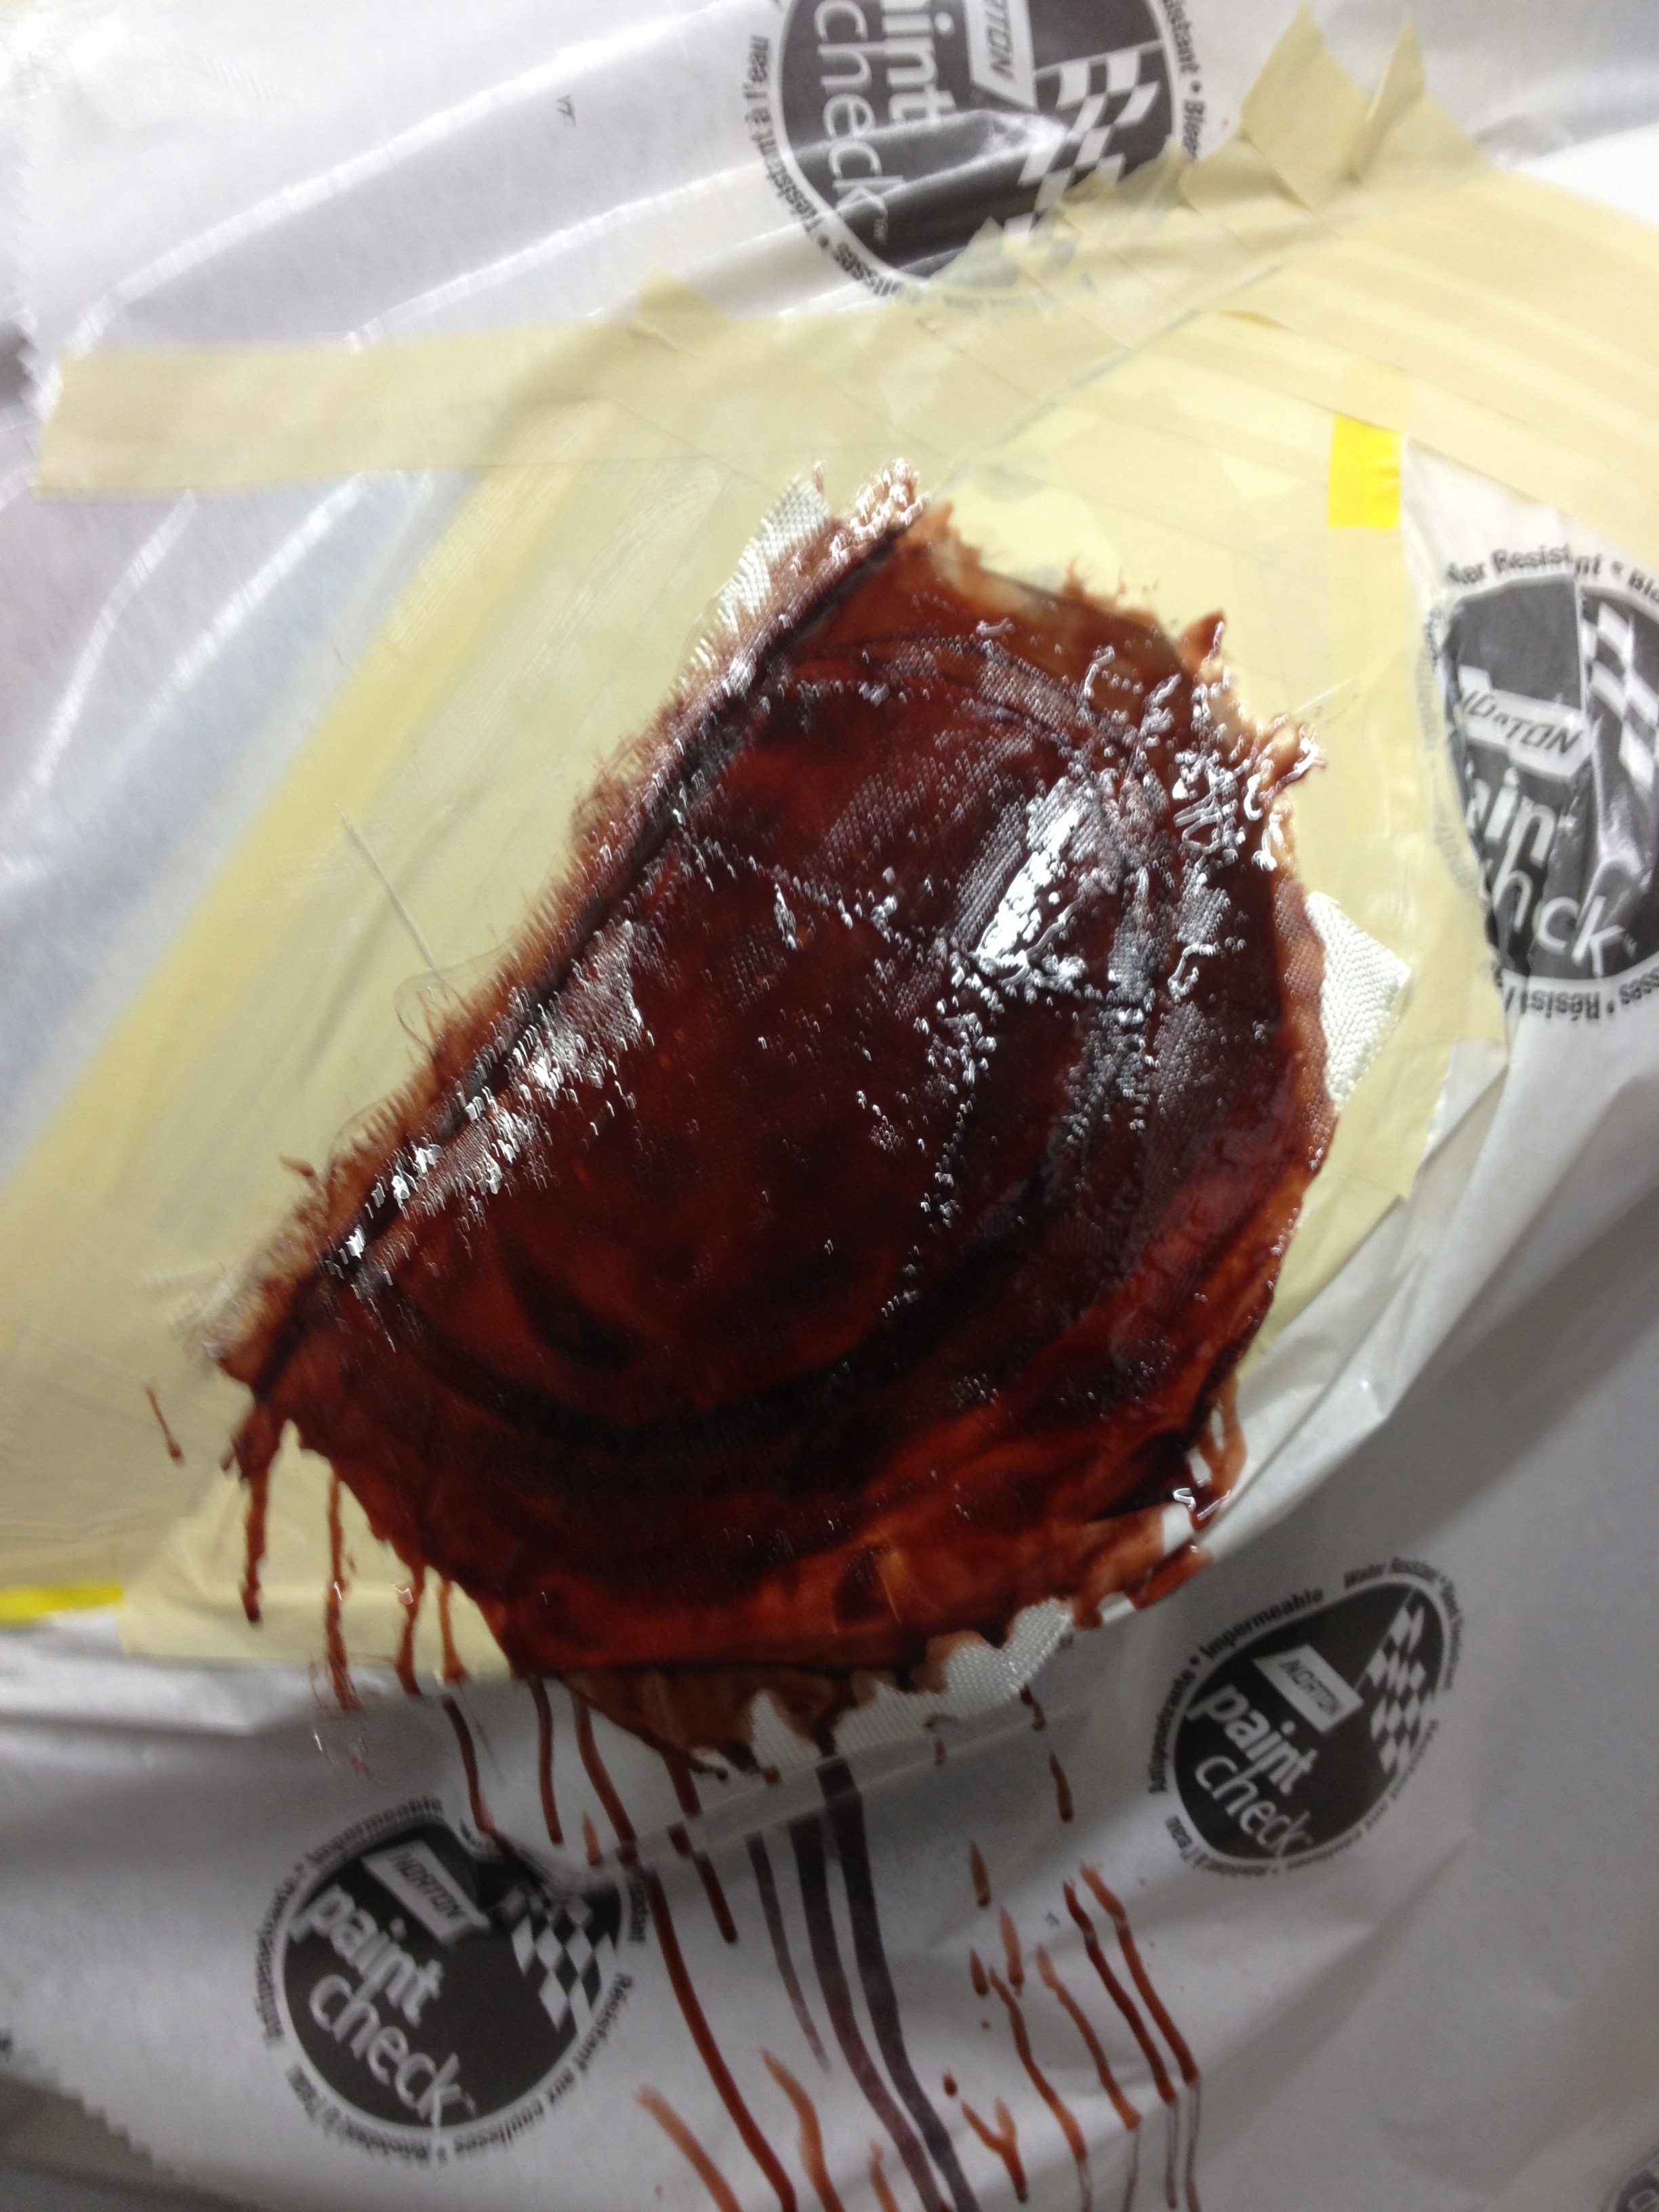
If you're wondering why my resin/fiberglass is brown/red it's because it was old. Reading the manuals for the resin it actually said that over time the resin would darken (I suspect because of the metal container it comes in). The manual said that even if the color changed the resin was still good to use. Regardless, I did a test batch before to make sure it was still good before using it on the car.
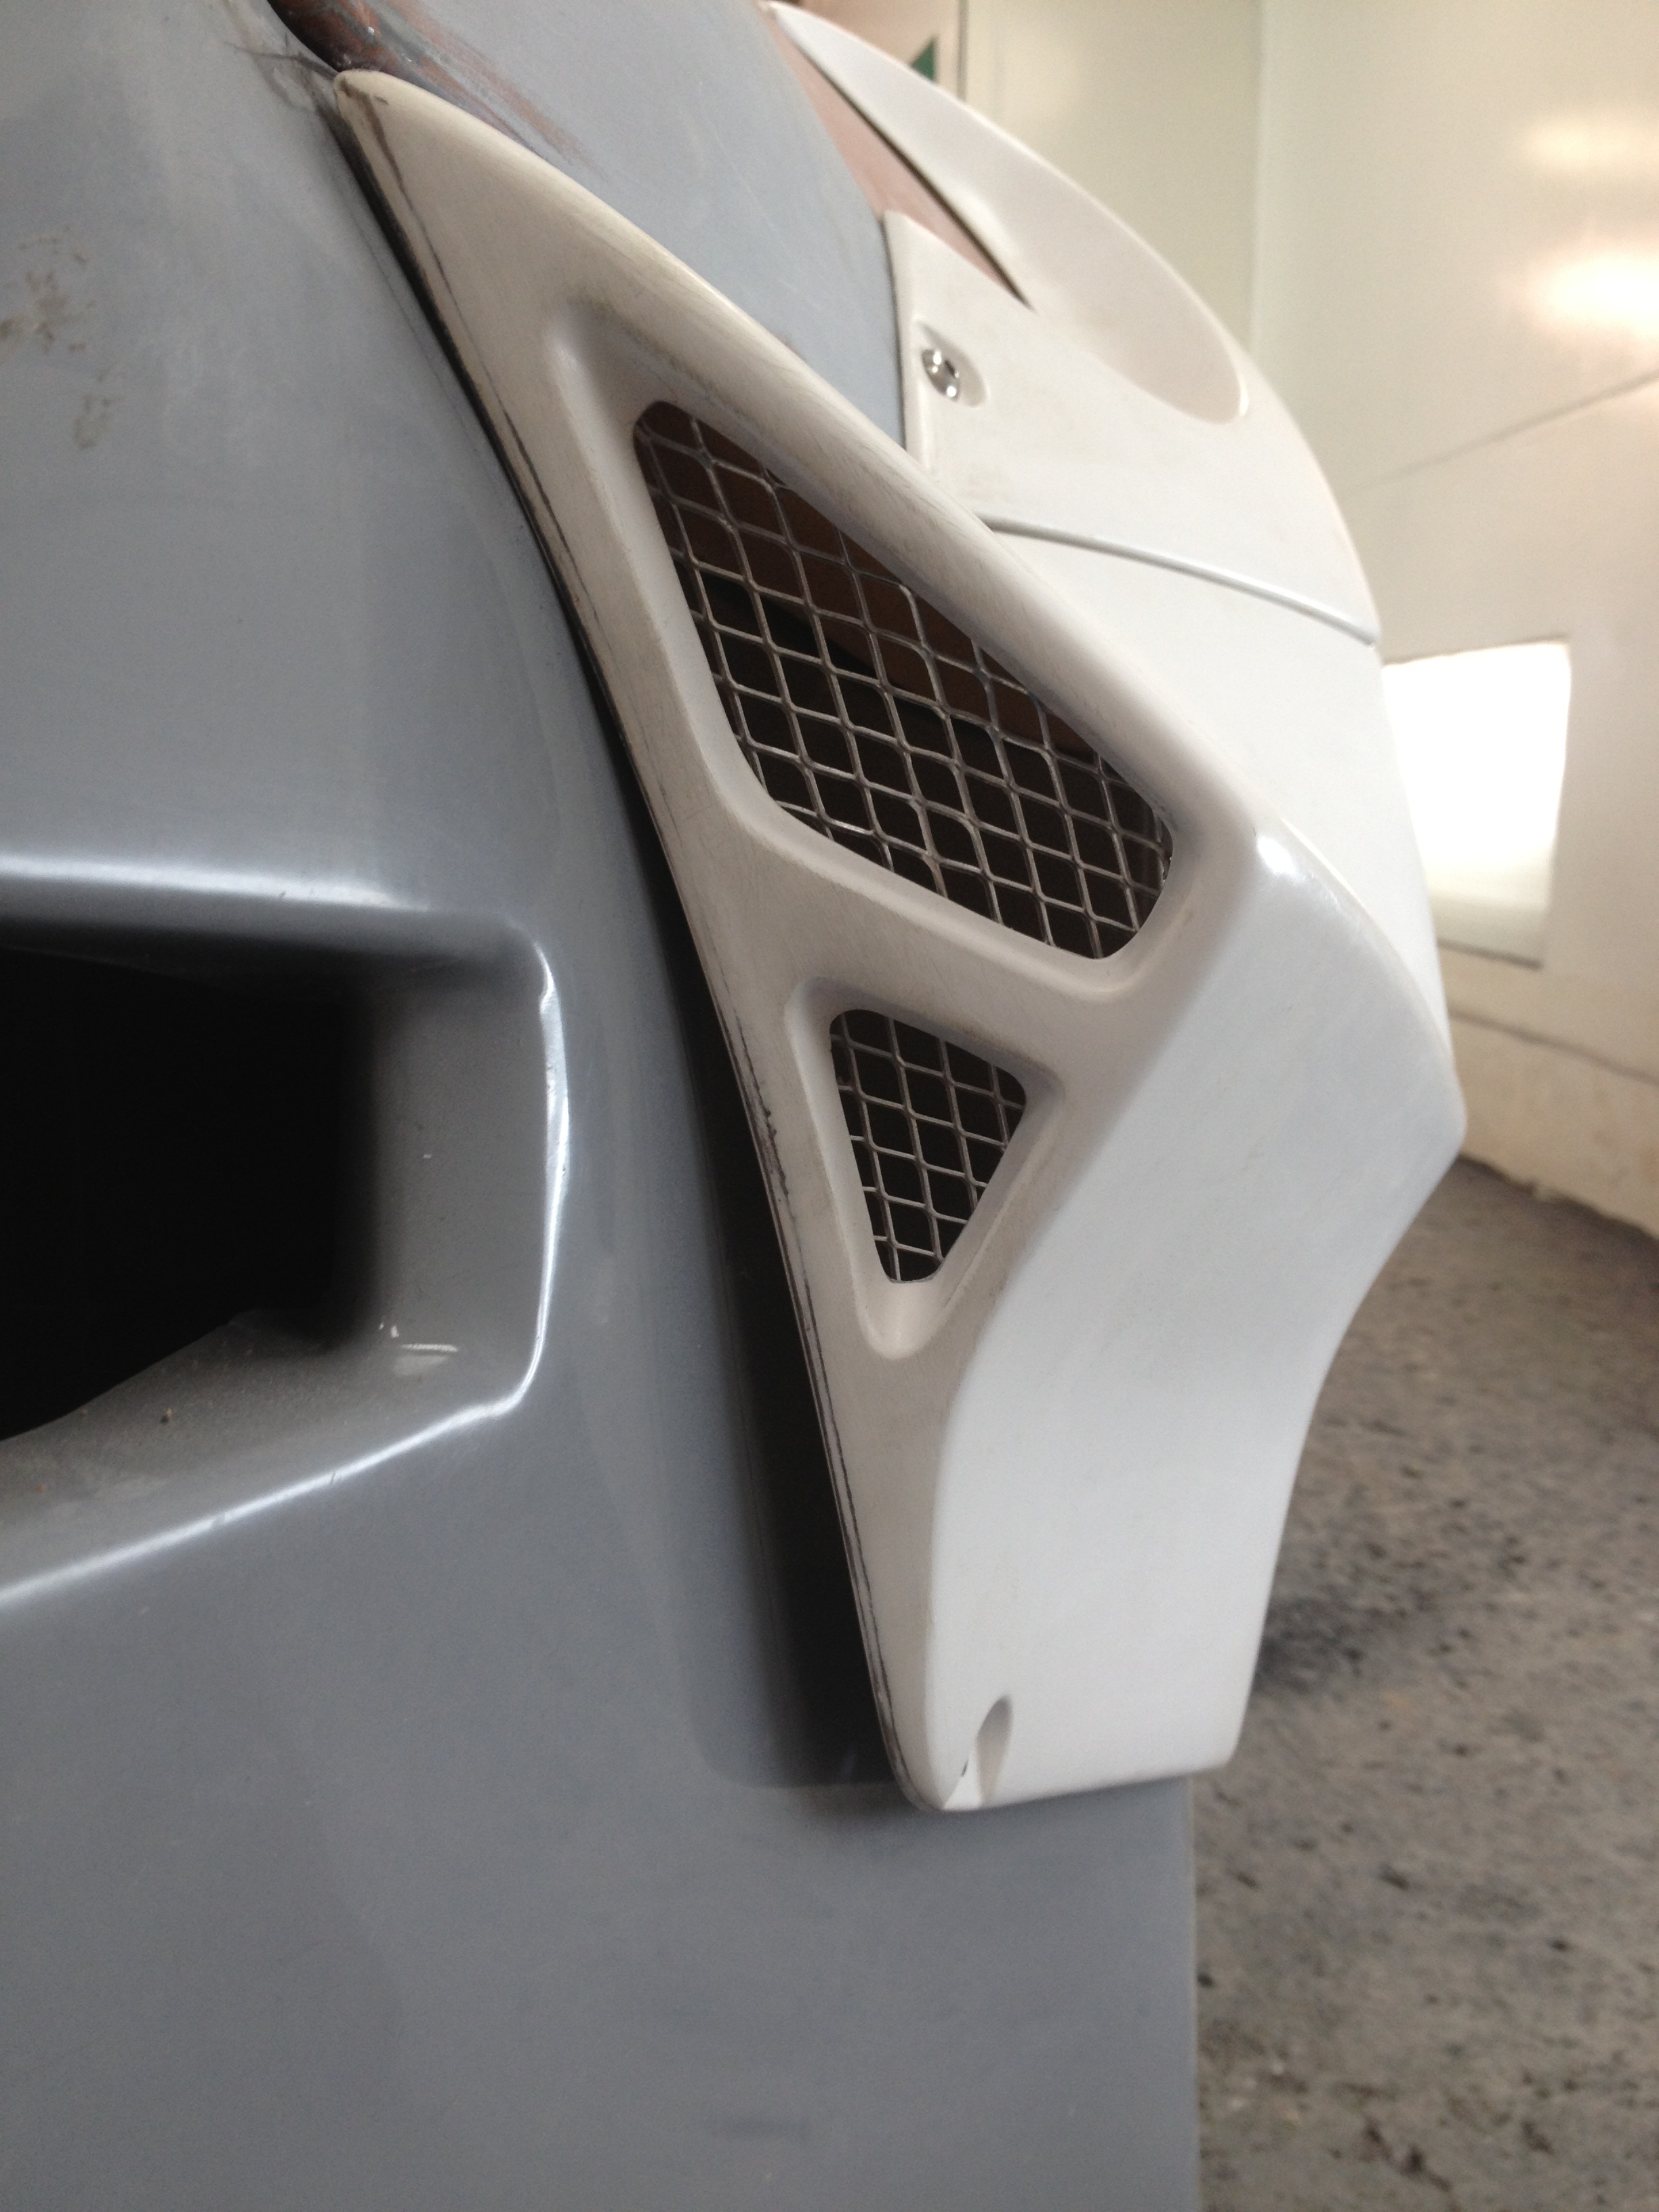
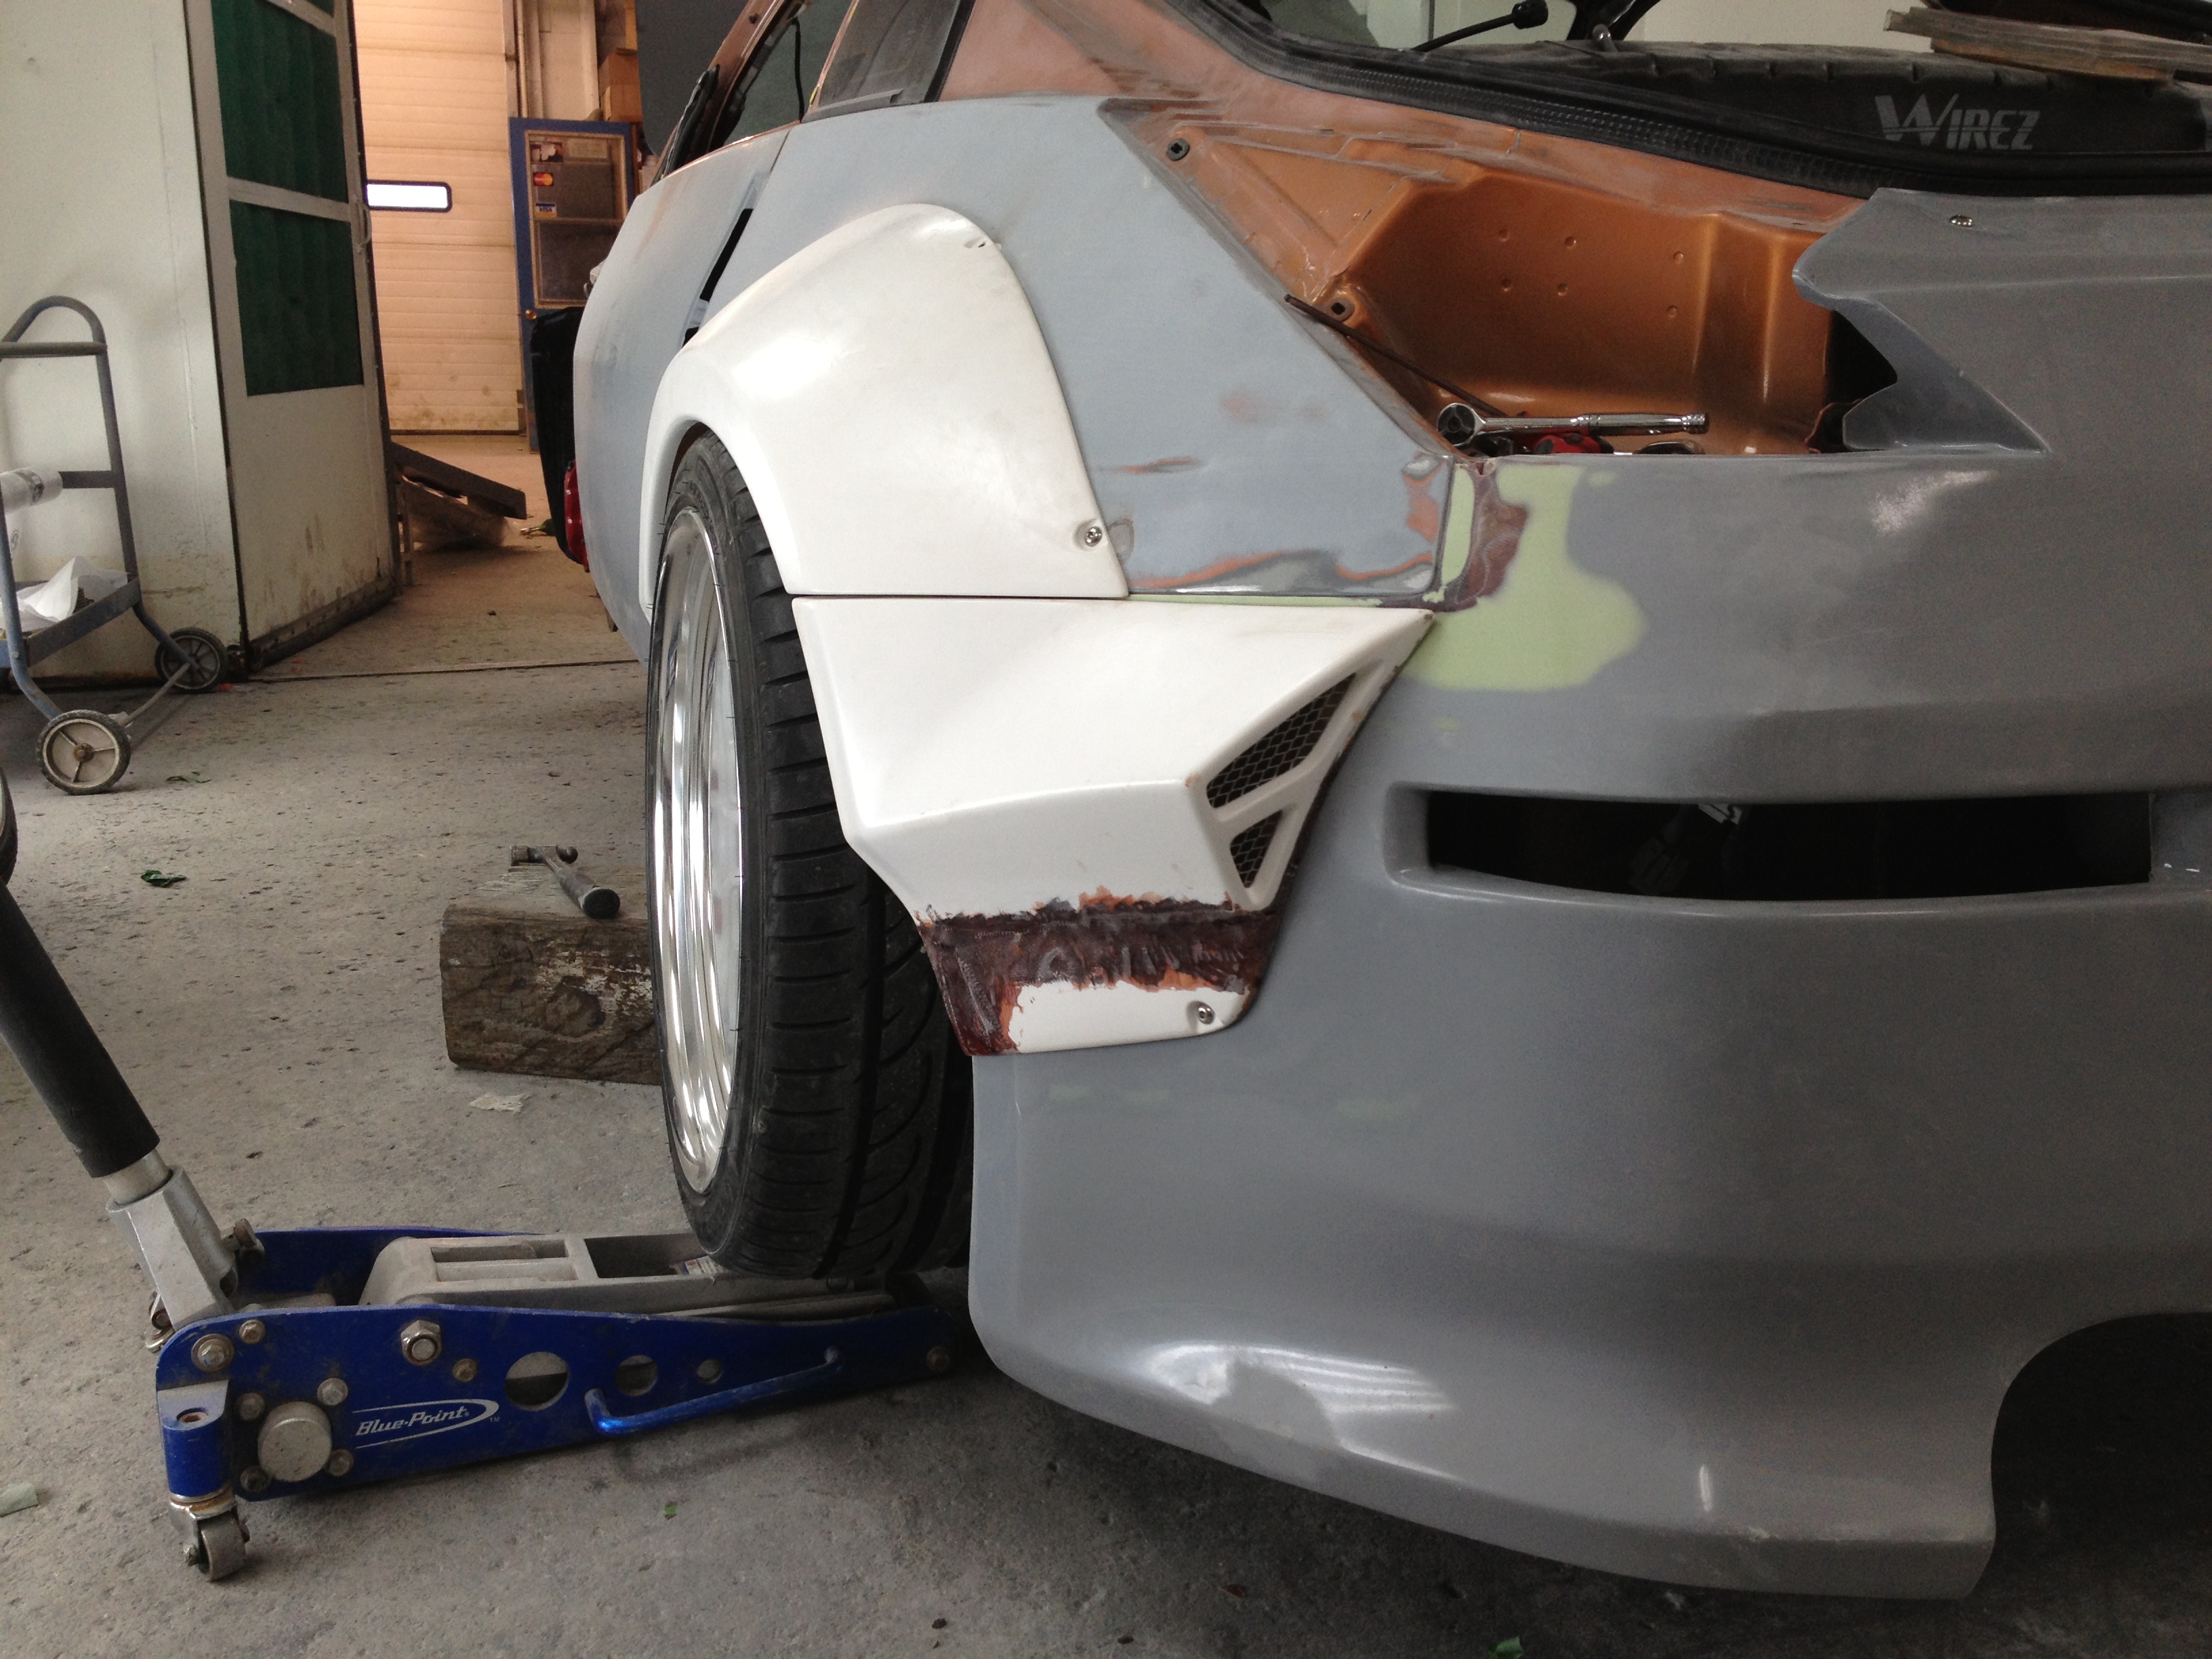
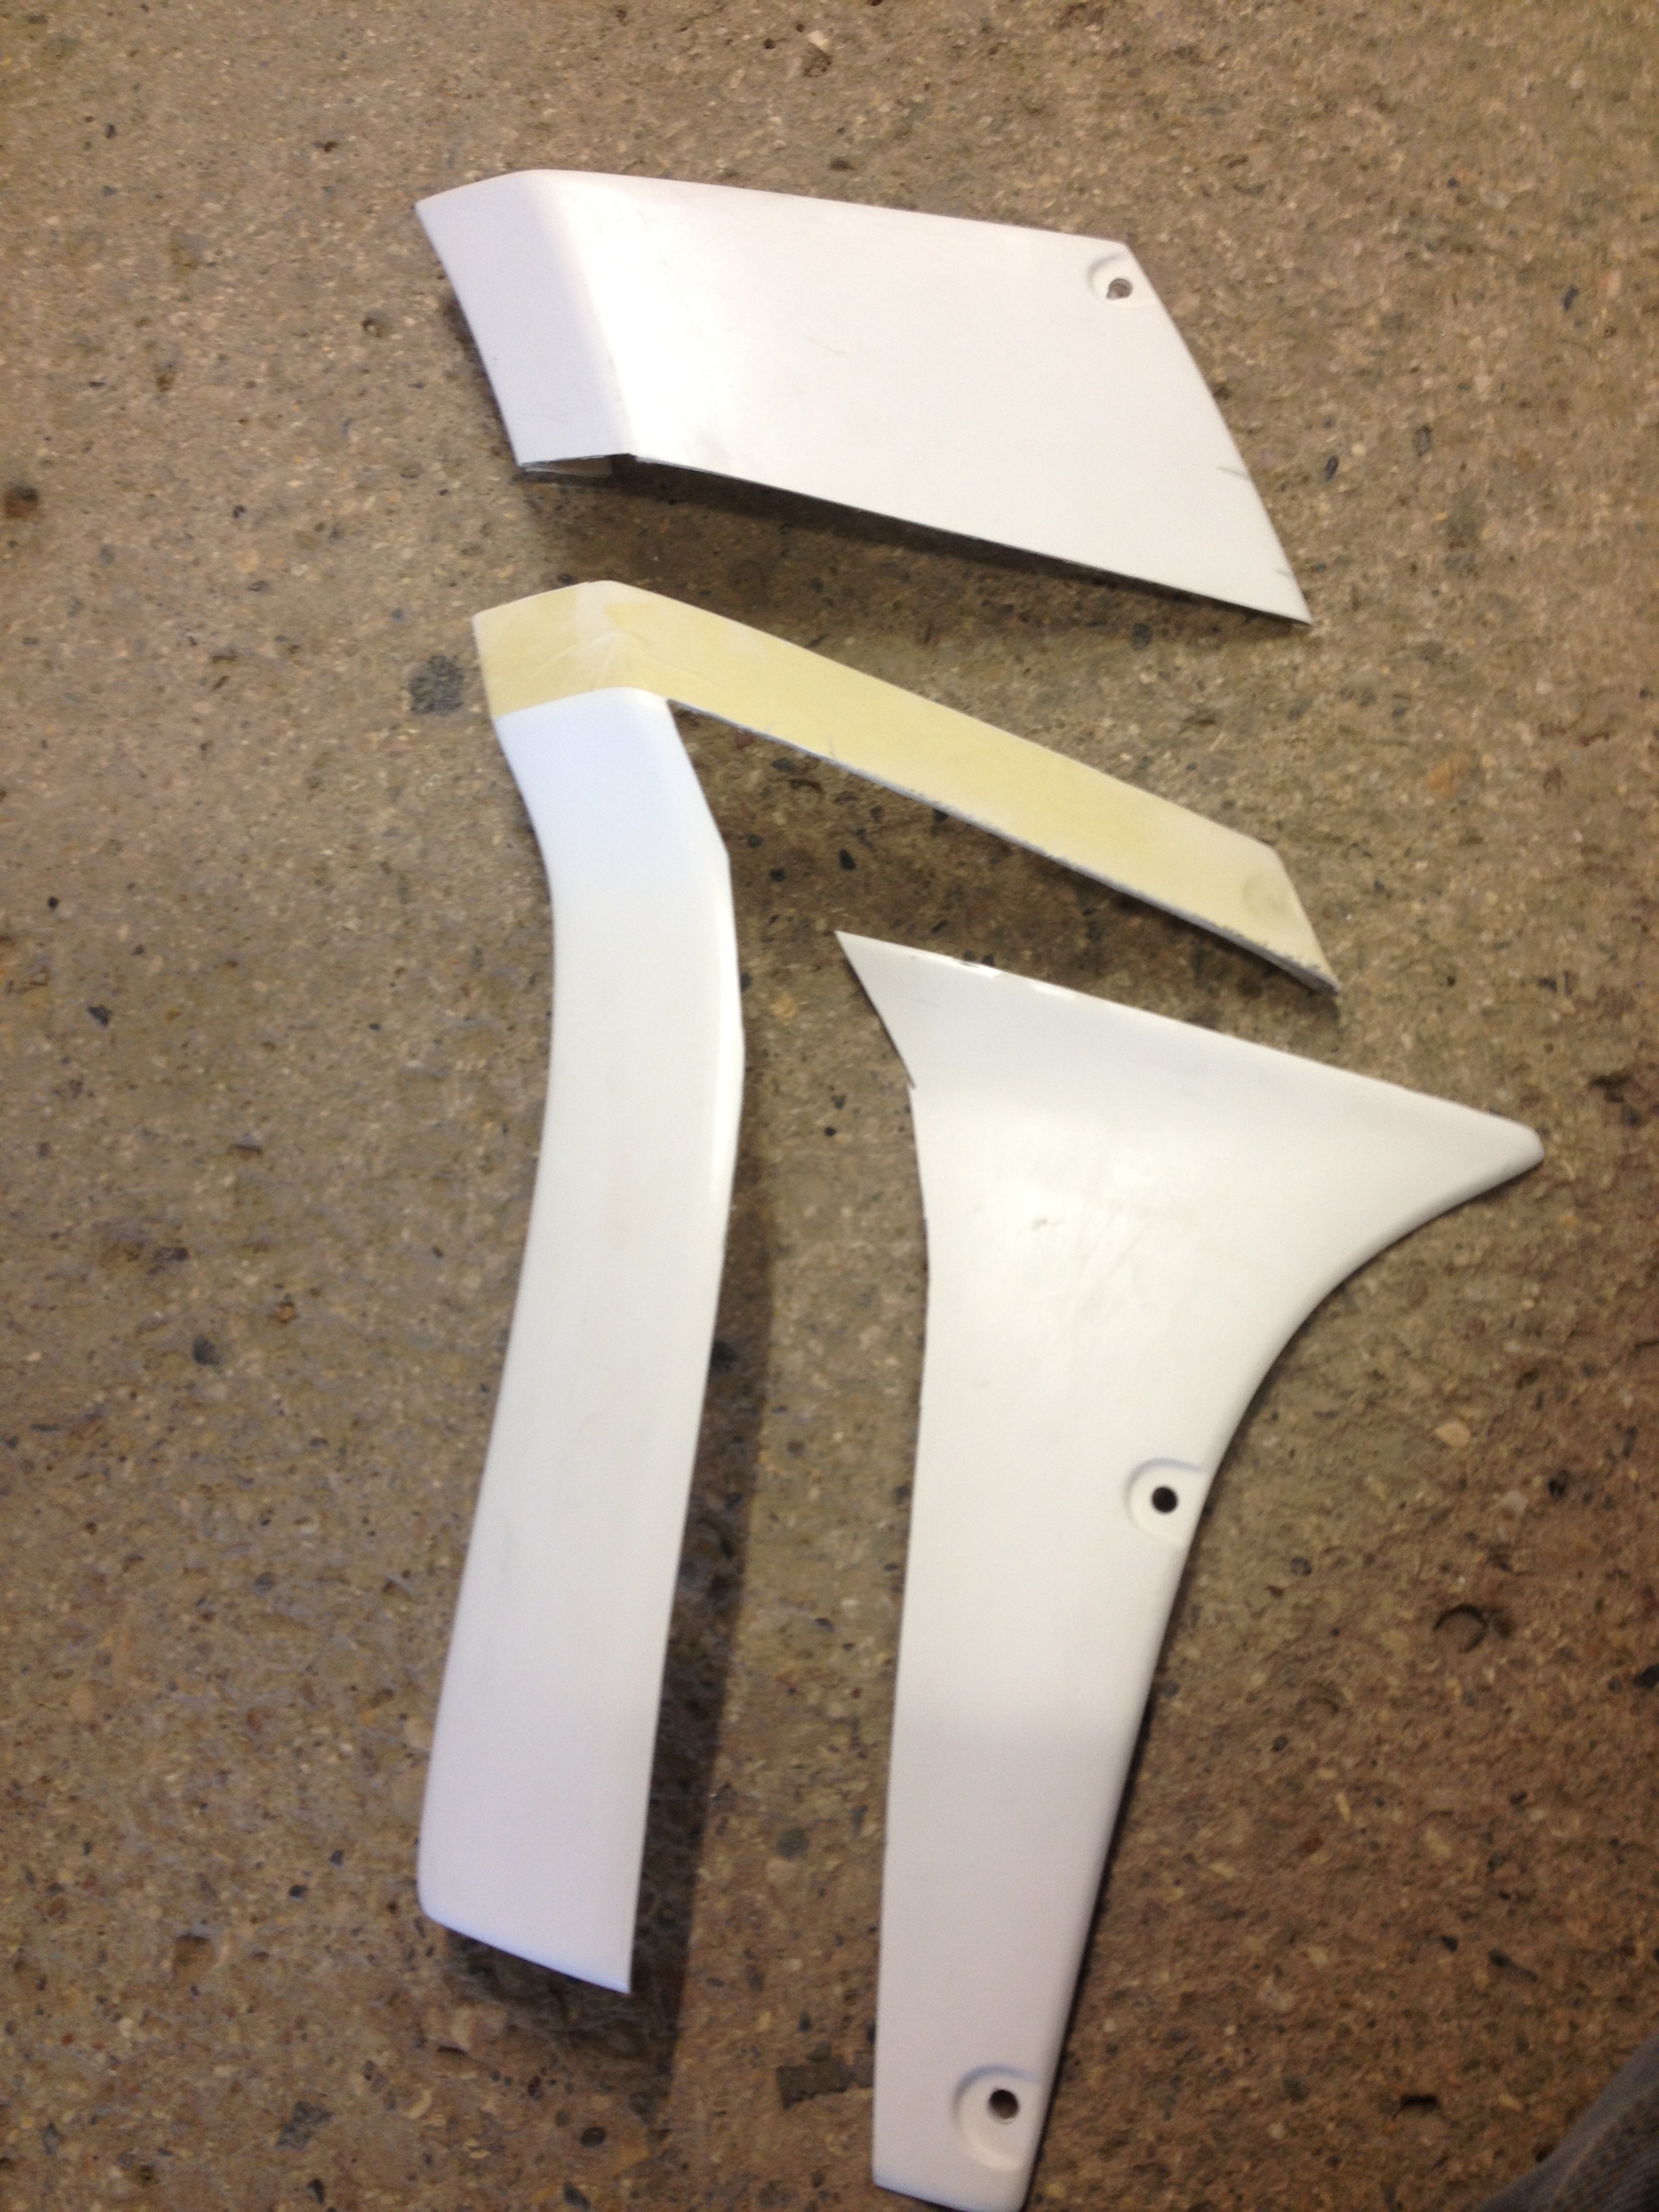
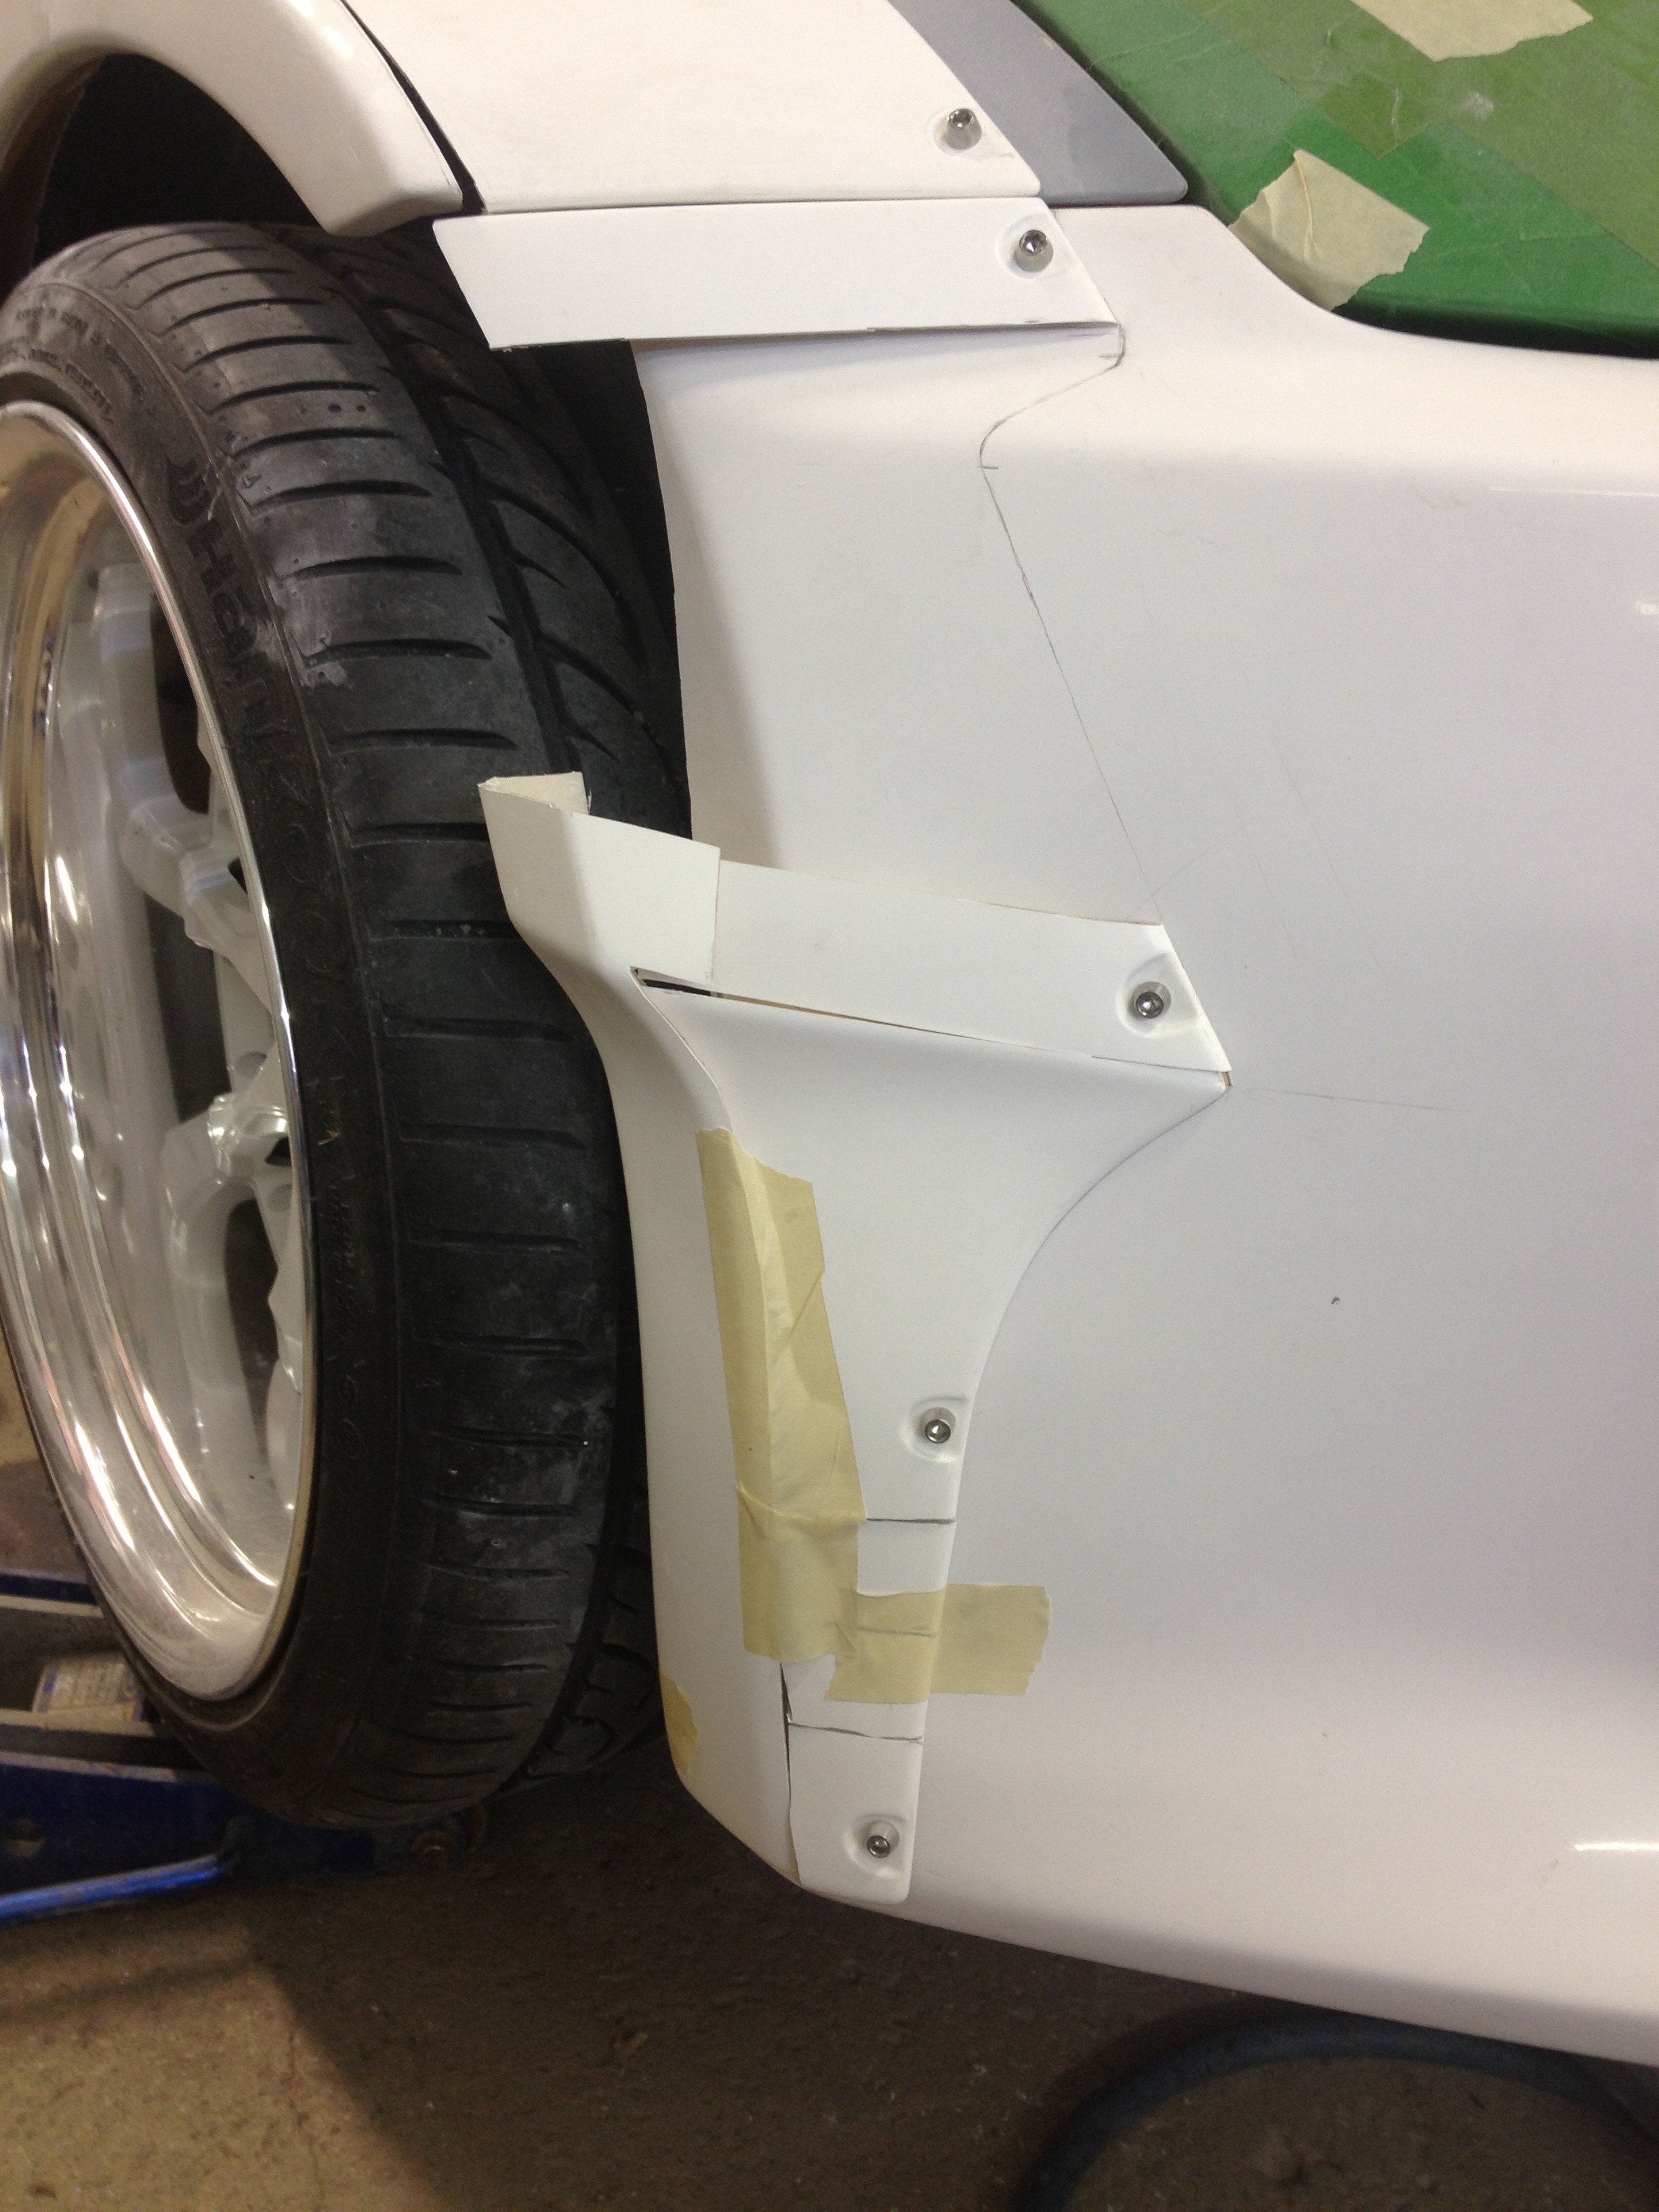
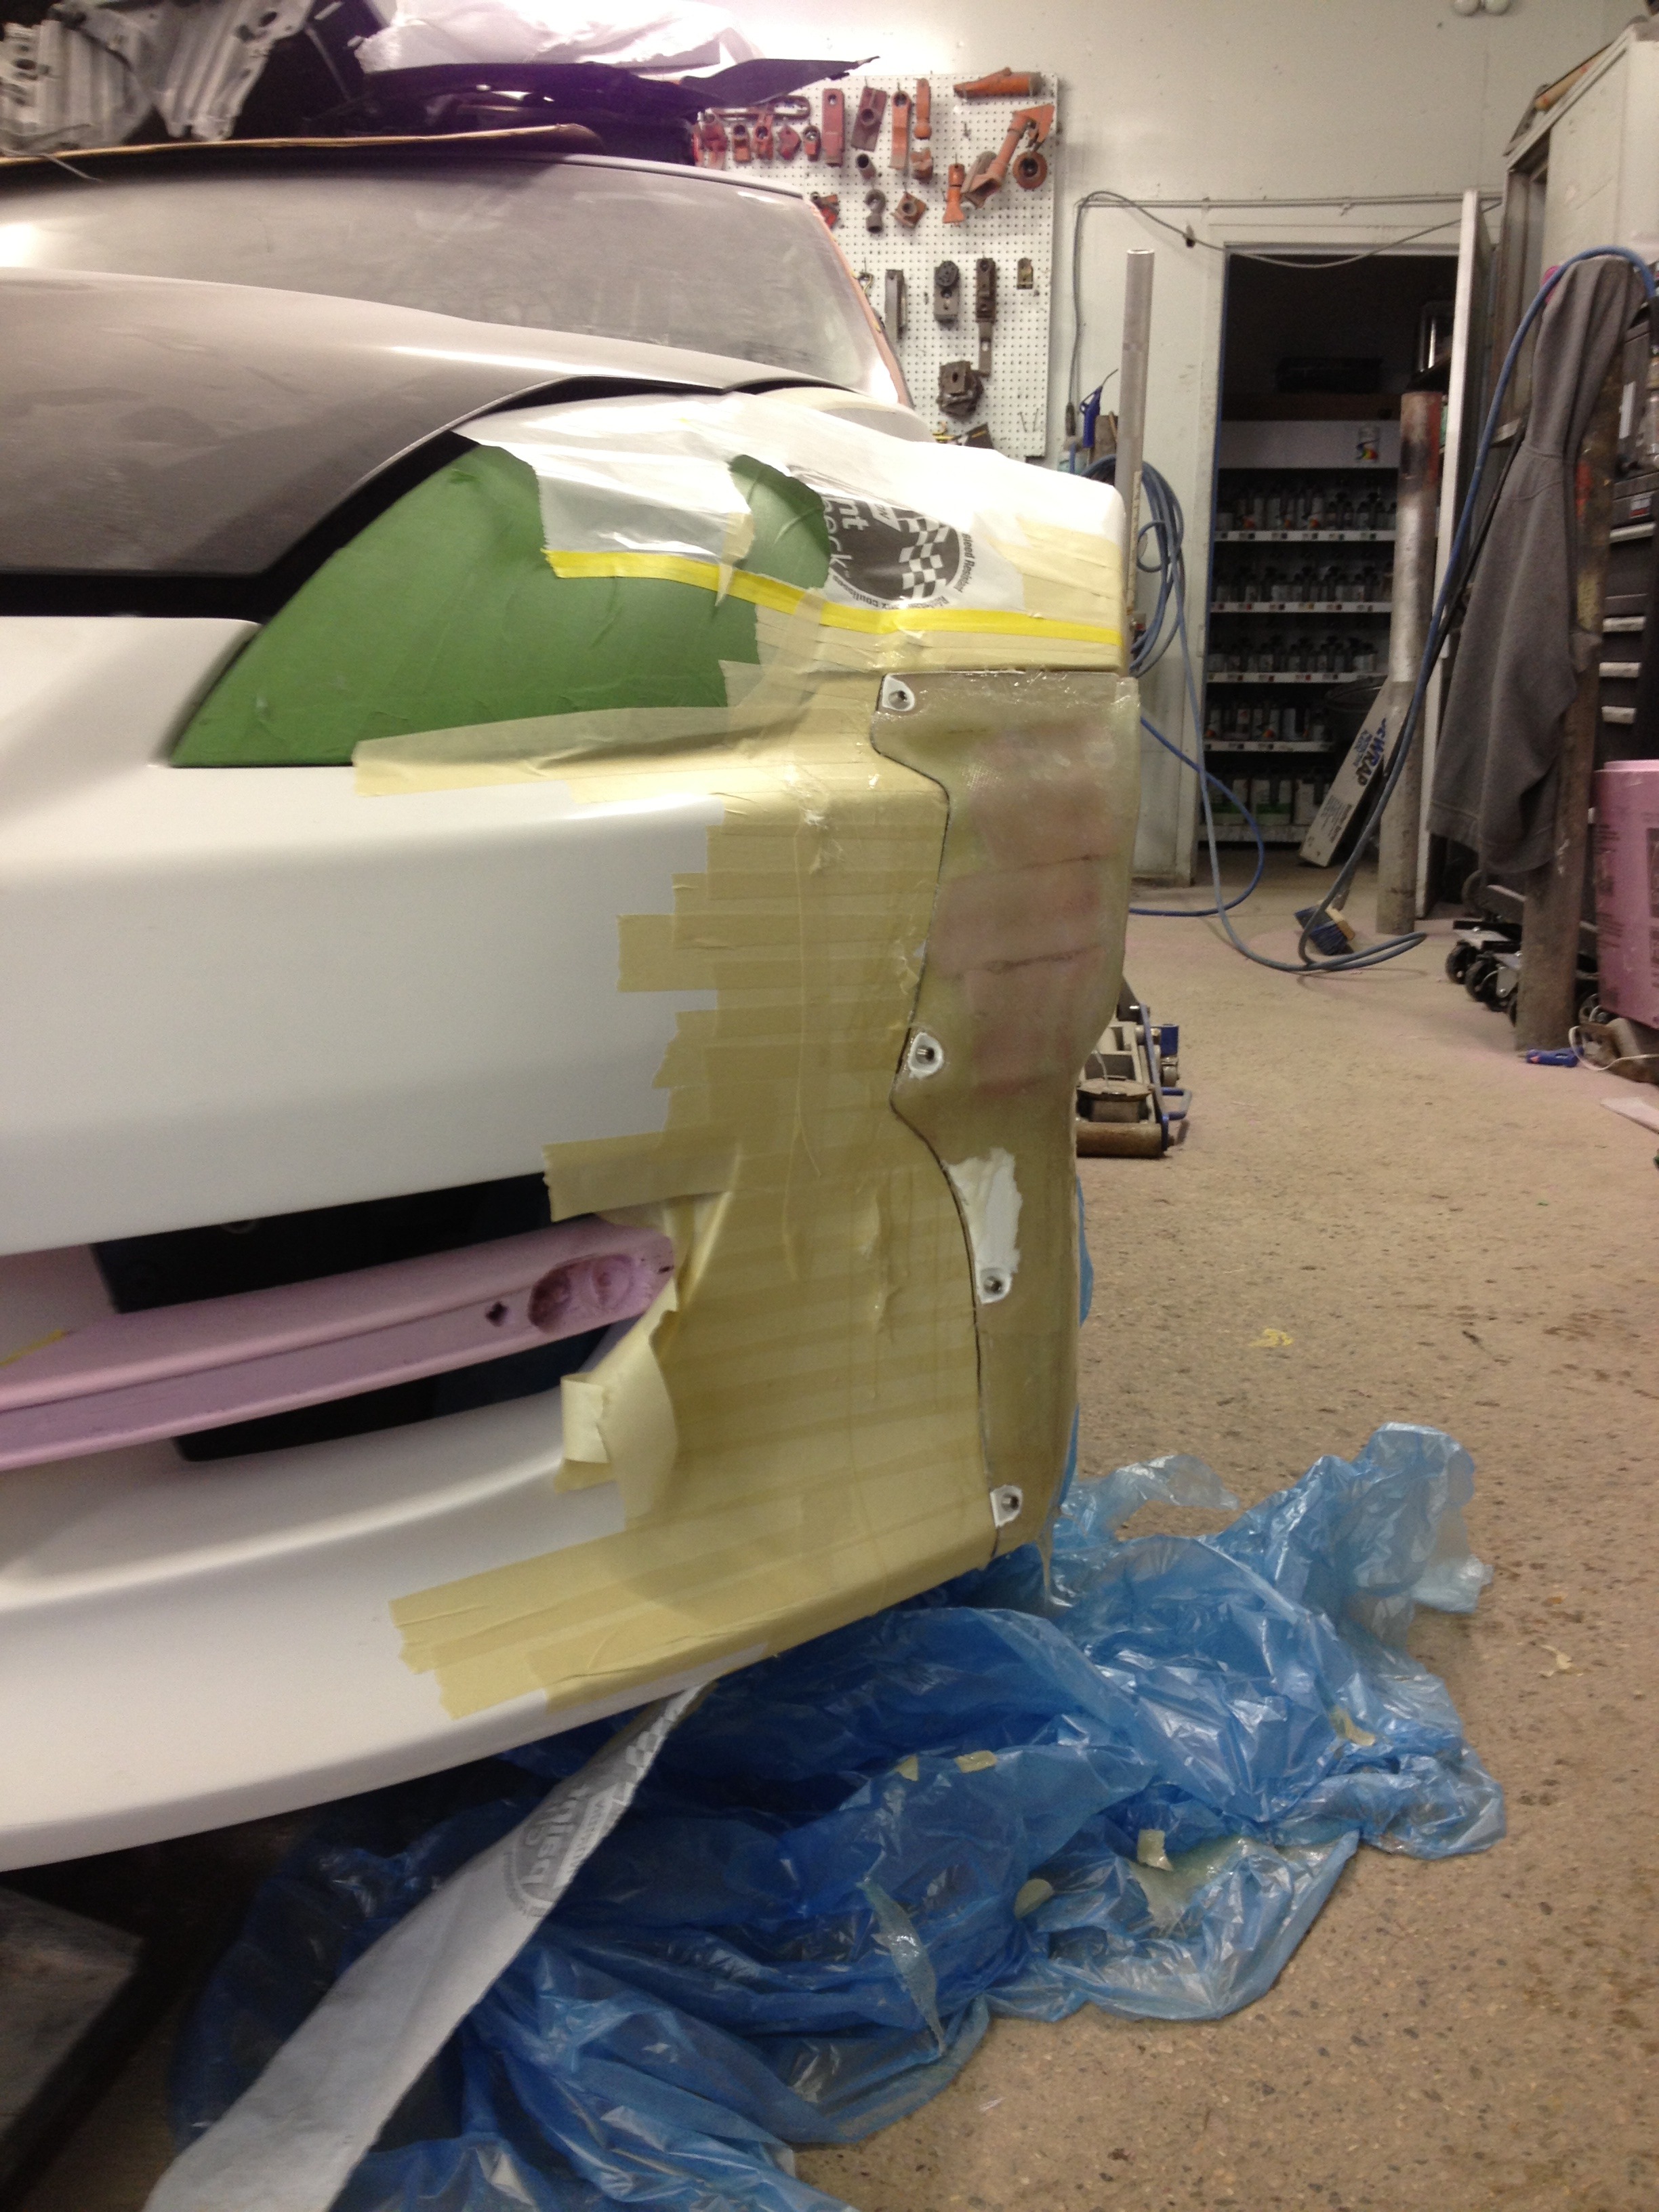
On to the front bumper flare pieces. Again, they're made for the stock bumper so they didn't fit at all with my aftermarket bumper.
These were a lot harder to make fit. It probably took me ~4 full days to re-build these pieces.
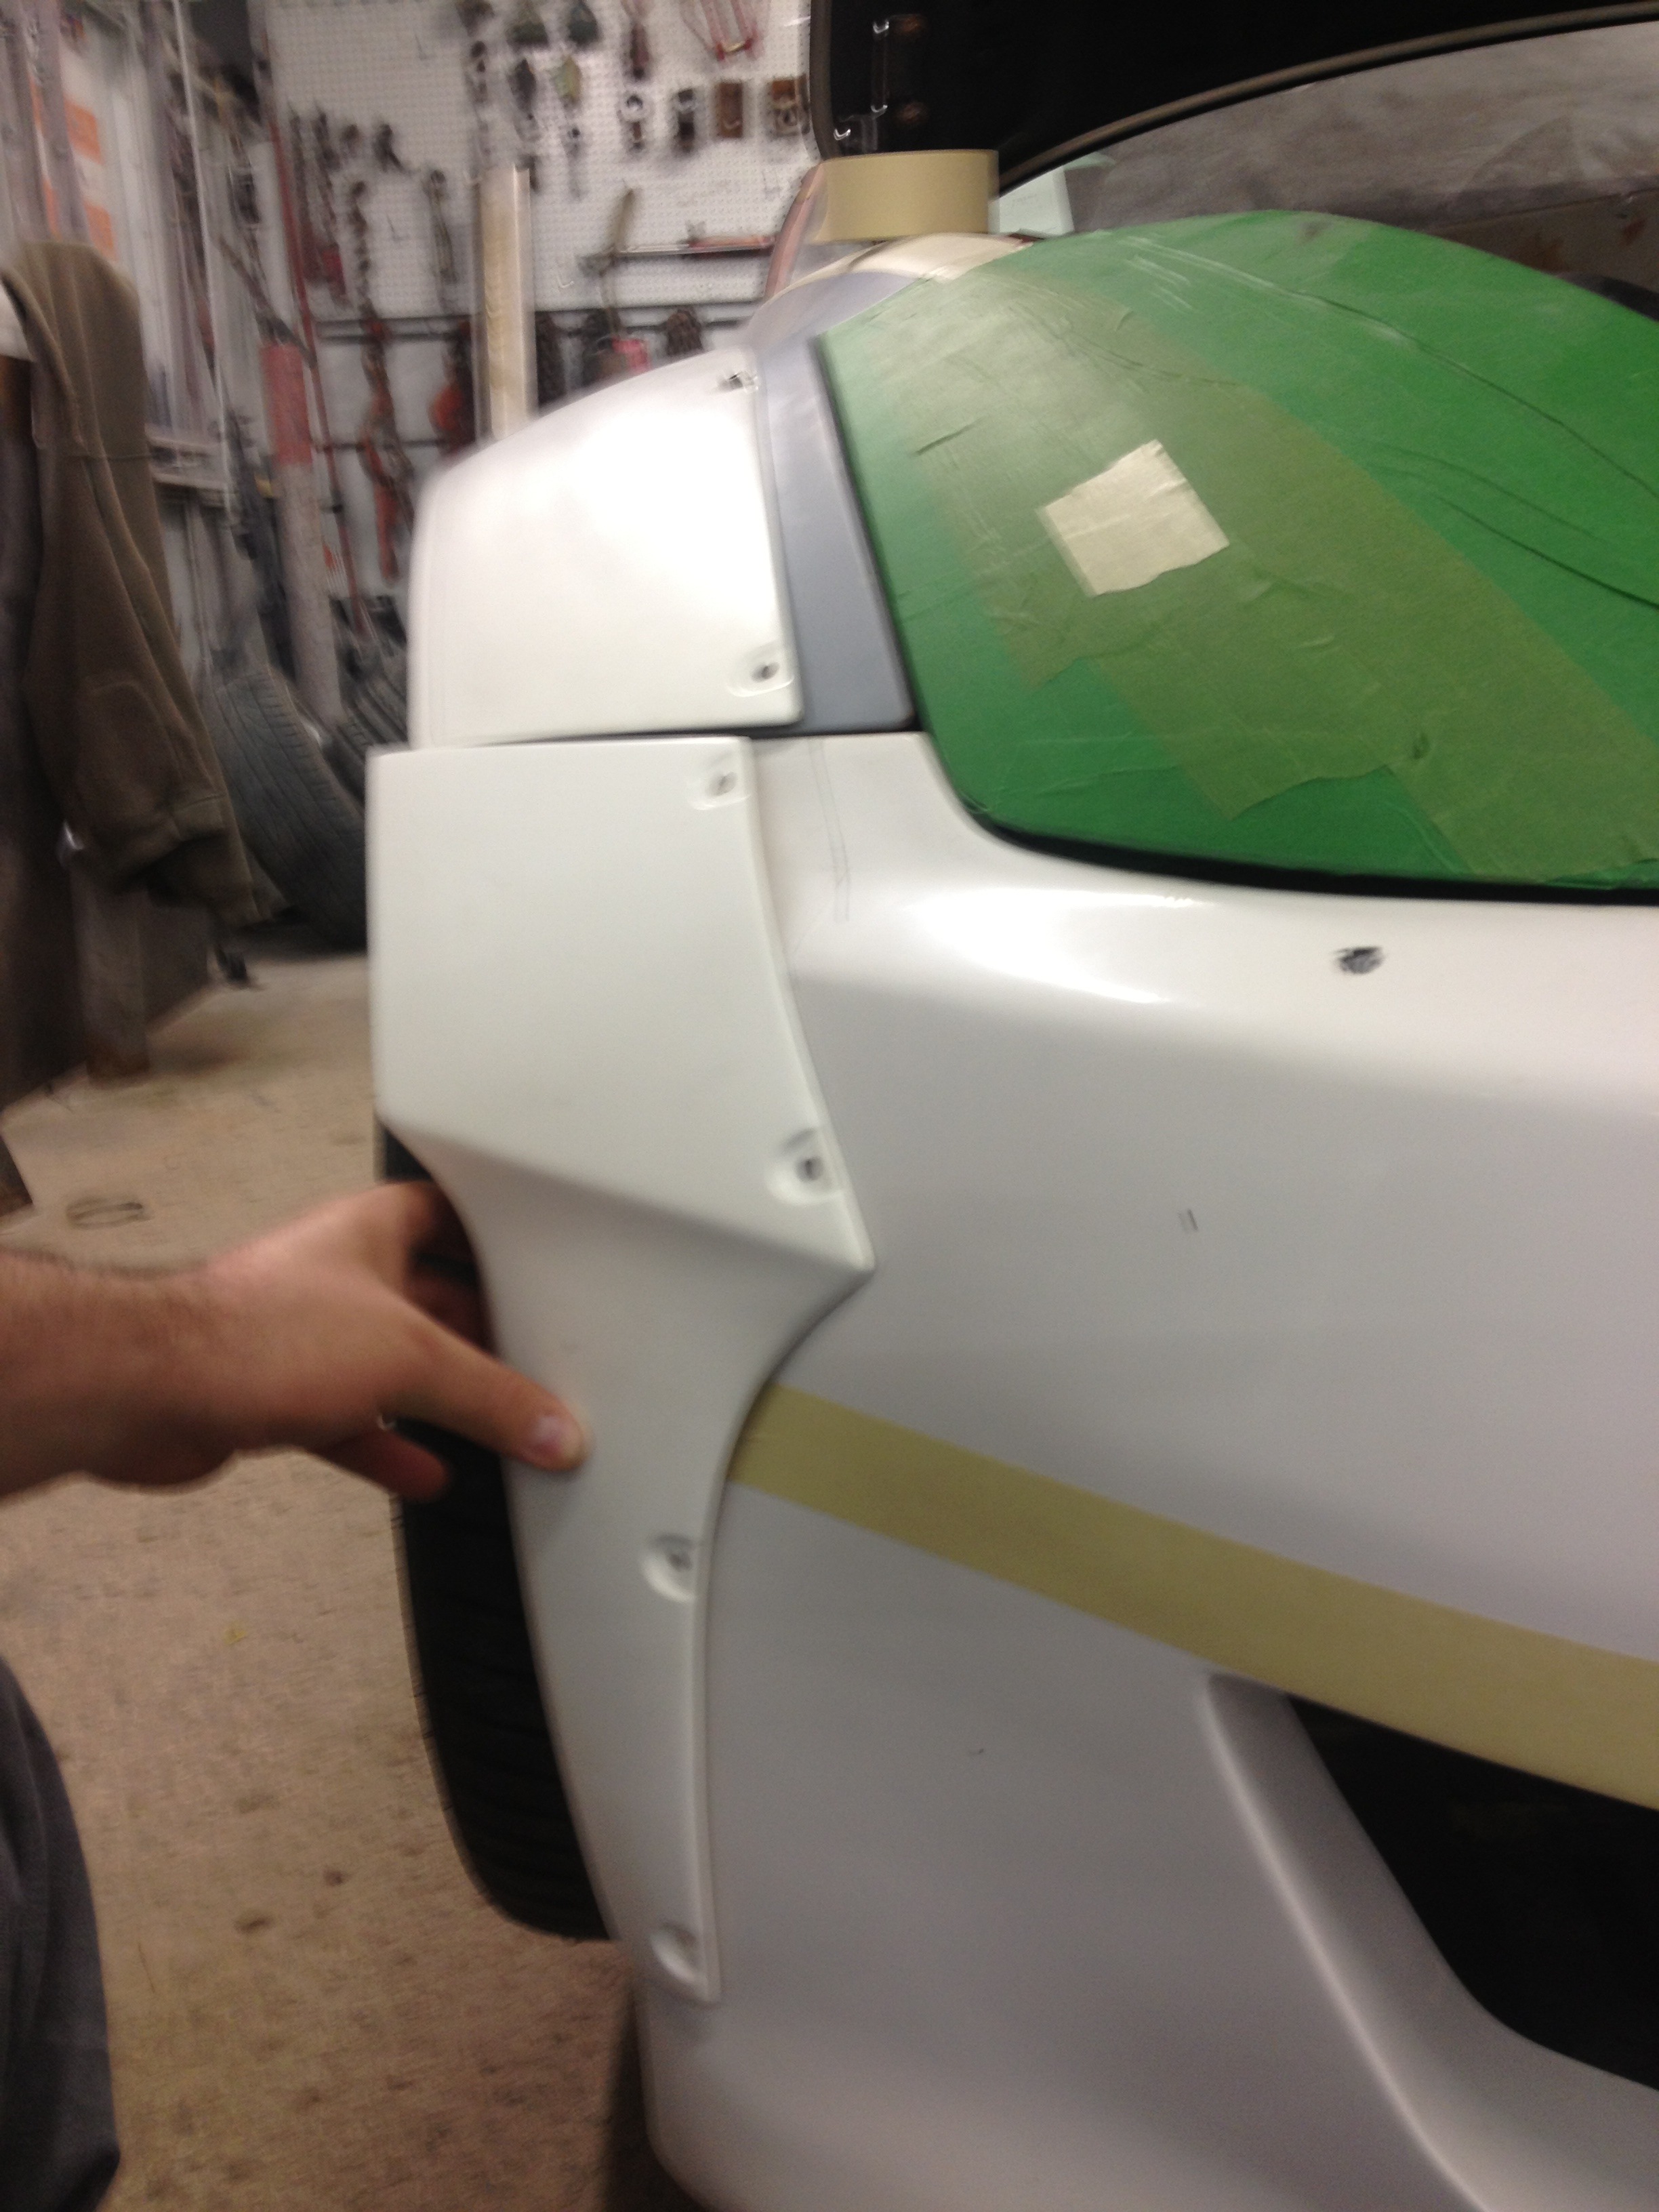
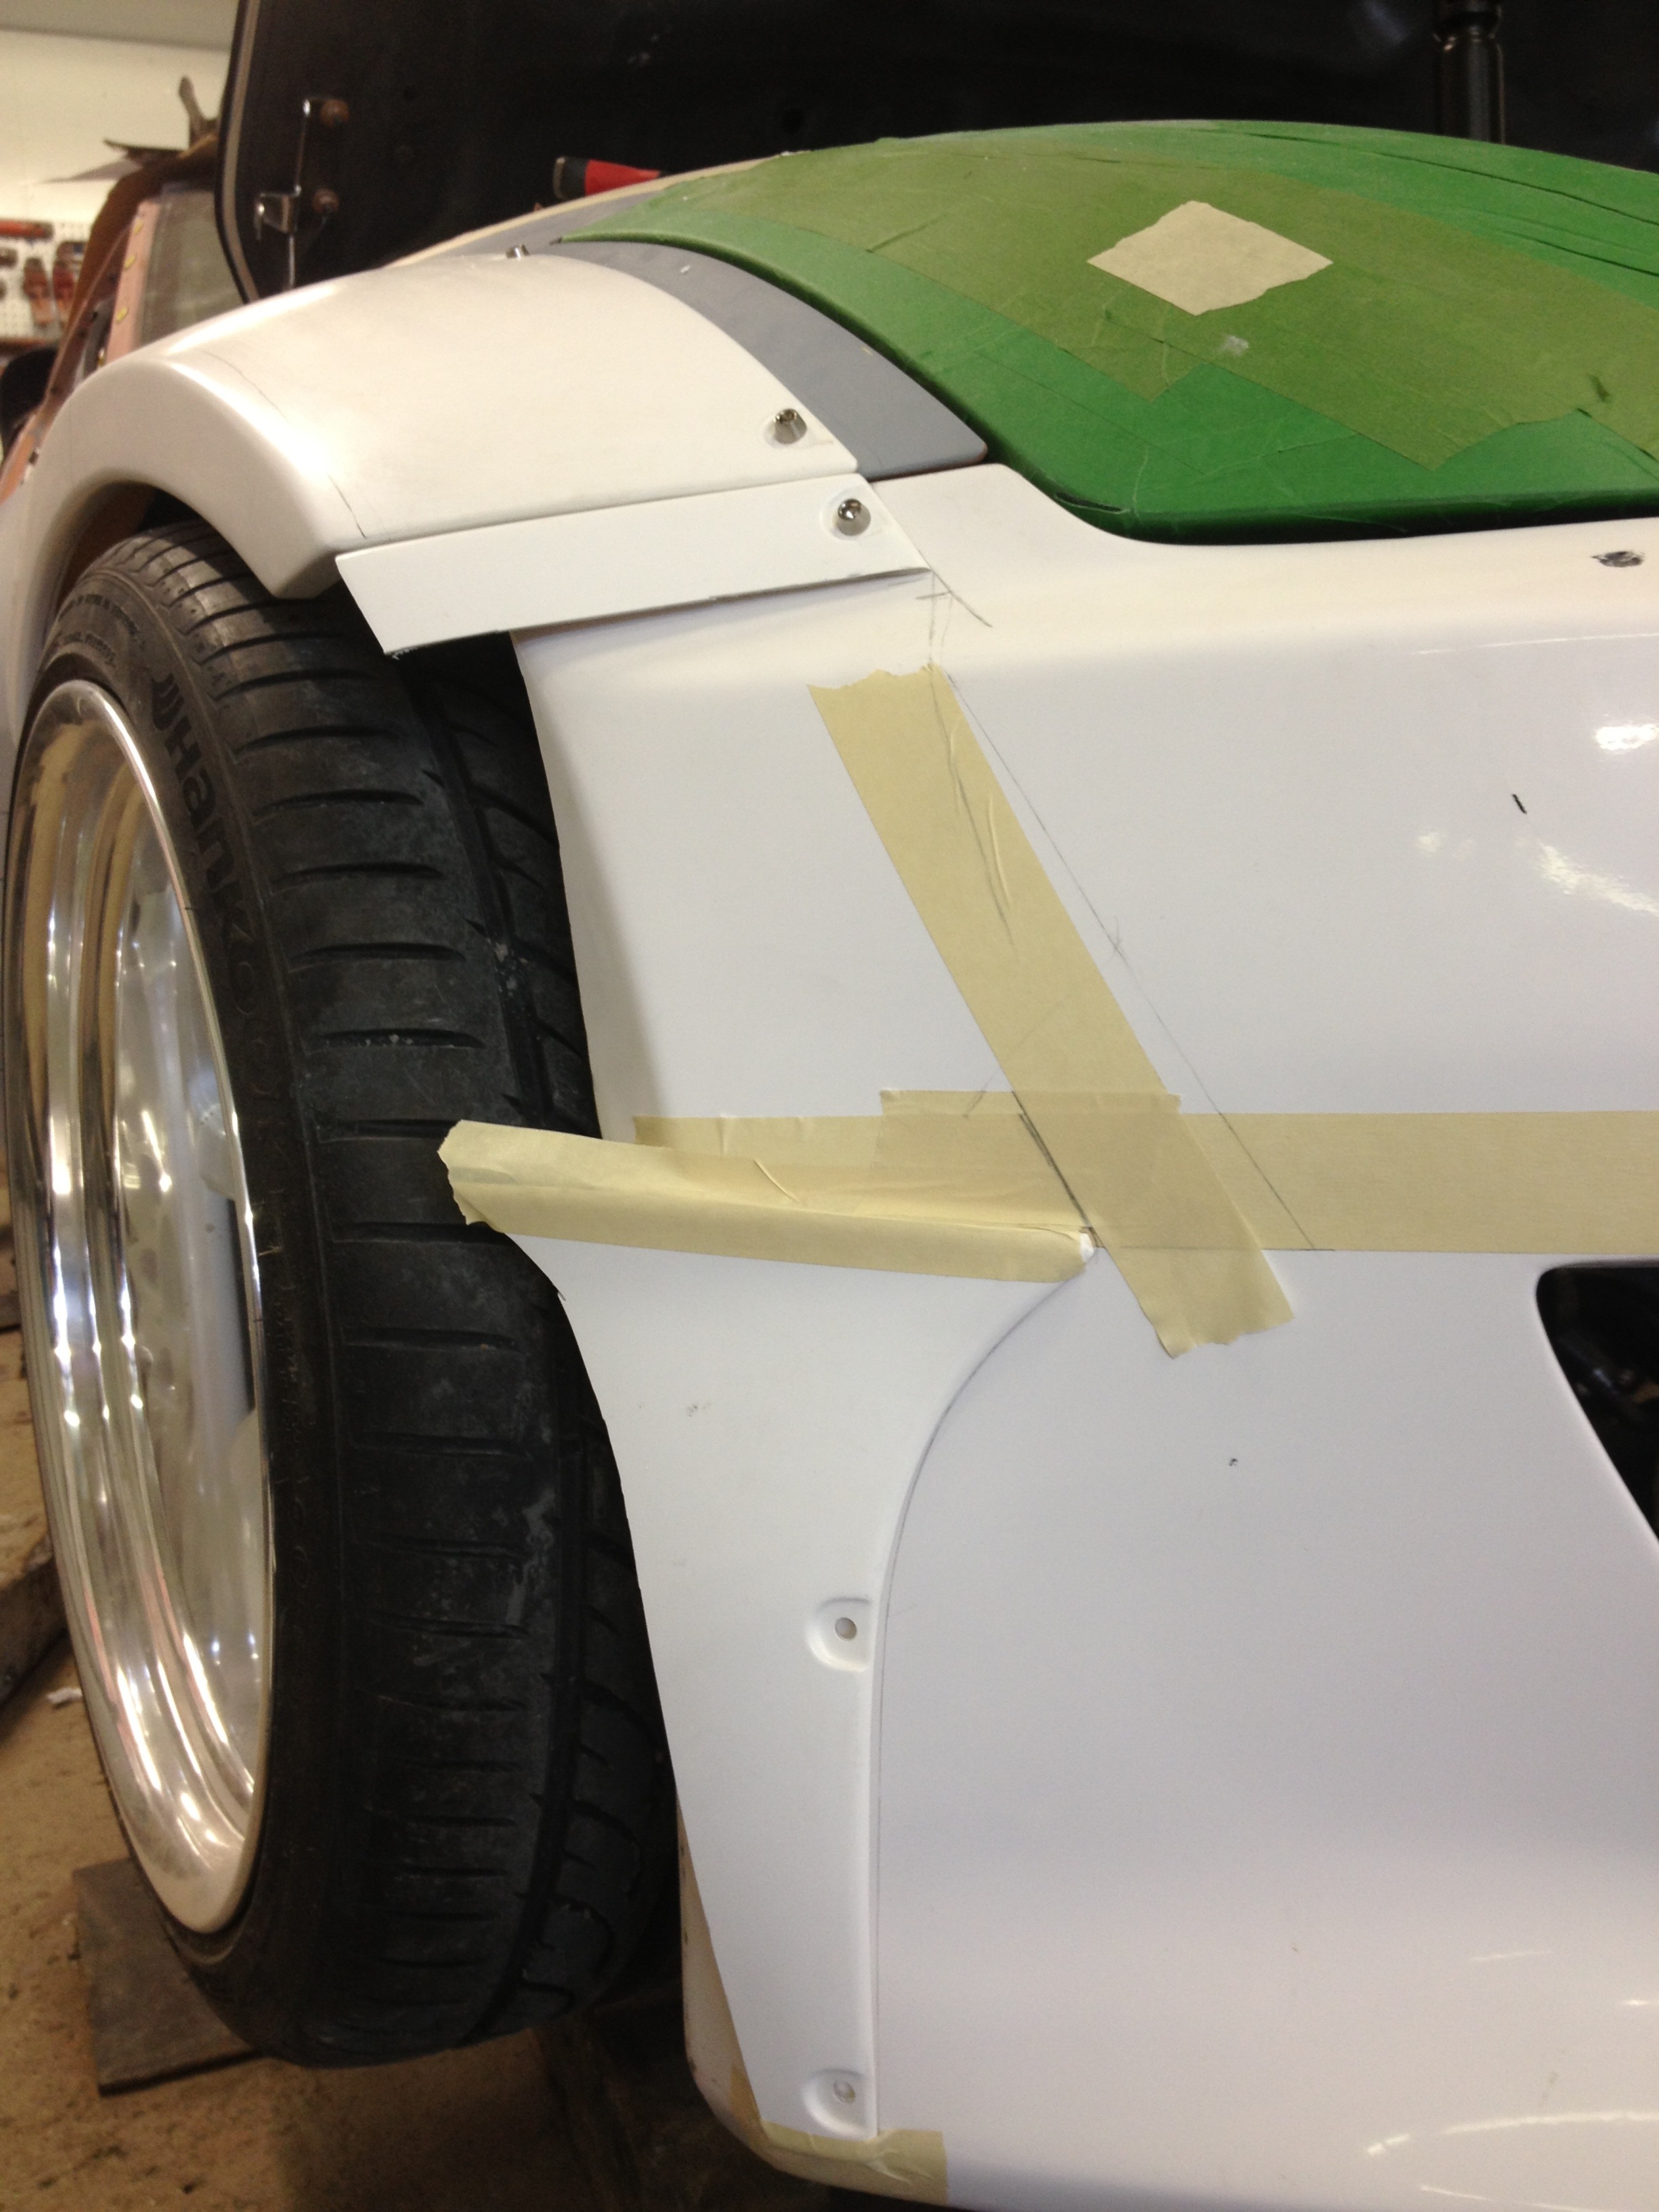
They look like the fit in this pic, but they really don't..
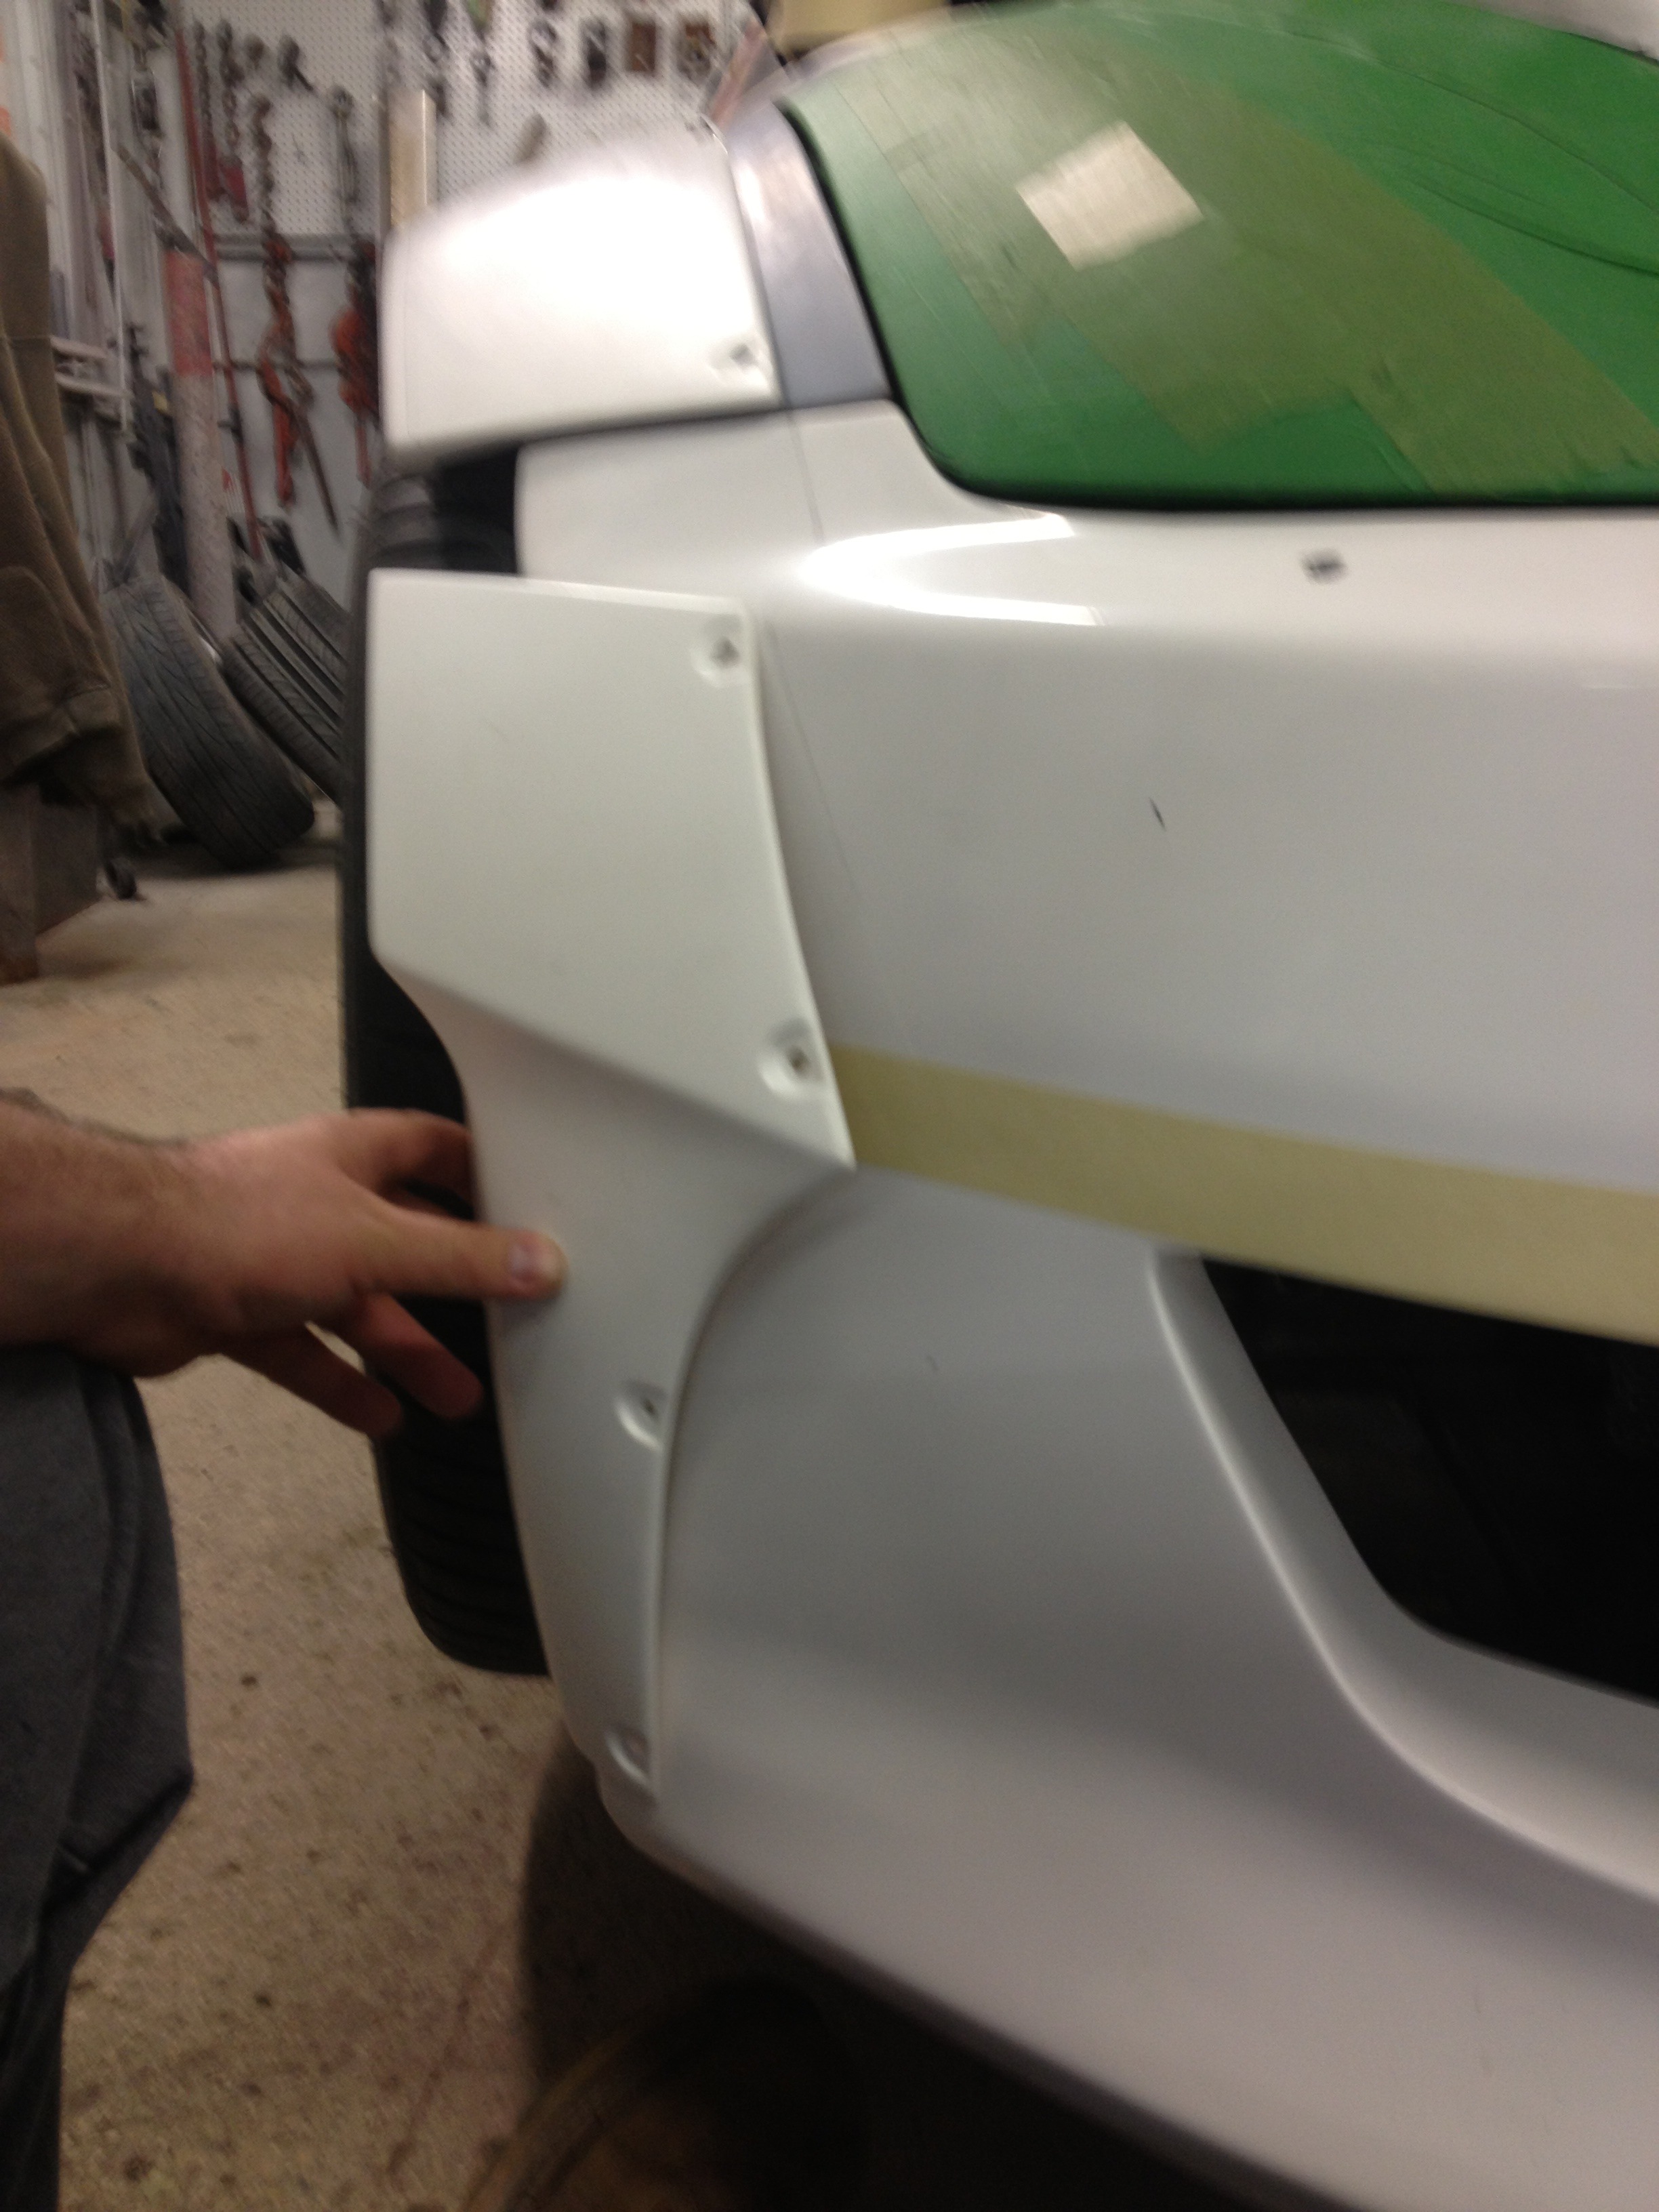
I decided they would look better if I moved them down so the point lined up with the body line of the top edge of the bumper cutouts.
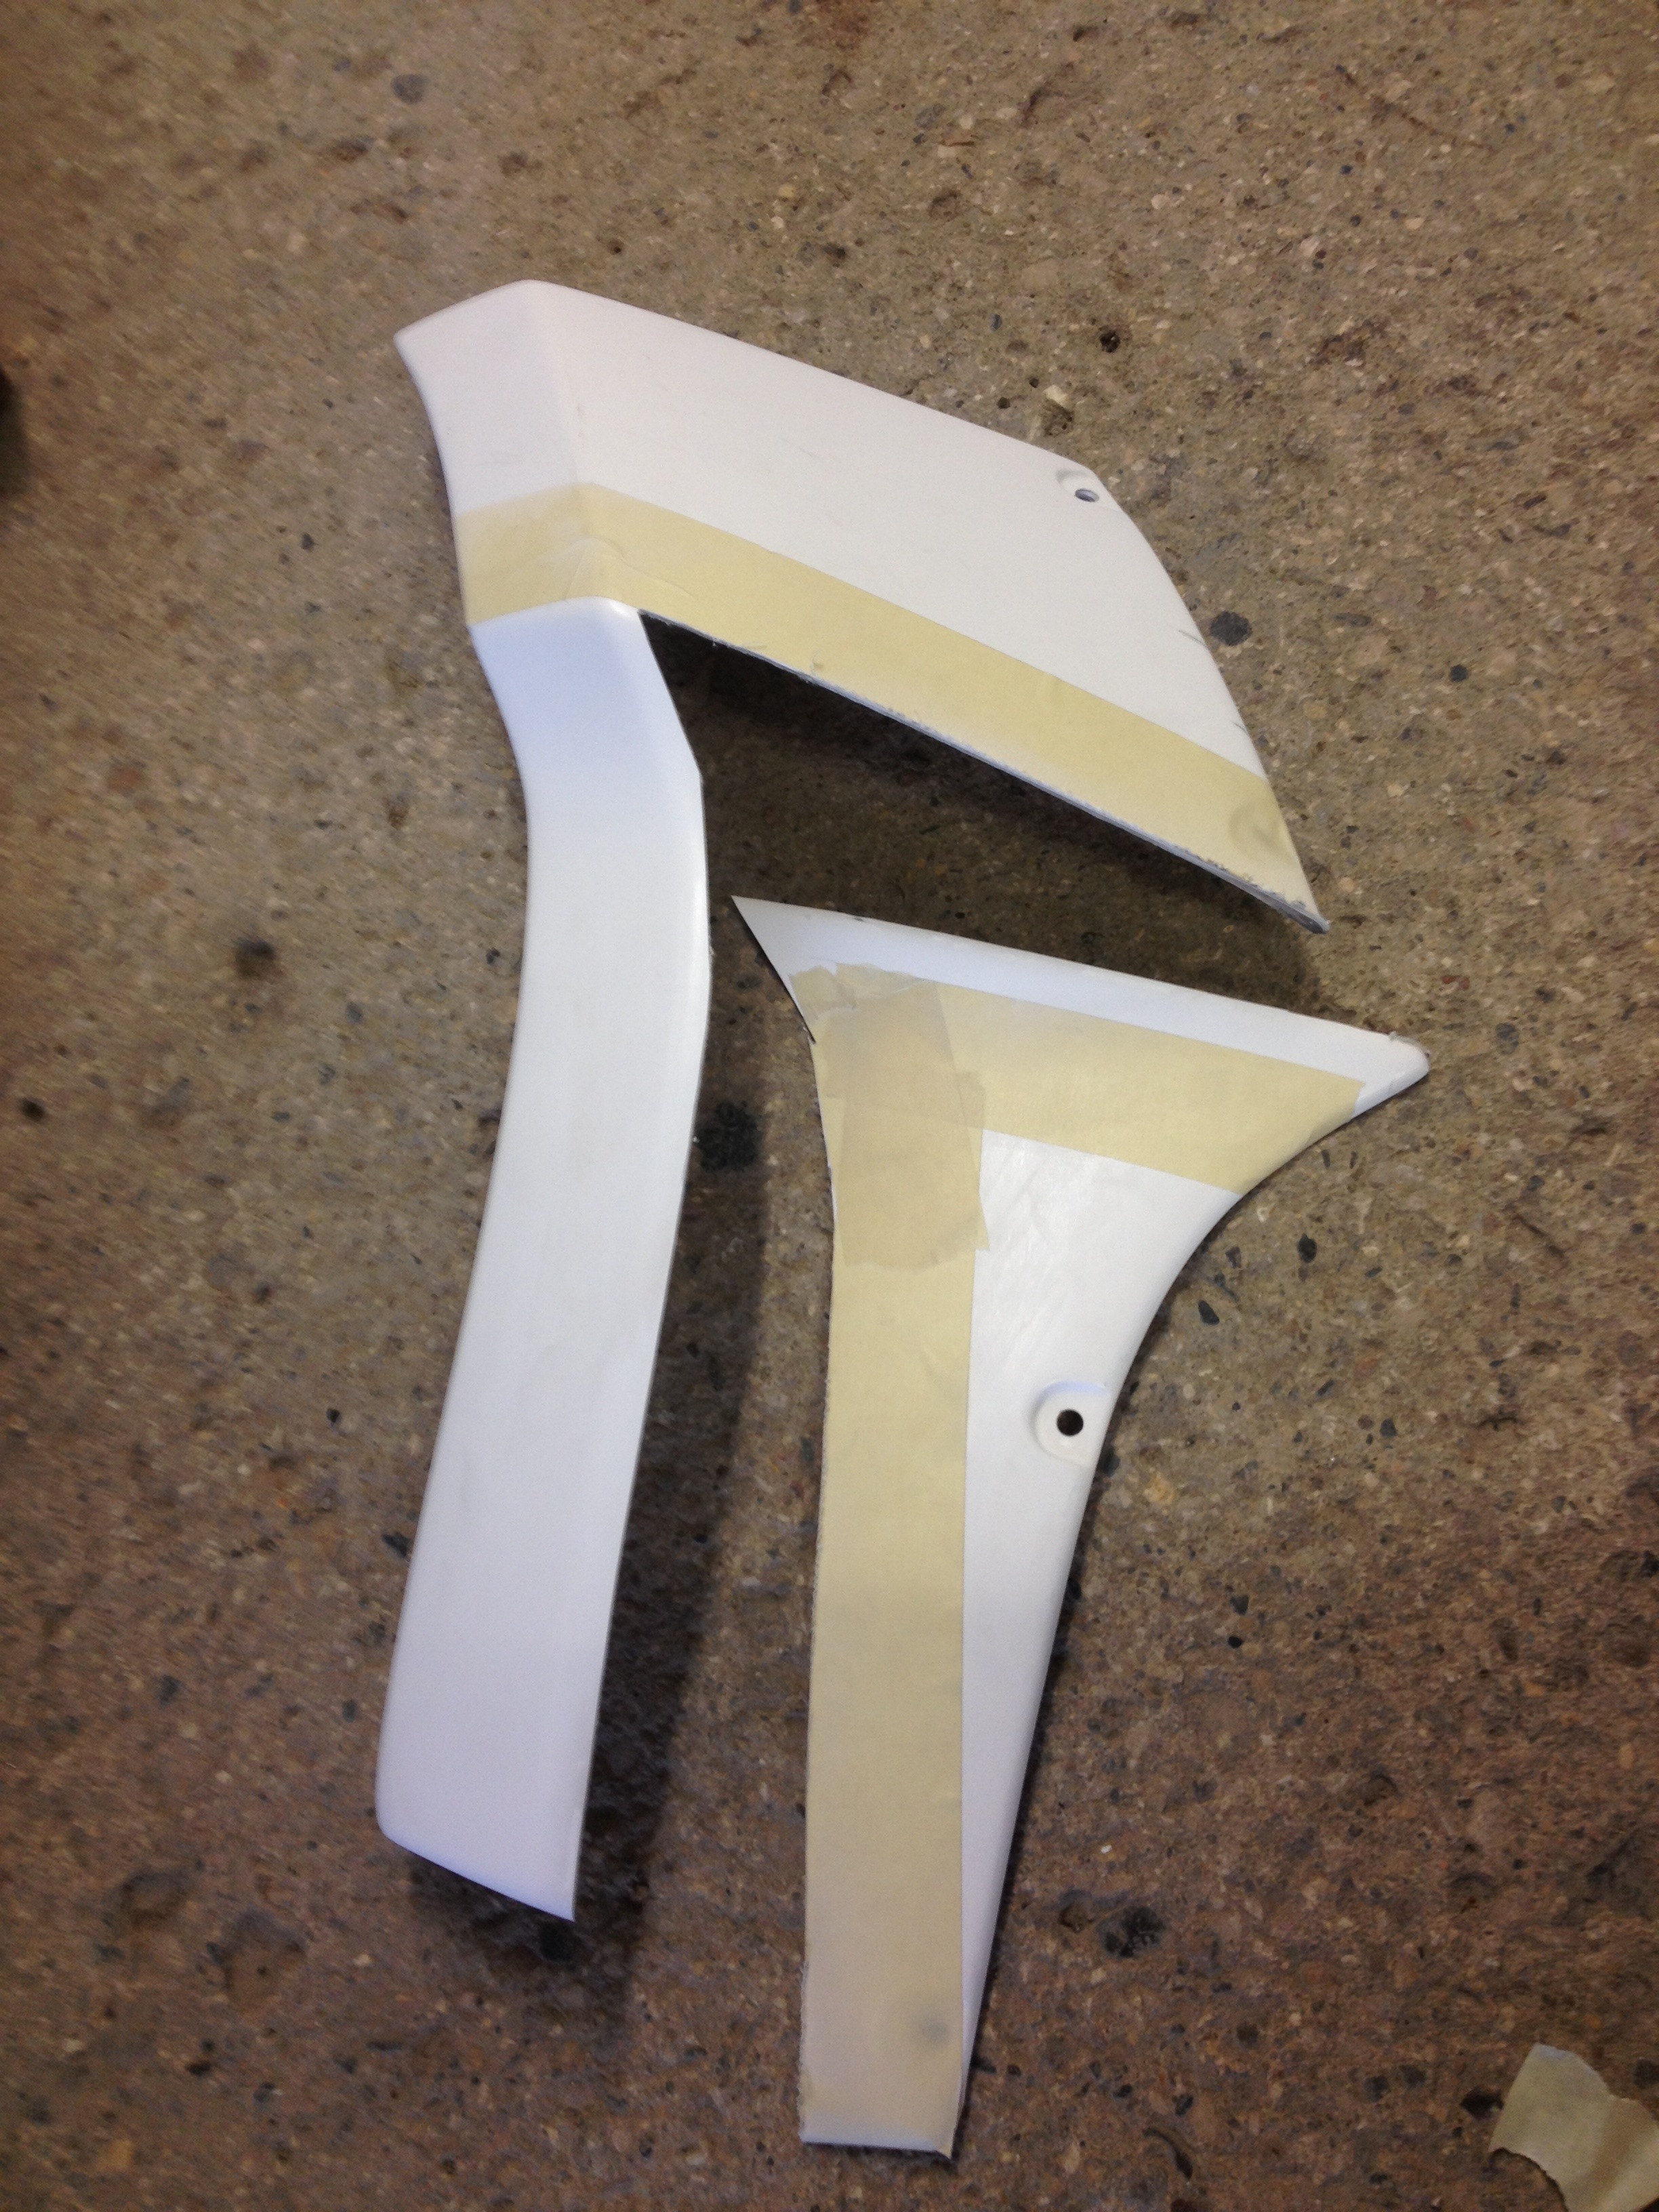
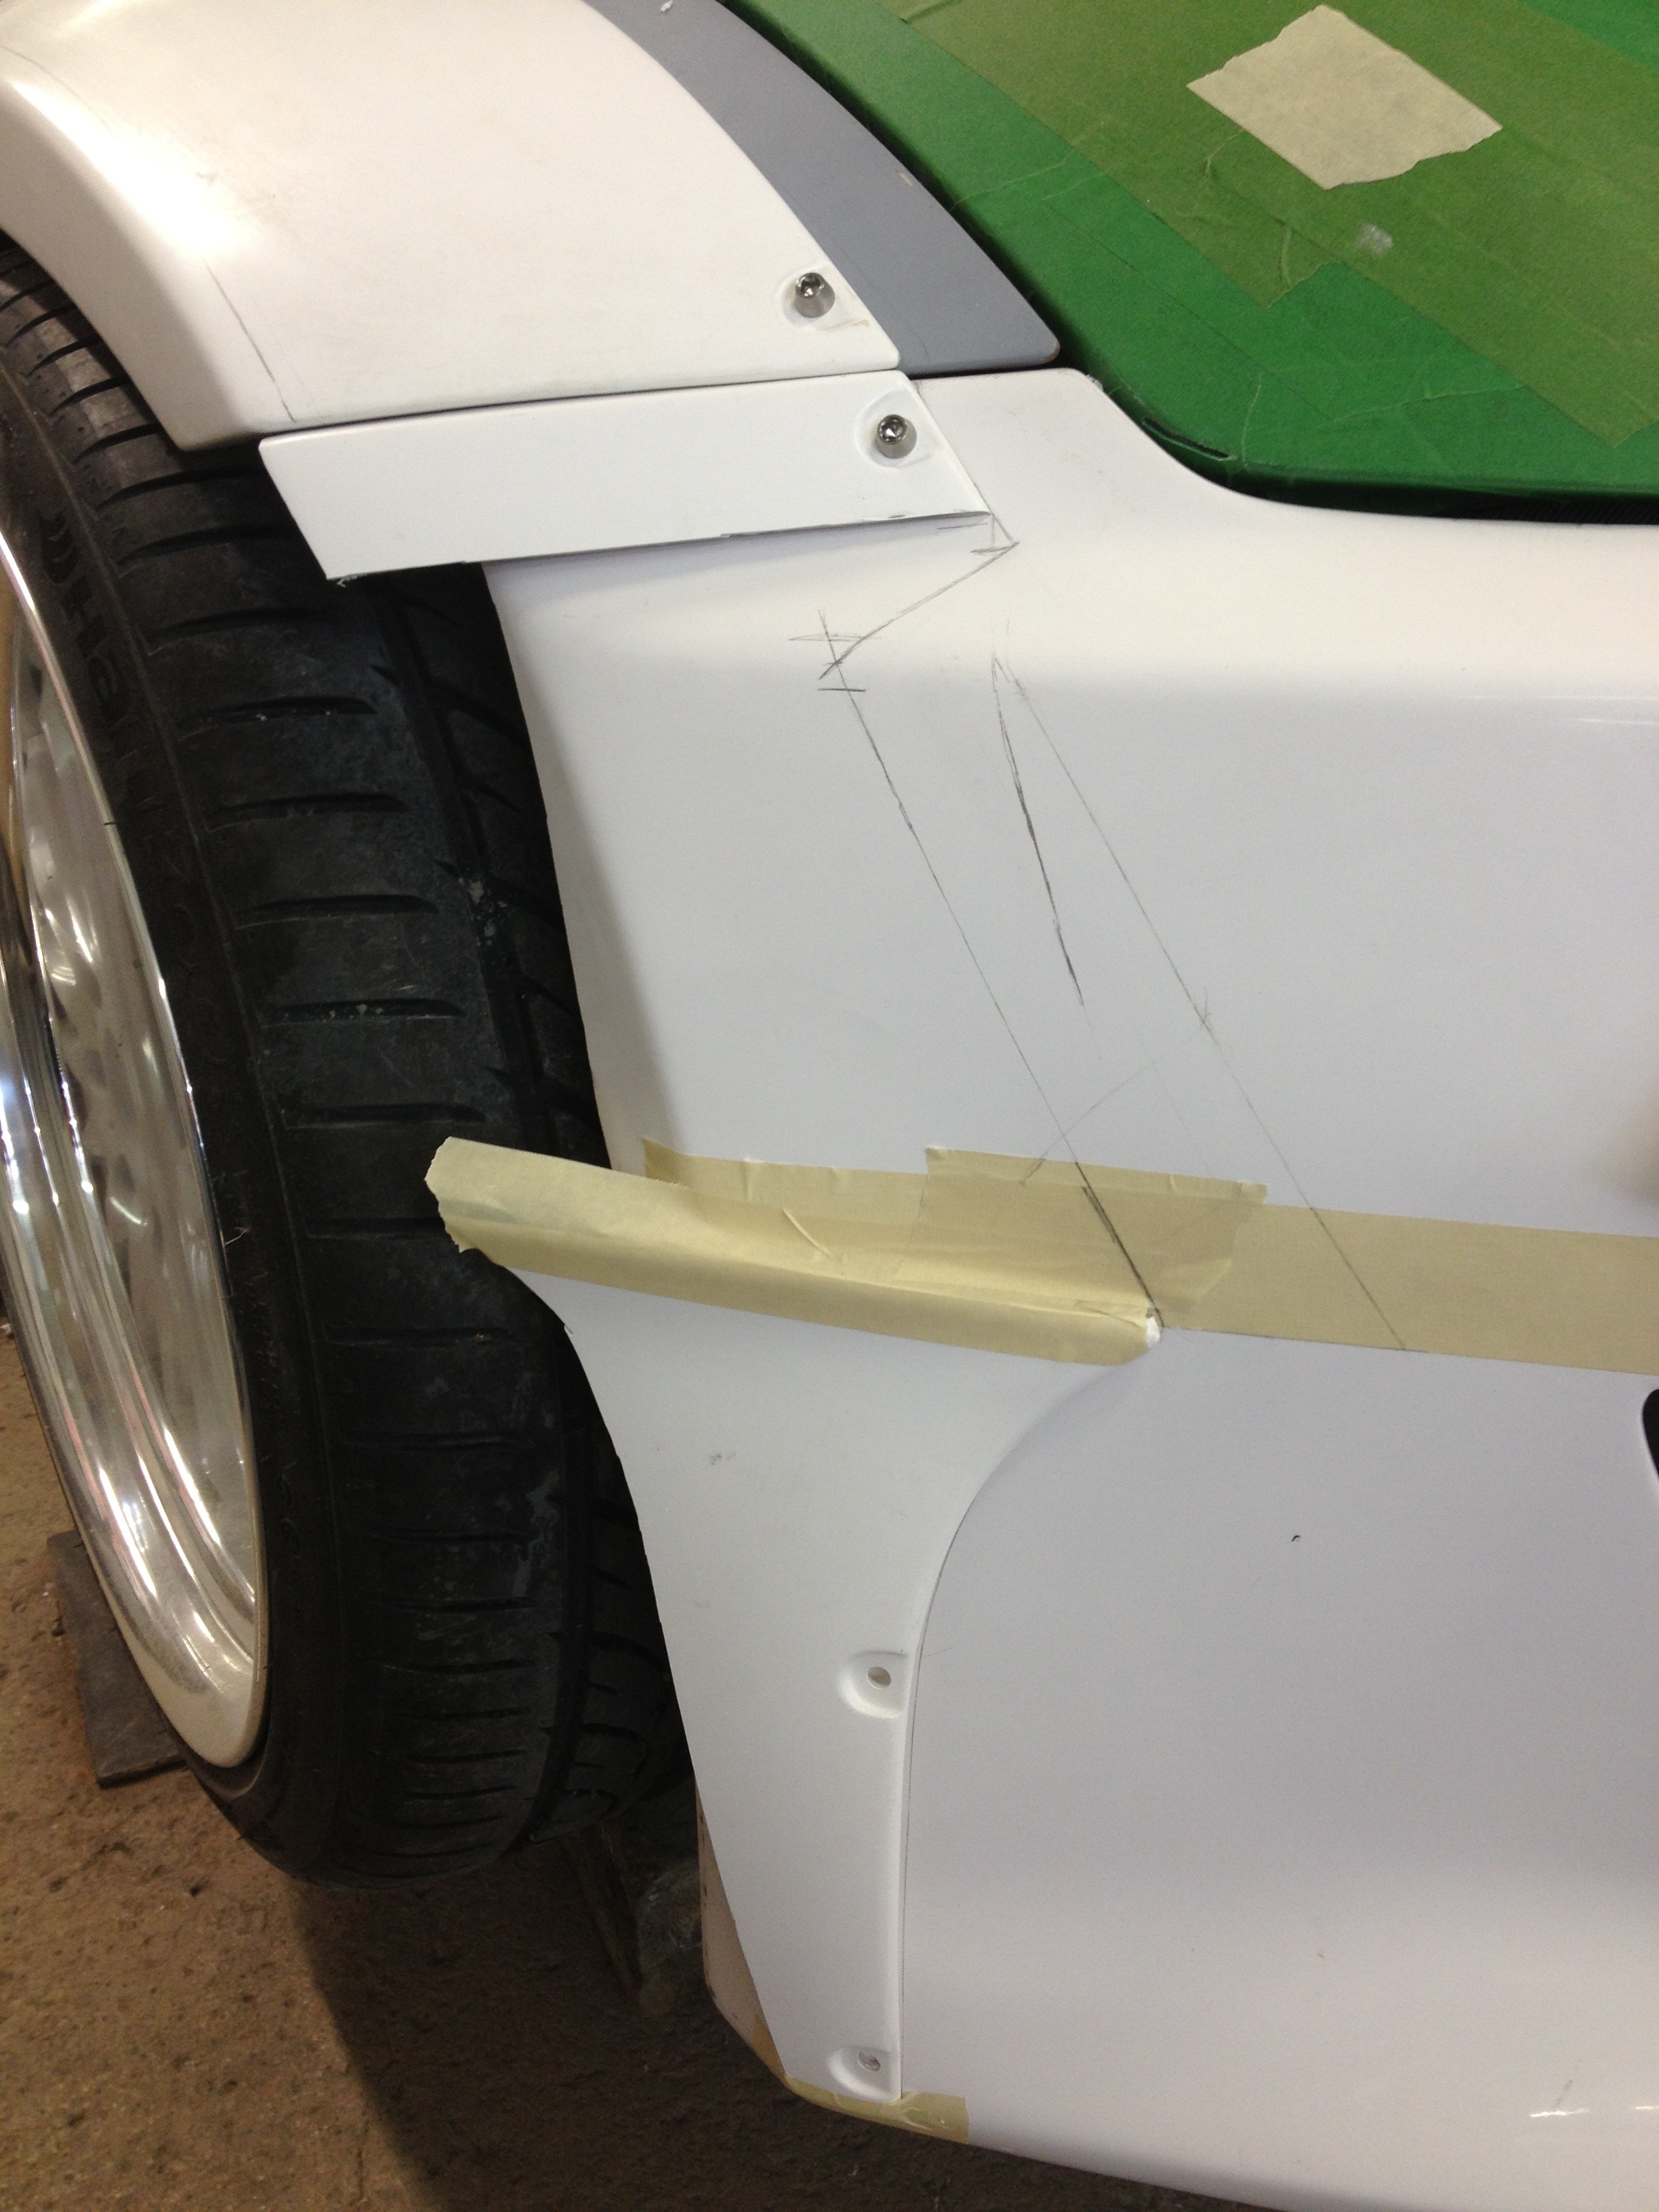
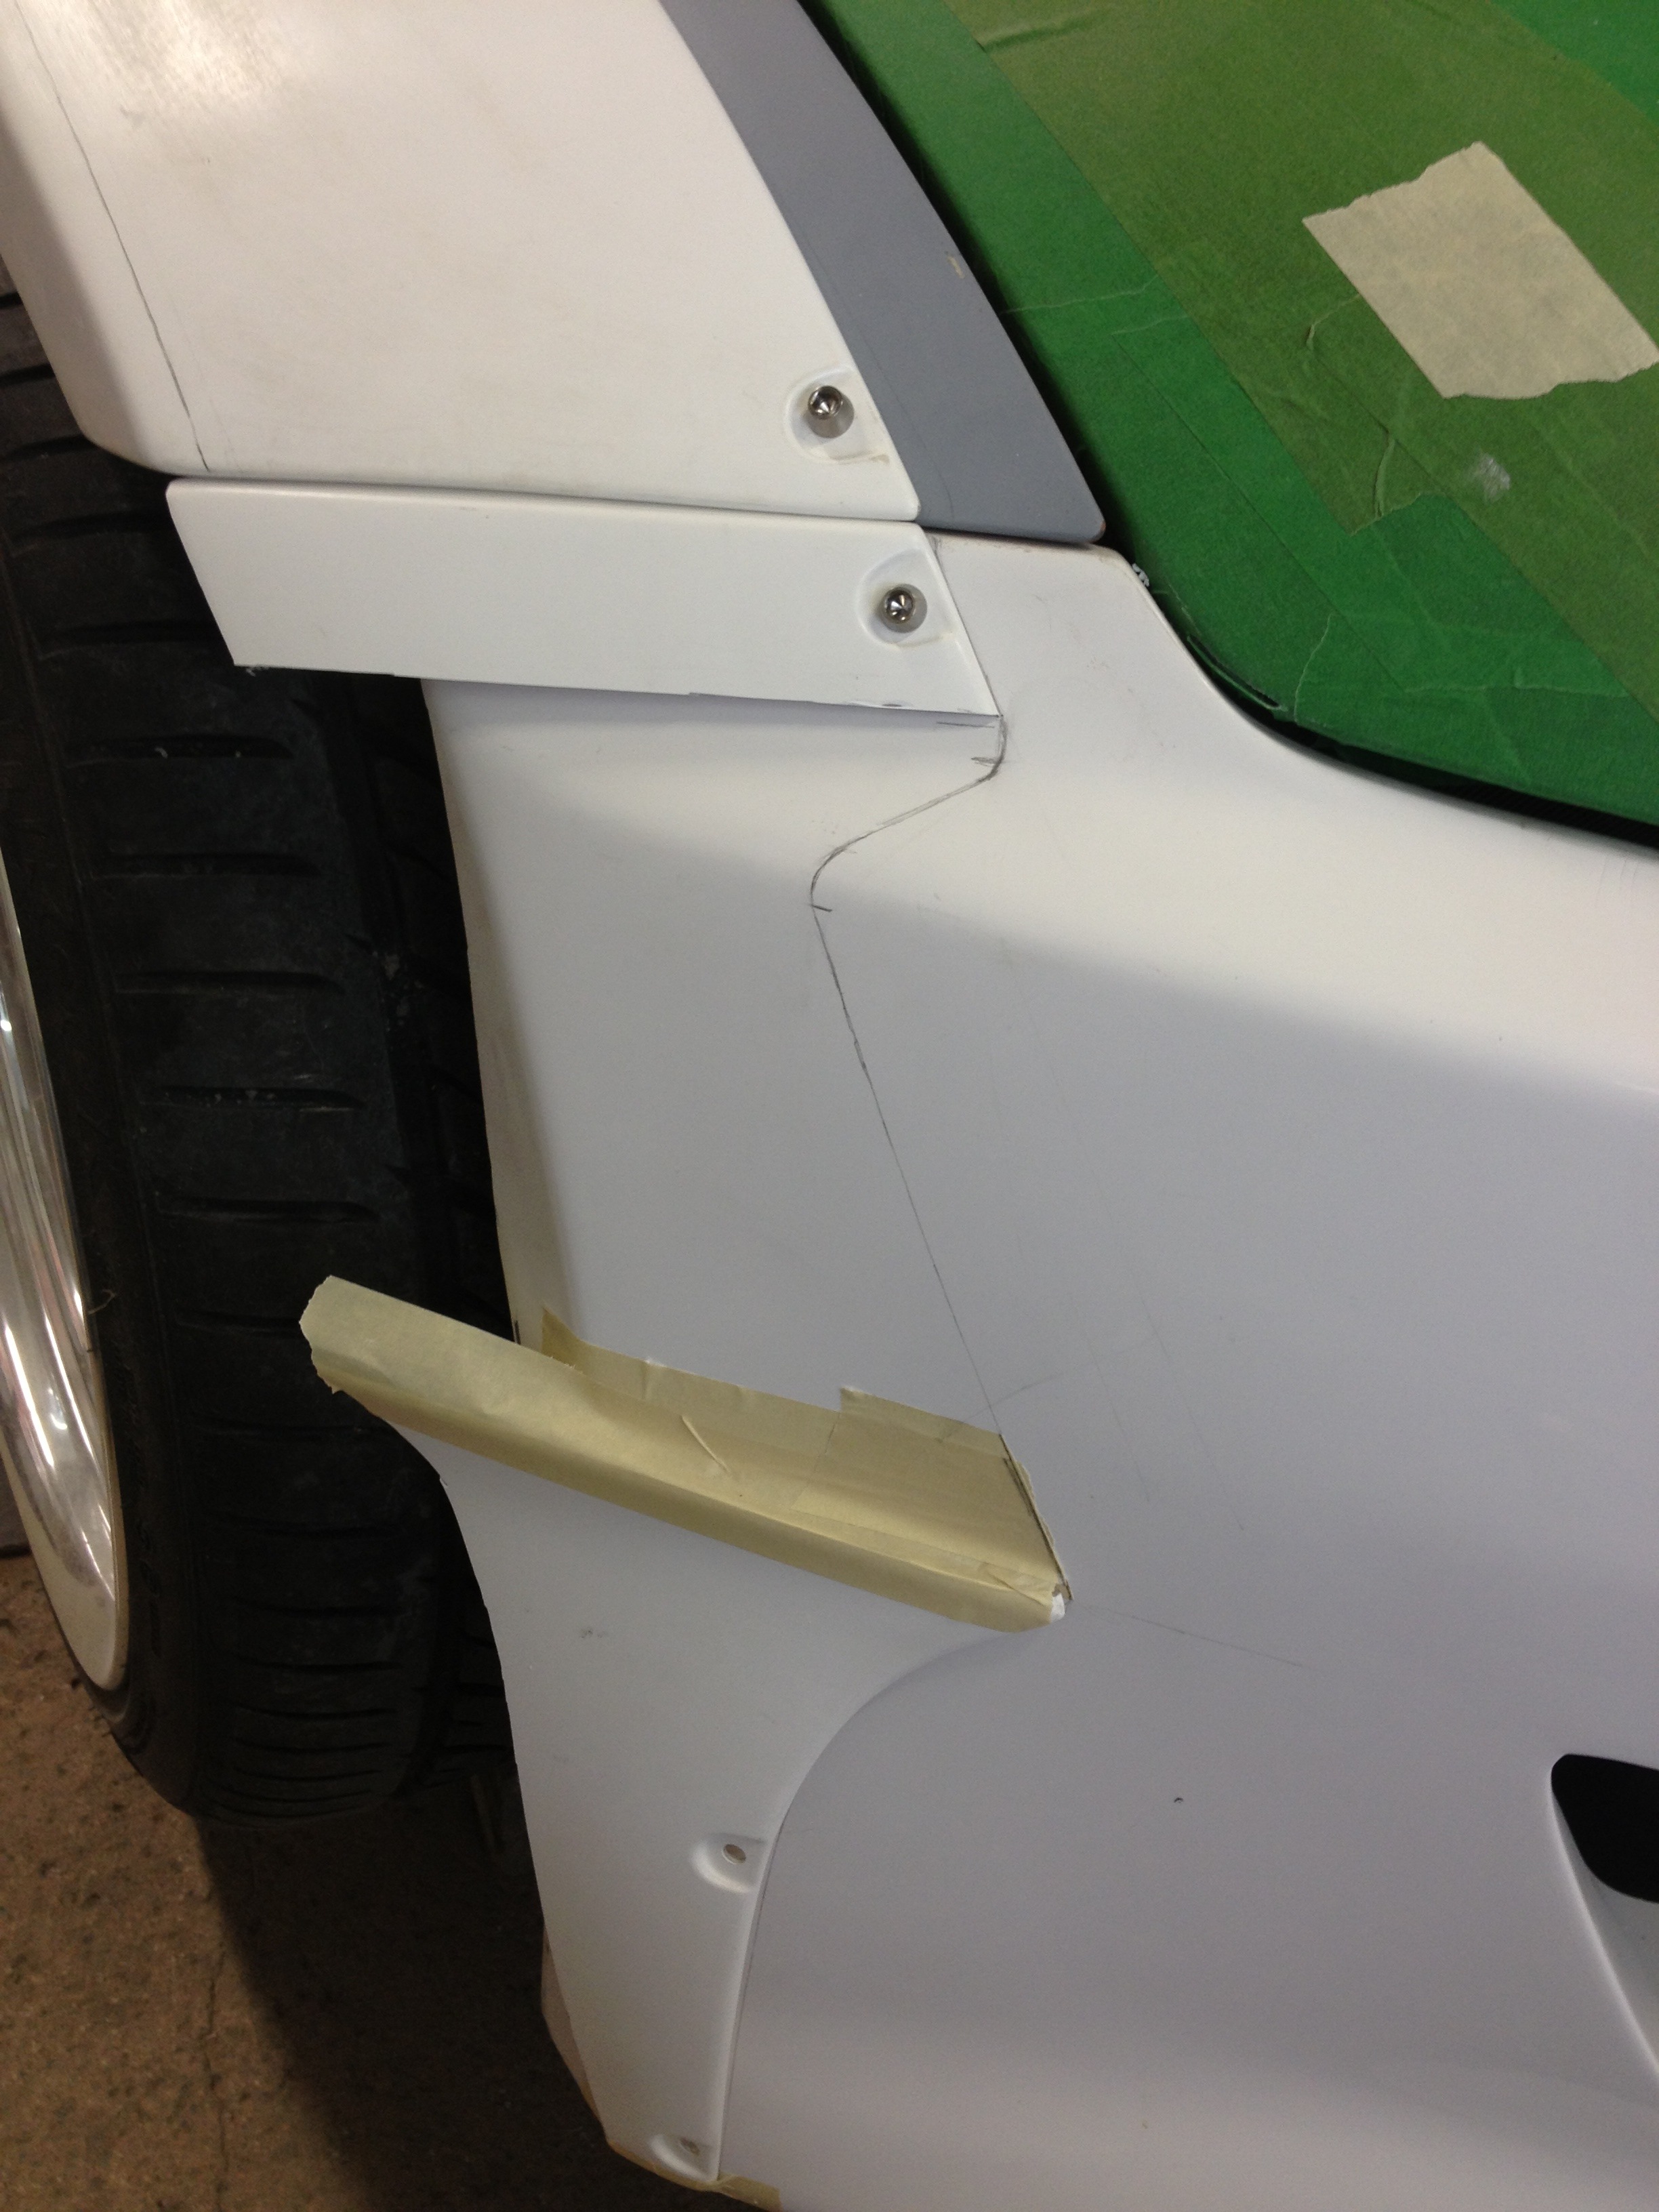
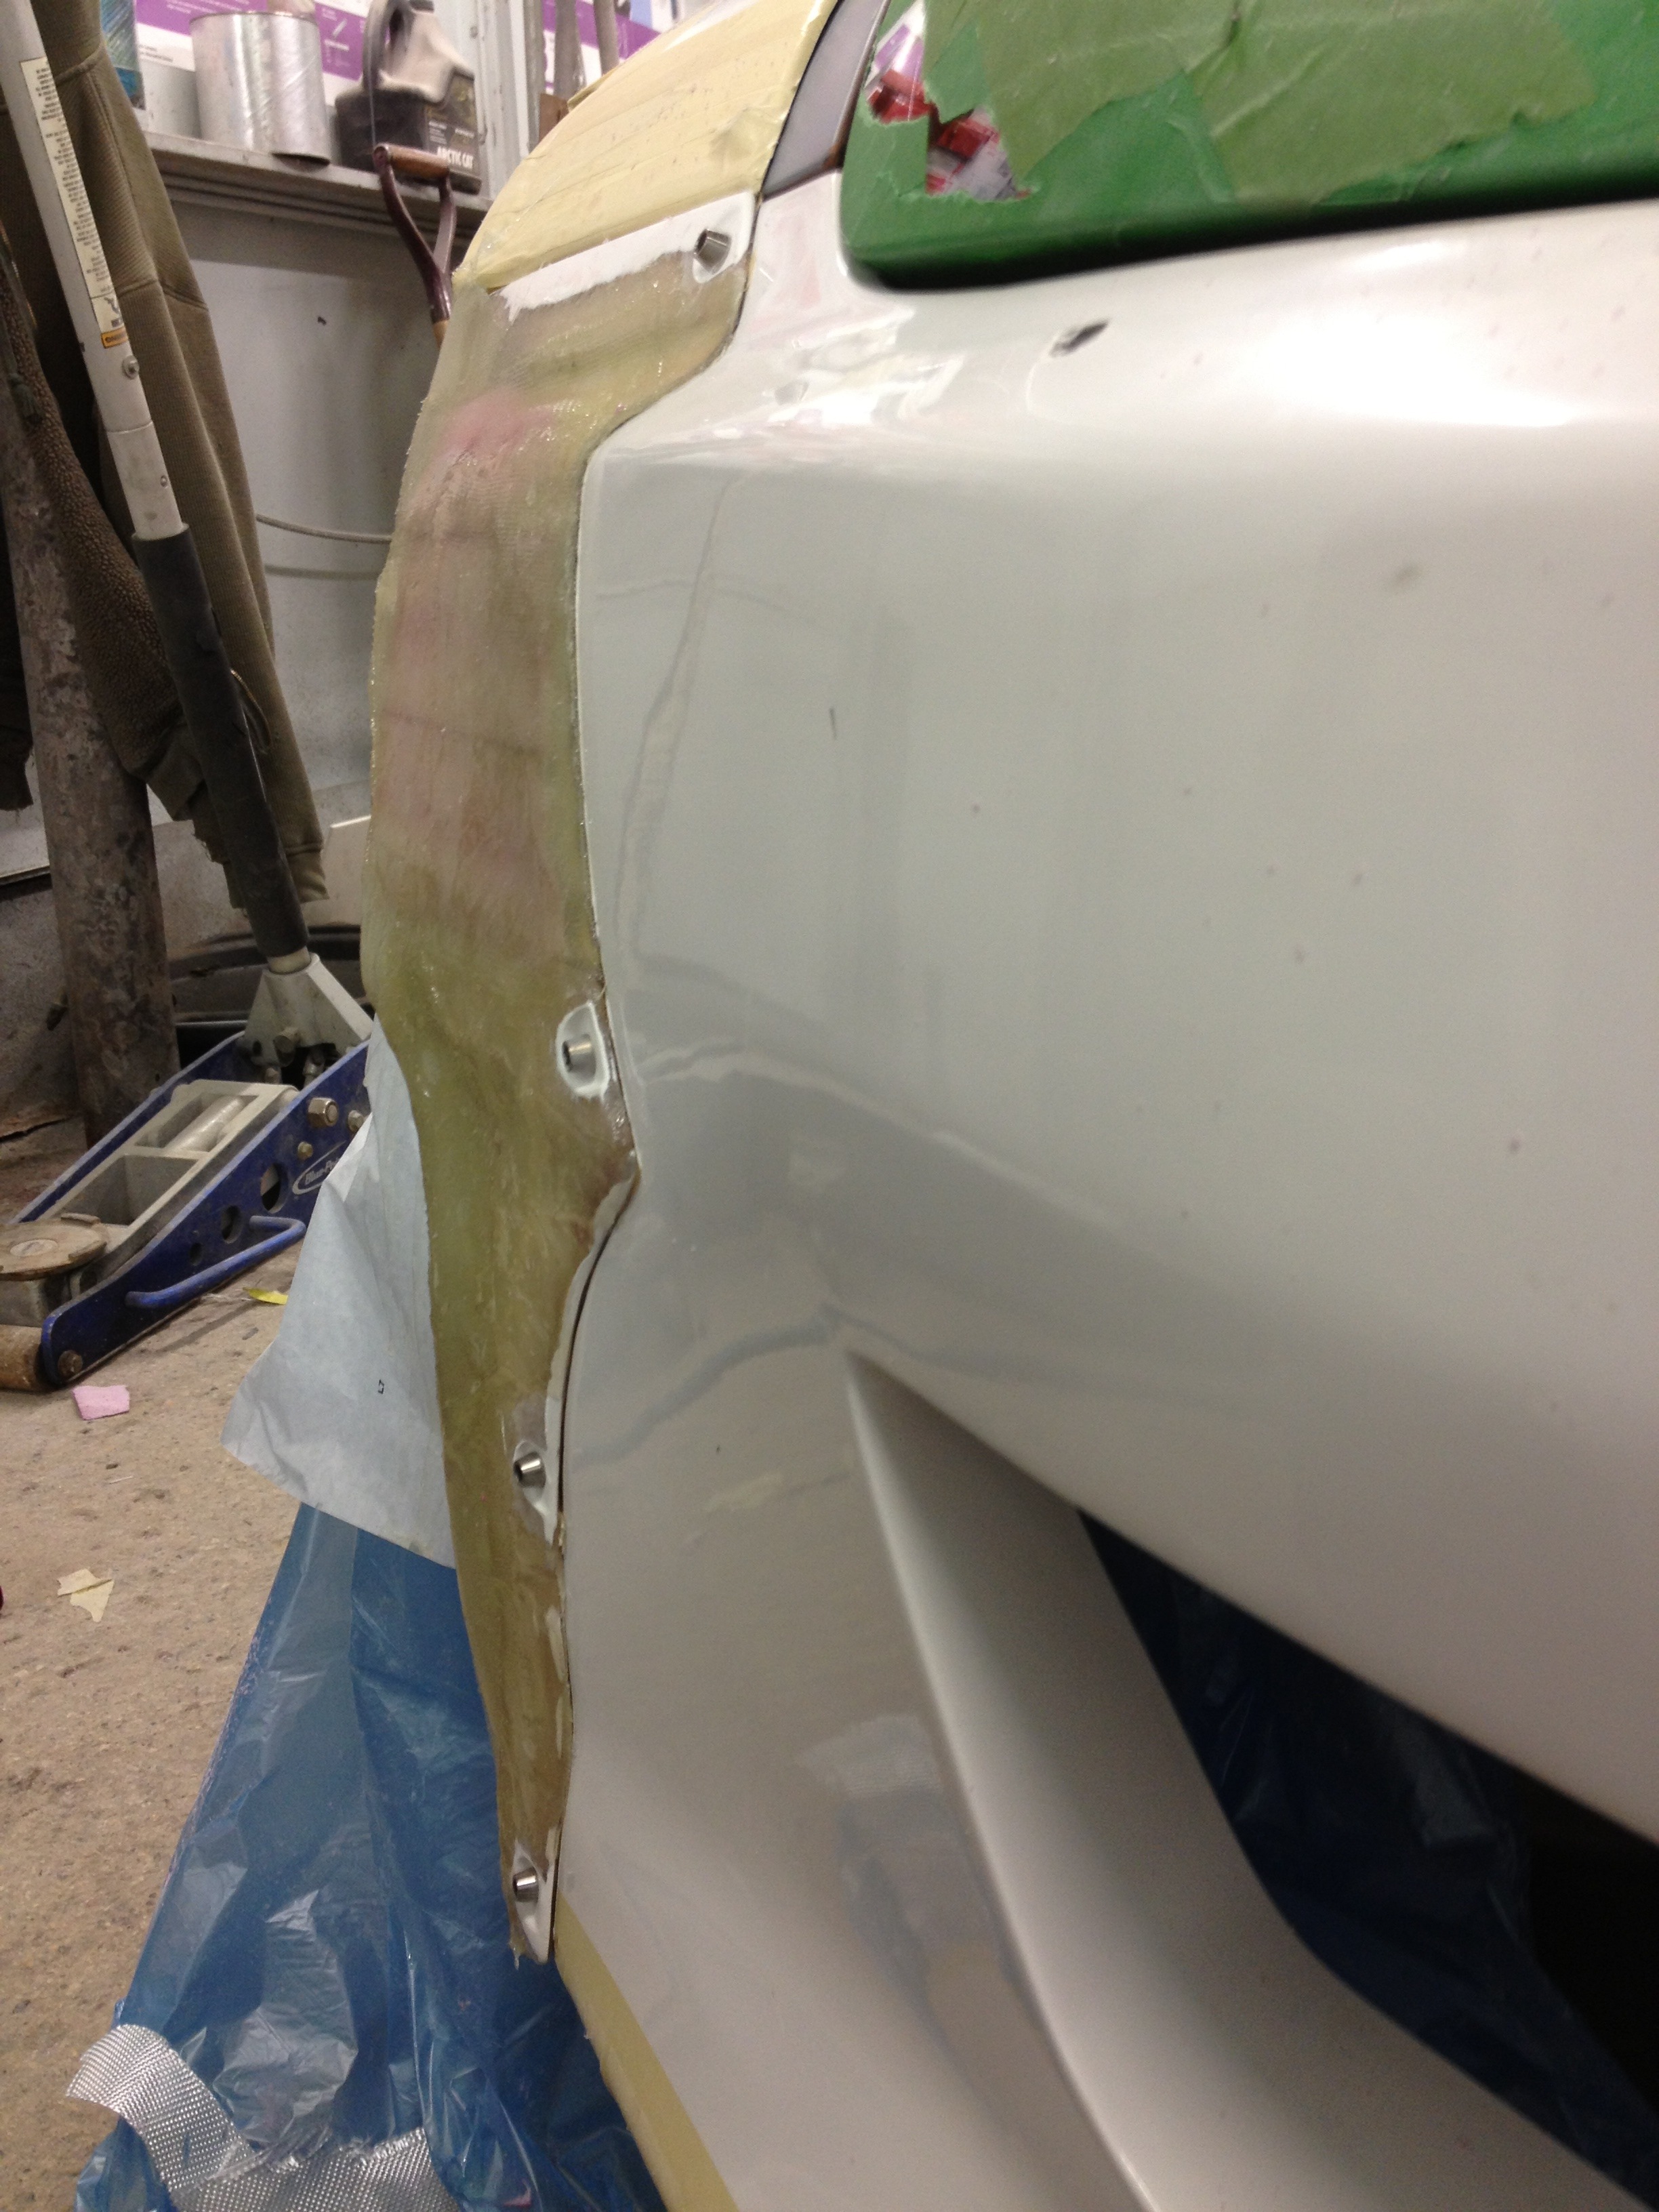
Then I started cutting them up to change the shape so they fit the bumper.
Then I drew up my alignment lines and contours on the bumper and started to rebuild them on the bumper to get the shape I wanted. All in all, I think they got cut into about 10 pieces.
This forum has some impressive cars and this one tops that list. This round of that competition kinda blows the big one being 350z vs 350z both very deserving.
This forum has some impressive cars and this one tops that list. This round of that competition kinda blows the big one being 350z vs 350z both very deserving.
Yeah it definitely does suck that we ended up against each other. We're buddies too, so that makes it even more interesting.
Either way, New day, new votes!
Thanks everybody for the support!
I'm only 200 votes behind, which isn't bad when you take into account how massive Brian's following is.
I will give you each a vote. both should have been in different brackets to get both there.
If he wins...you should "tow" his car to sema with your car and roll in as an "Un-hitchable trailer display"
Did you ever write up how you went about making the spoiler? Ive never been a big fan of wings or spoilers for that matter buy yours looks great. I have an oem one sitting in my basement that I thought about using to change things up a little but if you shared your method I might put my hatch on the line for a diy project... I have extras
Been a busy few weeks, now that things have settled down a bit I'll continue with the build thread!
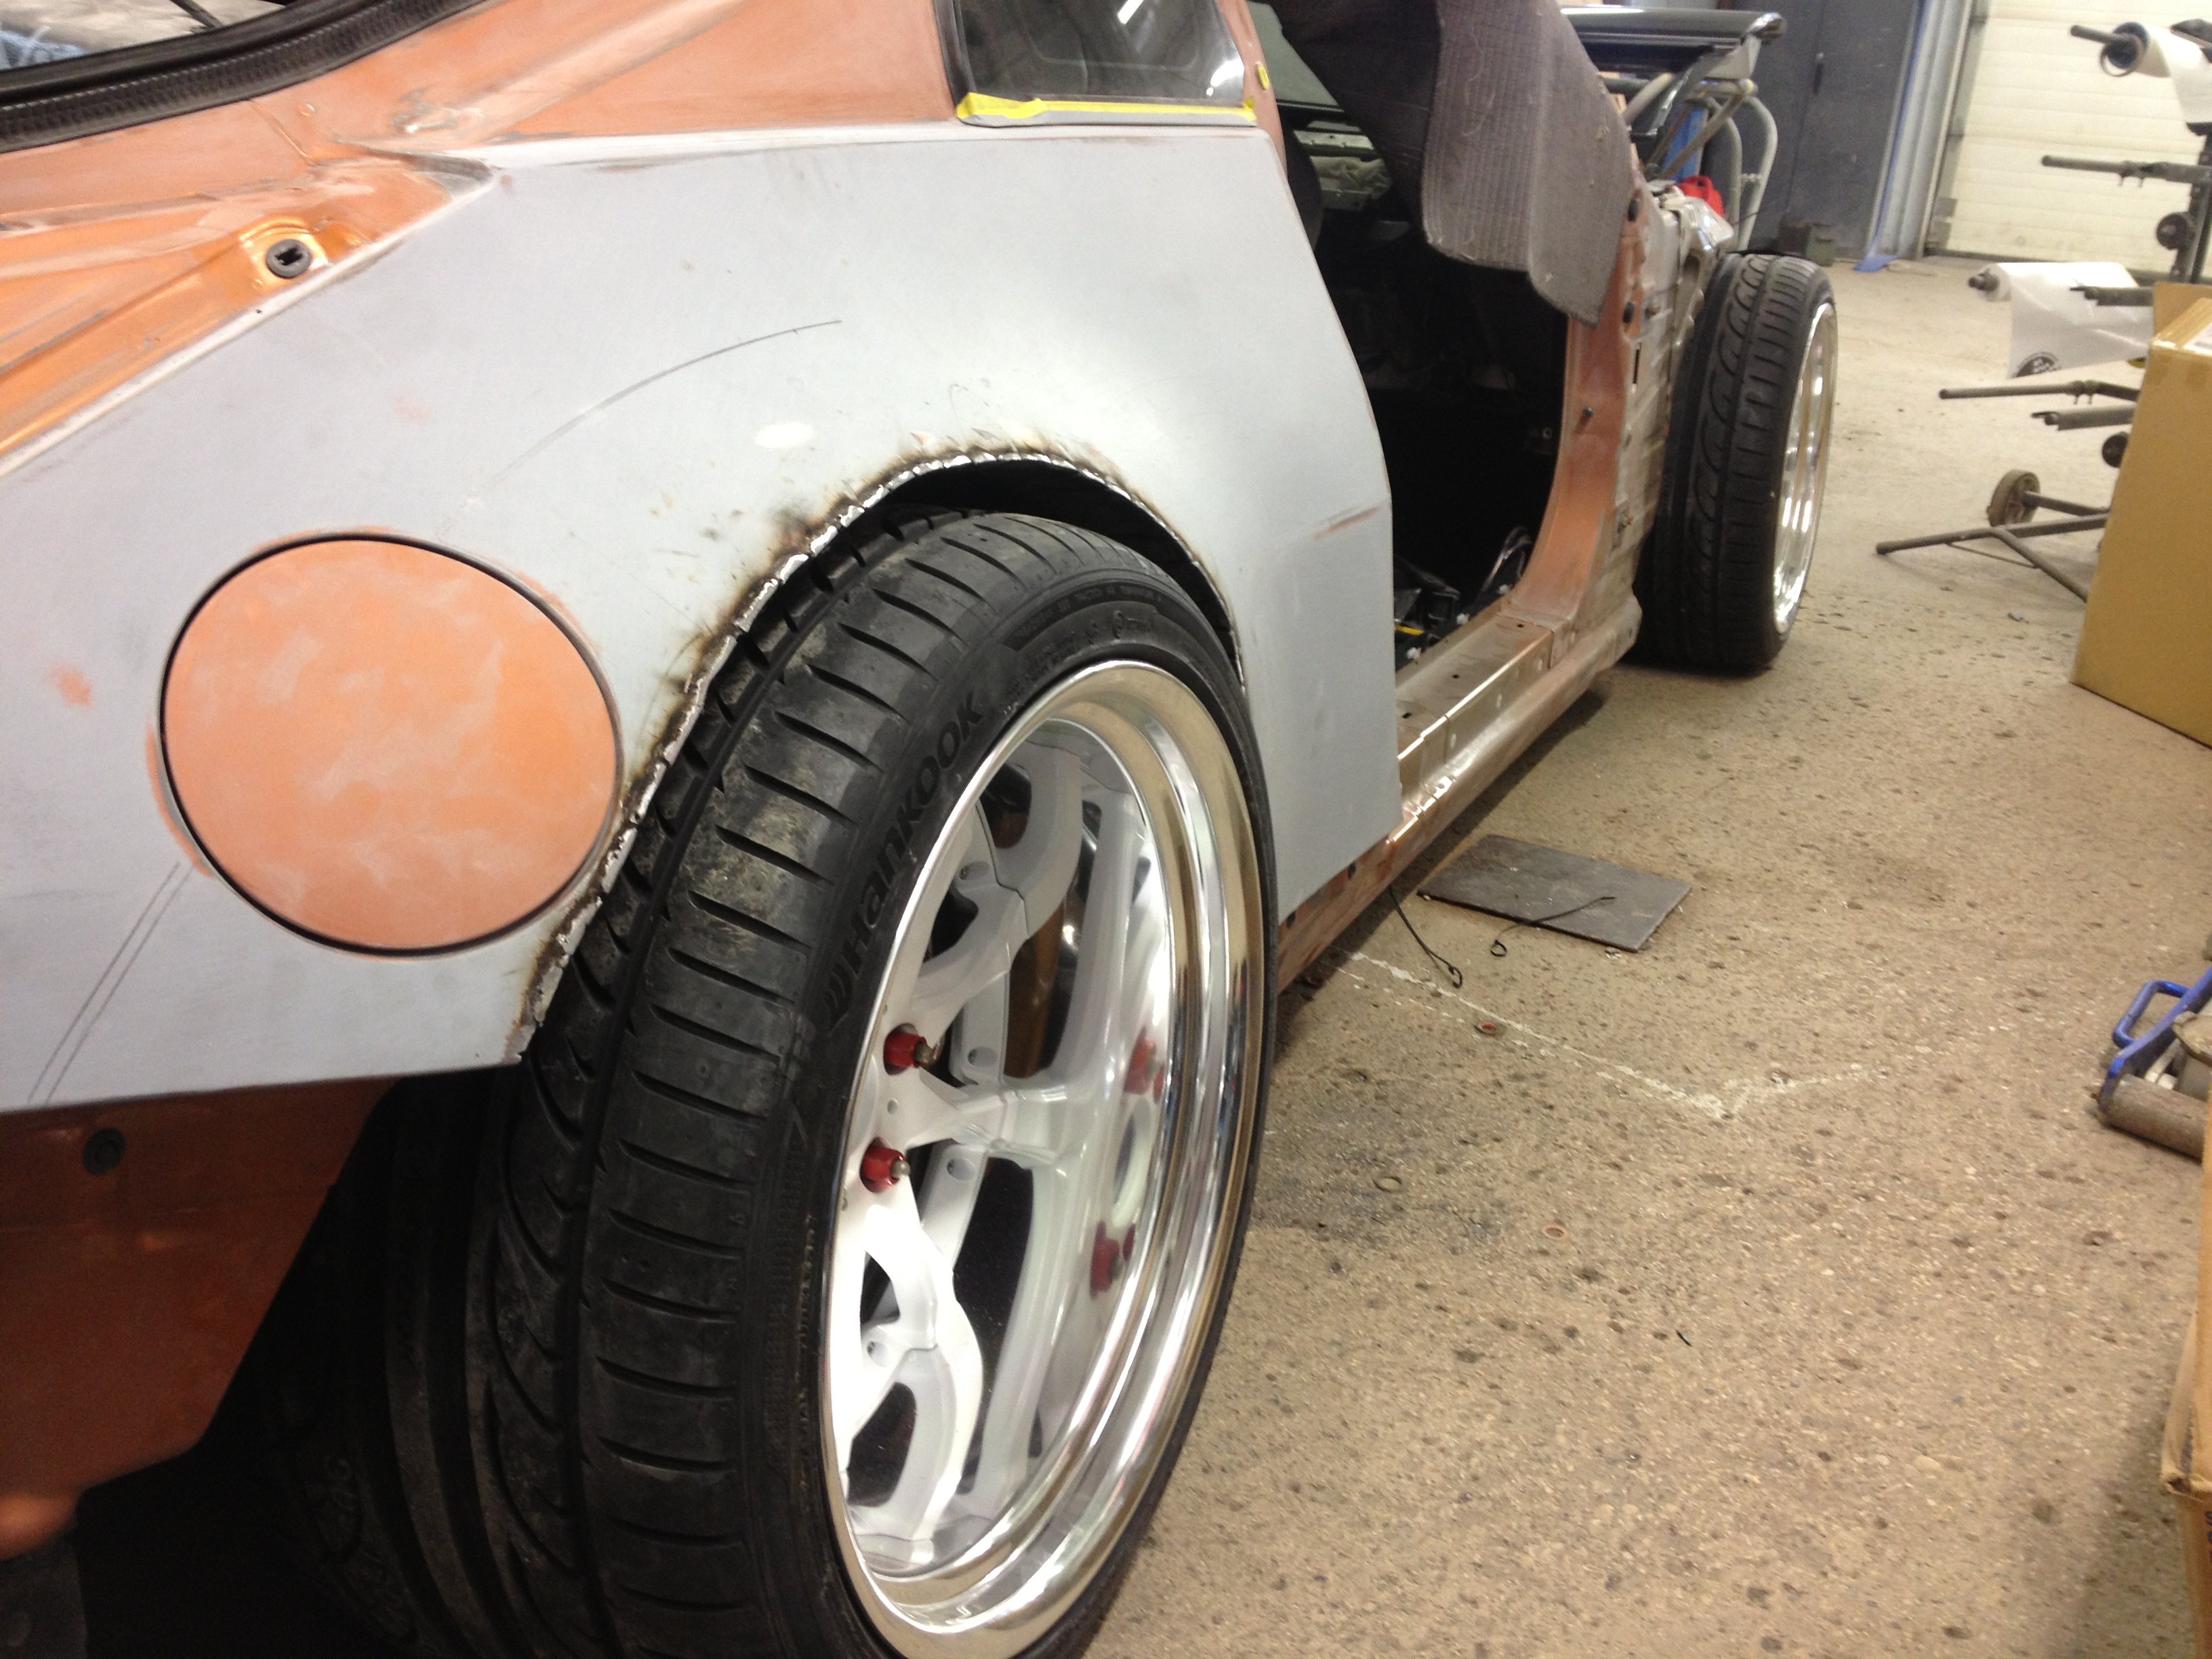
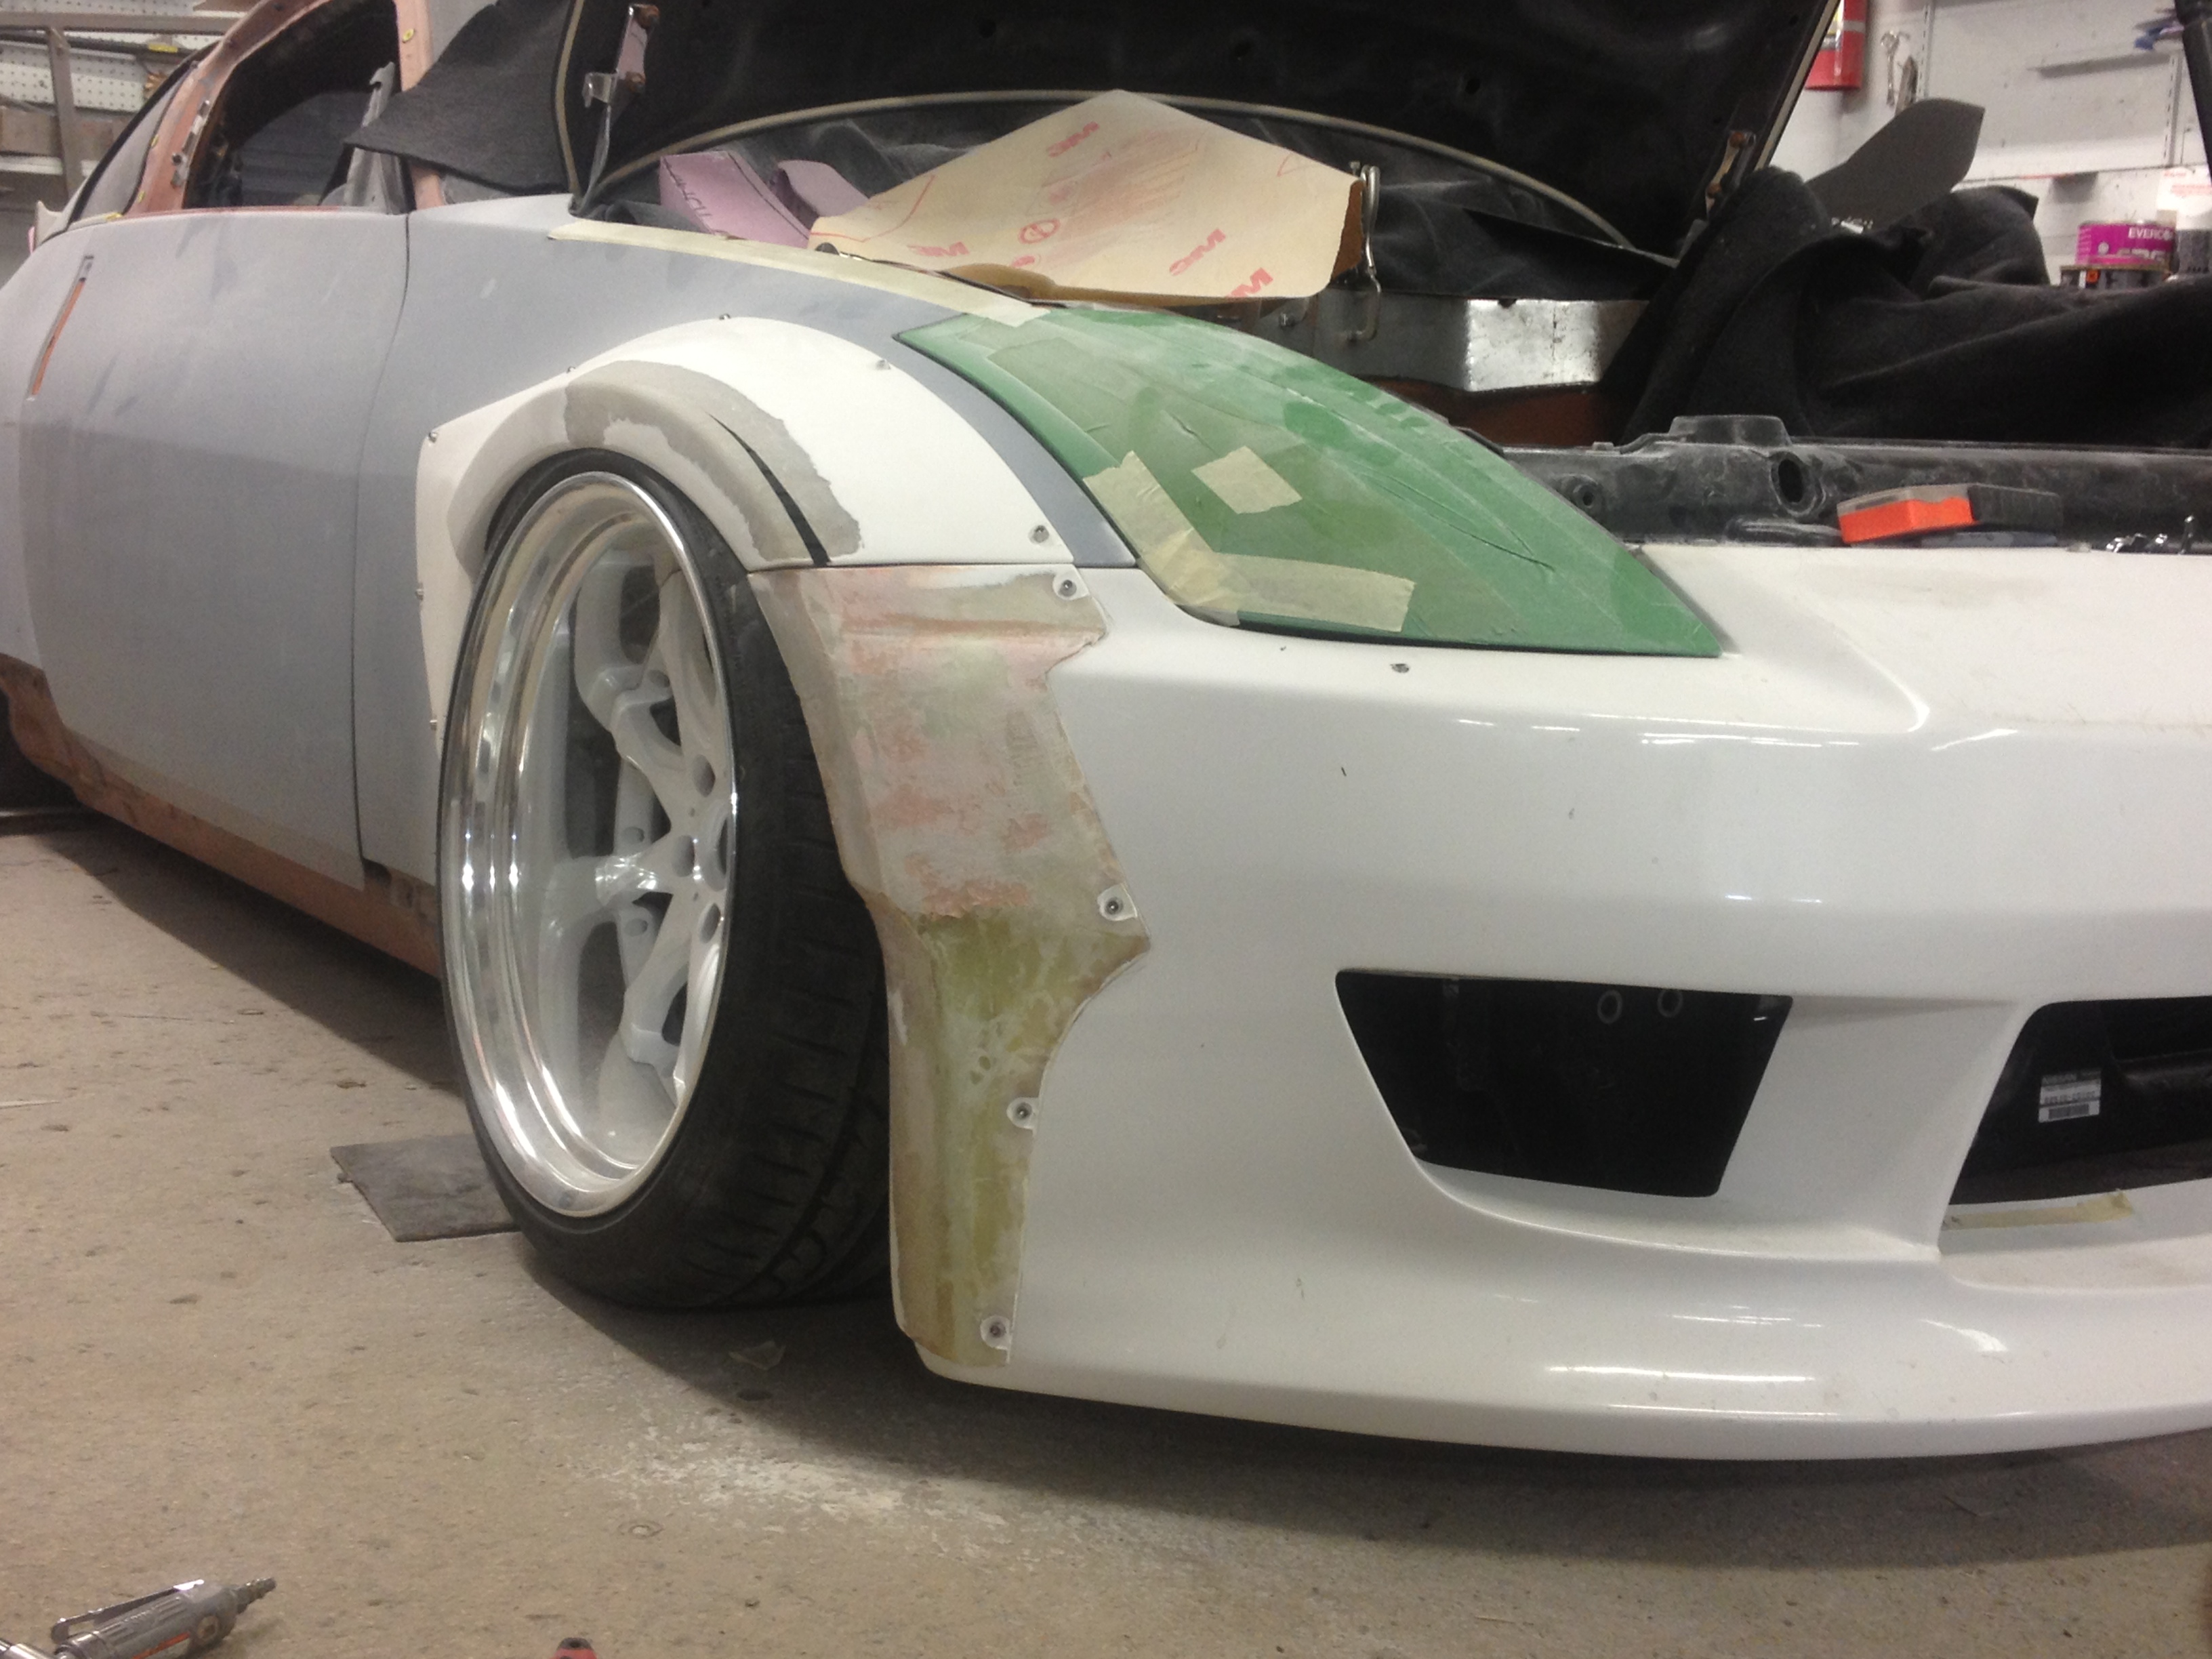
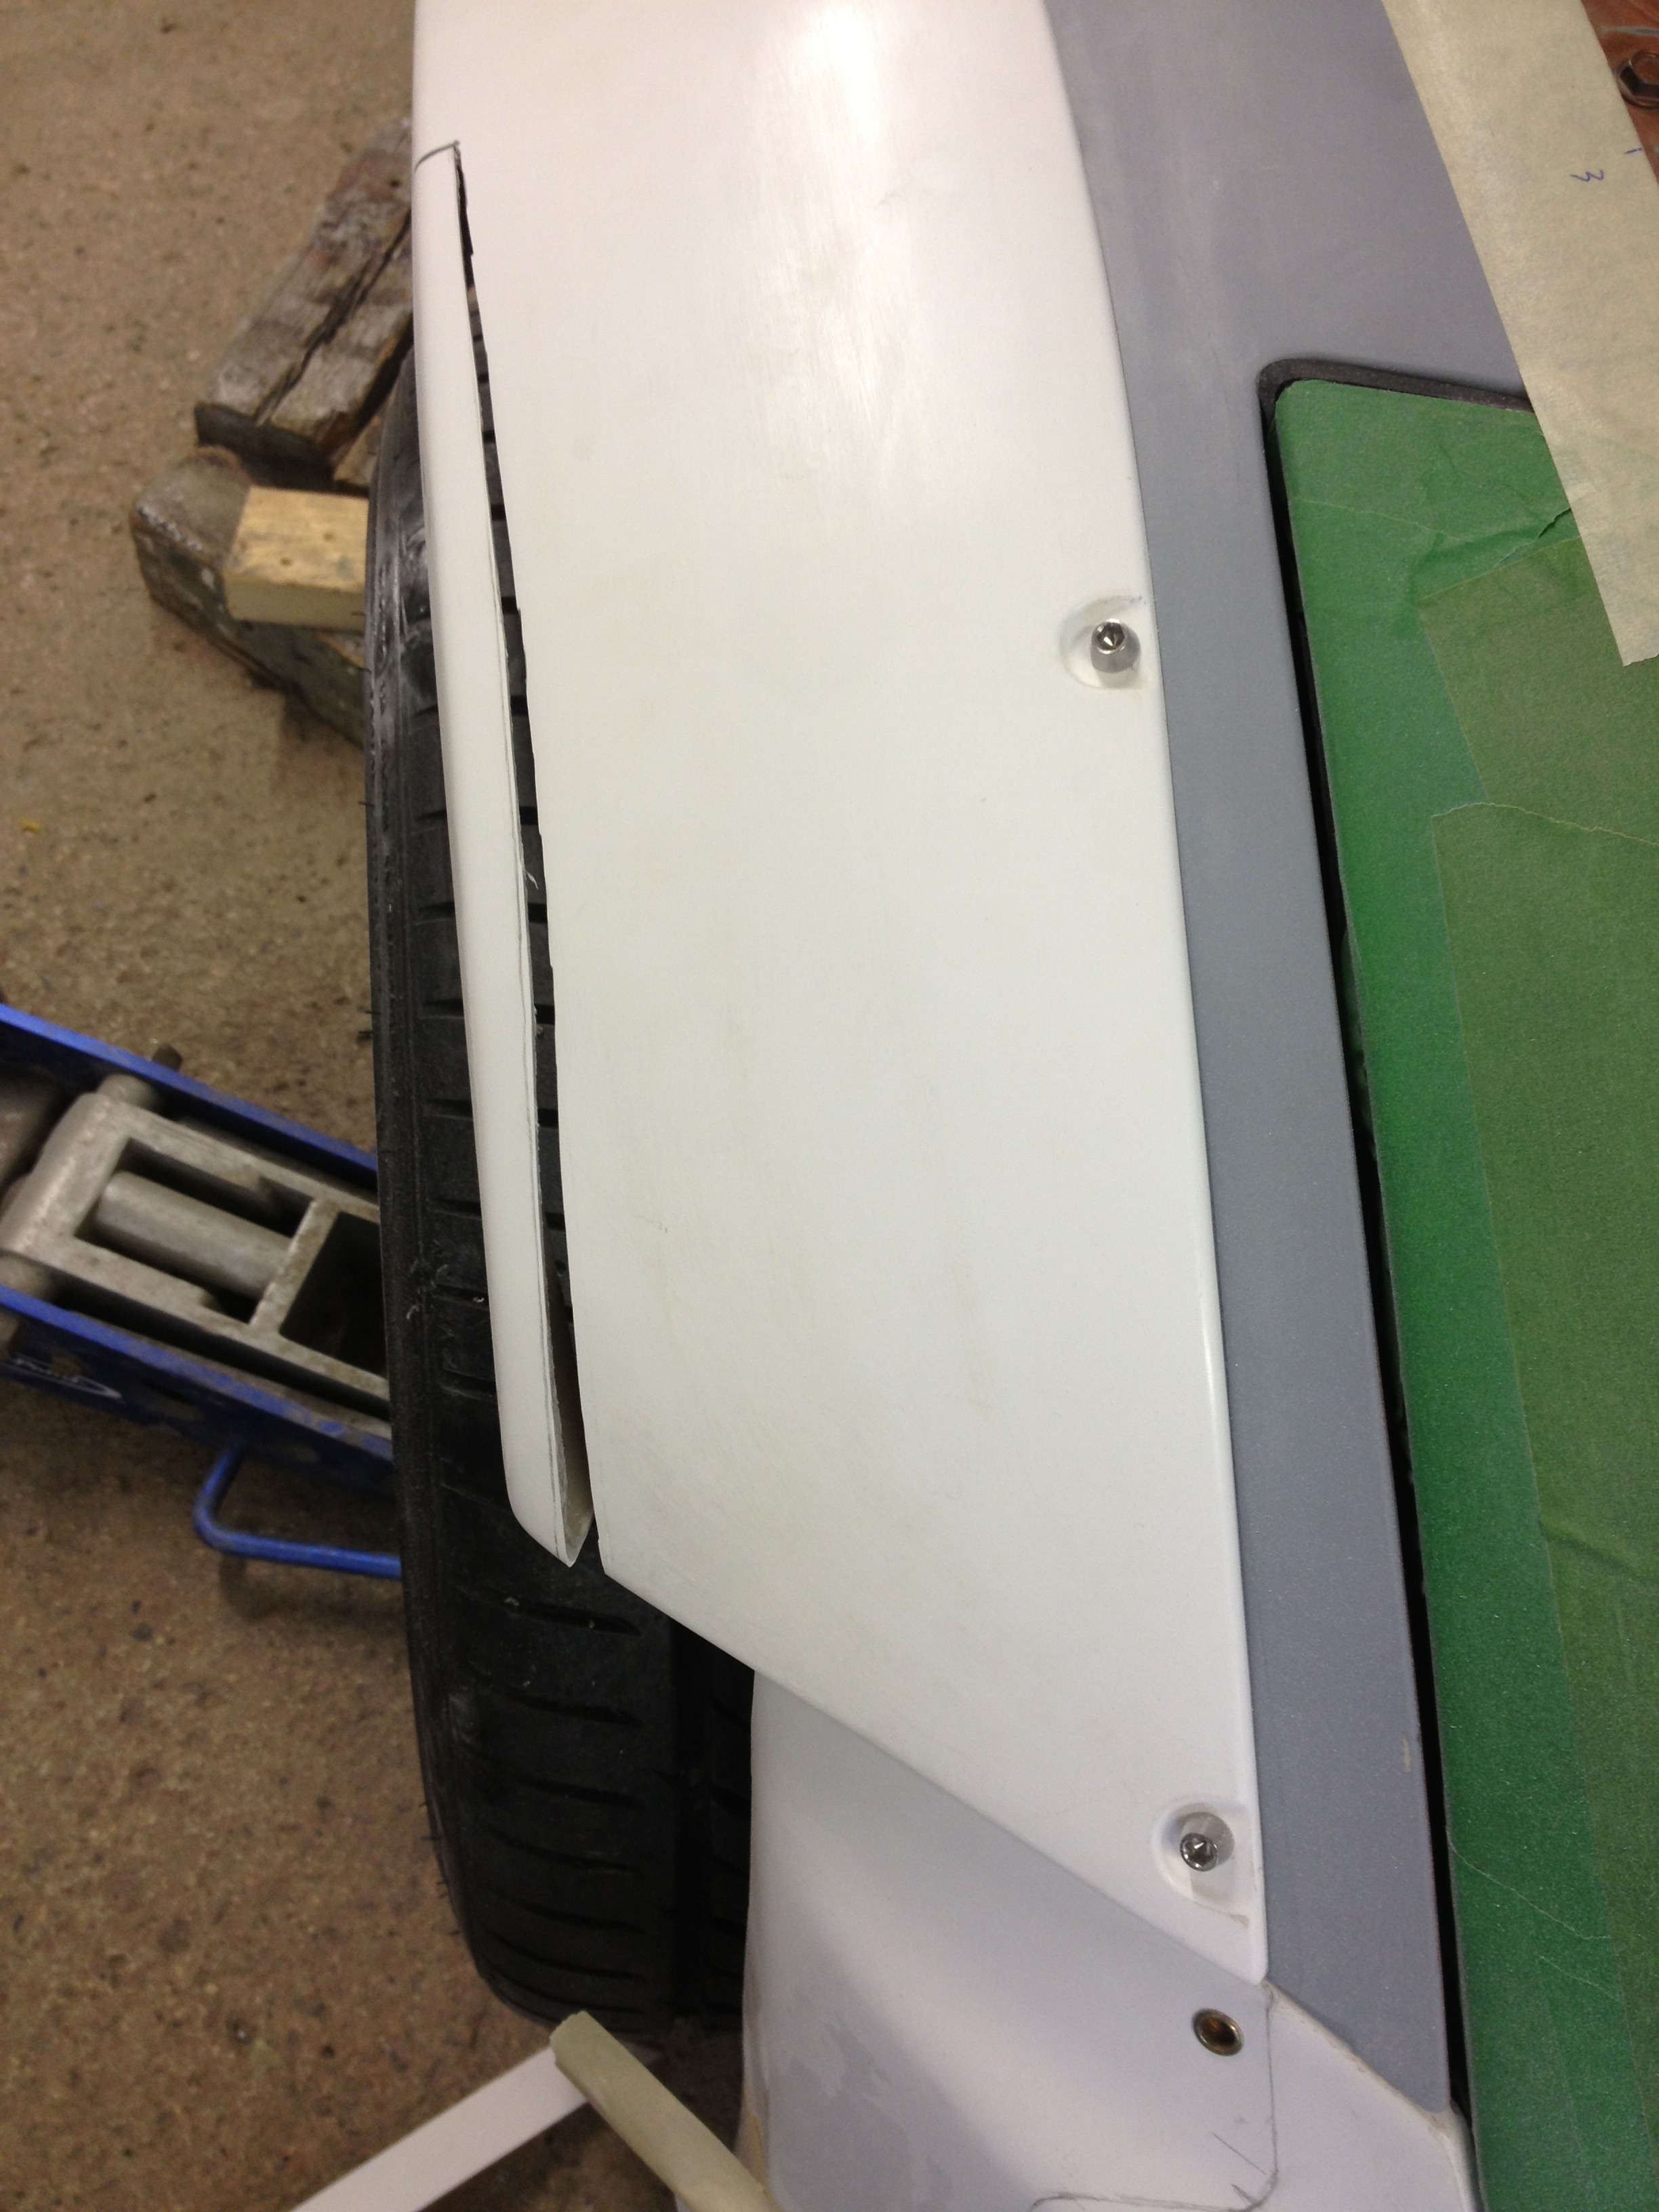
Next up is the front fender flares. These were widened about 1/2" and tapered to fit 295/30/19 tires up front.
Top side fiberglassed:
I actually fiberglassed the top side as well as the inside for reinforcement. Most of the top side ends up getting sanded off anyways. It's more so to hold the shape until the inside reinforcement is done.
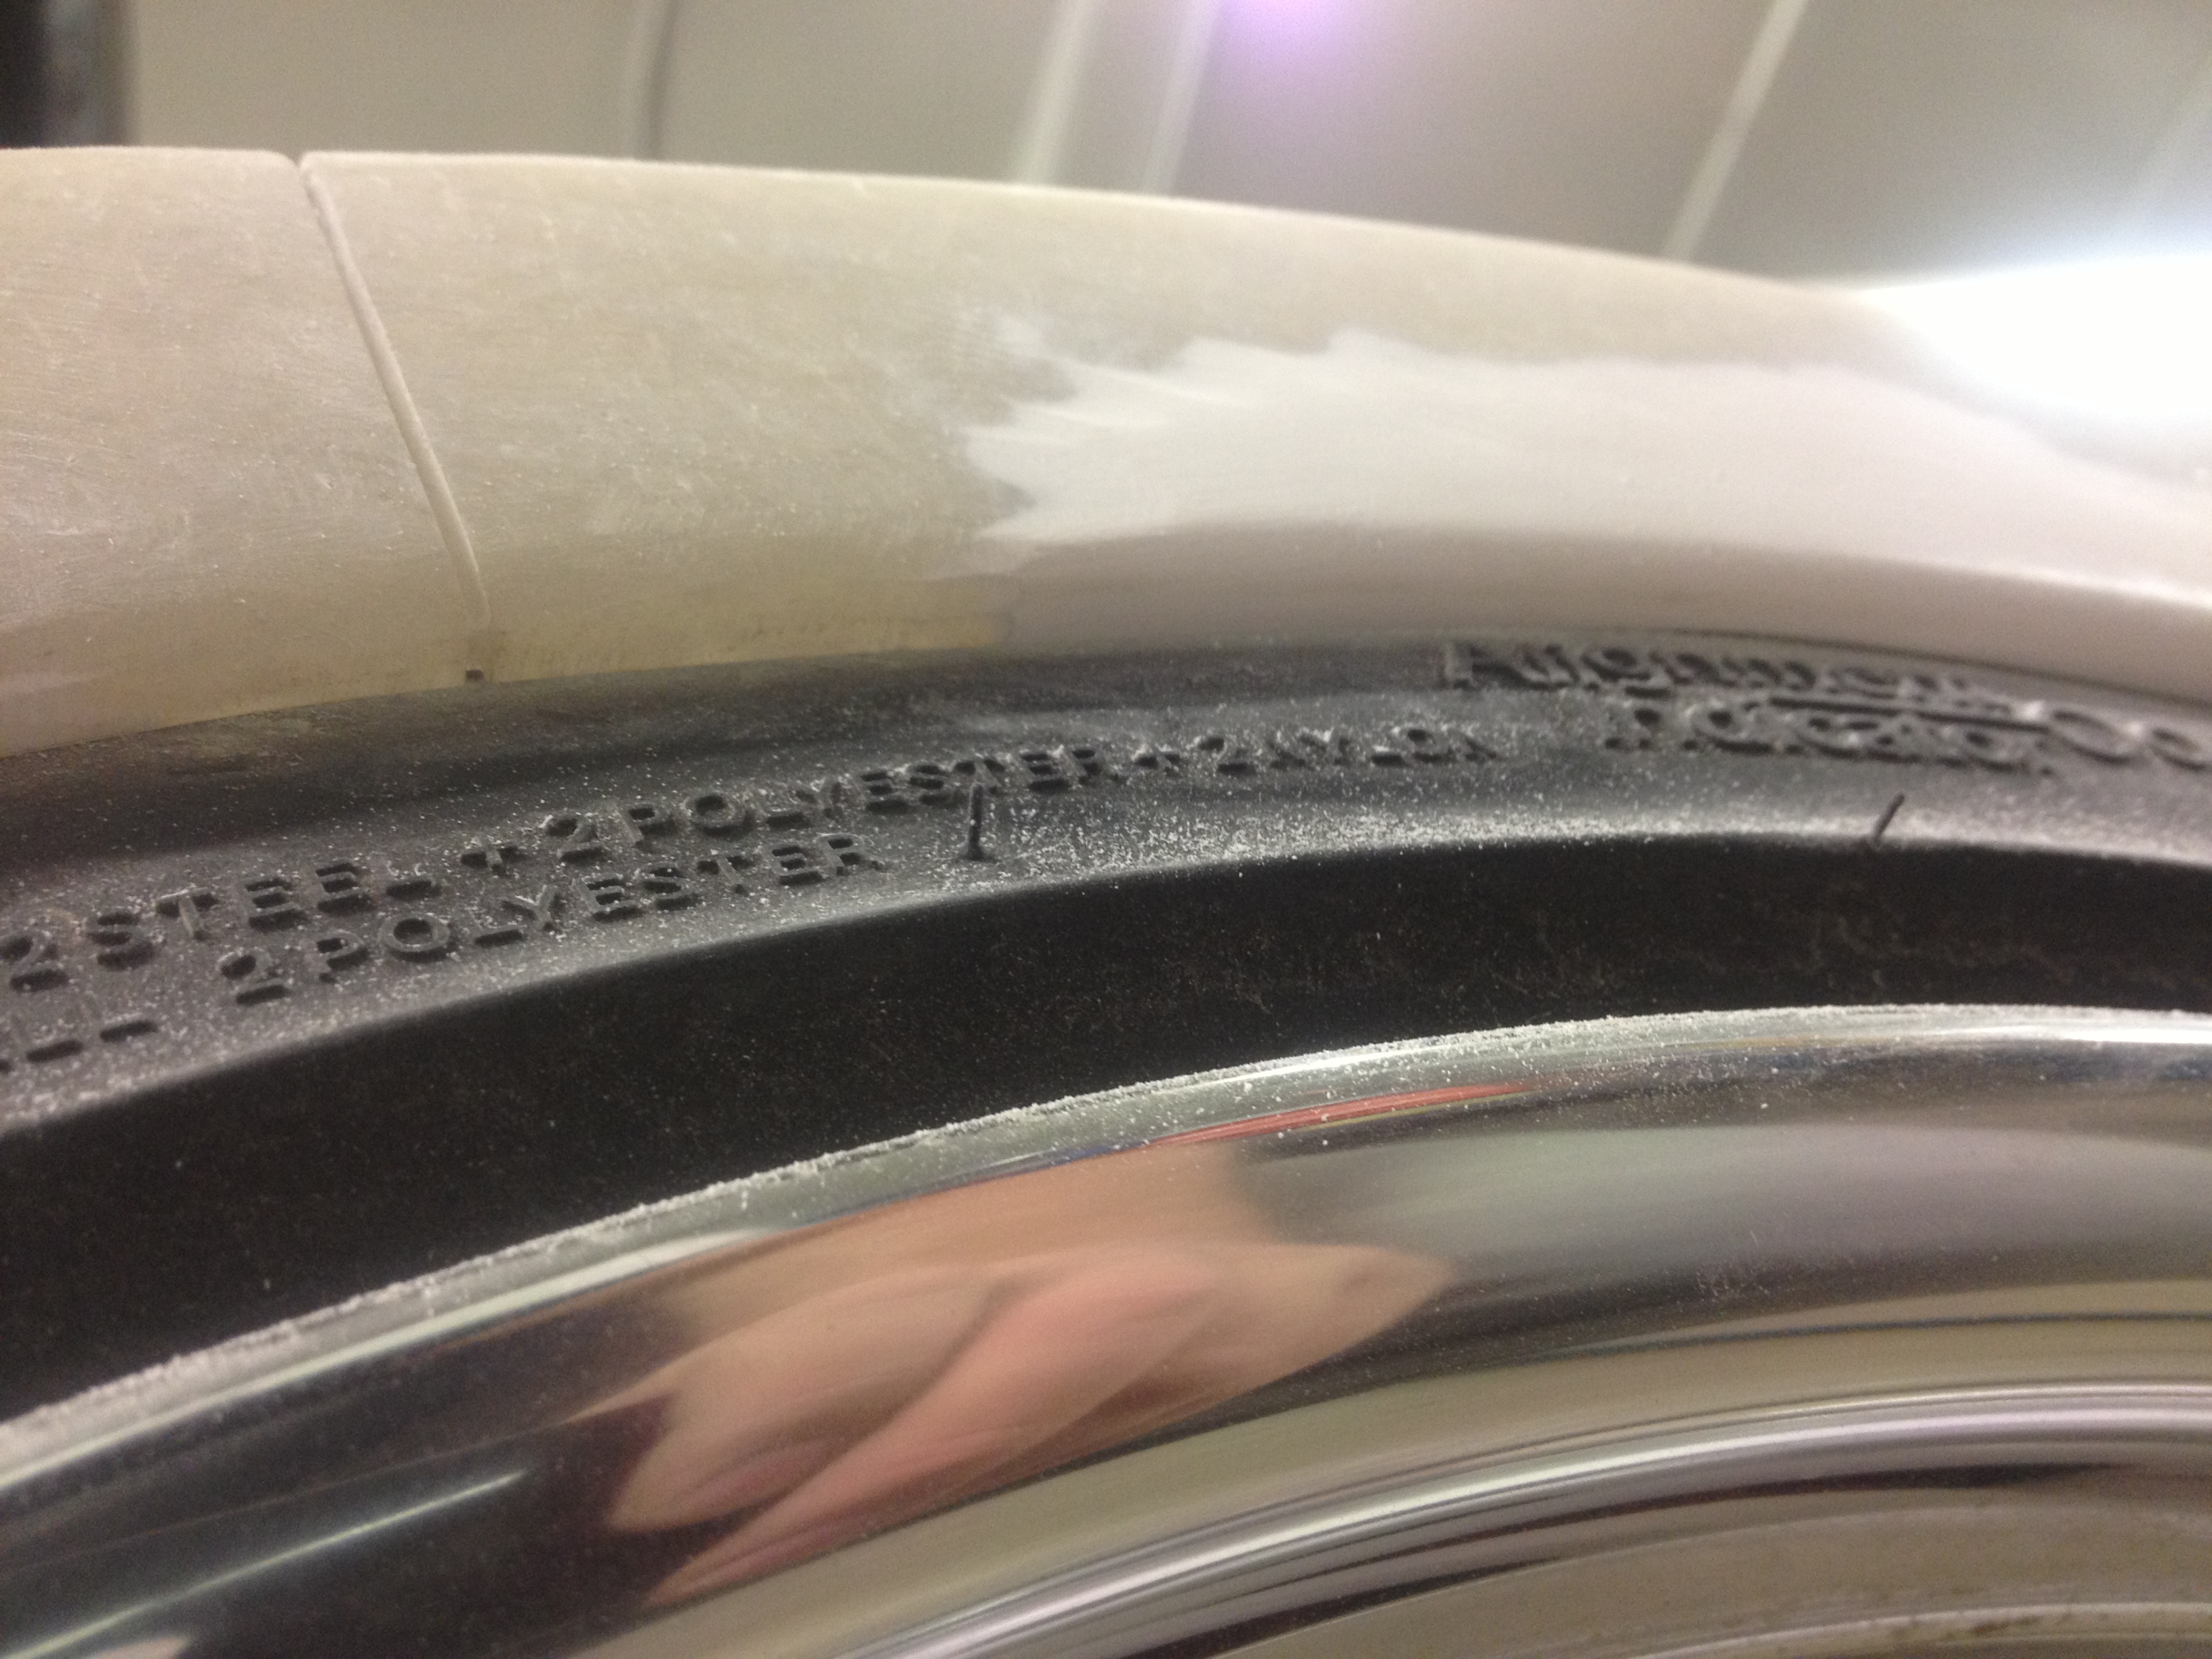
Here you can see the clearance between the tire and flare. It's about 1/8". A lot of time was spent clearancing and fitting things to make sure the front and rear tires cleared the flares and didn't rub when aired out. Each piece of the flare kit came on and off the car probably 50 times during the process of fitting and adjusting everything.
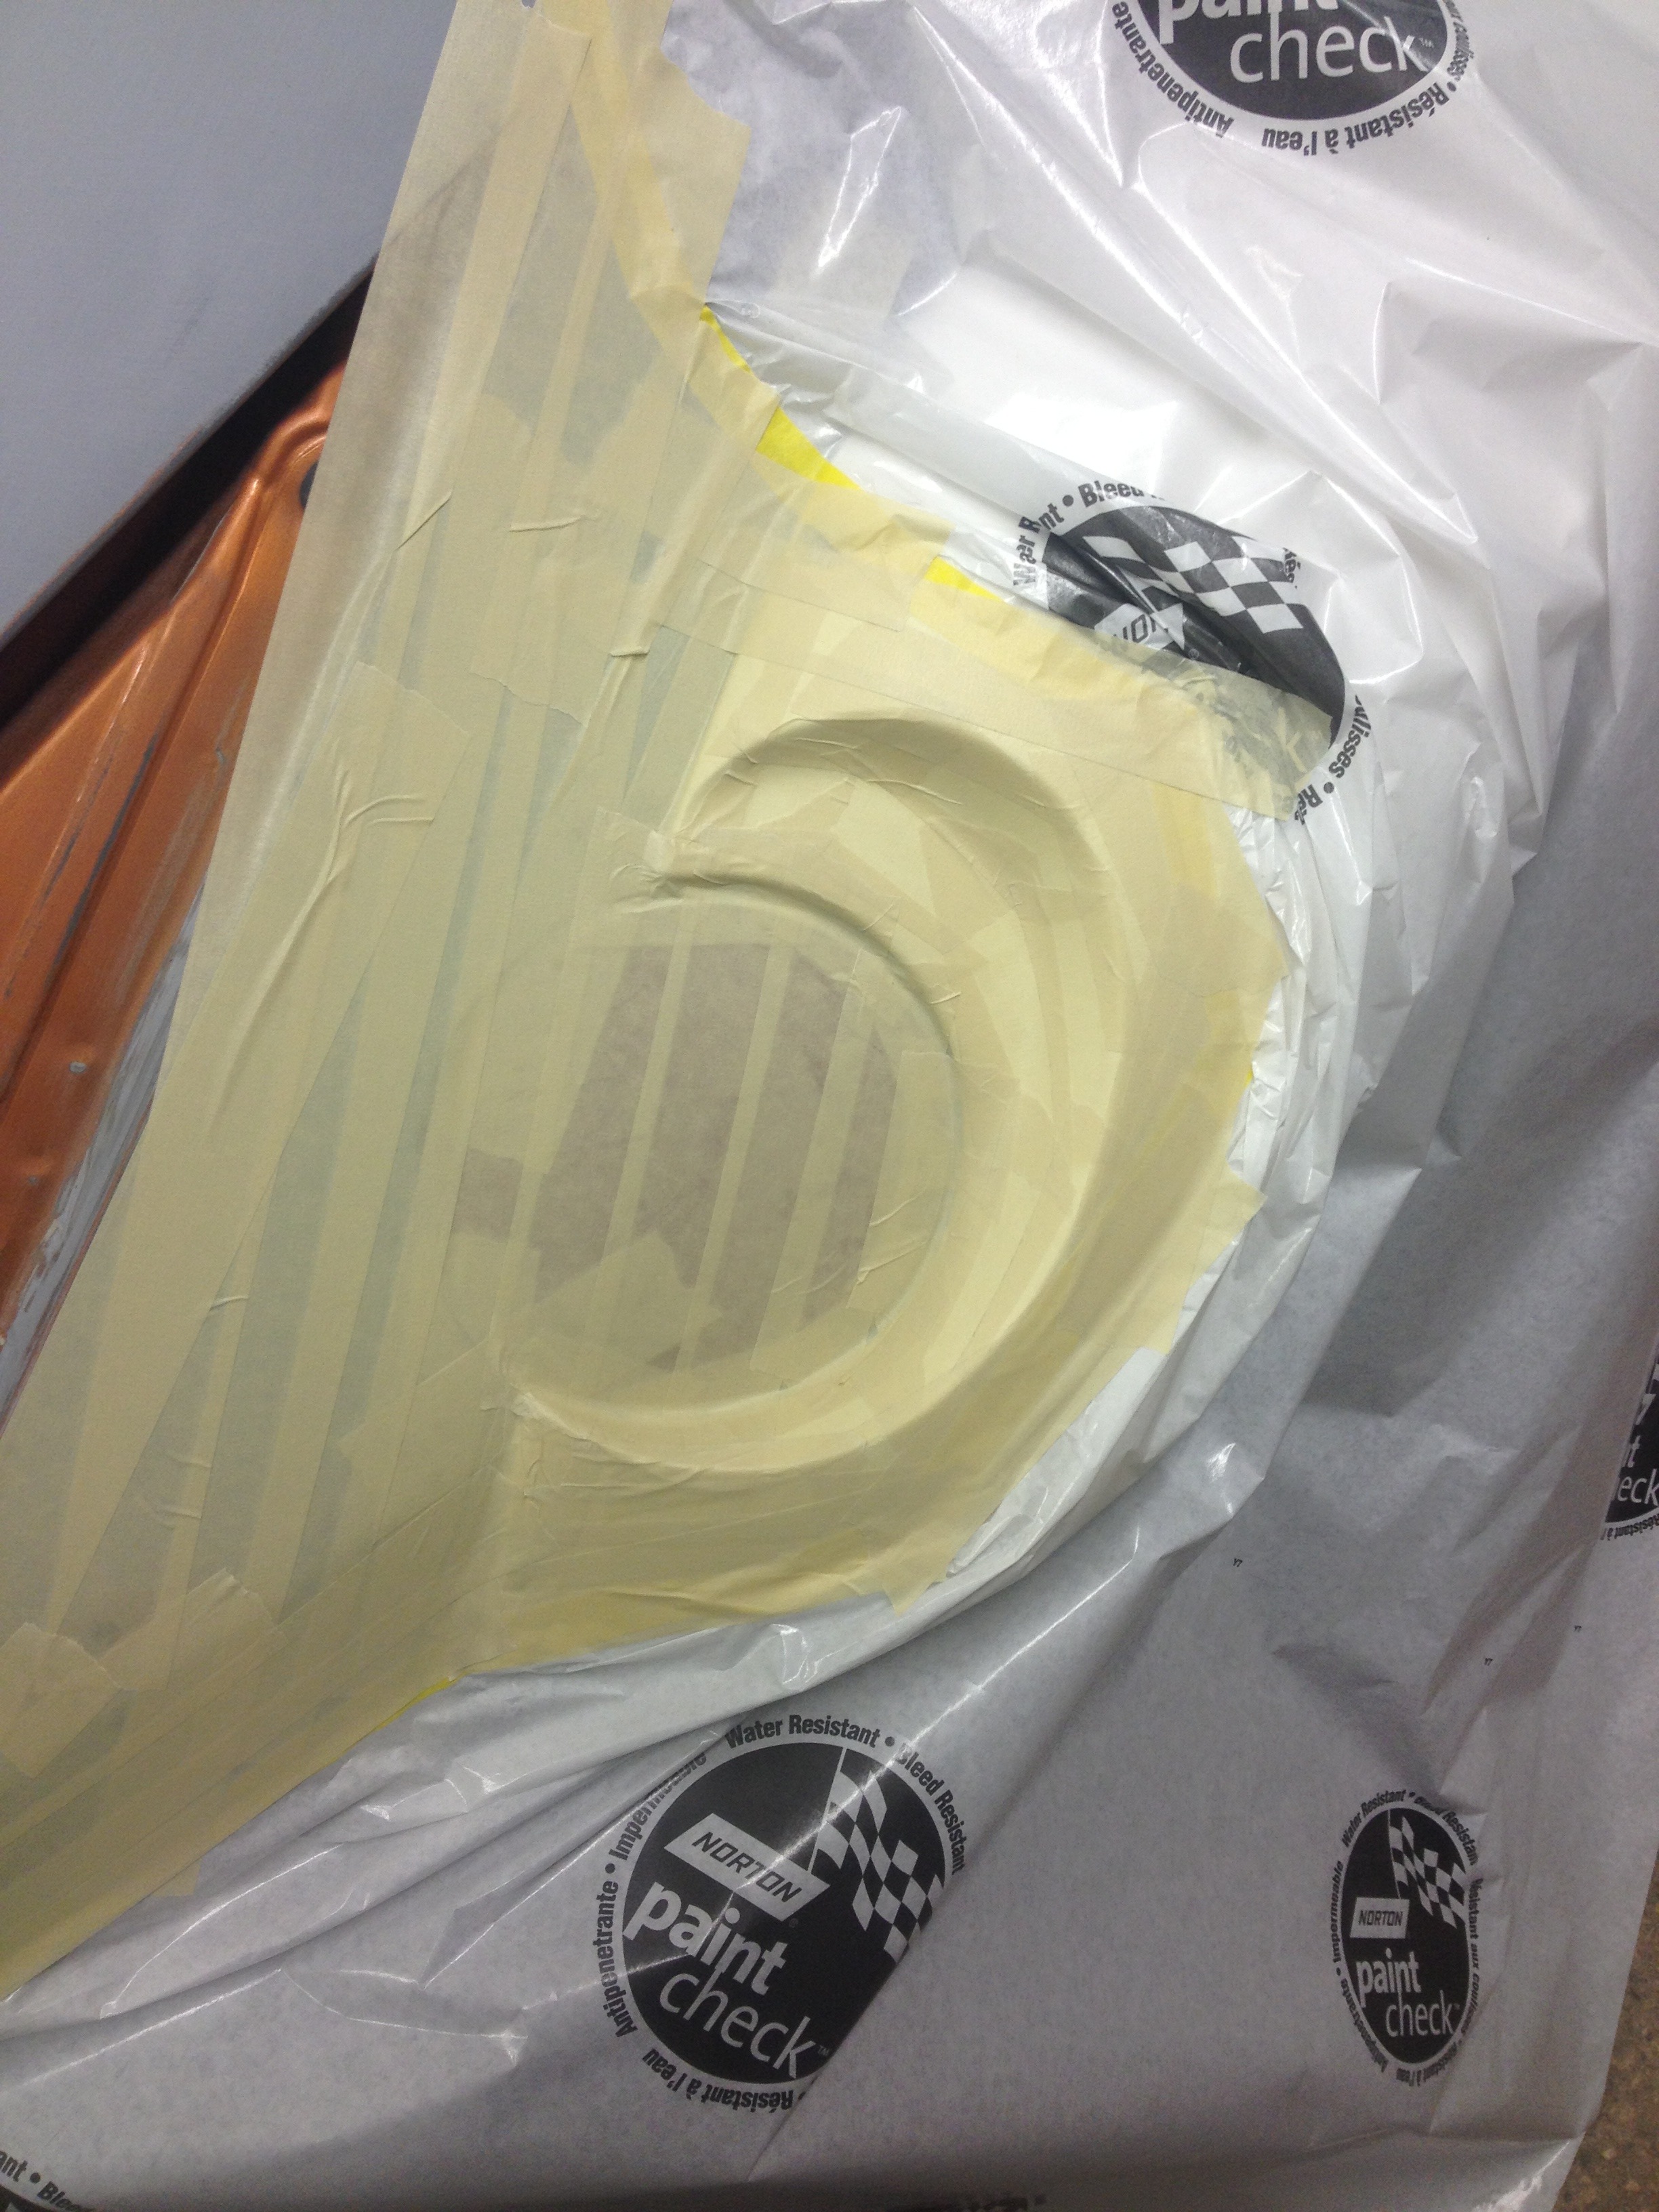
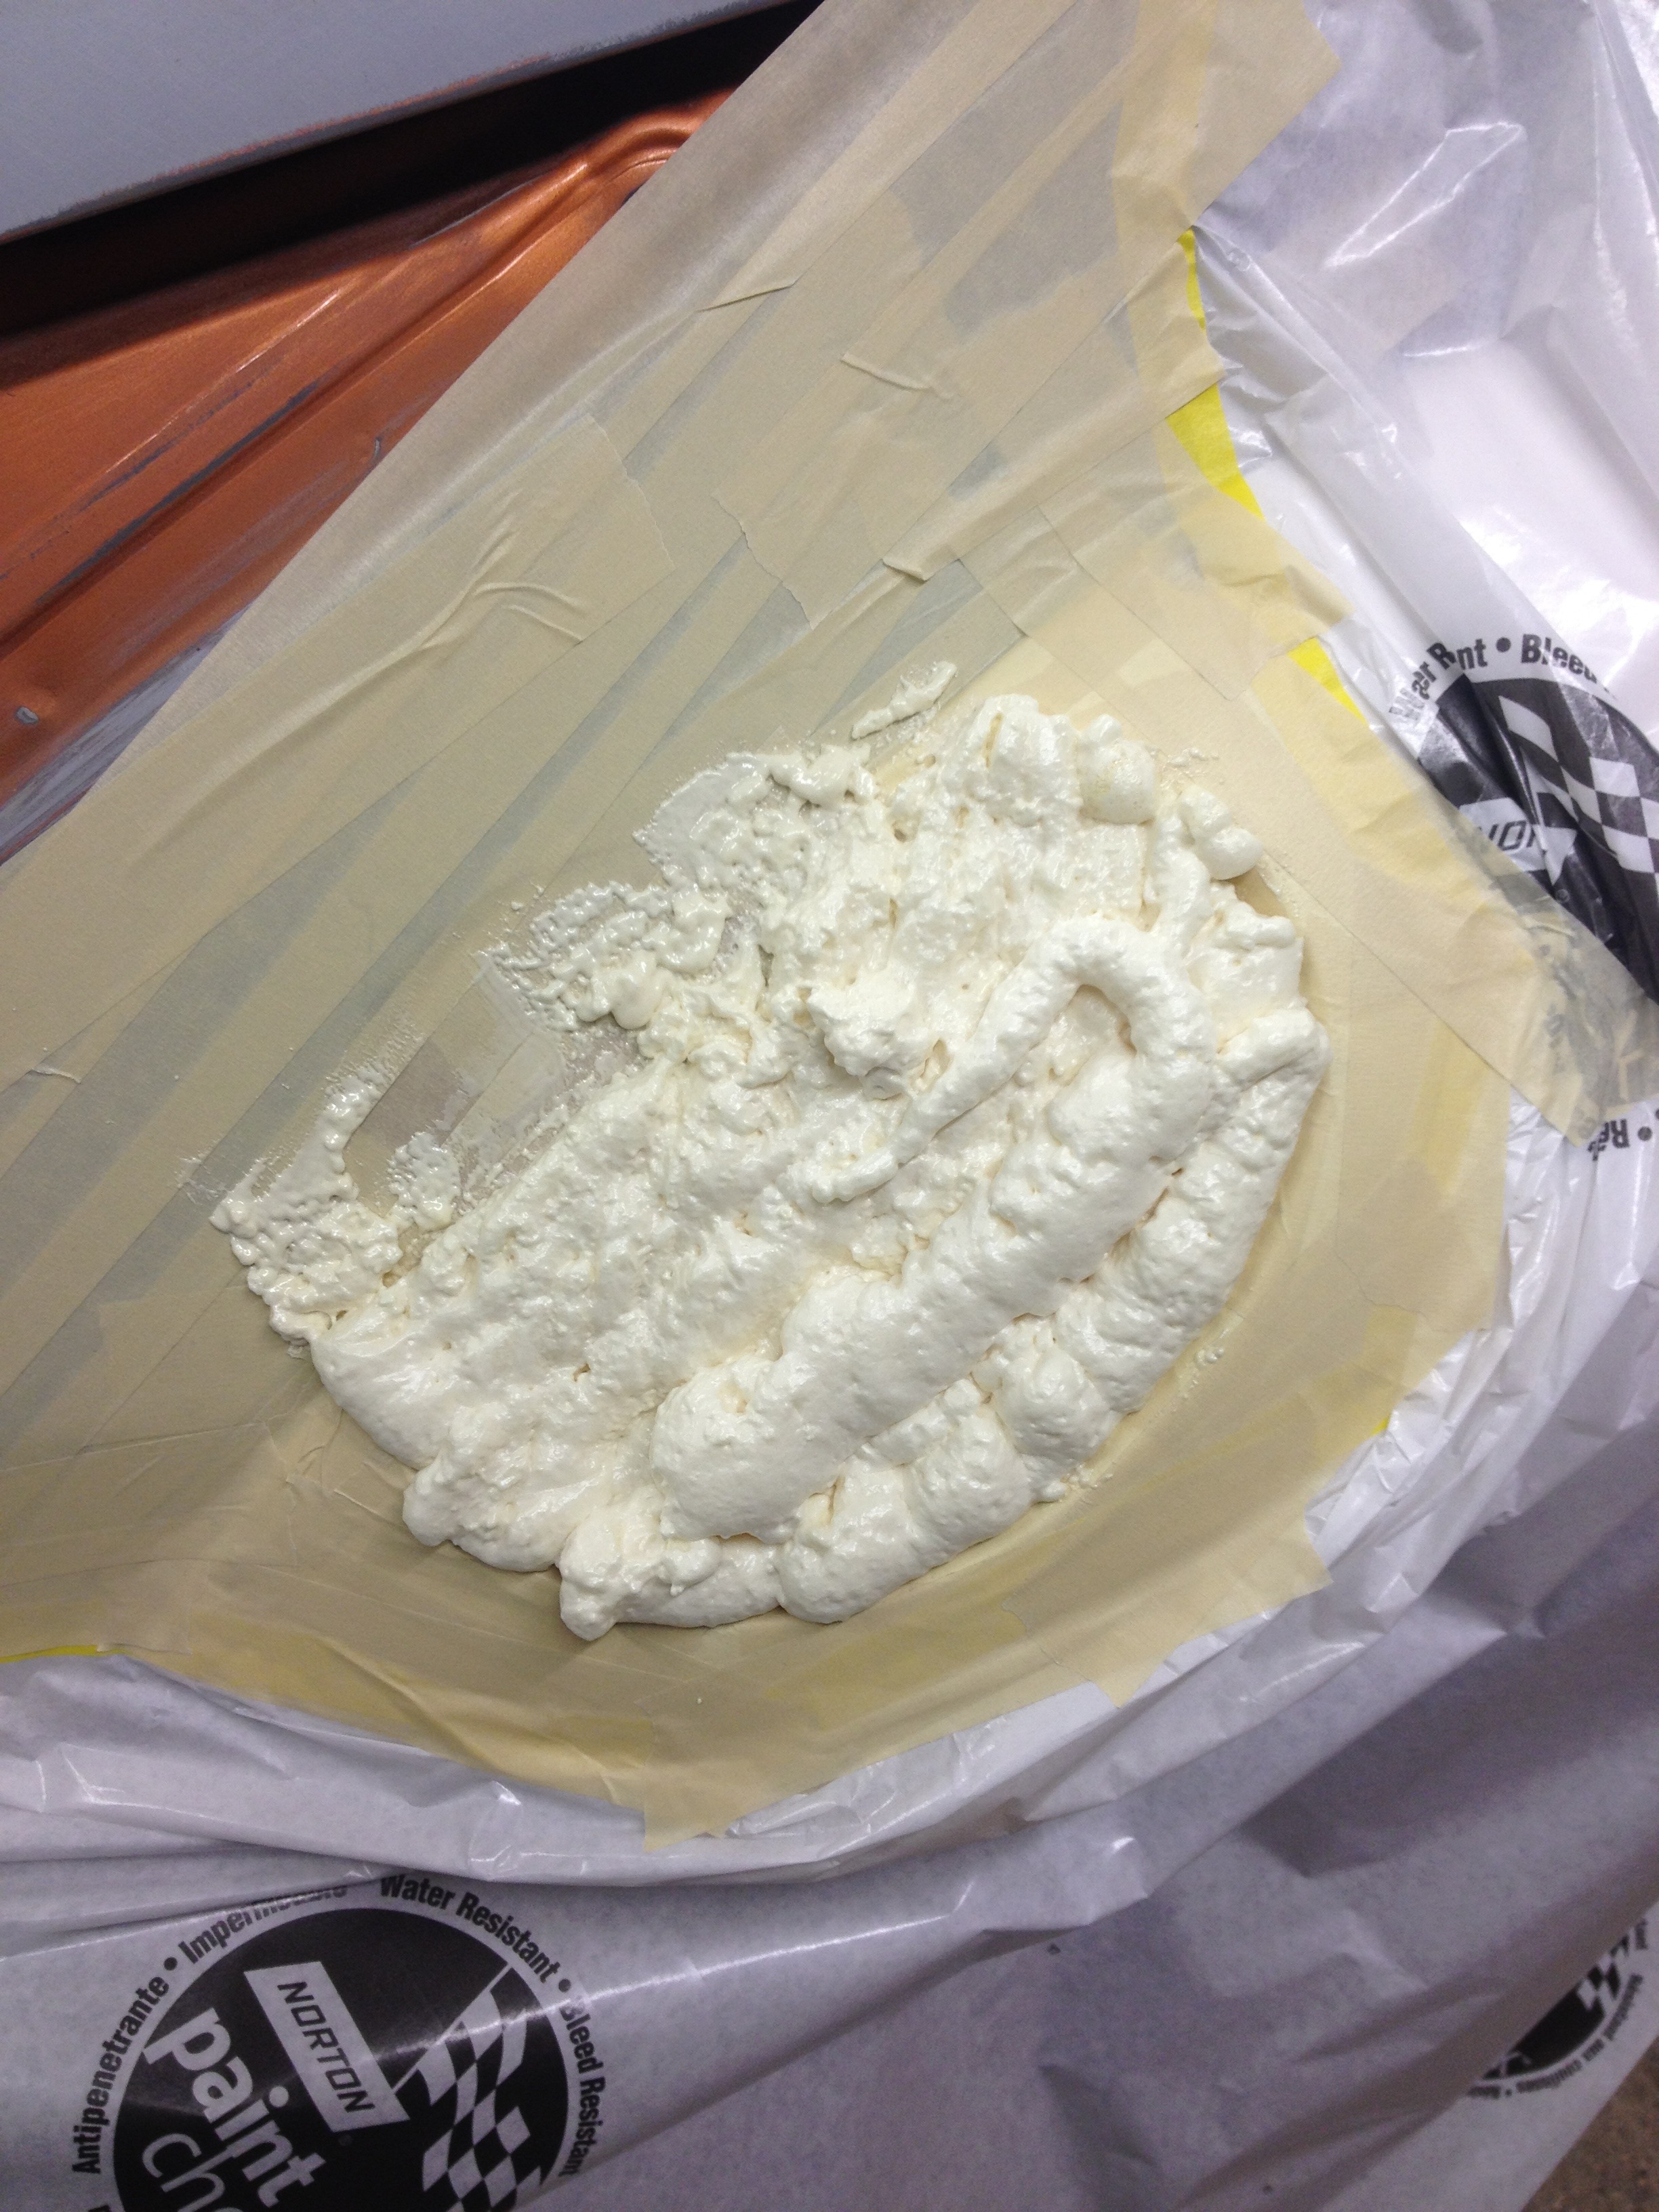
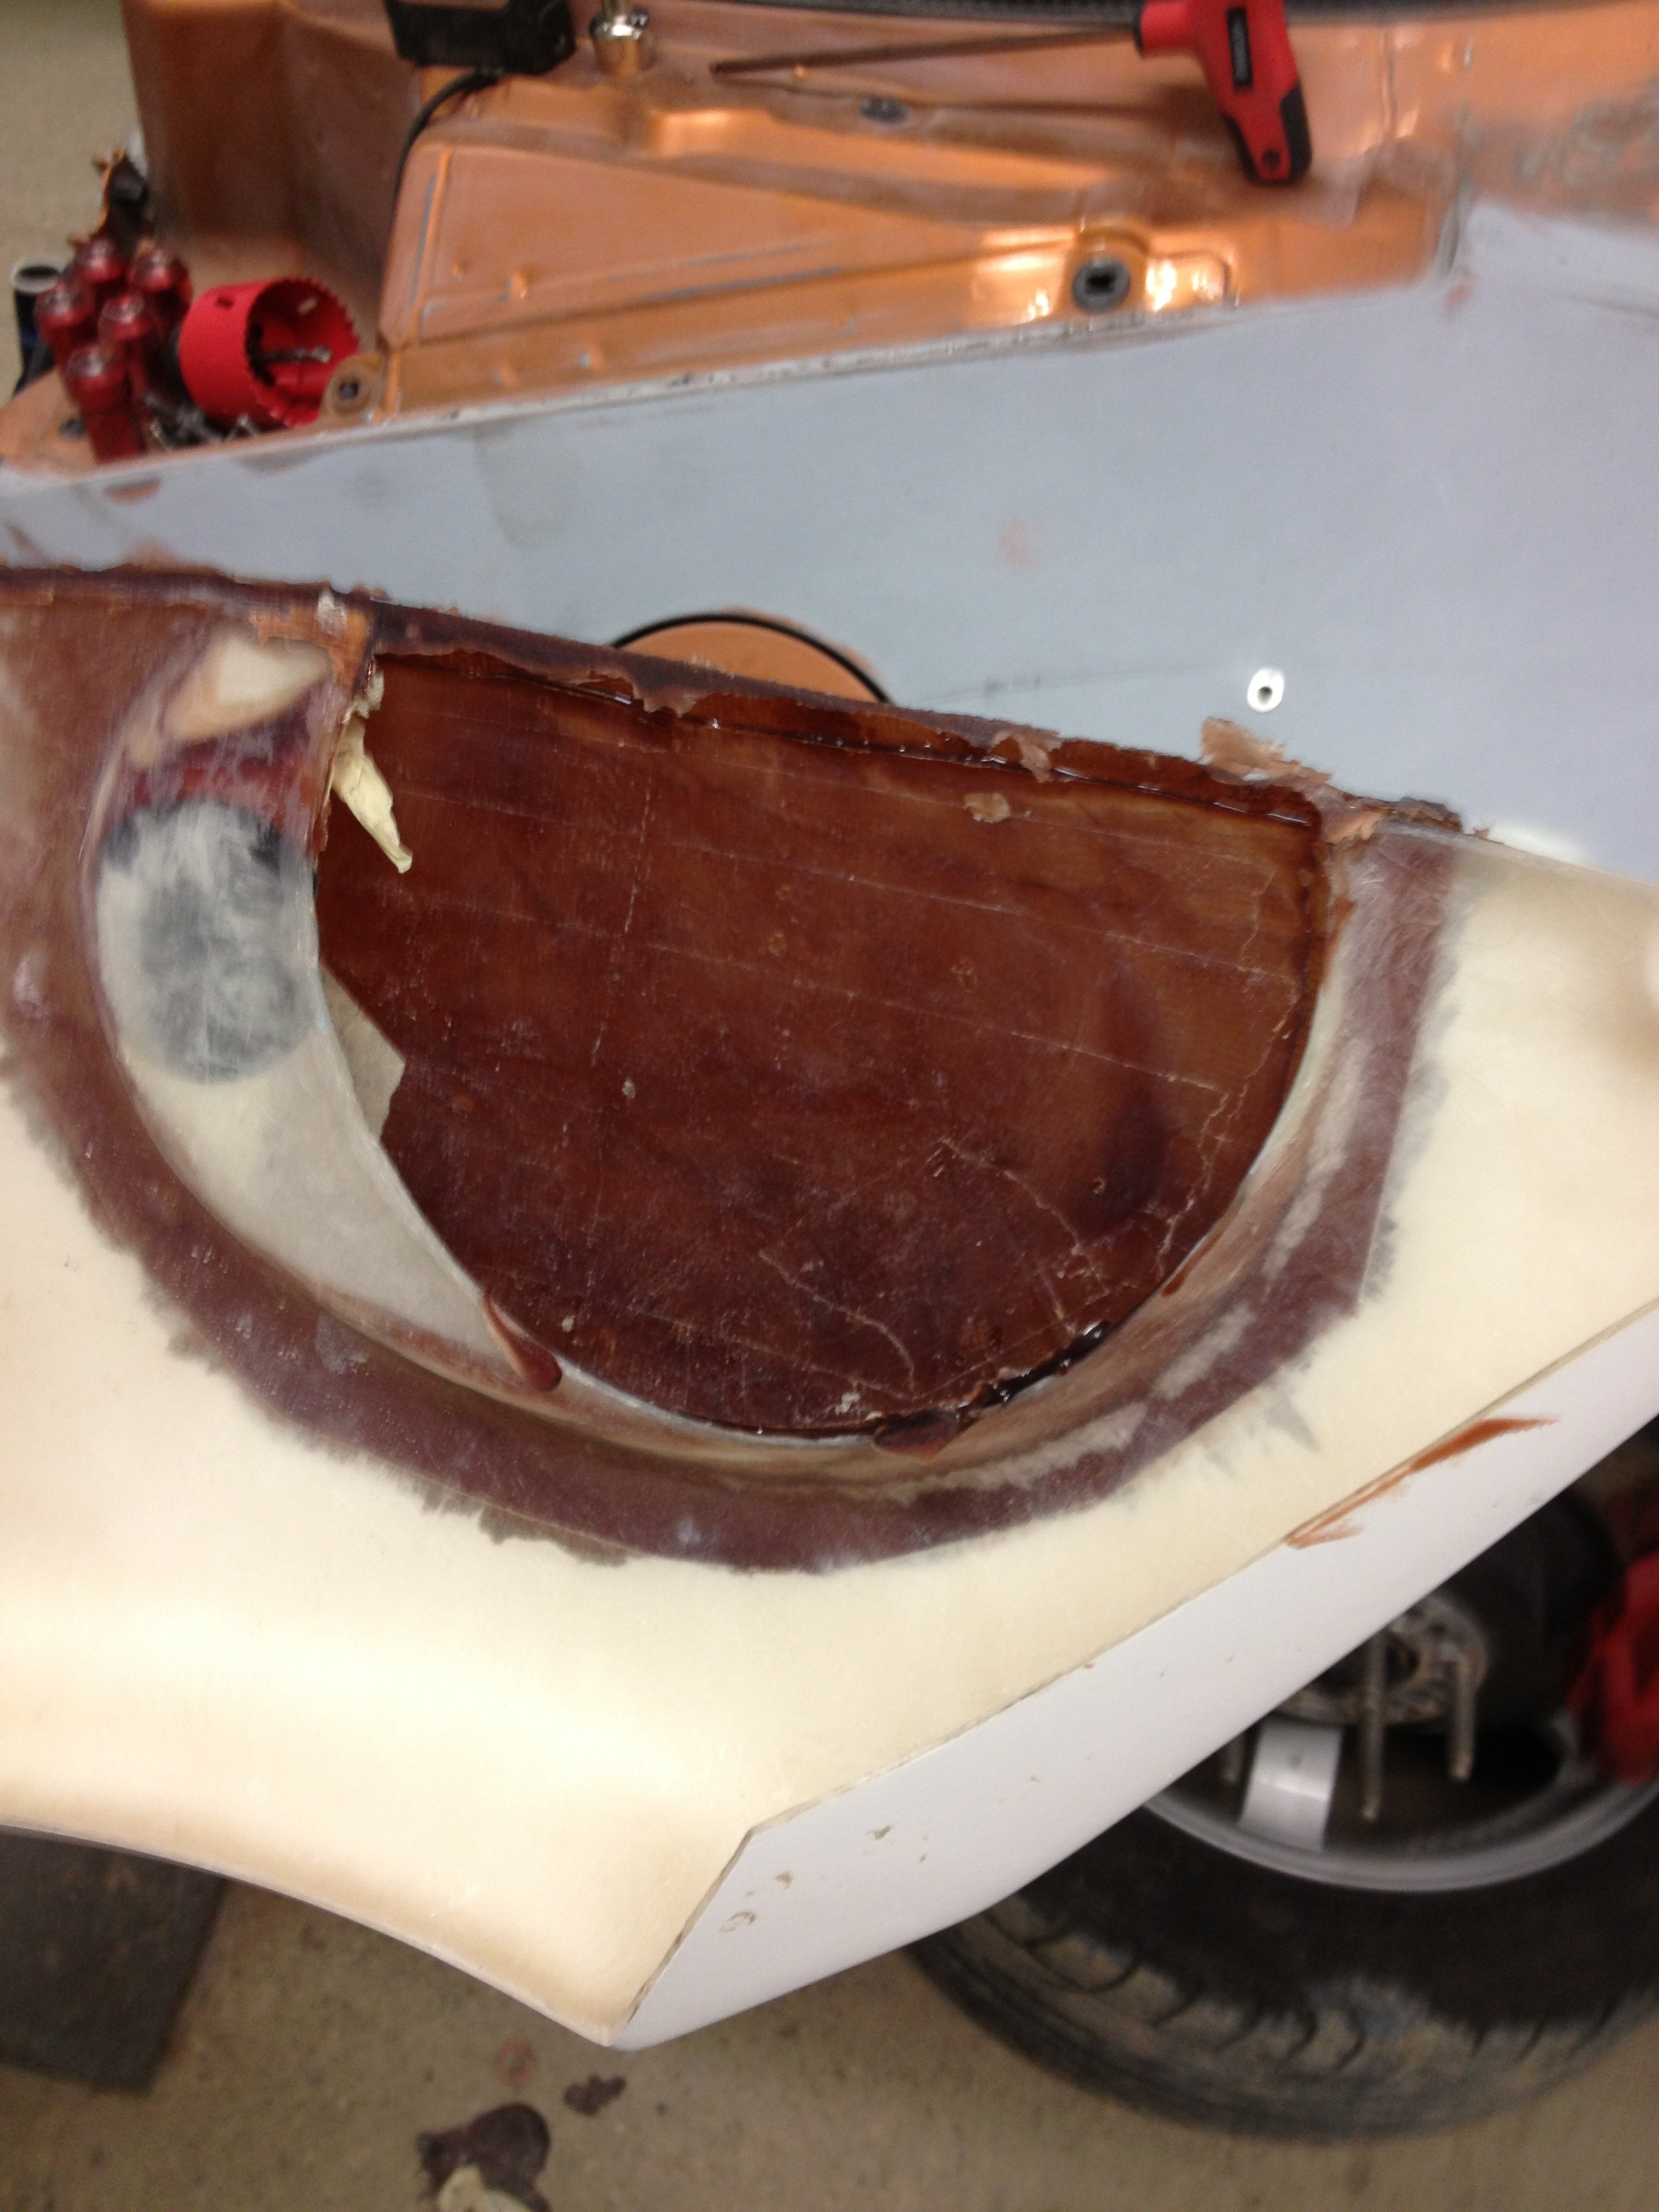
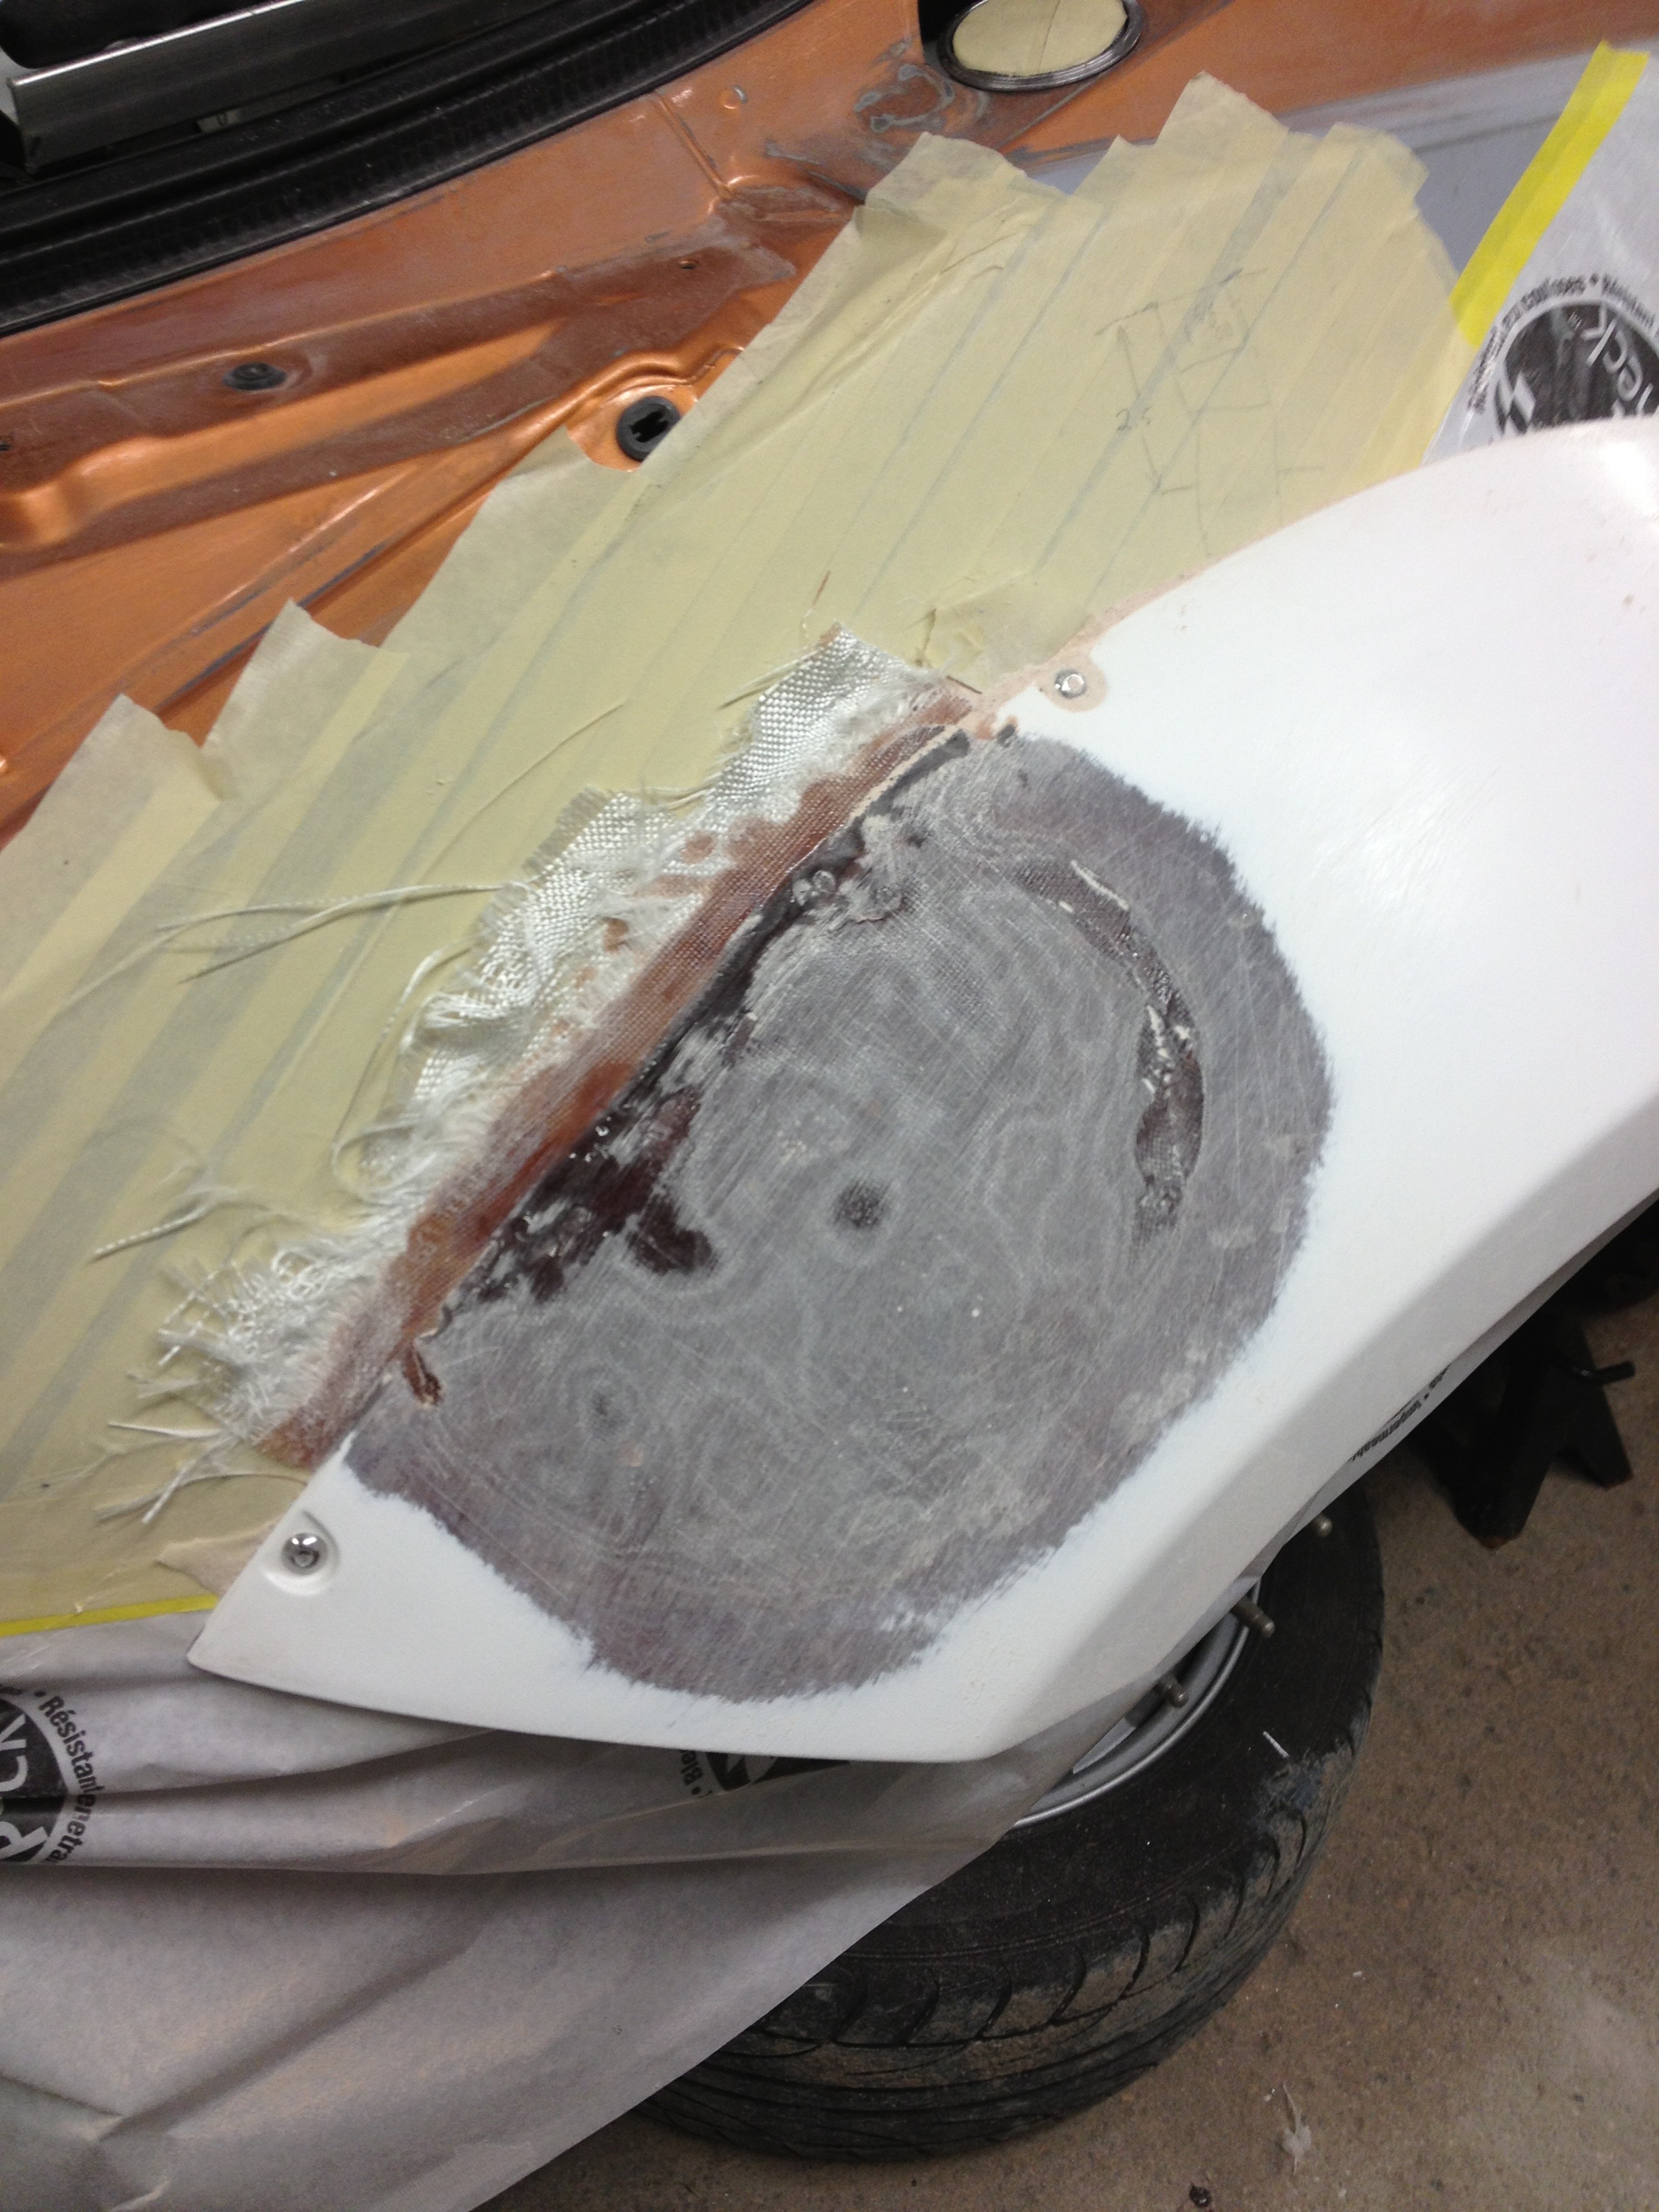
I like a smooth look, besides shaving the antenna, rear emblems and front fender emblems I decided to shave and relocate the gas cap. This is the flare portion of the job, I'll cover the relocation aspect later.
Mask work area:
Fill with expanding foam:
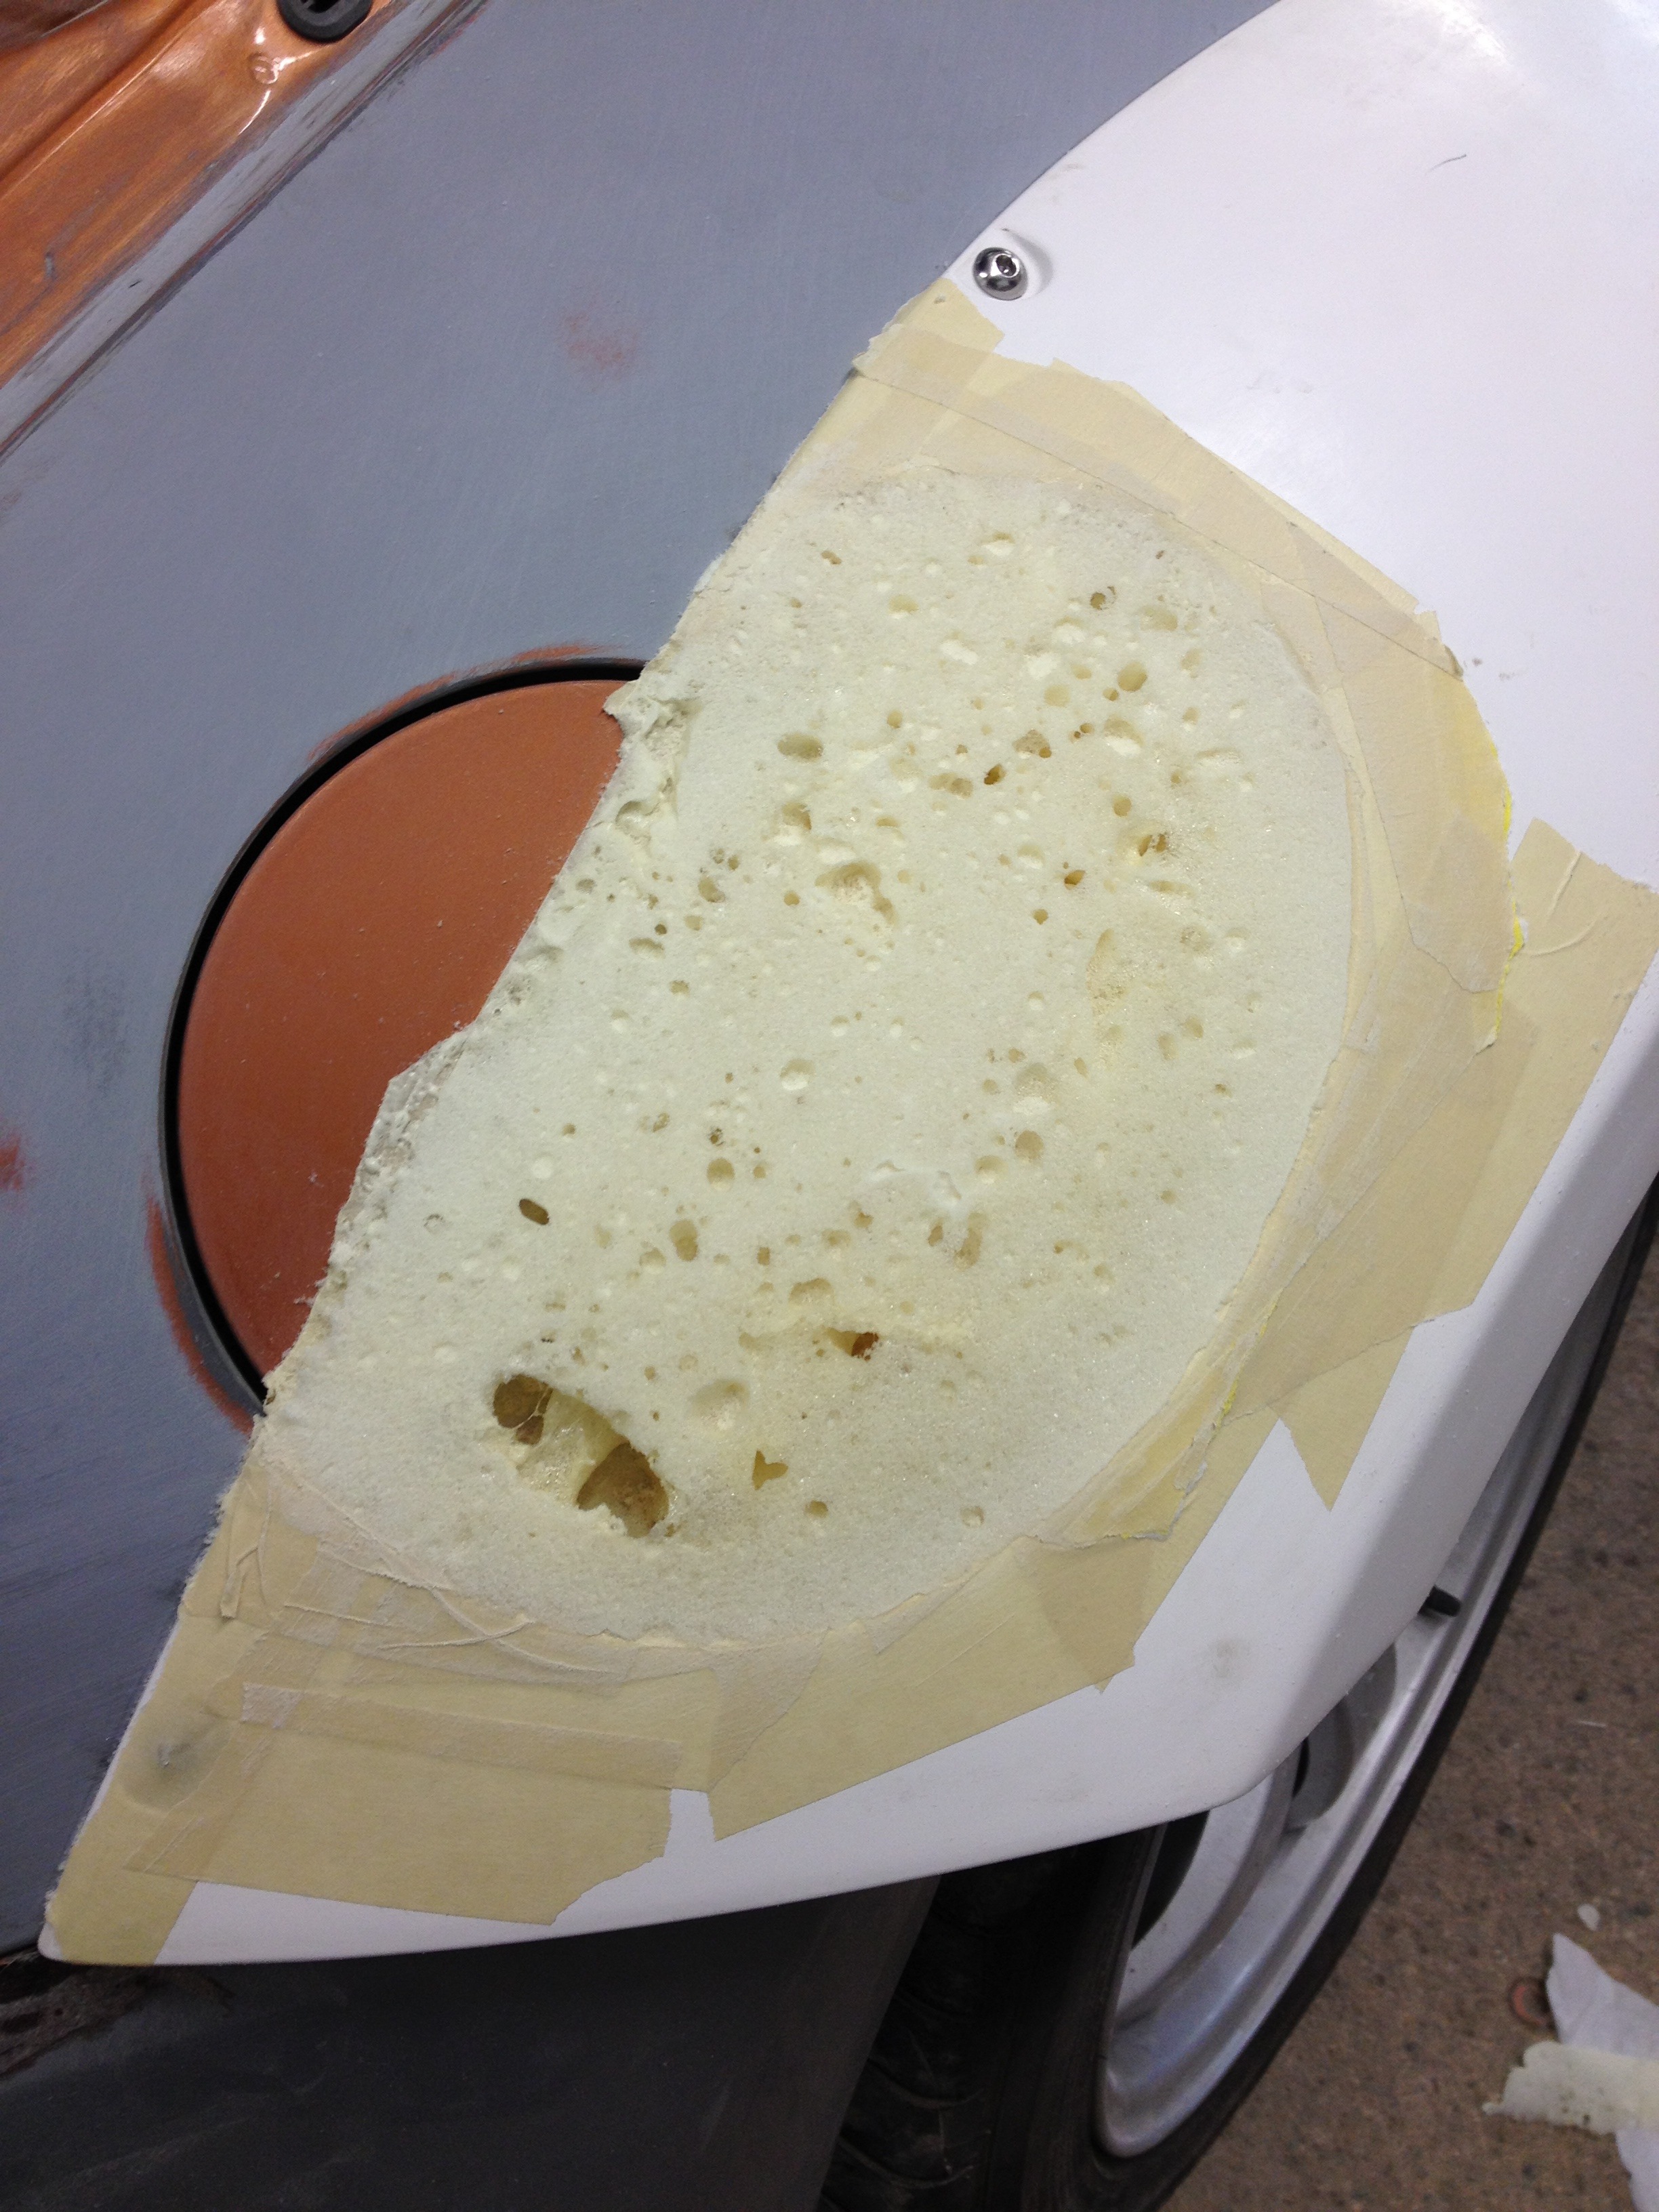
Shape expanding foam:
Prep work area for fiberglass:
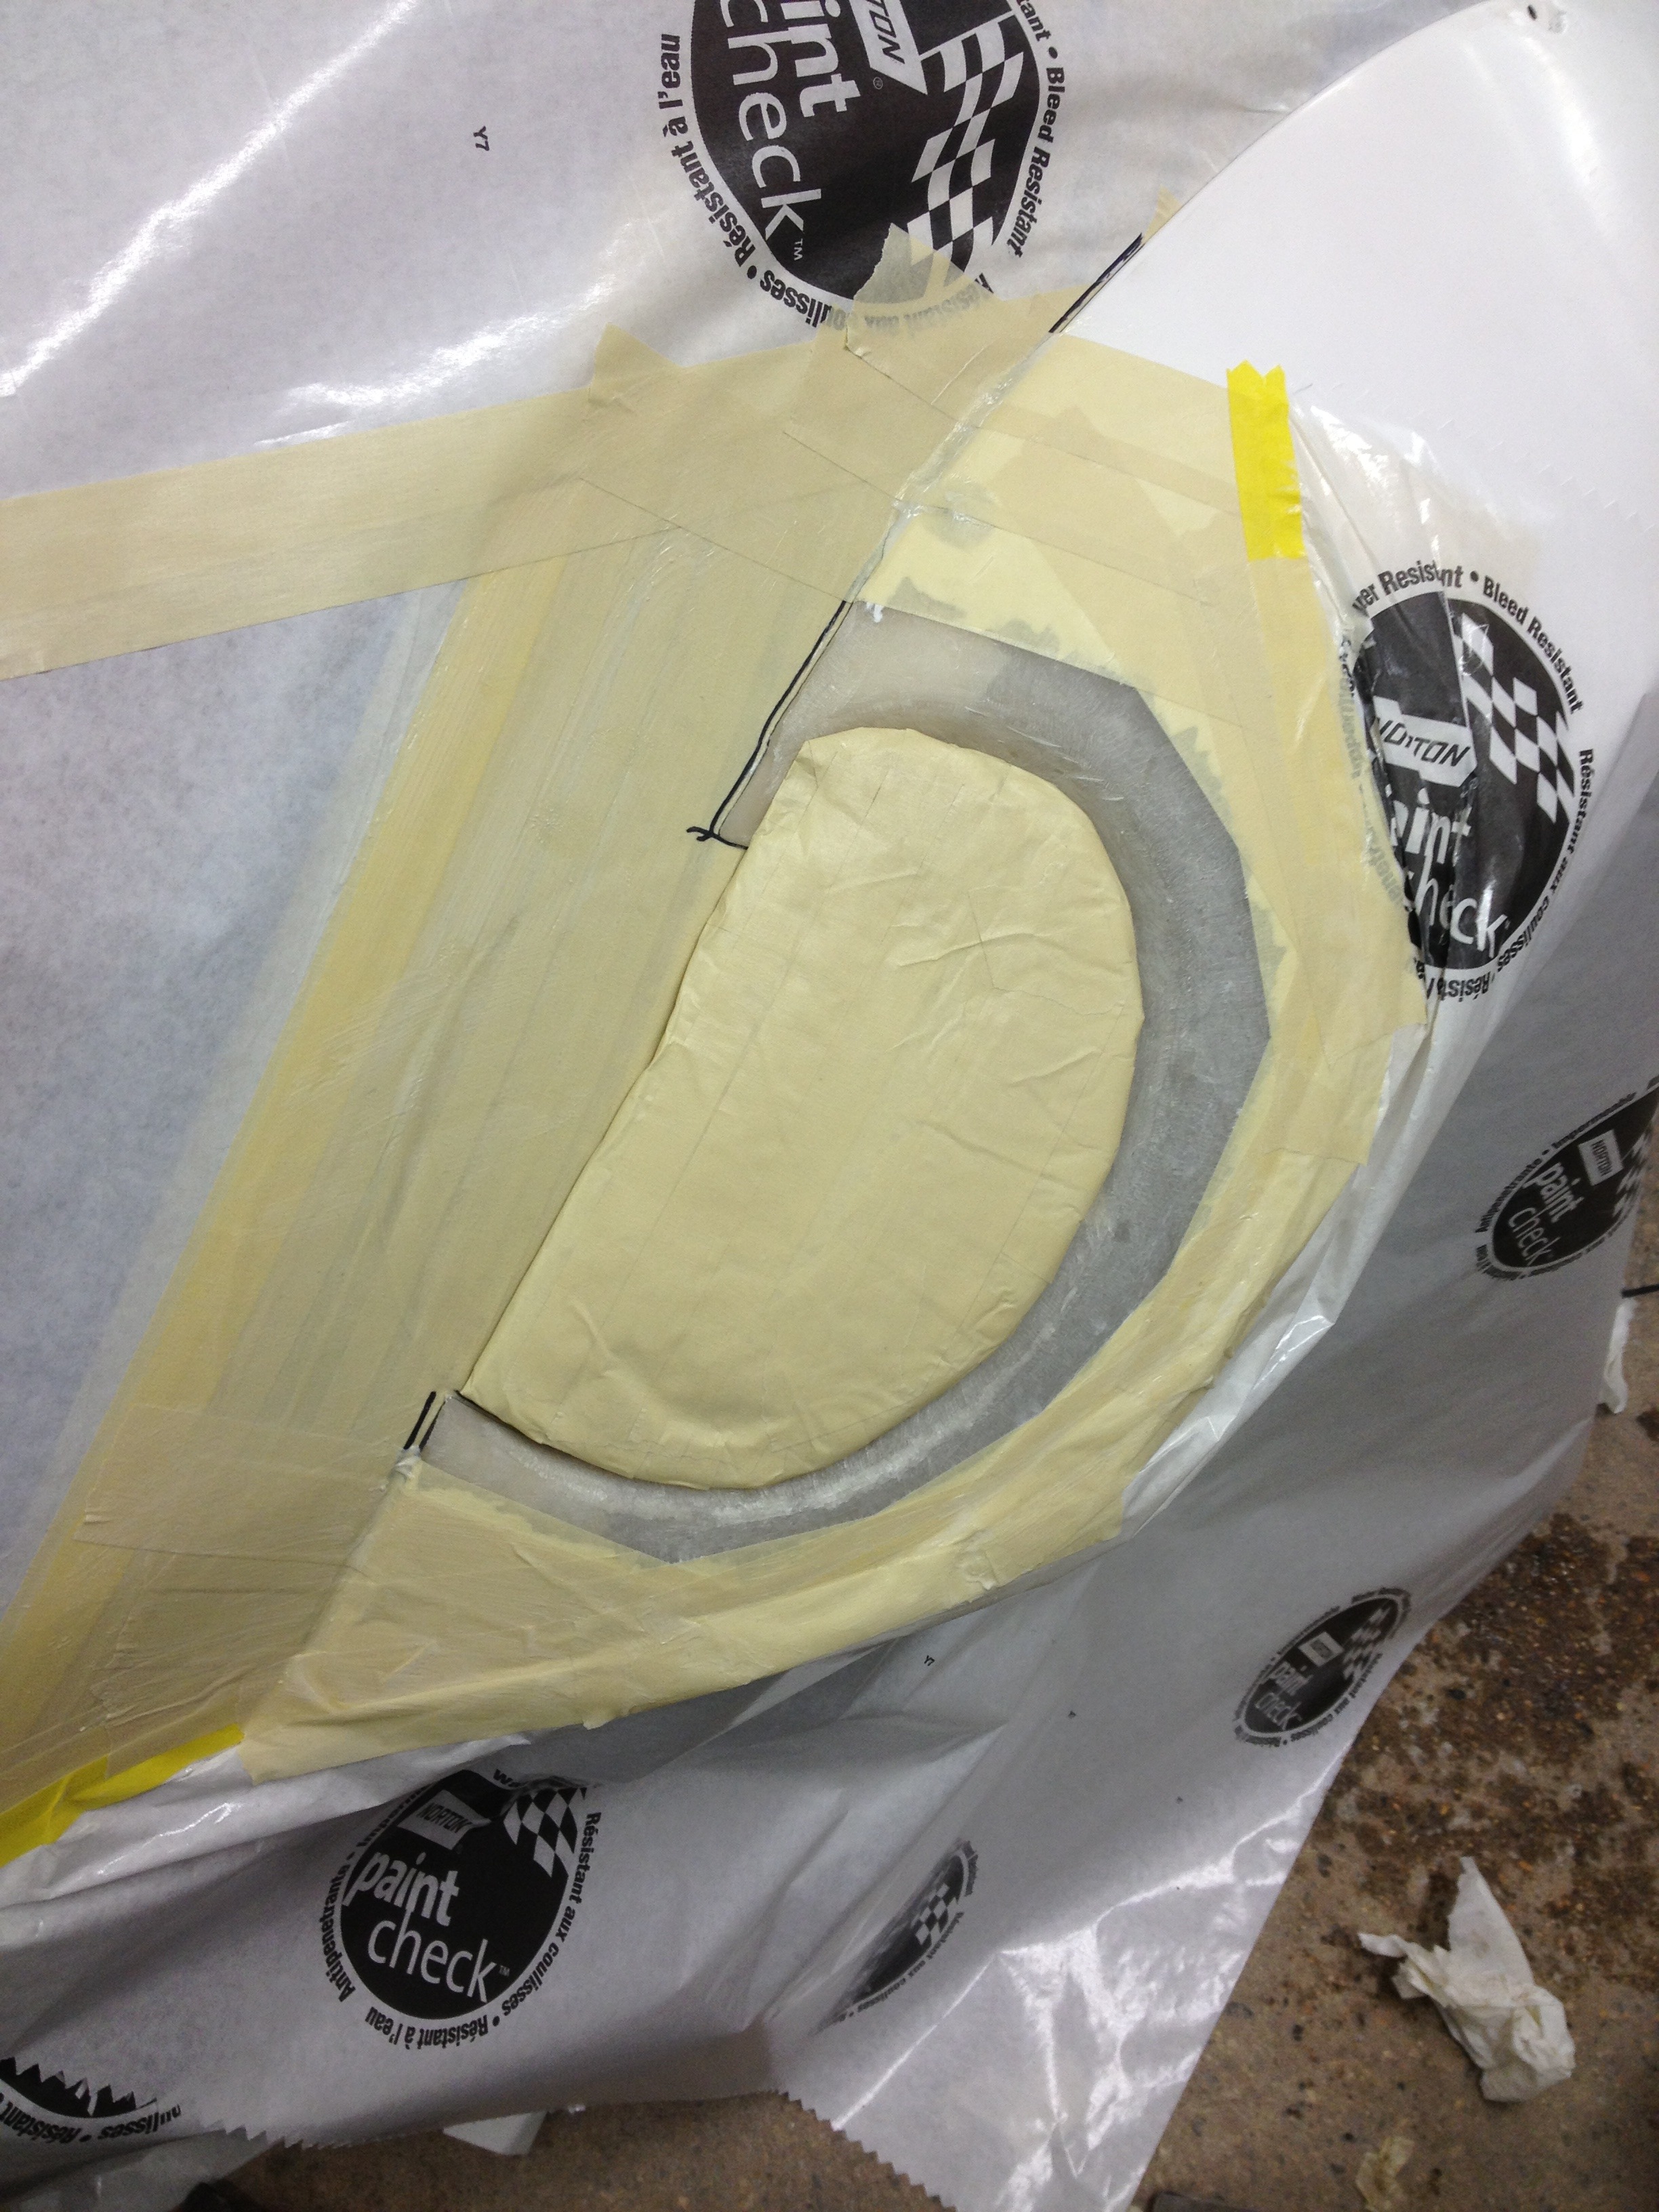
Put in foam "plug" to be removed after glass sets:
Fiberglass over top:
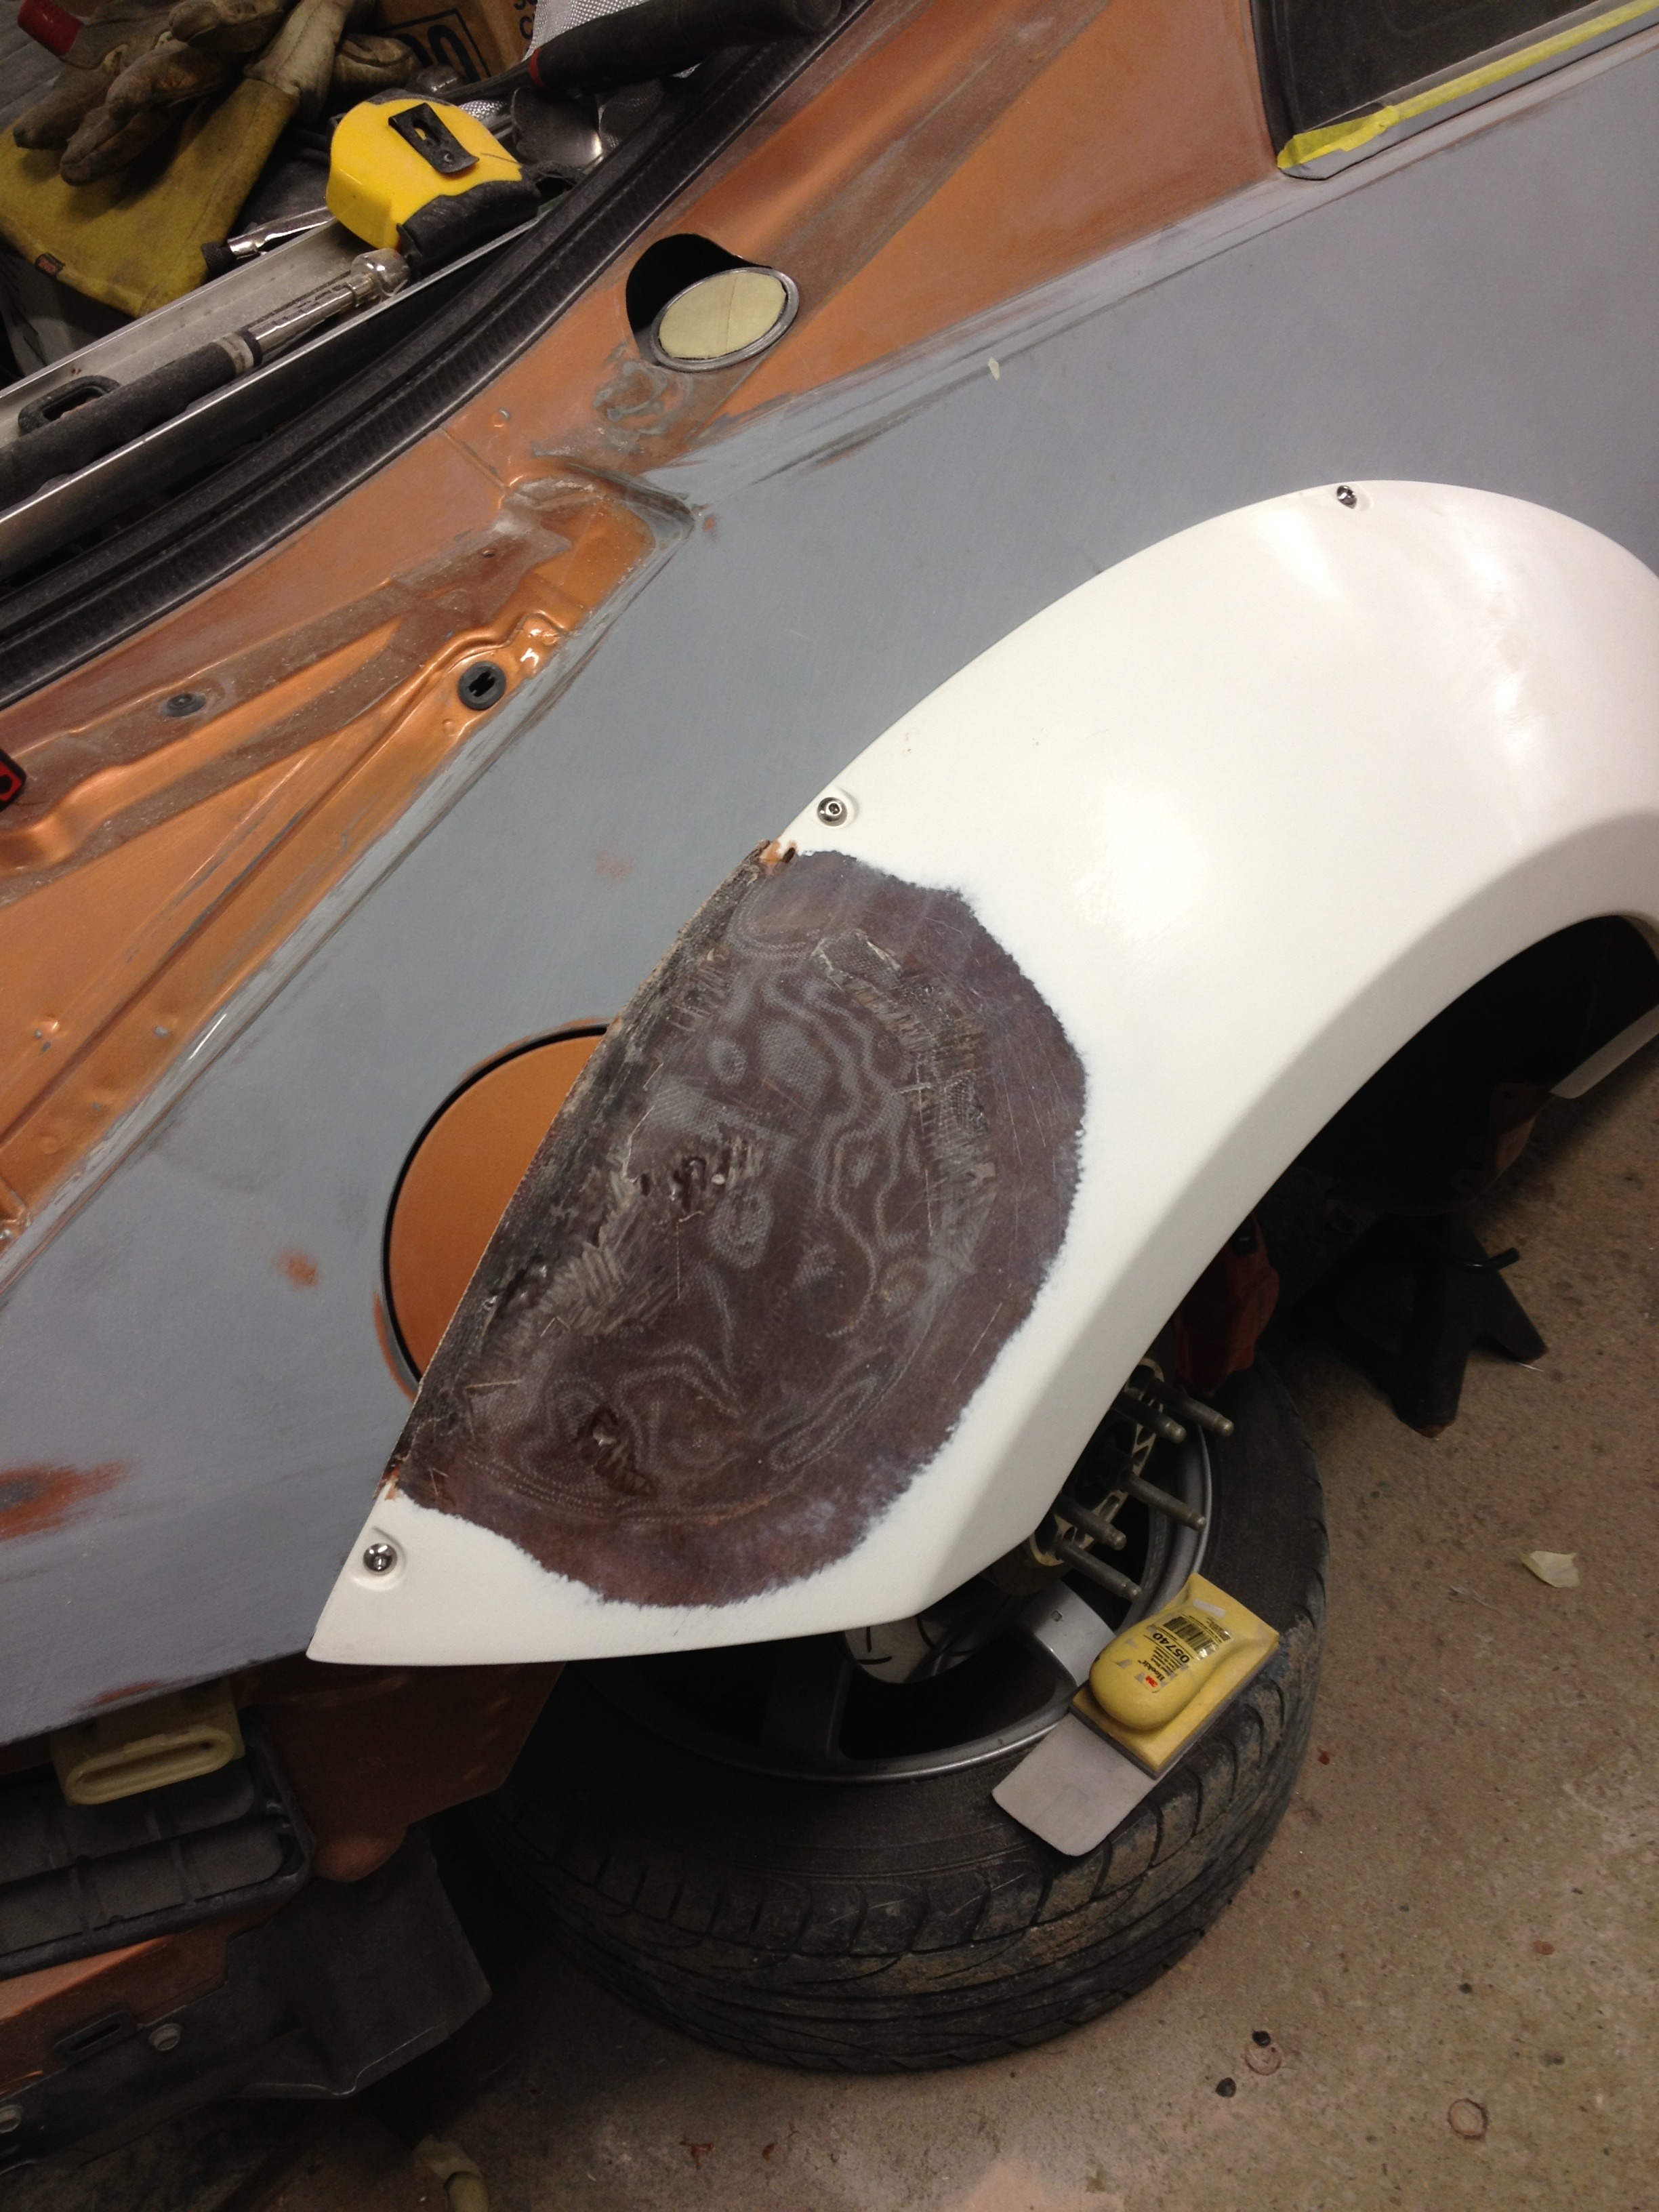
Once cured, remove foam 'plug' and prep back side for reinforcing:
I then reinforced the back side, no pics unfortunately. Then I block sanded the front side and added a bit more fiberglass to the edge that meets the body because it was a bit low:
Going to digress slightly and get into some of the audio upgrades..
I sold off some of the old audio gear and started a new high end audio build. I picked up all my audio from the good boys Ken, Nick and Dave at Brian Remier Audio on St. Mary's road.
I made the final call that "this car will never be racecar" and I started to do sound deadener for the audio build. By the end of it, there will probably be at least 100lbs of deadener in the car. I picked up a mix of deadener from Brian Reimer Audio:
- 2x Wirez Premium Bulk Kits (Butyl rubber w/ aluminum foil)
- 2x Wirez ultimate Kits (Butyl rubber w/ aluminum foil and a closed cell foam layer)
- A bunch of Blackhole America Tile for in sub enclosures and behind speakers.
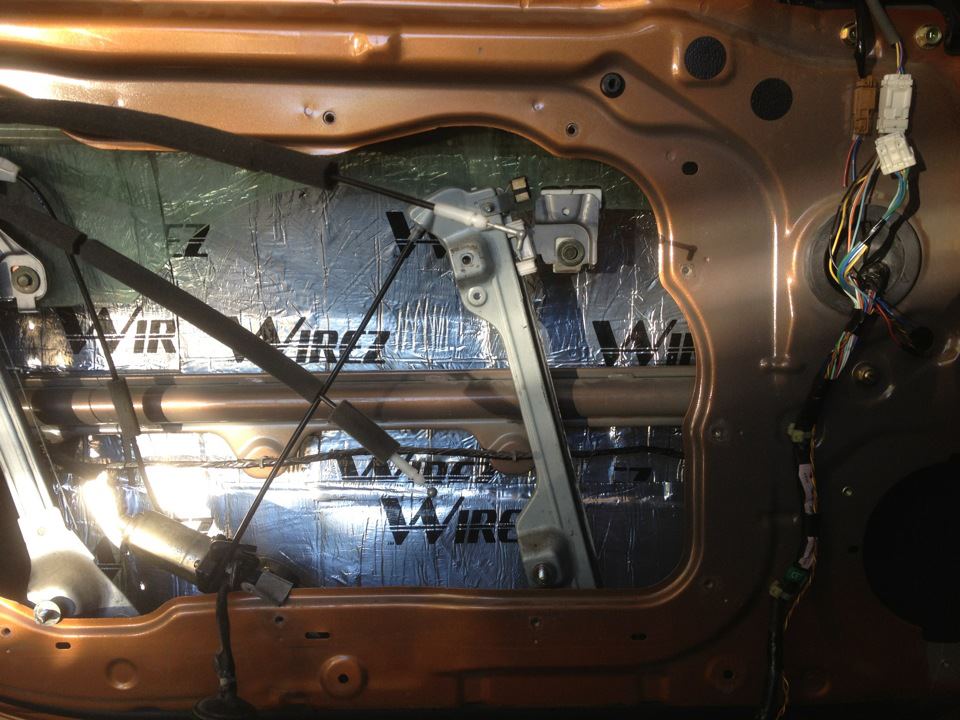
The sound deadening is still an ongoing project. I've got the trunk done with the Wirez Premium and Ultimate (in select spots). One door is done inner and outer door metal with a mix of Wirez Premium, Ultimate and Blackhole Tiles behind the speakers.
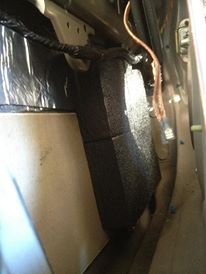
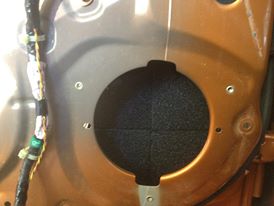
The next few pics are the inside (exterior door skin) of the drivers door. Factory sound deadener (brown), Wirez Premium Silver, and Blackhole Tiles (Thick black tile behind speaker opening).
I plan to do the floors, as well as the roof. Looking for a quite ride and great sound. It's too cold now to get proper adhesion so I'll wait until next summer to finish.
For the audio product, again I went to Brian Reimer Audio for the following:
Source Unit 1: Pioneer DEH-80PRS (May or may not upgrade to something more high end)
Source Unit 2: Samsung Galaxy Tab 3 8.0" (Bought this a couple weeks ago, might fiberglass it into the dash, not sure yet)
Processing: Audison bitONE digital processor
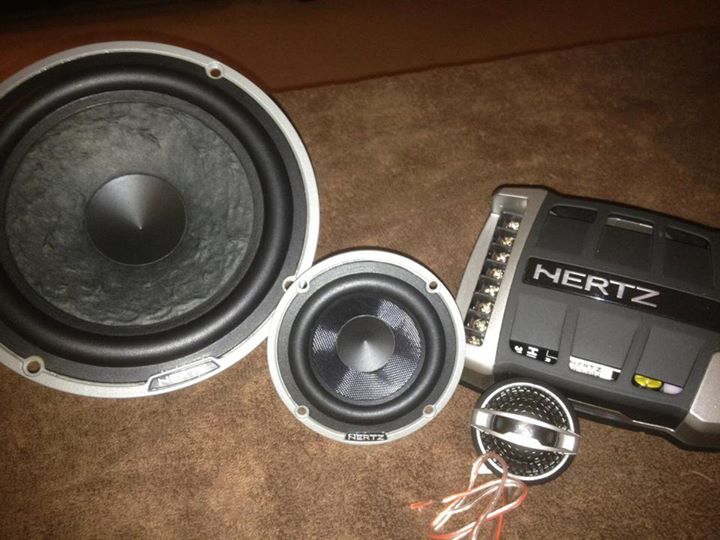
Front Stage: Hertz HSK163 running fully active
Rear Stage: None
Sub: 2x Hertz HX300D
Speaker Amps: 2x Hertz HDP4 Digital 4ch (have one, need second one still)
Sub Amps: 2x Hertz HDP1 Digital Sub Amp
Interconnects: Streetwires ZN9
Some of the gear:
The audio list may change slightly, I love the Hertz stuff, but I've been offered some DLS stuff, or some Focal stuff... So we'll see what spring 2016 brings. Most people don't know, but I was an audio installer/fabricator for several years, so when I do finally finish this system it will be pretty nice.
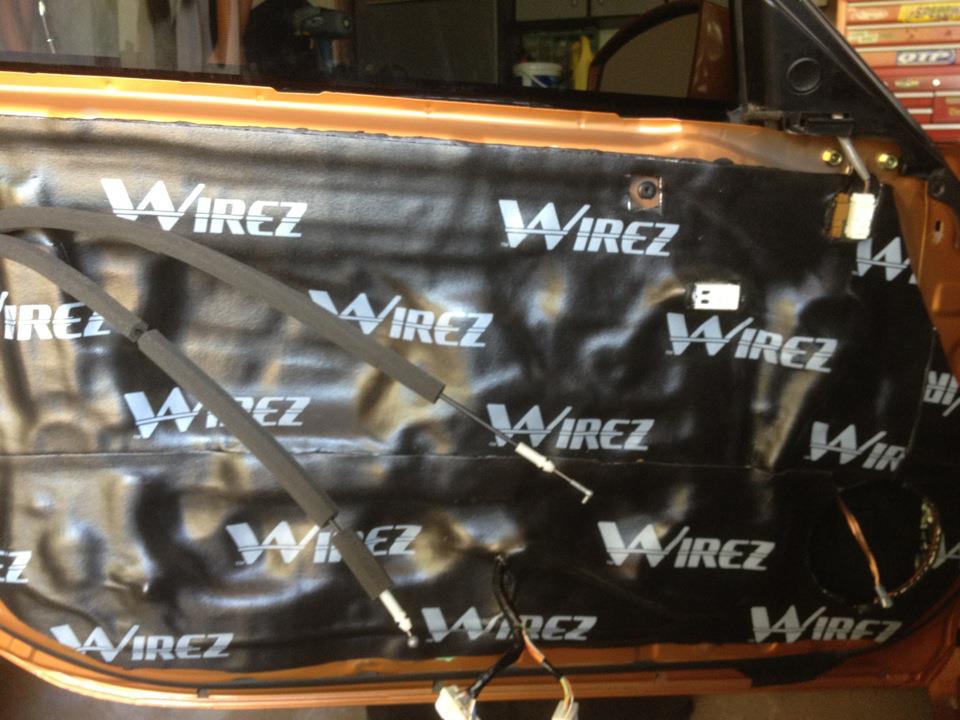
his is the inside door sheet metal covered in Wirez Premium. It's a butyl rubber base with aluminum foil like most sound deadeners, but it also has a layer of closed cell foam (the black part).
How this works is the butyl rubber and foil base adds mass to the metal panel. By adding mass to the panel you are lowering the resonant frequency of that panel and deadening/absorbing lower frequency noise. This will help reduce panel vibrations caused by bass, but will do little to reduce road noise in the car.
The closed cell foam acts as a physical isolator between two different panels and reduces the transfer of vibration from one panel to the next. It also absorbs a slight amount of higher frequencies, but its main purpose is to act as a vibration isolator.
The ultimate sound deadening is actually a 4 step process (or more) on doors.
Earlier in the summer of 2012 I think it was I ordered a body kit (bumpers, side skirts, wing). The kit has dual exhaust cutouts in the rear bumper like the stock 350Z, but being a fiberglass bumper I could not simple do a bumper tuck and keep my Agency Power Exhaust. I contemplated shaving the other exhaust cutout in the bumper, or converting my Agency Power to a dual. At the end of the day, I decided to sell the exhaust and buy a dual. I just preferred the symmetry of that rear bumper with a dual exhaust.
About half way through the winter I sold the Agency Power exhaust. It was a beautiful exhaust, but just too loud and the wrong style for the direction I'm taking the car. I wanted to go back to something a bit more modest. I went out to where I was storing the car, froze my ***** off, and removed the exhaust from the car mid winter. At least the car gets stored inside, so I didn't have the snow and wind to deal with.
The search for an exhaust was definitely another one of my many hours of research OCD things and definitely a hard decision. Huge thanks to Dave @ Speed Factor in Winnipeg for the suggestions, help and legwork he did trying to see if he could get the various exhausts I wanted.
I like having something that is different, rare and that you won't see very often, but still something that is high quality. While demanding those qualities, I also wanted something more modest volume and looks wise. So, as you can see, I'm a picky SOB..
A couple of the options I considered were:
- Amuse RS-Silent full titanium. Not the full dual, but the single that splits into a dual muffler. I prefer the sound of the single into dual over the full true dual. The holdback on this exhaust was the cost. IIRC it was well over $3k, may have even been closer to $5k. I can't remember. Also, as most of you know I like the car low, the exhaust would have gotten **** kicked.
- 5 Zigen Pro Racer SP. Not the quietest, but a beautiful exhaust with a great sound. Now the problem came in finding one. Through my various channels I was unable to get my hands on one. Rumor has it that it has been discontinued, but I never did get confirmation from the manufacturer.
- Motordyne true dual Harakiri, swap to rolled, burnt tips. Beautiful exhaust made by the geniuses/artists at Motordyne. Unfortunately after talking directly to Motordyne I found out it was discontinued and we were unable to pull any strings to get a one-off made.
After getting let down on the 5 Zignen I set my sights to the Motordyne. After getting let down on the Motordyne I was really getting discouraged in the exhaust search. I looked at every single 350Z exhaust I could find online. Like I said, I'm a picky SOB.
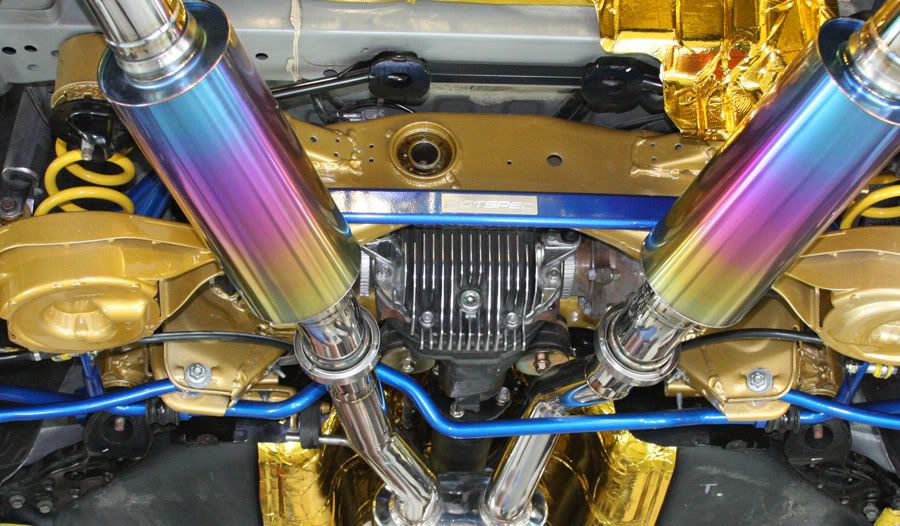
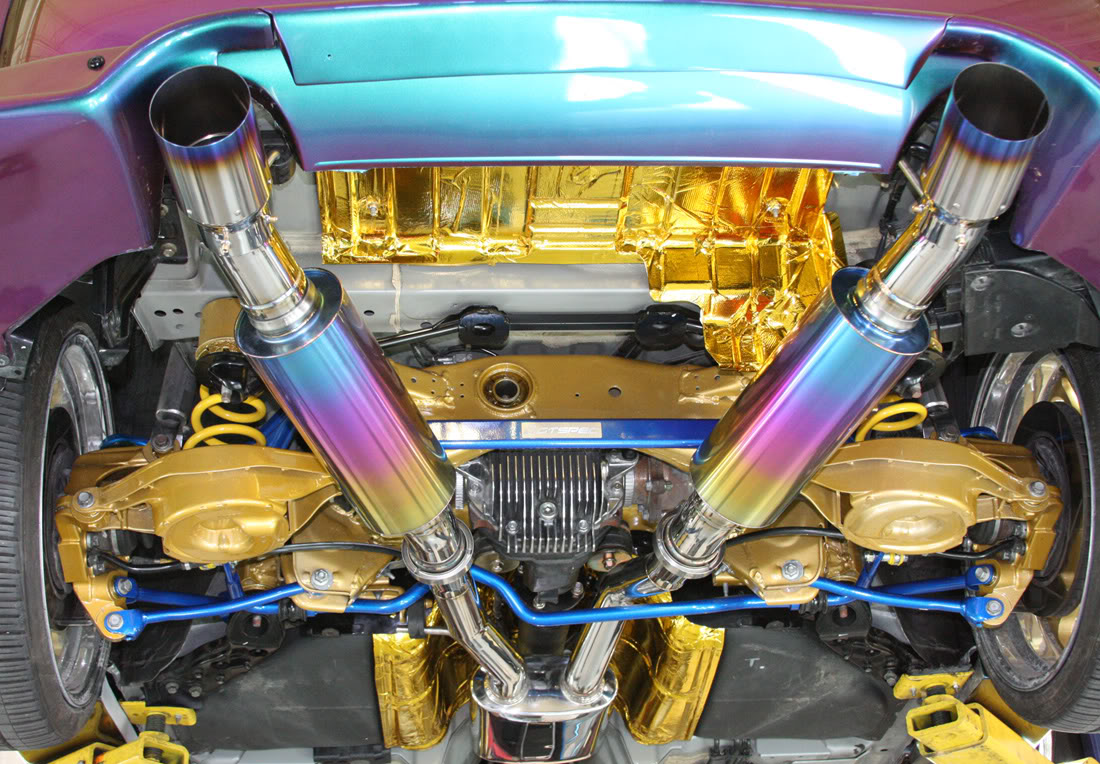
I finally found an exhaust online that interested me. I could only ever find ONE car with pics of it on though. I contacted the North American Distributor for that brand and sure enough that car was the only car in the world with that exhaust. Cool, that's definitely a rare piece! Being the picky SOB that I am though, there were a couple things on that exhaust that would not work for me.
After about a month of back and forth between myself, my contact, the distributor and the manufacturer I finally had an exhaust ordered. But not just any exhaust, they were going to produce a one off, prototype exhaust, built with the changes I wanted.
Now, while I will have a one-of-one in the world exhaust (yay!! ), there is the understanding that this exhaust may go into full production and may end up being a ton less rare. Either way, I'm ecstatic to have a one of one exhaust for now, and still have the first prototype of that exhaust if it does in fact make it to production and retail.
As for hints on what it is and what brand, my lips are sealed until it gets here at the earliest. Maybe as long as until the car gets back on the road. What I can say is, the last update I had is that the exhaust is on a container on its way to North America. I'm excited to finally see the exhaust I've waited about 6 months for!
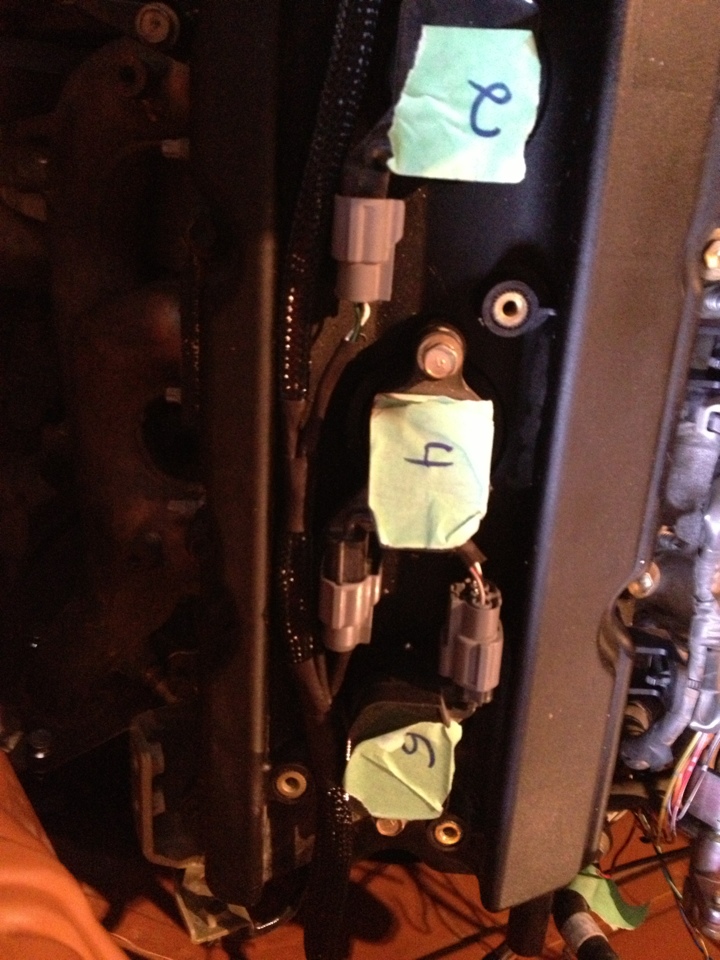
For those that don't know, I rewired the car from the firewall forward to tuck and hide all the wiring. I've actually got wiring running through the front frame rails at points to keep it out of the wheel wells like most guys do.
The motor wiring harness pretty much done!!! Just need to figure out where I'm putting the EVAP solenoid valve and finish the two wires there and put ring terminals on the two coil pack harness grounds.
What I've done is as tucked and hidden of a wire harness as possible. It's been completely reworked from the firewall forward. I probably have 15-20 hours into it or more. Once installed, very very little will be visible. 99% of 350Z/G35 wire tucks still have the large harness showing where it passes through the firewall, I've completely eliminated that spot and am using three different, hidden spots.
Really doesn't look like much now, but it's just one of the many small pieces to the larger puzzle.
Here is how the wiring sits nice and tight to the coil packs:
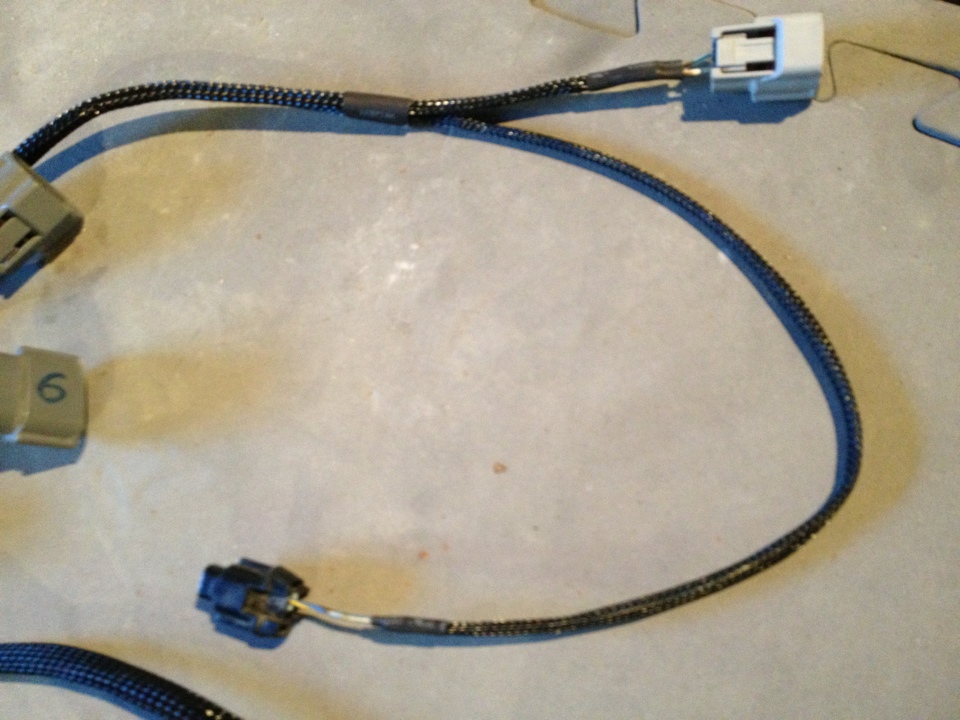
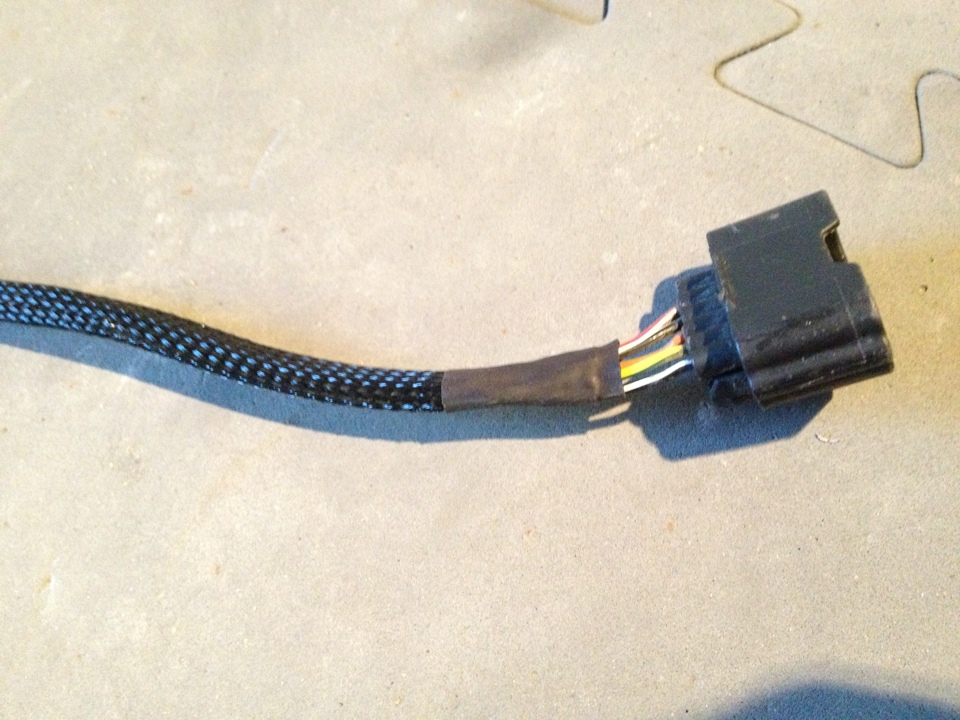
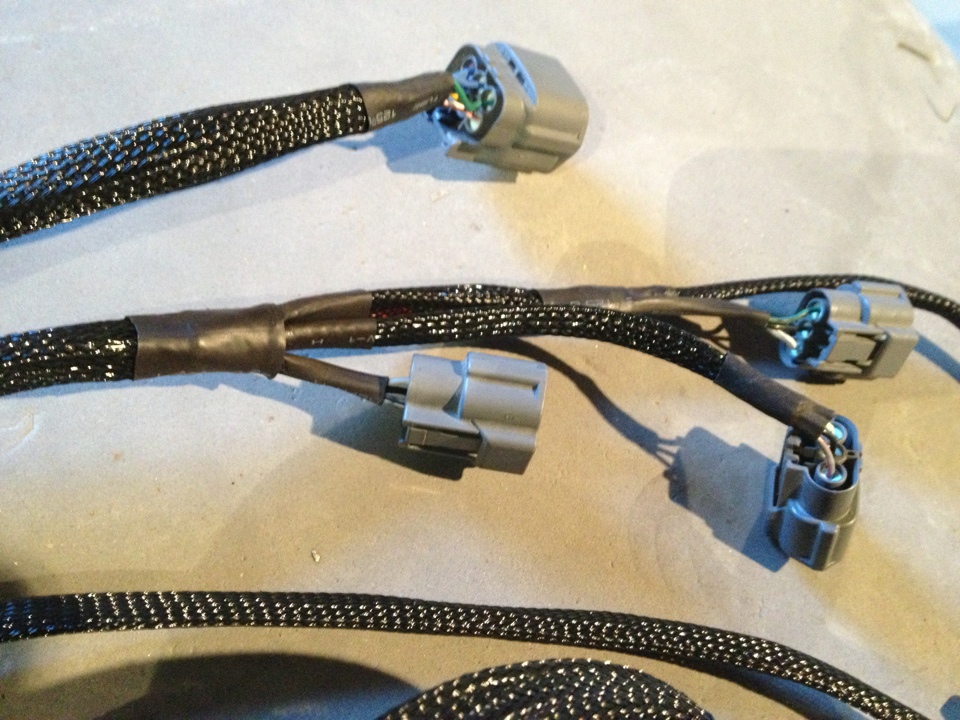
Full upper harnesses:
AC & Driver's side cam solenoid valve harness:
MAF sensor harness:
Driver's side coil packs and throttle body harnesses:
Sub'd for build updates. The finished product looks awesome, and I'll be anxious to see more of how it came about. Props for doing some truly unique things like the relocated gas cap, and hood with built-in eyelids. Canada is proving to have quite the car culture! Keep up the good work, bro!
Thanks for adding, I keep hoping the spoiler details get revealed. But really every post is full of awesome. I have little to add without sounding like a d bag or a 12 year old girl at a T Swift concert, but im a frequent visitor to your build thread.
Thanks for adding, I keep hoping the spoiler details get revealed. But really every post is full of awesome. I have little to add without sounding like a d bag or a 12 year old girl at a T Swift concert, but im a frequent visitor to your build thread.
Thanks! I'll definitely get to the spoiler how-to shortly!


 ), there is the understanding that this exhaust may go into full production and may end up being a ton less rare. Either way, I'm ecstatic to have a one of one exhaust for now, and still have the first prototype of that exhaust if it does in fact make it to production and retail.