When you click on links to various merchants on this site and make a purchase, this can result in this site earning a commission. Affiliate programs and affiliations include, but are not limited to, the eBay Partner Network.
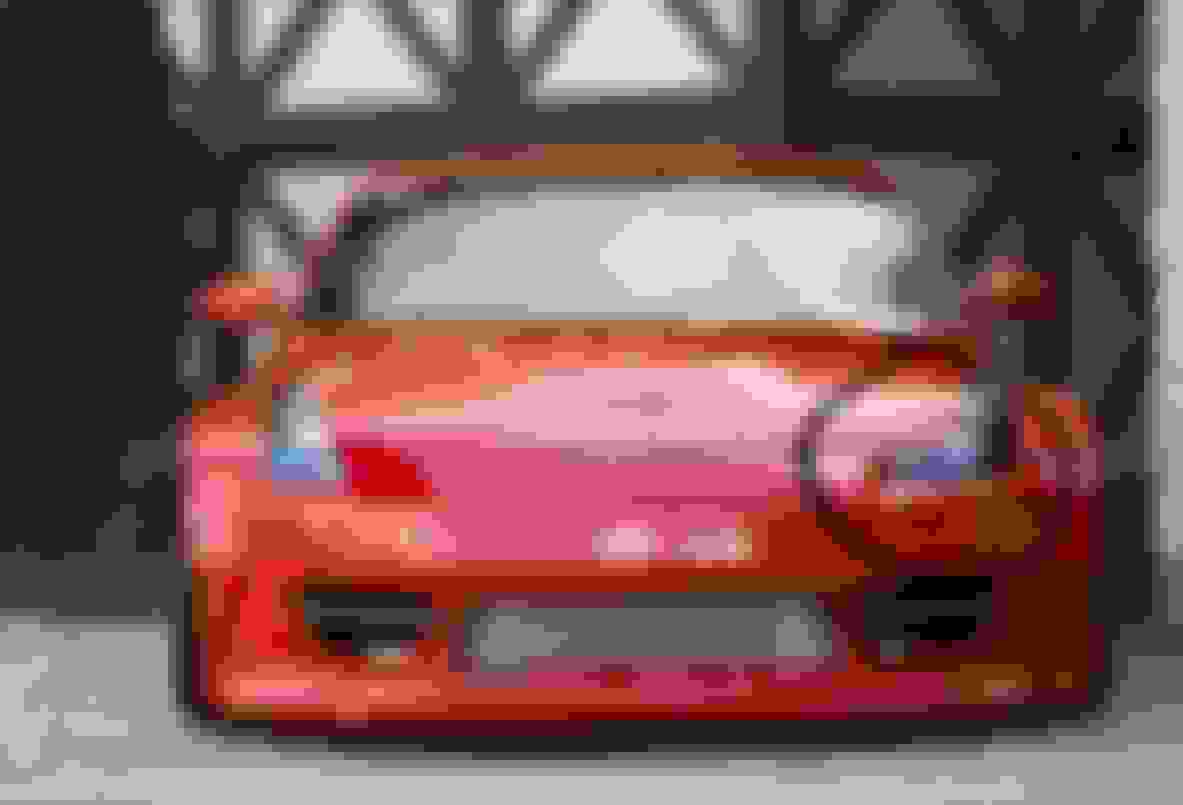
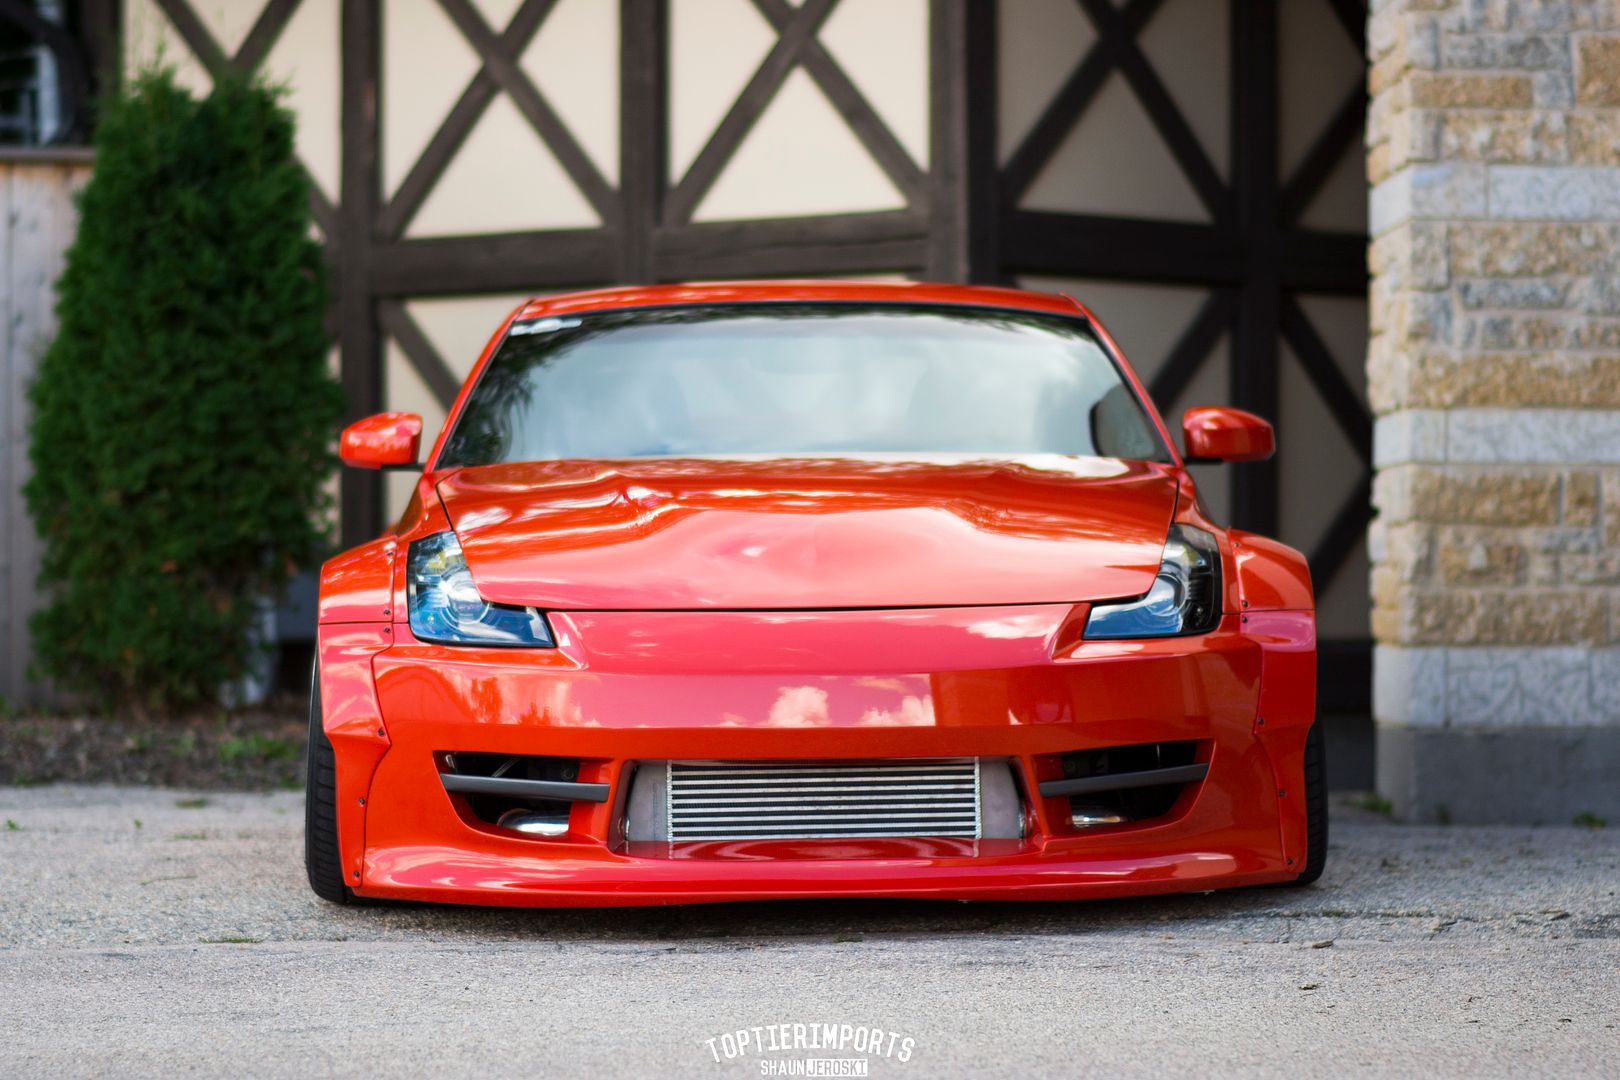
Here is a part of my build that I�ve never seen done on a Z before, molded on eyelids.
I loved the look of eyelids, but hated the gap that was left between the hood and the eyelid.
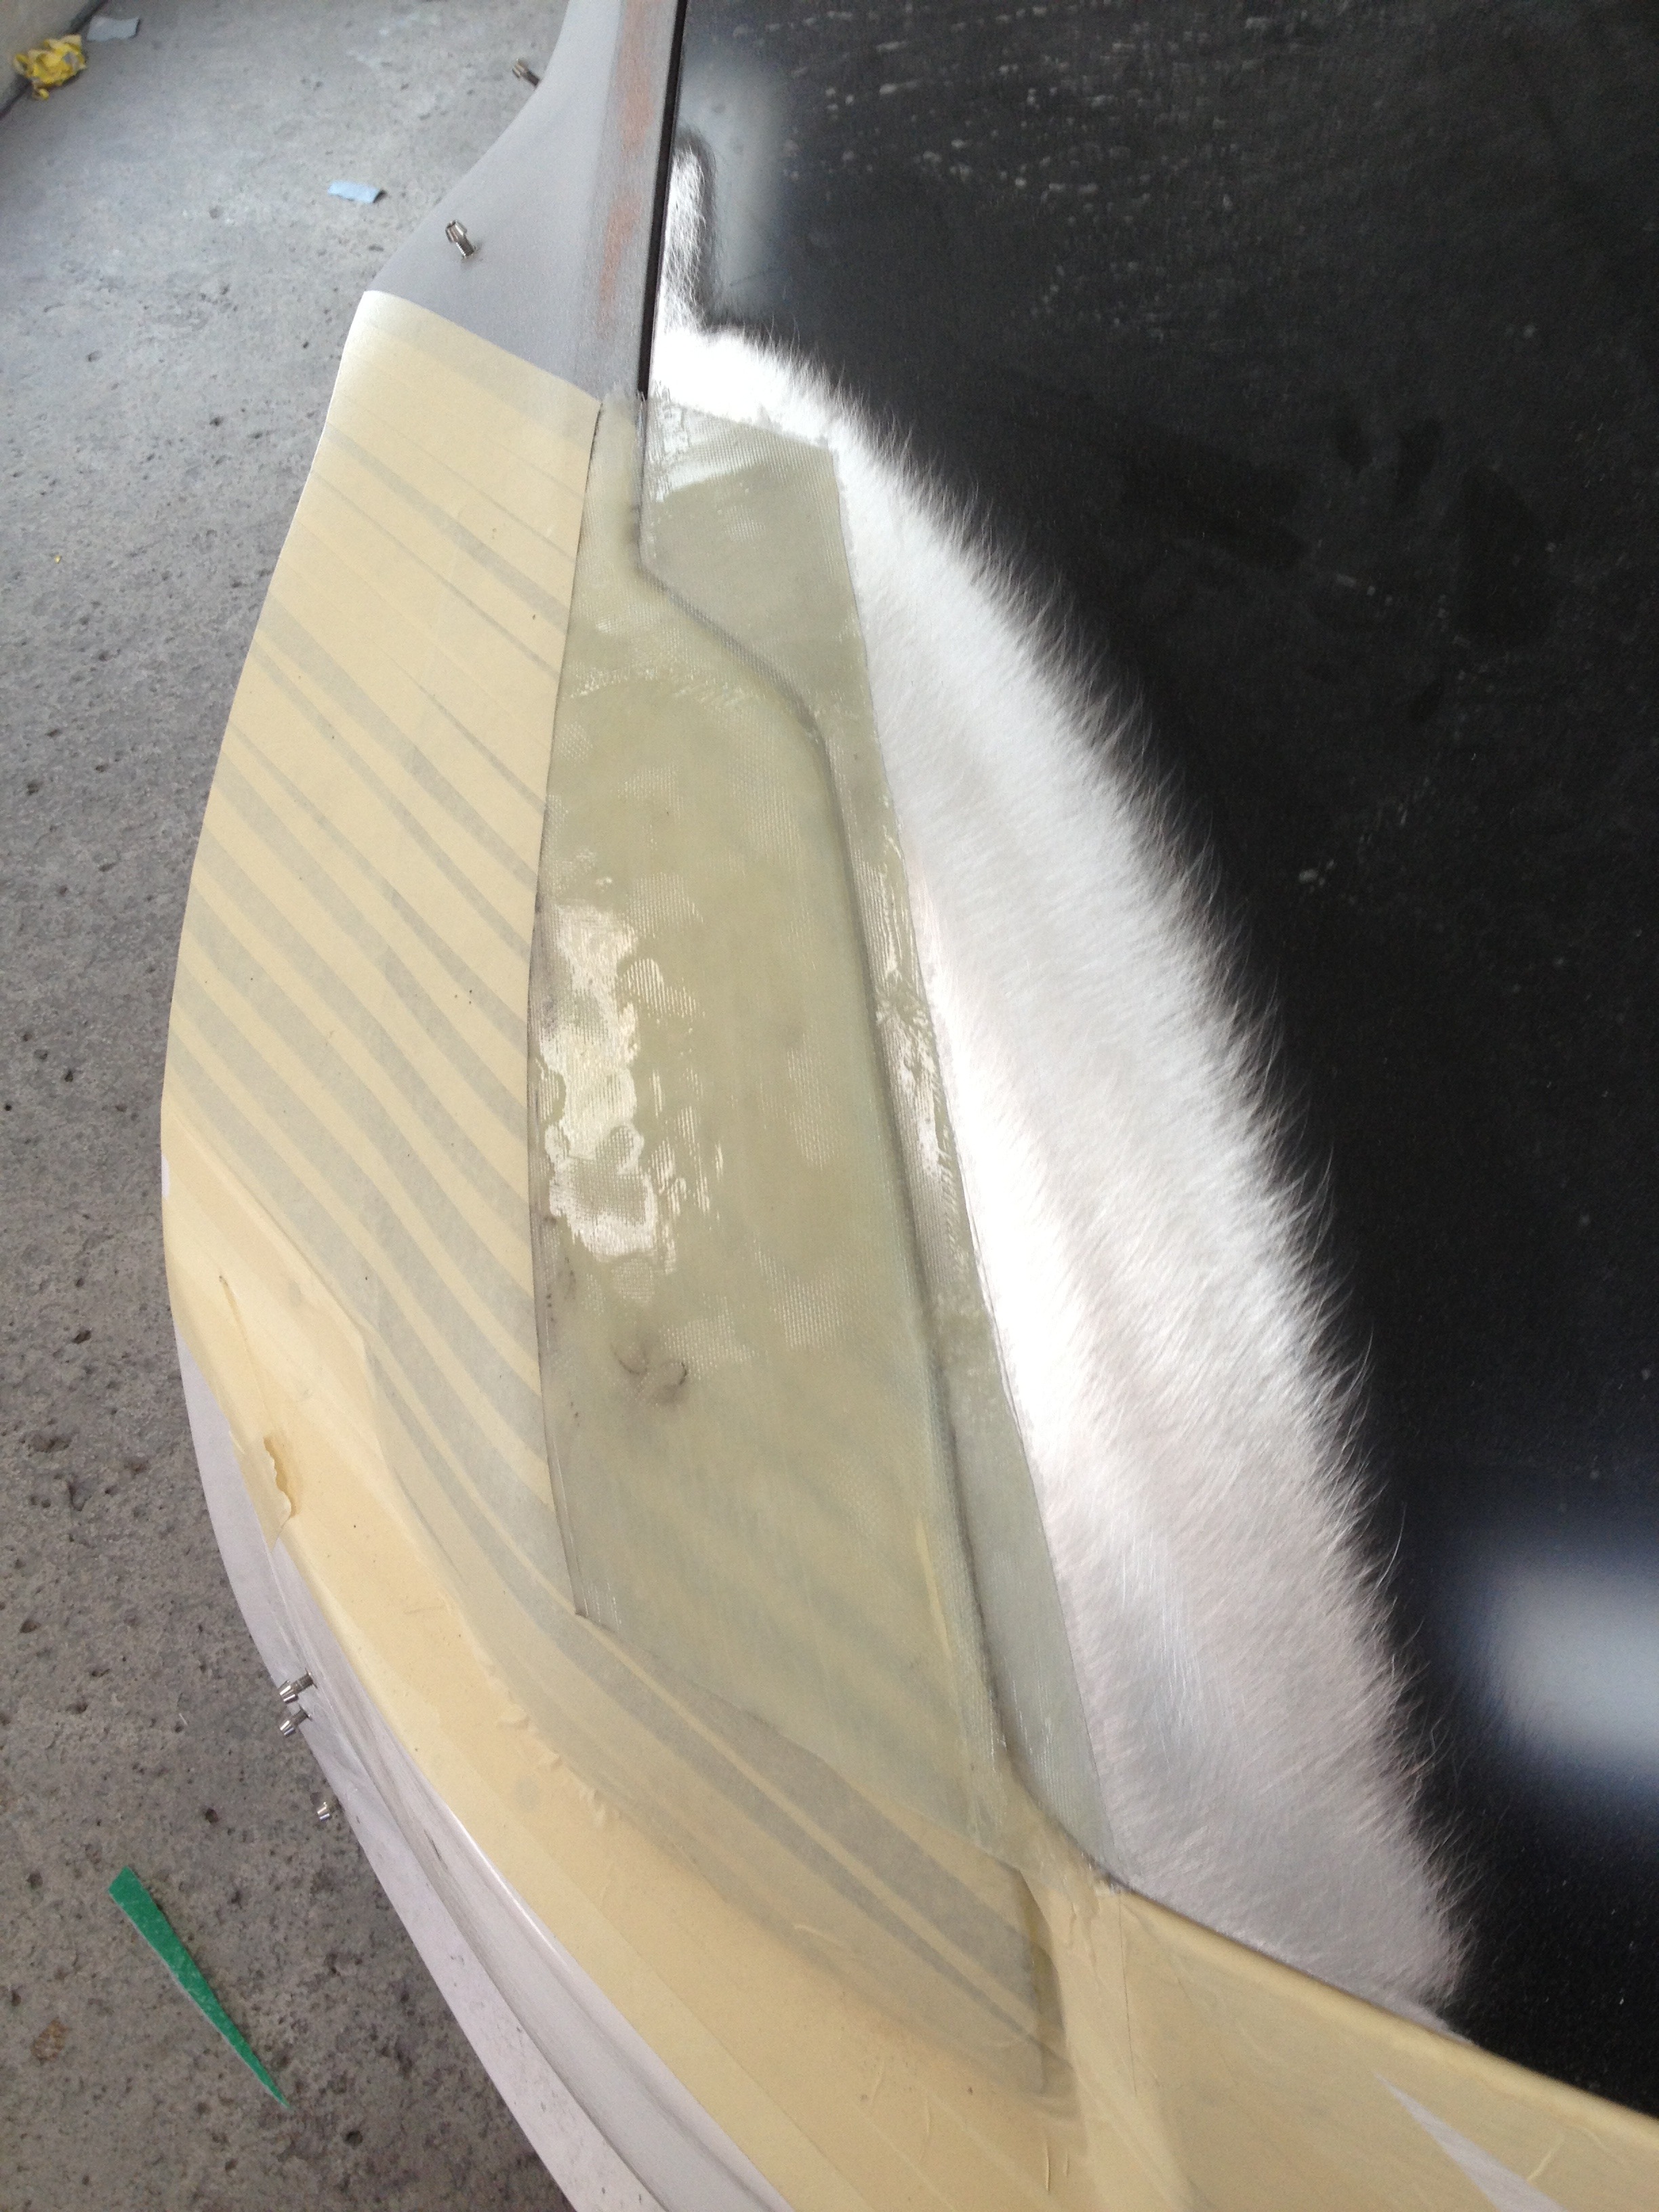
The eyelids were made from scratch and bonded to the hood. They are made of West Systems epoxy resin and fiberglass matt. Before making the hood was etched with West Systems aluminum etch kit. This resin is made to bond to aluminum.
I feel that with the shape of the hood, and the way these are made that the fiberglass is actually considerably stronger than if I would have used a piece of aluminum and welded it. There is also less filler required this way than if done with aluminum.
The fiberglass is roughly 12-16 layers of cloth, I can�t remember. 6-8 layers on the top side of the hood, and 6-8 on the bottom side. Doing this way sandwiches the hood between the fiberglass making for a super strong joint.
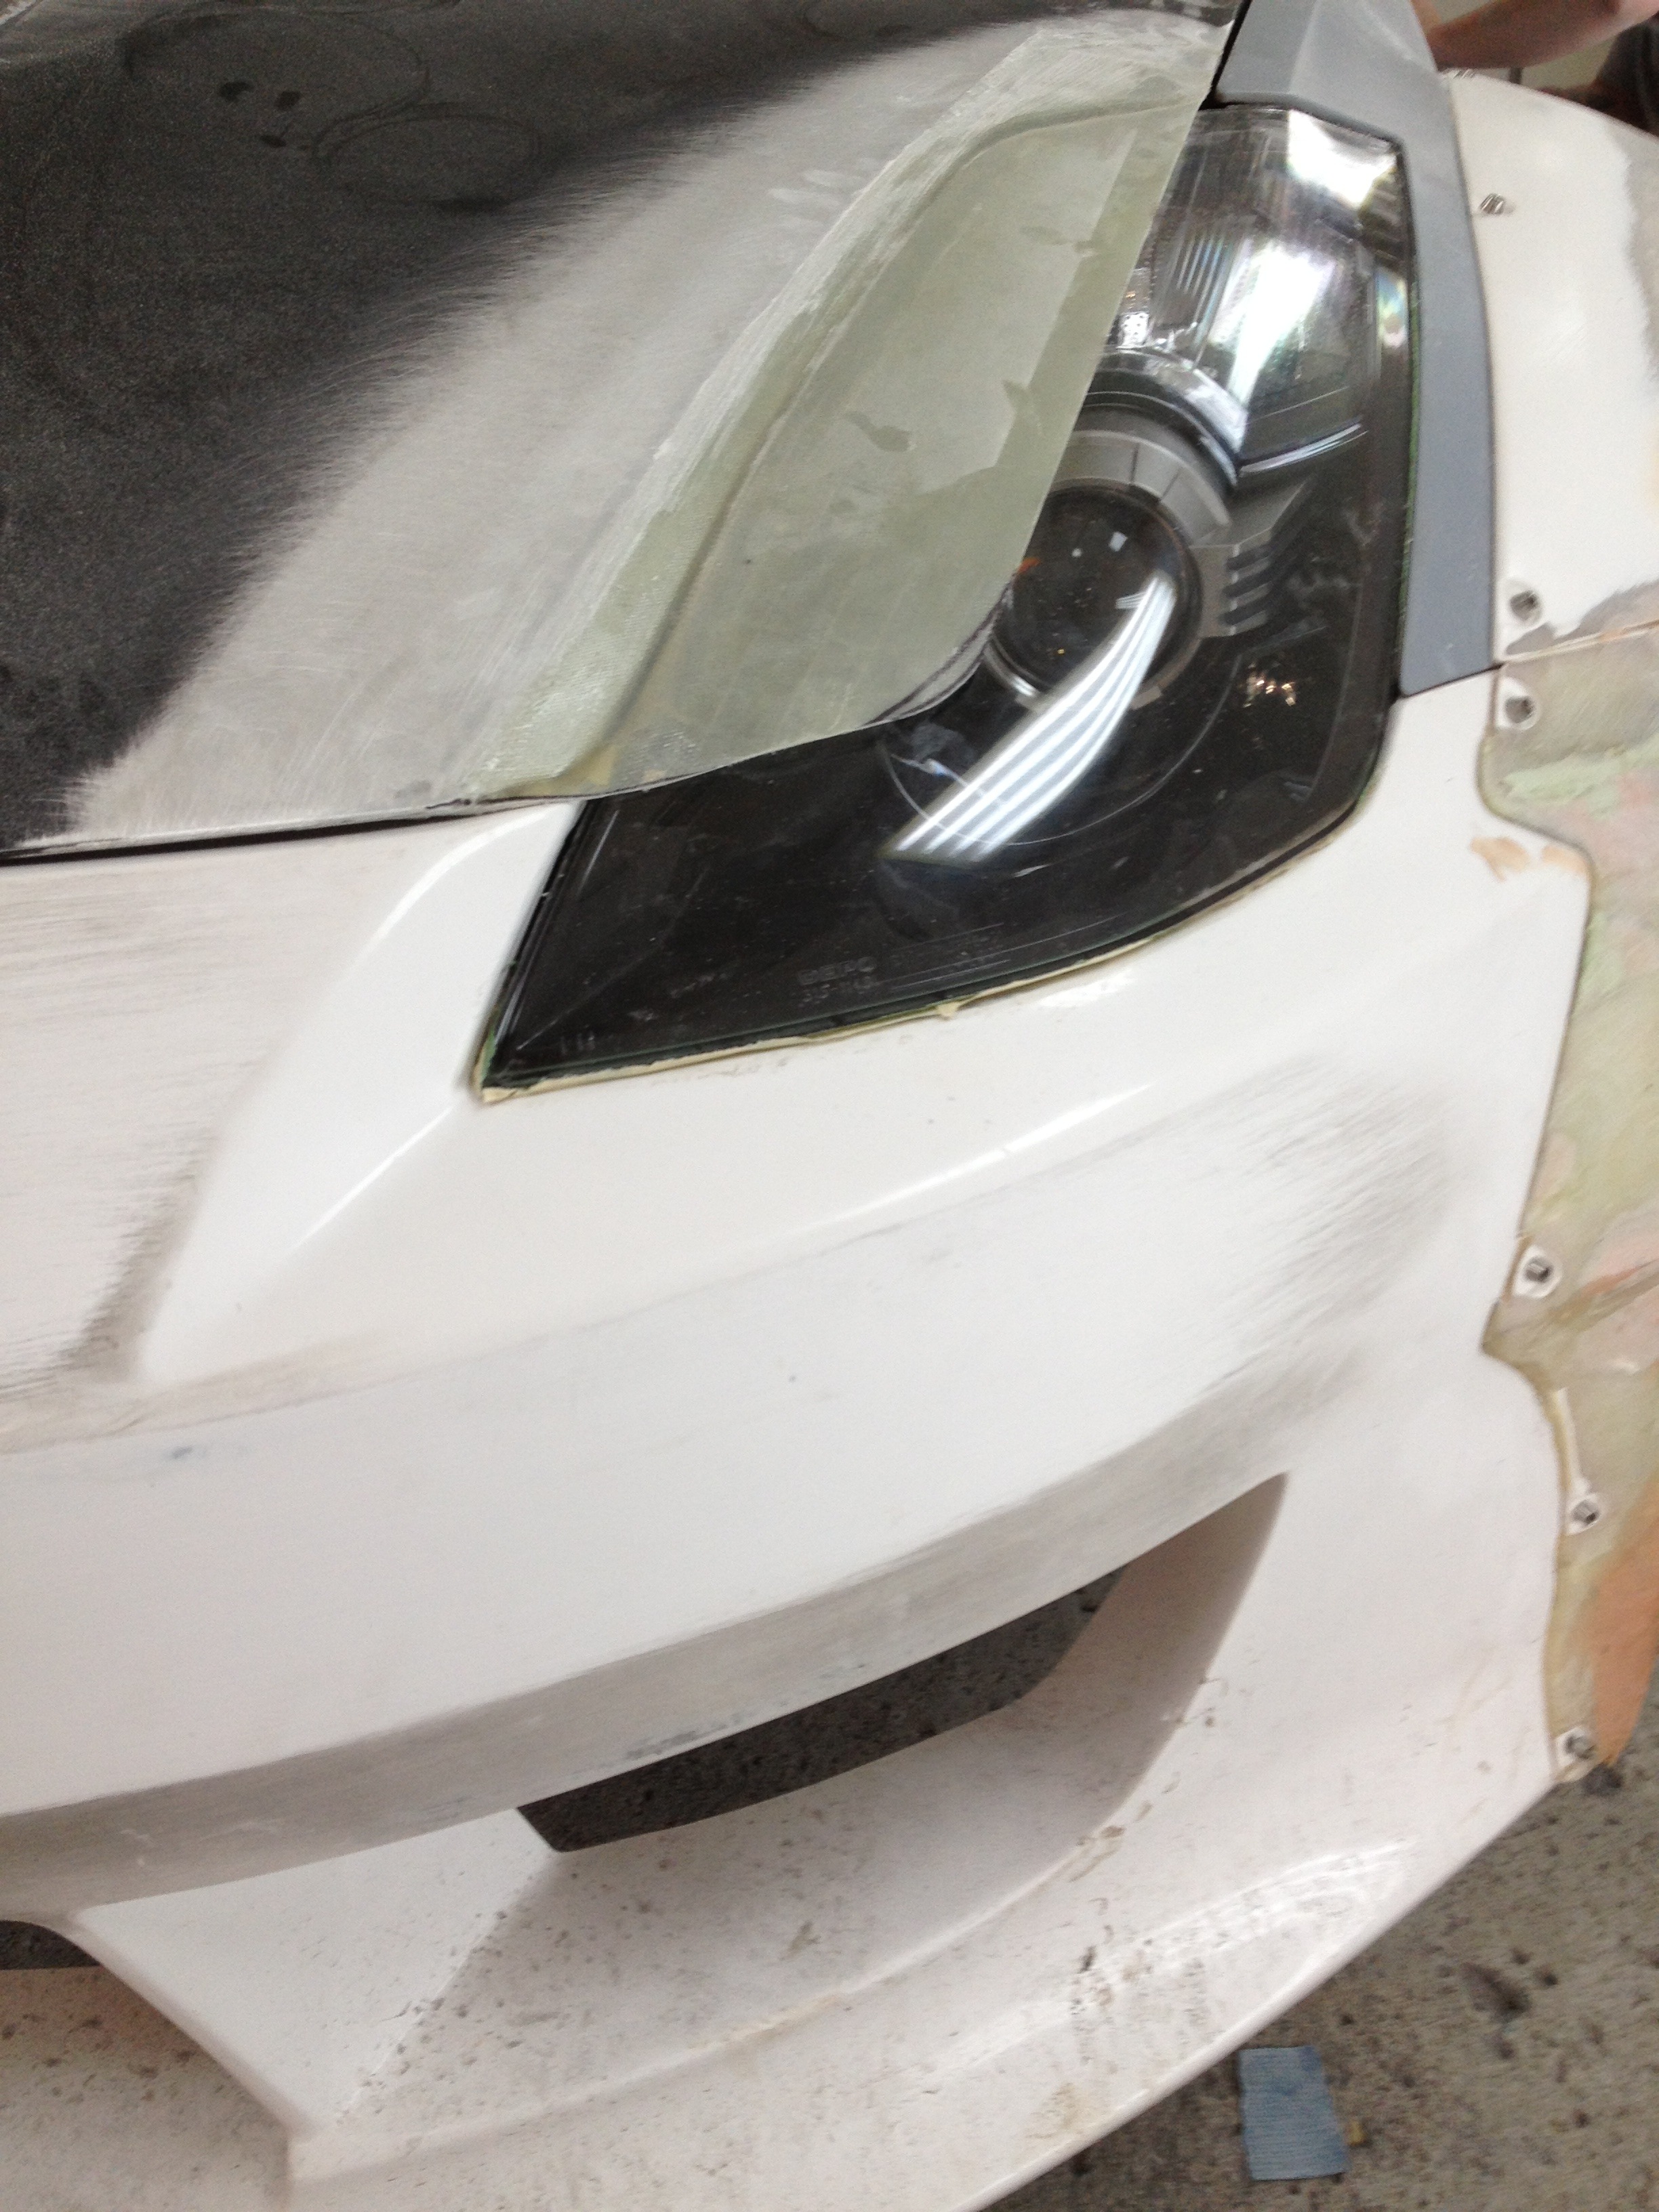
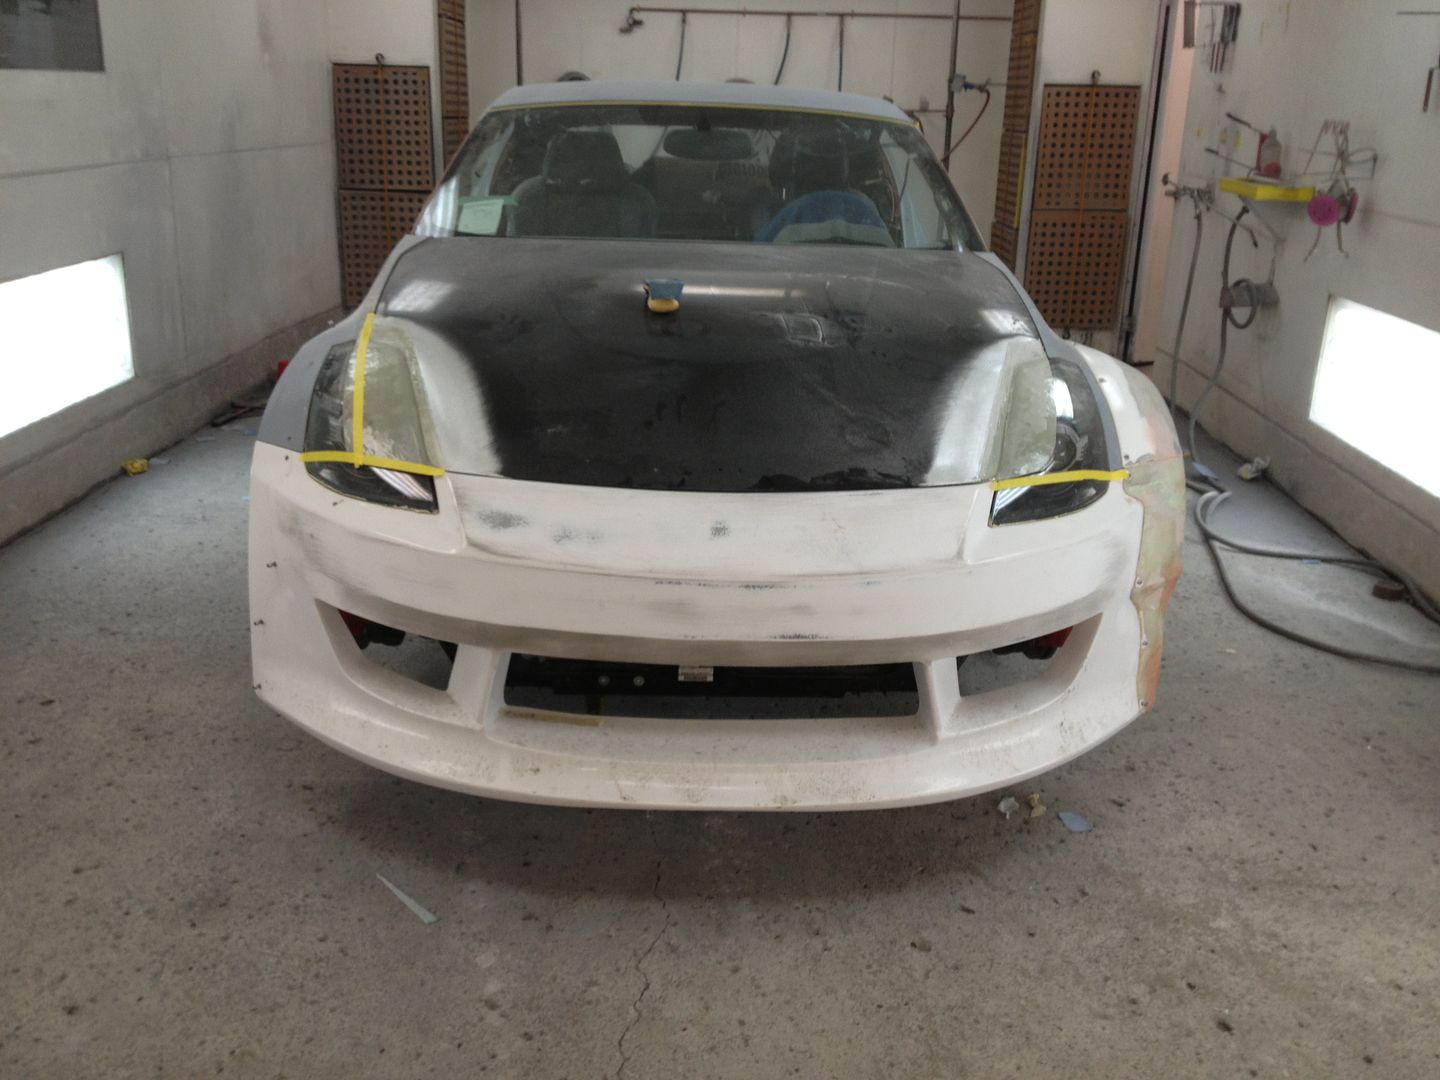
The eyelids are roughly 3/16� thick and sit about 3/16� above the headlight. Fitment at the back is tight, but it fits. It takes a bit of test fitting and fooling around, but it all fits.
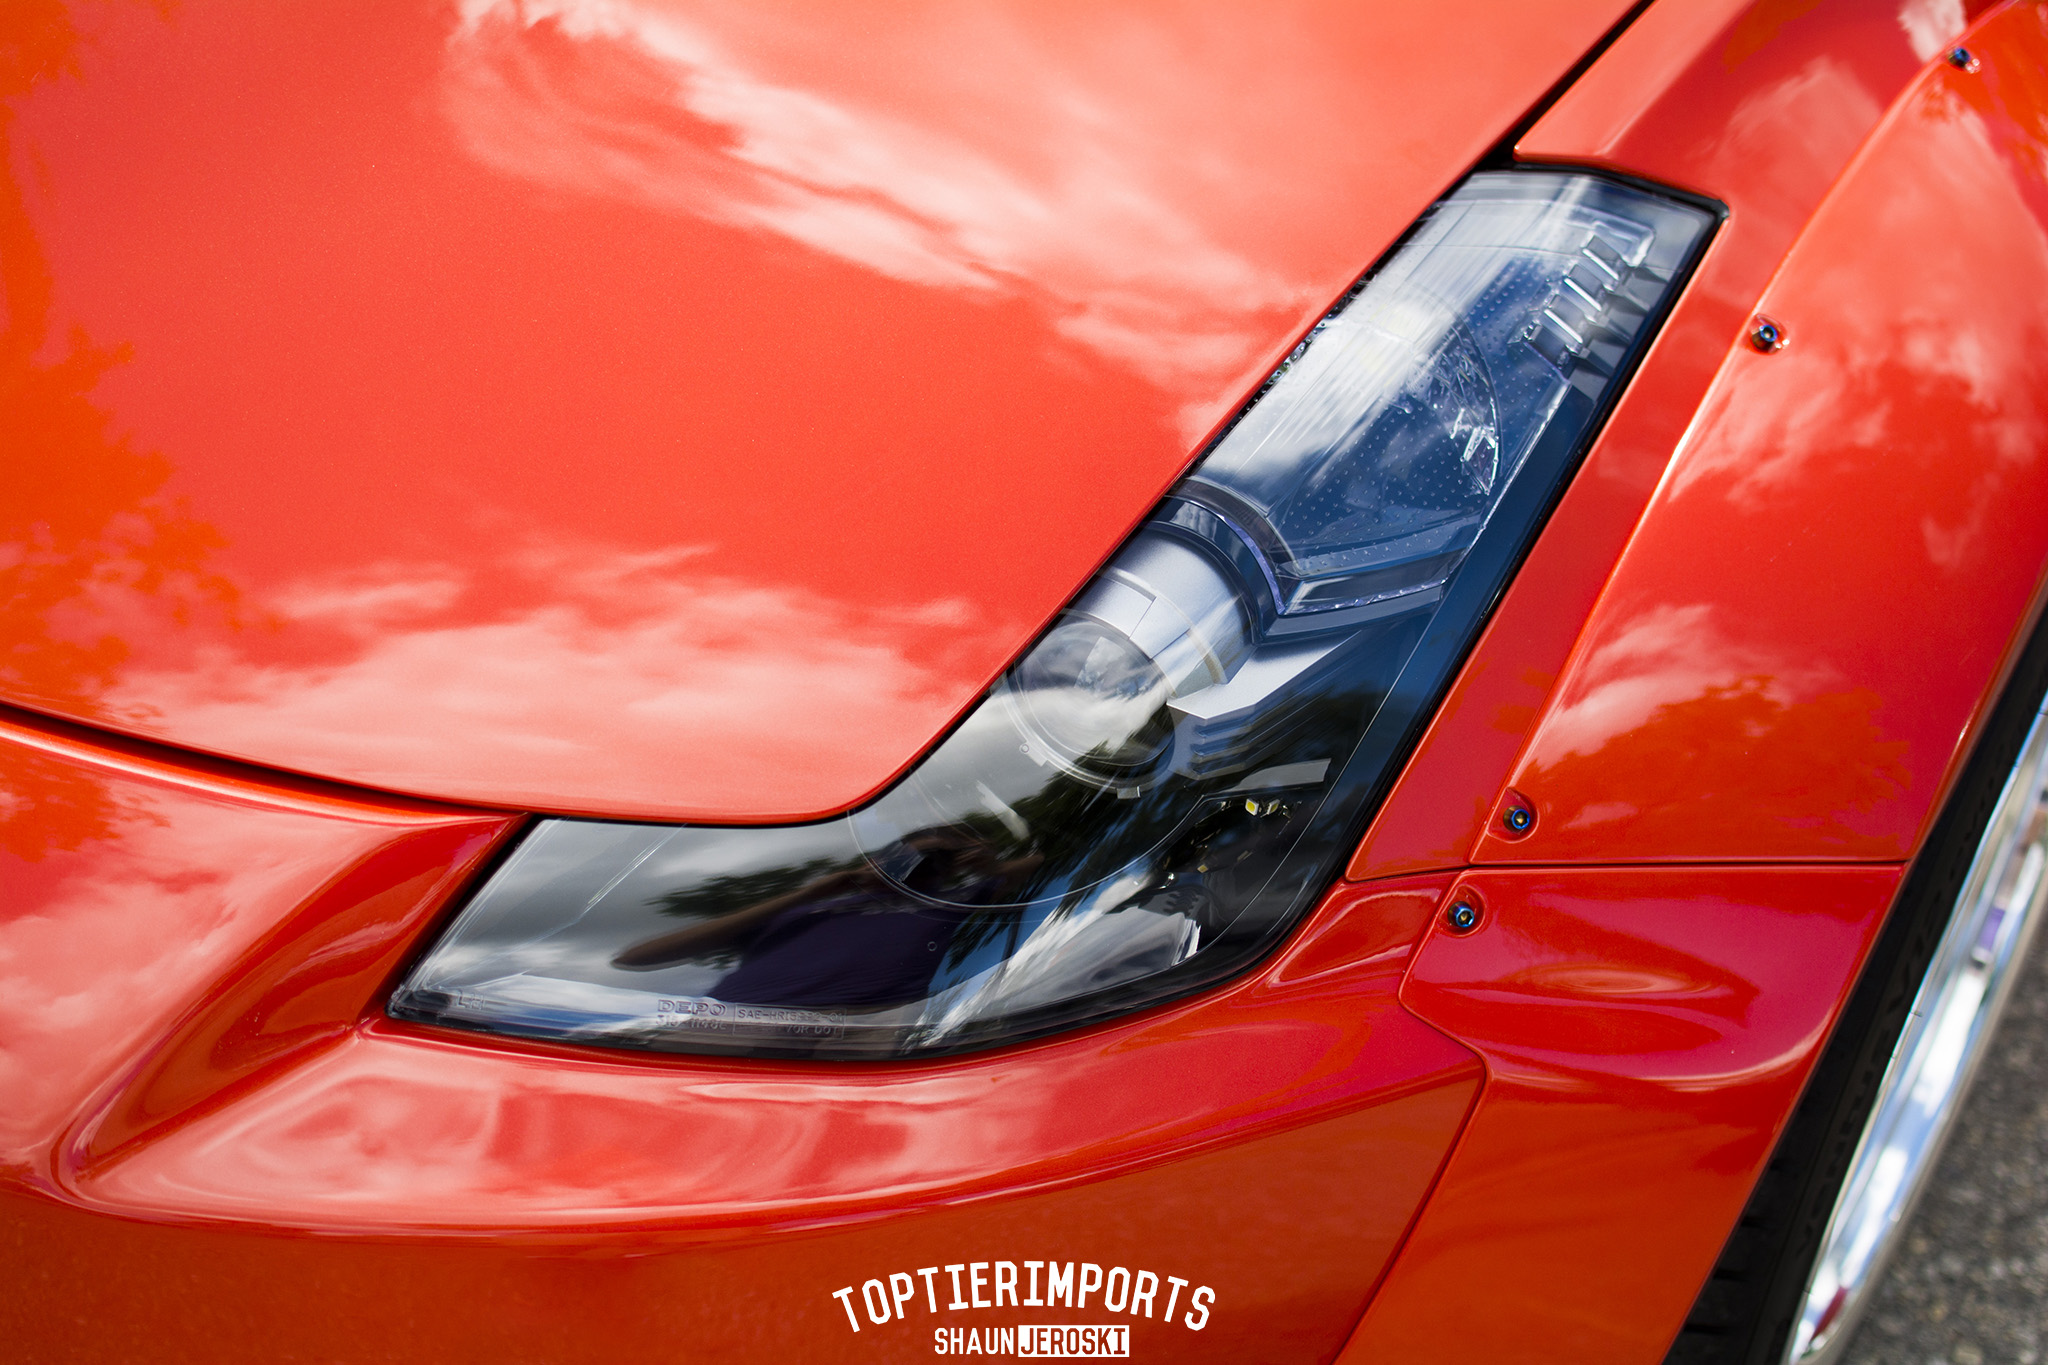
There is no noticeable loss of light output with these eyelids. They actually only cover the top corner of the projector, less than the size of a dime. We used a headlight aiming machine to check the output, and there was no noticeable difference between the hood being closed and the hood being open.
I have a pic of the underside somewhere too but I can't find it. It is finished just as nicely as the top, sanded and painted. Most people that don't know 350Zs don't even realize this mod was done, they think it's factory.
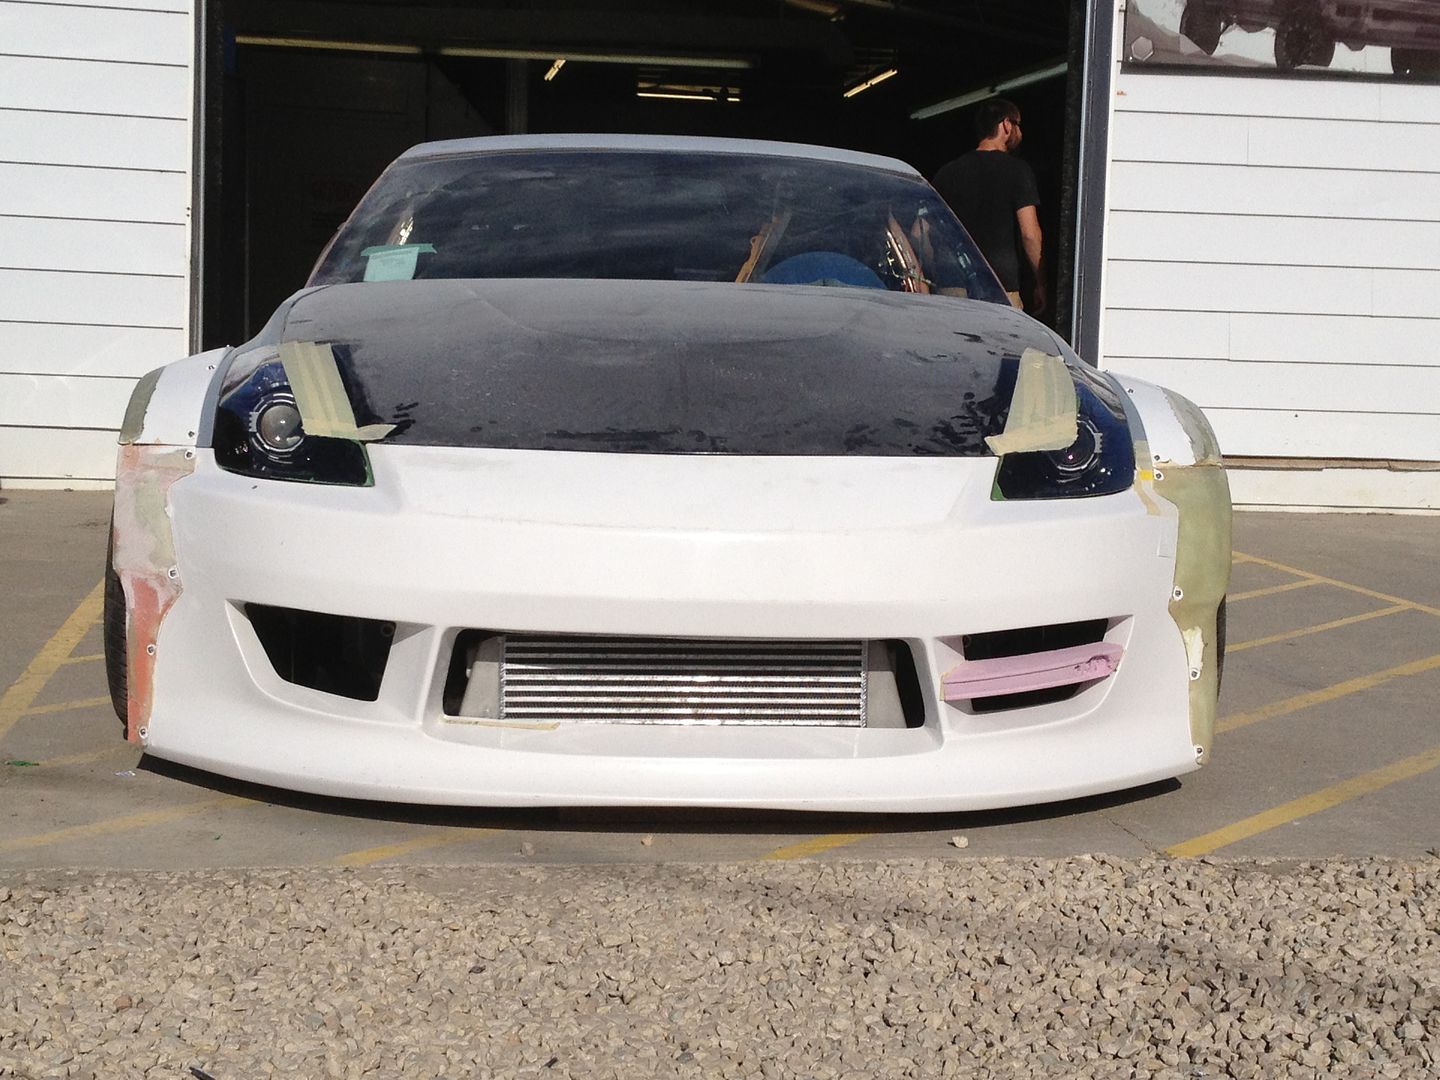
Laying out the shape on the car to get an idea if I wanted to go ahead with the mod or not.
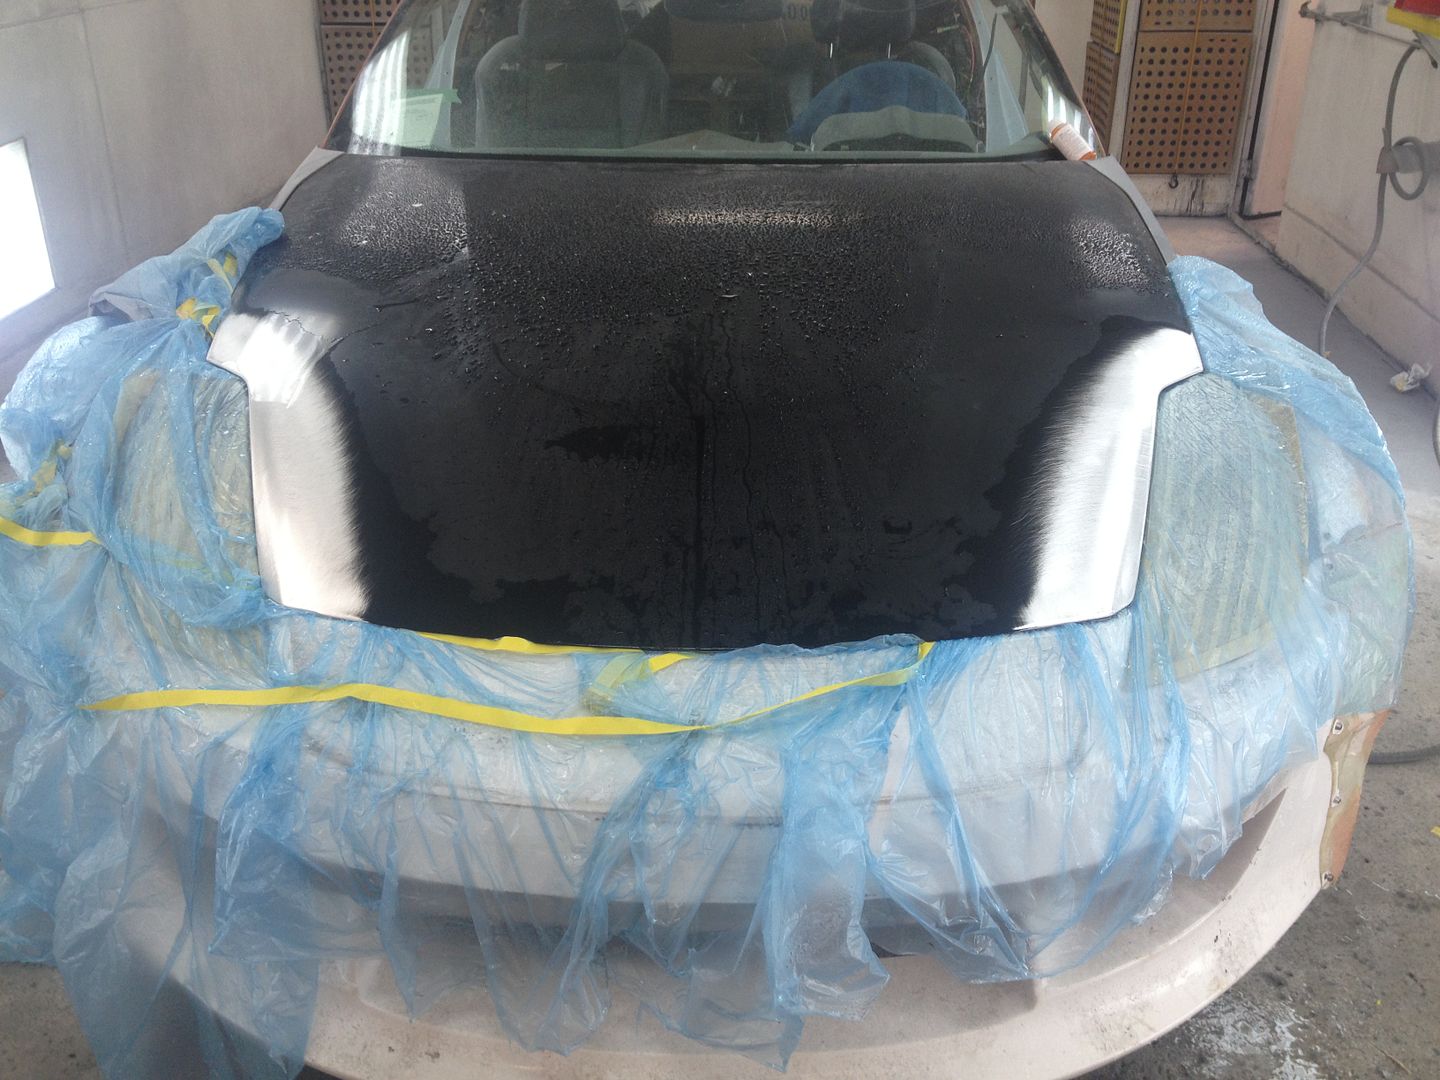
Sanding the paint off the hood, and etching the aluminum:
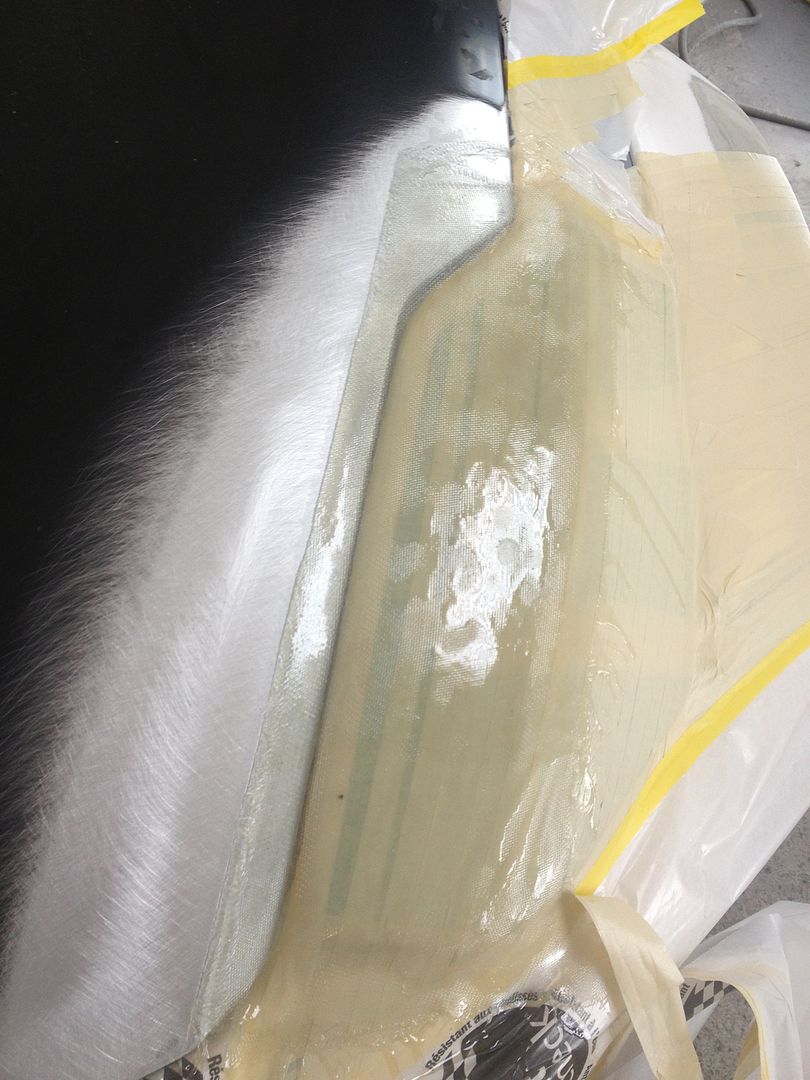
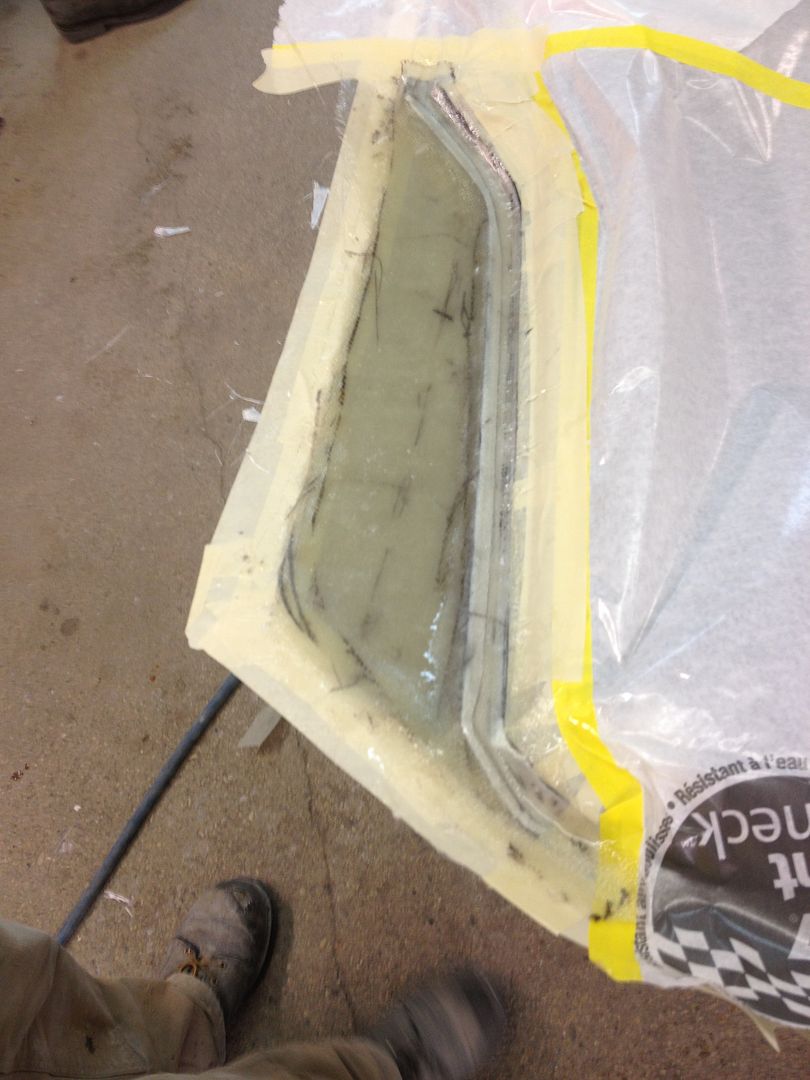
Fiberglassing the top side. You can see there is about a 1� flange that overlaps the top side of the hood. I used a piece of thin foam between the headlight and masking tape. This created the gap that is now between the eyelid and headlight.
Top side cured and hood opened.
Trimming the top side to get the shape.
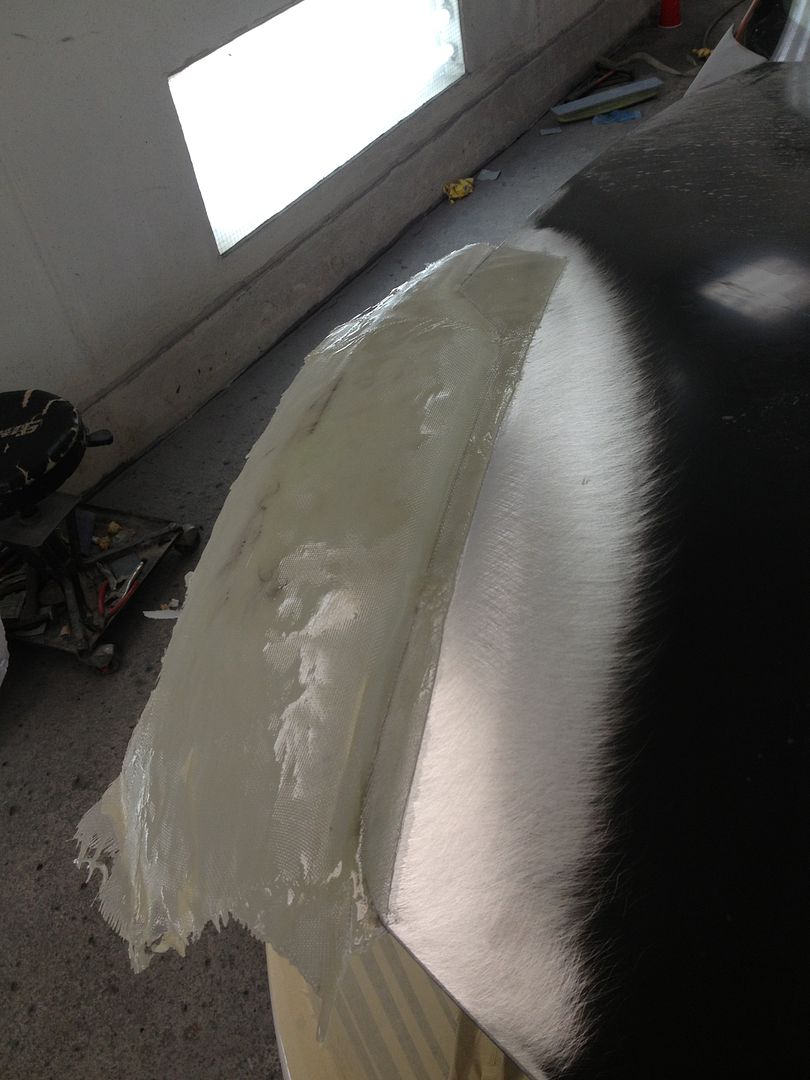
Fiberglassing the bottom side.
A skim coat of filler and finish sanding the top side.
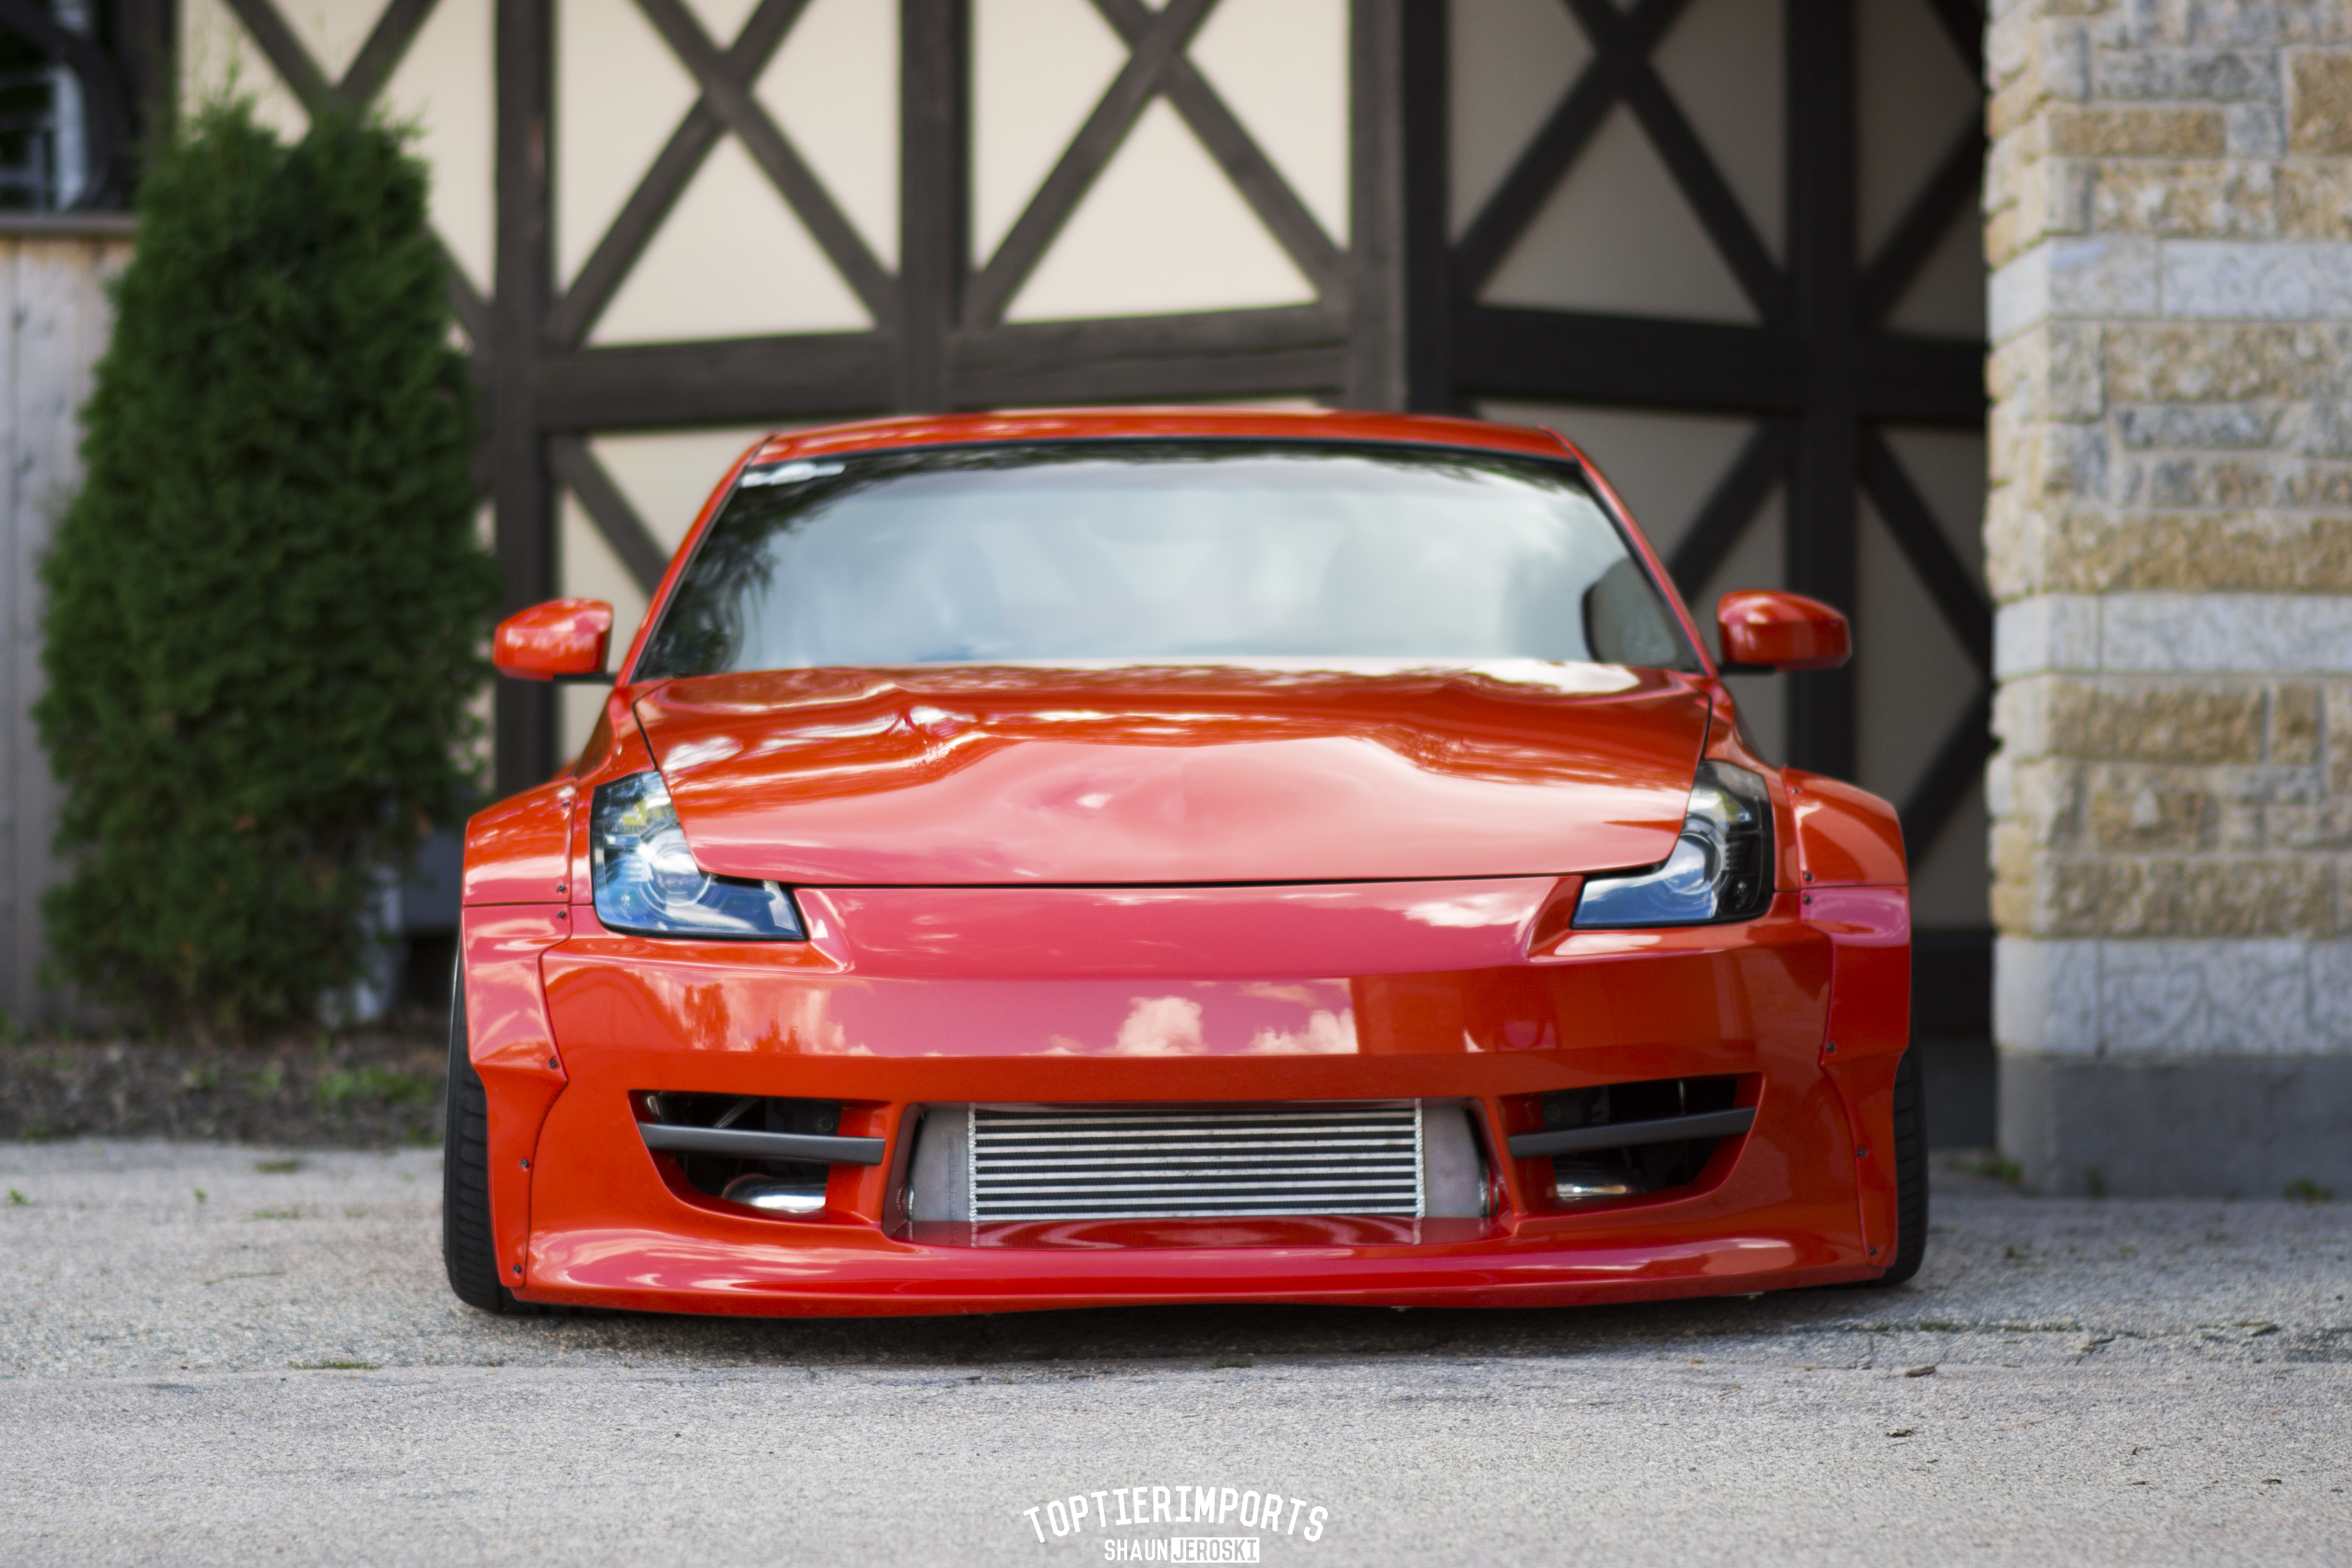
I like it but also feel something is "off" since the bumper lines don't continue up into the hood. I've seen this done most frequently on Euros.
Yeah I know, we did sacrifice that body line in making the eyelids. That allowed us to sit the eyelid above the headlight so it would all fit though. If you really tried, you could probably save half the height of that line, but I think that would probably look worse lol
Originally Posted by Flee0588
This. Headlight needs to be modified so that the hood cuts into the headlights to follow the bumper lines. Think 458 italia.
Man, if I had the ability to form custom plastics, headlight lenses, etc I totally would have done it lol... I've looked at the 458 headlight a lot and have considered redoing the internals of this headlight to suit the new shape better.. Either 458 style, or I've been toying with the idea of the Acura LED projectors, re-shaped to fit.. ideas lol
Here is a part of my build that I’ve never seen done on a Z before, molded on eyelids.
I loved the look of eyelids, but hated the gap that was left between the hood and the eyelid.
The eyelids were made from scratch and bonded to the hood. They are made of West Systems epoxy resin and fiberglass matt. Before making the hood was etched with West Systems aluminum etch kit. This resin is made to bond to aluminum.
I feel that with the shape of the hood, and the way these are made that the fiberglass is actually considerably stronger than if I would have used a piece of aluminum and welded it. There is also less filler required this way than if done with aluminum.
The fiberglass is roughly 12-16 layers of cloth, I can’t remember. 6-8 layers on the top side of the hood, and 6-8 on the bottom side. Doing this way sandwiches the hood between the fiberglass making for a super strong joint.
The eyelids are roughly 3/16” thick and sit about 3/16” above the headlight. Fitment at the back is tight, but it fits. It takes a bit of test fitting and fooling around, but it all fits.
There is no noticeable loss of light output with these eyelids. They actually only cover the top corner of the projector, less than the size of a dime. We used a headlight aiming machine to check the output, and there was no noticeable difference between the hood being closed and the hood being open.
I have a pic of the underside somewhere too but I can't find it. It is finished just as nicely as the top, sanded and painted. Most people that don't know 350Zs don't even realize this mod was done, they think it's factory.
I love everything you did to the car, except for this. Maybe one day ill grow into liking it. But for right now, it looks a little off...
Last edited by SR71; Dec 23, 2015 at 04:27 PM.
Reason: Please don't quote all the pics
Yeah I know, we did sacrifice that body line in making the eyelids. That allowed us to sit the eyelid above the headlight so it would all fit though. If you really tried, you could probably save half the height of that line, but I think that would probably look worse lol
Man, if I had the ability to form custom plastics, headlight lenses, etc I totally would have done it lol... I've looked at the 458 headlight a lot and have considered redoing the internals of this headlight to suit the new shape better.. Either 458 style, or I've been toying with the idea of the Acura LED projectors, re-shaped to fit.. ideas lol
Haha yea thats the problem. Car looks good either way, good work!
Don't know how I feel about this, looks like the hood is from another car. I agree that the hood should have a bodyline break.
You could start the body line break at the front edge of the hood, but where do you go from there with it? I'm having a hard time picturing a nice way to flow the break up the hood and end it... What do you think?
Did you line the underside of the hood so it doesn't goober up the headlight plastic? I think it looks pretty slick but that was my first thought. "I wonder how the headlight looks under that?"
Did you line the underside of the hood so it doesn't goober up the headlight plastic? I think it looks pretty slick but that was my first thought. "I wonder how the headlight looks under that?"
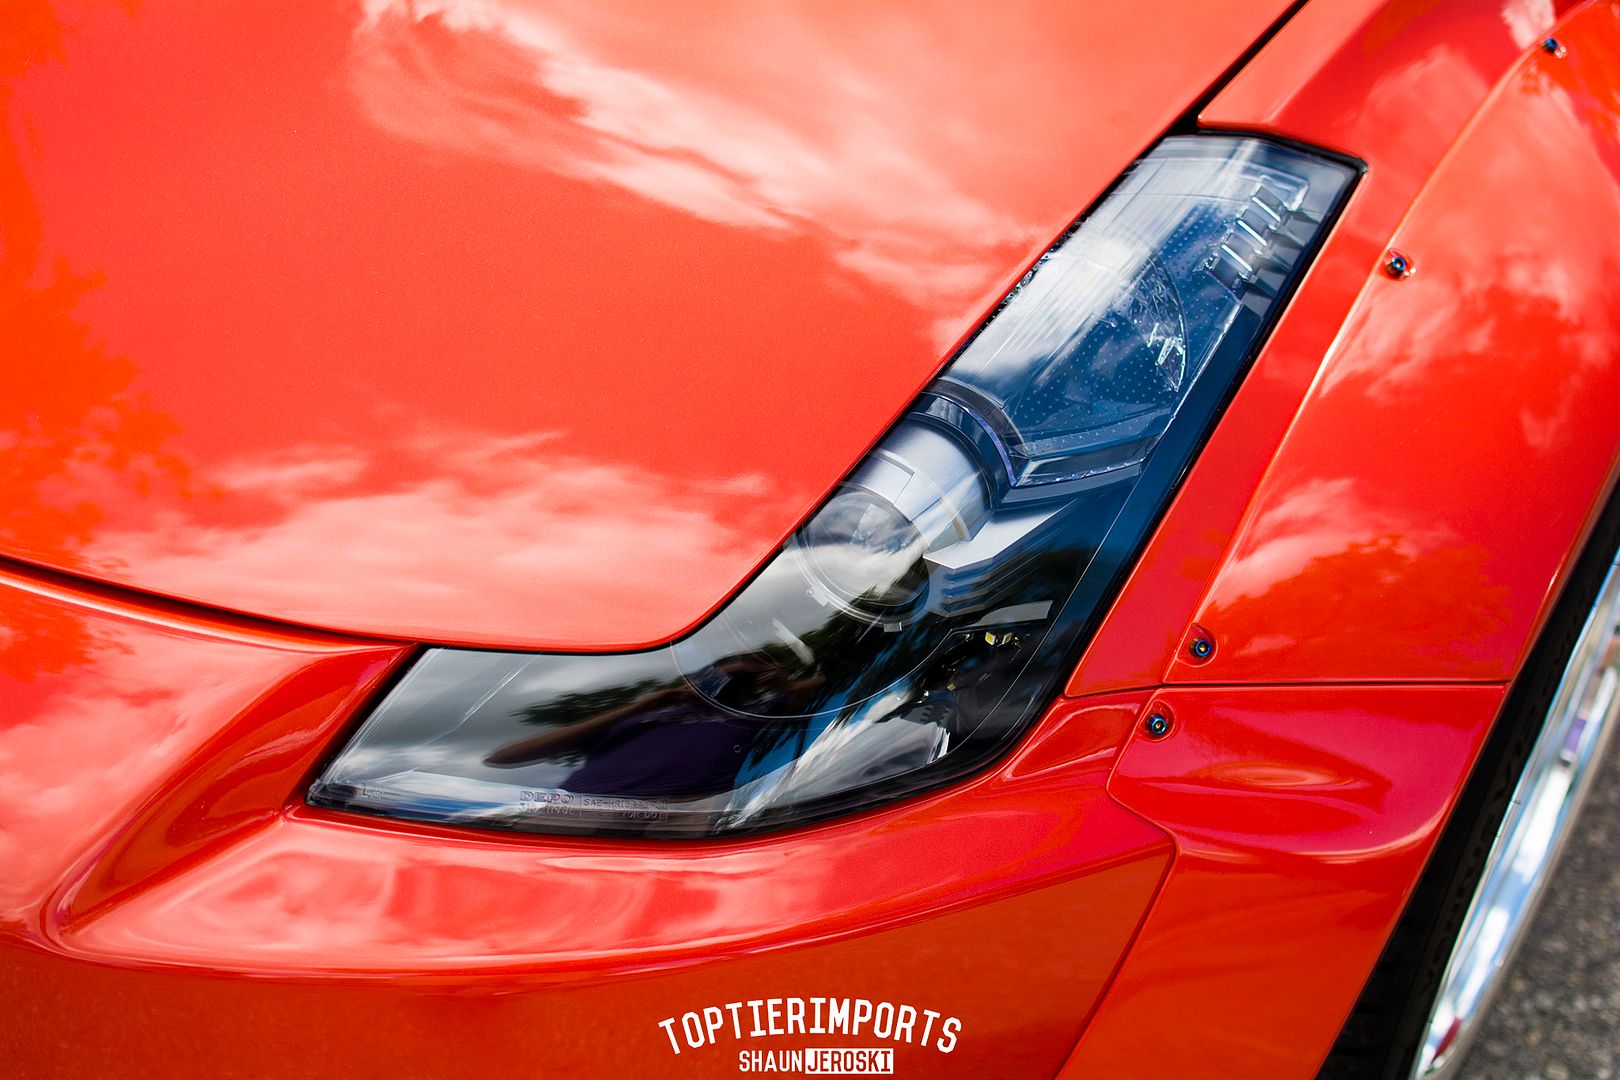
Headlight looks fine, it doesn't touch the headlight. The hood actually sits about 3/16" above the headlight at most parts. The back is the tightest, but it still doesn't quite touch.
Here is a part of my build that I�ve never seen done on a Z before, molded on eyelids.
I loved the look of eyelids, but hated the gap that was left between the hood and the eyelid.
The eyelids were made from scratch and bonded to the hood. They are made of West Systems epoxy resin and fiberglass matt. Before making the hood was etched with West Systems aluminum etch kit. This resin is made to bond to aluminum.
I feel that with the shape of the hood, and the way these are made that the fiberglass is actually considerably stronger than if I would have used a piece of aluminum and welded it. There is also less filler required this way than if done with aluminum.
The fiberglass is roughly 12-16 layers of cloth, I can�t remember. 6-8 layers on the top side of the hood, and 6-8 on the bottom side. Doing this way sandwiches the hood between the fiberglass making for a super strong joint.
The eyelids are roughly 3/16� thick and sit about 3/16� above the headlight. Fitment at the back is tight, but it fits. It takes a bit of test fitting and fooling around, but it all fits.
There is no noticeable loss of light output with these eyelids. They actually only cover the top corner of the projector, less than the size of a dime. We used a headlight aiming machine to check the output, and there was no noticeable difference between the hood being closed and the hood being open.
I have a pic of the underside somewhere too but I can't find it. It is finished just as nicely as the top, sanded and painted. Most people that don't know 350Zs don't even realize this mod was done, they think it's factory.
Laying out the shape on the car to get an idea if I wanted to go ahead with the mod or not.
Sanding the paint off the hood, and etching the aluminum:
Fiberglassing the top side. You can see there is about a 1� flange that overlaps the top side of the hood. I used a piece of thin foam between the headlight and masking tape. This created the gap that is now between the eyelid and headlight.
Top side cured and hood opened.
Trimming the top side to get the shape.
Fiberglassing the bottom side.
A skim coat of filler and finish sanding the top side.
A couple finished pics:
Honestly, it would of probably looked more flush if you kept the eyelid design and got rid of the gap. To me it just seems like the eyelids look too big. I hope that makes sense lol
I honestly don't think it could have come out any better. If they would have offered that as an aftermarket hood for sale in say the $750-$1000 range in a carbon fiber variety it would have sold like hot cakes.