
my "what did I get into" winter build


I'm starting this thread a little late. I wanted to start a build thread but completely forgot to start taking photos, so I'm well into everything already. I'll try and remember to take photos and update as I go.
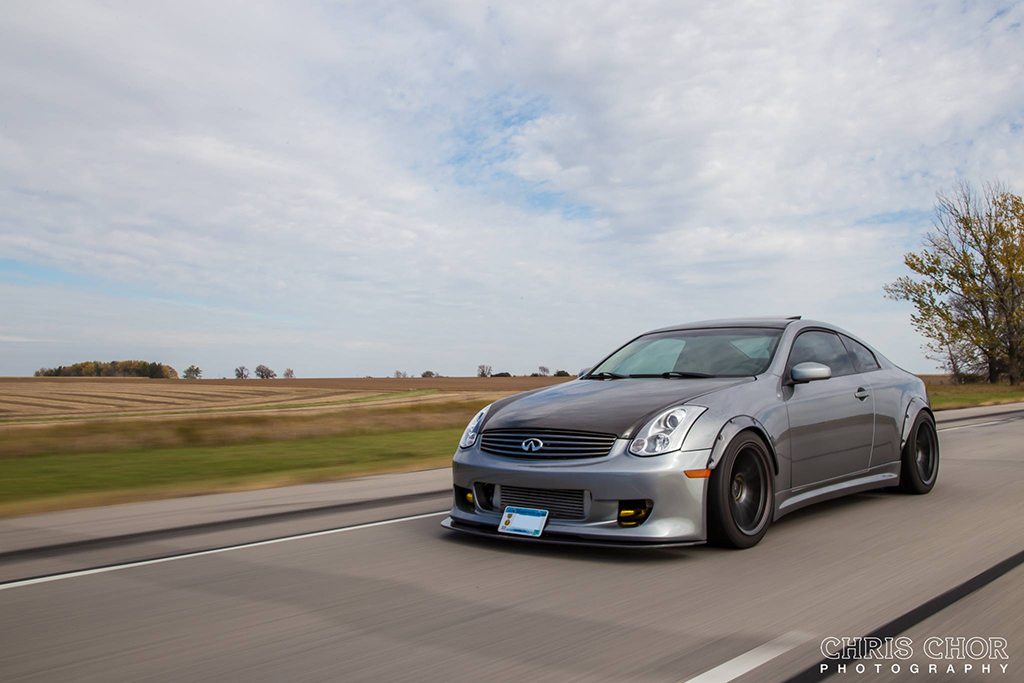
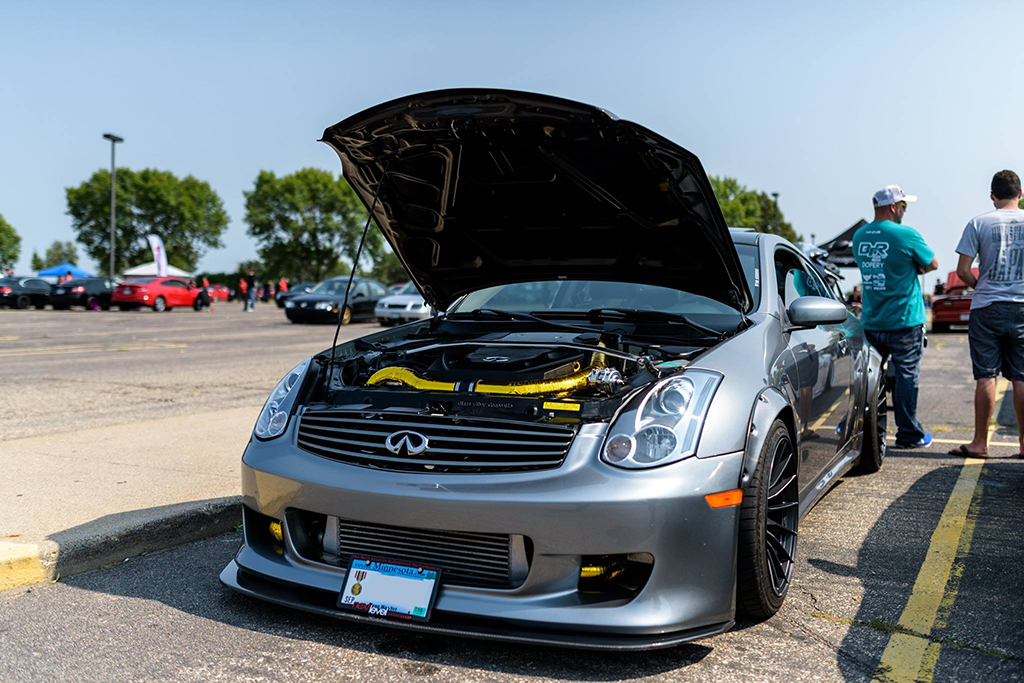
I've been wanting to build this car functinally for the track. The only events I ever do are HPDE track days, so I'm not worried about staying within class restrictions. I also want to see over 500 at the wheels. Kind of defeats the purpose of having a good track machine with that much power, but it will be fun regardless.
Before this build:
Osiris tune @~400 (unsure exact after changing to Tomei exhaust)
Powerlabs GT35 single turbo
Denso/DW 550cc injectors
Walbro 255lph
Tomei ExpremeTi exhaust
Vibrant Ultra Quiet resonator
Z1 6puck clutch disc
Exedy OEM spec pressure plate
RJM clutch pedal
MD spacer
GT Spec fr/rr strut bars
GT Spec fender braces
GT spec front lower
Hotchkis sways fr/rr
Megan Spec-RS coil-overs (converted to true type rear)
Stance 14/12 springs
SPC Camber correction
Stoptech rotors fr/rr
Stoptech pads
Stoptech braided brake lines
18x10.5 square Enkei RS05RR
295/35 NITTO NT05 rubber
Kuruma front bumer
Ipul sides
Chargespeed rear
OEM type carbon hood
Strafe carbon trunk
OC fcarbon front splitter
RareJDM undertray
JDMFlares universal fender flares
06 projector headlights
Build additions:
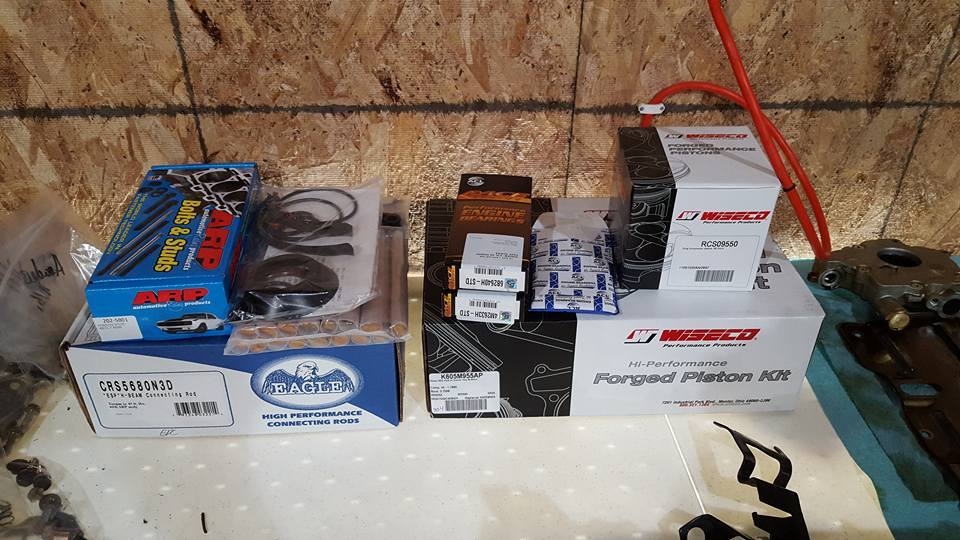
Wiseco Pistons 8.8-1
Eagle Rods
Cometic .030 head gasket
ACL bearings
ARP L19 studs
Z1 Viton Valve Seals
JWT valve springs
OEM cams (for now)
CJM S0 fuel return
DW 1000cc injectors
Aero 340lph pump
SB SS full disc clutch
Fidanza flyheel
DriveshaftShop carbon shaft
Z1 engine and trans mounts
ES full car bushing kit
Z1 oil cooler
Pathfinder cooling mod
Mishimoto radiator
Going to test my skills fabricating new flares. Should be interesting.
Would like to find a way to chassis mount a rear wing that I can run through the OEM trunk during trackdays, and then easily remove and run the carbon trunk daily. I have some ideas on this. I dont like the idea of the trunk supporting the pressure when on the track.
Also hoping to fit a full functional rear diffuser, but thinking I'll have to go back to the OEM rear bumper.
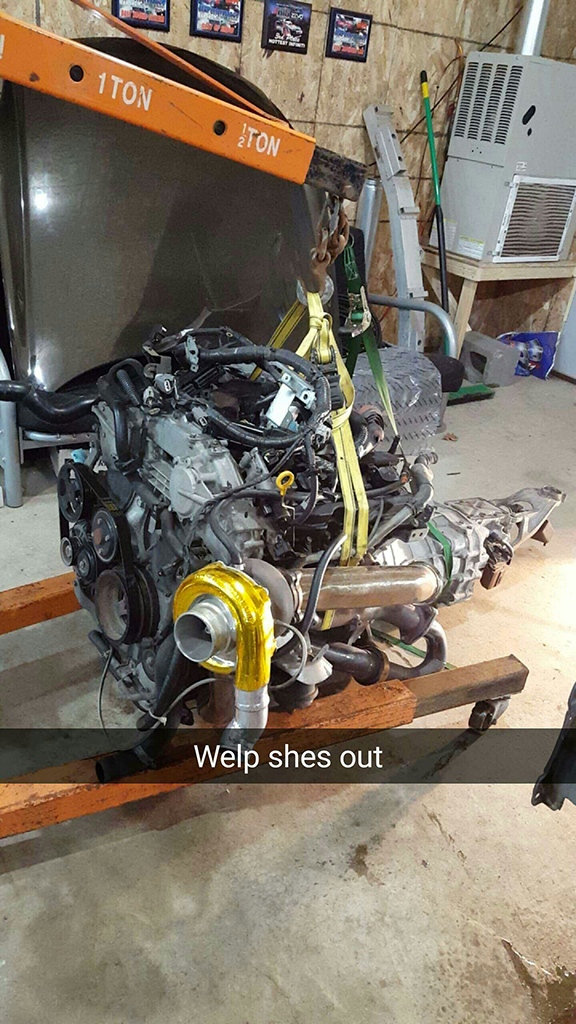
Ok, on to the photos...

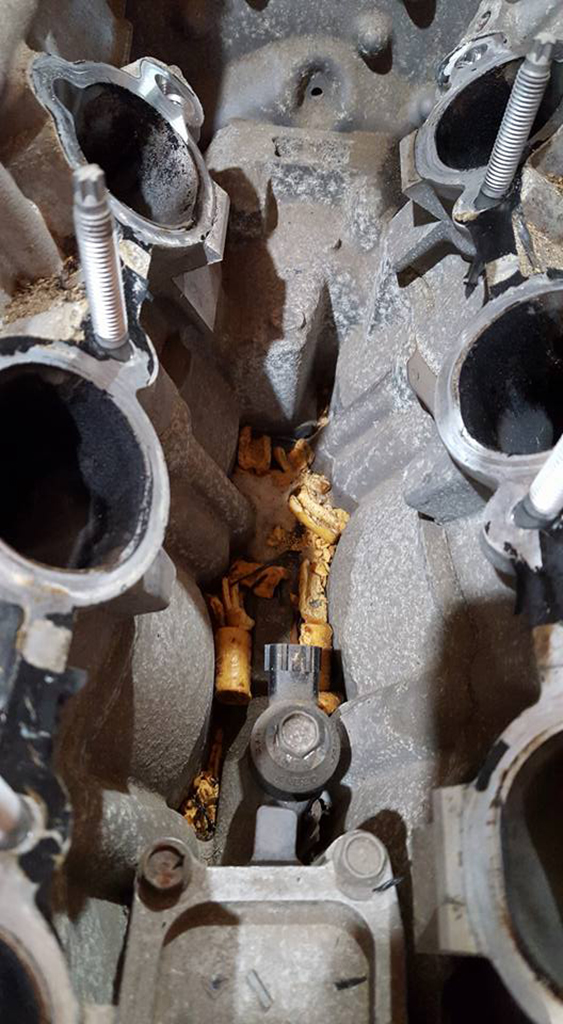
I noticed one of the MD spacers was missing when I popped off the upper plenum... well I found it. Its been in there a while. Thank god it was too big to fit past the valve!
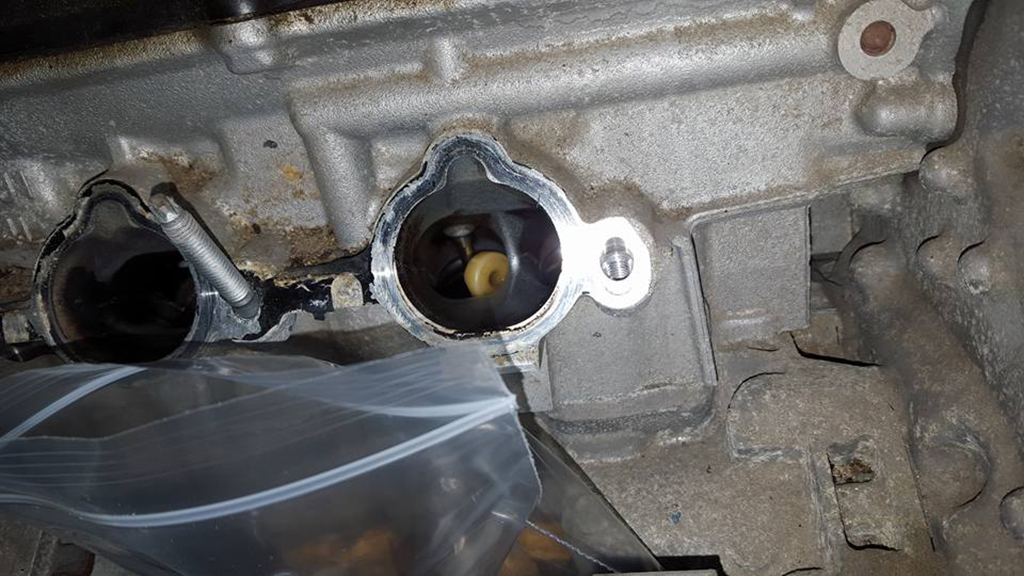
Edges were pretty rounded down. Its been rattling around in there for a while.
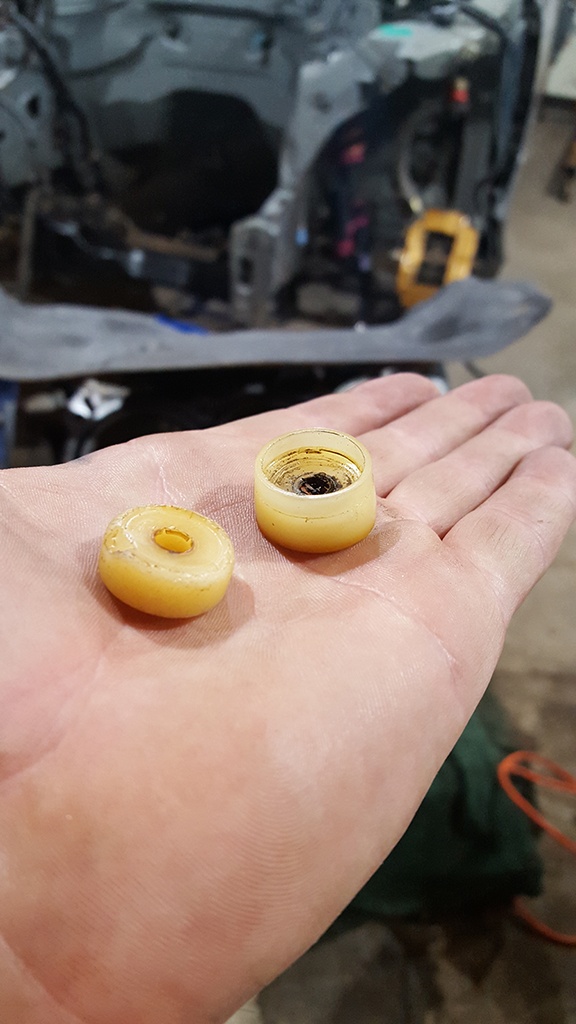
Anyone want some Combos?
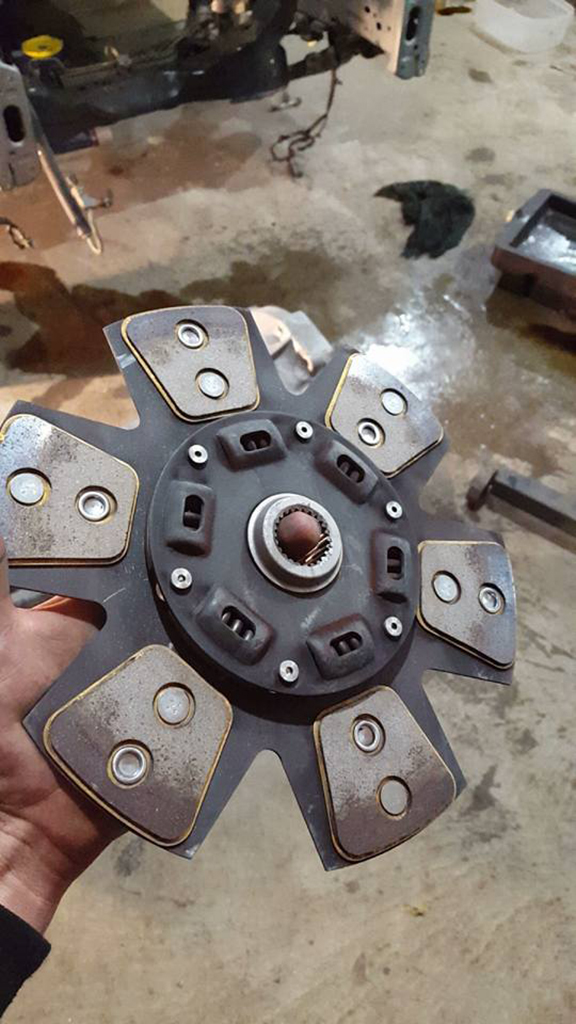
i'd say the pressure plate wasnt quite strong enough anymore.
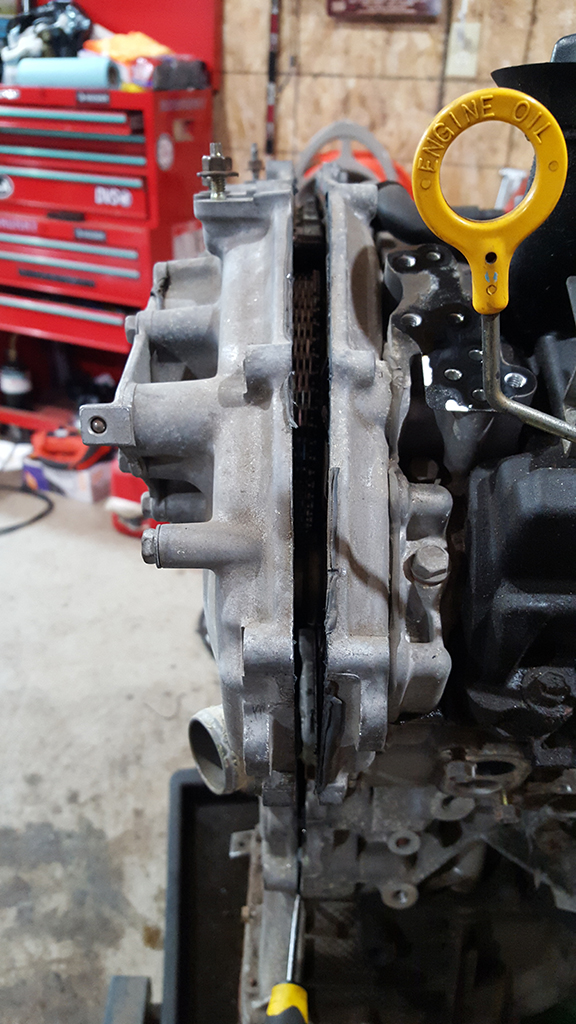
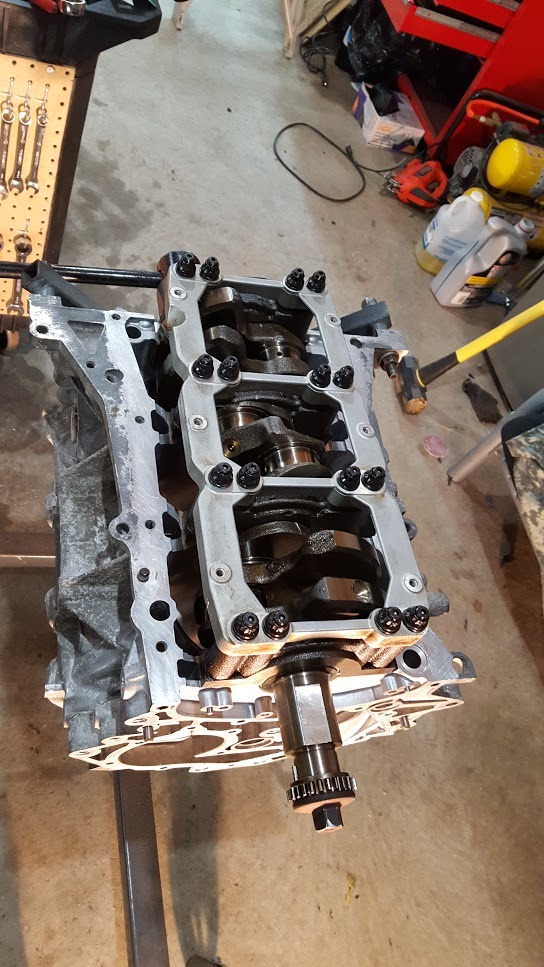
When cracking open the timing cover, be sure to remove the lower oil pan and remove 2 bolts from the bottom. Not one SM that i found mentioned these two bolts! Luckily nothing cracked before I figured it out.
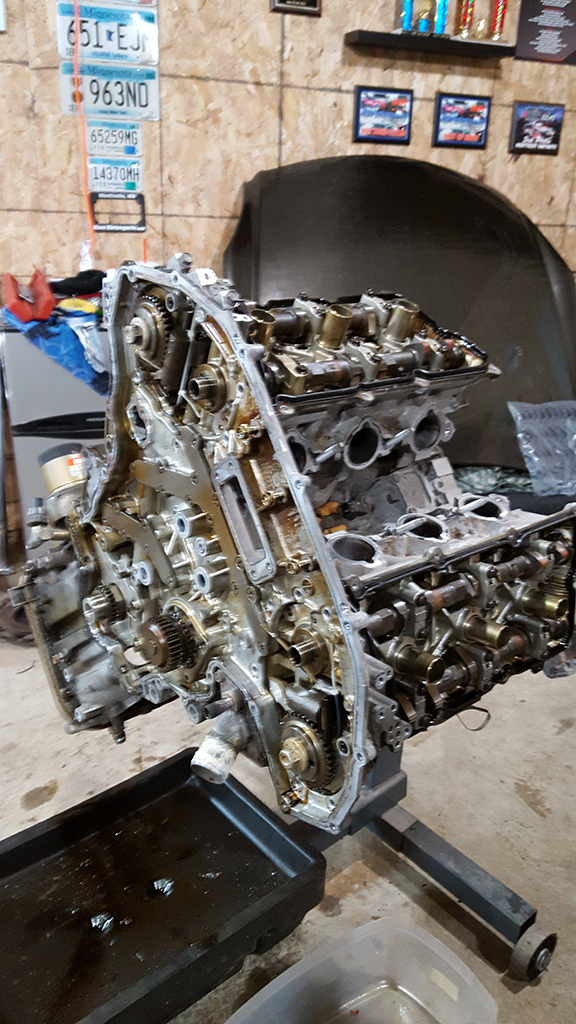
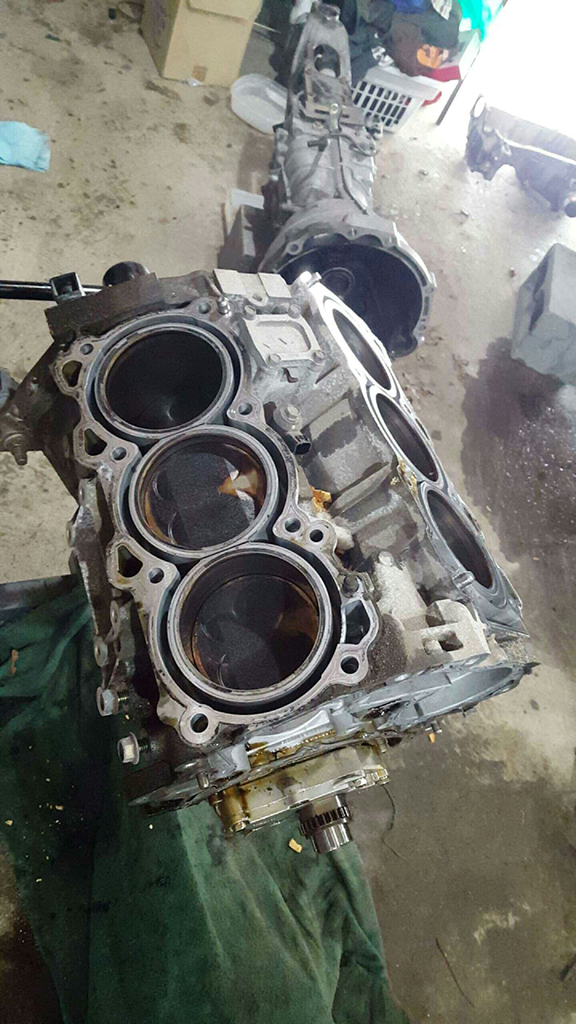
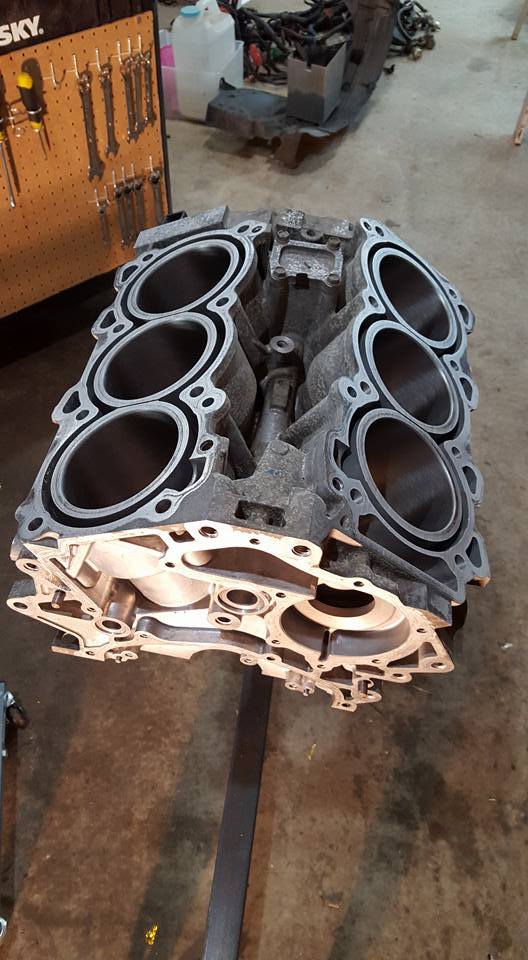
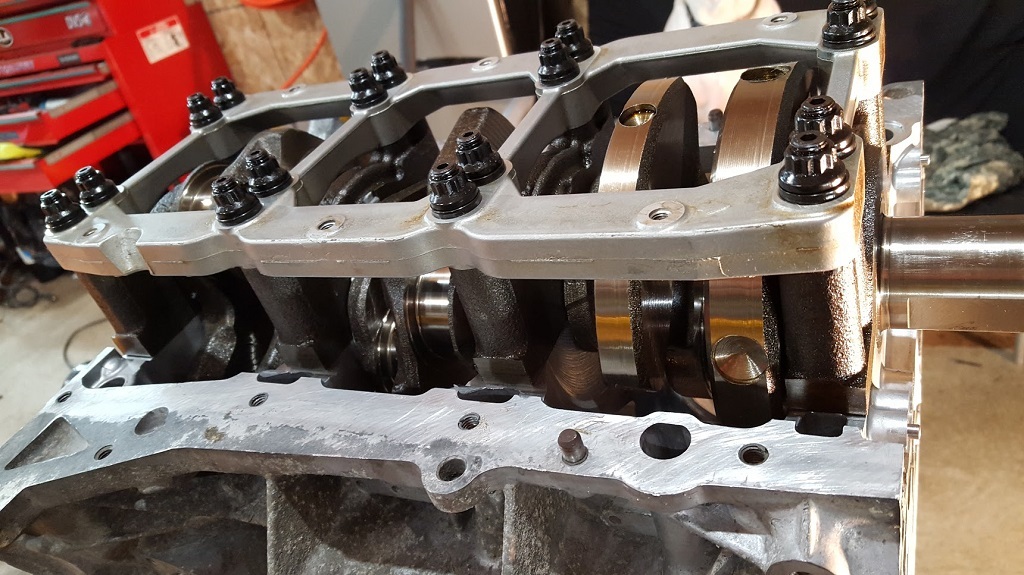
Everything out. Block and heads go to the machine shop next week.

I've been wanting to build this car functinally for the track. The only events I ever do are HPDE track days, so I'm not worried about staying within class restrictions. I also want to see over 500 at the wheels. Kind of defeats the purpose of having a good track machine with that much power, but it will be fun regardless.
Before this build:
Osiris tune @~400 (unsure exact after changing to Tomei exhaust)
Powerlabs GT35 single turbo
Denso/DW 550cc injectors
Walbro 255lph
Tomei ExpremeTi exhaust
Vibrant Ultra Quiet resonator
Z1 6puck clutch disc
Exedy OEM spec pressure plate
RJM clutch pedal
MD spacer
GT Spec fr/rr strut bars
GT Spec fender braces
GT spec front lower
Hotchkis sways fr/rr
Megan Spec-RS coil-overs (converted to true type rear)
Stance 14/12 springs
SPC Camber correction
Stoptech rotors fr/rr
Stoptech pads
Stoptech braided brake lines
18x10.5 square Enkei RS05RR
295/35 NITTO NT05 rubber
Kuruma front bumer
Ipul sides
Chargespeed rear
OEM type carbon hood
Strafe carbon trunk
OC fcarbon front splitter
RareJDM undertray
JDMFlares universal fender flares
06 projector headlights
Build additions:
Wiseco Pistons 8.8-1
Eagle Rods
Cometic .030 head gasket
ACL bearings
ARP L19 studs
Z1 Viton Valve Seals
JWT valve springs
OEM cams (for now)
CJM S0 fuel return
DW 1000cc injectors
Aero 340lph pump
SB SS full disc clutch
Fidanza flyheel
DriveshaftShop carbon shaft
Z1 engine and trans mounts
ES full car bushing kit
Z1 oil cooler
Pathfinder cooling mod
Mishimoto radiator
Going to test my skills fabricating new flares. Should be interesting.
Would like to find a way to chassis mount a rear wing that I can run through the OEM trunk during trackdays, and then easily remove and run the carbon trunk daily. I have some ideas on this. I dont like the idea of the trunk supporting the pressure when on the track.
Also hoping to fit a full functional rear diffuser, but thinking I'll have to go back to the OEM rear bumper.
Ok, on to the photos...


I noticed one of the MD spacers was missing when I popped off the upper plenum... well I found it. Its been in there a while. Thank god it was too big to fit past the valve!

Edges were pretty rounded down. Its been rattling around in there for a while.

Anyone want some Combos?

i'd say the pressure plate wasnt quite strong enough anymore.

When cracking open the timing cover, be sure to remove the lower oil pan and remove 2 bolts from the bottom. Not one SM that i found mentioned these two bolts! Luckily nothing cracked before I figured it out.


Everything out. Block and heads go to the machine shop next week.

Last edited by 2one8; Jan 19, 2016 at 08:10 AM.
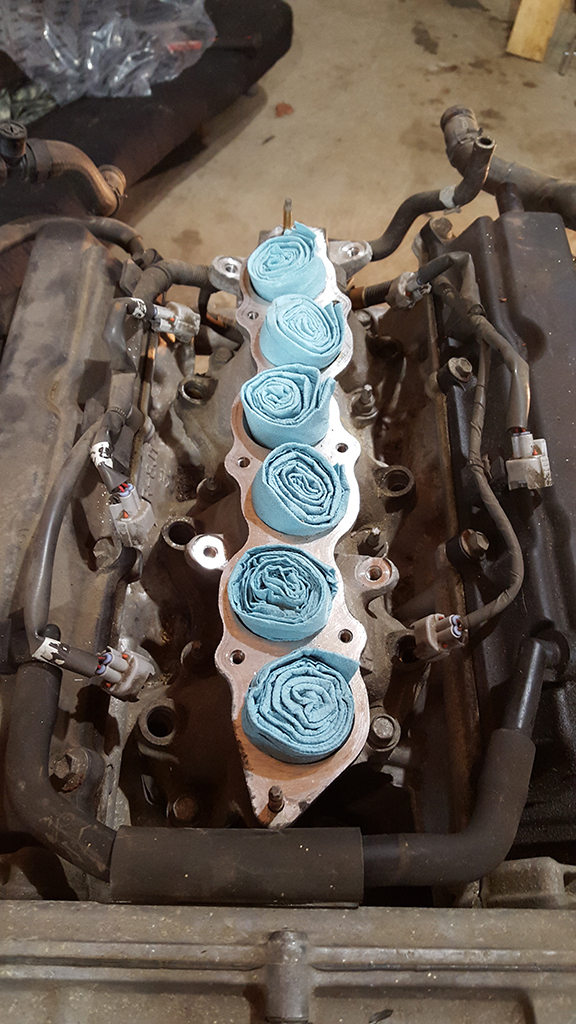
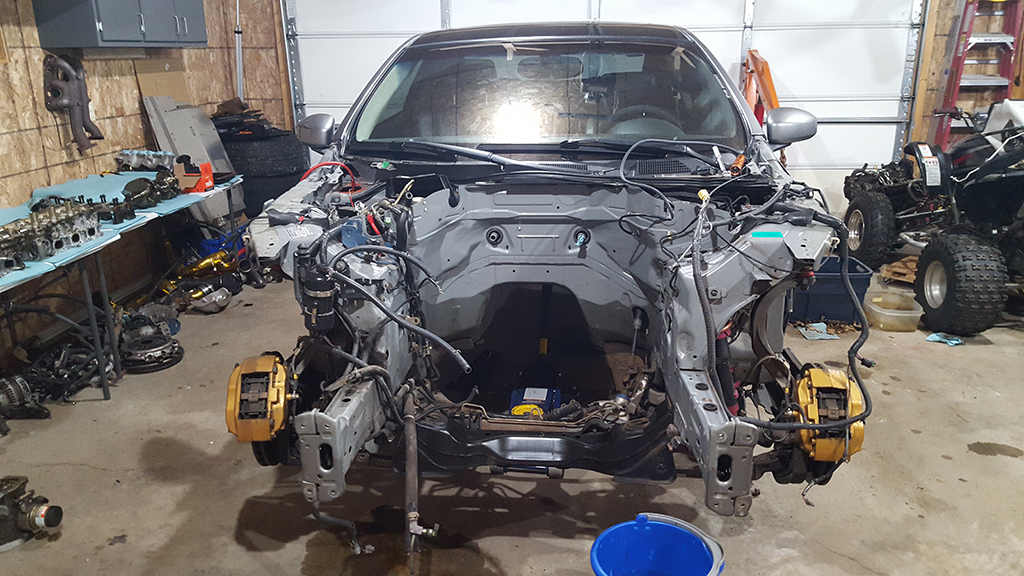
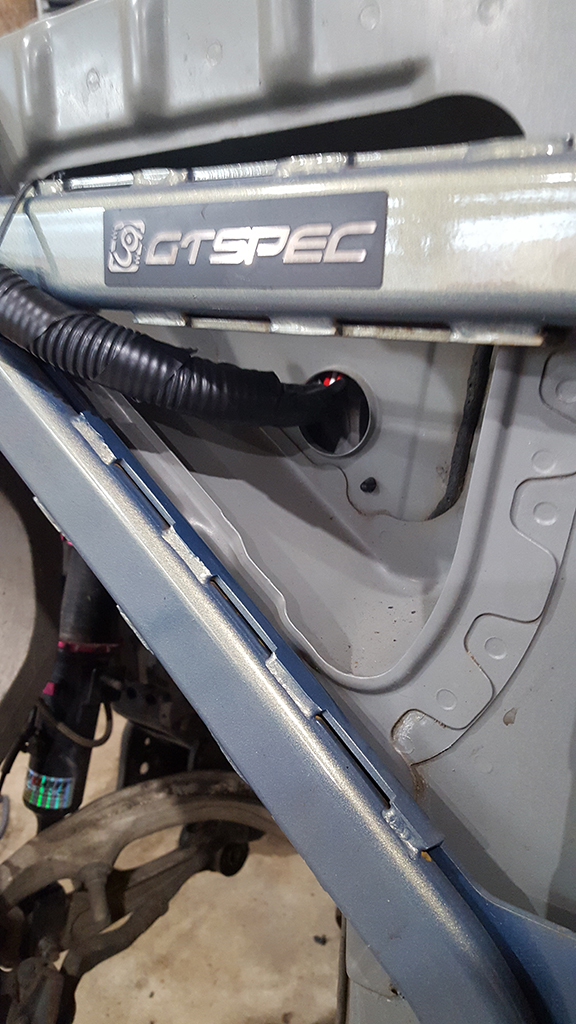
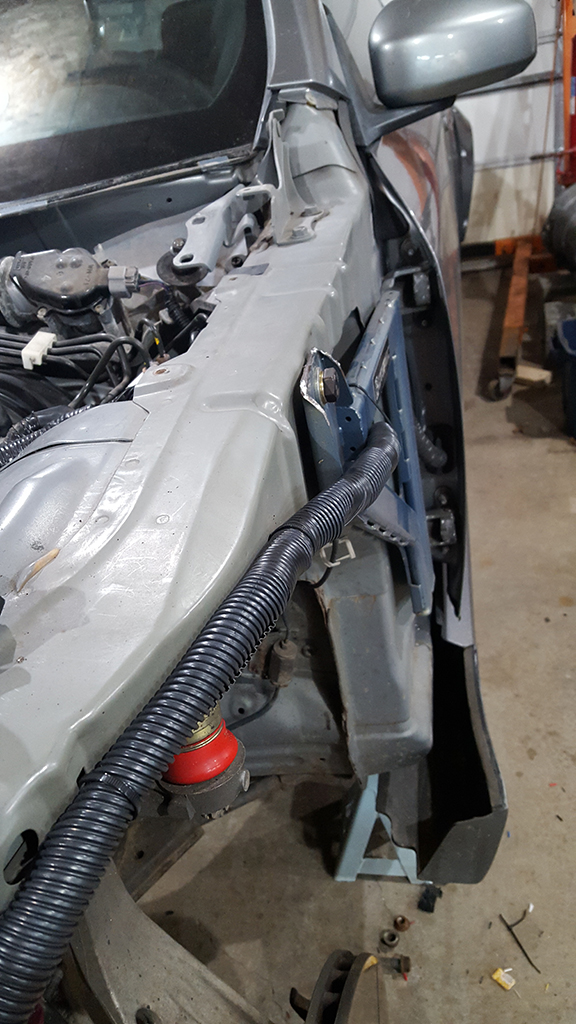
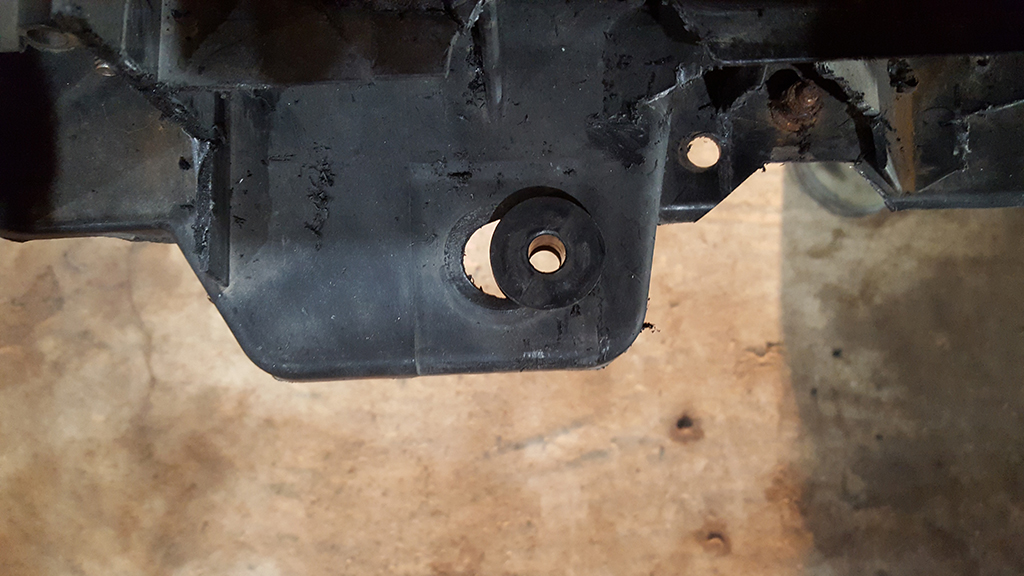
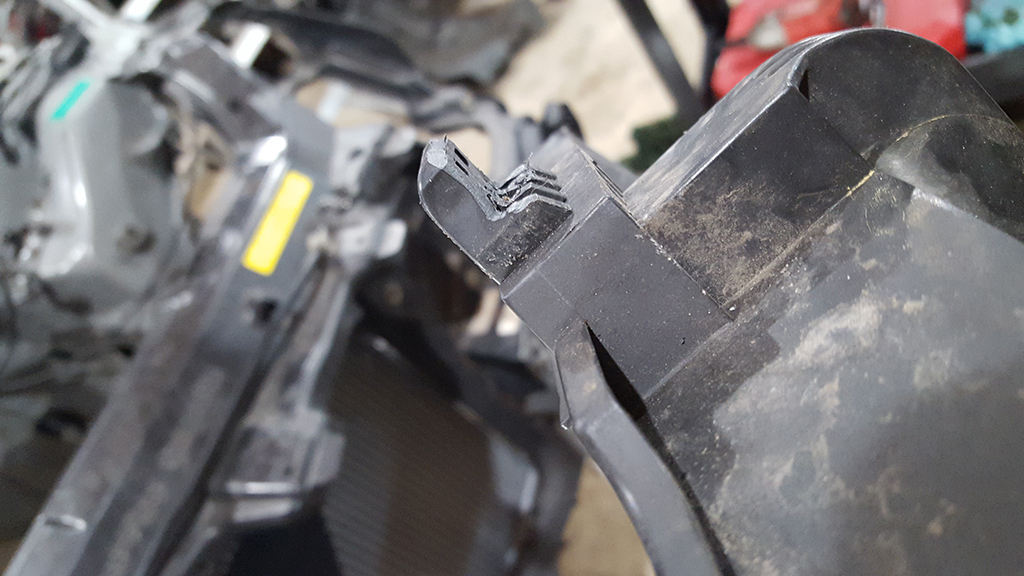
With the engine tore down I'm starting on the engine bay and front end. Cleaning, replacing broken tabs and clips. I'll be doing a engine harness tuck, debating on doing a fender wire tuck as well. When looking at the fenders I noticed the fender braces were still touching the fenders when installed, so I started grinding them down more.
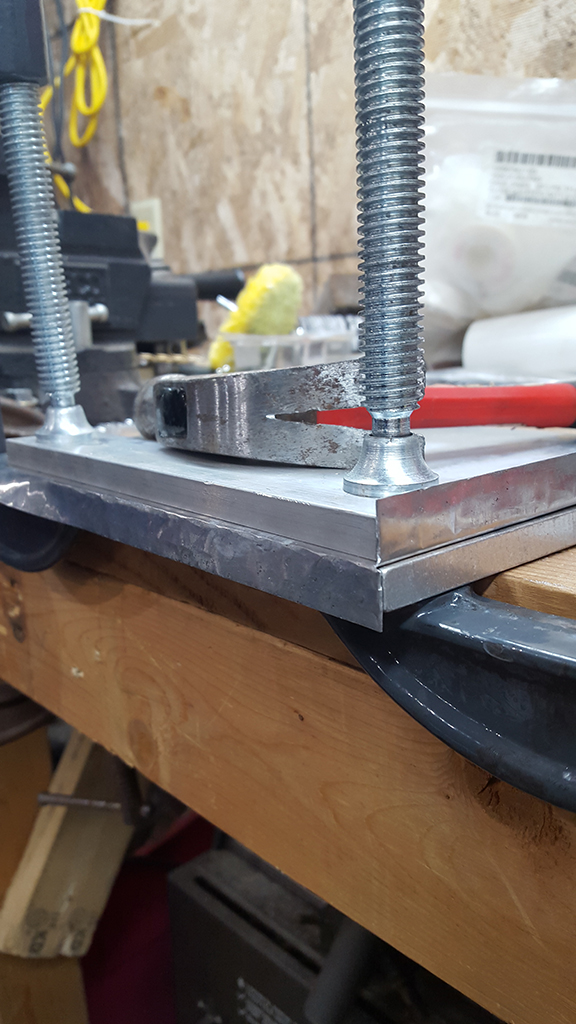
When you need a sheet metal brake and dont have one...
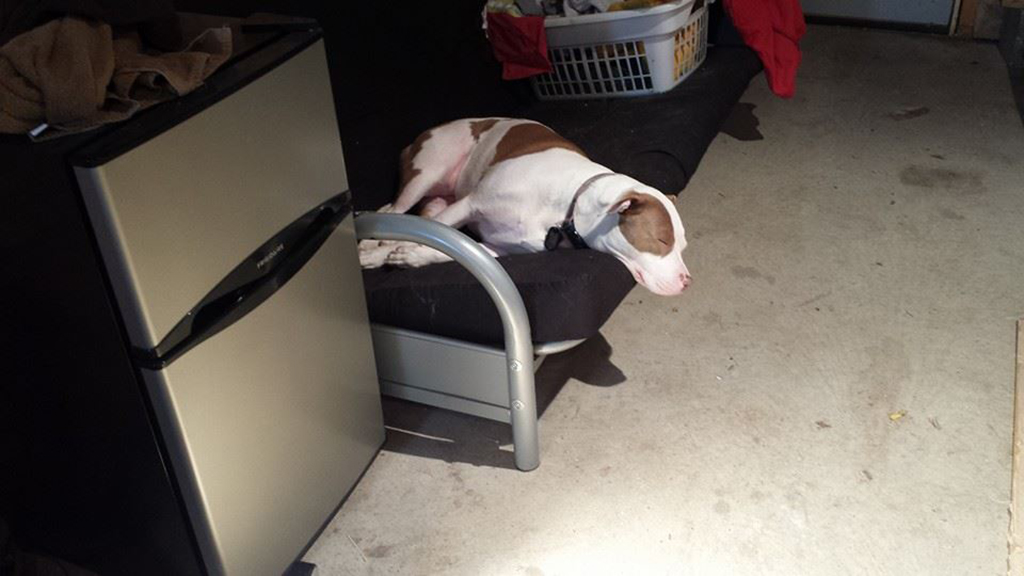
Shes not a very good helper when shes sleeping on the job.
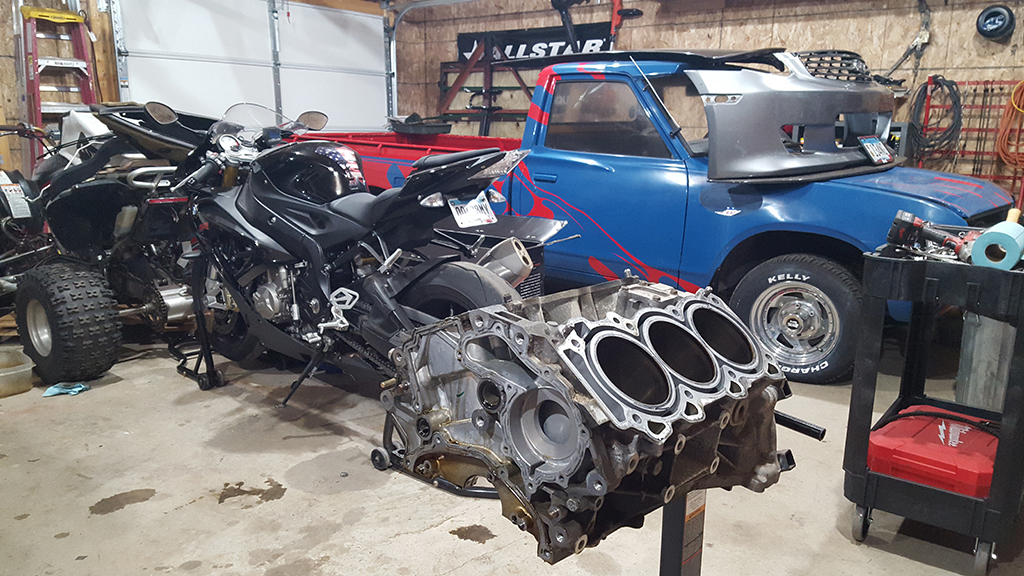
I need a bigger garage, or less stuff.


When you need a sheet metal brake and dont have one...

Shes not a very good helper when shes sleeping on the job.

I need a bigger garage, or less stuff.


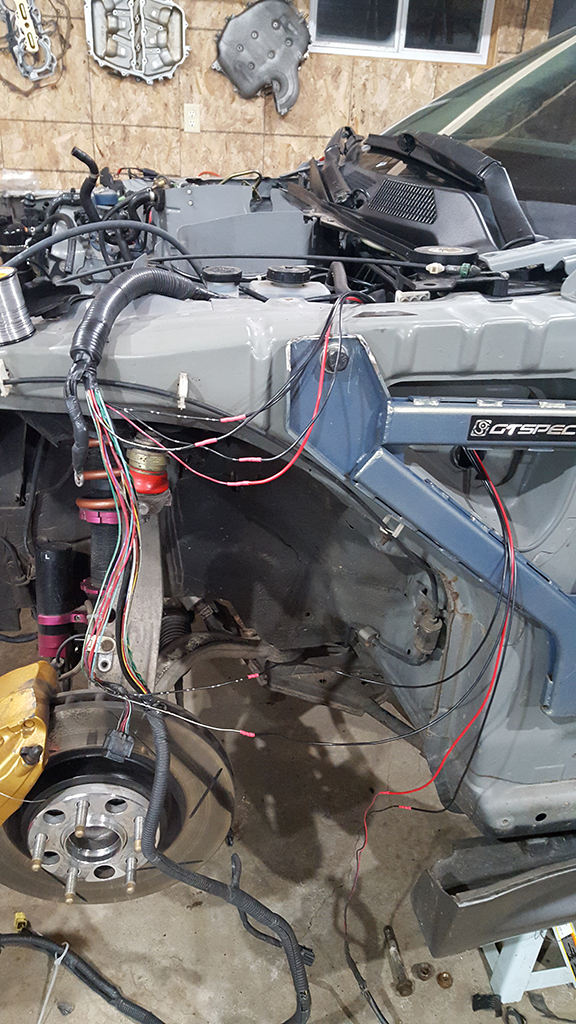
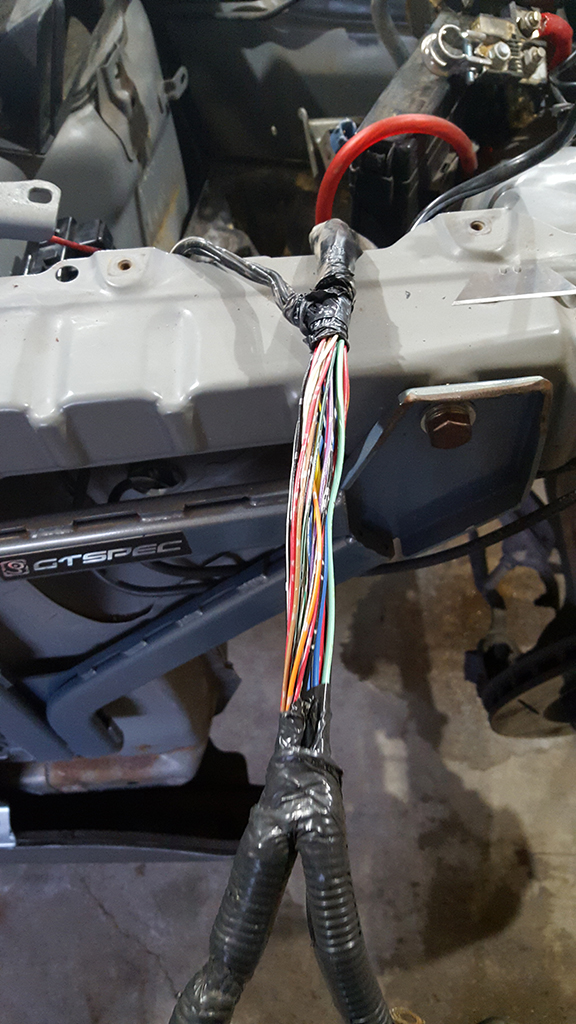
Started the fender wire tuck. Didn't use the original ground spot, might still change that though. I'm also concerned about the airbag wires as they are originally shielded, so I might pick up some shielded wire and re-do those. Hopefully have the other side done tomorrow evening. I ended up picking up a second engine harness, so once it comes time to do that one I'll be able to extend everything using the 2cnd harness and keep all wire colors the same. Not that it really matters, but I'm picky lol
Go one wire at a time to make sure you dont cross wires. Even though they are color coordinated, sometimes they have very similar combos. Make sure you solder your connections good. A good iron is key to getting a good solder, dab a little melted solder on the iron and then heat your wires over that melted solder and add new solder to the wire as it gets hot. It should melt right into the strands and coat everything. Be sure to shrink wrap the connection afterwords.
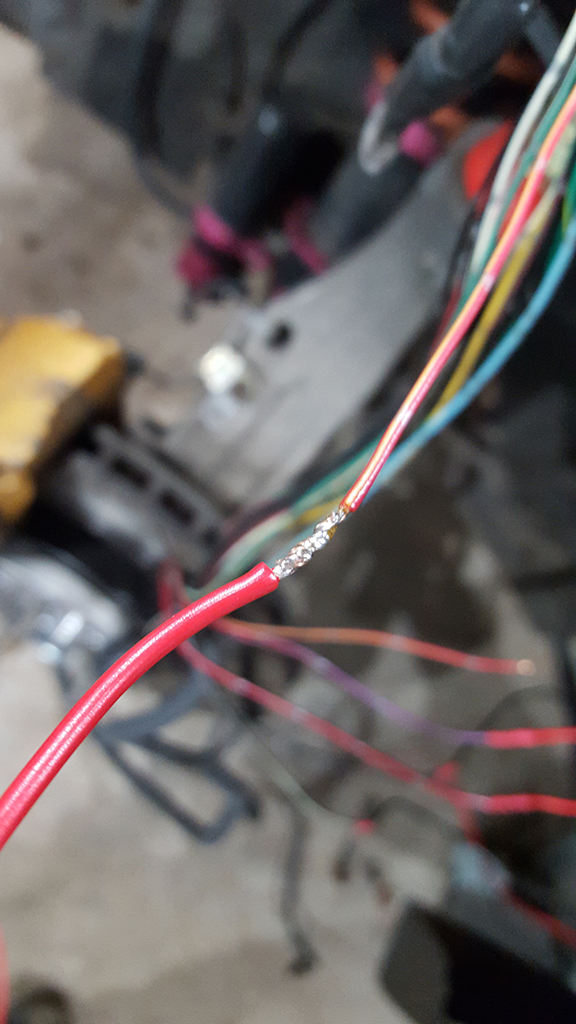

Go one wire at a time to make sure you dont cross wires. Even though they are color coordinated, sometimes they have very similar combos. Make sure you solder your connections good. A good iron is key to getting a good solder, dab a little melted solder on the iron and then heat your wires over that melted solder and add new solder to the wire as it gets hot. It should melt right into the strands and coat everything. Be sure to shrink wrap the connection afterwords.


Got quite a bit to update.
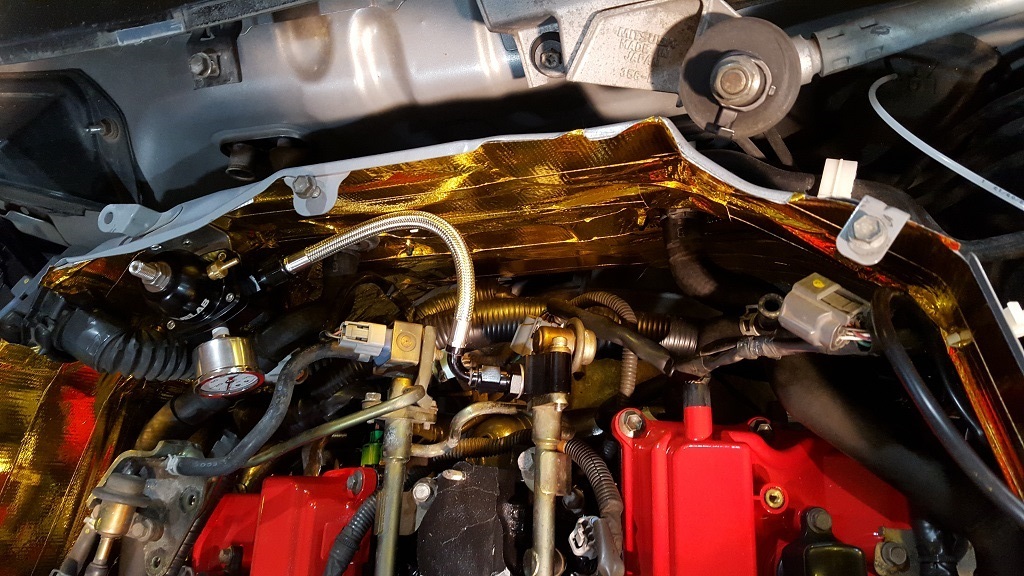
Finished the passenger side fender wire tuck, got the Aero fuel pump and CJM return installed, finally cut out the front bumper support to fit the intercooler, fitted the Mishi radiator (not fun), mounted the Z1 oil cooler, and got part of the firewall taped up with DEi Gold heat tape. Ran out of tape so ordered 2 more rolls. I also dropped off the block and heads at the machine shop.

Aero 340lph Stealth Fuel Pump.
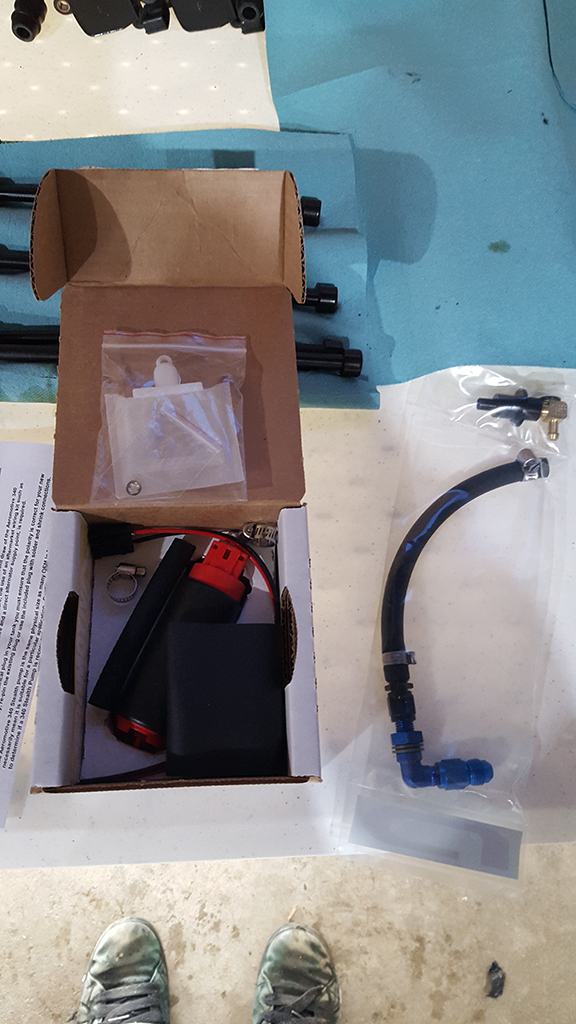
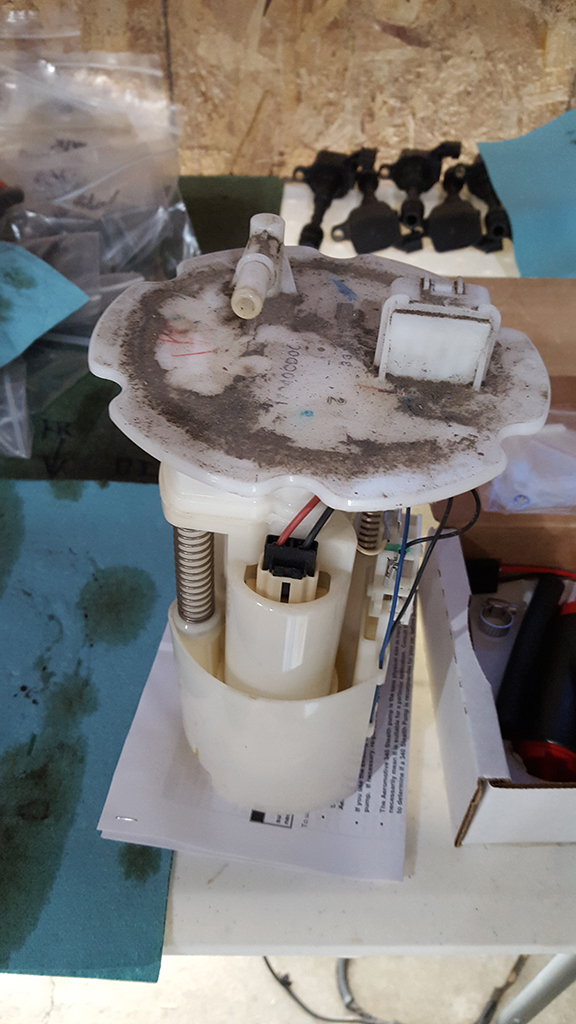
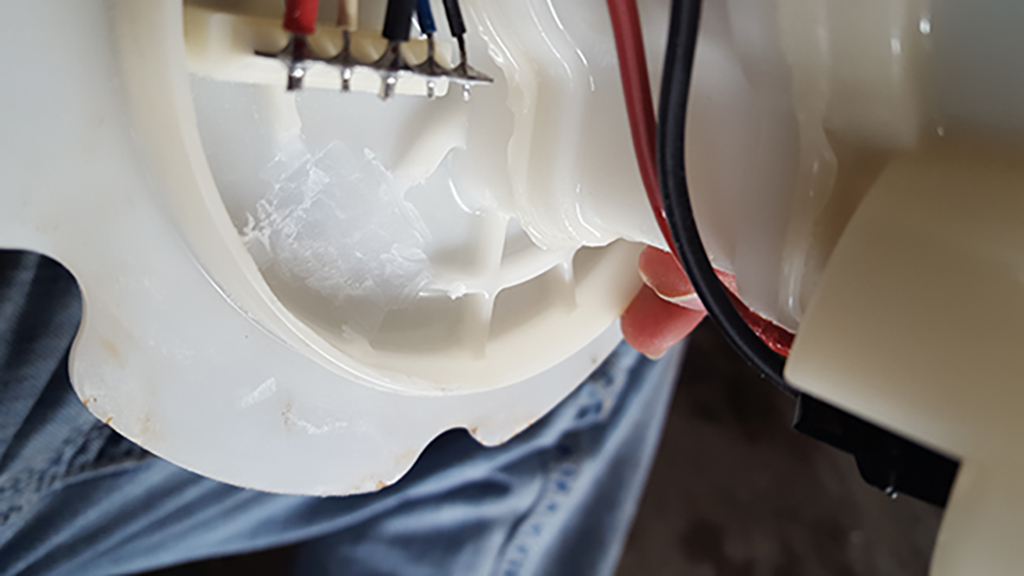
When I bought my turbo kit the previous owner sent the modified fuel bucket with it, so I still have my original one to work with. dug it out and got to work installing the Aero pump and CJM return.
Removing factory pressure regulator to replace with the CJM unit.
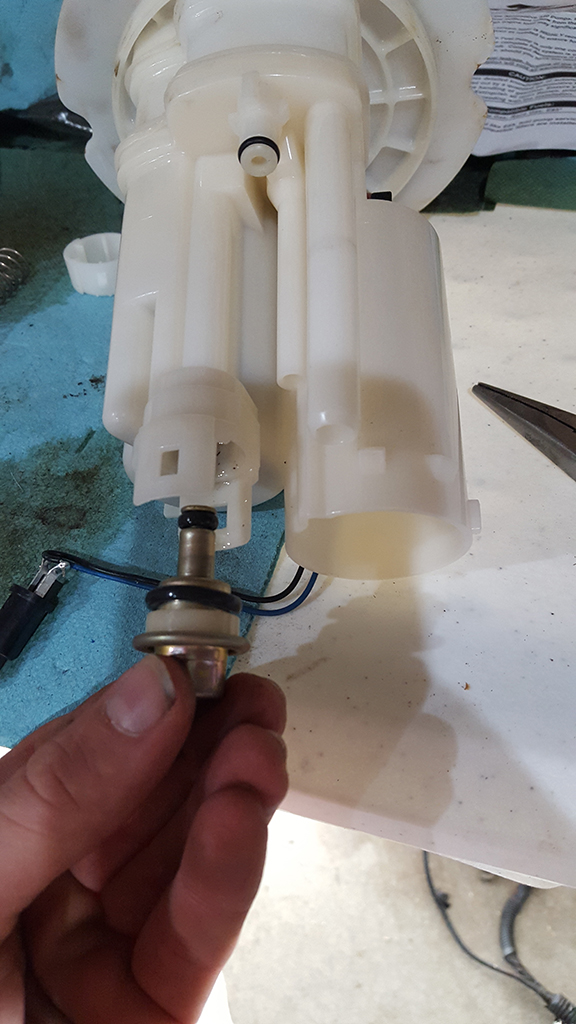
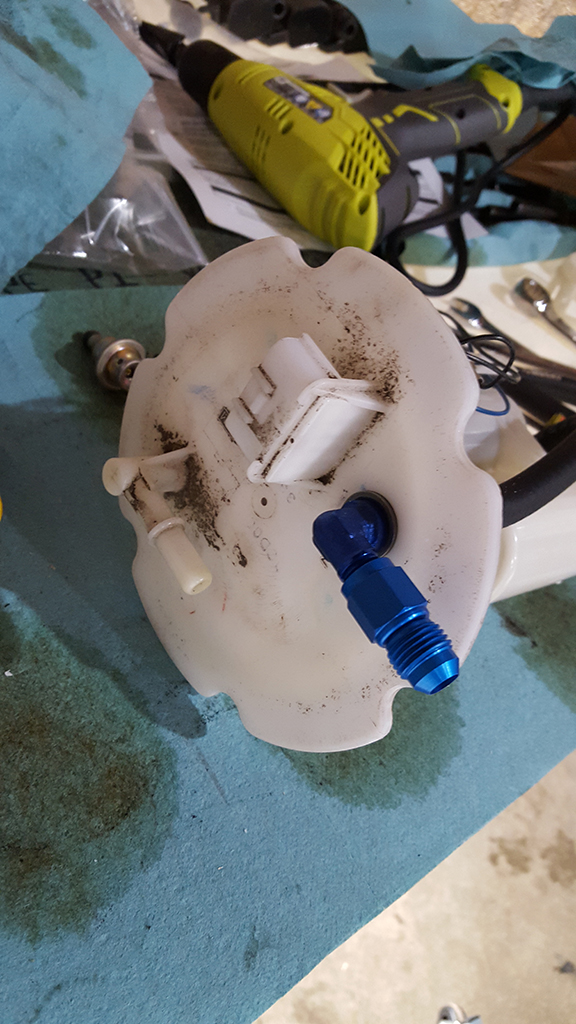
Dremel down the top of the assembly smooth so you can drill a hole and install a fitting for the return line.
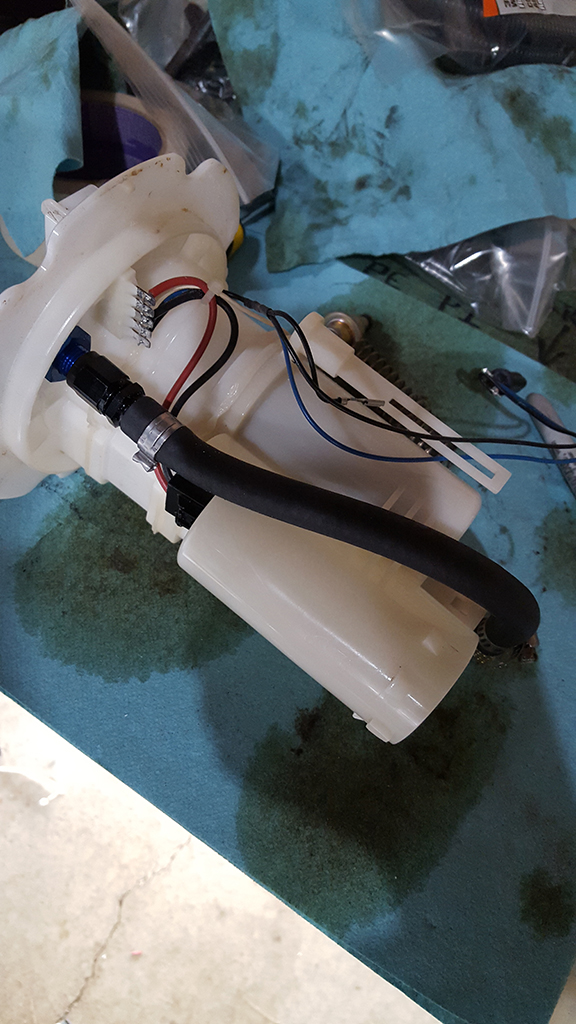
Aero pump installed. It is a little longer than the factory pump, so you need to file down the tabs to get the end cap to snap into place. I also forgot the pump came with its own sock so I eventually swapped it out after I took this photo.
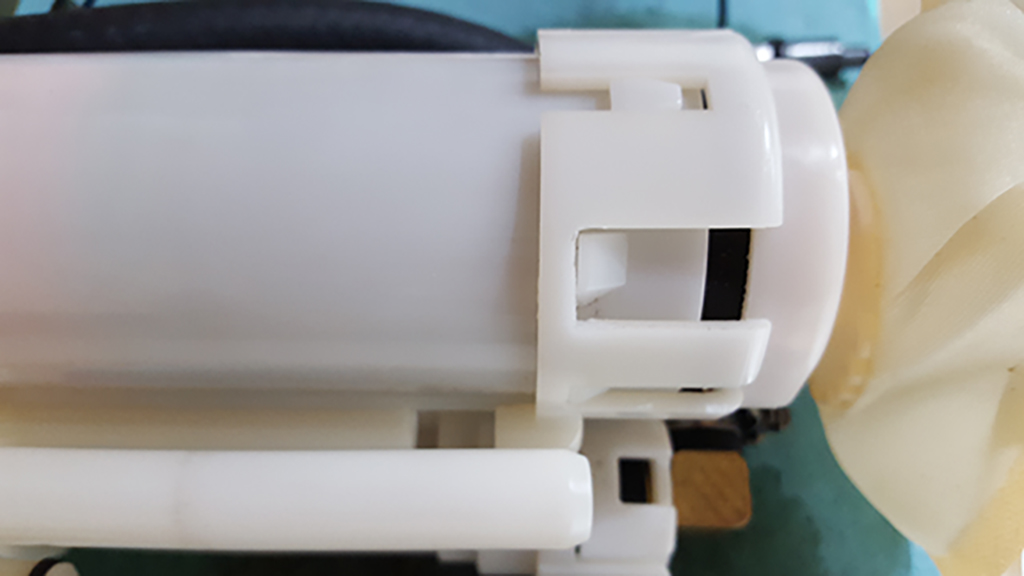
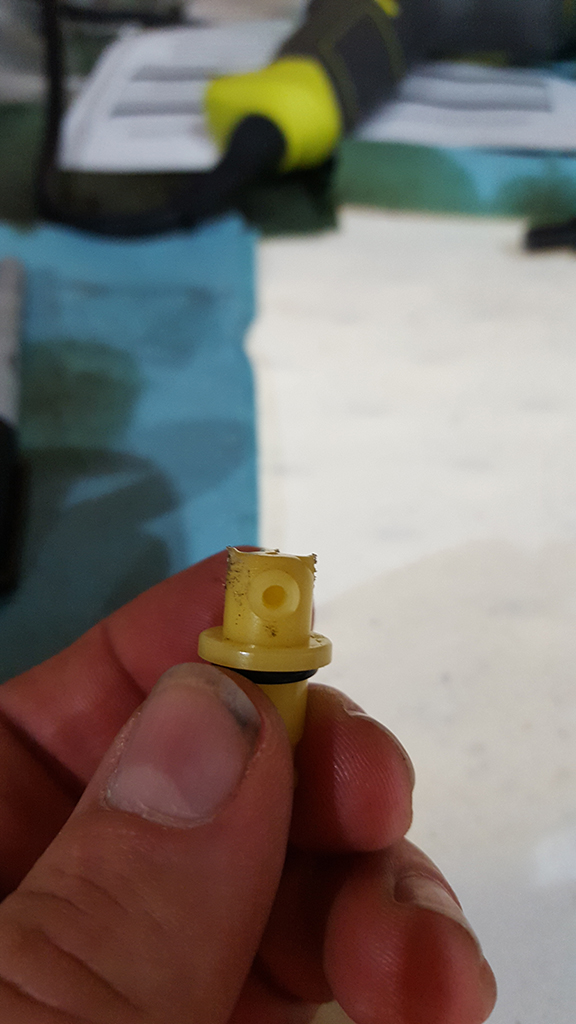
Drilled the swirl jet-pump hole to .100 inch
Fuel pump assembly done. You might have to do some filing down corners to get the lower bucket to slide on without resistance.
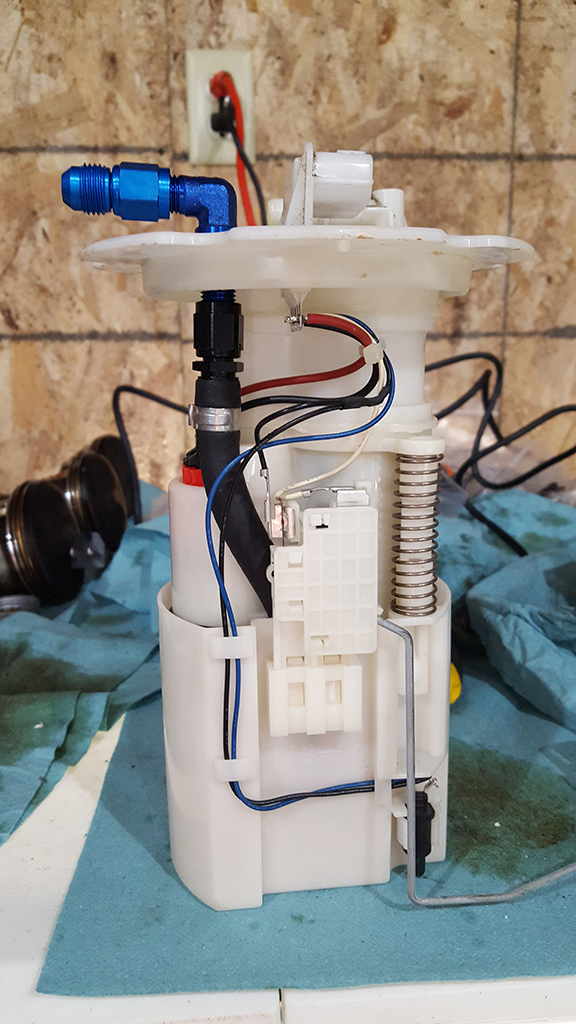
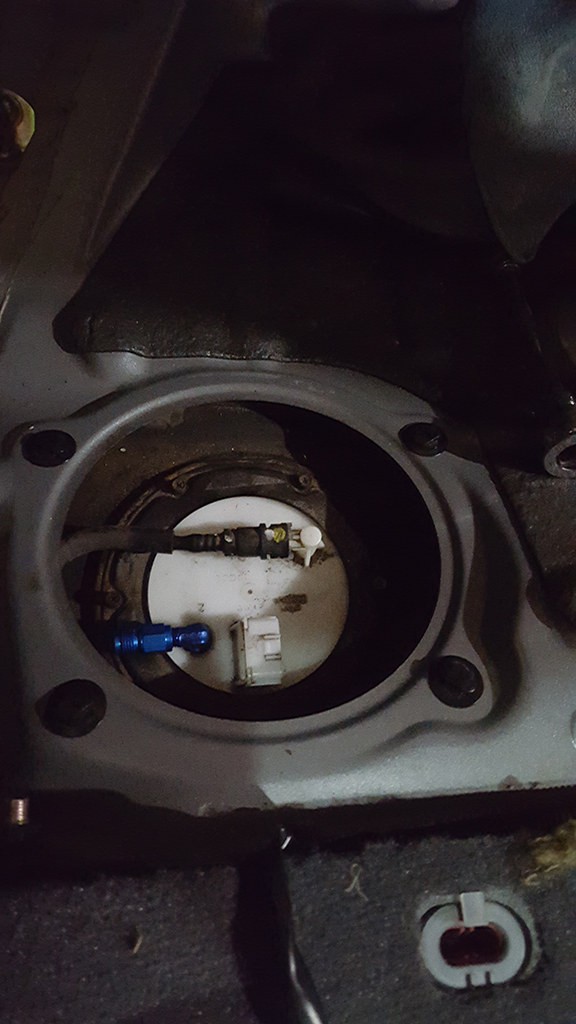
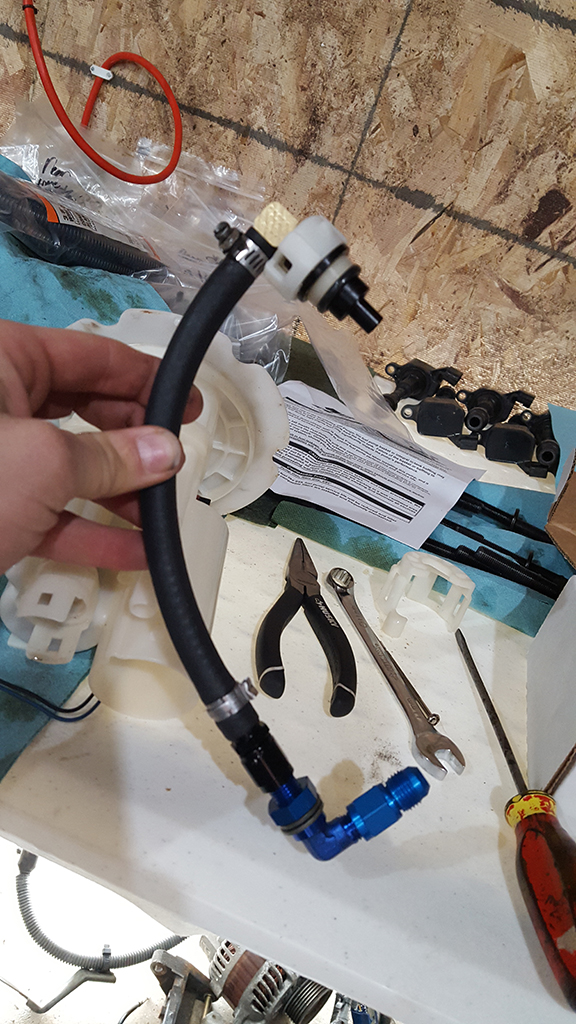
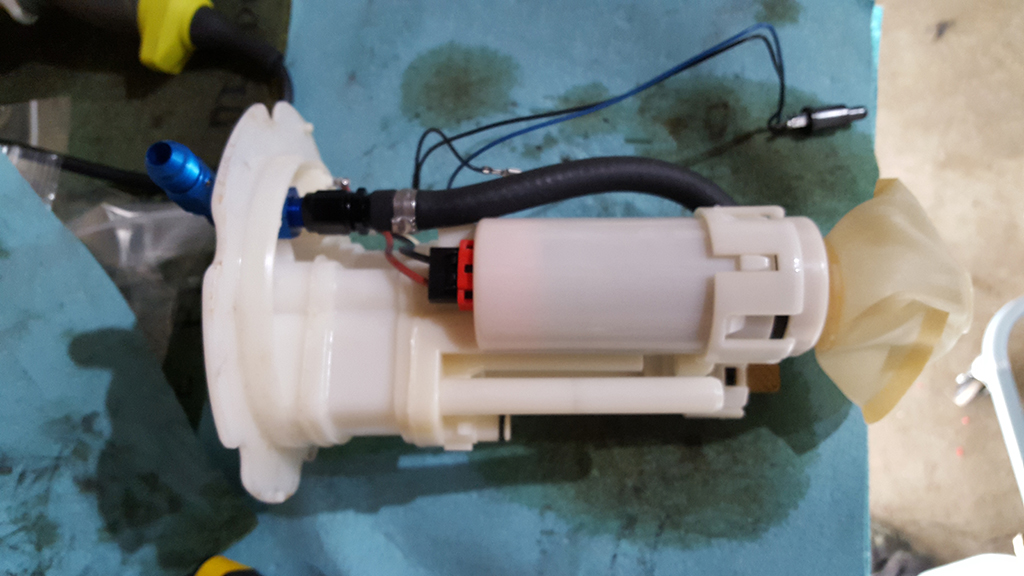
Next was the return line. There is one extra spot in the factory fuel line mounts that the new line will fit in if you break the tabs away from the mounts. Its a real pain to feed the line around the edge of the tank, but its do-able. I also zip tied it in, just in case.
Finished the passenger side fender wire tuck, got the Aero fuel pump and CJM return installed, finally cut out the front bumper support to fit the intercooler, fitted the Mishi radiator (not fun), mounted the Z1 oil cooler, and got part of the firewall taped up with DEi Gold heat tape. Ran out of tape so ordered 2 more rolls. I also dropped off the block and heads at the machine shop.


Aero 340lph Stealth Fuel Pump.

When I bought my turbo kit the previous owner sent the modified fuel bucket with it, so I still have my original one to work with. dug it out and got to work installing the Aero pump and CJM return.

Removing factory pressure regulator to replace with the CJM unit.


Dremel down the top of the assembly smooth so you can drill a hole and install a fitting for the return line.


Aero pump installed. It is a little longer than the factory pump, so you need to file down the tabs to get the end cap to snap into place. I also forgot the pump came with its own sock so I eventually swapped it out after I took this photo.


Drilled the swirl jet-pump hole to .100 inch

Fuel pump assembly done. You might have to do some filing down corners to get the lower bucket to slide on without resistance.


Next was the return line. There is one extra spot in the factory fuel line mounts that the new line will fit in if you break the tabs away from the mounts. Its a real pain to feed the line around the edge of the tank, but its do-able. I also zip tied it in, just in case.

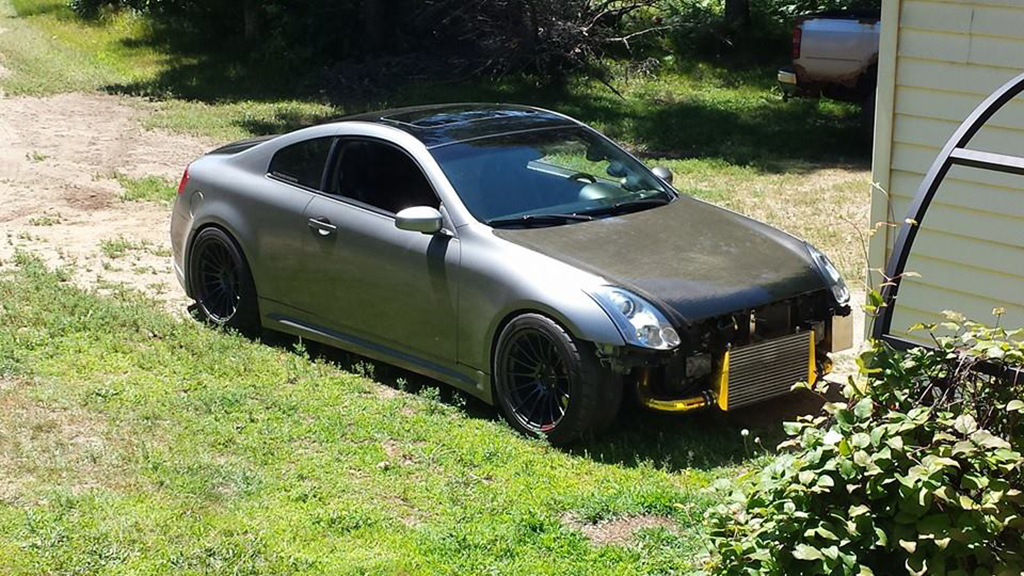
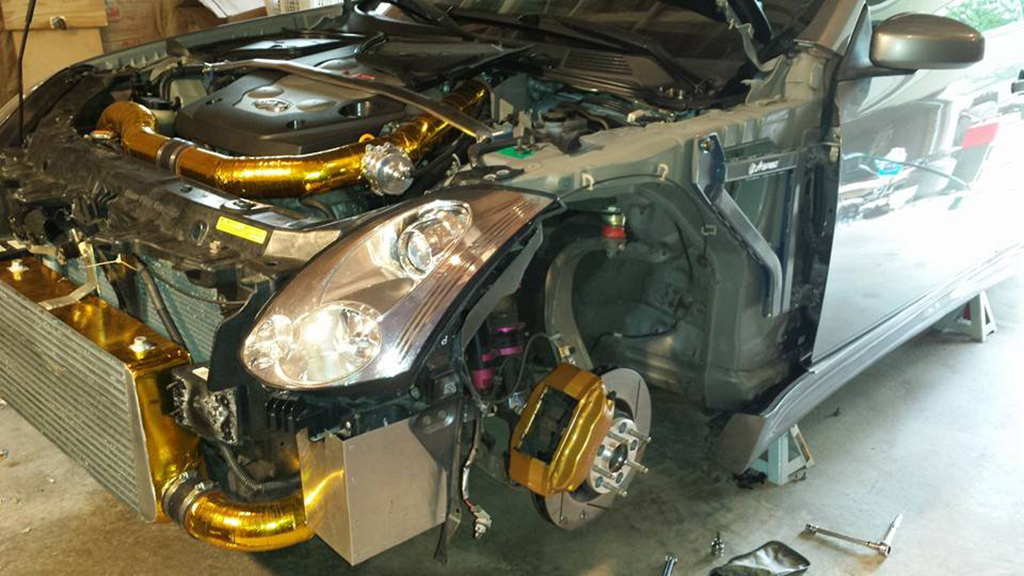
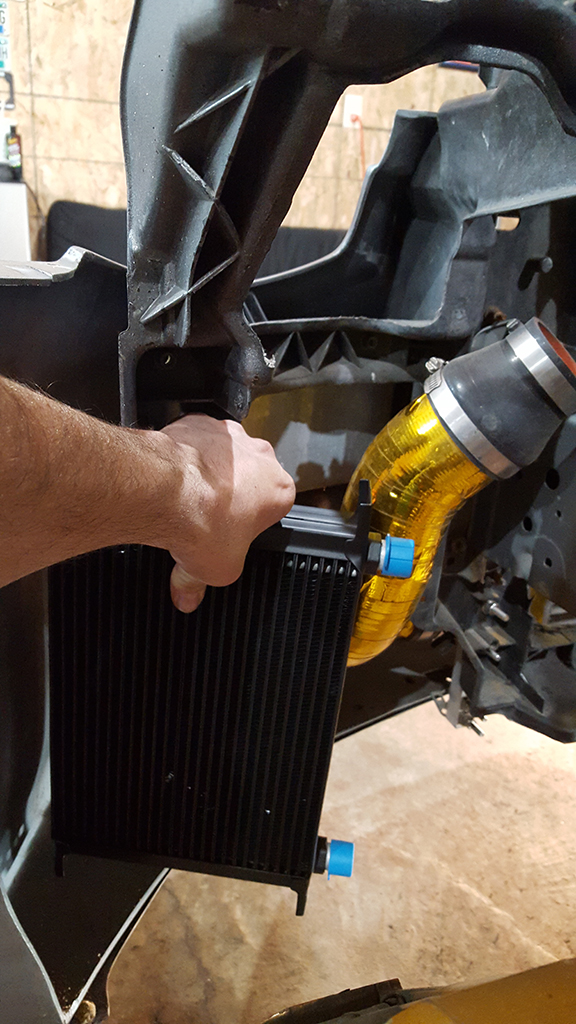
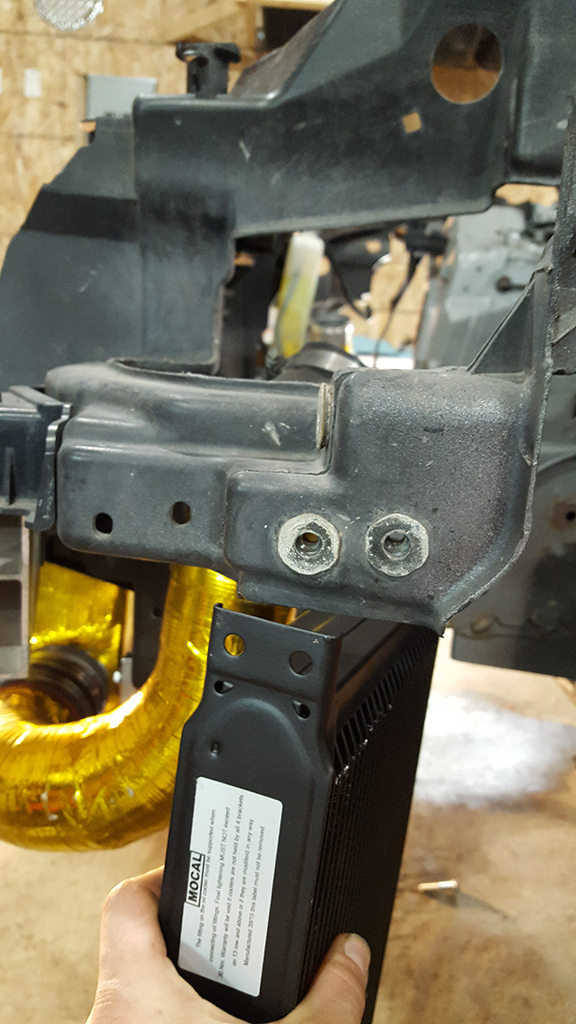
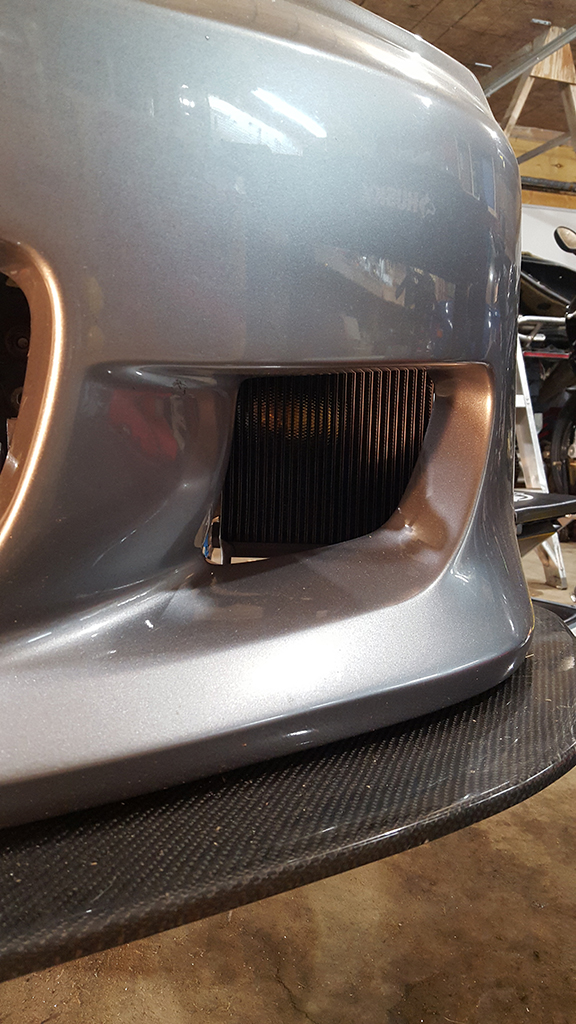
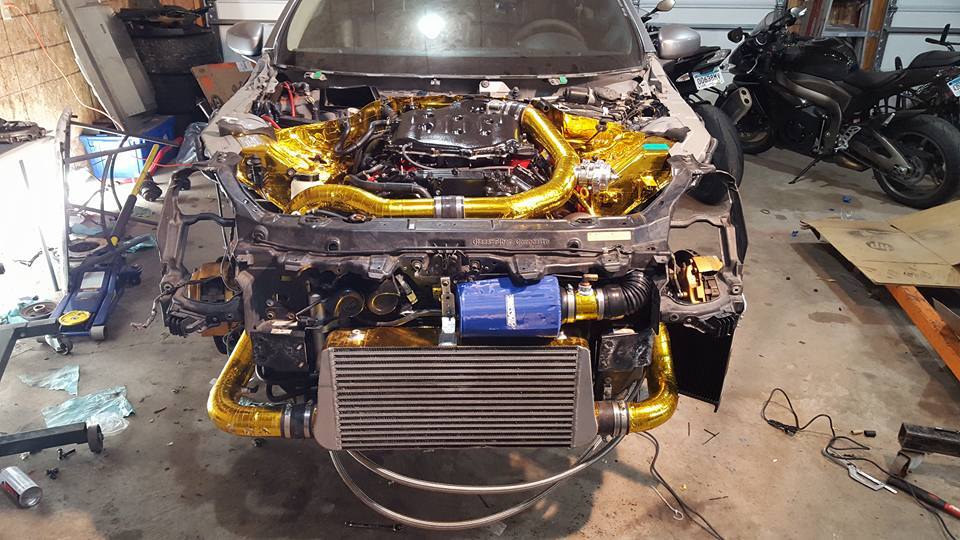
Fitting the bumper to fit around the intercooler. I will be bringing the bumper in to get new plates welded to close everything up.
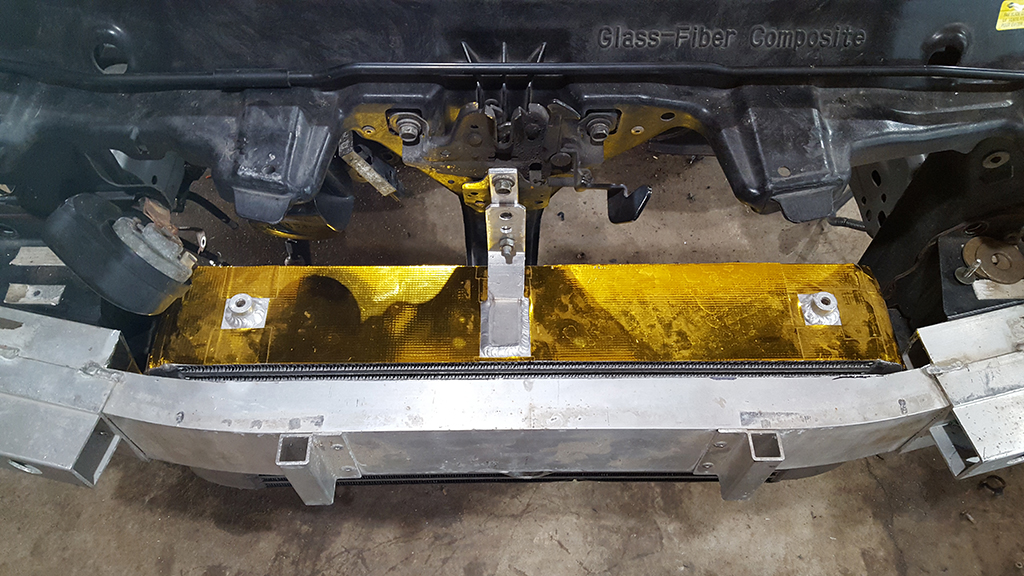
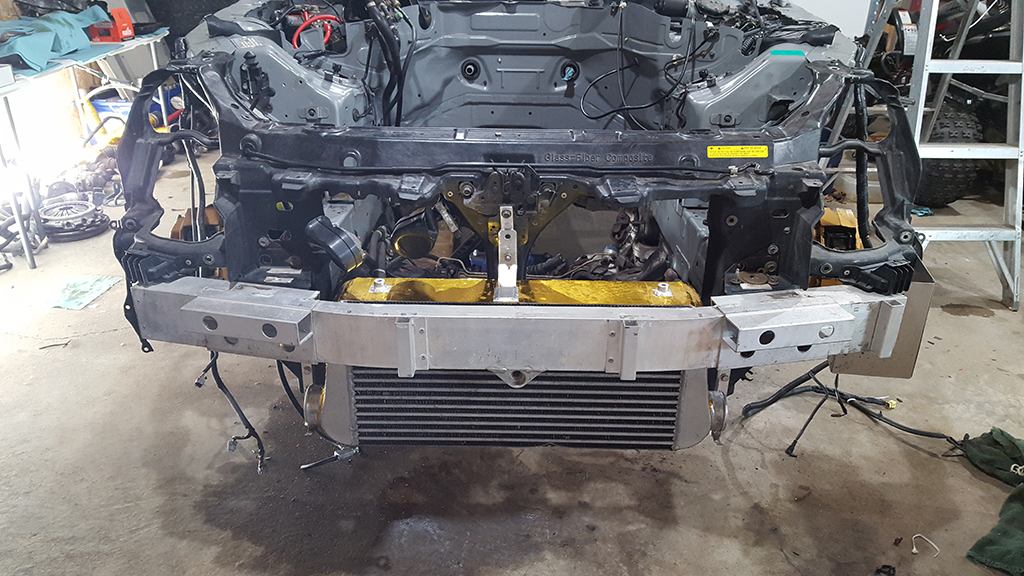
I used bolts threaded into the core support to get an even core-intercooler distance on both sides. Once the distance was set I could cut the intercooler brackets to length and get them mounted.
Next was the radiator. I'm still going to run A/C so to get everything to fit I had to cut away quite a bit of core support before it would fit.
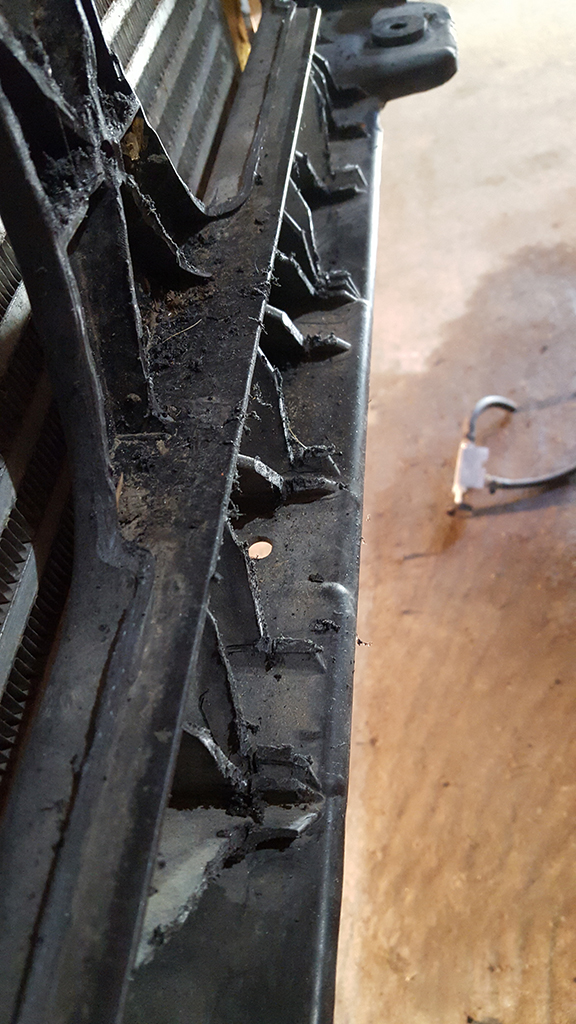
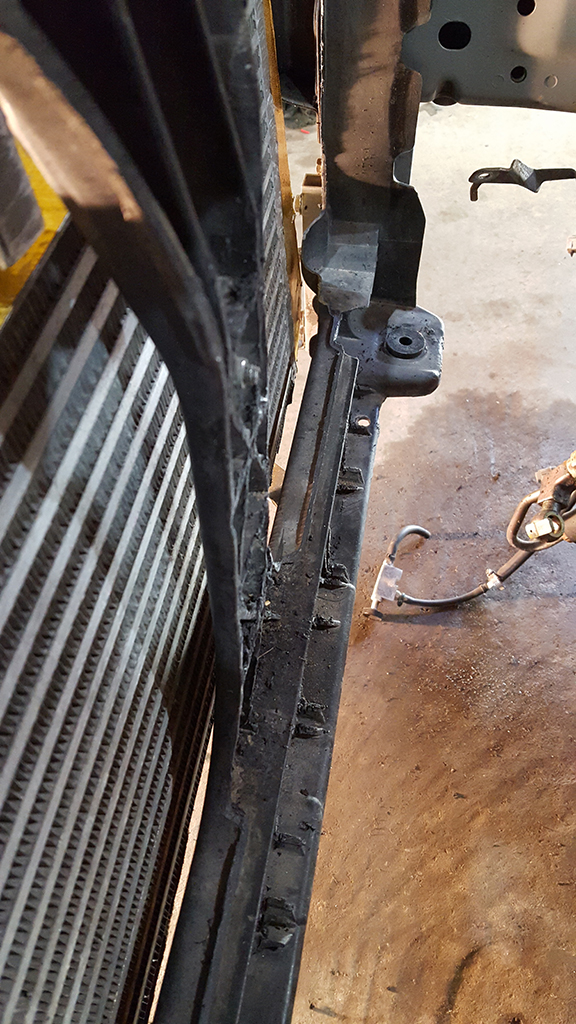
Also had to oblong the lower support holes as the new radiator wanted to sit too far to the drivers side.
If you're going to re-use the OEM fans you might have to cut away some of the lower mounts to get them to fitthe new radiator.
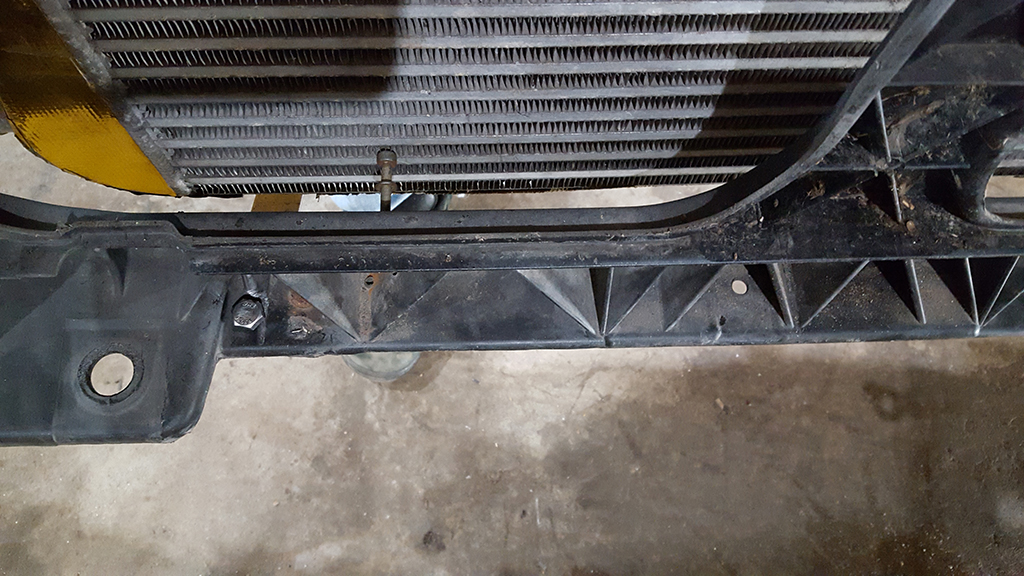
Finally in. I didnt get a photo of the OEM fans installed.
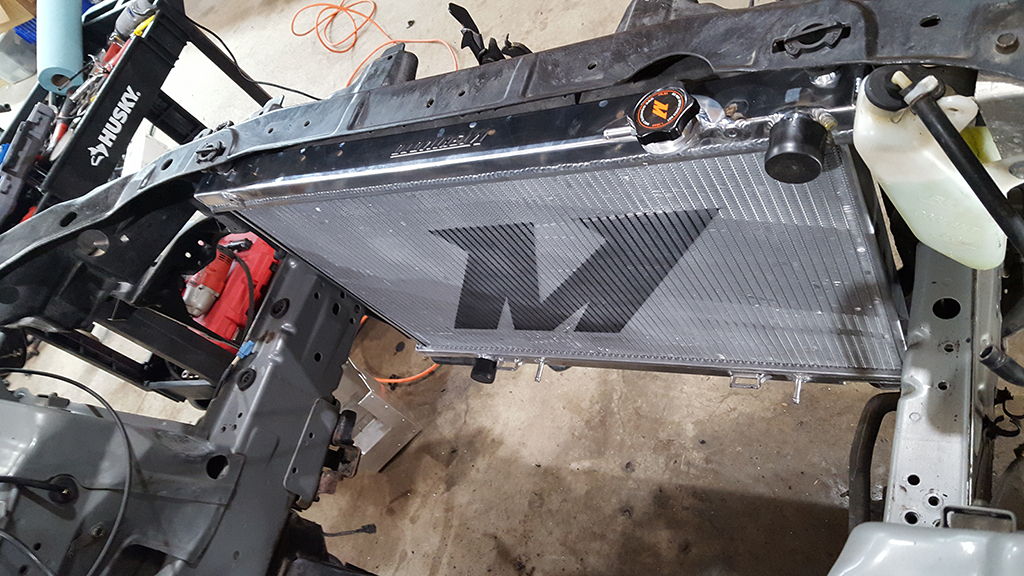
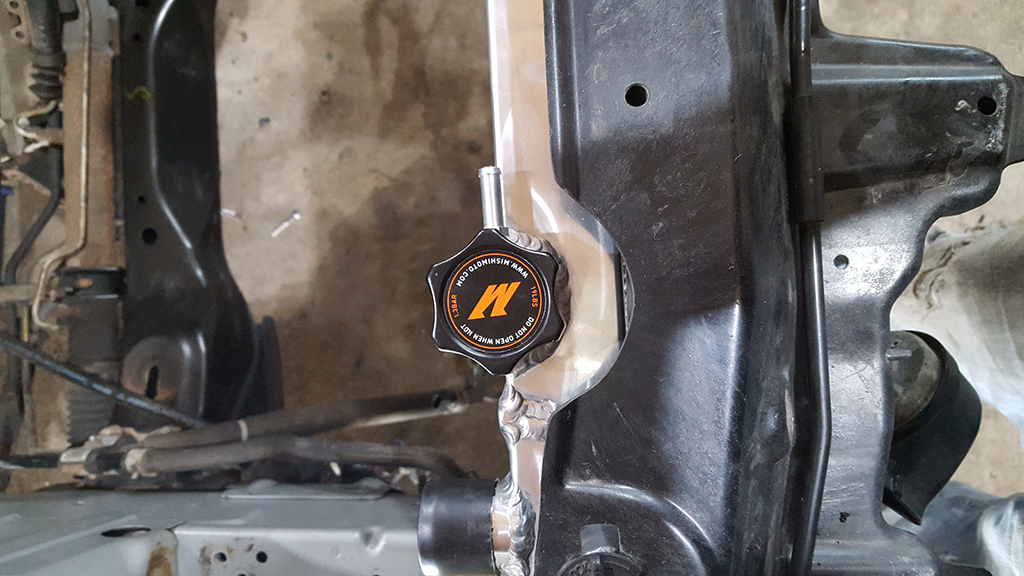
You'll want to cut away around the cap to make room for your fingers. Same goes for the drain plug.
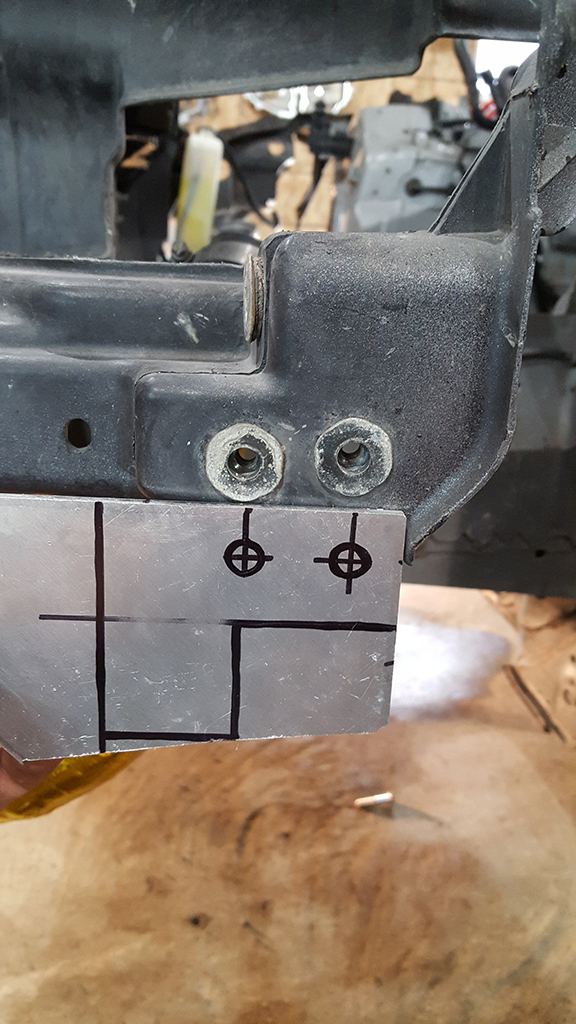
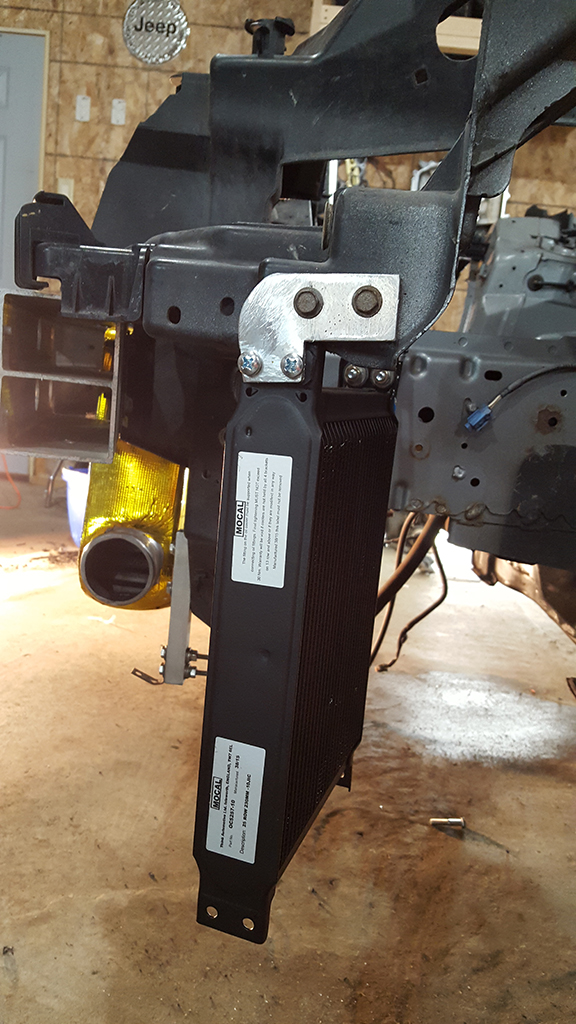
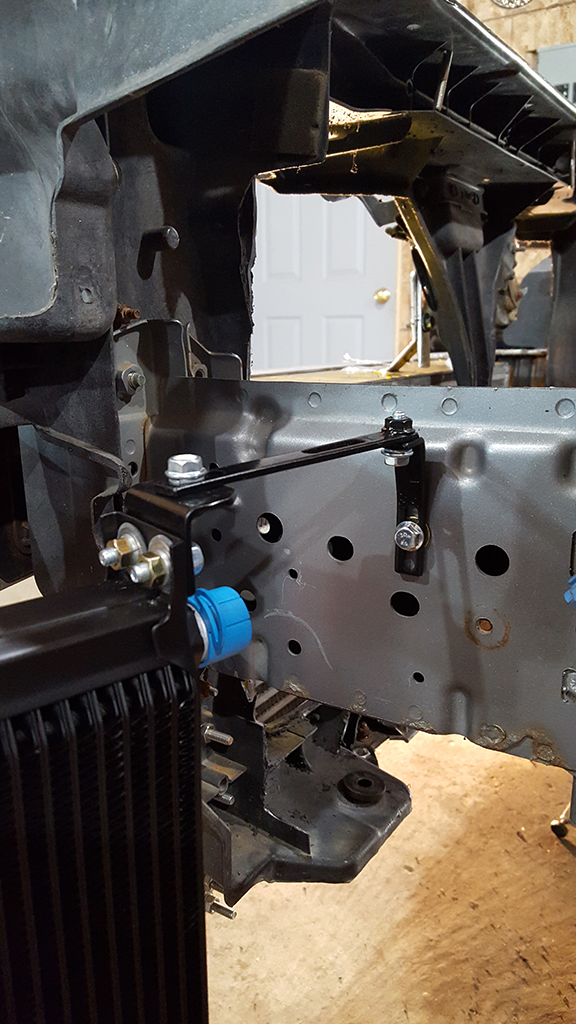
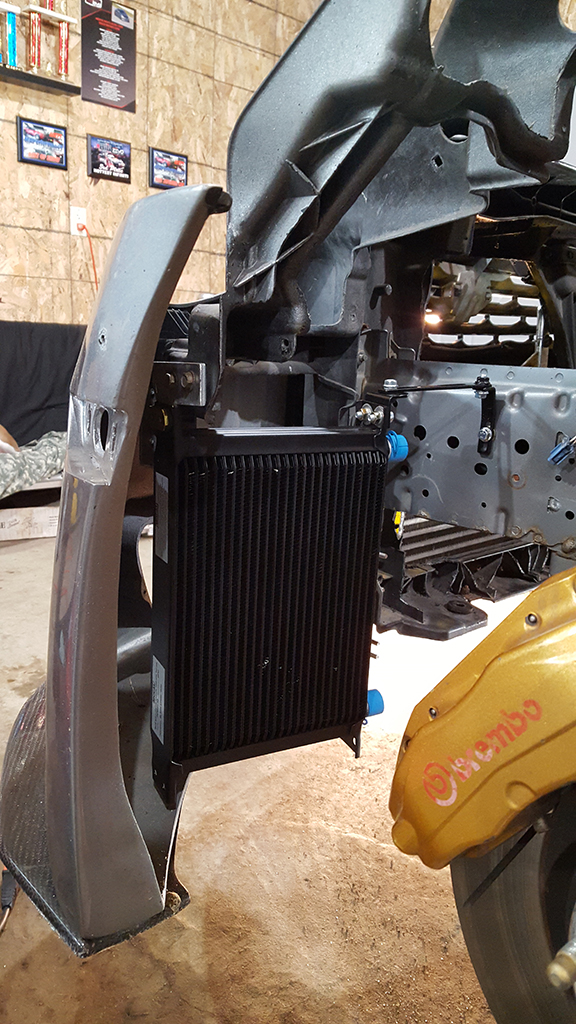
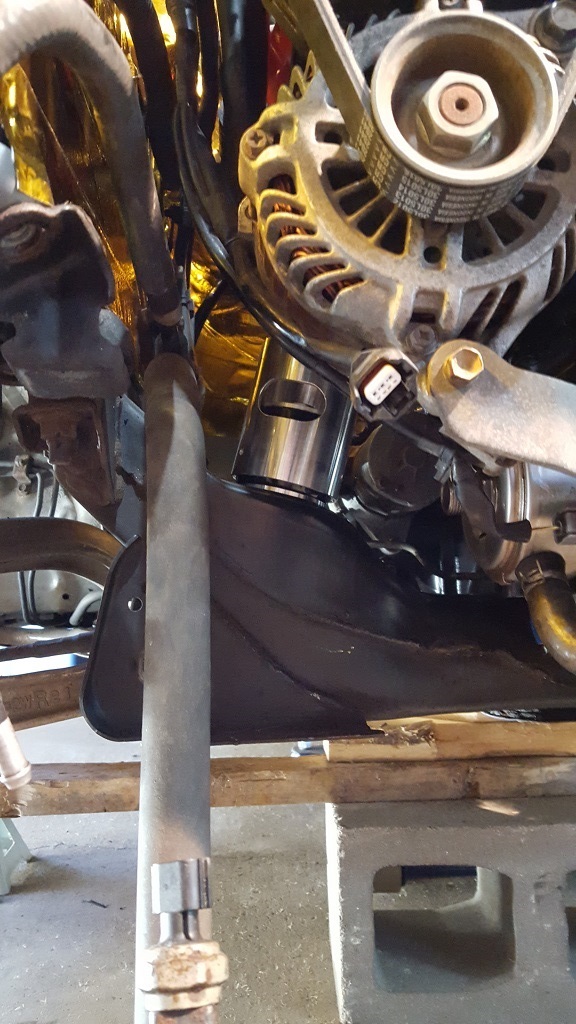
Next was finding a spot to mount the Z1 25 row oil cooler. I didnt want to sandwhich it between the intercooler and radiator, so I will fit in in the spot in front of the drivers tire. Made a bracket our of aluminum to mount it. I will be making some ducting to force air through it.
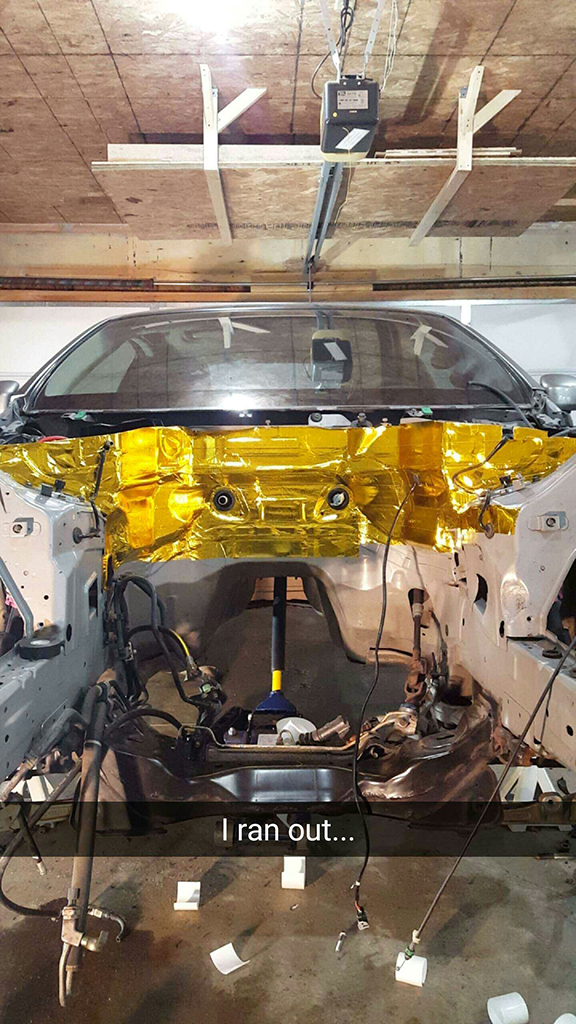
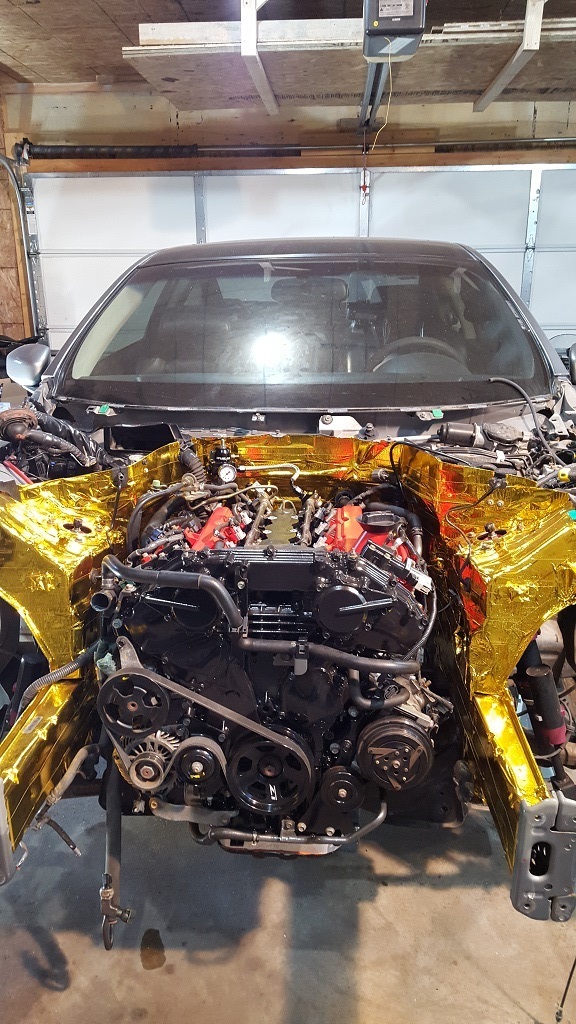
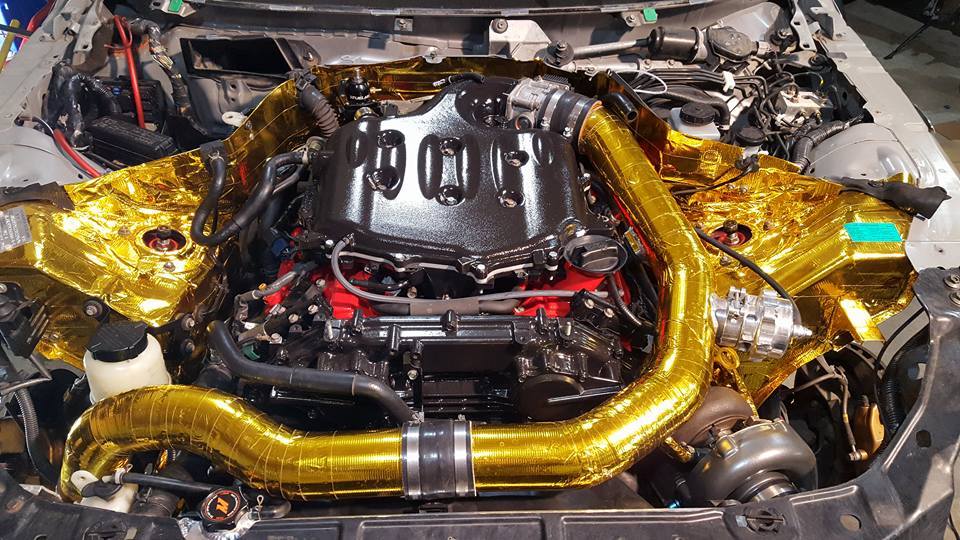
Started the gold wrap on the firewall but ran out. i also forgot to snap a photo so I had to resort to snapchat.
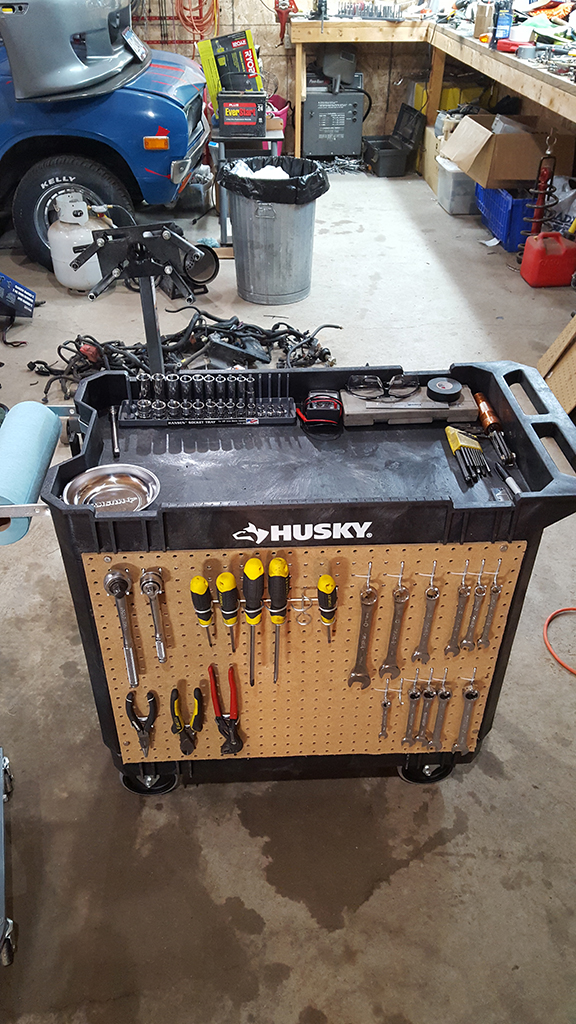
I got sick of my tool cart being cluttered with crap, so I decided to put some peg board on it and hang tools. Also put spools of wire in the back side with a soldier iron holder. Work is much easier when everything is organized. Now if I could just get the rest of the garage cleaned and organized......


I used bolts threaded into the core support to get an even core-intercooler distance on both sides. Once the distance was set I could cut the intercooler brackets to length and get them mounted.

Next was the radiator. I'm still going to run A/C so to get everything to fit I had to cut away quite a bit of core support before it would fit.


Also had to oblong the lower support holes as the new radiator wanted to sit too far to the drivers side.

If you're going to re-use the OEM fans you might have to cut away some of the lower mounts to get them to fitthe new radiator.

Finally in. I didnt get a photo of the OEM fans installed.

You'll want to cut away around the cap to make room for your fingers. Same goes for the drain plug.

Next was finding a spot to mount the Z1 25 row oil cooler. I didnt want to sandwhich it between the intercooler and radiator, so I will fit in in the spot in front of the drivers tire. Made a bracket our of aluminum to mount it. I will be making some ducting to force air through it.


Started the gold wrap on the firewall but ran out. i also forgot to snap a photo so I had to resort to snapchat.

I got sick of my tool cart being cluttered with crap, so I decided to put some peg board on it and hang tools. Also put spools of wire in the back side with a soldier iron holder. Work is much easier when everything is organized. Now if I could just get the rest of the garage cleaned and organized......


Little update:
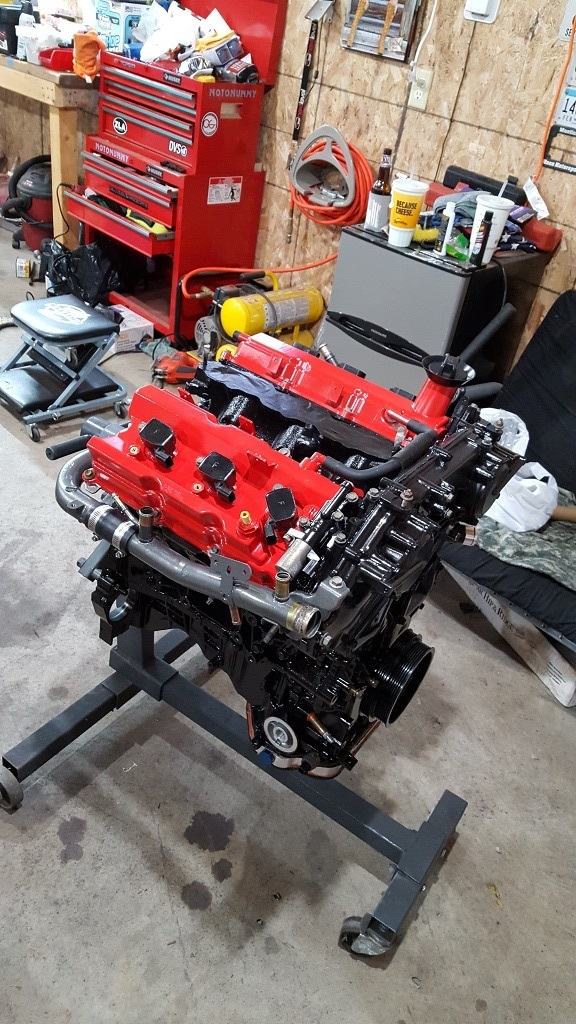
Finally got the motor back from the machine shop and started assembling the bottom end. Also checked ring gap and luckily I didn't have to file any of them (filing rings sucks). I've got a 3 day weekend so should have it together by next week hopefully. Will be shipping off he turbo CHRA to AMS tomorrow for a replacement since mine has quite a few miles on it and was starting to show signs of leaking. I've got a tune date set for April 22cnd and a show the weekend following that and starting to feel rushed.
Installed the rear Stance toe/spring bucket delete arms. Was going to do bushings while I was at it, but was having some troubles getting everything out so I decided I will tackle that job next winter when I'm not trying to get so much done.
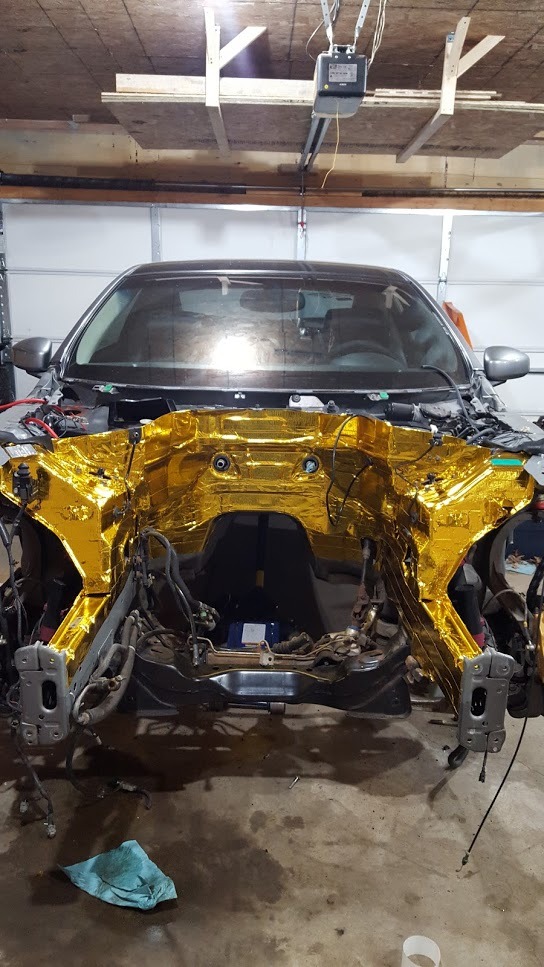
I also got a little carried away with the DEI wrap. I wish I had browsed Z1 more because they have it in longer rolls for less $$.
Finally got the motor back from the machine shop and started assembling the bottom end. Also checked ring gap and luckily I didn't have to file any of them (filing rings sucks). I've got a 3 day weekend so should have it together by next week hopefully. Will be shipping off he turbo CHRA to AMS tomorrow for a replacement since mine has quite a few miles on it and was starting to show signs of leaking. I've got a tune date set for April 22cnd and a show the weekend following that and starting to feel rushed.
Installed the rear Stance toe/spring bucket delete arms. Was going to do bushings while I was at it, but was having some troubles getting everything out so I decided I will tackle that job next winter when I'm not trying to get so much done.
I also got a little carried away with the DEI wrap. I wish I had browsed Z1 more because they have it in longer rolls for less $$.


Trending Topics

small update:
Havent taken many photos lately but the motor is built and dropped in the car. During the build I ran into some minor snags. The gasket rebuild kit that I got from Z1 did not come with a rear main seal, one of the upper oil pan gaskets, or VVT gaskets. Trying to go to the local Nissan dealer hoping they had them in stock was a mistake because they are idiots and cant understand how a G35 uses the same motor as the 350z.
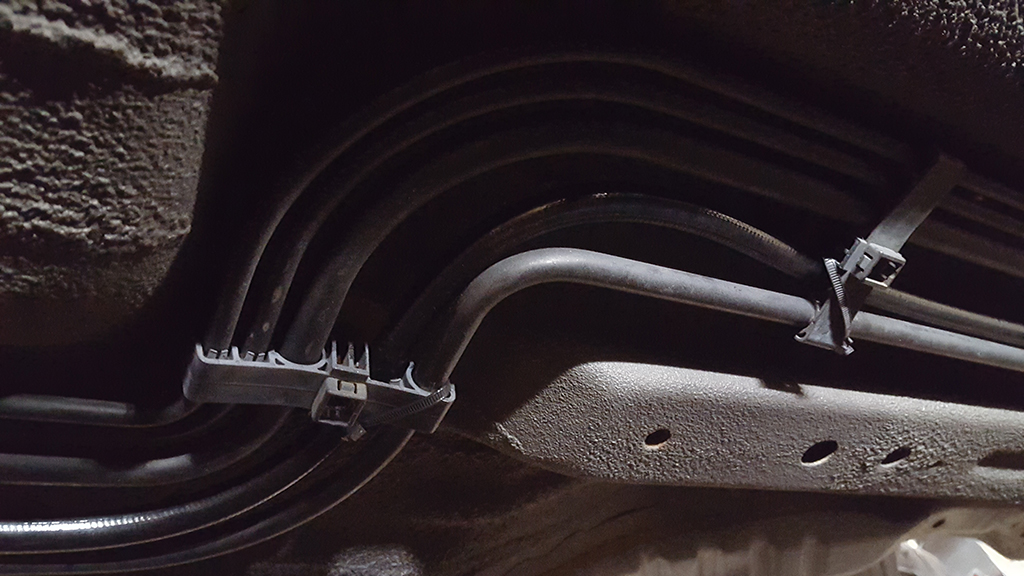
Did a engine harness wire tuck. If they would have just ran everything around the back of the engine from the start they could have cut down on a lot of wire.
I built a lift plate to avoid marking up the paint when hoisting the motor. I was super nervous with everything being aluminum but it worked great.
A couple other snags, the oil sandwich plate for the Z1 oil cooler is wrong. Not a show stopper but frustrating. I contacted Z1 and they said they would replace it, but after asking how to go about sending it they never got back to me. I would just send it to the shop but I don't want it to get lost after that because no one knows what its for. Wont give names but talked to them on Facebook, emailed, and CZP who I ordered the cooler through has tried contacting them as well and still waiting on an answer. So overall not impressed with Z1 after missing gaskets and now lacking customer support.
Also been trying to get a hold of Intense Power about ordering some headers and cant get through to them. Emailed, called, left messages, and facebooked and haven't received anything back. So right now I'm picking up some cheap no name headers just to get it running and a base tune to break the motor in. Would have liked to have the headers on before dropping in the motor but I'm running short on time, tune date on the 22cnd.
Havent taken many photos lately but the motor is built and dropped in the car. During the build I ran into some minor snags. The gasket rebuild kit that I got from Z1 did not come with a rear main seal, one of the upper oil pan gaskets, or VVT gaskets. Trying to go to the local Nissan dealer hoping they had them in stock was a mistake because they are idiots and cant understand how a G35 uses the same motor as the 350z.
Did a engine harness wire tuck. If they would have just ran everything around the back of the engine from the start they could have cut down on a lot of wire.
I built a lift plate to avoid marking up the paint when hoisting the motor. I was super nervous with everything being aluminum but it worked great.
A couple other snags, the oil sandwich plate for the Z1 oil cooler is wrong. Not a show stopper but frustrating. I contacted Z1 and they said they would replace it, but after asking how to go about sending it they never got back to me. I would just send it to the shop but I don't want it to get lost after that because no one knows what its for. Wont give names but talked to them on Facebook, emailed, and CZP who I ordered the cooler through has tried contacting them as well and still waiting on an answer. So overall not impressed with Z1 after missing gaskets and now lacking customer support.
Also been trying to get a hold of Intense Power about ordering some headers and cant get through to them. Emailed, called, left messages, and facebooked and haven't received anything back. So right now I'm picking up some cheap no name headers just to get it running and a base tune to break the motor in. Would have liked to have the headers on before dropping in the motor but I'm running short on time, tune date on the 22cnd.


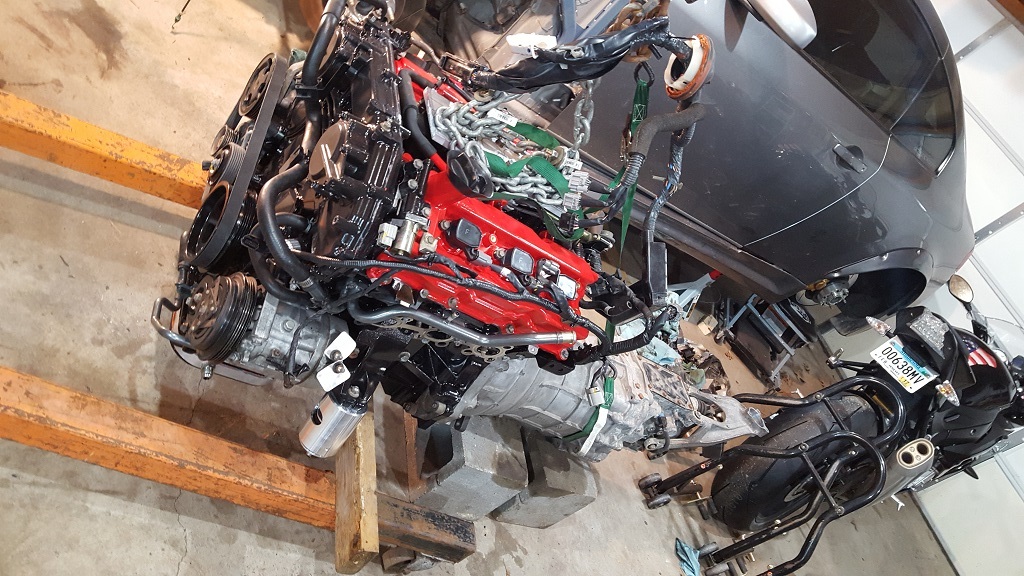
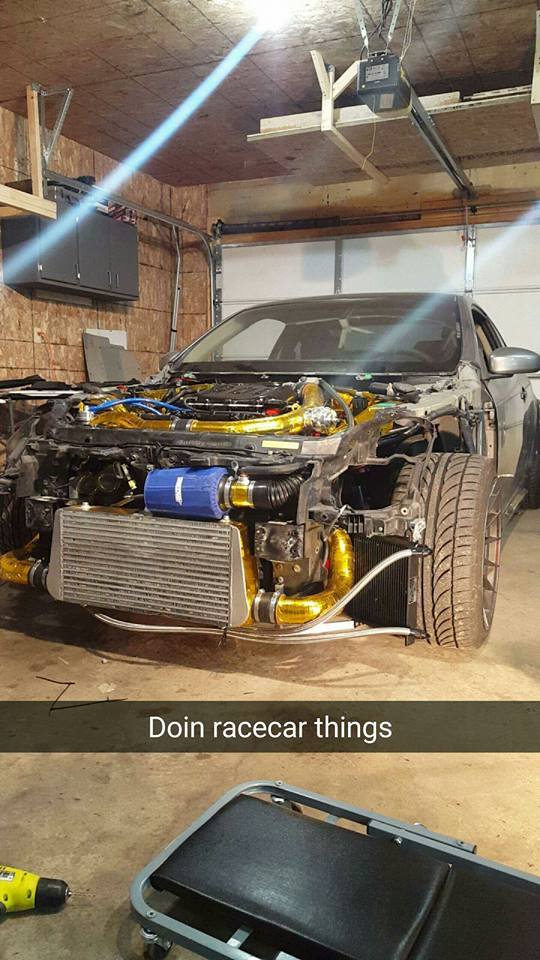
new current situation, with a few more minor things finished and back on the ground. Finally running! I've been at it every day non-stop since the last update.
Since the last update, man where do I begin?!
Finally got a replacement fitting from Z1 for the oil cooler sandwich plate. Took much longer than it should have, and had to go through CZP to get anything accomplished, but it finally arrived. I also got a hold of the company about the headers, turns out they are made to order. I didn't have the time to wait so I found a knockoff set that a buddy had and picked those up so I could get the car tuned, and I'll do new headers later. The knockoffs build quality is actually pretty good, but the holes were way off. Had to oblong every hole to get it to bolt up to the block. That was a couple day project. I also had to pull the motor back out to fit them.
Once headers and motor were back in the car, I started on the exhaust. The headers fit just a little different and caused the up-pipe to fit much tighter, turbo placement was a little different which caused the downpipe to rest on the header, and also caused the center section of the exhaust to sit too high and against the driveshaft. With some persuasion and custom brackets I was able to get everything to fit. Much tighter than before, and I also have more firewall clearance now so it worked out better in the end.
Then it was time to test fire. After getting the fuel system primed it fired on the second attempt and idled good, SUCCESS!!!! But it had a nasty squeal. Determined the squeal was p/s pump. Adjusted belt and got the squeal to go away, but also ran into a no start issue, I was getting fuel, no spark. Crap. Checked fuses, everything was good, but I wasn't getting power to the coils, and after some Googling everything pointed to the ECM relay, which according to Nissan you have to replace the whole IPDM and cant get just the relay. Double crap! After going through the FSM and testing everything from the ECM to the coils, by the time I got to the coils I had power again, so I'm assuming it was a bad ECM connection.
She livers again! Idles great, had a few small leaks that were addressed, temps look good, time for a test drive. Back out the garage and turn the wheel and steering hits something and wont turn. Turns out the steering shaft knuckle is hitting the header. So now my next hurdle is grinding down the knuckle and denting the header wall to make clearance. Hopefully will have that taken care of this evening and I can go for a test drive. I have to have her loaded up Thursday for a base tune on Friday. Fingers crossed for no more problems!


Registered User
Joined: Mar 2016
Posts: 8
Likes: 1
From: Harris county, Texas
Impressive!
A couple of thoughts.
Did you brace the bottom of the oil cooler? If not, your top-side brackets are gonna break. That's a lot of weight flapping in the breeze.
Open-deck block?! How sad. My first experience with one was a Chevy Vega. POS^2. And me with a VQ37. Huh oh.
A couple of thoughts.
Did you brace the bottom of the oil cooler? If not, your top-side brackets are gonna break. That's a lot of weight flapping in the breeze.
Open-deck block?! How sad. My first experience with one was a Chevy Vega. POS^2. And me with a VQ37. Huh oh.
Yes open deck. The VQ block is pretty stout and has proven to hold up to close to 30psi without sleeves (properly tuned, well taken care of, not beating on it). I don't plan to push 30psi and I typically drive like a grandma unless its a track day.
So Rod over at Z1 hooked me up with a new steering knuckle over night. I ground it down as far as I could to clear the header, and also torched the header and dented in the wall to make some clearance. The first attempt was 90% successful. It would clear while on stands, but once on the ground it would catch but I was able to pop it past the catching point with slight force, so I was able to get a test drive in. Everything went good minus overheating, which the VQ is notorious for air pockets in the cooling system. Got the car home, fronts on stands again to bleed the system. I removed the knuckle again and ground some more and got a little larger dent into the header tube, so hopefully that will clear completely now. I am a little concerned about the engine torqueing and causing it to hit again, but for now this will work to get it tuned.
So far still on the path to tuning on Friday.
So far still on the path to tuning on Friday.
