Window Motor repair, they can be fixed!
 06-07-2010, 03:45 PM
#21
New Member
Thread Starter
iTrader: (8)

Join Date: Jan 2007
Location: terre haute, IN; STL, MO
Posts: 6,457
Likes: 0
Received 7 Likes
on
6 Posts
Thread title looks like a question so people might refer to Vo's larger thread, in regards to cleaning/ replacement motor. No one has really updated a solution by linking to this thread (Until recently.)
The replacement motors are just robbery so I don't even care if these brushes last me six months.
Thanks again!
The replacement motors are just robbery so I don't even care if these brushes last me six months.
Thanks again!
and it says "they can be fixed!"
english language dictacts that is a statement

 06-08-2010, 01:26 PM
#24
Registered User

Thanks for this; I�m tucking it away for the future. My dad was a mechanic and machinist, he ran a small shop and did a lot of fabrication work for antique car restorers. He often refurbished generators, electric motors and magnetos. As a kid I was his helper and general indentured slave. Once I got my driver�s license he would frequently hand me some odd shaped, obsolete, worn brush etc. and send me on a mission to all the auto electrical outlets to procure the closest shaped replacement that he could then refashion into a working part.
My 2004 Z still has it�s original window motors obeying my every command. However, since day one, the driver�s side has run a little slower than the passenger side, so I�ve been worrying about the extra strain causing it to fail.
I have saved a good sized assortment of dad�s old tools, and I know that he would have approved of me repairing instead of just replacing a component. Mind you, I�ll need tons of help and hand holding if I attempt this on my own.
 07-05-2010, 11:04 PM
#30

Autozone/Kragen refurbished window motors are crap....
I have one and probably had to bring it in for a replacement at least 3 times now, in a 2 year period.
I went to go pick up another one today and it was missing the reset button and cover... Needless to say I was pissed.
Very tempted to do this fix...
I have one and probably had to bring it in for a replacement at least 3 times now, in a 2 year period.
I went to go pick up another one today and it was missing the reset button and cover... Needless to say I was pissed.
Very tempted to do this fix...
07-05-2010, 11:08 PM
#31
oh and I have at least 2 customers coming to me about twice a year for me to do the replacement labor on their Kragen refurbished window motors....
Finally had a customer come w a NEW window motor, and I was surprised to see that it didnt even need a relearn procedure or anything, it was cake. Why cant Kragen/Autozone get their refurbishing company to get their **** straight?
Finally had a customer come w a NEW window motor, and I was surprised to see that it didnt even need a relearn procedure or anything, it was cake. Why cant Kragen/Autozone get their refurbishing company to get their **** straight?
 07-06-2010, 08:33 AM
#33
Hey Binder,
Do you remember the brush compound you used? Or was it pretty generic?
Hard brush - More power, more commutator wear.
Soft brush - Less power, less commutator wear.
Full brush - More power, more torque, less rpms.
Cut brush - Less power, less torque, more rpms.
I had a spare set of brushes off of my low-turn RC motor but it was a tad too thick. I sanded the sides down but it couldn't sit in the window motor right. I'm going to need to run tot he RC shop and do this proper.
07-06-2010, 10:43 AM
#34
New Member
Thread Starter
iTrader: (8)
Join Date: Jan 2007
Location: terre haute, IN; STL, MO
Posts: 6,457
Likes: 0
Received 7 Likes
on
6 Posts
uncut, standard compound.
you do have to sand, but the obvious thing is DONT sand too much. i didn't have trouble with that. you must have used 80 grit or something on them. It doesn't take much to get them to fit. just a light sand. lay the paper on a flat surface so you sand them true.
you do have to sand, but the obvious thing is DONT sand too much. i didn't have trouble with that. you must have used 80 grit or something on them. It doesn't take much to get them to fit. just a light sand. lay the paper on a flat surface so you sand them true.
07-06-2010, 11:12 AM
#35
uncut, standard compound.
you do have to sand, but the obvious thing is DONT sand too much. i didn't have trouble with that. you must have used 80 grit or something on them. It doesn't take much to get them to fit. just a light sand. lay the paper on a flat surface so you sand them true.
you do have to sand, but the obvious thing is DONT sand too much. i didn't have trouble with that. you must have used 80 grit or something on them. It doesn't take much to get them to fit. just a light sand. lay the paper on a flat surface so you sand them true.
I didn't anticipate this step when taking my door apart in the afternoon, so I rushed in order to make up for losing sunlight.
Going to try this again. Thanks.
07-06-2010, 08:22 PM
#36
New Member
Thread Starter
iTrader: (8)
Join Date: Jan 2007
Location: terre haute, IN; STL, MO
Posts: 6,457
Likes: 0
Received 7 Likes
on
6 Posts
Ok, so with all this crap about the window motors not being rebuildable on our cars i decided to try it out. These are small electrical motors and like all other vehicles they can be repaired. This is also obvious by the fact that they sell refurbished motors. SOMEBODY repairs them.
I went to a local hobby shop that sells parts for RC cars. I purchased a set of electric motor brushes at a huge 0.79$ pricetag for each.
The rebuild wasn't hard. The worst part about it was removing some sticky goo off the side of the of the case which houses some wires. Then the wires have to be unsoldered so the whole brush assembly can be pulled out the top.
I didn't take as many pictures as i should but here are a few. Pics of the old brushes, pics of the new brushes and the assembly. The old brushes were worn down to only about 3mm long which is small. I had to do a little sanding on the new brushes a small amount to make them move smoothly.
haste makes waste
 07-12-2010, 12:59 PM
#38
Registered User
iTrader: (3)
Join Date: Jul 2004
Location: Fullerton, CA
Posts: 1,156
Likes: 0
Received 0 Likes
on
0 Posts
Hey Binder, finally got around to trying this thing out....so i got the motor out and im calling hobby shops and they are asking me how many "turns" i need. Not to sure what they are talking about as to im not familiar with RC's. Do you happen to have the part number on the motors you picked up? I did mention to them i needed 540 upright brushes, uncut standard brushes...thanks
edit: scratch that, i just went to the hobby shop with the motor and got exactly what i needed: 540 motor, upright brushes, uncut.
edit: scratch that, i just went to the hobby shop with the motor and got exactly what i needed: 540 motor, upright brushes, uncut.
Last edited by j3dz; 07-12-2010 at 04:04 PM.
07-12-2010, 06:38 PM
#39
New Member
Thread Starter
iTrader: (8)
Join Date: Jan 2007
Location: terre haute, IN; STL, MO
Posts: 6,457
Likes: 0
Received 7 Likes
on
6 Posts
Hey Binder, finally got around to trying this thing out....so i got the motor out and im calling hobby shops and they are asking me how many "turns" i need. Not to sure what they are talking about as to im not familiar with RC's. Do you happen to have the part number on the motors you picked up? I did mention to them i needed 540 upright brushes, uncut standard brushes...thanks
edit: scratch that, i just went to the hobby shop with the motor and got exactly what i needed: 540 motor, upright brushes, uncut.
edit: scratch that, i just went to the hobby shop with the motor and got exactly what i needed: 540 motor, upright brushes, uncut.
07-12-2010, 08:29 PM
#40
Registered User
iTrader: (3)
Join Date: Jul 2004
Location: Fullerton, CA
Posts: 1,156
Likes: 0
Received 0 Likes
on
0 Posts
Check it fellas lotsa pics!
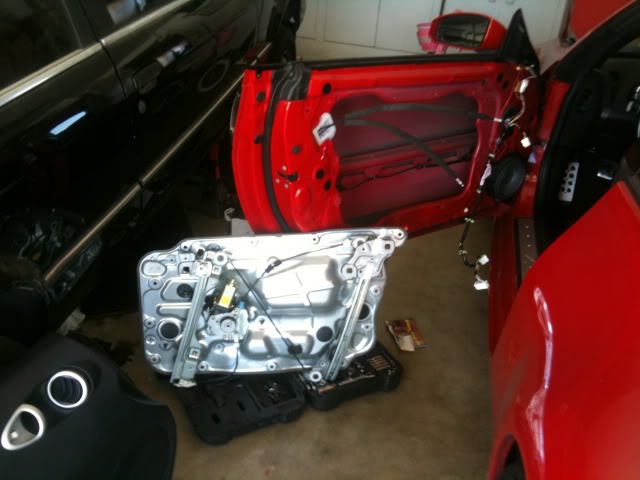
here's removing the door panel, VO has good guide on doing this.
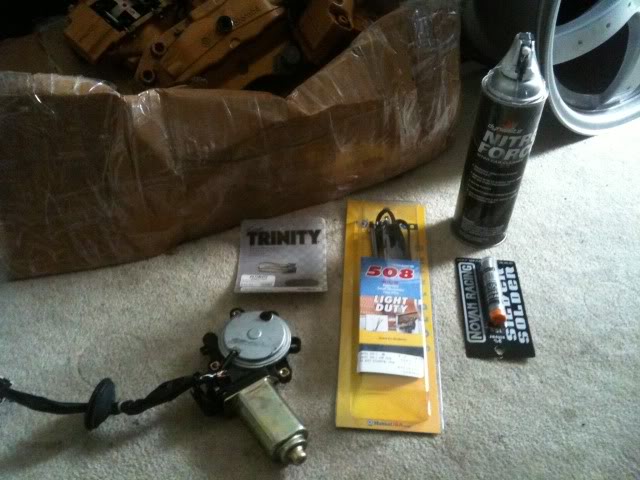
Here's the pic of the Motor, the package that says "trinity" are the brushes, Soldering iron, solder, and cleaner.
After removing the 3 screws of the motor cover here's whats inside, very dirty.
After the cleaning.
After removing the sticky silicone like substance.
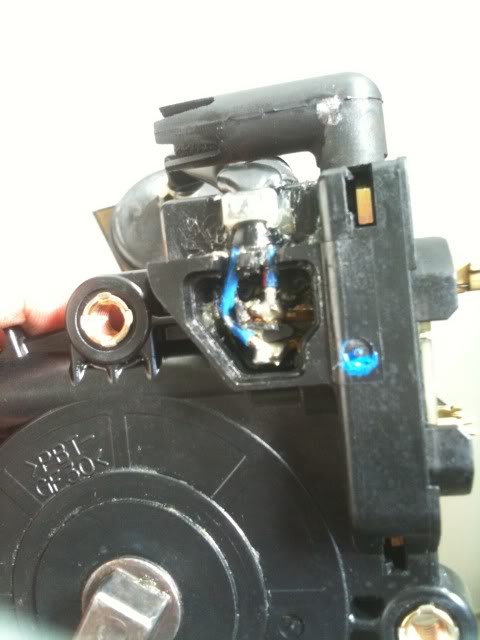
After desoldering the 2 wires. (like Binder says, gotta make sure its completely removed or the part that holds the brushes will not slide out, suckiest thing for me today)
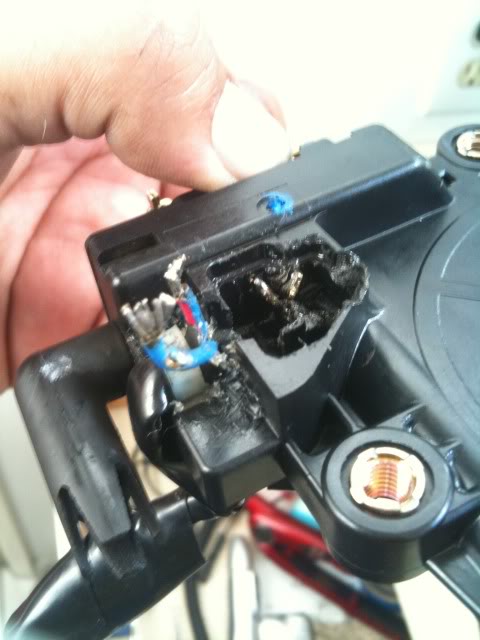
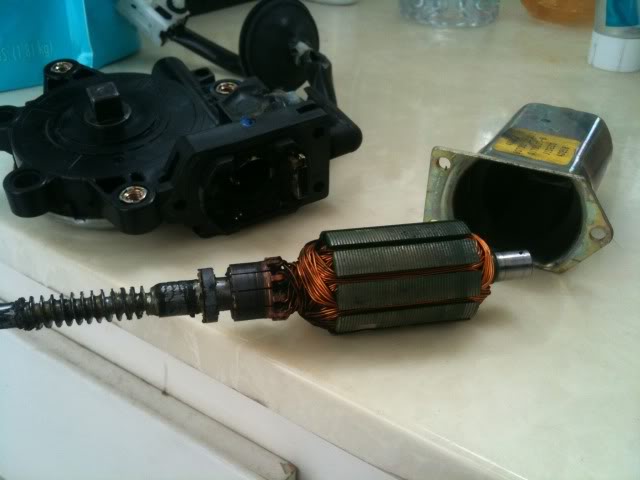
Here's what it looks like after sliding out. that is where the wires were soldered to, slides right out when completely cleaned off the solder.
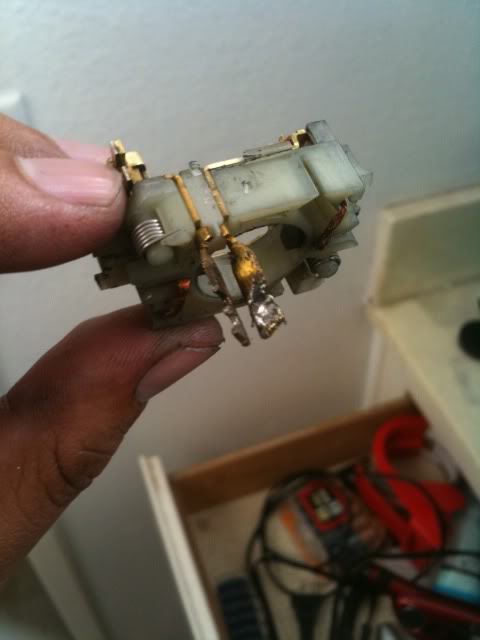
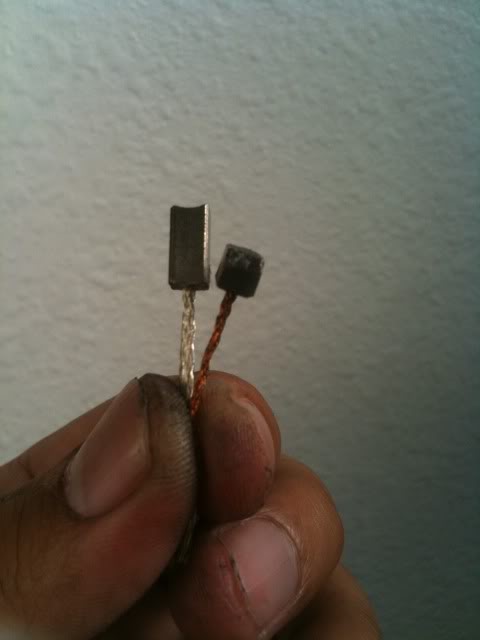
Check the brushes and where they are connected to
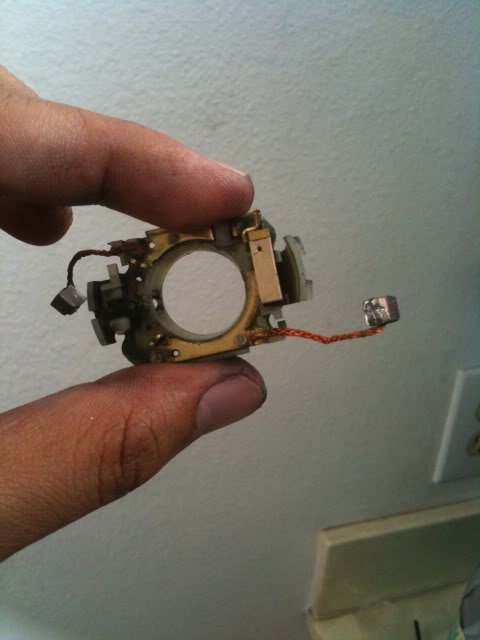
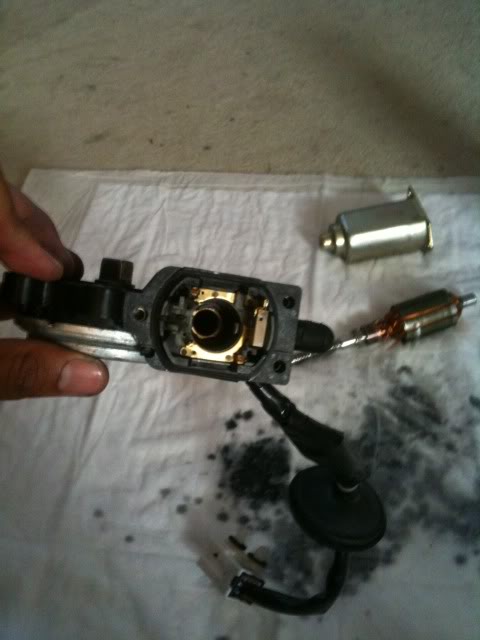
To the left is the NEW brush and the right is the old one, yup warn out!
So right now i just have to sand down the new brushes so it fits in the oem insert, solder em to the housing, and solder everything back up and hope it works. Got stuff to do tonight so not gonna get to sand em tonight...i'll hopefully finish up tomorrow and take more pics....again thanks Binder for this!
here's removing the door panel, VO has good guide on doing this.
Here's the pic of the Motor, the package that says "trinity" are the brushes, Soldering iron, solder, and cleaner.
After removing the 3 screws of the motor cover here's whats inside, very dirty.
After the cleaning.
After removing the sticky silicone like substance.
After desoldering the 2 wires. (like Binder says, gotta make sure its completely removed or the part that holds the brushes will not slide out, suckiest thing for me today)
Here's what it looks like after sliding out. that is where the wires were soldered to, slides right out when completely cleaned off the solder.
Check the brushes and where they are connected to
To the left is the NEW brush and the right is the old one, yup warn out!
So right now i just have to sand down the new brushes so it fits in the oem insert, solder em to the housing, and solder everything back up and hope it works. Got stuff to do tonight so not gonna get to sand em tonight...i'll hopefully finish up tomorrow and take more pics....again thanks Binder for this!