
Satin Grey 350Z Project


Thread Starter
Registered User
Joined: Jul 2009
Posts: 182
Likes: 0
From: Finland
Specs for now
Performance:
- Berk HFC
- HKS True Dual exhaust
- Stillen Generation 3 Dual Intake
Suspension:
- Eibach Pro Street-S Coilover
- Eibach Spacers rear 25mm
- SPC Rear Camber Kit
Wheels & Tires:
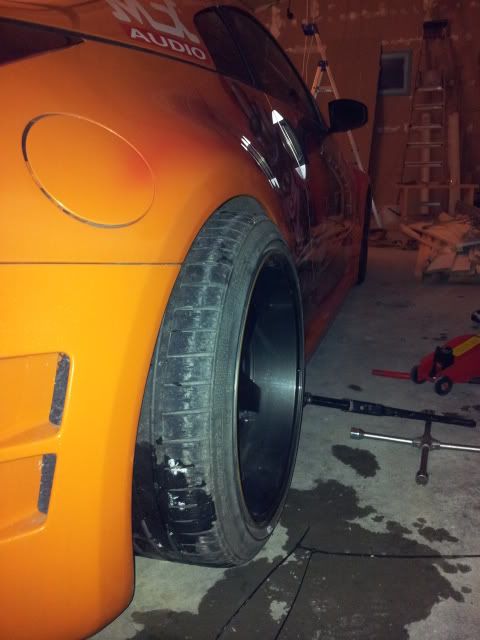
- Rear 20"x10,5" et20 ja front 20"x8,5" et20
- Rear 275/30 Nankang NS2, Front 245/30 Falken FK-452
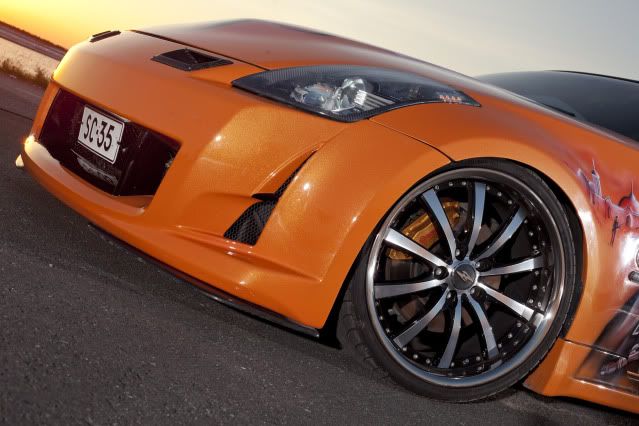
Body:
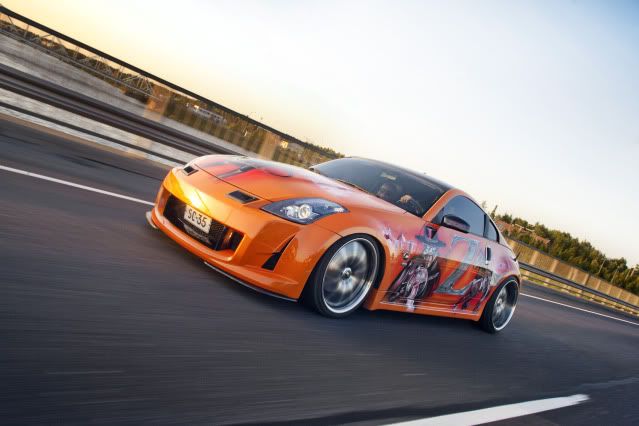
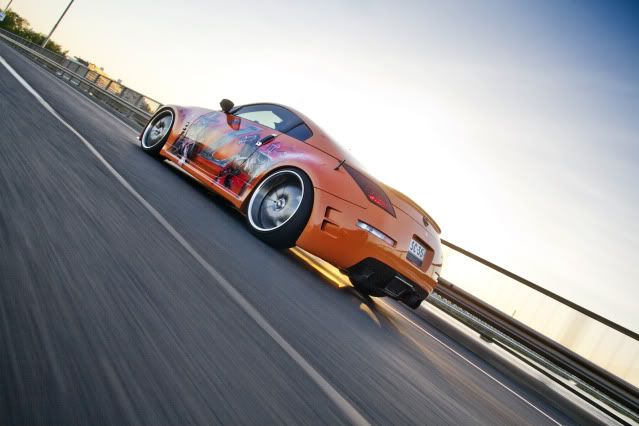
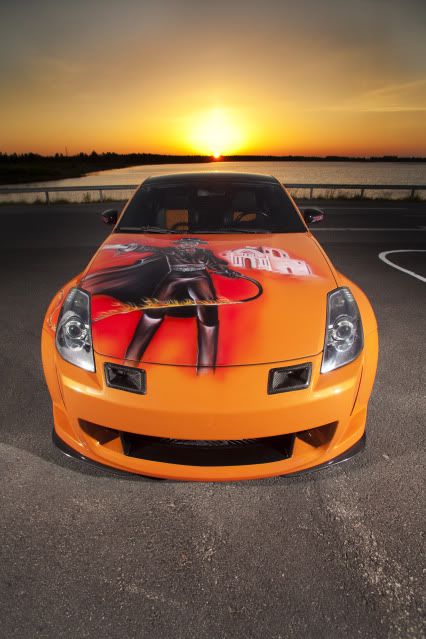
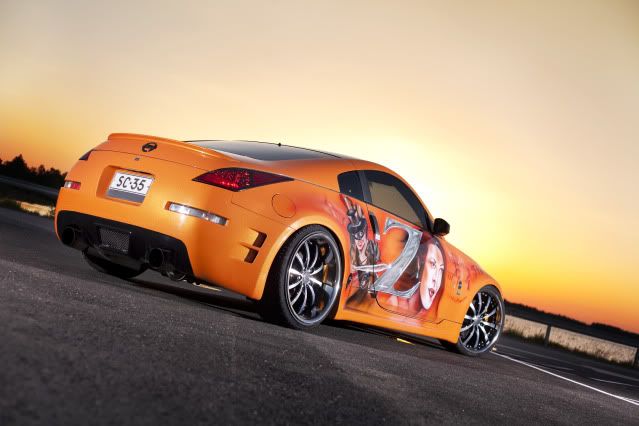
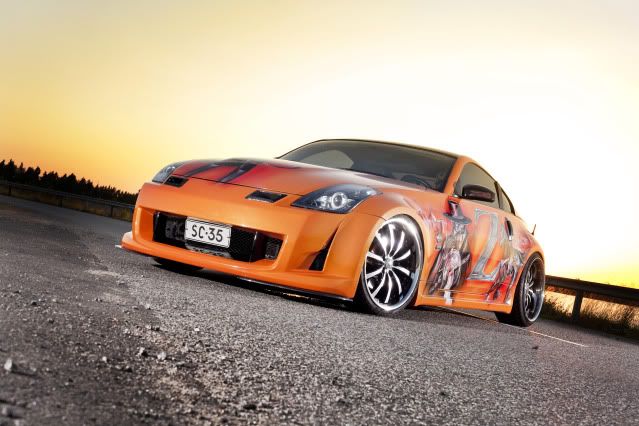
- Painting: The Legend Of Zorro by Mika Jefremoff
- Amuse Front, Amuse Sideskirts, Chargespeed rear with painted diffuser, Carbon fiber splitters, OEM Style spoiler
- Carbon Air intakes in front bumper
- Futurez sponsortaping
- 50% tinted windshied, 20% side, 5% rear
- Changed my Z emblems and debadged 350z logos
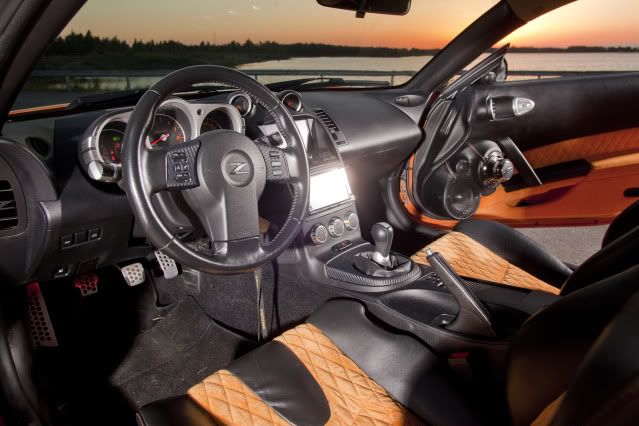
Interior:
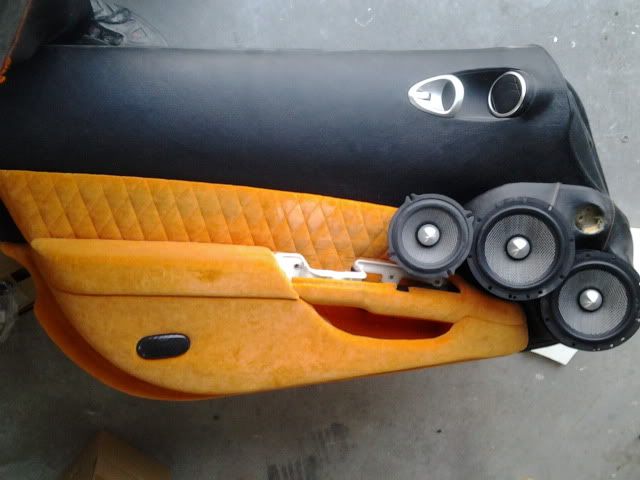
- Black leather with orange alcantara diamond stiched
- Carbon fiber interior parts
- Custom pedals
- Custom carpets
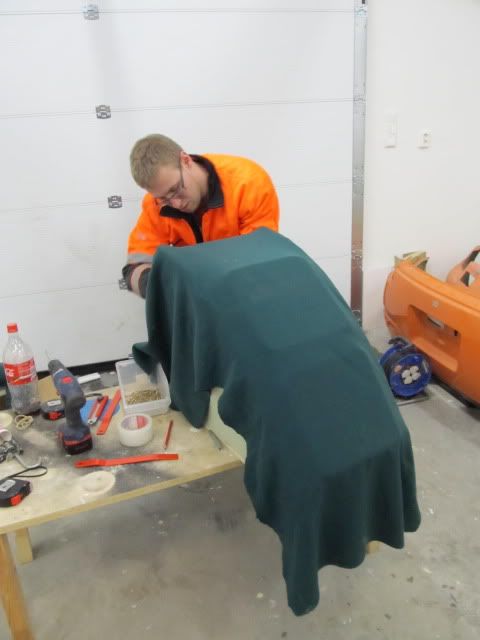
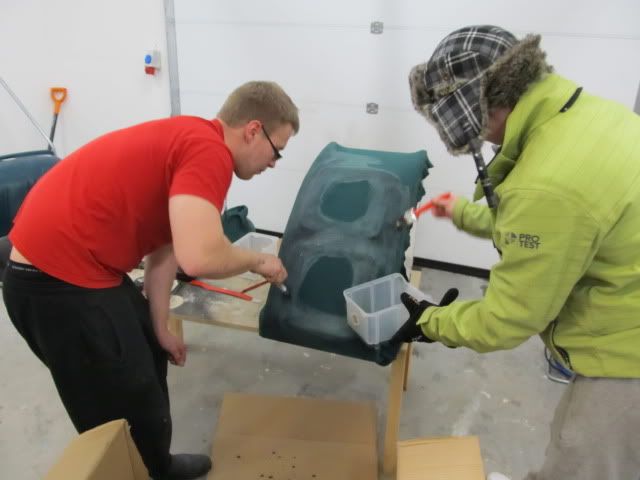
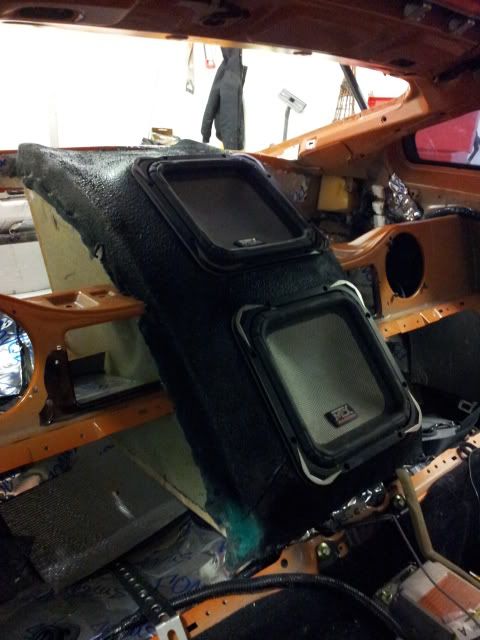
Ice:
LOTS OF IT with MTX
Year 2011
towards 2013
Performance:
- Berk HFC
- HKS True Dual exhaust
- Stillen Generation 3 Dual Intake
Suspension:
- Eibach Pro Street-S Coilover
- Eibach Spacers rear 25mm
- SPC Rear Camber Kit
Wheels & Tires:
- Rear 20"x10,5" et20 ja front 20"x8,5" et20
- Rear 275/30 Nankang NS2, Front 245/30 Falken FK-452
Body:
- Painting: The Legend Of Zorro by Mika Jefremoff
- Amuse Front, Amuse Sideskirts, Chargespeed rear with painted diffuser, Carbon fiber splitters, OEM Style spoiler
- Carbon Air intakes in front bumper
- Futurez sponsortaping
- 50% tinted windshied, 20% side, 5% rear
- Changed my Z emblems and debadged 350z logos
Interior:
- Black leather with orange alcantara diamond stiched
- Carbon fiber interior parts
- Custom pedals
- Custom carpets
Ice:
LOTS OF IT with MTX
Year 2011
towards 2013
Last edited by SR71; Jul 20, 2014 at 12:06 AM.


Registered User
Joined: Mar 2012
Posts: 56
Likes: 0
From: NE Ohio
While this car isn't really in my taste pallet, I can appreciate that you like it and you built it right and aren't being a douche and seem okay with people having a different opinion then you. For that reason I'm asking to hear more about the project and see more pics.

Trending Topics

Thread Starter
Registered User
Joined: Jul 2009
Posts: 182
Likes: 0
From: Finland
I appreciate your comments guys! 2012 I built a house and garage so didn't had that much spare time. But glad to hear that people want to hear more so I'll keep this thread updated!


Thread Starter
Registered User
Joined: Jul 2009
Posts: 182
Likes: 0
From: Finland
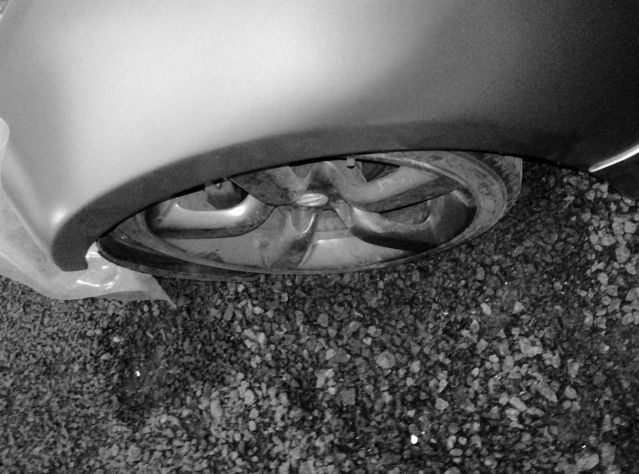
That wide setup was Rota 18x12. 0 offset plus 25mm spacers so setup was 18x12 -25.
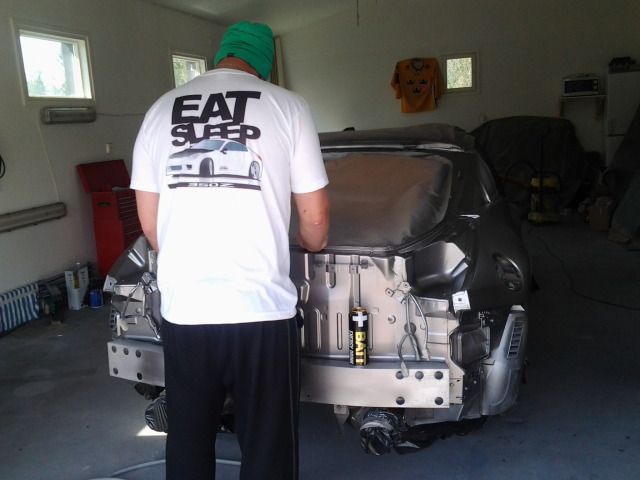
And yep that's me in the croc sandals drunken as f*ck I'm the guy in every pic and I do everything in my garage including paintjob so it's not "professionally" built car
  as For new paintjob I can't say that there's not going to be any graphics
And yep that's me in the croc sandals drunken as f*ck
I'm the guy in every pic and I do everything in my garage including paintjob so it's not "professionally" built car as For new paintjob I can't say that there's not going to be any graphics
Last edited by ordinaryme; Aug 7, 2012 at 12:16 PM.
Thread Starter
Registered User
Joined: Jul 2009
Posts: 182
Likes: 0
From: Finland
Little update on this.. Things have gone little slower now 'cause my newborn boy.
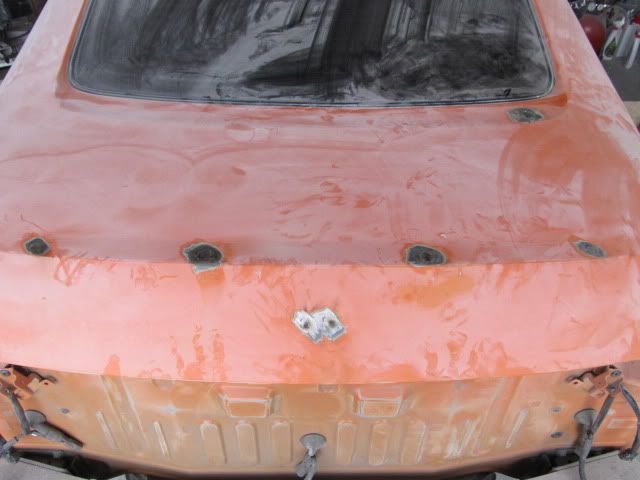
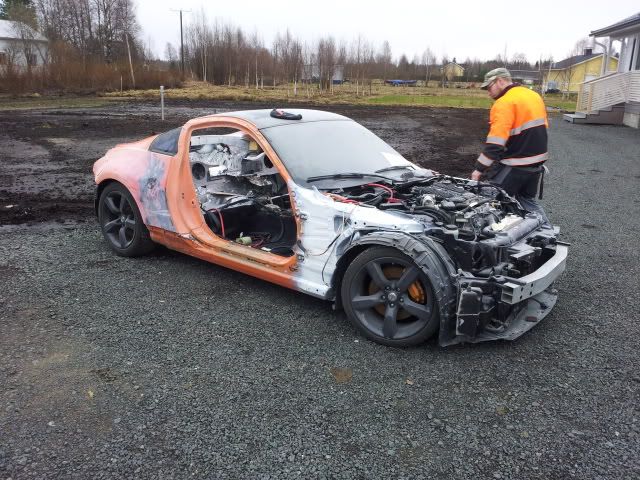
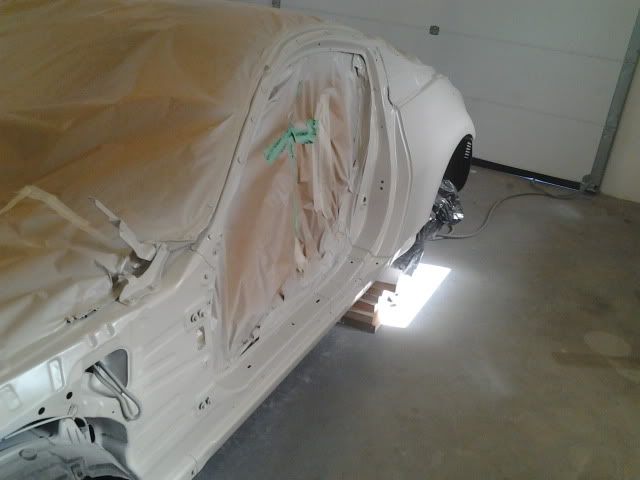
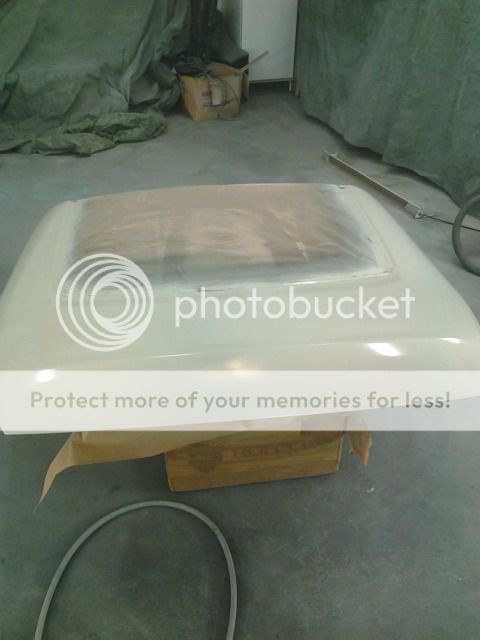
But I have shaved Z emblems from my front fenders and did a littlebit of widebody work with them.. Here's a pic of test fitting my fenders with base coat on. Don't mind of that shadow there's no problem in that are
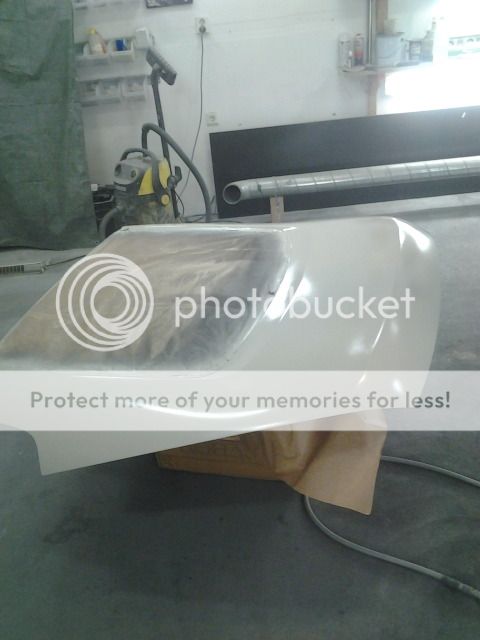
I also shaved my hatch after spoiler removal, emblem removal and wiper removal. Trunk with epoxy primer on. It's always very time consuming to DIY and DIY it again to get everything just right :O
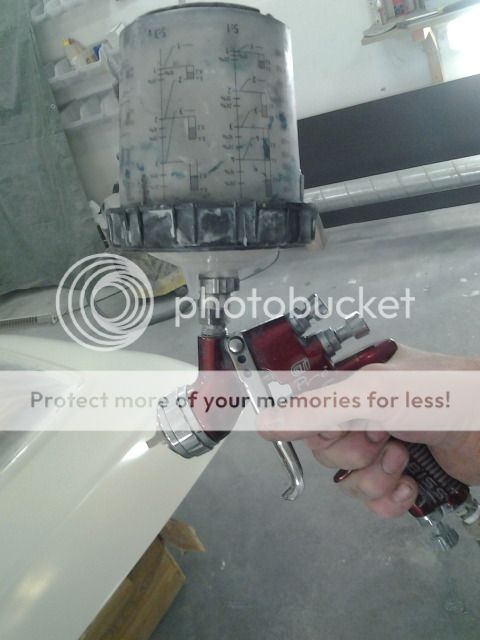
Finally just wanted to share my old friend Devilbiss GTI Pro which I have never regret of buying even it was quite expensive 600USD with PPM kit
But I have shaved Z emblems from my front fenders and did a littlebit of widebody work with them.. Here's a pic of test fitting my fenders with base coat on. Don't mind of that shadow there's no problem in that are
I also shaved my hatch after spoiler removal, emblem removal and wiper removal. Trunk with epoxy primer on. It's always very time consuming to DIY and DIY it again to get everything just right :O
Finally just wanted to share my old friend Devilbiss GTI Pro which I have never regret of buying even it was quite expensive 600USD with PPM kit
Last edited by ordinaryme; Oct 4, 2012 at 02:21 PM.