
Rust-Oleum Epoxy Shield Professional


Thread Starter
Registered User
Joined: Nov 2003
Posts: 376
Likes: 0
From: colorado
I was blessed to be able to purchase a home last summer. I had always wanted an epoxy floor on my first garage, so I set to researching it.
I looked at all the products--do it yourself, professional applications, etc. I looked at many different types--water based epoxies, paint, and chemical epoxies. I finally decided to go with the Rust-oleum Epoxy Shield Professional. The "professional" is their "chemical" based epoxy, while the one you can get at Home Depot is apparently water-based. After reading about hot-tire pickup on the of the water-based, I decided I give the Professional version a try.
I started out with a clean slate. I don't know how old this slab is, but it's not original to the house. The previous home-owner had a new slab and driveway installed before I took ownership.
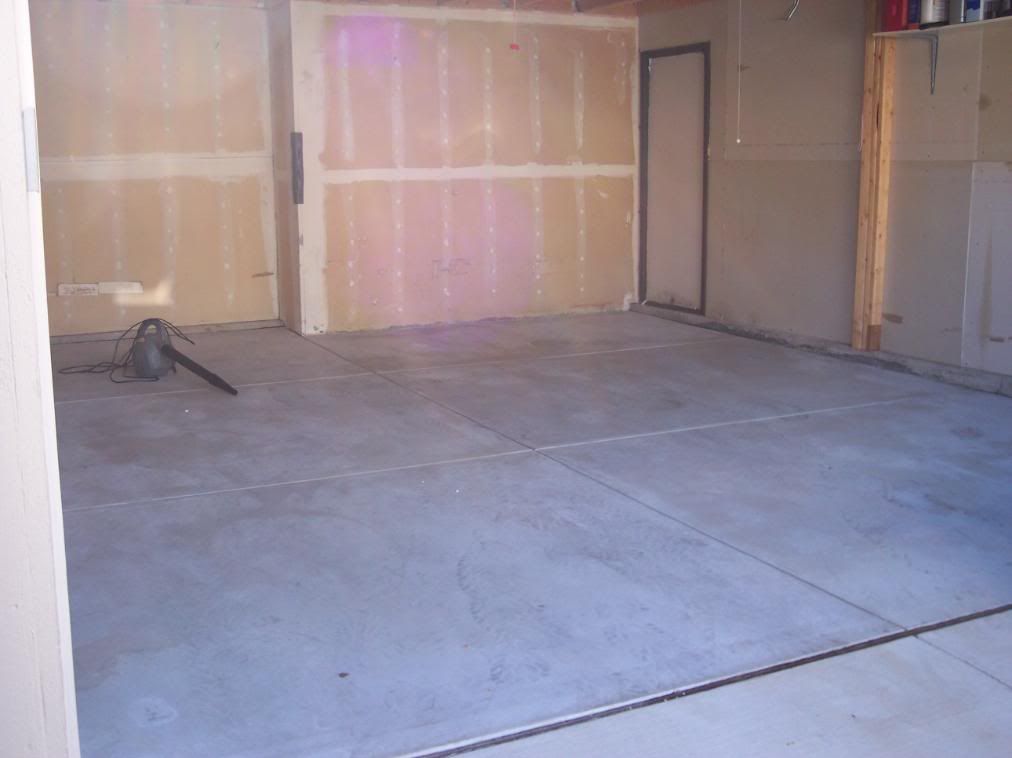
As you can see, the garage slab is in six sections, which I thought would make dividing up the epoxy easier.
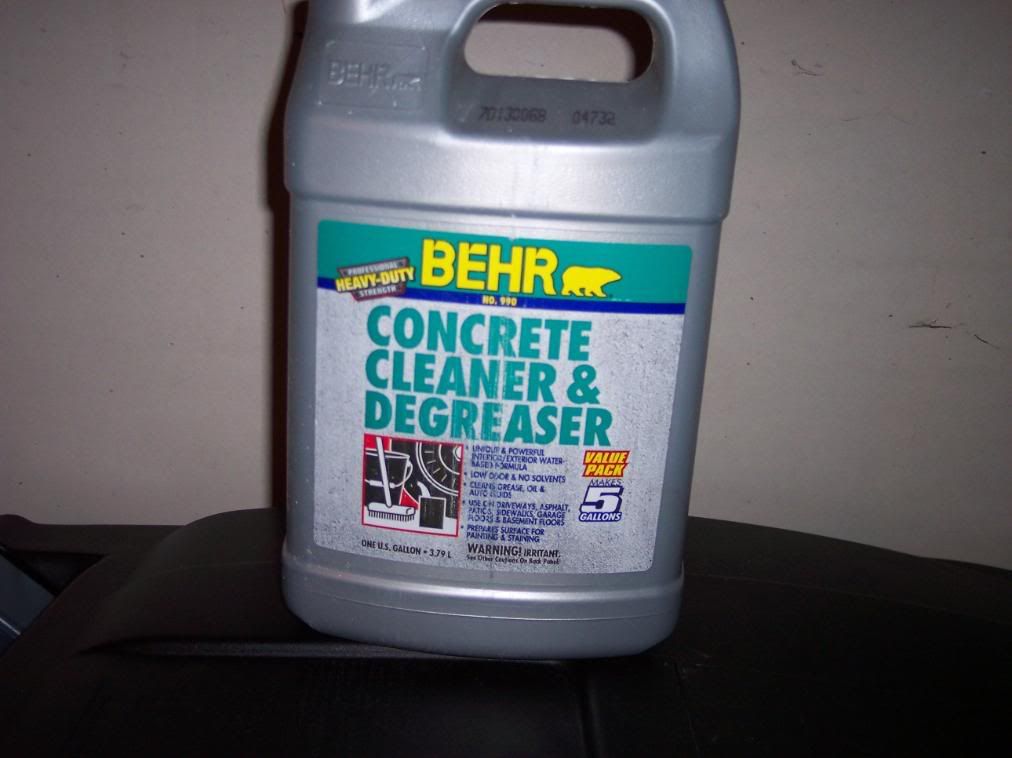
Preparation is key to getting a good bond between the epoxy and the concrete. First, you have to degrease any oil/grease, etc. on the concrete. Luckily, I didn't have years of oil drips to contend with. I used a stiff brush head I bought at home depot attached to a painter's pole to apply the degreaser. No degreaser comes with the Rust-Oleum kit, so I used Behr Concrete Cleaner and Degreaser. I'm sure other degreasers such as Simple Green would probably work as well
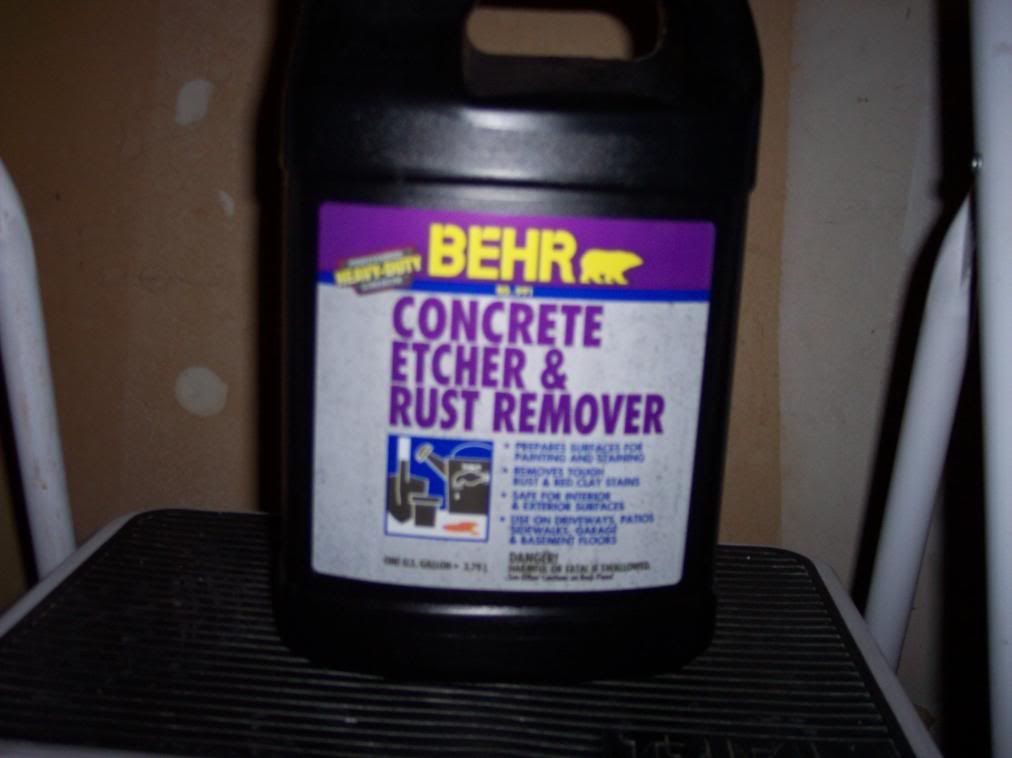
After the degreasing/cleaning step, you have to "etch" the concrete with a chemical peel to rough up the surface to give the epoxy something to bond to. The garage slab was a little rough and I considered skipping this step, as I thought the etching might be for really smooth concrete like you might see at Costco or something. Anyway, I etched it, and the acid in the etcher did make the surface a little rougher than when i started. I used the same brush/pole implement to apply the etcher, wearing chemical resistant gloves and a respirator (this stuff was potent).
The Professional kit
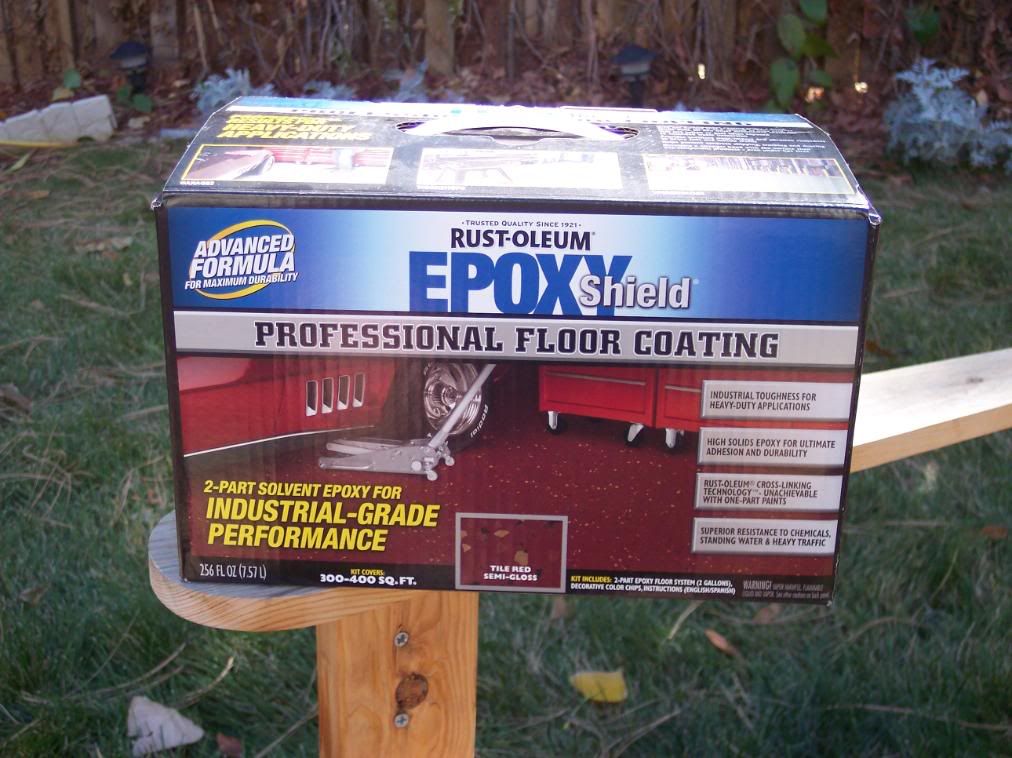
comes with two gallons of the two-part expoxy components as well as a bag of paint flecks if you so desire.
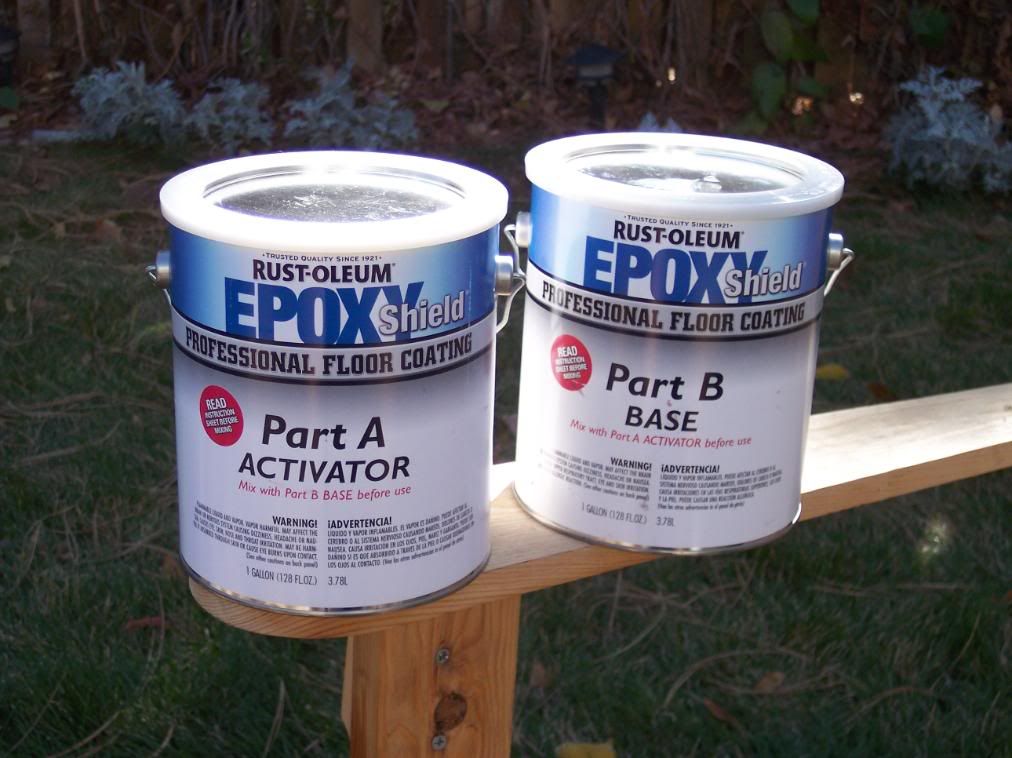
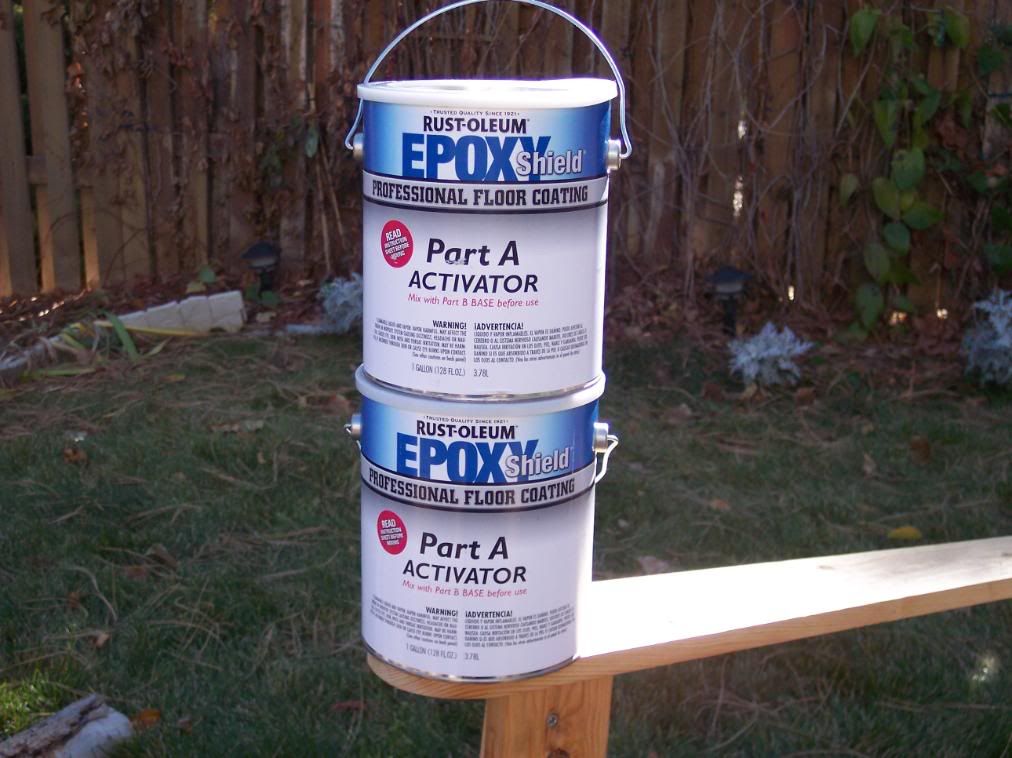
My garage is a hair over 400 square feet. One kit will not cover that much, so I had to initially use two kits. I read in another forum that there are slight color differences between kits, and they suggesting mixing all your Part A together and putting it back into their respective cans, and mixing all your Part B together and doing the same. You only want to mix one kit at a time as mixing two kits will accelerate the curing time.
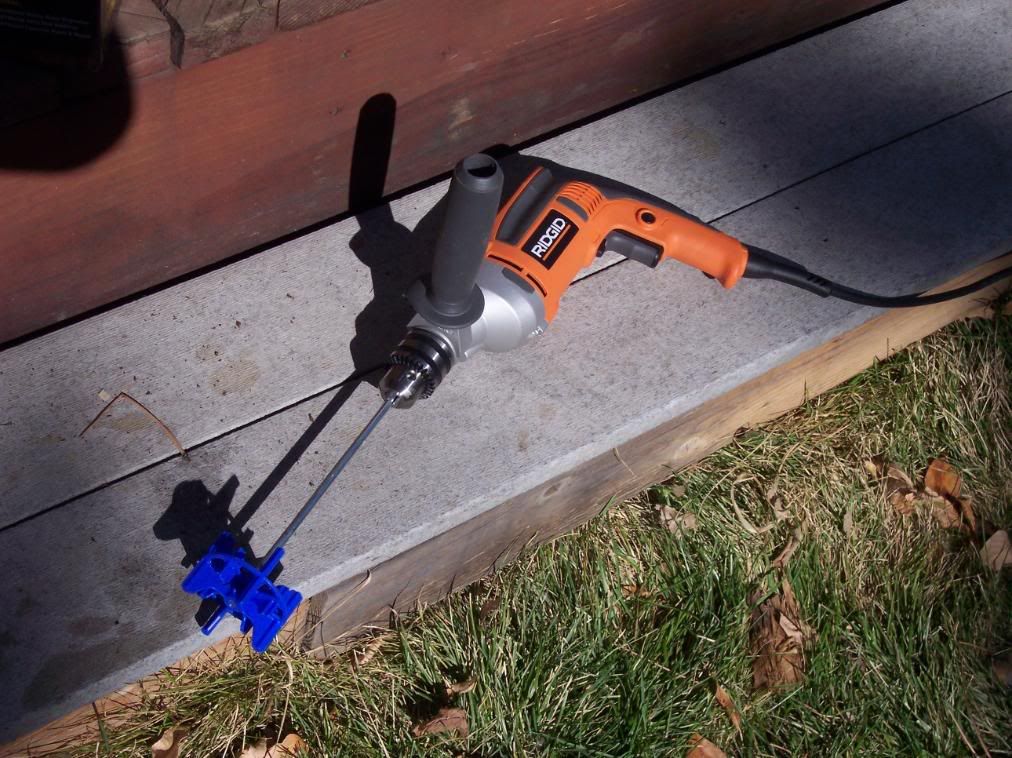
I used a power drill and mixing implement to get a good blend.
This epoxy crap sticks to everything. Most of the stuff you use that touches the epoxy should be considered disposable. I used epoxy-safe rollers and an epoxy safe brush to cut in the joints and edges of the slab.
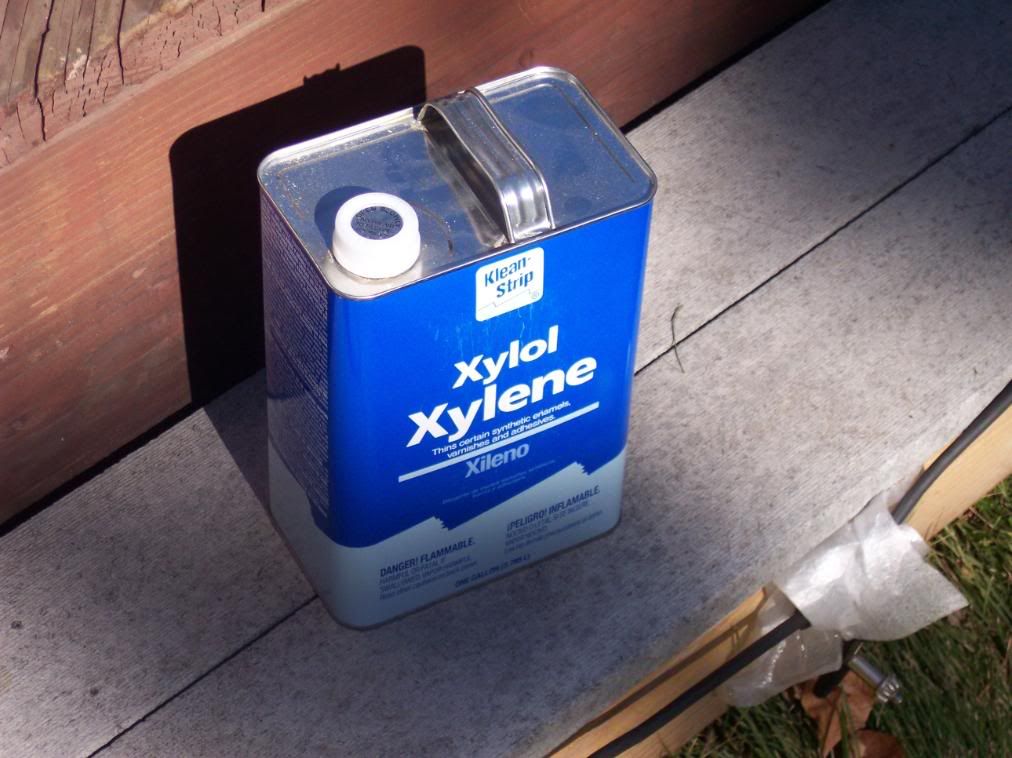
The epoxy is thinned and/or cleaned with Xylol. I bought a gallon just to have for clean up.
As I said, I thought two kits would do. I think if you follow these recommendations and my mistakes, you can get by with two. I ultimately needed three.
I started the application by cutting in the edges of the garage (i have a lip around the garage (no pics) and the expansion joints in the slab. I really layed this stuff on thick with a brush, and it took a surprising amount of the first kit.
My original plan was to do half the garage with one kit, half the garage with the other. Not knowing how thick to put the epoxy on with the roller, I hesitated a bit and put too thin a coat on initially. The Rust-oleum directions specifically say you do not need two coats, but my experience was quite different.
I got about two thirds of the way through the first half of the garage, and saw I had plenty left over. However, due to the size of the garage, I couldn't get back to the portions I had already done, so the first parts of the application turned out very crappy.
Once I was at the end of the first half, i had enough to really lay on a thick coat on one third of the other half of the garage. this thick coat turned out to be just fine and was not splotchy like the above photos.
So, at this point, I've got three crappy squares (one half of the garage) and one good square. I figure I'm good with the remainining kit to get it done--I'll lay on two thick coats, and just double coat the other half again. That didn't work, and I ran out, which required that I buy another kit. So, after the second kit dried, I put on another coat on top of the entire floor.
In retrospect, I think the best course of action would be to put one thin coat on to act almost like a primer, and then put another coat on top of that, instead of the ultra thick coats (which allowed some runs to show). If I were to do it again, I certainly would do that method.
I didn't use the paint flecks that came with the kit. Actually, I started to, and didn't like the way they looked, so I covered them.
After the three coats of epoxy dried, I put on the final clear coat. I don't have pictures of it, but it comes in a similar box, and has a total of one gallon of Part A and Part B. But, this is a thin coat, so that's all you need for about 400 square feet (a normal two-car garage).
The clear coat comes with an anti-slip material you can add to it. It was a grainy, sand/silica like grit. So, I mixed up the clear-coat and put in the anti-slip stuff and mixed for five minutes and set to work. I applied the clear coat, which is a little cloudy when you're pouring it. Much to my dismay, when I was finished, I noticed that most of the anti-slip had settled in the bottom of the can--not good at all. This epoxy is slick as crap when wet. Here in Colorado, the cars bring alot of ice and snow in the garage, so this has been a significant issue.
I followed the directions to a T and the anti-slip stuff still settled. I think the solution is to have your mixer right there at application, and remix between every little bit of application to keep the anti-skid material suspended in the epoxy. That's what I'm going to have to end up doing once the spring comes and its warm enough to put another coat on.
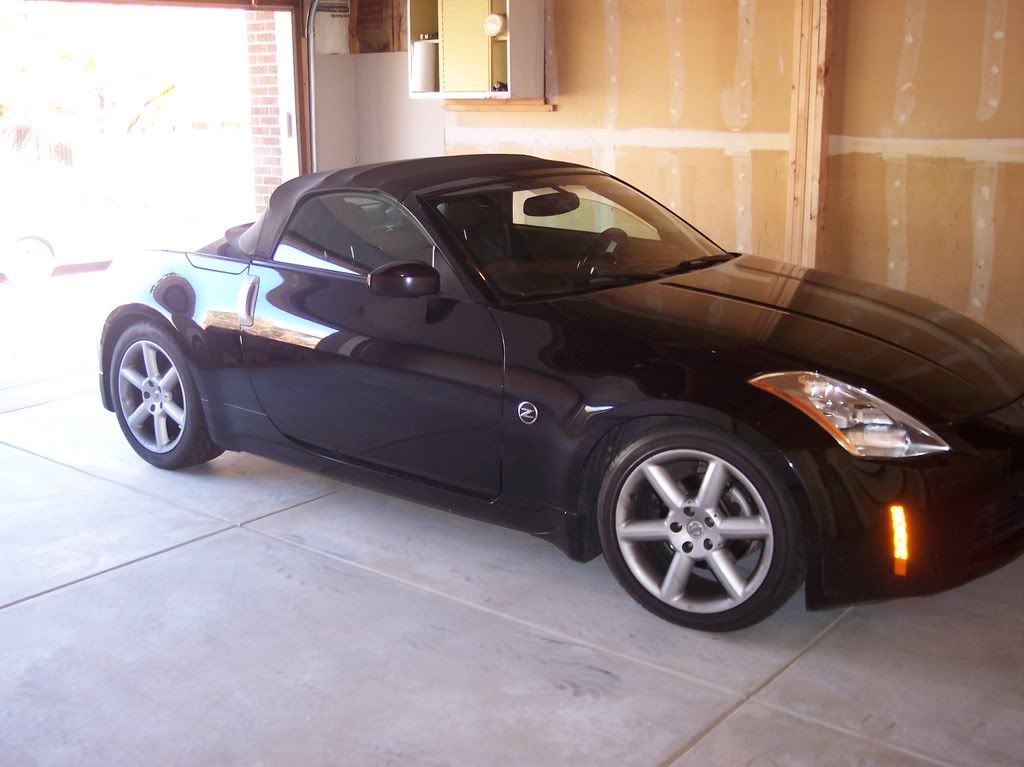
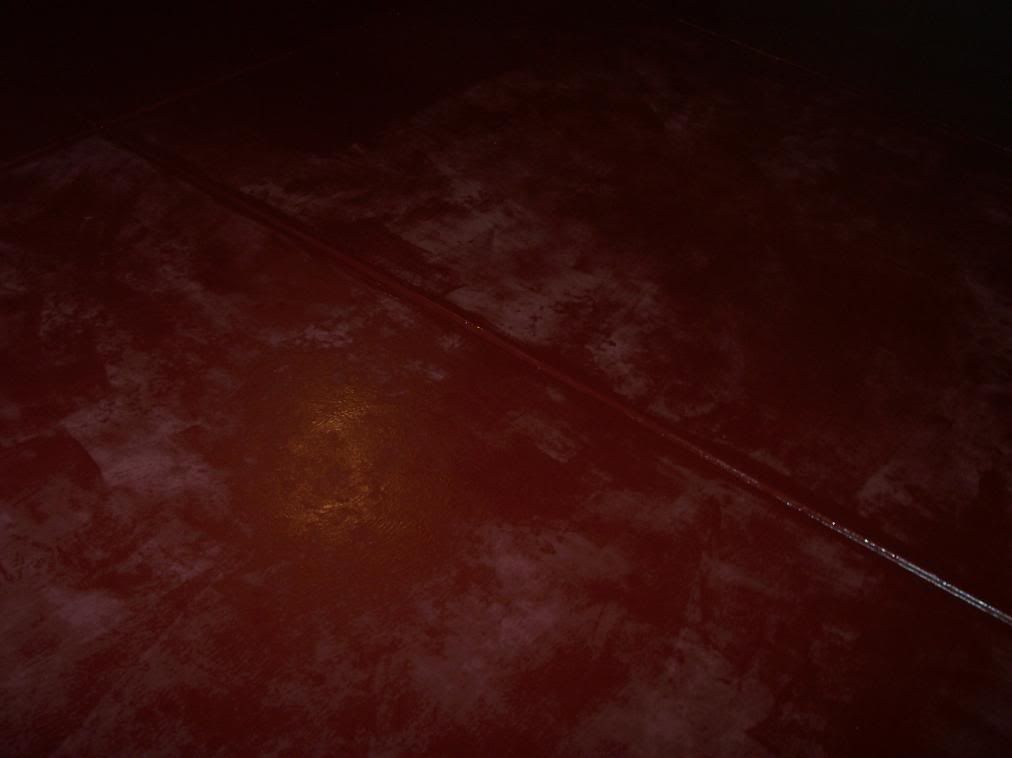
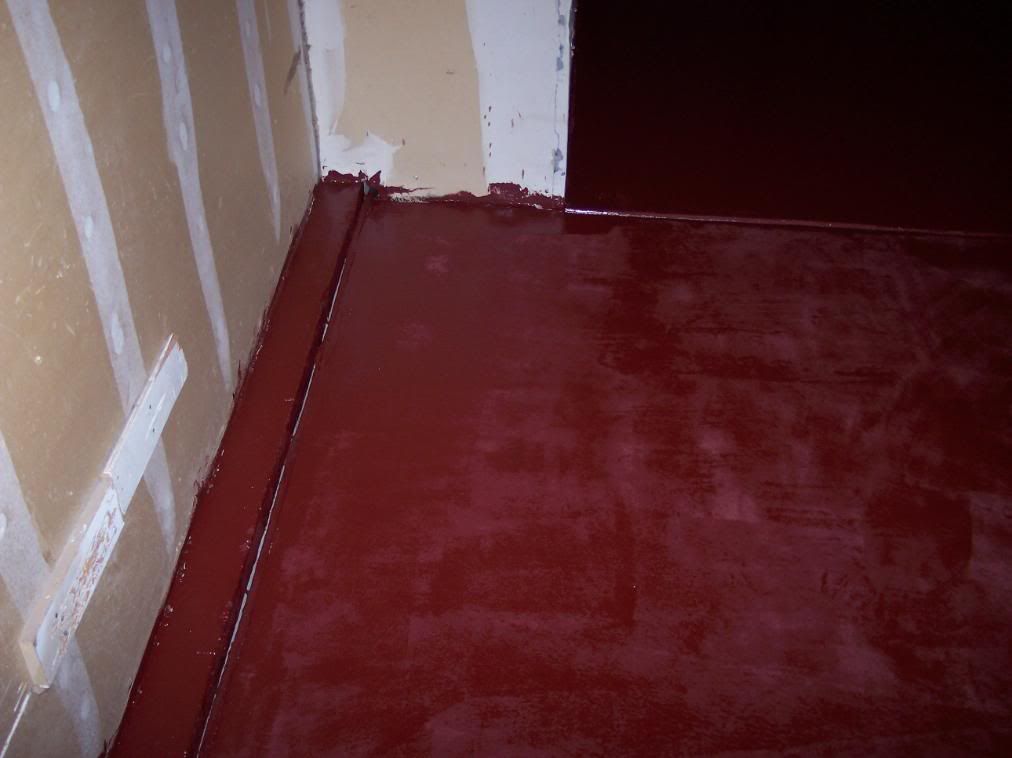
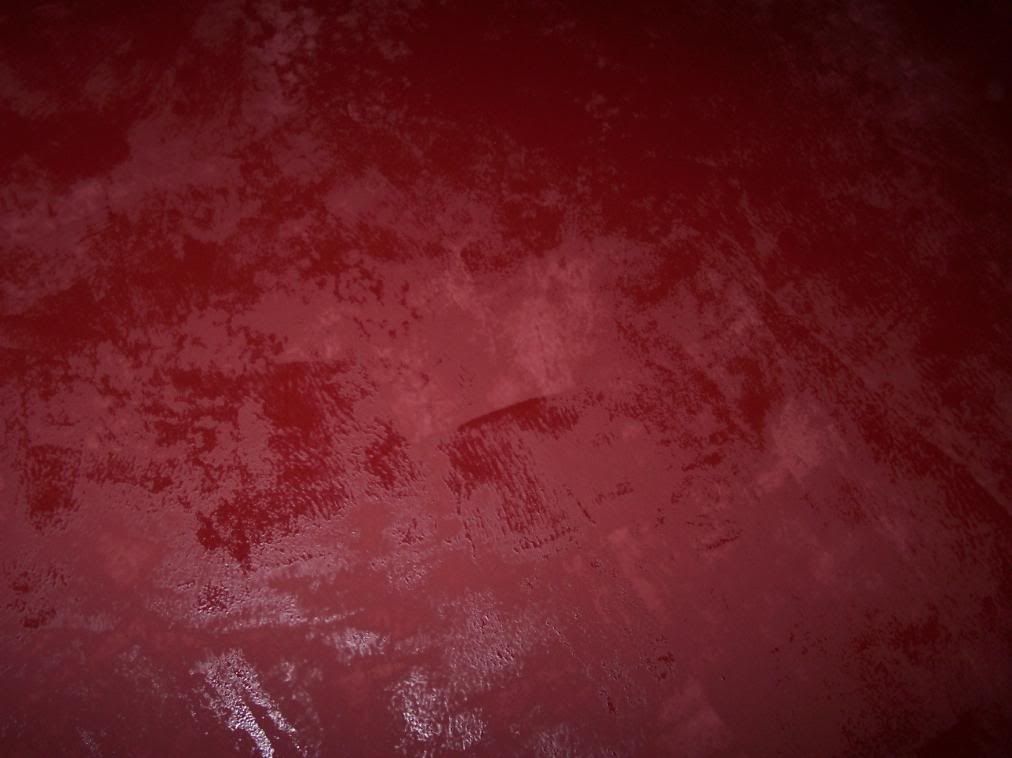
Here's a few pics of the finished product:


Each of the kits cost about $100 shipped. I thought I could get by with two kits and a clear coat kit in the $300 range. Of course, I already put another $100 in it, and will need another $100 kit when the spring comes. But, this is still cheaper than quotes for application (between $4 and $5 per square foot). Of course, had I paid someone to do it, it would've been done in a day and done right the first time, but heck, I enjoy the home improvement projects.
I looked at all the products--do it yourself, professional applications, etc. I looked at many different types--water based epoxies, paint, and chemical epoxies. I finally decided to go with the Rust-oleum Epoxy Shield Professional. The "professional" is their "chemical" based epoxy, while the one you can get at Home Depot is apparently water-based. After reading about hot-tire pickup on the of the water-based, I decided I give the Professional version a try.
I started out with a clean slate. I don't know how old this slab is, but it's not original to the house. The previous home-owner had a new slab and driveway installed before I took ownership.
As you can see, the garage slab is in six sections, which I thought would make dividing up the epoxy easier.
Preparation is key to getting a good bond between the epoxy and the concrete. First, you have to degrease any oil/grease, etc. on the concrete. Luckily, I didn't have years of oil drips to contend with. I used a stiff brush head I bought at home depot attached to a painter's pole to apply the degreaser. No degreaser comes with the Rust-Oleum kit, so I used Behr Concrete Cleaner and Degreaser. I'm sure other degreasers such as Simple Green would probably work as well
After the degreasing/cleaning step, you have to "etch" the concrete with a chemical peel to rough up the surface to give the epoxy something to bond to. The garage slab was a little rough and I considered skipping this step, as I thought the etching might be for really smooth concrete like you might see at Costco or something. Anyway, I etched it, and the acid in the etcher did make the surface a little rougher than when i started. I used the same brush/pole implement to apply the etcher, wearing chemical resistant gloves and a respirator (this stuff was potent).
The Professional kit
comes with two gallons of the two-part expoxy components as well as a bag of paint flecks if you so desire.
My garage is a hair over 400 square feet. One kit will not cover that much, so I had to initially use two kits. I read in another forum that there are slight color differences between kits, and they suggesting mixing all your Part A together and putting it back into their respective cans, and mixing all your Part B together and doing the same. You only want to mix one kit at a time as mixing two kits will accelerate the curing time.
I used a power drill and mixing implement to get a good blend.
This epoxy crap sticks to everything. Most of the stuff you use that touches the epoxy should be considered disposable. I used epoxy-safe rollers and an epoxy safe brush to cut in the joints and edges of the slab.
The epoxy is thinned and/or cleaned with Xylol. I bought a gallon just to have for clean up.
As I said, I thought two kits would do. I think if you follow these recommendations and my mistakes, you can get by with two. I ultimately needed three.
I started the application by cutting in the edges of the garage (i have a lip around the garage (no pics) and the expansion joints in the slab. I really layed this stuff on thick with a brush, and it took a surprising amount of the first kit.
My original plan was to do half the garage with one kit, half the garage with the other. Not knowing how thick to put the epoxy on with the roller, I hesitated a bit and put too thin a coat on initially. The Rust-oleum directions specifically say you do not need two coats, but my experience was quite different.
I got about two thirds of the way through the first half of the garage, and saw I had plenty left over. However, due to the size of the garage, I couldn't get back to the portions I had already done, so the first parts of the application turned out very crappy.
Once I was at the end of the first half, i had enough to really lay on a thick coat on one third of the other half of the garage. this thick coat turned out to be just fine and was not splotchy like the above photos.
So, at this point, I've got three crappy squares (one half of the garage) and one good square. I figure I'm good with the remainining kit to get it done--I'll lay on two thick coats, and just double coat the other half again. That didn't work, and I ran out, which required that I buy another kit. So, after the second kit dried, I put on another coat on top of the entire floor.
In retrospect, I think the best course of action would be to put one thin coat on to act almost like a primer, and then put another coat on top of that, instead of the ultra thick coats (which allowed some runs to show). If I were to do it again, I certainly would do that method.
I didn't use the paint flecks that came with the kit. Actually, I started to, and didn't like the way they looked, so I covered them.
After the three coats of epoxy dried, I put on the final clear coat. I don't have pictures of it, but it comes in a similar box, and has a total of one gallon of Part A and Part B. But, this is a thin coat, so that's all you need for about 400 square feet (a normal two-car garage).
The clear coat comes with an anti-slip material you can add to it. It was a grainy, sand/silica like grit. So, I mixed up the clear-coat and put in the anti-slip stuff and mixed for five minutes and set to work. I applied the clear coat, which is a little cloudy when you're pouring it. Much to my dismay, when I was finished, I noticed that most of the anti-slip had settled in the bottom of the can--not good at all. This epoxy is slick as crap when wet. Here in Colorado, the cars bring alot of ice and snow in the garage, so this has been a significant issue.
I followed the directions to a T and the anti-slip stuff still settled. I think the solution is to have your mixer right there at application, and remix between every little bit of application to keep the anti-skid material suspended in the epoxy. That's what I'm going to have to end up doing once the spring comes and its warm enough to put another coat on.
Here's a few pics of the finished product:
Each of the kits cost about $100 shipped. I thought I could get by with two kits and a clear coat kit in the $300 range. Of course, I already put another $100 in it, and will need another $100 kit when the spring comes. But, this is still cheaper than quotes for application (between $4 and $5 per square foot). Of course, had I paid someone to do it, it would've been done in a day and done right the first time, but heck, I enjoy the home improvement projects.

I have cans of that stuff. I was all excited to do it and since I read the instructions it has been sitting in my garage waitng for me to get motivated. So how time consuming was it?
Sean
Sean

This is easier and not much more $$$
http://armorpoxy.com/armortile_gd.html
Doesn't your have the little chips of color in it?
http://armorpoxy.com/armortile_gd.html
Doesn't your have the little chips of color in it?
Last edited by hr2burn; Jan 28, 2008 at 07:02 PM.


Joined: May 2002
Posts: 8,621
Likes: 1,392
From: Aurora, Colorado
I've epoxy coated two garage floors and found they take about three days. But doing it in the summer made it a lot easier. Start of a Friday evening (clean and prep), acid etch early Sat morning and rinse 2X before allowing ample drying time. Thin coats really help and warmer weather helped dry and harden the epoxy on Sunday. By that night, the last coat should be drying, but if you can stay off the surface for a few days ensures the epoxy hardens and bonds to the concrete.
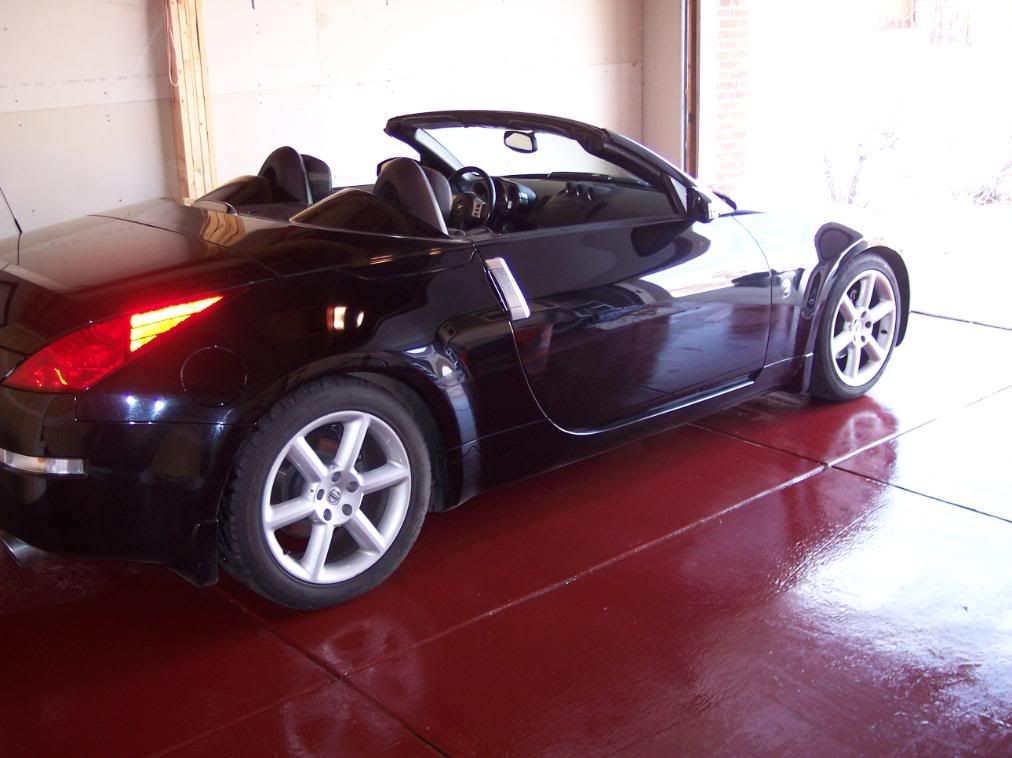
That's a pretty RED floor you got there, Funkymonkey1111!
That's a pretty RED floor you got there, Funkymonkey1111!
New Member
Joined: Jun 2002
Posts: 1,258
Likes: 4
From: Golden, CO
Looks great! You should be happy with that for years to come.
Quick question: where did you buy the Xylol? I might need some for a project I'm working on, and I'm not sure I'll just be able to walk into my neighborhood Home Depot and pick that stuff up.
Quick question: where did you buy the Xylol? I might need some for a project I'm working on, and I'm not sure I'll just be able to walk into my neighborhood Home Depot and pick that stuff up.
Trending Topics
Thread Starter
Registered User
Joined: Nov 2003
Posts: 376
Likes: 0
From: colorado
Originally Posted by hr2burn
I have cans of that stuff. I was all excited to do it and since I read the instructions it has been sitting in my garage waitng for me to get motivated. So how time consuming was it?
Sean
Sean
degreasing/rinsing: 1 hour
etching/rinsing: 1.5 hours
prep/mixing kits together: 10 minutes
prep/mixing/curing each coat (x4): 5 minutes mixing; 45 minutes waiting to cure
cutting in edges and expansion joints for first coat: 45 minutes
application of each coat (x4): 45 minutes - 1 hour
depending on the temp, on this kit you have to wait between 20 (approx) and 45 minutes from the time you mix it to the time you apply it. of course, you can be doing other things in that time, but you're tied to the location. after that, you only have about a 2 hour window to put the epoxy down (again, based on the temp). i did this in the fall, and it was right at the edge of the recommended cool temps.
one thing to figure is the amount of time your garage is out of commission and the re-coat times. since it was cooler at the time, i wanted to make sure the concrete was completely dry, so the drying took a few days. in the summer, it'd likely be an afternoon like dkmura says.
as for the recoat times, again, based on temperature, you have 12 to 48 hours or to do your recoats. since it was cold, i had to wait actually longer than the 48 hours. and, since it was cold by the time i applied clear coat, i ended up letting it dry for 2 weeks before i put a car on it. if you're smart and do it in the summer, your wait is alot shorter.
i didn't want a winter's worth of snowmelt chemicals and drips, etc. on the floor (only to be cleaned up later) so i was doing this in the fall, which obviously slowed down the process.
Last edited by funkymonkey1111; Jan 29, 2008 at 06:00 AM.
Thread Starter
Registered User
Joined: Nov 2003
Posts: 376
Likes: 0
From: colorado
Originally Posted by hr2burn
This is easier and not much more $$$
http://armorpoxy.com/armortile_gd.html
Doesn't your have the little chips of color in it?
http://armorpoxy.com/armortile_gd.html
Doesn't your have the little chips of color in it?
one thing i worried about those tiles was moisture and fluids getting underneath them--i don't know how tight their seals were.
my kits came with the paint flecks. i started putting them down, and didn't like the way it looked, so i just covered them.
Thread Starter
Registered User
Joined: Nov 2003
Posts: 376
Likes: 0
From: colorado
Originally Posted by GaryM05
Looks great! You should be happy with that for years to come.
Quick question: where did you buy the Xylol? I might need some for a project I'm working on, and I'm not sure I'll just be able to walk into my neighborhood Home Depot and pick that stuff up.
Quick question: where did you buy the Xylol? I might need some for a project I'm working on, and I'm not sure I'll just be able to walk into my neighborhood Home Depot and pick that stuff up.

Looks good. The florr is the onmly thing I have not done with my garage remodel. I haven't decided on what to do. I originally wanted to go with epoxy, from a company called U-Coat-It, but I read too many complaints from Colorado home owners that did not like their epoxy, no matter which brand they chose. After a few years, they seemed to chip, flake, or crack. Some people had good experience with it, but the number of complaints outweighed the number of satisfied users. I hope you like yours and it holds well. I eventually decided to use Daytona garage floor tiles. But, I still haven't put them in.
Will
Will

Thread
Thread Starter
Forum
Replies
Last Post
ars88
Zs & Gs For Sale
18
Apr 4, 2016 07:52 AM
NOLAGG
Misc.
6
Sep 28, 2015 04:14 PM

