Z1 Plenum Spacer Install How-to
 02-19-2009, 04:59 PM
#1
Registered User
Thread Starter
Join Date: Feb 2005
Location: Savannah, GA
Posts: 347
Likes: 0
Received 0 Likes
on
0 Posts
This is really not a technical job at all, but I realize working on your own car can be intimidating if you've never done it before. So I took some photos and notes as I installed my Z1 plenum spacer yesterday. I'm not going to completely duplicate the install instructions from Z1 Motorsports, but they can be found here, and a printed copy is included with the plenum spacer. Lets get started!
Difficulty: 1-2 beers
Time: 1 hour or less
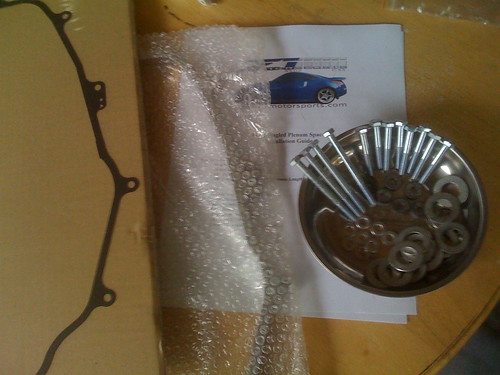
These are the parts included with the kit. You can find the breakdown in the instructions, but I was pleased to see that they included some extra hardware, which comes in handy when you inevitably lose a bolt or washer (even with my magnetic parts bowl, which I highly recommend).
These are the tools that you will require (They are also listed in the instructions). 10mm socket for the bolts on the plenum, a 14mm socket for the strut bar bolts, a ratchet that will drive both those sockets, and an extension that fits the 14mm socket to get to the strut bar nut. I also used my 1/4" drive nut driver (screwdriver looking thing) to speed up removing the 10mm bolts, and also to install them without over-torquing them.

Step 1: Remove the bolts and nuts for your strut tower. I found mine to be really tight, and had to use a breaker bar to break the torque on them. However, I've taken the bar off before and I probably torqued them on too tight the last time. You'll probably have to use your extension to get to the two nuts on the strut bar, and the bolt that comes up out of the strut mount can make it hard to seat the socket all the way down with an extension in it. I put the socket on the nut, then pushed the extension into the socket. It didn't go in fully, but I'd rather round off my extension than that nut!
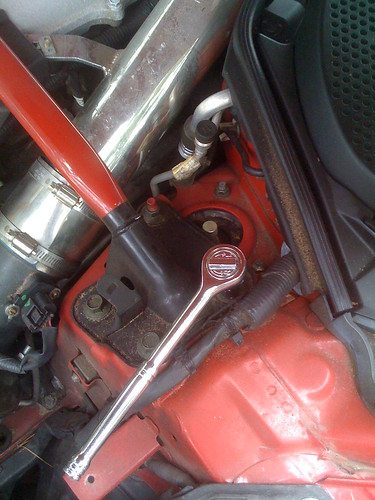
Now remove your strut bar. You'll have wiring clipped to the bar that can be a ***** to remove (mine was) so I ended up just swinging the bar out of they way as needed, and that provided plenty of clearance.
Step 2: Remove the nuts and bolts that hold the engine cover down, and remove the engine cover. It's pretty self-explanatory, there are two bolts and two nuts (if I remember correctly). The only tricky part is that there are brass bushings inside the holes used to mount the engine cover, and these can fall out if you're not careful. This is what's underneath that cover, if you've never seen it before.
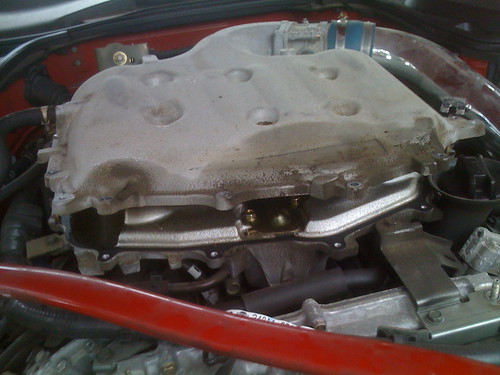
Step 3: Remove all the bolts from the plenum and carefully lift it upwards. You'll need to keep some of the OEM hardware (the four bolts on the back edge of the plenum, and the three rear bolts on top of the plenum, but reference the instructions to be sure you're using the right ones), so seperate those bolts from the rest, but don't discard anything until you're done! I also had to remove a bracket holding something (not sure what) to the back of the upper plenum so I had more wiggle room to lift it, but that's just preference. Check out your OEM gasket and make sure it's still properly aligned. Also, be careful while you have the plenum open; anything that may find its way in there will most likely be sucked into the engine the next time you start it!
Step 4: Place the plenum spacer in on top of the OEM gasket. If you don't have someone else there to hold the upper plenum for you, it can be a bit of a pain to get it in there. Be sure not to disturb that OEM gasket, and once you do have it in, double check to make sure everything is aligned. For reference, the thicker part of the spacer faces the front, but there is only one possible way you can put it in so don't sweat it.
Step 5: Place the new gasket (included with the spacer) on top of the spacer, and align it. This would probably be easiest to do BEFORE you put the spacer in, but it's still not that difficult to get that thing in there on top of the spacer by yourself. I didn't take a picture because it's pretty self-evident what you need to do. Just be sure that all the bolt holes in the gasket are lined up with the spacer, and the bolt holes in the spacer are lined up with the holes in the lower plenum. Once you have everything square, carefully lower the upper plenum onto the new gasket and spacer.
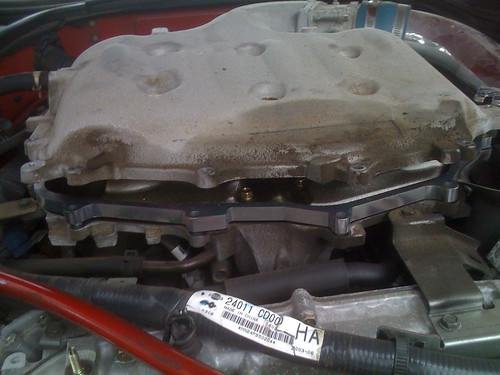
Step 6: Start threading bolts back through the upper plenum, spacer, and into the lower plenum. I started with the bolts in the back (these four are re-used). Hand start the bolts just enough to get them threaded. Leave them plenty loose in case you need to move the plenum or spacer around to get everything aligned. In this picture you can also see the bracket I removed from the upper plenum. I remounted the bracket once I had the plenum fully bolted down.
Next I hand-started the bolts on top of the plenum. The three rear bolts are new hardware supplied with the spacer. The three front bolts are re-used OEM hardware. HOWEVER, those three bolts were originally in the REAR holes. Be sure you're using the correct OEM hardware! You can tell which bolts are new and which are old in the picture. All six bolts have a rubberized washer underneath (also supplied with the spacer).

Last, use six of the smaller bolts supplied with the kit (as well as a small metal washer for each bolt) and hand start the bolts in the rest of the mounting holes (Four in the front, one on each side). Two studs coming out of the lower plenum, which originally had nuts on them, are no longer used and will be left without hardware on them.
Once you have hand-started all the bolts, and are sure everything is lined up, torque all the plenum bolts to 44-61 INCH-POUNDS. Yes, inch-pounds, not foot pounds, so don't break out your monster torque wrench. I don't have a torque wrench that goes that low, so I used my nut driver and guestimated the torque. A rule of thumb, so I've been told, is that the tightest you can get a bolt with a nut driver and bare hands is 100 in-lbs. So tighten it about half as hard as you can go, and that should be within range. I would worry more about over-torquing them than under-torqing, keep in mind that if you're using a 6" ratchet it will only require 10 lbs of force on the end of that thing to over-torque the bolt.
Step 7: Replace the engine cover using the OEM nuts and bolts. It's not going to fit quite right because the plenum will now sit higher, but it'll still go on ok.
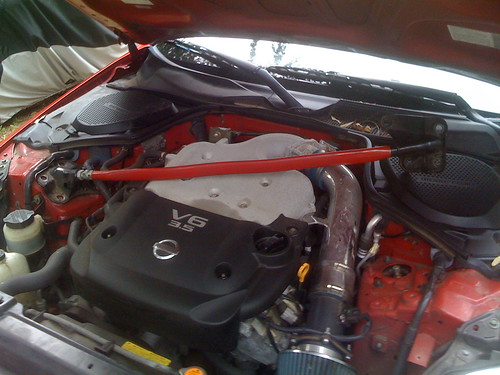
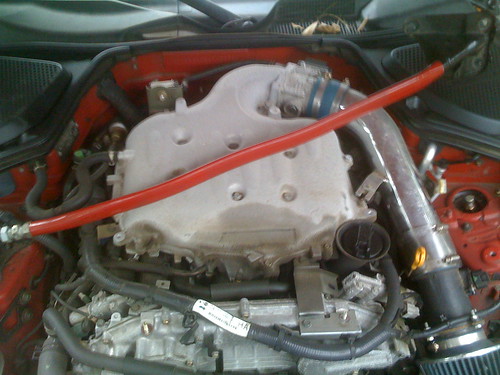
Step 8: Reinstall your strut bar. Since the plenum is raised, you're probably going to require additional clearance. There are some large washers provided with the spacer for this. This will vary from engine to engine, but I used two washers under each inside mounting point, and one washer under each outside mounting point (there were 12 washers supplied, hence the odd number). Be careful not to drop those washers down into your engine bay, as they'll end up on that lower engine cover and if you don't have skinny bird arms (luckily I do!) you'll have a really hard time getting them out. Once I torqued the strut bar down, I also used the adjustment bolt to lengthen the bar for a little additional clearance. Keep in mind that when your engine is under load it actually twists in the engine bay, so what may look like adequate clearance with the engine off (or idling) may cause the plenum to contact the strut bar while driving. This will cause a vibration in the car that you can hear and feel. In that case, take your bar back off and add another washer underneath. My bar has about 1/4" clearance minimum with the engine off and that's adequate to keep it from touching.
Once you're sure the strut bar is secure and has adequate clearance, you're done! Go wash your hands and take it for a drive! In my car, the most notable increase is in the low to mid power band, and was enough to make a $160 part seem worthwhile. This was part of my ongoing BSP autocross build, so we'll see what kind of difference it makes at the next event. And besides that, you drank a beer and got your hands dirty working on your car, that's always worthwhile!
Difficulty: 1-2 beers
Time: 1 hour or less
These are the parts included with the kit. You can find the breakdown in the instructions, but I was pleased to see that they included some extra hardware, which comes in handy when you inevitably lose a bolt or washer (even with my magnetic parts bowl, which I highly recommend).
These are the tools that you will require (They are also listed in the instructions). 10mm socket for the bolts on the plenum, a 14mm socket for the strut bar bolts, a ratchet that will drive both those sockets, and an extension that fits the 14mm socket to get to the strut bar nut. I also used my 1/4" drive nut driver (screwdriver looking thing) to speed up removing the 10mm bolts, and also to install them without over-torquing them.
Step 1: Remove the bolts and nuts for your strut tower. I found mine to be really tight, and had to use a breaker bar to break the torque on them. However, I've taken the bar off before and I probably torqued them on too tight the last time. You'll probably have to use your extension to get to the two nuts on the strut bar, and the bolt that comes up out of the strut mount can make it hard to seat the socket all the way down with an extension in it. I put the socket on the nut, then pushed the extension into the socket. It didn't go in fully, but I'd rather round off my extension than that nut!
Now remove your strut bar. You'll have wiring clipped to the bar that can be a ***** to remove (mine was) so I ended up just swinging the bar out of they way as needed, and that provided plenty of clearance.
Step 2: Remove the nuts and bolts that hold the engine cover down, and remove the engine cover. It's pretty self-explanatory, there are two bolts and two nuts (if I remember correctly). The only tricky part is that there are brass bushings inside the holes used to mount the engine cover, and these can fall out if you're not careful. This is what's underneath that cover, if you've never seen it before.
Step 3: Remove all the bolts from the plenum and carefully lift it upwards. You'll need to keep some of the OEM hardware (the four bolts on the back edge of the plenum, and the three rear bolts on top of the plenum, but reference the instructions to be sure you're using the right ones), so seperate those bolts from the rest, but don't discard anything until you're done! I also had to remove a bracket holding something (not sure what) to the back of the upper plenum so I had more wiggle room to lift it, but that's just preference. Check out your OEM gasket and make sure it's still properly aligned. Also, be careful while you have the plenum open; anything that may find its way in there will most likely be sucked into the engine the next time you start it!
Step 4: Place the plenum spacer in on top of the OEM gasket. If you don't have someone else there to hold the upper plenum for you, it can be a bit of a pain to get it in there. Be sure not to disturb that OEM gasket, and once you do have it in, double check to make sure everything is aligned. For reference, the thicker part of the spacer faces the front, but there is only one possible way you can put it in so don't sweat it.
Step 5: Place the new gasket (included with the spacer) on top of the spacer, and align it. This would probably be easiest to do BEFORE you put the spacer in, but it's still not that difficult to get that thing in there on top of the spacer by yourself. I didn't take a picture because it's pretty self-evident what you need to do. Just be sure that all the bolt holes in the gasket are lined up with the spacer, and the bolt holes in the spacer are lined up with the holes in the lower plenum. Once you have everything square, carefully lower the upper plenum onto the new gasket and spacer.
Step 6: Start threading bolts back through the upper plenum, spacer, and into the lower plenum. I started with the bolts in the back (these four are re-used). Hand start the bolts just enough to get them threaded. Leave them plenty loose in case you need to move the plenum or spacer around to get everything aligned. In this picture you can also see the bracket I removed from the upper plenum. I remounted the bracket once I had the plenum fully bolted down.
Next I hand-started the bolts on top of the plenum. The three rear bolts are new hardware supplied with the spacer. The three front bolts are re-used OEM hardware. HOWEVER, those three bolts were originally in the REAR holes. Be sure you're using the correct OEM hardware! You can tell which bolts are new and which are old in the picture. All six bolts have a rubberized washer underneath (also supplied with the spacer).
Last, use six of the smaller bolts supplied with the kit (as well as a small metal washer for each bolt) and hand start the bolts in the rest of the mounting holes (Four in the front, one on each side). Two studs coming out of the lower plenum, which originally had nuts on them, are no longer used and will be left without hardware on them.
Once you have hand-started all the bolts, and are sure everything is lined up, torque all the plenum bolts to 44-61 INCH-POUNDS. Yes, inch-pounds, not foot pounds, so don't break out your monster torque wrench. I don't have a torque wrench that goes that low, so I used my nut driver and guestimated the torque. A rule of thumb, so I've been told, is that the tightest you can get a bolt with a nut driver and bare hands is 100 in-lbs. So tighten it about half as hard as you can go, and that should be within range. I would worry more about over-torquing them than under-torqing, keep in mind that if you're using a 6" ratchet it will only require 10 lbs of force on the end of that thing to over-torque the bolt.
Step 7: Replace the engine cover using the OEM nuts and bolts. It's not going to fit quite right because the plenum will now sit higher, but it'll still go on ok.
Step 8: Reinstall your strut bar. Since the plenum is raised, you're probably going to require additional clearance. There are some large washers provided with the spacer for this. This will vary from engine to engine, but I used two washers under each inside mounting point, and one washer under each outside mounting point (there were 12 washers supplied, hence the odd number). Be careful not to drop those washers down into your engine bay, as they'll end up on that lower engine cover and if you don't have skinny bird arms (luckily I do!) you'll have a really hard time getting them out. Once I torqued the strut bar down, I also used the adjustment bolt to lengthen the bar for a little additional clearance. Keep in mind that when your engine is under load it actually twists in the engine bay, so what may look like adequate clearance with the engine off (or idling) may cause the plenum to contact the strut bar while driving. This will cause a vibration in the car that you can hear and feel. In that case, take your bar back off and add another washer underneath. My bar has about 1/4" clearance minimum with the engine off and that's adequate to keep it from touching.
Once you're sure the strut bar is secure and has adequate clearance, you're done! Go wash your hands and take it for a drive! In my car, the most notable increase is in the low to mid power band, and was enough to make a $160 part seem worthwhile. This was part of my ongoing BSP autocross build, so we'll see what kind of difference it makes at the next event. And besides that, you drank a beer and got your hands dirty working on your car, that's always worthwhile!
Last edited by Mr.Jadkowski; 02-19-2009 at 05:05 PM.

 04-09-2009, 08:26 AM
#4
Registered User
iTrader: (9)

Join Date: Sep 2008
Location: LAS VEGAS
Posts: 267
Likes: 0
Received 0 Likes
on
0 Posts
I installed my md 5/16 spacer yesterday and I dont know how to adjust the strut bar.My car shakes a little when Im at idle or 1st gear to like 3000 rpm. Would it be better I take it off until I find out how to adjust it? Its on right now but not like fully bolted on so prettty much use less I think.
06-26-2009, 01:55 PM
#5
Registered User

Join Date: Apr 2006
Location: chevy chase
Posts: 60
Likes: 0
Received 0 Likes
on
0 Posts
I would, it fine to drive without the strut bar. I also might add that you should be careful that you do not have too much clearance, you might go drop your hood and hear a nice whack - like leaving a wrench in the engine bay haha.
06-28-2009, 10:16 PM
#6
Registered User

Join Date: Sep 2008
Location: California
Posts: 3
Likes: 0
Received 0 Likes
on
0 Posts
will it make a difference if i didn't use the bolts that came with the spacer? i bought a motordyne 5/16 spacer but my mechanic decided to use the original bolts? will this affect anything?
 06-30-2009, 07:59 PM
#8
Registered User
Join Date: Sep 2008
Location: California
Posts: 3
Likes: 0
Received 0 Likes
on
0 Posts
haha funny... i was just checking because the stupid stock bolts loosened up but i replaced them...its not running shitty so i know its koo ... but i forgot to mention the torquing recommendation ...i didn't torque it to the certain pounds thats what i really wanted to know
 10-08-2013, 05:39 AM
#10

A good DIY is not complete w out beers!! Haha.
I'm assuming this is the z1 angled spacer? I just purchased one from the z nationals show at a discounted rate. Installed next day. instructions are included and packaging is great/wrapped up. I really like mine and going to out it on the dyno soon to see what kind of number changes I get being boosted (heard n/a-11-15hp and forced is more ~20+HP) but who knows. I love the spacer how it is nice and silver and goes well w my polished plenum. Also how it is angled from 5/16 to 1/2 up front. very good piece id have to say. nice write.
And I remember reading MD instructions it says torque to 100 inch lbs and this says 40-60 inch. not a huge diff but was curious why. I've Done both and all works and drives perfectly fine.
Edit:
I sprayed my upper plenum under inside w some parts cleaner while I had it apart. May want to clean it up while anyone has theirs open.
Last edited by taywan; 10-08-2013 at 05:50 AM.
 12-22-2016, 06:47 PM
#12
New Member

Holy cheap ratchet
