When you click on links to various merchants on this site and make a purchase, this can result in this site earning a commission. Affiliate programs and affiliations include, but are not limited to, the eBay Partner Network.
DIY - Replacing Camshaft Position Sensor Bank 1(p0340)
Ok guys, so I'm new here and I figured I should contribute. Hmmm error code p0340? Me too! I don't know if there is an actual guide already, if so just delete this, but I'm pretty sure there isn't because I searched far and wide. I wound up watching a video of a guy do his g35. Anywho, here we go.
You'll need:
Flathead screwdriver (optional)(but probably)
Your bae
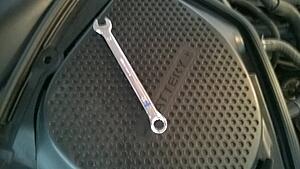
A 10mm wrench (small)(small hands also help)
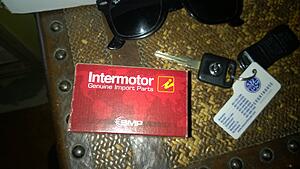
Replacement sensor (the straight one)
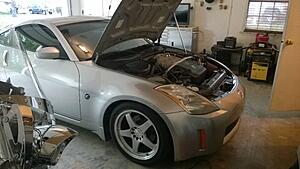
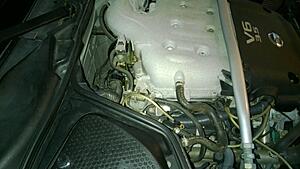
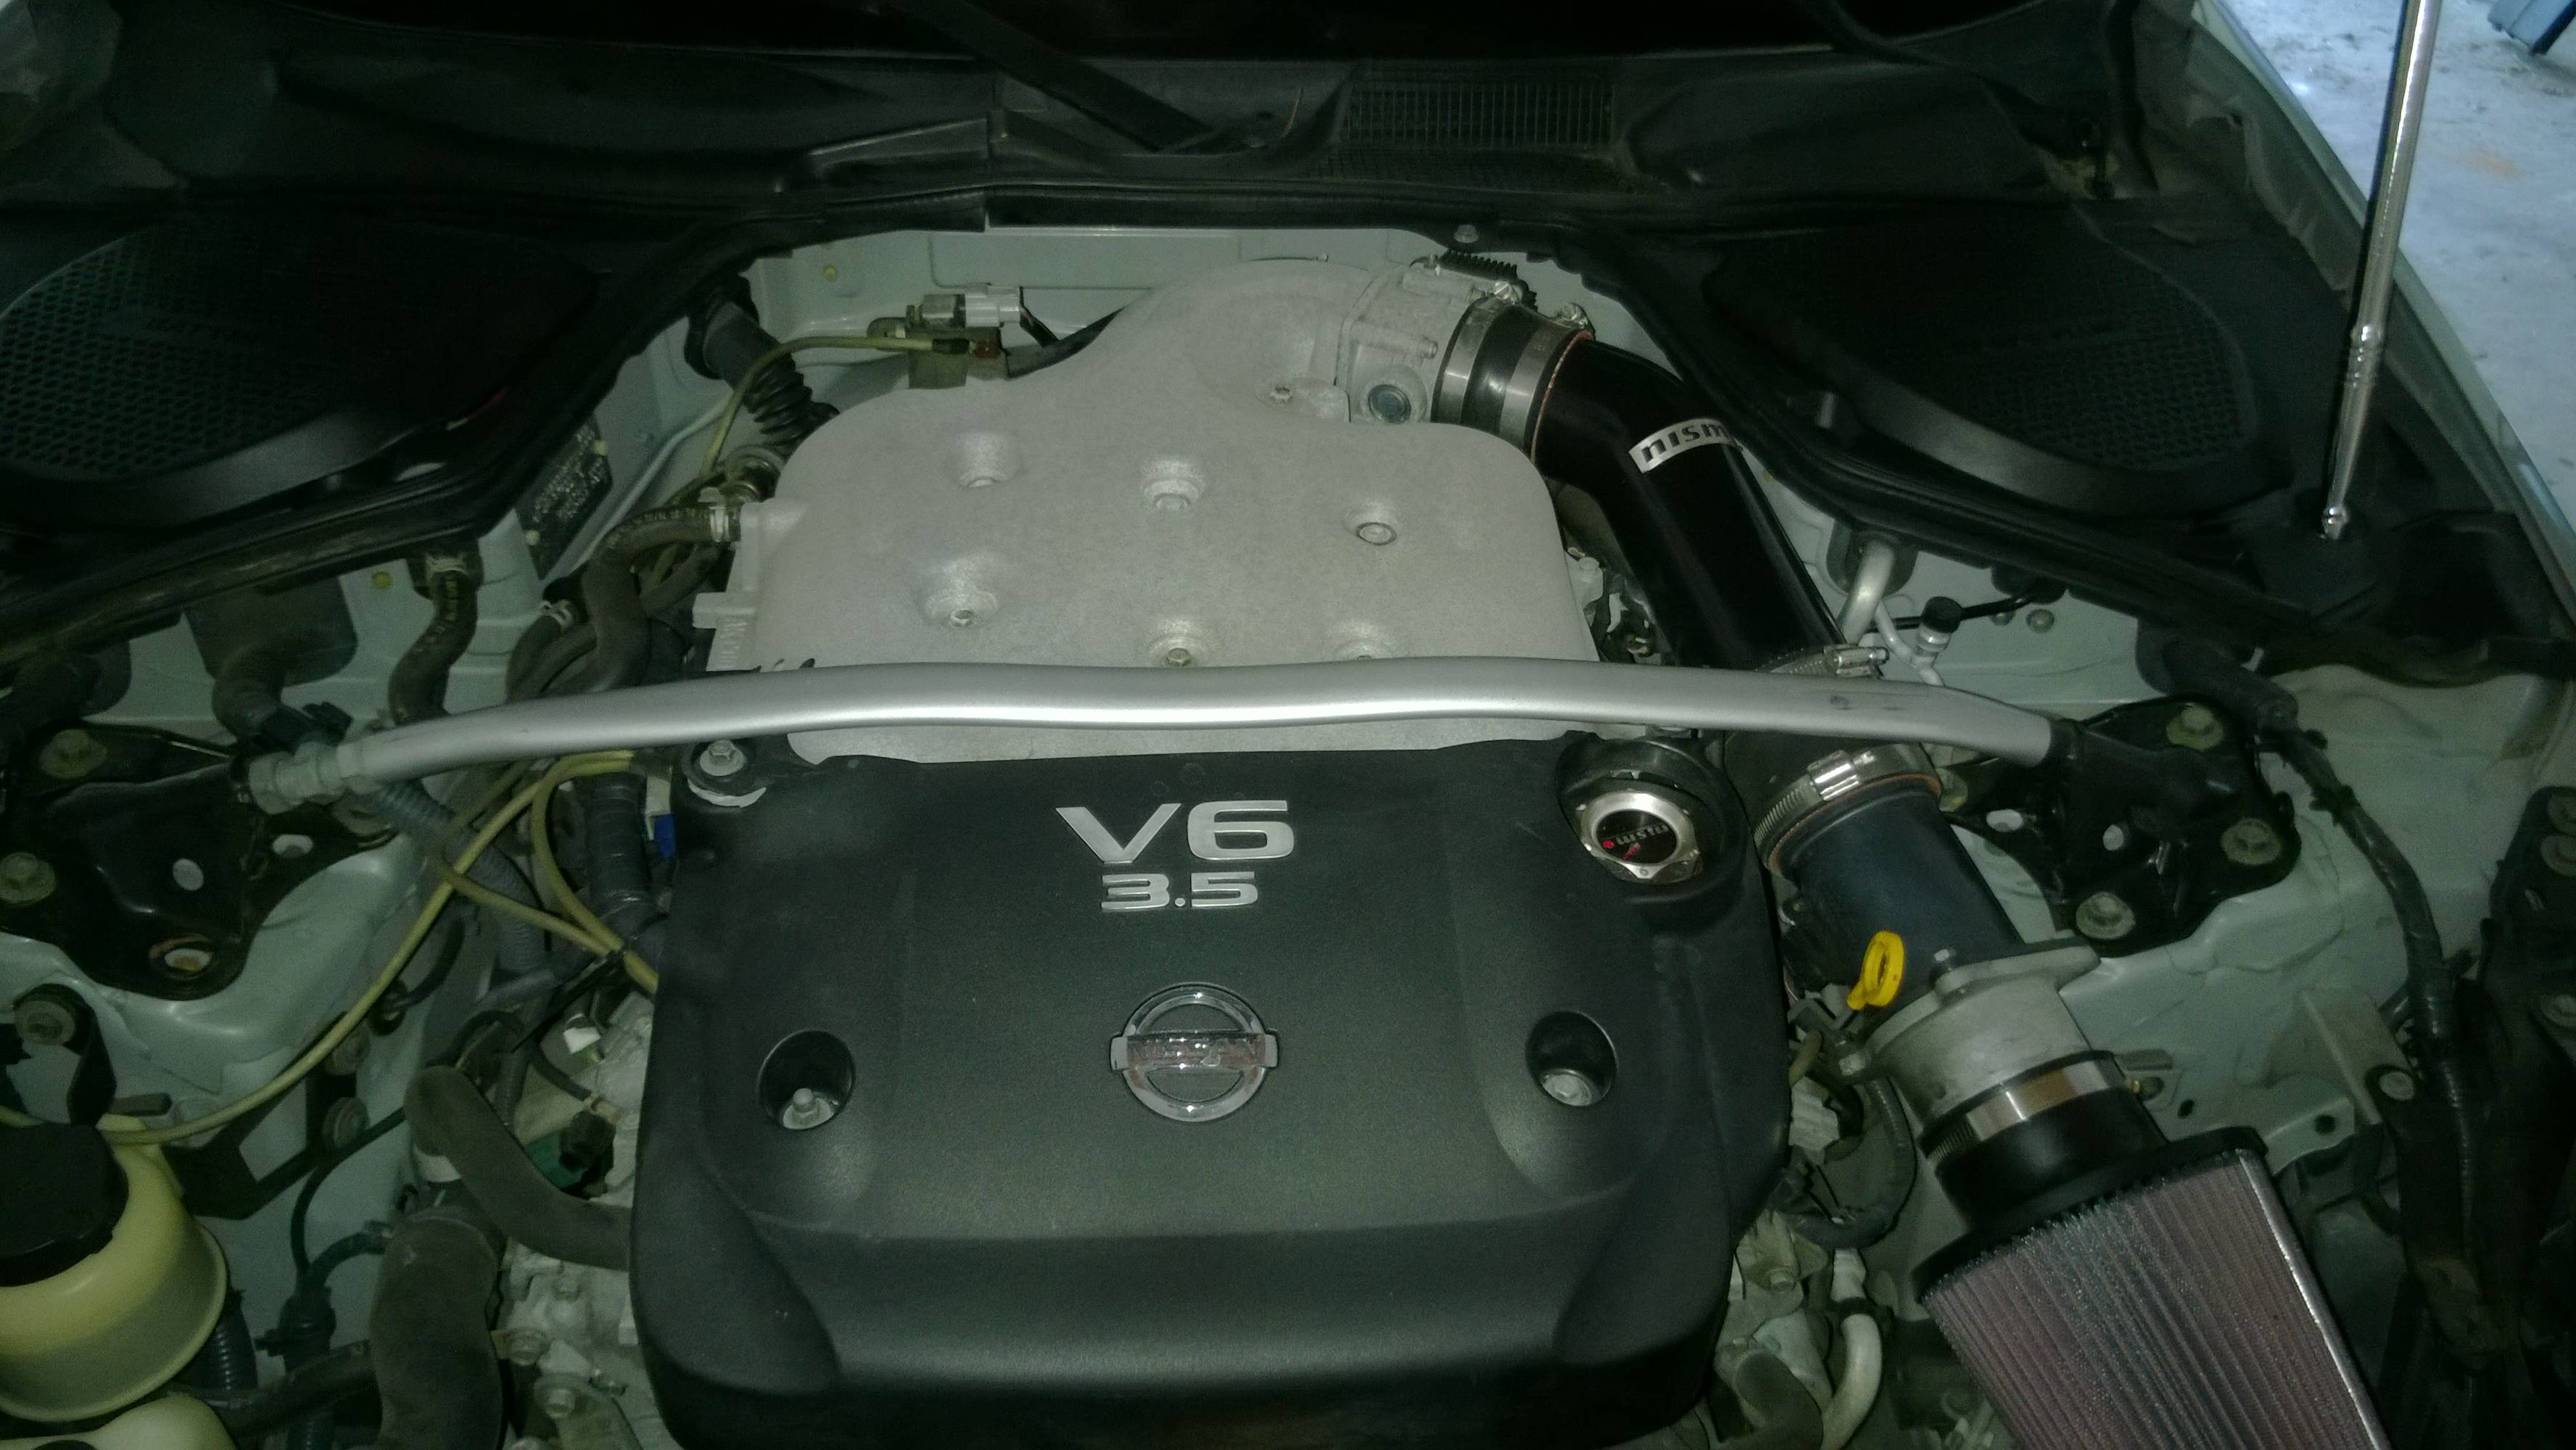
<------------------ We'll be working from the passenger side
Change angle (passenger side)
Zoom in...
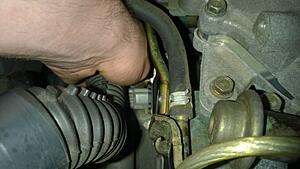
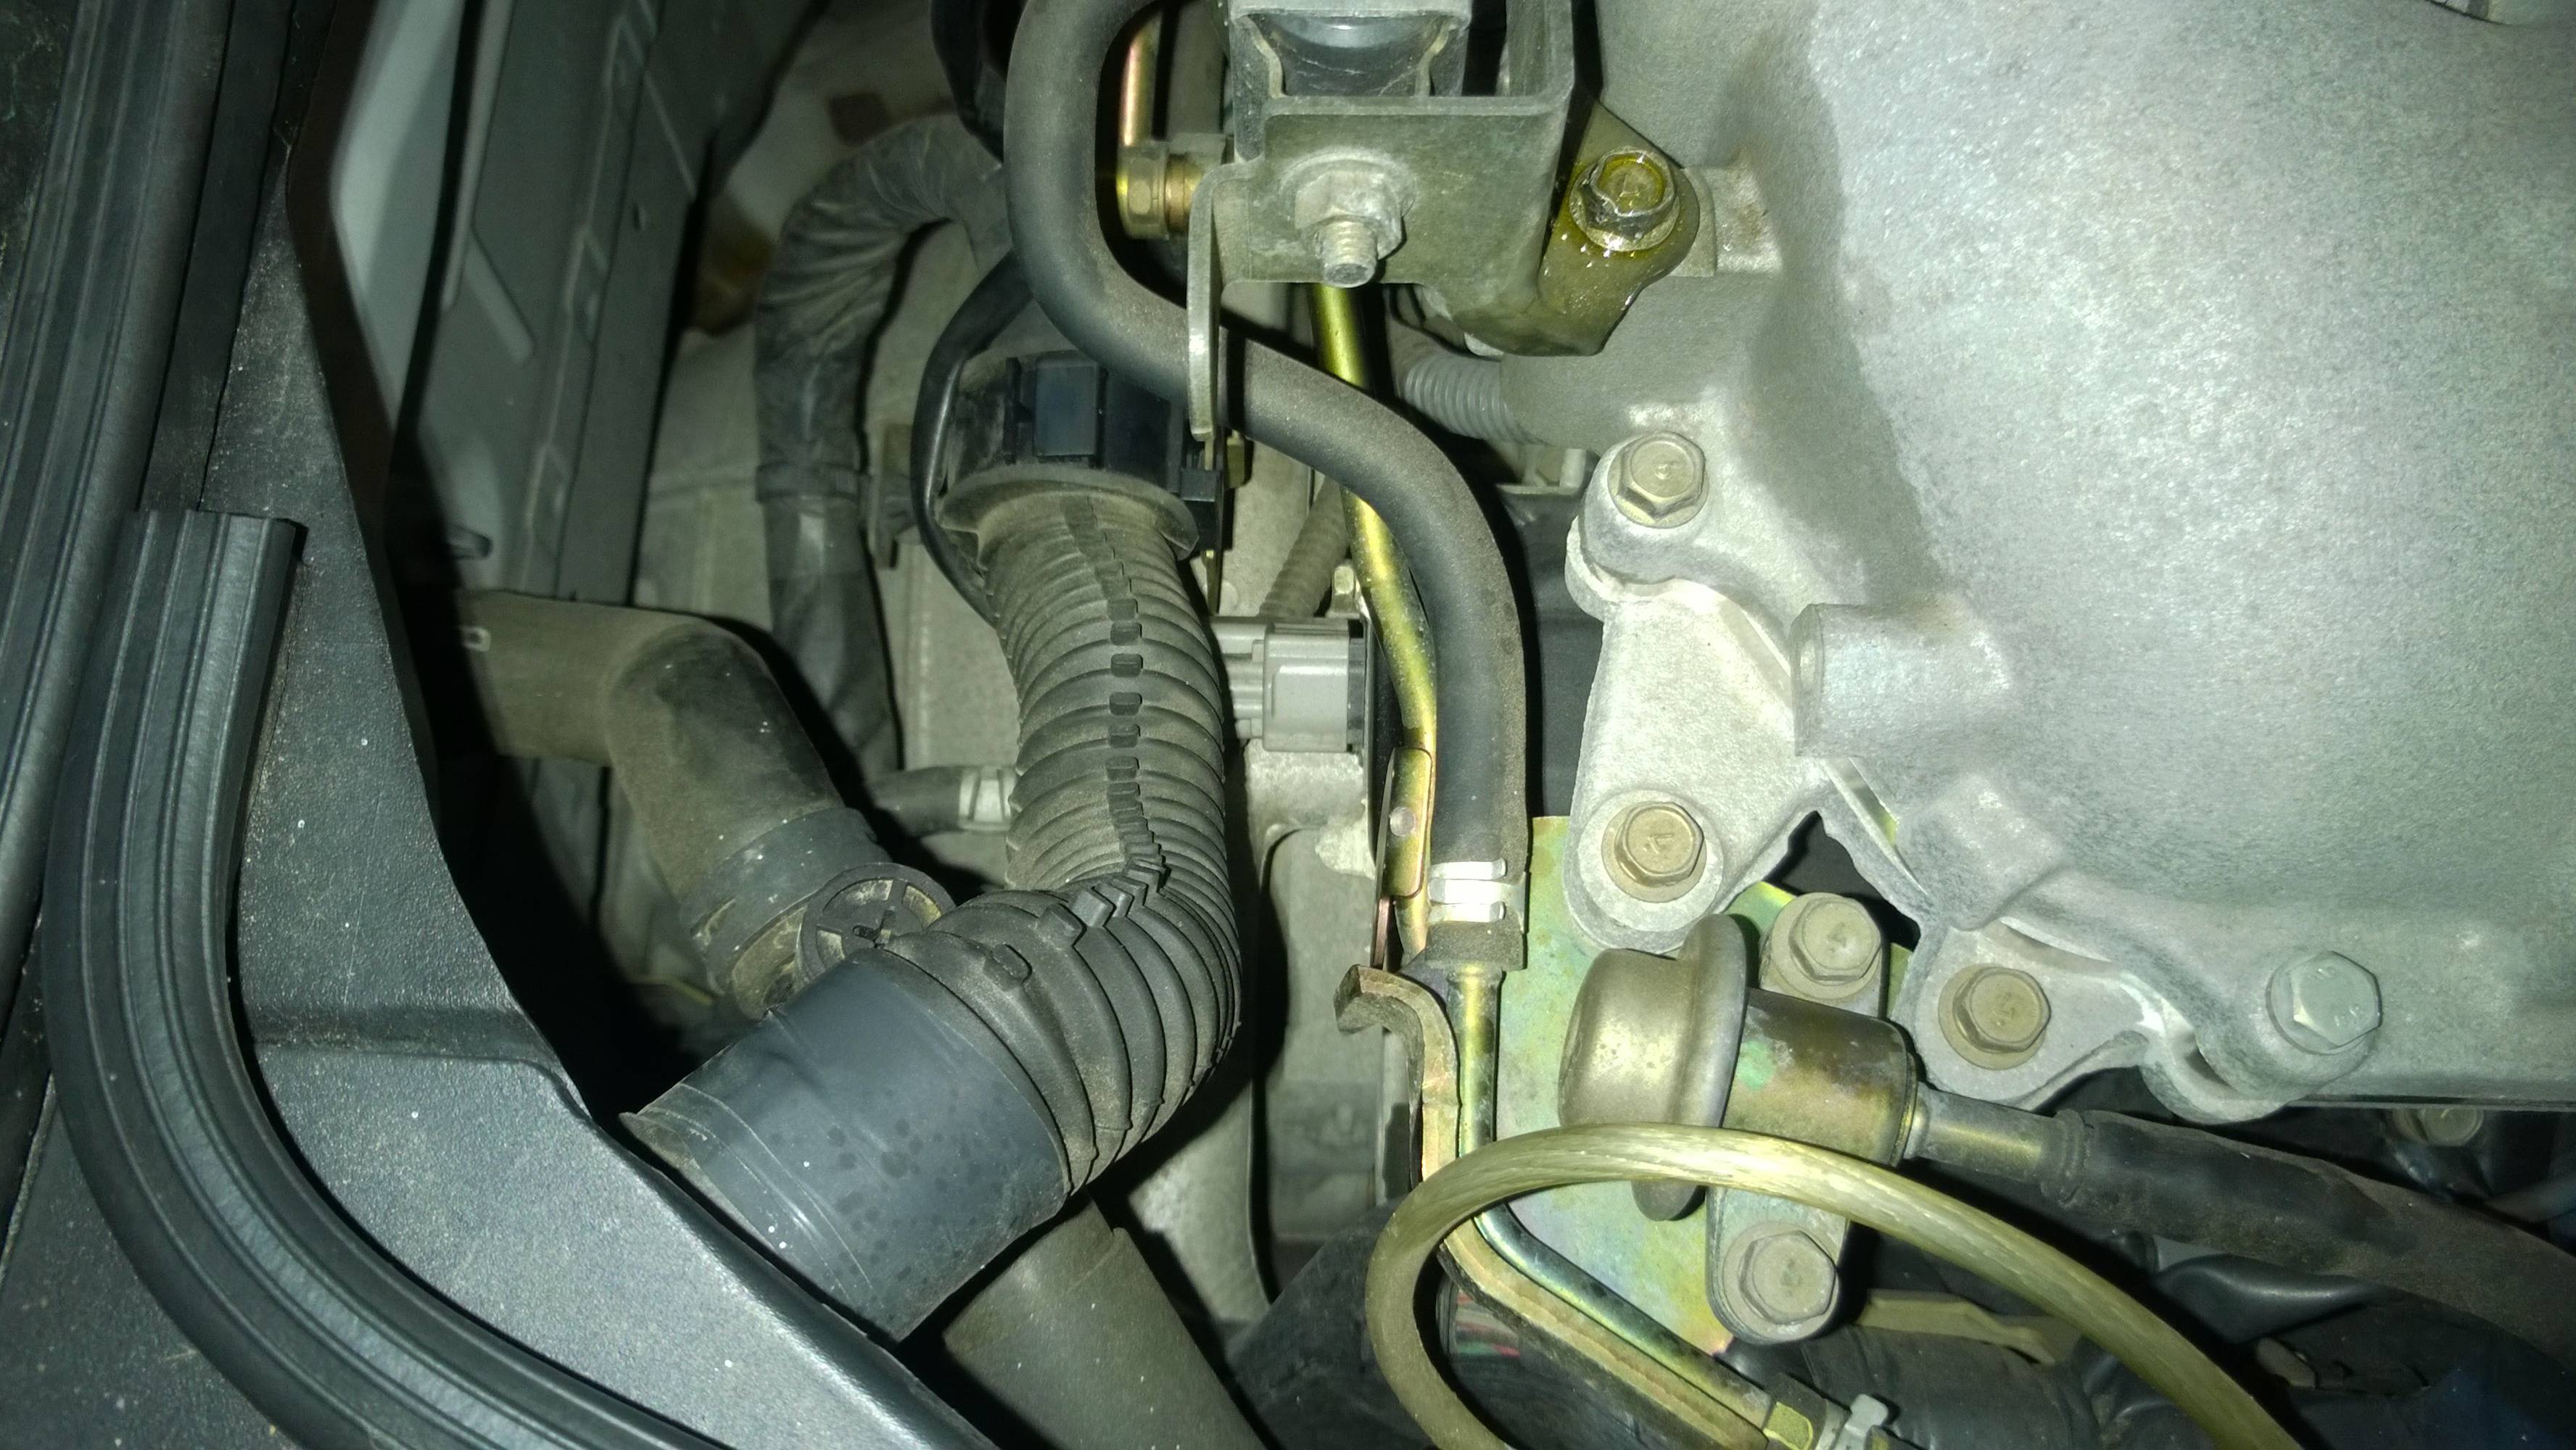
Oh yeah, that's it. Loosen gold bolt closest to the gray plug with your 10mm wrench. (good luck)
Once loose, unscrew by hand. My sausage hand trying...
Once it's loose and you have the bolt, set it aside. Now find an angle and pull the sensor out (don't pull on the wires, I saw a post and someone had a bad time getting them back in). It's going to be a little rough, but it will come out.
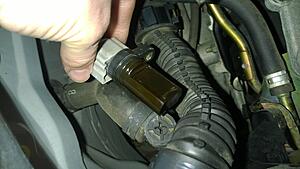
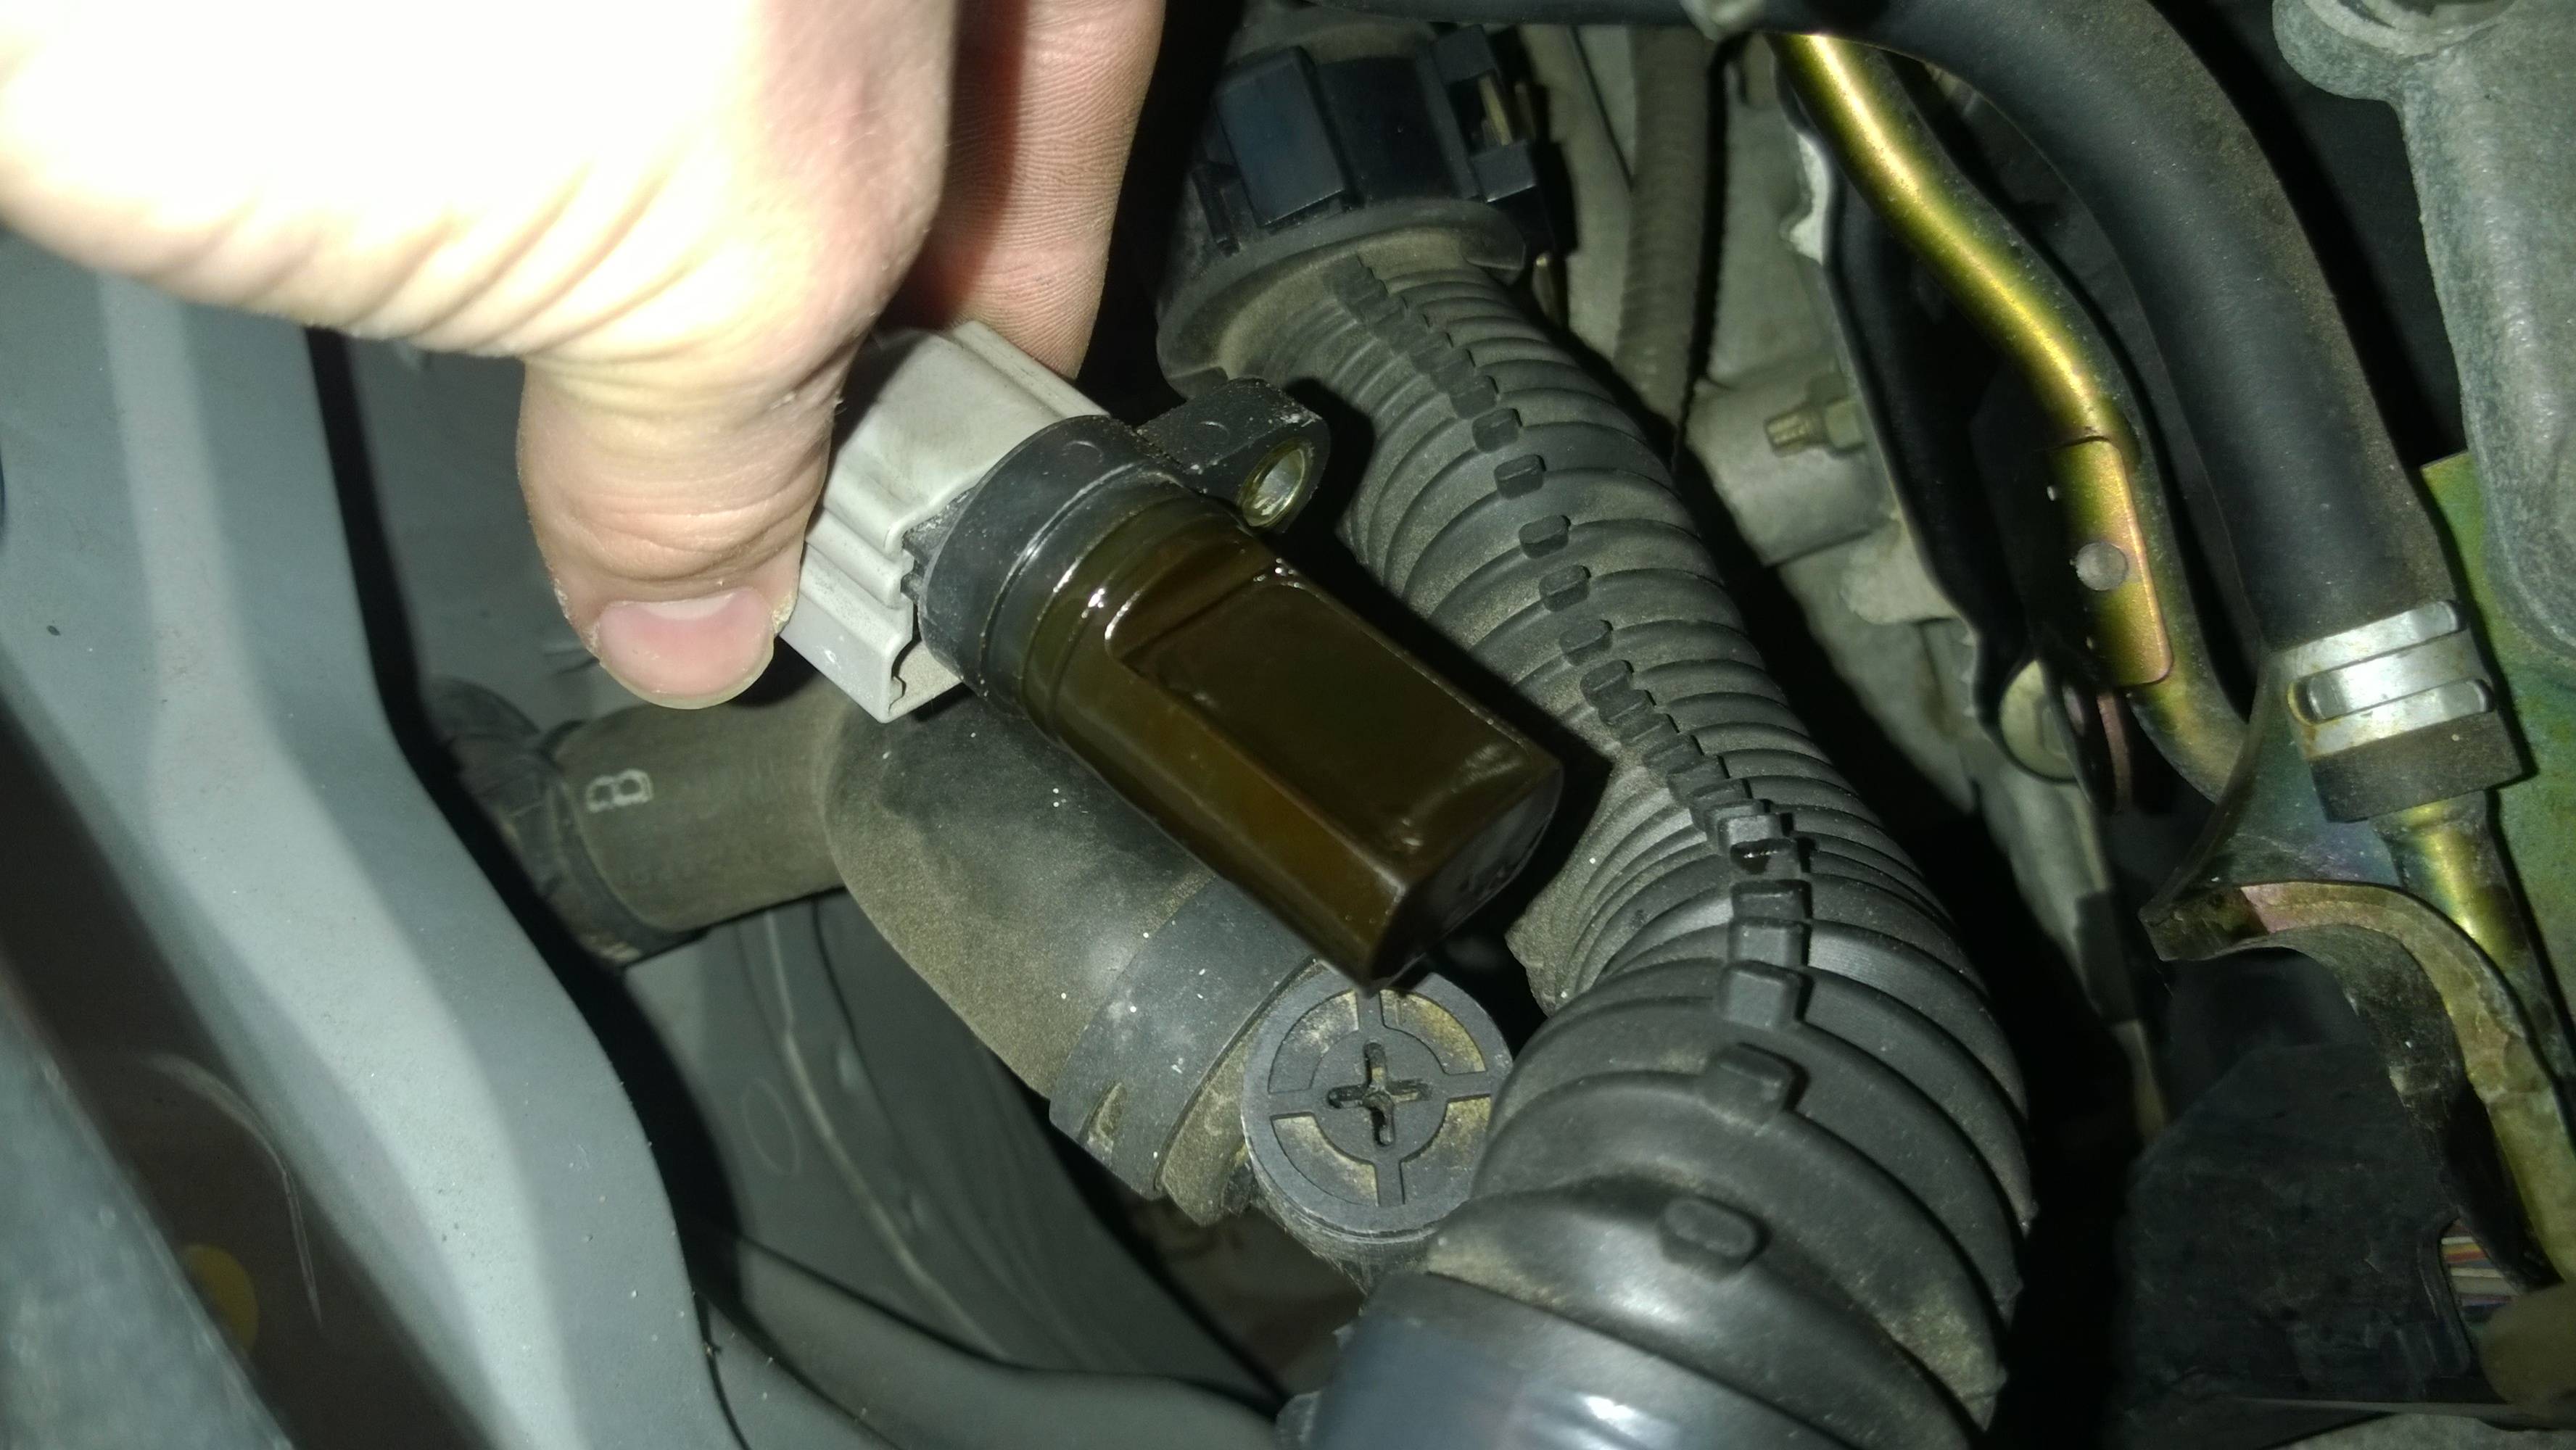
Ah it's covered in oil, great! (clean it with scott shop towels for better grip)
Sorry I don't have pics for removing it from the harness. It was a tough battle, I questioned my sanity the more I pulled. It was almost glued. For this I suggest you push the clip until you hear the click, then take a flathead and try to find an anchor point and pry it. This was the only way I got it off.
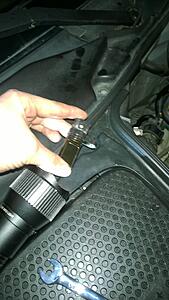
Once it's off keep it because you never know (I'm a pack rat!)
Now to complete, take new sensor, plug it into the harness, reverse steps. It can be kind of fun getting it back in, just rely on your sense of touch, it will guide you. Also a flashlight. Hope this helps someone. As for the driver side? I'll revisit that when I have to. Cheers!
I followed these instructions today and wanted to say thanks for the writeup, it made it much easier to do with these instructions and pictures. My Z is running perfectly again.
For those of you following them, here is some extra info. The process took me about an hour. I could probably do it again in half that time, so let me try to save you some time and effort.
Symptoms
While driving, the car suddenly felt like the engine stopped firing for a split second. After that the VDC, Service Engine Soon, and Slip warning lights all came on and remained on. The car felt normal while driving. After this, cranking the car took much longer than normal and sometimes wouldn�t succeed and every time it did the same warning lights would go on. Hooking up an OBD2 diagnostic reader gave me the following code
p0340 - camshaft position sensor A - Bank 1 Circuit Malfunction
Part
First, you'll need to buy a new sensor. If you're buying the OEM part, you'll need the VIN to match, not just the year of the car. There are different parts for bank 1 (US passenger side - p0340) and bank 2 (US driver side - p0345). I did bank 1 so I don't know about bank 2, although from what I've seen bank 2 looks more difficult due to the air intake being in the way.
Tools
As mentioned above, you will need a 10mm wrench. You will have to fit this wrench in a fairly tight spot. I highly recommend a torque wrench with an extender about 3 inches (8 cm) long because then you can wrench around the pipe in front of that bolt.
The work
Using your wrench, loosen the bolt that holds the sensor on. Breaking it was very hard for me due to not being able to get good leverage on the wrench because of the tight space. Big hands don�t help. I found that laying on the engine block and pulling worked for me. Once the bolt is loose it�s pretty easy to take out. Try to remember where the screw hole is since it�s not really visible when you�re working and you�ll need to put the bolt back in later blindly.
Once you remove the screw, you can just pull the sensor out directly. There are pipes in the way so getting it out is a bit of a struggle. It will be oily when it comes out so be ready to wipe it down.
Now comes the tricky part, separating the sensor from the connector. This is all inconvenient to do due to the shortness of the connector cable. I�m not sure if all cars are the same, I can only tell you about what I saw. Looking at my sensor, it had a plastic T at the end that was grabbed by the clips on the connector. The connector has an internal piece at the back that slides forward and depresses these clips. However, sliding it forward was very hard and took a good amount of force just to get it half way. The other half I could only do by using a flathead screwdriver to wedge it forward. Once I drove it all the way the sensor came out easily. The new sensor clipped in easily with little force and seemed to be held on tightly.
Now basically reverse the process. Working the sensor in past the pipes took some effort. Finding the screw hole was surprisingly easy even though I couldn�t see much (or maybe I just got lucky). Wrenching it back was a pain but nothing surprising.
Finishing up
Finally, after doing this turn the key to ON but don�t start the car and use the OBD2 tool to clear the error code. After clearing the code turn the key to off for a few seconds and then crank the motor. Mine started as smoothly as it normally does with no warning lights.
So replacing the sensor i droped the bolt and its not on the ground its in the bay somewhere. What size bolt is needed? Or is there one on the car i can take off and use?
After changing the camshaft position sensor (CPS) on both my Z racecar (HR) and street Z (DE), it seems changing the HR CPS was quite a bit easier. For the DE the clearances were quite a bit tighter, but I found a few more tools really helped the process along. Thought I'd add them to this thread:
-First, I found using a 3/8" ratchet with a short extension and 10 mm (shorty) socket worked well in removing and tightening up the small 10 mm bolt holding the CPS in place. You just had to pull up the black hose and slip it underneath to get to properly align.
-I found the CPS difficult to remove after the removal of the 10 mm bolt. Despite twisting, it wasn't coming out. I finally had success when I angled it to where it was originally installed and applying gradual pressure with my fingers. It seemed easier to remove from that position.
-A big point made in this DIY thread is how difficult it was to remove the CPS unit from the (green or grey) plug. One distinction not clear to me was how that plug functions. Rather that pushing DOWN on the release clip (believe me, it won't budge), you have to push it IN (towards the end of the plug). That's the way it pivots. I found using a set of my trust vice grip pliers allowed me to get one edge around the release clip and the other lightly anchored on the edge of the plug itself. BINGO! I could hold the entire unit in one end and release the CPS, while the other simply pulled the CPS free.
Tricks like these will hopefully help the hordes of new Z33 owners who will be replacing their CPS sensors in the future.
Well, after rebuilding the motor everything went fine for about a week, but suddenly I got 0340 error. Cleaning the sensor and working on socket contacts with the needle didn't really help. So I replaced the sensor with the new OEM one. Got through all the troubles with disconnecting the thing, but finally all was set. Cleared the error with OBD and AutoDoctor app. BUT the car would crank as bad as it was with old sensor and throw the check again. Here we come to the strange part: if I clear it when idling, the engines turns off and I crank the engine again, it gives no codes (cranking is still too long) and so on when driving it at least for 30-40 miles. Then when you turn it off and start again the same thing happens, it throws TCS, slip and SES lights. So long story short, everytime I clear the error it runs fine, never dies, idles ok, no power loss, no nothing. When I turn it off everything start over again!!! Tried the technosquare method, same old cranking problems and no SES lights, turn off and on, "christmas tree" turns on again! Any ideas? Maybe this methods don't clear the ECU memory? And it "remembers" the error somehow))? Is there a way to clear it without Nissan OBD scanner? Maybe other problem, but what could it be as the engine runs fine after clearing the error???
Great post. Thanks OP. I also had P0340 with 95K miles on the ticker...
The most difficult part was releasing the sensor from the plug. I suggest using something flat and not sharp to push-in in the tab on the plug. I would avoid using anything even semi-sharp, because it is very easy to slip and stab yourself in the hand... it was a close call.
On a side note, after replacing the sensor and I connected with Cipher to clear the code, it started right up, but I noticed code C1130 was there, which I had not seen before. I cleared everything, and it seems to be running nice and and smooth...smoother than I remember this car running in a while. Not sure if placebo effect.
Great post. Thanks OP. I also had P0340 with 95K miles on the ticker...
The most difficult part was releasing the sensor from the plug.
Sorry to bring up an old post but I just got the P0340 code myself recently at 70K on my 2003 Touring. Symptoms: the car would suddenly surge and jerk, then nearly stall, it felt like the worst misfire ever! It actually scared me because it felt like the clutch slipped then suddenly grabbed without warning. SES, SLIP and VDC lights came on. It did this randomly a few times during the last month, but only threw the code twice. Happened at various speeds but always occured during the first 3 miles of driving. I once had trouble starting the car where it would immediate die and stumbled badly and basically couldn't maintain proper idle at all. Took about 6 or 7 starts followed by very careful throttle application before it ran good enough to drive safely. The whole time I though it was going stall because the idle was so rough.
I followed this excellent DYI and it was pretty straight forward to replace the passenger side sensor. I'd say it took around 40 minutes to swap it out. I will attempt the driver's side next week since I assume it fail soon. I used a combination of a 10mm box wrench and 1/4" socket ratchet with a thin 3" extension to reach around the big hose that is in the way. My connector was green so it was easier to identify then the grey one show here. The tricky part (aside from having NO room for your hands in there) was wiggling the sensor out (I didn't want to pull on the wires) so I used a large flat head screwdriver to help encourage it little by little.
Releasing the sensor from the wiring harness is easy once you understand how it works. The clip SLIDES and EJECTS the sensor out. All you need to do is squeeze (length wise) - I used Robo Grip Pliers - no pushing down or screw driver required. There are some YouTube videos that show the correct action, there is no prying and you don't unclip or snap anything. The locking tab disengages automatically as the sensor slides out. One jaw of the pliers goes on harness, the other goes on the clip. You push the clip straight towards the sensor, not down.
Putting the sensor back into the engine was the step I found most challenging because you have to align the sensor and the small bolt at the same time. I think it might be easier to do if the wiring harness was NOT connected during the re-installation. This gives you a tiny bit of space so you can use one hand to push the sensor in while your other fingers attempt to turn the bolt to get the threads started. Just make sure you heard the hardness click solidly into place and then ensure connector is on firmly.
I swear the car idles and revs smoother now. As mentioned I will do the drivers side next with the angled sensor. I couldn't even see it with the intake and throttle body in the way, but at least now have an idea of where it should be and the required steps + tools. Will also do the crank position sensor at the flywheel - once the car is on ramps that seems super easy (famous last words).
Noob here, I just wanted to say that reading this thread helped me replace the Camshaft Position Sensor(bank 1-PO340) today. I�m a novice mechanic as well as a new Z owner. I really look forward to hanging around here & learning from you Pros. Later, EYDJ!!!
Just experienced this last weekend. Car shut off while on my way to work and the VDC/Slip/SES lights lit up. Had a really "fun" drive home at 25MPH with the hazards on.
Two questions: I bought a new Cam sensor [Bank 1] from AutoZone, but now I'm reading everyone saying only the OEM ones will work. Is this true? Or should I just get one from Nissan?
I already know if one is going bad then the other probably needs to get yanked also. Where is Bank 2 located? I keep searching diagrams and YT but none of them are really clear where this stupid thing is.
thanks!
These sort of questions are much better answered by starting a new thread, rather than putting them in on top of a DIY thread. But moving beyond that, you may have jumped the gun in assuming this is a CPS failure. Did you ever pull codes to verify a P0340 code was in memory? If you could drive your (Z?/G?) home after having the dash lights come on, you hit limp mode. CPS failures simply STOP the engine from running- limp mode usually doesn't apply. All your other questions can wait until it's determined what your problem is...
These sort of questions are much better answered by starting a new thread, rather than putting them in on top of a DIY thread. But moving beyond that, you may have jumped the gun in assuming this is a CPS failure. Did you ever pull codes to verify a P0340 code was in memory? If you could drive your (Z?/G?) home after having the dash lights come on, you hit limp mode. CPS failures simply STOP the engine from running- limp mode usually doesn't apply. All your other questions can wait until it's determined what your problem is...
When I got the car home, I did use my OBD2 to check it out and I verified it was P0340 [Bank 1]. And just from cursory research I've done, I thought the car would experience 'limp mode' first and then shut down if you left this issue alone and didn't address it soon[?]
And I may not have explained it fully [sorry], my engine did shut down and i coasted to the side of the road in traffic. I gave it a few minutes and it started up again [really rough though] and the 'Slip/VDC/SES' lights lit up until I got it to a parking garage.
Car started rough again and I kept my speed low on the way home. BTW, I think I may have found some more info on YT. Only added to this thread since I figured it'd be a waste for a new one since this was already here.
This section is a DIY guide section. What you're asking would better fit in the 350Z maintenance and repair section. FWIW- I would replace your aftermarket CPS with an OEM unit if you're still getting the P0340 code.
This section is a DIY guide section. What you're asking would better fit in the 350Z maintenance and repair section. FWIW- I would replace your aftermarket CPS with an OEM unit if you're still getting the P0340 code.
Just wanted to post a Big Thank You!
Great Guide, used it to replace my camshaft position sensor on my 03 350z enthusiast.
I'm sure someone mentioned this, but this guide was written for the VQ35DE engine.
I ordered the: Standard Motor Products PC460 Camshaft Sensor
Amazon Link: http://a.co/1wOE5mO
I couldn't get the OE Nissan parts in fast enough so I went with the above.
The job was of course as any job ends up being on my 350z a pain in the rear.
Looks easy in the illustrations, but as the original poster alluded to it can get sketchy/hard.
Took me 2 1/2 hours from start to finish.
Double checking work, referring back to this thread and others etc.
Clearing codes, test drive, and checking for leaks etc.
The connector itself took nearly 30 minutes -> hour to get off.
The space is so limited, and you have to be careful not to damage the wiring.
Yet at the same time pull like a mad man to separate the connector.
Here is a comparison between the Original part (on the left) and the aftermarket part mentioned above (on the right) (the one I installed). After closer inspection of the Original part, I am not sure if it is Nissan OEM.
FYI I had code P0340 and P1078 and when I started reading about the after market sensor that don't seem to last I tracked down the OEM supplier as Hitachi. I called Hitachi and spoke to a tech support who confirmed that Hitachi supplies Nissan's sensors.
The Nissan p/n 23731-AL61A angled connector is Hitachi p/n CPS0005
the Nissan p/n 23731-6J90B straight connector is Hitachi p/n CPS0008
You can go to http://www.hitachi-automotive.us/dow...icacatalog.pdf
for a download of Hitachi's catalog sorted by vehicle make and model.
Last edited by Bill Zeek; Jul 30, 2019 at 02:48 PM.
Reason: hyperlink correction
I followed these instructions today and wanted to say thanks for the writeup, it made it much easier to do with these instructions and pictures. My Z is running perfectly again.
For those of you following them, here is some extra info. The process took me about an hour. I could probably do it again in half that time, so let me try to save you some time and effort.
Symptoms
While driving, the car suddenly felt like the engine stopped firing for a split second. After that the VDC, Service Engine Soon, and Slip warning lights all came on and remained on. The car felt normal while driving. After this, cranking the car took much longer than normal and sometimes wouldn�t succeed and every time it did the same warning lights would go on. Hooking up an OBD2 diagnostic reader gave me the following code
p0340 - camshaft position sensor A - Bank 1 Circuit Malfunction
Part
First, you'll need to buy a new sensor. If you're buying the OEM part, you'll need the VIN to match, not just the year of the car. There are different parts for bank 1 (US passenger side - p0340) and bank 2 (US driver side - p0345). I did bank 1 so I don't know about bank 2, although from what I've seen bank 2 looks more difficult due to the air intake being in the way.
Tools
As mentioned above, you will need a 10mm wrench. You will have to fit this wrench in a fairly tight spot. I highly recommend a torque wrench with an extender about 3 inches (8 cm) long because then you can wrench around the pipe in front of that bolt.
The work
Using your wrench, loosen the bolt that holds the sensor on. Breaking it was very hard for me due to not being able to get good leverage on the wrench because of the tight space. Big hands don�t help. I found that laying on the engine block and pulling worked for me. Once the bolt is loose it�s pretty easy to take out. Try to remember where the screw hole is since it�s not really visible when you�re working and you�ll need to put the bolt back in later blindly.
Once you remove the screw, you can just pull the sensor out directly. There are pipes in the way so getting it out is a bit of a struggle. It will be oily when it comes out so be ready to wipe it down.
Now comes the tricky part, separating the sensor from the connector. This is all inconvenient to do due to the shortness of the connector cable. I�m not sure if all cars are the same, I can only tell you about what I saw. Looking at my sensor, it had a plastic T at the end that was grabbed by the clips on the connector. The connector has an internal piece at the back that slides forward and depresses these clips. However, sliding it forward was very hard and took a good amount of force just to get it half way. The other half I could only do by using a flathead screwdriver to wedge it forward. Once I drove it all the way the sensor came out easily. The new sensor clipped in easily with little force and seemed to be held on tightly.
Now basically reverse the process. Working the sensor in past the pipes took some effort. Finding the screw hole was surprisingly easy even though I couldn�t see much (or maybe I just got lucky). Wrenching it back was a pain but nothing surprising.
Finishing up
Finally, after doing this turn the key to ON but don�t start the car and use the OBD2 tool to clear the error code. After clearing the code turn the key to off for a few seconds and then crank the motor. Mine started as smoothly as it normally does with no warning lights.
I hope this helps you guys out.
thanks a lot!!!
I�ve owned mine since 07/20k miles.
and it was ****ing perfect for years. Now I rebuilt the motor and every couple months I seem to find
A new sensor that goes south. Ps can you guess what I didn�t replace? Hint, It wasn�t the piston rings 😆