
Amp rack - behind the driver stock sub department.
 01-20-2009 | 07:56 PM
#1

Thread Starter
Registered User
iTrader: (5)
Joined: Oct 2006
Posts: 317
Likes: 0
From: Jacksonville, FL
What is the size of the amp rack that would go in the stock sub location? I want mine to look something like: http://shadowviper.sytes.net/350z/

Also, few more questions on this:
1. Where do I buy the carpet for it?
2. Where do I buy plastic/rubber rings thru which the cables are routed in that install?
3. I have 08 non-bose Z and I was wondering if my stock sub department looks like that or does it have a white metal with a sub cut out hole that needs to be cut?
I want the amps to look as neat as possible in glove box and stock sub location so any help on this would be much appreciated. Thanks!
 01-20-2009 | 09:36 PM
#3

I used a roll of cheap interior carpeting from the local auto-hut store. not the most professional looking install but clean enough for me.
Grommets and stuff like that should be available at a decent car stereo place. If they have an install bay, the install guys should know where to get them if they don't carry them.
There is a metal plate behind the plastic trim panel. It can be removed by taking out all the 10mm bolts. In order to get to it you have to remove the entire rear trim panel.
There used to be someone that made amp racks for the cubbys, two strips of metal that fasten to bolts in the rear upper area inside the cubby and to the lower front.
I didn't use that approach but would have had I searched around.

You can see the two bolts up front in the pic below. This is where the rack supports I've seen attach in the front.

Grommets and stuff like that should be available at a decent car stereo place. If they have an install bay, the install guys should know where to get them if they don't carry them.
There is a metal plate behind the plastic trim panel. It can be removed by taking out all the 10mm bolts. In order to get to it you have to remove the entire rear trim panel.
There used to be someone that made amp racks for the cubbys, two strips of metal that fasten to bolts in the rear upper area inside the cubby and to the lower front.
I didn't use that approach but would have had I searched around.
You can see the two bolts up front in the pic below. This is where the rack supports I've seen attach in the front.
01-21-2009 | 07:36 AM
#4
Thread Starter
Registered User
iTrader: (5)
Joined: Oct 2006
Posts: 317
Likes: 0
From: Jacksonville, FL
Thank you LBZ, that looks nice! What are the measurements of the amp rack and what wood did you use, what thickness? I am new to all this lol.. Is it hard removing the entire rear panel trim? Also, I wish I could find who made those amp racks... I'll do some searching around tonight
01-21-2009 | 07:57 AM
#5
I made my amp rack in the same fashion (4 straps, piece of 1/2" MDF- get all at Home Depot). It was literally a trial and error session getting MDF cut to the right size to fit in the cubby. I can't get exact measurements for you, since I won't be near my car for some time, but from memory I started with a 25"x25" piece of MDF, and then cut it down from there until it fit without hitting anything. You will need to cut off the top right corner to avoid hitting the wheel well bulge. Not sure ho big your amps are, but my amps, crossovers and distro block all fit on the board.
The straps were the toughest part- basically I hung the straps from the hanging screw holes, placed the MDF board in where I wanted it to hang, and then drew tick marks on the top of the board where the strap intersects the board. Then, I marked the strap where it met the edge of the board, took the traps out, and bent them in 90 degree angles. Its hard to explain, but once you get in there, you will figure it out. The front straps are done the same, but you don't need to bend them as much.
Lastly, I mounted my amps and crossovers onto the board, set the board in the cubby. wired everything up, and then mounted it to the screw locations. Trust me when I say: take the trim paneling off before hand so that you have as much room as possible to work with!!!
I didn't cover my rack with carpet because no one see's it anyway.
Last edited by KManZ; 01-21-2009 at 08:00 AM.
01-21-2009 | 11:15 AM
#6

I just built one from MDF, but didnt build it the size of the whole. I built it the size of the amp, and left room in the front to drill holes for the wires to run through. I also bought some metal with holes in it to hang it from. When I went to home depot, the guy new exactly what I was talking about and pulled me away from the strapping because he said it isnt sturdy enough and might rattle. SO I bought some stiffer stuff.
01-21-2009 | 12:07 PM
#7
Thread Starter
Registered User
iTrader: (5)
Joined: Oct 2006
Posts: 317
Likes: 0
From: Jacksonville, FL
I have no idea what "straps" are but thank you guys for the inputs. I also saw in another thread that the guy hung his amp rack with metal as well. I will find the pics tonight and post them here... and when I go to home depot... I'll bring the pic and ask the guy to find that part for me 
Now, I just need the dimensions of the amp rack so I can have a friend cut the wood for me... I won't have any tools to cut the wood where I'll be installing the stuff in my car so I can't just cut trim pieces on the spot to make it fit perfectly :\
Now, I just need the dimensions of the amp rack so I can have a friend cut the wood for me... I won't have any tools to cut the wood where I'll be installing the stuff in my car so I can't just cut trim pieces on the spot to make it fit perfectly :\
Trending Topics


 01-22-2009 | 03:56 AM
#9
"Straps"= pieces of metal shaped into long, thin rectangles (like 2"x8"). At Home Depot they have holes in them, so you can drive screws in them to "strap" stuff together. Like ohfourzee said, there are 2 different kinds you can buy, one being thicker than the other. To find them, just go to HD, and the lumber section. They are usually hanging at the end of an aisle (at least in the 2 HD's I have seen them at)


 01-22-2009 | 06:32 AM
#12
+1 on removing the back trim panel. In order to do that though, at least my experience, is to start with the narrow trim pieces by the door kick plates. Then move to the rear side pieces that cover the inside of the rear fenders, then loosen the two screws aon each side of the lower very rear of the center console.
With the side panels off, you can get a grip on the end of the rear panel and start tugging it out, the fasteners should just start popping out... make sure you keep moving your hands in towards the center so you don't crak the narrower areas of the panel like the front lip under the cubby cover / door. I ended up breaking one or two of the fasteners, meh, no biggee. Can get them from the dealer if you must have it go back perfect but I dont notice any noise from vibration.
When you go to pull the whole thing out you will have to raise up the back end of the center console a bit for the panel to come out.
For me it was a process of discovery, trial and error. Good thing to start out early in the morning with as much stuff as you think you are going to need and someone else available to drive you to the local home depot or autoparts store for stuff.
There are some good examples here, much simpler yet just as effective than mine. I used 1/2" mdf on top of expanding foam that had dried and hardened. I couldnt figure out how to come up with a level mounting surface for the MDF and didn't think of the hanging idea which I think is way better.
You can use some cardboard as a template to cut your MDF to. A jig saw for $25 makes short work of cutting the mdf
01-22-2009 | 06:33 AM
#13
Thread Starter
Registered User
iTrader: (5)
Joined: Oct 2006
Posts: 317
Likes: 0
From: Jacksonville, FL
GWAPITO69 and Paul, very nice jobs!
I wish you guys had exact measurements! :O
Paul, can you maybe remove the grill and get the measurements that way?
Also, were those racks made to fill the holes completely? I am putting 2 little Alpine PDX Amps on mine and if there is room, 2 Focal K2P crossovers.
I wish you guys had exact measurements! :O
Paul, can you maybe remove the grill and get the measurements that way?
Also, were those racks made to fill the holes completely? I am putting 2 little Alpine PDX Amps on mine and if there is room, 2 Focal K2P crossovers.
01-22-2009 | 06:38 AM
#14
Thread Starter
Registered User
iTrader: (5)
Joined: Oct 2006
Posts: 317
Likes: 0
From: Jacksonville, FL
lbz, thanks for the reply too! That's a good idea... I can use some card board for the template and then have a friend go to home depot and get them to cut the wood based on those dimensions 
I plan on doing the install next weekend if I get all the stuff by then. I plan on having 2 friends with me and we'll start out on Friday or early Saturday morning. Car will be in friend's 1 car garage for the whole weekend and he will drive me home or I'll stay over at his house.
As far as removing panels go, I am sure my process will be discovery, trial and error as well. I just want to make sure I have as much information as possible so I don't have to ask later in the middle of the install
01-22-2009 | 07:17 AM
#15
This is my first install as well, and nothing ever goes as planned. I worked on it this past Saturday for about 4 hrs, Sunday for about 6 hrs, and then 1 hr or so each day until today, and im starting now and going to try and finish it. Its cold here in NJ and obviously weather plays a big part in doing things outside.
01-22-2009 | 07:46 AM
#16
This is my first install as well, and nothing ever goes as planned. I worked on it this past Saturday for about 4 hrs, Sunday for about 6 hrs, and then 1 hr or so each day until today, and im starting now and going to try and finish it. Its cold here in NJ and obviously weather plays a big part in doing things outside.
As for fitting the PDX amps and crossovers, you will have a ton of room since the amps stack. The tricky part is wiring everything up AND THEN mounting the board. Otherwise, if you mount the board first, connecting the wires will be a pain in the ****. So, place (ie. screw everything where you want it) everything on the board, slide it in part way, enough so you can acccess the connections on back of the amp, connect everything, and then screw the board to the mounting points. Trust me on this, and save yourself the time and frustration. The Alpine PDX connections are hard to get to since they are angled funny.
01-22-2009 | 09:21 AM
#18
Get all the wiring done first. Take some time to think about what you may want to install in the future, and lay wire for it, even though you don't have the component yet. That will save you from having to run wire again and again.
01-22-2009 | 10:02 AM
#19
Thread Starter
Registered User
iTrader: (5)
Joined: Oct 2006
Posts: 317
Likes: 0
From: Jacksonville, FL
Yup, that's exactly what I'll do. I will wire the car for front comps, 10" sub and 2 amps but I will only have front comps and 1 sub at first. However, I will still have to take hatch and trunk apart when I get the sub so I deaden the crap out of it. From what I heard... it's REAL fun getting the wire thru the door :\ I plan on using 350z tech's guide on that
01-22-2009 | 12:32 PM
#20

My setup is below...I just measured it out and made a cardboard piece, then cut it out with wood and covered in carpet I bought from a car audio store. Cut out the cover and put a piece of plexiglass on the underside I got from Home Depot, and did the border in chrome with door guard strips. My apologies for the chitty picture....
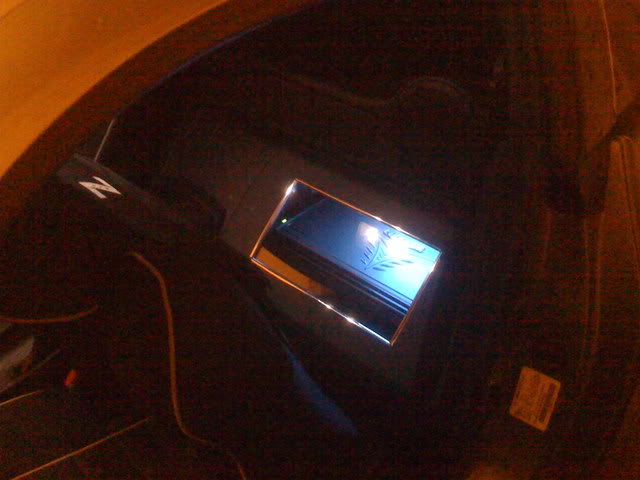
Yeah, the wiring in the doors sucks a$$. I found a dremel is best for getting in there and drilling a hole for the wiring. Thats a different topic though...
Yup, that's exactly what I'll do. I will wire the car for front comps, 10" sub and 2 amps but I will only have front comps and 1 sub at first. However, I will still have to take hatch and trunk apart when I get the sub so I deaden the crap out of it. From what I heard... it's REAL fun getting the wire thru the door :\ I plan on using 350z tech's guide on that