
farenheit t-700mhr help


Having problems with the install. did some research and can't find anything i needed on this screen... So i installed it added a switch to turn power on and off, but the screen never turns on. Do u need the remote to turn the screen on.

New Member


Joined: Dec 2006
Posts: 7,337
Likes: 204
From: Edina, Minnesota
You were wise adding a mechanical switch to turn your Farenheit T-700mhr ON/OFF. That way you can turn the LCD screen on or off.
The reason you cannot use this mechanical switch to turn the LCD screen ON is that you need to use the handheld remote control to set the monitor�s preferences (more about this later in this post).
Follow these steps to install your Farenheit T-700mhr LCD monitor.
 The monitor set to �Always On� will sleep (it appears to be OFF), but it remains in a state where it can be awakened, and therefore always draws power. That is why you want to connect the monitor to an ignition-switched power source.
If this is not clear, you should post your additional questions here since you will receive more input. I answer PM�s, but a Forum posting provides a broader range of answers and solutions.
Hope this is helpful,
--Spike
The reason you cannot use this mechanical switch to turn the LCD screen ON is that you need to use the handheld remote control to set the monitor�s preferences (more about this later in this post).
Follow these steps to install your Farenheit T-700mhr LCD monitor.
- Install the monitor
- Install a manual power switch that receives 12v power from an ignition-switched power source. You connect the Farenheit�s red power line to this power source.
- Use the handheld Farenheit remote control to set your preferences (screen size, brightness, contrast, etc.). The most important setting is selecting the �Always On� feature. When you set the Farenheit monitor to �Always On,� the LCD screen will turn-on when it receives power. In this case it will be when you close the manual switch that you installed between the monitor and the ignition-controlled power line. The monitor will turn on when the car�s ignition switch is on and your-added ON/OFF switch is ON.
- Once you set your preferences, you will hardly ever use the Farenheit�s handheld remote control. I installed my Farenheit 6 years ago at which time I set my preferences, and I have never used the handheld remote control since doing this.
The monitor set to �Always On� will sleep (it appears to be OFF), but it remains in a state where it can be awakened, and therefore always draws power. That is why you want to connect the monitor to an ignition-switched power source.If this is not clear, you should post your additional questions here since you will receive more input. I answer PM�s, but a Forum posting provides a broader range of answers and solutions.
Hope this is helpful,
--Spike
Still got a few questions tho.
1. So I must have the controller to turn this on (until i change the settings to always on).
1.5 If so anyone willing to let me borrow one??
2. I connected the (yellow wire) constant source of power, but I'm guessing that it will not drain the battery if the switch is off.
Thanks for the help in advance.
New Member
Joined: Dec 2006
Posts: 7,337
Likes: 204
From: Edina, Minnesota
Still got a few questions tho.
1. So I must have the controller to turn this on (until i change the settings to always on).
1.5 If so anyone willing to let me borrow one??
2. I connected the (yellow wire) constant source of power, but I'm guessing that it will not drain the battery if the switch is off.
Thanks for the help in advance.
1. So I must have the controller to turn this on (until i change the settings to always on).
1.5 If so anyone willing to let me borrow one??
2. I connected the (yellow wire) constant source of power, but I'm guessing that it will not drain the battery if the switch is off.
Thanks for the help in advance.
If you can find someone willing to loan you the remote, you can get it setup; but if you ever replace your car�s battery or disconnect the power source to the monitor, you will lose the preference setting and need the remote control to reset your monitor. You must consider this: Do you want to go to all the trouble it takes to install a fixed-monitor in your car only to have it lack function because you lack the necessary remote control?
You mention a yellow wire. I need this information before I can answer your question:
Does your Farenheit T-700mhr have three leads (red, black, yellow)?
--Spike

whats a GPS that can be connected to power acoustic screen any suggestions and whats the easiest way to sonnect the sound from the screen?? plz someone give me some advice any is appreciated
New Member
Joined: Dec 2006
Posts: 7,337
Likes: 204
From: Edina, Minnesota
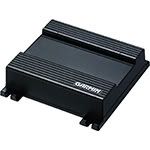
Garmin GVN 53 GPS Blackbox Unit

Power Acoustik PT-700MHR 7� LCD Monitor (same as Farenheit T-7000MHR and NESA Vision NSM-7005 7" Monitor) is easily mounted in the Z�s upper/forward cubby slot).
Specifications for the Garmin GVN 53:
https://buy.garmin.com/shop/shop.do?cID=134&pID=10573
Installations instructions for the Garmin GVN 53:
http://static.garmincdn.com/pumac/GV...structions.pdf
Installation
- Test the Power Acoustik LCD monitor and the Garvin GVN 53 by connecting the devices to a 110V AC/12V DC converter. You do not want to go to a lot of trouble installing the components and then not having them work and wonder if you have a defective device. Testing the devices first can save a lot of trouble.
- Install the 7� LCD screen in the Z�s upper/forward cubby. Connect the monitor�s red power line to an ACC switched power source and the black wire to a ground. Never connect the Power Acoustik monitor�s power line to a constant power source (usually a yellow power line in your car) since this will cause a power drain on your battery. The Power Acoustik monitor never shuts off, but instead it sleeps waiting for a wake-up command if you set the monitor to �Always On� which is what you want to do (more about this later).
- Install the Garmin GVN 53 Blackbox. A good place is inside the upper small rear cubby behind the driver�s seat. The device fits perfectly here. Be sure you install the device so that its SD slot faces forward and is accessible. You use SD cards to update the Garmin�s maps and application software, so you need access to this slot.
- Connect the Garmin�s yellow RCA connector to the Power Acoustik�s composite video connector.
- Connect the Garmin�s red power line to an ACC switched power source in your car (more details about this later).
- Connect the Garmin�s black wire to a ground.
- Connect the Garmin�s yellow power line to a constant (fused) power line.
- If you want your Garmin GPS to issue its voice guidance through your car�s CES (your car�s speakers connected to the your H/U): Connect the Garmin�s white RCA line to your H/U�s left AUX audio input and connect the Garmin�s red RCA line to your H/U�s right AUX audio input.
- Or, if you want to use your H/U�s AUX for other equipment: Install a separate speaker somewhere and then connect the Garmin�s white non-RCA wire (it�s not the same wire as the white RCA speaker wire coming from the Garmin) to the speaker�s �- connector � and the green line form the Garmin to the independent speaker�s �+ connector.�
- Install the GPS antenna somewhere where it not totally shielded by metal from the �sky.� You can place the antenna as far forward as possible on the dash, or use the strut bar on the 350Z as a mounting position. You do not need to place the GPS antenna outside the car for it to work.
Additional points:
- Use the Power Acoustik�s handheld remote to adjust your color balance and saturation, set the monitor to �Always On� (that is why you never connect the monitor to a constant power supply, a yellow power line from your car), and full screen 16:9 (which is best for the Garmin), and NTSC.
- Once you make these initial setting, you will never need to use the handheld remote control.
- Consider interrupting your ACC power lines to which you connect the LCD monitor�s power source and the Garmin�s power source with a manual ON/OFF switch mounted somewhere like the position Nissan uses for the seat heater switches. That way you can set your Power Acoustik monitor (you do this using the handheld remote) to �Always On.� The advantage is you can turn the monitor on or off using the manual switch instead of digging for your remote control when you want to use the GPS.
Hope this is helpful,
--Spike
Trending Topics
New Member
Joined: Dec 2006
Posts: 7,337
Likes: 204
From: Edina, Minnesota
^^ You set your Power Acoustik LCD monitor to �Always On� using the handheld remote control. That way the monitor powers up and turns on automatically when the LCD receives power. That way you do not need to dig for the remote control when you want to turn the LCD ON/OFF.
But, if you do this (set the monitor to �Always On�), it will always be ON when you start the car. If you want to control ON/OFF without using the remote control, you must wire a manual switch that interrupts the ACC power line to the LCD.
If you do not set the LCD monitor to �Always On,� then you need to dig for the handheld remote control to turn the monitor ON/OFF.
No matter how you configure your setup, you must drill a small hole in the cubby bezel to expose the LCD�s IR eye. That is the only way you can send from the handheld remote control to the LCD. I forgot to mention this in my last post. Thanks for pointing this out.
--Spike

Thread
Thread Starter
Forum
Replies
Last Post