
Front Components for 350Z that FIT? CDT?


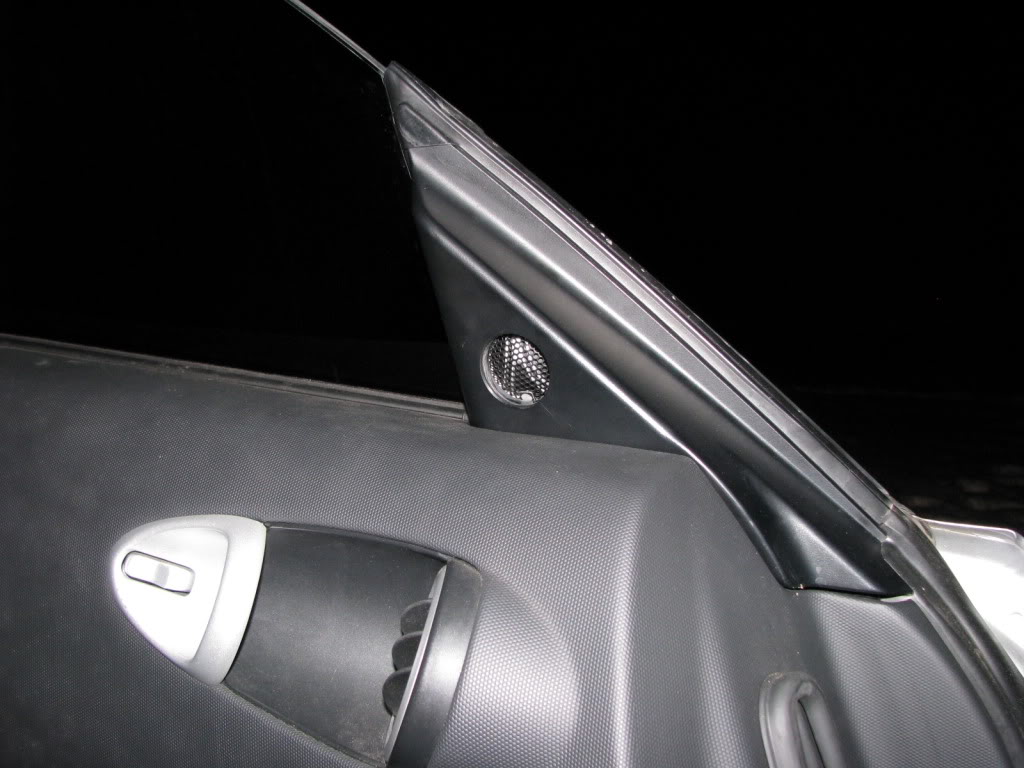
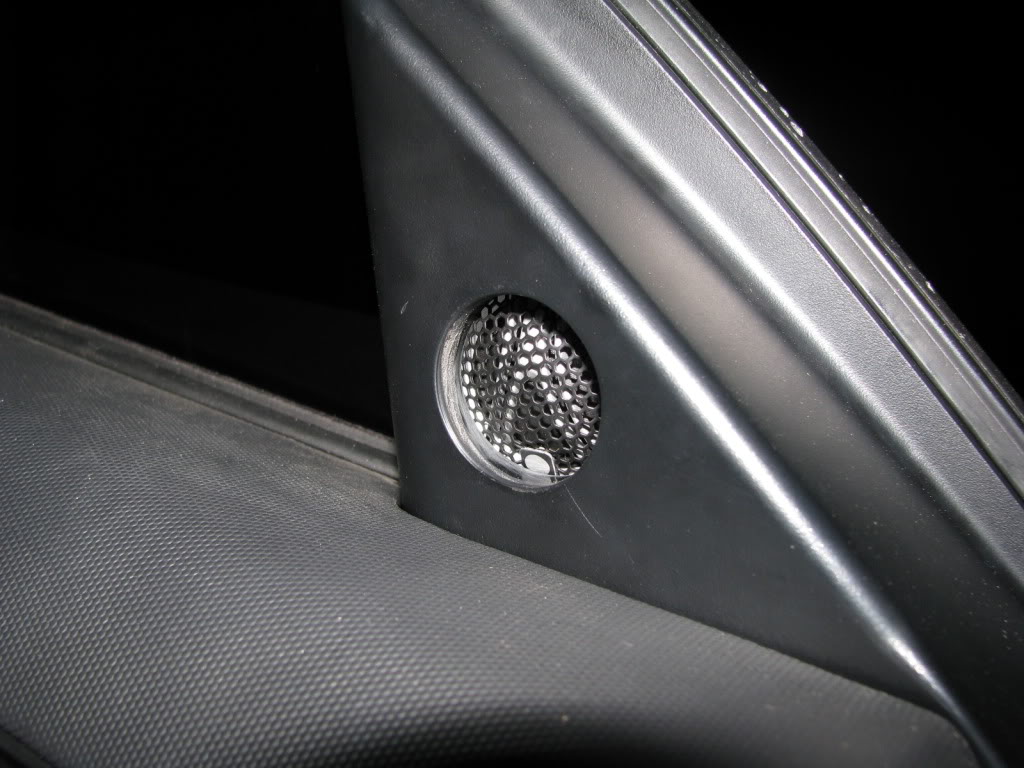
Make sure to mod your sails if you're reusing factory position for the tweets. The stock sails block half the output.
Some of the advice came from a member of this forum that is also staff on an audio forum.


Somewhat similar to what I'm going to do to the factory grills on the 6.5's. But I can sort the lower grilles at any time post install if I'm beat on install day(s).
Some of the advice came from a member of this forum that is also staff on an audio forum.
On that note -- I went to the 2 Car audio shops local to me,.. and to make a long story short -- They blew me away with their prices and how they wouldn't listen to the fact that I wanted just a LITTLE bass and just an upgrade to the factory 10-14watt clarion speakers I have.
They both pushed $500 amps on me that were less power than the amps I'm going to buy.. they pushed Subs at 500-600watts RMS and went cheap on the components with a pair of 119$ components (at their markup) at like 45 watts RMS. I just couldn't make them understand that I wanted clean, medium to low volume sound with an 8" sub (10" is fine.. but all I need is an 8).
Then when pricing came to the table.. for the cheapest components it was $1500 minimum.
When I asked about bringing a pair of 6.5" speakers, sub in box.. and and amp to install.. One said $450 (AND said "Are you going to supply to the wires? lol).. and the other said $500 to install essentially 3 speakers and an amp. I'd pay 2-300 at a shop I trusted,.. but $500.. really guys?
I didn't expect to get what I was after at a shop.. but I thought they'd have some option with 2 front speakers and a small sub for a $1000 bucks.. but neither were even close.. even when they recommended everything with me letting them go the cheapest they could.
So,.. everyone has been yelling at me to install this myself.. Well, it's 100% my 1st car stereo install.. Pray for me.

Nah, I think I'll be ok.. I've done a ton of homework on it.. Thanks to you guys and a few guys on an audio forum, and general google/youtube research.
I should be able to get components, Amp, Custom Sub box, 8 OR 10" sub.. whatever I decide to go with.. for $650. Then I can get the wires needed for $75 or so.
I want to ask another question about the sub.. but don't want to **** off anymore people. So I just take a stab at it and hope for the best.
Appreciate it guys!
I have no doubt I can install this,.. My main concern in the install is:
1) How to remove the panels in the front,.. not sure what all needs to come off besides door panels, seats, center console, all panels in the back (glove box and so on).. and panels around battery to run power wire into grommet.
2) How to easily run the speaker wires once I attach them to the amp in the glovebox and get them down the sides and up under the dash area. From here I need to get them through the door boot. This part looks daunting since it's "blind" so any tips on how to make this part relatively quick and painless would be VERY much appreciated. From what I've seen so far you drill holes in the factory connector, but beyond that I know just jamming the wire up in that general direction from under the dash isn't going to magically pop right through the boot,.. So I'm sure those who've done this before or many times know a trick or two to get the 12 gauge speaker wires into that boot and out the other side in a few minutes instead of a few hours of frustration.
Other than that.. I think I'm clear.
I'm going to run one of these two amps:
http://www.sonicelectronix.com/item_...FWRk7AodiTMAKA
PPI 900.4
145x2 then bridging 3/4 channel for 450watts (Gains will be set much lower cause speakers will need 100 up front, and sub either 150 or 250 depending on the exact model I end up with (talking with the enclosure designer on the sub).
OR:
http://www.ebay.com/itm/380794393550
Kenwood XR-4S -- 120x2 and 300watts bridged on channel 3/4.
Same as above on speakers.
I think the PPI is the better brand here,.. Both should do the job though.
As for the Front speakers.. I'm leaning toward:
http://www.sonicelectronix.com/item_...CTX-6.5cs.html
Image Dynamics 6.5" components -- Brand was recommended here,.. and got the nod from some others. But, on the components it really seems pretty much every recommendation I've gotten here, that I've written down, is going to be a good choice.. so I'm not concerned the least bit no matter which one I order.
It's an upgrade from the TWO clarion 10-14 watt speakers running now (the rear speakers don't even work..)
Anyhow, I thank everyone of you for your help, and I'm sorry to those who I've annoyed or otherwise upset.
Take care,
Last edited by Chromatic; Jan 4, 2014 at 03:29 PM.

Registered User
Joined: Dec 2012
Posts: 5,126
Likes: 9
From: somewhere better than here

Not too clean, appearance wise.

The Dremel is your friend, for a clean install.
Check out photos in post #2, and #43.
https://my350z.com/forum/audio-and-v...ents-rock.html
I would hazard that for the high frequencies being produced by tweeters, it is absolutely CRUCIAL to have them cleanly installed, not recessed, covered, or blocked - even partially.

The mounting depth for front speakers on the 350Z is 1.5".
Thus a 1" spacer makes a 2.5" speaker fit.
There is top mounting depth and bottom mount depth. For the 350, you want to just pay attention to Top mount depth obviously.
From my measurements it looks like you can squeeze MAX a Top mount speaker that is 2 and 3/4" depth spec. between the speaker mount and window. This would require using a one inch spacer and then a little more on top.. As there is a little spacer between speaker and grill after you have a 1" spacer on it.. at least a quarter inch.. But you obviously don't want 90% of your Mid to be out of the mounting hole for sound quality unless you do a bang up job on some custom spacers that mold around the speaker for a good seal.. or otherwise seal well with solid dampening material.
Then just for thoroughness the Rears look like you can fit most 6.5" speakers in them without hassle on depth.
Last edited by Chromatic; Jan 5, 2014 at 09:42 PM.
Registered User
Joined: Dec 2012
Posts: 5,126
Likes: 9
From: somewhere better than here
^^^, also, it is NOT the depth of the door itself which is the limiting factor.
It is the window, when rolled down, that limits the depth of install. This being said, the window, when rolled down, is NOT directly behind the speaker in the stock location, so that the DIAMETER of the MAGNET becomes important. Meaning that you could probably get away with a 3" or more depth speaker IF it has a smaller diameter magnet/basket.
When (if) you actually disassemble your door speaker, you will see what I am talking about.
And again, if you are on ANY kind of a budget, and more importantly, if CLEAR audiophile sound is important to you, SKIP the rear speakers.
With their position right behind your head they will only serve to muddy the soundstage.
Also, in terms of DIY install, the rear speakers are MUCH harder to access in our car. You have to pull off the entire rear plastic piece(s) behind the seats, which has MANY very easy to break plastic attachments, etc.
The uber stereo technogeeks on the car audio forums (I provided a link to the one that had a good review of my JBL comps) are in total agreement on this.
Last edited by NismoDude; Jan 5, 2014 at 09:12 PM.
I ended up going with JBL MS-62C components up front. Through numerous threads they were mentioned here with good reviews.. and had thumbs up on a pure audio forum, so I pulled the trigger.
This is what I ended up with and ordered all parts Sunday:
Headunit: Pioneer AVH-P4100DVD (Already have and installed) - AVH-P4100DVD - In-Dash Double-DIN DVD Multimedia AV Receiver with 7" Widescreen Display | Pioneer Electronics USA
Amplifier: PPI 900.5 (5 Channel Amp) - 70Watts RMS x 4 + 270Watts RMS x 1 (Sub) - Precision Power PPI P900.5 (p9005) 5-Channel Phantom Car Amplifier
Front Components: JBL MS-62C 6.5" Mids with 1" Tweeters (80 Watts RMS) - JBL MS-62C (MS62C) 6-1/2" 2-Way MS Component Car Speakers System
Rear Speakers: MB-Quart QM-160 KX 6.5" Mids with 1" Tweeters (Coaxial) (70 Watts RMS) - No link for these as these are from the 90's, and I had them stored. These are when MB Quarts were made in Germany. Purchased them in 1997 for $400-500.
Sub Woofer: JL Audio 10" w0v3-4 (300 watts RMS) - JL Audio 10W0v3-4 W0v3 Series 10" 4-ohm subwoofer at Crutchfield.com
Custom SRQ Sub Enclosure for the 350z: (10" Enclosure with .66 cu. ft of airspace, covered in Black textured finish, built to order, with Spring-loaded Terminal Cup.) - Nissan 350z Vehicle Specific Sub Enclosure 1-10"
Sound Dampening Material: (Versa Kit - 4 Square Feet of Sound Dampening Material) - I decided to get a little Sound material for the doors, as you guys told me it would help with sound quality. --
NVX SDVK4 Versa Kit, 4 Sq Ft of Sound Dampening (1 18"x32" Piece)
My goal was to upgrade the factory speakers I had in my Base speaker system. (Which after further investigation turns out only 2 of the 4 speakers are working. And, since this is the Base stereo,.. it's just two paper weight Clarion speakers. )
Original plan based on budget was to go with components up front, and a sub.
I ended up finding finding the PPI 900.4 recommended highly in my budget,.. then ran across the 5 channel version of the amp.. PPI 900.5,.. and that allows me to use my stored German MB Quarts 6.5" 70Watt Coaxials in the rear slots,.. So between the JBL components, and MB Quarts in the rears the Mid/Highs should be well covered.
I took the advice you guys gave me over 8" vs 10" .. and went with a 10" Sub,.. I talked with the owner of SRQ a bit and discussed the box and 350Z a bit and I'm pretty confident in how that Sub is going to sound in that .66 Cubic Ft. Custom Box in the slot behind Driver seat. Ryan is ridiculously knowledgeable about audio and taught me a lot in a short time, I strongly recommend using him for any Custom box designs you need done, he is a master fabricator and knows more than Fabrication.
Anyhow, I also took the advice to use Sound dampening to enhance the sound from the mids, So got 4 Square feet of it,.. Which should help pull out the potential of the doors.
I don't know how much 4 Square feet covers honestly,.. I assume enough for medium coverage of just the front two doors,.. but if you have any advice on where best to apply it (and if any should saved and used on the rears as well) I'm all ears.
The Enclosure will be the last thing to arrive as SRQ builds per order based on your requirements,.. which takes 1-3 days, then 2 days to ship. Everything else will be here by Wed. So Maybe the Enclosure will be here Friday and I can get this installed this weekend.
Thanks for all the help.
It is the window, when rolled down, that limits the depth of install. This being said, the window, when rolled down, is NOT directly behind the speaker in the stock location, so that the DIAMETER of the MAGNET becomes important. Meaning that you could probably get away with a 3" or more depth speaker IF it has a smaller diameter magnet/basket.
When (if) you actually disassemble your door speaker, you will see what I am talking about.
And again, if you are on ANY kind of a budget, and more importantly, if CLEAR audiophile sound is important to you, SKIP the rear speakers.
With their position right behind your head they will only serve to muddy the soundstage.
I am curious about how it's all going to blend given the locations,.. so I'm not disagreeing with you about rears effecting the total sound quality. That said I'm still going to install them. Depending on how things sound, I'll tune them down accordingly to how they effect Sound quality. Won't be difficult to see how things sound with them out of the equation, then slowly introducing them as fill all the way up to full power. I have a feeling I will personally like the rears dialed in at about 20% or so of what they can do and fronts at full power obviously.
Though, you may be dead on with this particular speaker combo,.. if you are, then I'll take them out of the equation all together. If I end up doing that,.. I'll bridge the 5 channel amp which will shift the 70watts x 4 at 4 ohms to 230watts x 2 at 4 ohms (not to mention the Sub power),.. which will give me a great deal of headroom in that amp.
I'm not a more speakers = better guy. I ran a 2 speaker front in my 300ZX,.. I'll do it again if it's the best sound for my ears.
Also, in terms of DIY install, the rear speakers are MUCH harder to access in our car. You have to pull off the entire rear plastic piece(s) behind the seats, which has MANY very easy to break plastic attachments, etc.
From what I've studied, the running through the factory Molex's to get new speaker wire into the doors seems to be the hardest , most painstaking, part of an install (unless you decide to just use the factory wiring on your new speakers/crossovers). I'm going a different route to not take any chances with damaging the pins in the molex and to not spend what could be hours running a few feet of wire. So I'm feeling pretty solid about this install now.
After getting quotes from the two Car Audio shops locally for $1500 minimum for front speakers and one sub (All of which were much lesser quality than what I bought).. That confirmed that I was doing this myself.
Including wiring I ended up paying $680,.. I have a few little pieces from the hardware store I'm going to grab, but that won't amount to much and I'm good to go.
The uber stereo technogeeks on the car audio forums (I provided a link to the one that had a good review of my JBL comps) are in total agreement on this.

New Member
Joined: Oct 2011
Posts: 558
Likes: 41
From: Margate, FL
From what I've studied, the running through the factory Molex's to get new speaker wire into the doors seems to be the hardest , most painstaking, part of an install (unless you decide to just use the factory wiring on your new speakers/crossovers). I'm going a different route to not take any chances with damaging the pins in the molex and to not spend what could be hours running a few feet of wire. So I'm feeling pretty solid about this install now.
Best advice I can give is: take your time - don't rush. Then fully test everything before you button things down. The worst part of an install is finding out a wire got lose in a location that is hard to get to. Do everything possible to ensure your connections are top notch (heat shrink + zip ties!) so nothing comes lose. Use the factory wiring as a guide of how to do things right. Be mindful that water gets in the doors so waterproof any connections in there.
SUB BOX INFO You'll need longer bolts and some trimming to get that SRQ box to fit perfectly. You see I had that same sub box and quit using it... too many rattles and yes I sound proofed the hell out of the area. I'm not saying its bad, its actually a good box provided you understand its limits. In the end its performance depends on hard you push the sub and what kind of music you like. For rock it was fine, but with rap/hip-hop or EDM above 90 dBs the factory location just doesn't work that well. For the record I was running a 12" Polk MM with 250 watts of power. Now I've got a 8" Kicker L5 in a temporary box, but will switch to a JL 10" in the CAS corner box as soon as funds are available. Shame since the SRQ box is perfectly hidden in the factory space and is a great deal at $100.
If this is your first install then YES this is the best move. I only did the molex thing because of the excellent documentation on this site. When I first saw the thing I said "forget it!" and I've been installing audio systems since the mid 80s. I was PAINFULLY difficult, but in the end I managed it.
This is my first install.. I've got everything down .. drawn out schematics for my wiring plan.. Bookmarked and studied how to take the whole car apart on interior. The ONLY part I haven't found yet is how to take apart the front.. Anything in front of the seats.. Kick panels,.. and whatever other panels need to come off in that area.
What all needs to come off up here? And happen to have a link , or what I should search for.. I know a lot of this is dependent on knowing the right terminology for the panel names when searching for "How do I remove X panel".
Back to the running a new small hole in the door jams for two speaker wires per door instead of messing with factory molex.
I've several ideas here on how to clean it up. Obviously using grommets is a must to prevent wire chaffing.
Now what ideas do you have for what to surround the wires with? To make it look "Clean" and sealed. (Of course It's going to be black whatever it is.).
I've thought about putting wire loom around it and then electrical taping the loom,.. then using epoxy to seal.
But, I've also thought about using some rubber tubing (just like the same sort of tubing (maybe more flexible) that your vacuum hoses use.. running it about an inch through both grommets (on kick panel side, AND inside door panel). Then I thought, ok.. It needs to held in there some smart way just in case it slips over time. So I thought a pin of some sort that is longer than the tube with some screw on tips that make it wider than the hole, and just goes straight through the ends of the rubber tubing AFTER they've run through the grommets on both sides. So if you pulled on the rubber between the door jam the pin would hit on the inside and the tube would never come out. Whatcha think? Got a better idea?
Then I always OVER do things for the heck of it.. so I'll also seal it on each side with something.. Black or clear epoxy do? Or have something better/easier to seal with?
I know they make some specific things with lock nuts on the ends for this application,.. but they are like $50 -- $5-10 at a hardware store should do both doors with tubing, cotter pin or something similar.. something to seal it from air/moisture, etc.
That's MY idea.. you give me any improvements on that, or better ideas (or maybe even something to buy for the job if it's not too expensive.)
Best advice I can give is: take your time - don't rush. Then fully test everything before you button things down. The worst part of an install is finding out a wire got lose in a location that is hard to get to. Do everything possible to ensure your connections are top notch (heat shrink + zip ties!) so nothing comes lose. Use the factory wiring as a guide of how to do things right. Be mindful that water gets in the doors so waterproof any connections in there.
I'd like to solder the wires as that's supposedly the BEST way to do it right.. I just don't have a soldering iron.. Is there a portable (wireless) iron that's any good? Or do I just need to grab another wired iron and make due? I have tons of solder.
Also, crimp connectors is that a No-No anywhere in the system? If I were to NOT solder.. and NOT use crimp connectors is there a "third" acceptable option to connect wire ends, connectors and such?
As for all of this, I'd like to buy some sort of Car audio installers kit that has screws, ground bolts/nuts, all different size connectors, shrink tubing, wire ties, a small bit of wire loom,.. etc etc..and such that I could buy it all in one kit and have handy for when I'm installing.
Does such a thing exist? If so.. link it up for me please.
If not,.. I'm using 4 gauge power and ground,.. 14 gauge speaker wire,.. What all accessories would I need to do this RIGHT through and through? Even though I bought $100 worth of quality wiring, I know I'll need some odds and ends to ground properly,.. to make connections (without crimping),.. to fashion secondary door boots for my new speaker wire up front,.. I'm clean and **** about my work,.. so I'd put Wire loom on my power wire in the engine compartment and stuff like that even though it's technically not necessary.
SUB BOX INFO You'll need longer bolts and some trimming to get that SRQ box to fit perfectly. You see I had that same sub box and quit using it... too many rattles and yes I sound proofed the hell out of the area. I'm not saying its bad, its actually a good box provided you understand its limits. In the end its performance depends on hard you push the sub and what kind of music you like. For rock it was fine, but with rap/hip-hop or EDM above 90 dBs the factory location just doesn't work that well. For the record I was running a 12" Polk MM with 250 watts of power. Now I've got a 8" Kicker L5 in a temporary box, but will switch to a JL 10" in the CAS corner box as soon as funds are available. Shame since the SRQ box is perfectly hidden in the factory space and is a great deal at $100.
I'm using a JL 10" w0 (the least powerful JL 10" sub, besides their Wx series..) It runs 300watts RMS,.. I'll be putting 270 watts on it.
Ryan (SRQ's owner and master fabricator) said that it shouldn't rattle for me,.. and he wasn't trying to sell me on it. But, you had the same box and say it made enough rattling that you aren't using it anymore. Dang man!
The positive is I don't listen to Rap. I listen to Rock, Alternative, and that's about it.
You've used the box,.. but you weren't able to find a solution to keep it quiet apparently.. so I'd ask you what to do, but if you knew I guess you'd still have it in the car?
I guess I CAN ask where specifically did the SRQ box rattle for you? With this info I can deaden this area before installation of the box to try to prevent or lessen it. Was it above the box? Below it? The hatch area? Door panels? etc.?
You totally impressed me with information here, thanks for taking the time to respond. I really appreciate you guys.
New Member
Joined: Oct 2011
Posts: 558
Likes: 41
From: Margate, FL
WOW slow down man  I put your questions in italics and put my reply under them.
Back to the running a new small hole in the door jams for two speaker wires per door instead of messing with factory molex.
Not recommended... instead use the factory wires, spice IN at the factory radio location and OUT at the midrange. Then wire up your crossover, mid and tweeter. Put the crossover inside the doors, there is a large section of foam you'll see when you remove the door (top back) and the crossover will be perfectly safe up in that area as there is no way for water to reach it. Screw (carefully) or zip tie + sound proof + strong double sided tape to secure it, you might need to hatch the foam or remove it entirely. That's they way I've done systems in the past. Once again I only did the Molex thing because the instructions on this site showed it was possible and I was willing to put in the necessary blood, sweat and tears. Plus I might go full active in the future and thus needed separate tweeter wires.
I wouldn't attempt to drill holes and run new wires, even with grommets your asking for trouble. Mostly because the area to work in is so ridiculously small. You would almost have to remove the doors to get access to the area. Plus behind the kick panels you can't directly access the door jam, there is a separate (razor sharp) metal sub-structure in the way
What all needs to come off up here?
Its all pretty much here in these links:
https://my350z.com/forum/audio-and-v...z-how-tos.html
except maybe the door sills and kick panels, but they are pretty straight forward - look for screws, remove, then S L O W L Y lift up using a pry tool (covered in cloth / old sock to prevent damage to plastic / metal) start popping off the various clips.
Also, crimp connectors.
They are fine, just heat shrink over them. If your really want them to last forever crimp them, confirm everything works, then fill the connector with silicone, then heat shrink. That is how my boat trailer lights were done - over 10 YEARS in saltwater = no problems. Remember your enemies are: vibration, temperature change and moisture. As long as the connection can survive those your golden. Zip ties help with vibration, heat shrink basically takes care of the last two with the silicone being insurance. Most people discount the vibration and so silicone helps with that as well.
As for all of this, I'd like to buy some sort of Car audio installers kit... Does such a thing exist?
Sorry but you are just going to have buy various bits as you go. I've got a tackle box FULL of tools, connectors, various screws and clips that I've accumulated over the years. To inventory all of that would be impractical. Be prepared for multiple trips to the hardware / auto parts store. Lots of fun when your dash board and door panels are MISSING
HELPFUL TIP do NOT remove the window controls, as you might have noticed the Z automatically rolls the windows up/down slightly when you open/close the doors. If you disconnect EITHER window switch they stop working COMPLETELY! Take the door panels off, remove the switches and reconnect them, BOTH of them.
Figure more then two days, it took me about FOUR to do a similar sized system. But I could only get about six hours per day before getting pissed off over some small detail and needed a cold one to clam down
Nooo.. I didn't want to hear this. Longer bolts eh? That's fine,.. I just need sizes (width, head size, and how long to buy)
Sorry can't remember, I just took the factor bolts with me to Lowes and found longer versions with the same threads (Metric for sure).
You sound proofed the area with that SRQ box? It looks like it fits in there with VERY little area to put any sound proof material in .. Where did you put in sound deadener in that area?
I sound proofed ALL the metal back there. Once you get the all the plastic bits out you'll see the area where the box goes is actually pretty big, just oddly shaped. Remember the amp mounting thread - several members here have amps mounted UNDER the factory glove box.
Ryan (SRQ's owner and master fabricator) said that it shouldn't rattle for me,.. and he wasn't trying to sell me on it. But, you had the same box and say it made enough rattling that you aren't using it anymore. Dang man!
Others claimed the same thing. Sorry but your moving a lot of air in a small space... things are going to rattle. It wasn't as bad as I thought originally but over time I got sick of it
I listen to Rock, Alternative, and that's about it.
You might be OK then
You've used the box,.. but you weren't able to find a solution to keep it quiet apparently.. so I'd ask you what to do, but if you knew I guess you'd still have it in the car?
I gave up and put a "normal" box in the hatch area. I might attempt to reuse the SRQ by front mounting an 8" (firing at the seat back). Having a box in the hatch is not ideal as there is not much room in the Z to start with and it has to be removed on track days.
I guess I CAN ask where specifically did the SRQ box rattle for you?
Its not the box itself, its mostly the surrounding metal and plastic bits that form the bulkhead / rear speaker area in general. Think about what you are doing - you are firing a subwoofer DOWN at a gas tank that is surround by various other bits of mostly non-structural metal supports with plastic snapped to them. Its just not an "ideal" solution.
I put your questions in italics and put my reply under them.Back to the running a new small hole in the door jams for two speaker wires per door instead of messing with factory molex.
Not recommended... instead use the factory wires, spice IN at the factory radio location and OUT at the midrange. Then wire up your crossover, mid and tweeter. Put the crossover inside the doors, there is a large section of foam you'll see when you remove the door (top back) and the crossover will be perfectly safe up in that area as there is no way for water to reach it. Screw (carefully) or zip tie + sound proof + strong double sided tape to secure it, you might need to hatch the foam or remove it entirely. That's they way I've done systems in the past. Once again I only did the Molex thing because the instructions on this site showed it was possible and I was willing to put in the necessary blood, sweat and tears. Plus I might go full active in the future and thus needed separate tweeter wires.
I wouldn't attempt to drill holes and run new wires, even with grommets your asking for trouble. Mostly because the area to work in is so ridiculously small. You would almost have to remove the doors to get access to the area. Plus behind the kick panels you can't directly access the door jam, there is a separate (razor sharp) metal sub-structure in the way
What all needs to come off up here?
Its all pretty much here in these links:
https://my350z.com/forum/audio-and-v...z-how-tos.html
except maybe the door sills and kick panels, but they are pretty straight forward - look for screws, remove, then S L O W L Y lift up using a pry tool (covered in cloth / old sock to prevent damage to plastic / metal) start popping off the various clips.
Also, crimp connectors.
They are fine, just heat shrink over them. If your really want them to last forever crimp them, confirm everything works, then fill the connector with silicone, then heat shrink. That is how my boat trailer lights were done - over 10 YEARS in saltwater = no problems. Remember your enemies are: vibration, temperature change and moisture. As long as the connection can survive those your golden. Zip ties help with vibration, heat shrink basically takes care of the last two with the silicone being insurance. Most people discount the vibration and so silicone helps with that as well.
As for all of this, I'd like to buy some sort of Car audio installers kit... Does such a thing exist?
Sorry but you are just going to have buy various bits as you go. I've got a tackle box FULL of tools, connectors, various screws and clips that I've accumulated over the years. To inventory all of that would be impractical. Be prepared for multiple trips to the hardware / auto parts store. Lots of fun when your dash board and door panels are MISSING
HELPFUL TIP do NOT remove the window controls, as you might have noticed the Z automatically rolls the windows up/down slightly when you open/close the doors. If you disconnect EITHER window switch they stop working COMPLETELY! Take the door panels off, remove the switches and reconnect them, BOTH of them.
Figure more then two days, it took me about FOUR to do a similar sized system. But I could only get about six hours per day before getting pissed off over some small detail and needed a cold one to clam down
Nooo.. I didn't want to hear this. Longer bolts eh? That's fine,.. I just need sizes (width, head size, and how long to buy)
Sorry can't remember, I just took the factor bolts with me to Lowes and found longer versions with the same threads (Metric for sure).
You sound proofed the area with that SRQ box? It looks like it fits in there with VERY little area to put any sound proof material in .. Where did you put in sound deadener in that area?
I sound proofed ALL the metal back there. Once you get the all the plastic bits out you'll see the area where the box goes is actually pretty big, just oddly shaped. Remember the amp mounting thread - several members here have amps mounted UNDER the factory glove box.
Ryan (SRQ's owner and master fabricator) said that it shouldn't rattle for me,.. and he wasn't trying to sell me on it. But, you had the same box and say it made enough rattling that you aren't using it anymore. Dang man!
Others claimed the same thing. Sorry but your moving a lot of air in a small space... things are going to rattle. It wasn't as bad as I thought originally but over time I got sick of it
I listen to Rock, Alternative, and that's about it.
You might be OK then
You've used the box,.. but you weren't able to find a solution to keep it quiet apparently.. so I'd ask you what to do, but if you knew I guess you'd still have it in the car?
I gave up and put a "normal" box in the hatch area. I might attempt to reuse the SRQ by front mounting an 8" (firing at the seat back). Having a box in the hatch is not ideal as there is not much room in the Z to start with and it has to be removed on track days.
I guess I CAN ask where specifically did the SRQ box rattle for you?
Its not the box itself, its mostly the surrounding metal and plastic bits that form the bulkhead / rear speaker area in general. Think about what you are doing - you are firing a subwoofer DOWN at a gas tank that is surround by various other bits of mostly non-structural metal supports with plastic snapped to them. Its just not an "ideal" solution.
Back to the running a new small hole in the door jams for two speaker wires per door instead of messing with factory molex.
Not recommended... instead use the factory wires, spice IN at the factory radio location and OUT at the midrange. Then wire up your crossover, mid and tweeter. Put the crossover inside the doors, there is a large section of foam you'll see when you remove the door (top back) and the crossover will be perfectly safe up in that area as there is no way for water to reach it. Screw (carefully) or zip tie + sound proof + strong double sided tape to secure it, you might need to hatch the foam or remove it entirely. That's they way I've done systems in the past. Once again I only did the Molex thing because the instructions on this site showed it was possible and I was willing to put in the necessary blood, sweat and tears. Plus I might go full active in the future and thus needed separate tweeter wires.
-- I'm sticking to my guns on this part. Hey it's my vehicle right? If I want to bash the windows in.. well doesn't bother you. 
I'm going to use a Dremel with a Flex attachment to get into the area with ease,.. have specific bits for sheetmetal and starting off small. I'm good with this type of thing,.. not too worried about it.
But I respect you and others telling me to go through factory molexes/electrical system and boots. I am not heeding that "warning" or recommendation and going Maverick here. If it gets me into trouble I had ample warning that is for sure!
I wouldn't attempt to drill holes and run new wires, even with grommets your asking for trouble. Mostly because the area to work in is so ridiculously small. You would almost have to remove the doors to get access to the area. Plus behind the kick panels you can't directly access the door jam, there is a separate (razor sharp) metal sub-structure in the way
I'm not going to waste your time explaining my process of doing this.. we have two different schools of thought on this particular vehicle in this one aspect of running speaker wires about 18 inches.
What all needs to come off up here?
Its all pretty much here in these links:
https://my350z.com/forum/audio-and-v...z-how-tos.html
except maybe the door sills and kick panels, but they are pretty straight forward - look for screws, remove, then S L O W L Y lift up using a pry tool (covered in cloth / old sock to prevent damage to plastic / metal) start popping off the various clips.
Shouldn't need to pull actual DASH out of the car here.
Also, crimp connectors.
They are fine, just heat shrink over them. If your really want them to last forever crimp them, confirm everything works, then fill the connector with silicone, then heat shrink. Remember your enemies are: vibration, temperature change and moisture. As long as the connection can survive those your golden. Zip ties help with vibration, heat shrink basically takes care of the last two with the silicone being insurance. Most people discount the vibration and so silicone helps with that as well.
They are fine, just heat shrink over them. If your really want them to last forever crimp them, confirm everything works, then fill the connector with silicone, then heat shrink. Remember your enemies are: vibration, temperature change and moisture. As long as the connection can survive those your golden. Zip ties help with vibration, heat shrink basically takes care of the last two with the silicone being insurance. Most people discount the vibration and so silicone helps with that as well.
As for all of this, I'd like to buy some sort of Car audio installers kit... Does such a thing exist?
Sorry but you are just going to have buy various bits as you go. I've got a tackle box FULL of tools, connectors, various screws and clips that I've accumulated over the years. To inventory all of that would be impractical. Be prepared for multiple trips to the hardware / auto parts store. Lots of fun when your dash board and door panels are MISSING
Variety pack of heat shrink tubing, various connectors and sizes, etc.. I have a fair amount of tools already..
HELPFUL TIP do NOT remove the window controls, as you might have noticed the Z automatically rolls the windows up/down slightly when you open/close the doors. If you disconnect EITHER window switch they stop working COMPLETELY! Take the door panels off, remove the switches and reconnect them, BOTH of them.
Thanks for the tip. I also know that the passenger seat has the seatbelt sensor connector attached,.. and I need to disconnect the neg. battery terminal before I pull that connector, AND reconnect the battery AFTER I reconnect it. I've read otherwise the computer will give you some error code or something of that nature.
So basically you are just saying the windows are "connected" essentially,.. and if I want to work the doors/window controls I need both switches on both sides plugged into the harness. Good tip.. I can see trying to figure out why the dang doors don't work with one switch unplugged for an hour.
Figure more then two days, it took me about FOUR to do a similar sized system. But I could only get about six hours per day before getting pissed off over some small detail and needed a cold one to clam down
Nooo.. I didn't want to hear this. Longer bolts eh? That's fine,.. I just need sizes (width, head size, and how long to buy)
Sorry can't remember, I just took the factor bolts with me to Lowes and found longer versions with the same threads (Metric for sure).
Sorry can't remember, I just took the factor bolts with me to Lowes and found longer versions with the same threads (Metric for sure).
You sound proofed the area with that SRQ box? It looks like it fits in there with VERY little area to put any sound proof material in .. Where did you put in sound deadener in that area?
I sound proofed ALL the metal back there. Once you get the all the plastic bits out you'll see the area where the box goes is actually pretty big, just oddly shaped. Remember the amp mounting thread - several members here have amps mounted UNDER the factory glove box.
I sound proofed ALL the metal back there. Once you get the all the plastic bits out you'll see the area where the box goes is actually pretty big, just oddly shaped. Remember the amp mounting thread - several members here have amps mounted UNDER the factory glove box.
Ryan (SRQ's owner and master fabricator) said that it shouldn't rattle for me,.. and he wasn't trying to sell me on it. But, you had the same box and say it made enough rattling that you aren't using it anymore. Dang man!
Others claimed the same thing. Sorry but your moving a lot of air in a small space... things are going to rattle. It wasn't as bad as I thought originally but over time I got sick of it
I listen to Rock, Alternative, and that's about it.
You might be OK then
Others claimed the same thing. Sorry but your moving a lot of air in a small space... things are going to rattle. It wasn't as bad as I thought originally but over time I got sick of it
I listen to Rock, Alternative, and that's about it.
You might be OK then
I guess I CAN ask where specifically did the SRQ box rattle for you?
Its not the box itself, its mostly the surrounding metal and plastic bits that form the bulkhead / rear speaker area in general. Think about what you are doing - you are firing a subwoofer DOWN at a gas tank that is surround by various other bits of mostly non-structural metal supports with plastic snapped to them. Its just not an "ideal" solution.
Appreciate your response(s).. Some really good advice in there.
Take care,
Last edited by Chromatic; Jan 7, 2014 at 07:16 PM.
Registered User
Joined: Dec 2012
Posts: 5,126
Likes: 9
From: somewhere better than here
WOW slow down man I put your questions in italics and put my reply under them.
Back to the running a new small hole in the door jams for two speaker wires per door instead of messing with factory molex.
Not recommended... instead use the factory wires, spice IN at the factory radio location and OUT at the midrange. Then wire up your crossover, mid and tweeter. Put the crossover inside the doors, there is a large section of foam you'll see when you remove the door (top back) and the crossover will be perfectly safe up in that area as there is no way for water to reach it. Screw (carefully) or zip tie + sound proof + strong double sided tape to secure it, you might need to hatch the foam or remove it entirely. That's they way I've done systems in the past. Once again I only did the Molex thing because the instructions on this site showed it was possible and I was willing to put in the necessary blood, sweat and tears. Plus I might go full active in the future and thus needed separate tweeter wires.
I wouldn't attempt to drill holes and run new wires, even with grommets your asking for trouble. Mostly because the area to work in is so ridiculously small. You would almost have to remove the doors to get access to the area. Plus behind the kick panels you can't directly access the door jam, there is a separate (razor sharp) metal sub-structure in the way
What all needs to come off up here?
Its all pretty much here in these links:
https://my350z.com/forum/audio-and-v...z-how-tos.html
except maybe the door sills and kick panels, but they are pretty straight forward - look for screws, remove, then S L O W L Y lift up using a pry tool (covered in cloth / old sock to prevent damage to plastic / metal) start popping off the various clips.
Also, crimp connectors.
They are fine, just heat shrink over them. If your really want them to last forever crimp them, confirm everything works, then fill the connector with silicone, then heat shrink. That is how my boat trailer lights were done - over 10 YEARS in saltwater = no problems. Remember your enemies are: vibration, temperature change and moisture. As long as the connection can survive those your golden. Zip ties help with vibration, heat shrink basically takes care of the last two with the silicone being insurance. Most people discount the vibration and so silicone helps with that as well.
As for all of this, I'd like to buy some sort of Car audio installers kit... Does such a thing exist?
Sorry but you are just going to have buy various bits as you go. I've got a tackle box FULL of tools, connectors, various screws and clips that I've accumulated over the years. To inventory all of that would be impractical. Be prepared for multiple trips to the hardware / auto parts store. Lots of fun when your dash board and door panels are MISSING
HELPFUL TIP do NOT remove the window controls, as you might have noticed the Z automatically rolls the windows up/down slightly when you open/close the doors. If you disconnect EITHER window switch they stop working COMPLETELY! Take the door panels off, remove the switches and reconnect them, BOTH of them.
Figure more then two days, it took me about FOUR to do a similar sized system. But I could only get about six hours per day before getting pissed off over some small detail and needed a cold one to clam down
Nooo.. I didn't want to hear this. Longer bolts eh? That's fine,.. I just need sizes (width, head size, and how long to buy)
Sorry can't remember, I just took the factor bolts with me to Lowes and found longer versions with the same threads (Metric for sure).
You sound proofed the area with that SRQ box? It looks like it fits in there with VERY little area to put any sound proof material in .. Where did you put in sound deadener in that area?
I sound proofed ALL the metal back there. Once you get the all the plastic bits out you'll see the area where the box goes is actually pretty big, just oddly shaped. Remember the amp mounting thread - several members here have amps mounted UNDER the factory glove box.
Ryan (SRQ's owner and master fabricator) said that it shouldn't rattle for me,.. and he wasn't trying to sell me on it. But, you had the same box and say it made enough rattling that you aren't using it anymore. Dang man!
Others claimed the same thing. Sorry but your moving a lot of air in a small space... things are going to rattle. It wasn't as bad as I thought originally but over time I got sick of it
I listen to Rock, Alternative, and that's about it.
You might be OK then
You've used the box,.. but you weren't able to find a solution to keep it quiet apparently.. so I'd ask you what to do, but if you knew I guess you'd still have it in the car?
I gave up and put a "normal" box in the hatch area. I might attempt to reuse the SRQ by front mounting an 8" (firing at the seat back). Having a box in the hatch is not ideal as there is not much room in the Z to start with and it has to be removed on track days.
I guess I CAN ask where specifically did the SRQ box rattle for you?
Its not the box itself, its mostly the surrounding metal and plastic bits that form the bulkhead / rear speaker area in general. Think about what you are doing - you are firing a subwoofer DOWN at a gas tank that is surround by various other bits of mostly non-structural metal supports with plastic snapped to them. Its just not an "ideal" solution.
I put your questions in italics and put my reply under them.Back to the running a new small hole in the door jams for two speaker wires per door instead of messing with factory molex.
Not recommended... instead use the factory wires, spice IN at the factory radio location and OUT at the midrange. Then wire up your crossover, mid and tweeter. Put the crossover inside the doors, there is a large section of foam you'll see when you remove the door (top back) and the crossover will be perfectly safe up in that area as there is no way for water to reach it. Screw (carefully) or zip tie + sound proof + strong double sided tape to secure it, you might need to hatch the foam or remove it entirely. That's they way I've done systems in the past. Once again I only did the Molex thing because the instructions on this site showed it was possible and I was willing to put in the necessary blood, sweat and tears. Plus I might go full active in the future and thus needed separate tweeter wires.
I wouldn't attempt to drill holes and run new wires, even with grommets your asking for trouble. Mostly because the area to work in is so ridiculously small. You would almost have to remove the doors to get access to the area. Plus behind the kick panels you can't directly access the door jam, there is a separate (razor sharp) metal sub-structure in the way
What all needs to come off up here?
Its all pretty much here in these links:
https://my350z.com/forum/audio-and-v...z-how-tos.html
except maybe the door sills and kick panels, but they are pretty straight forward - look for screws, remove, then S L O W L Y lift up using a pry tool (covered in cloth / old sock to prevent damage to plastic / metal) start popping off the various clips.
Also, crimp connectors.
They are fine, just heat shrink over them. If your really want them to last forever crimp them, confirm everything works, then fill the connector with silicone, then heat shrink. That is how my boat trailer lights were done - over 10 YEARS in saltwater = no problems. Remember your enemies are: vibration, temperature change and moisture. As long as the connection can survive those your golden. Zip ties help with vibration, heat shrink basically takes care of the last two with the silicone being insurance. Most people discount the vibration and so silicone helps with that as well.
As for all of this, I'd like to buy some sort of Car audio installers kit... Does such a thing exist?
Sorry but you are just going to have buy various bits as you go. I've got a tackle box FULL of tools, connectors, various screws and clips that I've accumulated over the years. To inventory all of that would be impractical. Be prepared for multiple trips to the hardware / auto parts store. Lots of fun when your dash board and door panels are MISSING
HELPFUL TIP do NOT remove the window controls, as you might have noticed the Z automatically rolls the windows up/down slightly when you open/close the doors. If you disconnect EITHER window switch they stop working COMPLETELY! Take the door panels off, remove the switches and reconnect them, BOTH of them.
Figure more then two days, it took me about FOUR to do a similar sized system. But I could only get about six hours per day before getting pissed off over some small detail and needed a cold one to clam down
Nooo.. I didn't want to hear this. Longer bolts eh? That's fine,.. I just need sizes (width, head size, and how long to buy)
Sorry can't remember, I just took the factor bolts with me to Lowes and found longer versions with the same threads (Metric for sure).
You sound proofed the area with that SRQ box? It looks like it fits in there with VERY little area to put any sound proof material in .. Where did you put in sound deadener in that area?
I sound proofed ALL the metal back there. Once you get the all the plastic bits out you'll see the area where the box goes is actually pretty big, just oddly shaped. Remember the amp mounting thread - several members here have amps mounted UNDER the factory glove box.
Ryan (SRQ's owner and master fabricator) said that it shouldn't rattle for me,.. and he wasn't trying to sell me on it. But, you had the same box and say it made enough rattling that you aren't using it anymore. Dang man!
Others claimed the same thing. Sorry but your moving a lot of air in a small space... things are going to rattle. It wasn't as bad as I thought originally but over time I got sick of it
I listen to Rock, Alternative, and that's about it.
You might be OK then
You've used the box,.. but you weren't able to find a solution to keep it quiet apparently.. so I'd ask you what to do, but if you knew I guess you'd still have it in the car?
I gave up and put a "normal" box in the hatch area. I might attempt to reuse the SRQ by front mounting an 8" (firing at the seat back). Having a box in the hatch is not ideal as there is not much room in the Z to start with and it has to be removed on track days.
I guess I CAN ask where specifically did the SRQ box rattle for you?
Its not the box itself, its mostly the surrounding metal and plastic bits that form the bulkhead / rear speaker area in general. Think about what you are doing - you are firing a subwoofer DOWN at a gas tank that is surround by various other bits of mostly non-structural metal supports with plastic snapped to them. Its just not an "ideal" solution.

The part about getting pissed after 6 hours and needing a cold brew, and about the multiple "mid-project" run to radioshack/autozone/walmart reminded me of most every install I've done over the years.
Add to that having my back and neck so twisted out from laying with my back draped over the corner of one seat and my head and neck twisted up into the footwell area as a reason why I needed frequent breaks. I definitely could NOT do this for a living.Agree with using the stock speaker wires from behind the headunit. Did alot of reading on car audio forums on this, and the consensus seemed to be that for a basic system with less than 100W/channel, the factory wires were thick enough gauge and well insulated enough to be up to the task.
Last edited by NismoDude; Jan 7, 2014 at 07:59 PM.
Agree,.. great advice for sure!
The part about getting pissed after 6 hours and needing a cold brew, and about the multiple "mid-project" run to radioshack/autozone/walmart reminded me of most every install I've done over the years. Add to that having my back and neck so twisted out from laying with my back draped over the corner of one seat and my head and neck twisted up into the footwell area as a reason why I needed frequent breaks. I definitely could NOT do this for a living.
Agreed. I was NOT going to do this install myself for that precise reason. I also have chronic neck/back pain from a bad car accident 8 years ago.. So it makes these things doubly hard on me. That said, I enjoy this kind of work.. building things, fixing things, figuring out how they work, anything electrical, mechanical etc.. If the body would keep up with the brain I COULD do this stuff for a living. Instead I work on a smaller scale as a Network Engineer and systems designer.
But,.. going to a few car audio shops and seeing to get the kind of speakers and equipment I bought installed was going to be over 3 grand.. I said, F that.. I'll spend $750 and if takes me a week I'm doing it myself.
Half the reason I'm doing what all you guys are telling me *not* to do by drilling some 3/8th inch holes , throwing in some grommets, tubing, sealing, etc is because I know I would get immensely frustrated working with the factory harness and boot.. I've already been down there just adjusting the clutch .. No thanks on the 2, 3, 4 or more hours of what would be absolute hell on me. I've already opened doors measured things out and it's going to work quite well with my dremel with flex attachment. Helps there is already a gromet not being used on one side (Saves a hole to drill.. and it already protected.. so I'll cut it a bit.. run my tubing through it, and once I'm happy with the results, length and so on... I'll secure that end of the tubing with a Pin so it can't be pulled out (even though I'm using tubing longer than what would extend with the door fully opened).. and then liberally apply some epoxy for a good water/air tight seal. I may or may not throw some black loom on top of it, depends on how it looks with and without it.
I plan on taking breaks,.. My plan is to expect taking seats out, door panels off, headunit out, console out, rear panels out, and other such panels to take me a good 3 hours if not more. Once I get her opened up completely, I'll take my first break and probably go ahead and use my butane torch and solder on the ring connectors for the Power wire and ground wire (something outside the car to stretch a bit.) Then go over my diagram and notes I've made on my wiring layout compare it to how the car actually looks "naked" inside.. then start with the power wire through the factory grommet on the back upper left side of the firewall.
The way I have this planned in my head is fairly straight forward, before I've gone to sleep it invariably pops in my head and I'm thinking up all sorts of ideas on wiring and have about 10 different ways I've figured out how to do the tubing and such on the 3/8th" holes I drill.
But, I also know it won't go as smooth as it seems in my head and I'll run into a snag or two. That's the nature of the game.
Agree with using the stock speaker wires from behind the headunit. Did alot of reading on car audio forums on this, and the consensus seemed to be that for a basic system with less than 100W/channel, the factory wires were thick enough gauge and well insulated enough to be up to the task.
I actually agree with this statement and logic. I just prefer to run some over-sized and I suppose you could say unnecessary wire for the speakers just for the "over-engineering" effect I guess. I'm not going to pull the stock wire, just cut it behind the headunit, and tape/heatshrink tube it. Same for doors.. that wire is all staying in there, I'll just tidy it up and seal it off.
When the day comes I get rid of this car (no time soon).. I'll very likely leave the system in it. I MAY pull the sub out,.. but it's a custom box for that car, and the sub is just a $109 JL 10" W0v3-4,.. The next owner can enjoy it. But honestly, I know I've only had the car a month now.. but I don't have any plans of getting rid of it. I just have this laundry list of things to do to it in my head. Which makes me smile,.. the car makes me smile every time I go down to the garage and see it.
I've replaced any little panel/piece that was scratched, so it's absolutely flawless. As I said a few weeks ago,.. When I got it the prev. owner must not have cared, or known how to hand wax a car,.. because the paint looked good until you ran your hand across it. Felt so gritty,.. So first thing I did was make her feel better -- Clay barred for the longest I've ever done by far.. a solid 3 hours (the body on the car is deceptively large.. especially with a coupe).. then used the rotary for polishing out imperfections,.. through on a synthetic NXT 2.0 polymer wax. Let that "settle" on the paint for a week, then topped it off with a good Meguires Gold Carnauba Hard wax. Feels so smooth now.. how these cars should feel.. like butter when you run your hand across them, and I know it's adequately protected.)
I have thought about taking pictures all throughout the install, or even videoing it.. But, there are so many writeups about panel removal and such it'd probably just be a redundant DIY.
Although I tend to make quite good DIY's,.. as I'm so wordy and detailed,.. If I end up doing a DIY it will be on:
Complete panel removal from engine bay, kick panels, door seals, seats, console, headunit, tweeter seal panels, the entire rear bulkhead, then I went ahead and got 30 Square Ft. of solid Sound Deadener so applying that would be included, how to properly solder wire connectors on 4 gauge power/ground wires, how to solder wire to wire (with tinning), The quick and proper way to use heat shrink tubing, How to run Power wire, RCA's, and Speaker wire that won't interfere each other, how to find a good factory ground and use a BOLT with lockwasher,.. and blah blah.. ending up with setting your gains on amp for 4 speakers, + sub with specific tracks, using a DMM if you don't have a DD-1 or an O-scope (which, let's be honest.. most don't).
I think even being redundant having it all in one large post with pictures and video would be a great help if my information is right (the right way to do things).. which I've strived to learn. The only bit of it that would be controversial is the drilling the small hole in the doors, which I would include but say very adamantly that I recommend going through FACTORY molex and boots and give the reason I'm doing it the way I am.
Because let's face it,.. some people are going to end up drilling the doors whether we like it or not,.. so sometimes showing people how to do it safely and properly without jacking up their car can be a good thing.
Anyhow,.. parts will start arriving tomorrow.
It shall prove interesting how these MB Quarts in the rear speaker slots sound in the car given that most agree to NOT use rear speakers no matter how good they are. If I'm able to tune the rear Mb Quarts down to a lower level and it AIDS in the overall sound that will be nice. If the car, indeed, ends up sounding infinitely better when I cut the rear speakers off.. I'll literally pull the MB Quarts out of the car and probably put them up for sale on here. They are $500 speakers .. and I don't see why I couldn't get a $100 out of them.
This is getting long,.. so guys thanks for your help, I can't express enough my gratitude for your willingness to give me your advice, whether I use all of it or not.
The part about getting pissed after 6 hours and needing a cold brew, and about the multiple "mid-project" run to radioshack/autozone/walmart reminded me of most every install I've done over the years.
Add to that having my back and neck so twisted out from laying with my back draped over the corner of one seat and my head and neck twisted up into the footwell area as a reason why I needed frequent breaks. I definitely could NOT do this for a living.But,.. going to a few car audio shops and seeing to get the kind of speakers and equipment I bought installed was going to be over 3 grand.. I said, F that.. I'll spend $750 and if takes me a week I'm doing it myself.
Half the reason I'm doing what all you guys are telling me *not* to do by drilling some 3/8th inch holes , throwing in some grommets, tubing, sealing, etc is because I know I would get immensely frustrated working with the factory harness and boot.. I've already been down there just adjusting the clutch .. No thanks on the 2, 3, 4 or more hours of what would be absolute hell on me. I've already opened doors measured things out and it's going to work quite well with my dremel with flex attachment. Helps there is already a gromet not being used on one side (Saves a hole to drill.. and it already protected.. so I'll cut it a bit.. run my tubing through it, and once I'm happy with the results, length and so on... I'll secure that end of the tubing with a Pin so it can't be pulled out (even though I'm using tubing longer than what would extend with the door fully opened).. and then liberally apply some epoxy for a good water/air tight seal. I may or may not throw some black loom on top of it, depends on how it looks with and without it.
I plan on taking breaks,.. My plan is to expect taking seats out, door panels off, headunit out, console out, rear panels out, and other such panels to take me a good 3 hours if not more. Once I get her opened up completely, I'll take my first break and probably go ahead and use my butane torch and solder on the ring connectors for the Power wire and ground wire (something outside the car to stretch a bit.) Then go over my diagram and notes I've made on my wiring layout compare it to how the car actually looks "naked" inside.. then start with the power wire through the factory grommet on the back upper left side of the firewall.
The way I have this planned in my head is fairly straight forward, before I've gone to sleep it invariably pops in my head and I'm thinking up all sorts of ideas on wiring and have about 10 different ways I've figured out how to do the tubing and such on the 3/8th" holes I drill.
But, I also know it won't go as smooth as it seems in my head and I'll run into a snag or two. That's the nature of the game.
Agree with using the stock speaker wires from behind the headunit. Did alot of reading on car audio forums on this, and the consensus seemed to be that for a basic system with less than 100W/channel, the factory wires were thick enough gauge and well insulated enough to be up to the task.
When the day comes I get rid of this car (no time soon).. I'll very likely leave the system in it. I MAY pull the sub out,.. but it's a custom box for that car, and the sub is just a $109 JL 10" W0v3-4,.. The next owner can enjoy it. But honestly, I know I've only had the car a month now.. but I don't have any plans of getting rid of it. I just have this laundry list of things to do to it in my head. Which makes me smile,.. the car makes me smile every time I go down to the garage and see it.
I've replaced any little panel/piece that was scratched, so it's absolutely flawless. As I said a few weeks ago,.. When I got it the prev. owner must not have cared, or known how to hand wax a car,.. because the paint looked good until you ran your hand across it. Felt so gritty,.. So first thing I did was make her feel better
-- Clay barred for the longest I've ever done by far.. a solid 3 hours (the body on the car is deceptively large.. especially with a coupe).. then used the rotary for polishing out imperfections,.. through on a synthetic NXT 2.0 polymer wax. Let that "settle" on the paint for a week, then topped it off with a good Meguires Gold Carnauba Hard wax. Feels so smooth now.. how these cars should feel.. like butter when you run your hand across them, and I know it's adequately protected.)I have thought about taking pictures all throughout the install, or even videoing it.. But, there are so many writeups about panel removal and such it'd probably just be a redundant DIY.
Although I tend to make quite good DIY's,.. as I'm so wordy and detailed,.. If I end up doing a DIY it will be on:
Complete panel removal from engine bay, kick panels, door seals, seats, console, headunit, tweeter seal panels, the entire rear bulkhead, then I went ahead and got 30 Square Ft. of solid Sound Deadener so applying that would be included, how to properly solder wire connectors on 4 gauge power/ground wires, how to solder wire to wire (with tinning), The quick and proper way to use heat shrink tubing, How to run Power wire, RCA's, and Speaker wire that won't interfere each other, how to find a good factory ground and use a BOLT with lockwasher,.. and blah blah.. ending up with setting your gains on amp for 4 speakers, + sub with specific tracks, using a DMM if you don't have a DD-1 or an O-scope (which, let's be honest.. most don't).
I think even being redundant having it all in one large post with pictures and video would be a great help if my information is right (the right way to do things).. which I've strived to learn. The only bit of it that would be controversial is the drilling the small hole in the doors, which I would include but say very adamantly that I recommend going through FACTORY molex and boots and give the reason I'm doing it the way I am.
Because let's face it,.. some people are going to end up drilling the doors whether we like it or not,.. so sometimes showing people how to do it safely and properly without jacking up their car can be a good thing.
Anyhow,.. parts will start arriving tomorrow.
It shall prove interesting how these MB Quarts in the rear speaker slots sound in the car given that most agree to NOT use rear speakers no matter how good they are. If I'm able to tune the rear Mb Quarts down to a lower level and it AIDS in the overall sound that will be nice. If the car, indeed, ends up sounding infinitely better when I cut the rear speakers off.. I'll literally pull the MB Quarts out of the car and probably put them up for sale on here. They are $500 speakers .. and I don't see why I couldn't get a $100 out of them.
This is getting long,.. so guys thanks for your help, I can't express enough my gratitude for your willingness to give me your advice, whether I use all of it or not.
Chromatic is starting to come to his senses a little on this Door drilling:
I'm strongly considering running my 14 gauge speaker wire from Amp in glove box up sides of car under carpet to kick panels and then SPLICING into the factory wire at that location INSTEAD of drilling holes in my doors.
It still saves me tons of time,.. and eliminates the risk of screwing with the factory molex.
There won't be any issues running 100watts per speaker splicing into the factory wire will there?
This seems like a good compromise.
New Member
Joined: Oct 2011
Posts: 558
Likes: 41
From: Margate, FL
The part about getting pissed after 6 hours and needing a cold brew, and about the multiple "mid-project" run to radioshack/autozone/walmart reminded me of most every install I've done over the years. Add to that having my back and neck so twisted out from laying with my back draped over the corner of one seat and my head and neck twisted up into the footwell area as a reason why I needed frequent breaks. I definitely could NOT do this for a living.
Add to that having my back and neck so twisted out from laying with my back draped over the corner of one seat and my head and neck twisted up into the footwell area as a reason why I needed frequent breaks. I definitely could NOT do this for a living. I wanted so bad to remove the seats but I've got the side airbags in mine and chickened out. Thus they stayed, which made the job about 10X more painful since I'm 6' and barely fit in the Z as is. Half in the car, half out, upside down, flashlight in my mouth, screw driver jamming me in my back... so much FUN
I've done installs for people for money but only as a side gig... there is a good reason why audio shops change BIG money for this work, its miserable - unless your a midget or an octopus! Or BOTH!
Agree with using the stock speaker wires from behind the headunit. Did alot of reading on car audio forums on this, and the consensus seemed to be that for a basic system with less than 100W/channel, the factory wires were thick enough gauge and well insulated enough to be up to the task.
http://www.audioholics.com/audio-vid...er-cable-gauge
http://en.wikipedia.org/wiki/Speaker_wire
The problem with the mess of wires running into the doors is the limited working space in the kick panels. Multiple small wires are grouped together in a big, tight bundle with almost no slack, all surrounded by sharp metal in a dark hole.
Registered User
Joined: Dec 2012
Posts: 5,126
Likes: 9
From: somewhere better than here
^^^^^^
More good advice. The wires in the kickpanel area are SO tightly bundled and wrapped it would take an afternoon to dissect out the ones you want to crimp into. Just skip it. You will have the wires cut behind the headunit when you do your new wiring harness.
The holding the flashlight in your teeth thing is fun too.
Last time around I used my camping headlight - you can pick up a really bright LED headlight at most any store now for like $20. It REALLY helps with this kind of work.
Ahem brother. I wanted so bad to remove the seats but I've got the side airbags in mine and chickened out. Thus they stayed, which made the job about 10X more painful since I'm 6' and barely fit in the Z as is. Half in the car, half out, upside down, flashlight in my mouth, screw driver jamming me in my back... so much FUN
I wanted so bad to remove the seats but I've got the side airbags in mine and chickened out. Thus they stayed, which made the job about 10X more painful since I'm 6' and barely fit in the Z as is. Half in the car, half out, upside down, flashlight in my mouth, screw driver jamming me in my back... so much FUN I'm 6ft, 200lbs myself.. and I'm not built to work in small spaces. Though you've gotta do what what you've gotta do =)
I've done the flashlight in teeth.. just did it with the clutch pedal adjustment.. I followed a guide, and needlessly removed the pin .. which was what caused me most of the time I spent doing it (not removing, but getting it back in).. Turns out I could have just loosened the lock nut,.. live and learn.
I've done installs for people for money but only as a side gig... there is a good reason why audio shops change BIG money for this work, its miserable - unless your a midget or an octopus! Or BOTH!
Yeah it's stuff like this that makes me temporarily envy the 5'6 guys with little hands, and narrow shoulders.
You will thank us later. As noted above: make the connection at radio, it will be EASIER and will work just fine.
The problem with the mess of wires running into the doors is the limited working space in the kick panels. Multiple small wires are grouped together in a big, tight bundle with almost no slack, all surrounded by sharp metal in a dark hole.
I'll play that by ear. If the wires are as difficult to get to in the kick panels as you say,.. I'll make a quick turn to the headunit, trust me. If I can separate the wires to the speakers (they are color coded..) then I'll wire it up there.
Not to DEFY you Nismo hahah.. but because I'm running RCA's down center console.. and speaker wires down each side of the car respectively.. I'd rather not have to make a right and left hook with the wires if I can help it,..
But,.. We shall see when I get down under that dash.. if those speaker wires are impossible to get apart enough to strip and splice into with relative ease.. I'll go to the headunit.
I think I'll make the effort to make the wires in that bundle work.. I'm pretty good with wire splicing and handling.. give me an inch of wire and I can solder into it in 5 minutes.. I'll make slack dammit
-- Seriously, I'll play it by ear (or feel). Again I'd like to keep the speaker wire completely out of the path of the RCA's even if it's just a right turn to behind the headunit.Do my new wiring harness?
Way I figure it.. The wiring hardness is going to turn into basically a remote wire, power wire, and ground (just guessing off top of my head). Speaker wire is getting spliced, remote wire spliced.. So that's what.. 5 wires I'm splicing into ,.. I haven't looked at the harnesses , but It's bound to be a power, ground, remote, RF, LF, RR, and LR. Maybe I'm missing something,.. but antenna should be off on the other side if it's like other radios I've dealt with.. and what else is there in a harness? The USB is plugged into a USB port on the back of headunit,.. Ipod/Iphone is plugged into the Aux port,... And I haven't "yet" bought the extremely hard to find Bluetooth adapter kit, and Backup camera. Thought about buying them and doing them while I was back there.. but damn, $200+ for the BT box/addon on a discontinued model.. I'll wait till later on that one. Maybe I'll do that when I add some exhaust and other perf. mods.. then Steering wheel controls, pedal switches, to prep for cruise on a base.. (essentially when a "tune" would be warranted) -- cause for cruise control it's just as much as a tune due to license so I read.
Last time around I used my camping headlight - you can pick up a really bright LED headlight at most any store now for like $20. It REALLY helps with this kind of work.
I figured out what I'm going to do to mount amp, and cover it so I can continue to use glovebox for storage.. I'll show that off after I build it. It's nothing fancy, but it'l look pretty "Factory" anyway. Definitely not just shoving the amp under that tray that pulls out on top of the gas tank unmounted like I've seen in some picture (no offense to whoever did that).
Amp came with a Bass ****.. been scoping out the car on errands of where I'm going to mount it. I have empty switch panels right behind the shifter,.. but I can tell the way I rest my arm/hand just behind the shifter that mounting there is never going to work. So may put it inside the pop up console thing,.. Or off to the side of the center console/passenger side area under dash in reach. Surprisingly the **** feels good,.. nice tight feel , not sloppy at all.
By the way guys:
This amp has High Pass and Low pass filters for Front, Rear, and Sub channels (and has Subsonic Filter for sub as well) -- Sub sonic can be dialed in easily as it's just 20hz-38hz range.. just no idea what to put it at. But.. I'm not sure what method people use to set Amp crossovers.
I know where to set them .. But, the amp dials are marked with the min and max values on the X-overs.. so I'm dialing blind when setting.
So do I play some tones at X frequency and turn the dial until the frequency STOPS coming from the speaker(s) I'm dialing in.. or what? I know you'll probably say don't use them,.. but hypothetically if I used them,.. what's the method to set them?
Take care,