
DIY Mirror blinkers


Thread Starter
Registered User
Joined: Jan 2007
Posts: 103
Likes: 0
From: Japan
OK this kind of work I do all the time and well on time in band camp I took pix. Its preaty easy to do once you get into it. I had this posted on another forum so Im cutting and pasteing it here.
Disclamer I cant spell so bear with it.
Ok Make sure you mask your parts off dont be stupid and scratch them or get S#$T on them.
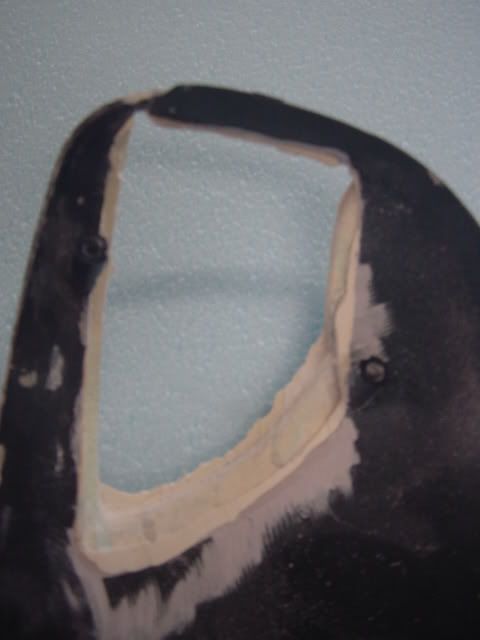
Mark your lines out and try and find a peice that somewhat resembles the conture of your mirror not only the out side but the inside. If your new at this NOW isnt the time to be puting a square peg in a round hole.
Becouse I did the drivers side first I use it to get the location of the passenger side. Now these Sentia mirrors are nice to work with the outer unscrews and makes it stupid easy to do this.
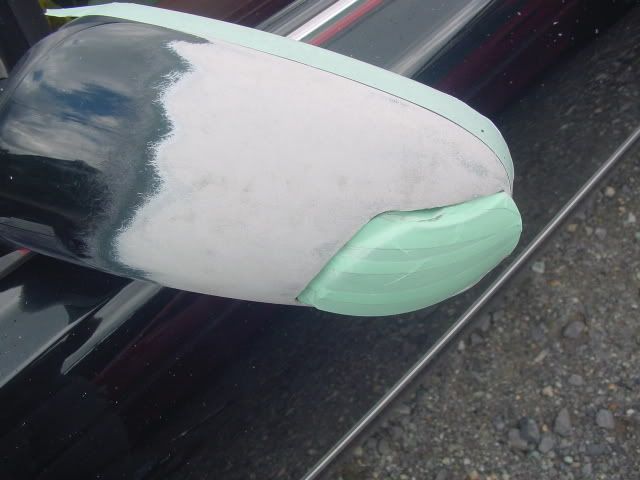
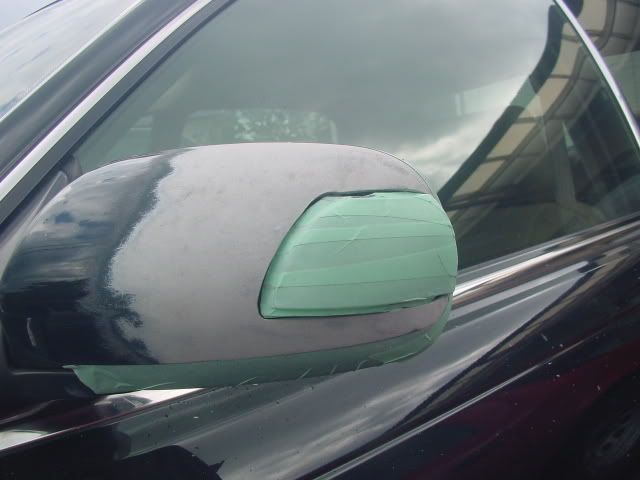
1. masked and ready to mark
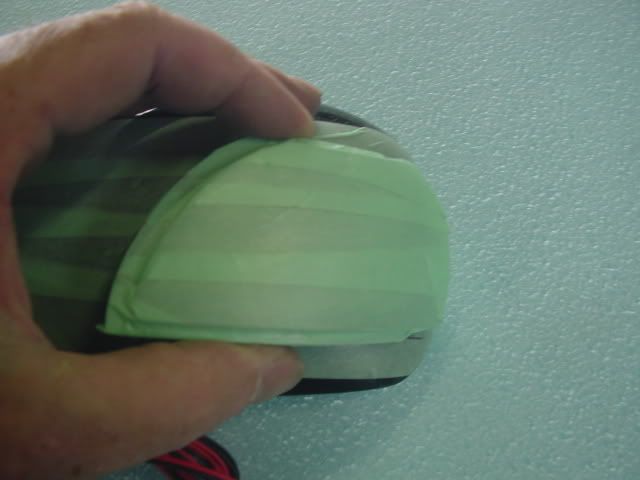
2. Now cut it out
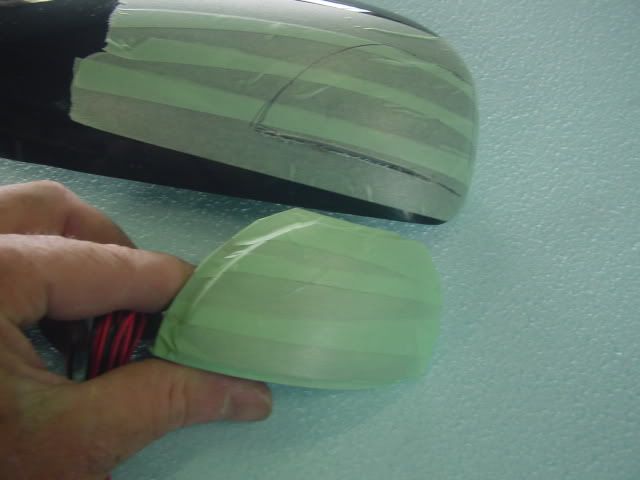
3. See if it fits
4. Compare the fir and line up
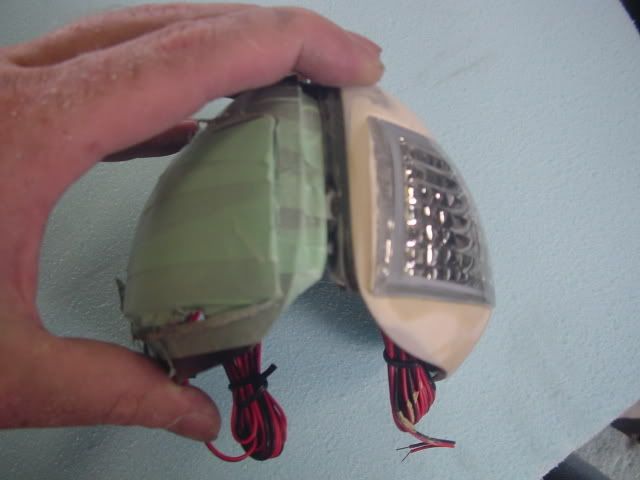
5. Make sure it fits inside too
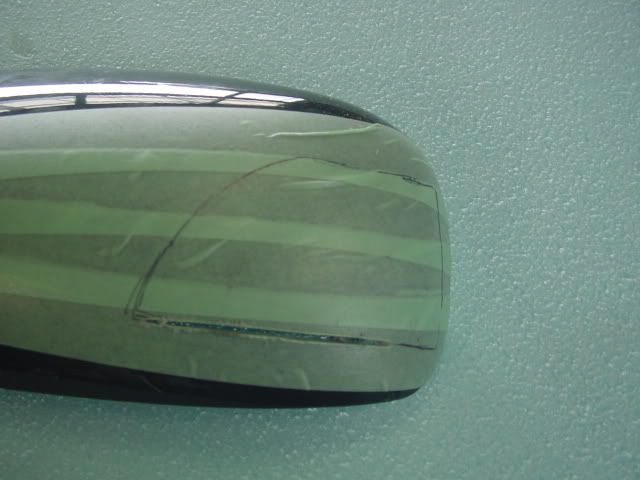
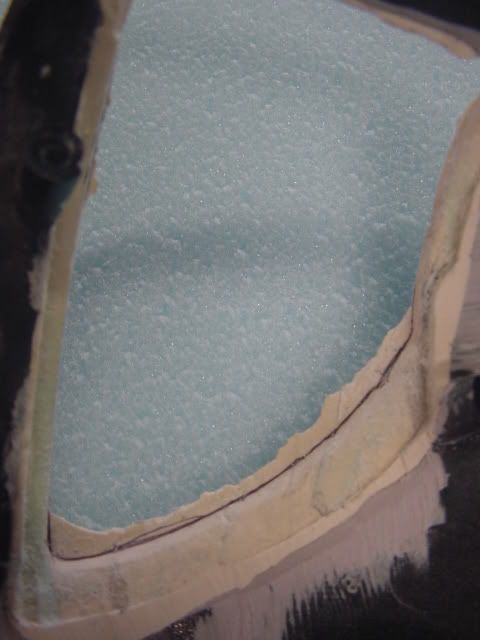
6. Cut the inside for the extruded portion of the lens
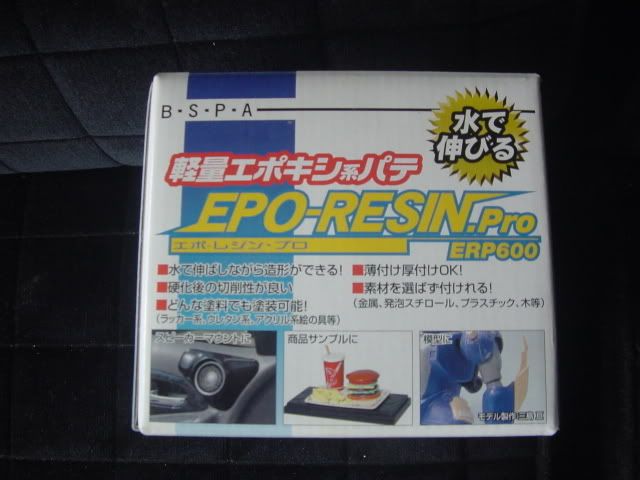
7. test fit and align everything
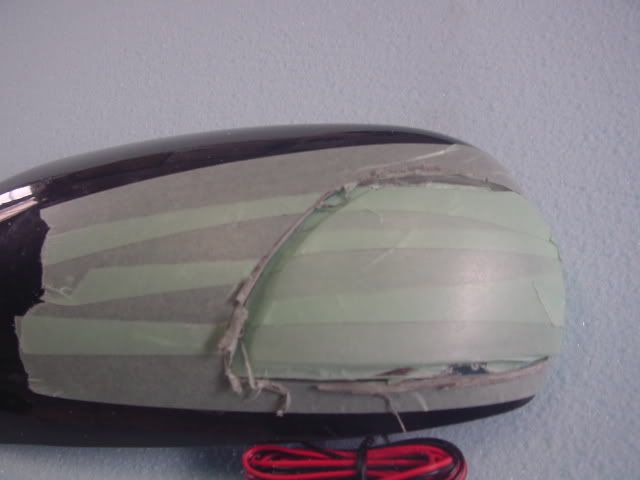
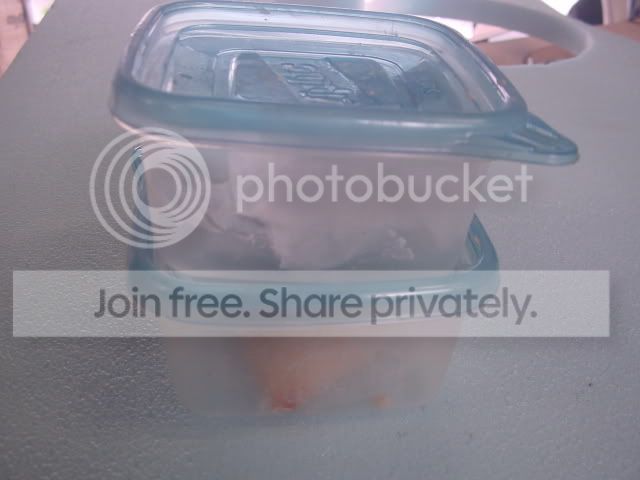
8. I usse this modeling epoxy the stuff is wicked for doing this it gets hard as the origional plastic and you can work it with water. you need to mix it one to one
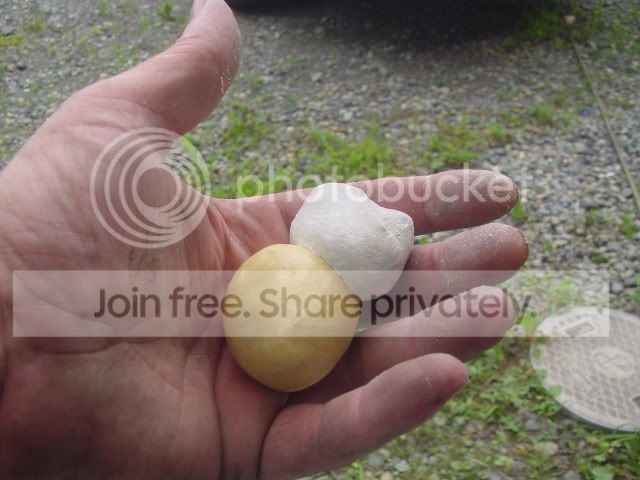
9. Now apply it to the surounding and force it into the cracks you want a little to push threw the back for a tight fit
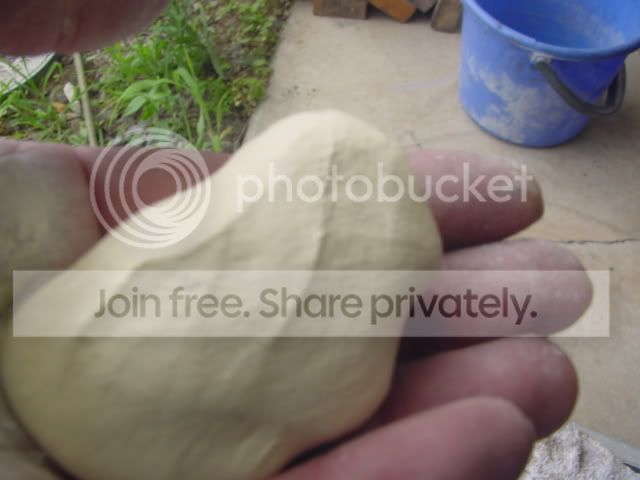
10. Like I said I can work this with water up to 30 mins so get a bucket of water and start forming it with your hands like a potery project.
You can add and subtract material where needed I went with a little more volume than the parts so I can sand it back to the part depth. Make sure you cary it out far enough so you dont have to throw a bunch of putty back at it latter.
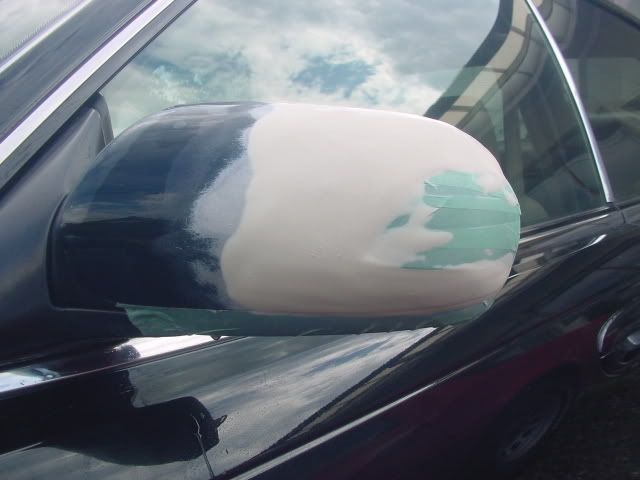

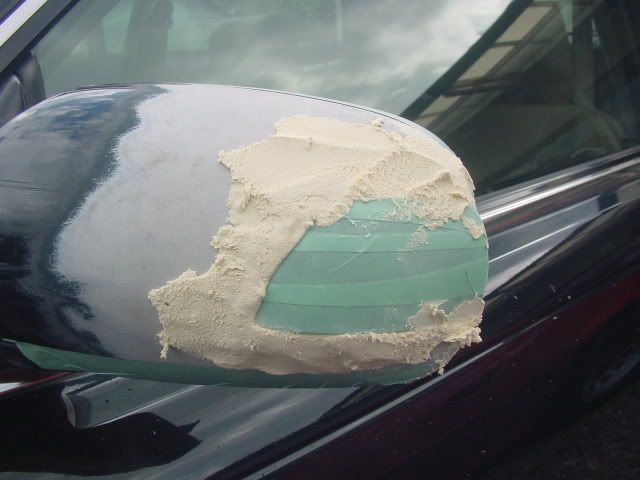
OK this takes a good 3 hours to dry enough to sand so when I get to that point Ill update the thread or you can look at the first pic to see what it looks like before primer.
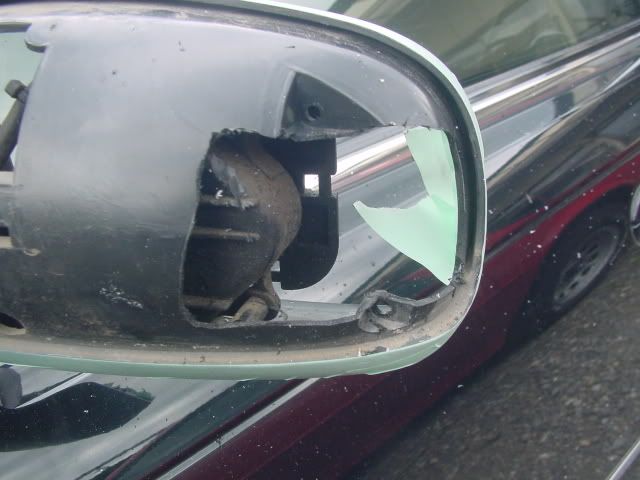
From this part on is just prep and paint. What I did was pull the part then sand the outer to a close conure of the mirror. You want to do that first before sanding the edges of the part. Why well most times the lines will open up as you get close to the levelness of your peice and the body peice.
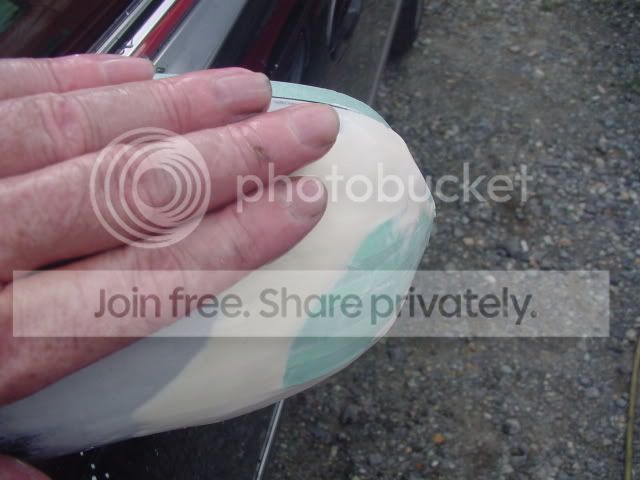
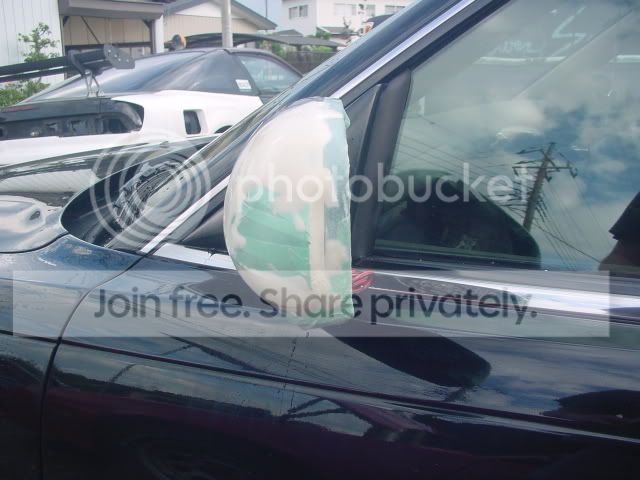
Part pulled and sanded

Here you can see the overlap on the part
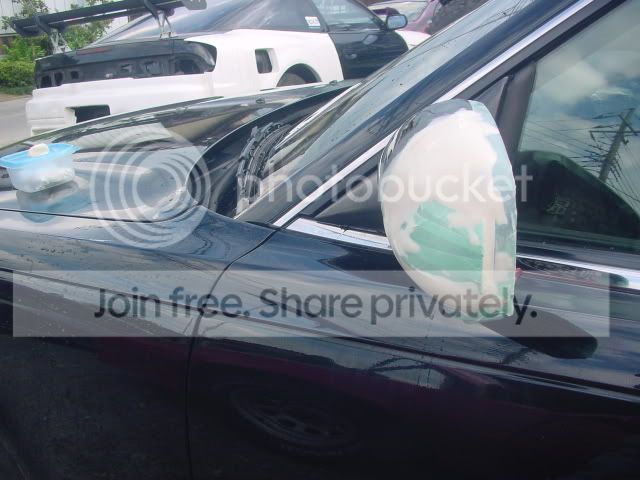
Here you can see the line left by the part
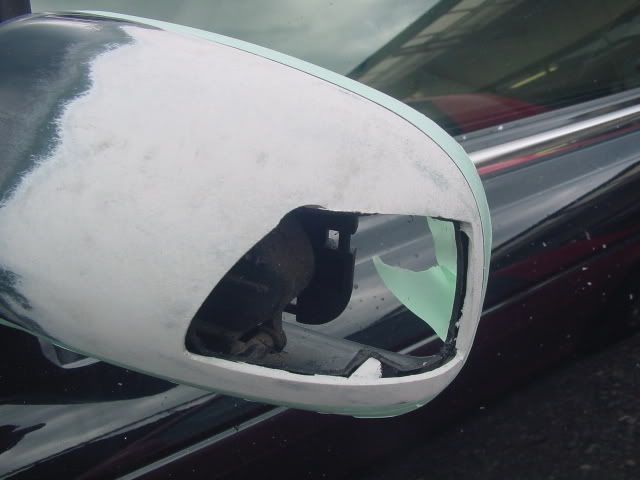
here is where it needs to be sanded back to fit the part I also leveled the over flow to the back side so it is smooth there to.
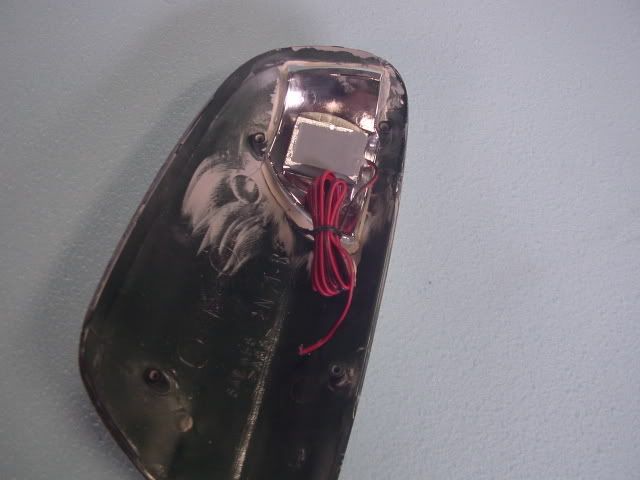
PArt in place
Now I need to sand it back to flush the part here I draw a line to work to
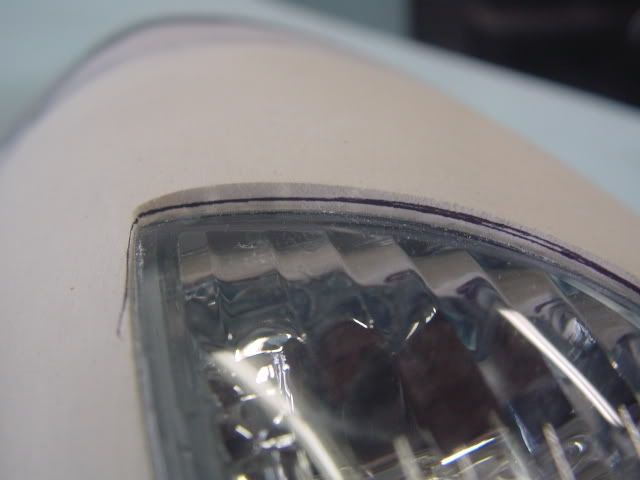
I will need to add putty in behind the lenz to fill in the opening

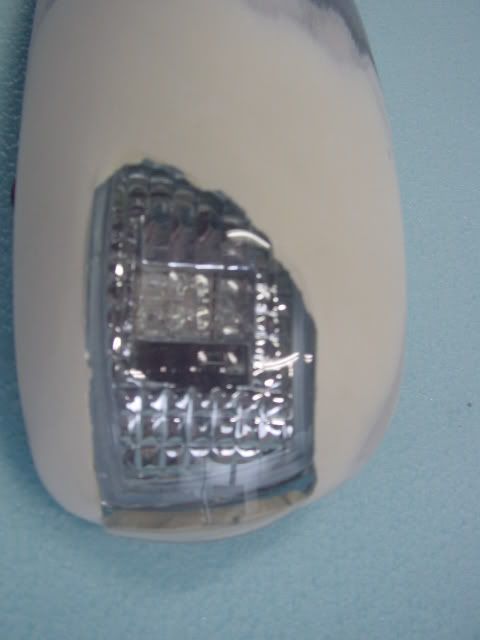
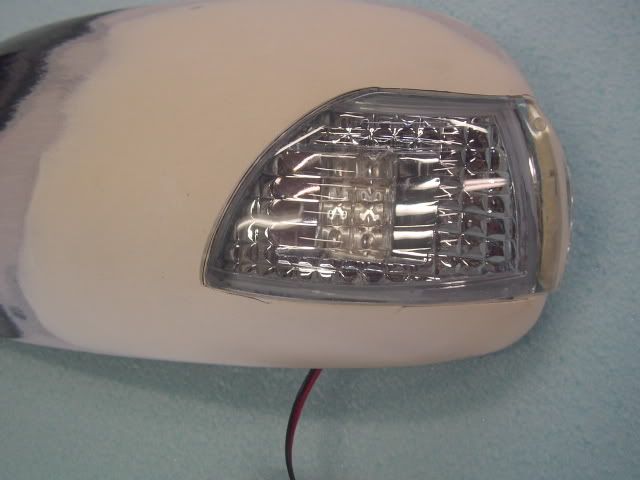
And finaly I will sand it so the lens sticks out enough to compensate for primer and paint. Next pix will be painted. You will need to run the wires threw the door and tap into your turn signal harness.
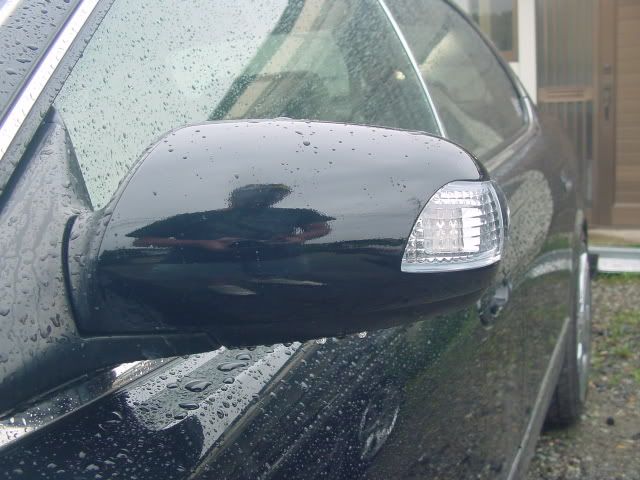
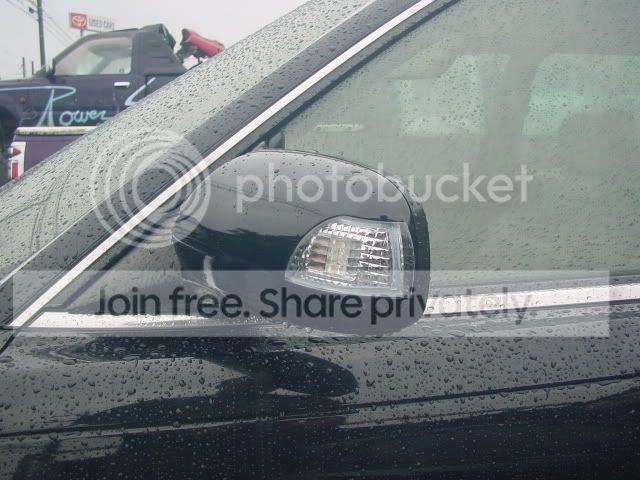
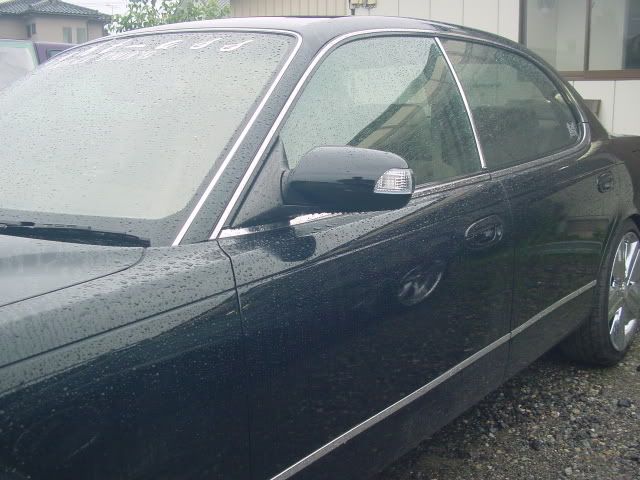
here it is painted and assembled.
Disclamer I cant spell so bear with it.
Ok Make sure you mask your parts off dont be stupid and scratch them or get S#$T on them.
Mark your lines out and try and find a peice that somewhat resembles the conture of your mirror not only the out side but the inside. If your new at this NOW isnt the time to be puting a square peg in a round hole.
Becouse I did the drivers side first I use it to get the location of the passenger side. Now these Sentia mirrors are nice to work with the outer unscrews and makes it stupid easy to do this.
1. masked and ready to mark
2. Now cut it out
3. See if it fits
4. Compare the fir and line up
5. Make sure it fits inside too
6. Cut the inside for the extruded portion of the lens
7. test fit and align everything
8. I usse this modeling epoxy the stuff is wicked for doing this it gets hard as the origional plastic and you can work it with water. you need to mix it one to one
9. Now apply it to the surounding and force it into the cracks you want a little to push threw the back for a tight fit
10. Like I said I can work this with water up to 30 mins so get a bucket of water and start forming it with your hands like a potery project.
You can add and subtract material where needed I went with a little more volume than the parts so I can sand it back to the part depth. Make sure you cary it out far enough so you dont have to throw a bunch of putty back at it latter.
OK this takes a good 3 hours to dry enough to sand so when I get to that point Ill update the thread or you can look at the first pic to see what it looks like before primer.
From this part on is just prep and paint. What I did was pull the part then sand the outer to a close conure of the mirror. You want to do that first before sanding the edges of the part. Why well most times the lines will open up as you get close to the levelness of your peice and the body peice.
Part pulled and sanded
Here you can see the overlap on the part
Here you can see the line left by the part
here is where it needs to be sanded back to fit the part I also leveled the over flow to the back side so it is smooth there to.
PArt in place
Now I need to sand it back to flush the part here I draw a line to work to
I will need to add putty in behind the lenz to fill in the opening
And finaly I will sand it so the lens sticks out enough to compensate for primer and paint. Next pix will be painted. You will need to run the wires threw the door and tap into your turn signal harness.
here it is painted and assembled.


Trending Topics

Registered User
Joined: Aug 2007
Posts: 1
Likes: 0
From: Connecticut
Originally Posted by accordfreak
damn.. where can we can that modeling epoxy stuff in america???
I found that epoxy clay at a hobby site (in Japan):
http://www.1999.co.jp/eng/10040550
After doing the conversion, it's about $25 USD....I wonder where I can get some locally. So many ideas

I'm tempted to get a couple boxes...
Edit: Found what seems to be a similar product called magic sculpt at http://www.sculpt.com (click on on-line catalog and then scroll to Magic Sculpt)
- Jeff
Last edited by Jeff Z; Aug 16, 2007 at 06:55 PM.


Thread
Thread Starter
Forum
Replies
Last Post
bcoffee20
Zs & Gs For Sale
5
Nov 19, 2015 06:39 PM