
DIY: Making Front Diffuser for Nismo Bumper


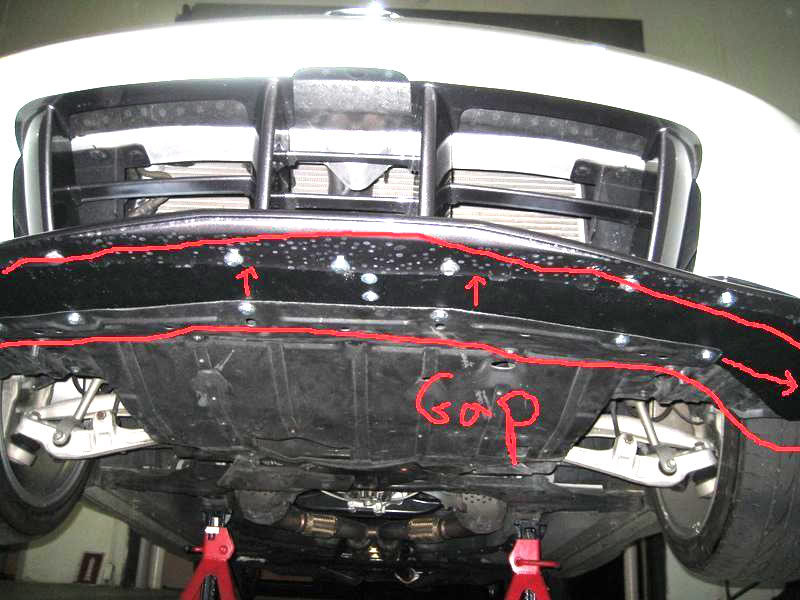
I wanted to make a write up because I think its ridiculous to pay $400 bucks for the lower diffuser when changing to the new nismo bumper. The nismo bumper will fit just fine from any year, but if you want to connect your lower body panel it will not fit because there is about a 6-7" gap to the front bumper. You can ride without the lower body panel but you'll get more drag and the chance of damage to your oil pan. This is what I made for about $15 and 4 hours of sweat and tears.
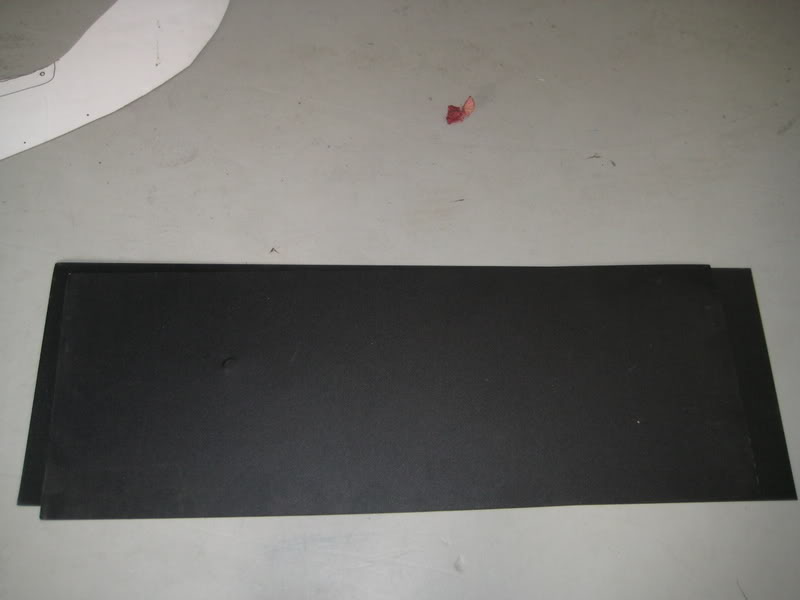
My roommate brought me home some black powder coated sheat metal
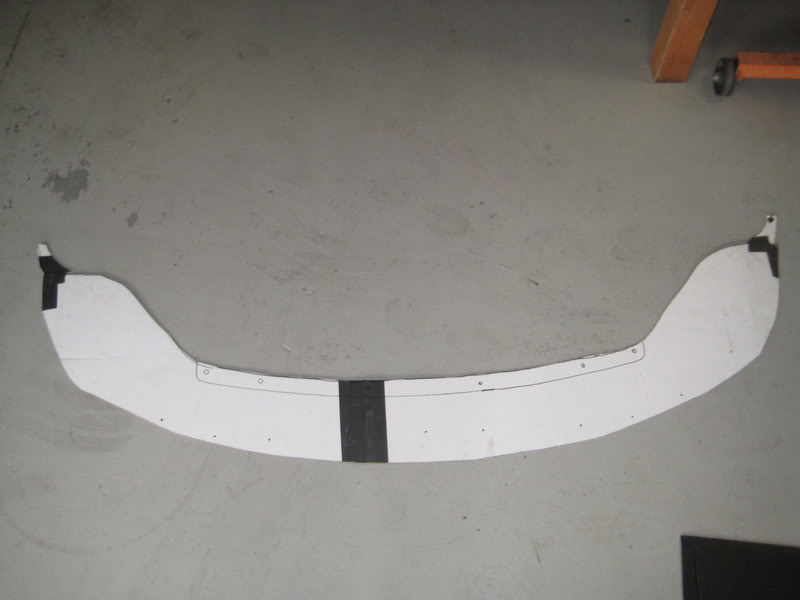
Attached the front bumper and lower body panel, lay cardboard or something underneath and draw out a templet like so.
We had to bolt 2 pieces of sheet metal together because it was not long enough
Traced templet on sheet metal or your material
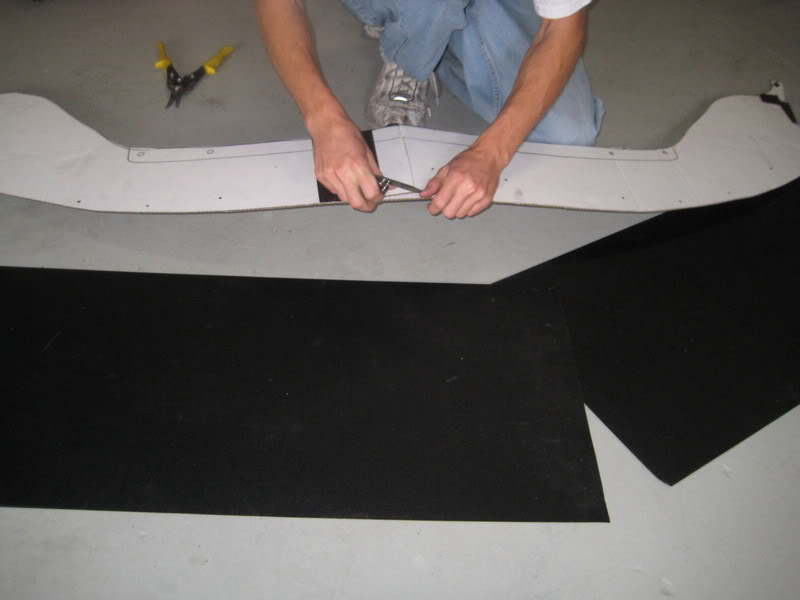
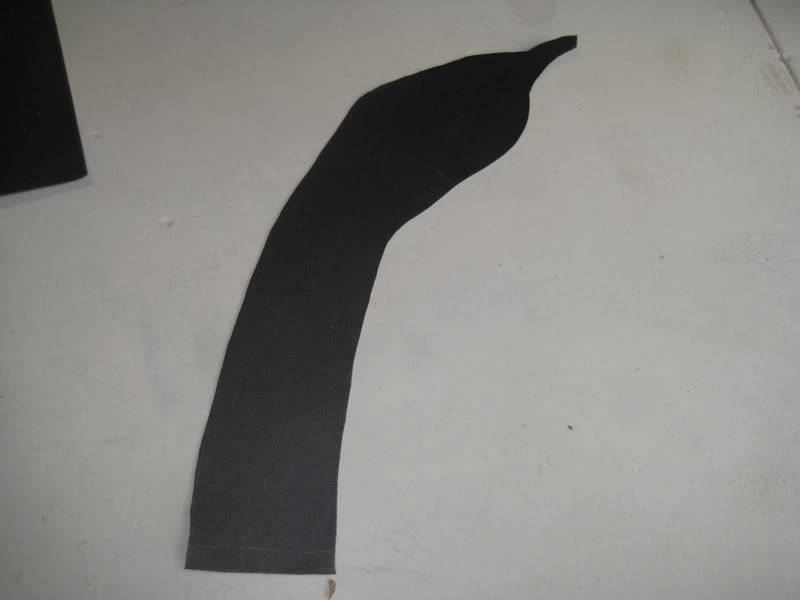
Cut out your traced templet
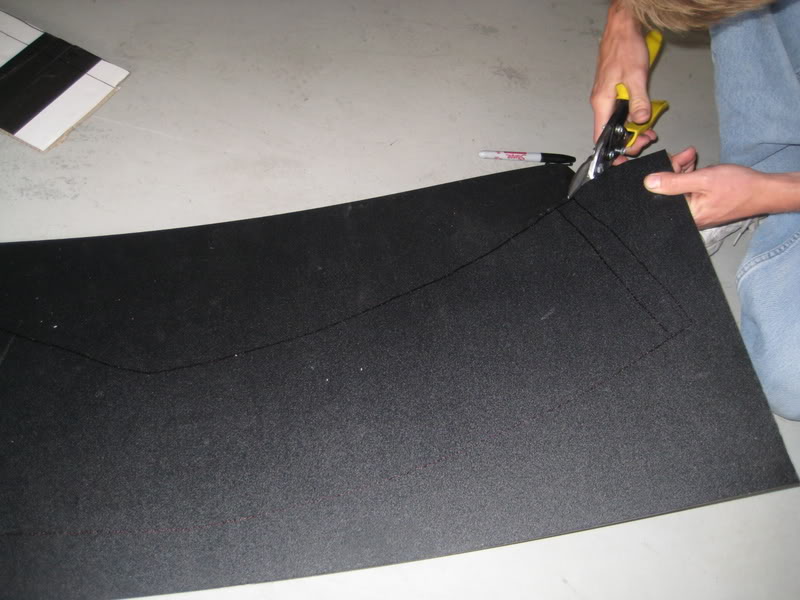
The cut out should look like either a creepy witch finger or condom, which ever is preferable in your house hold.
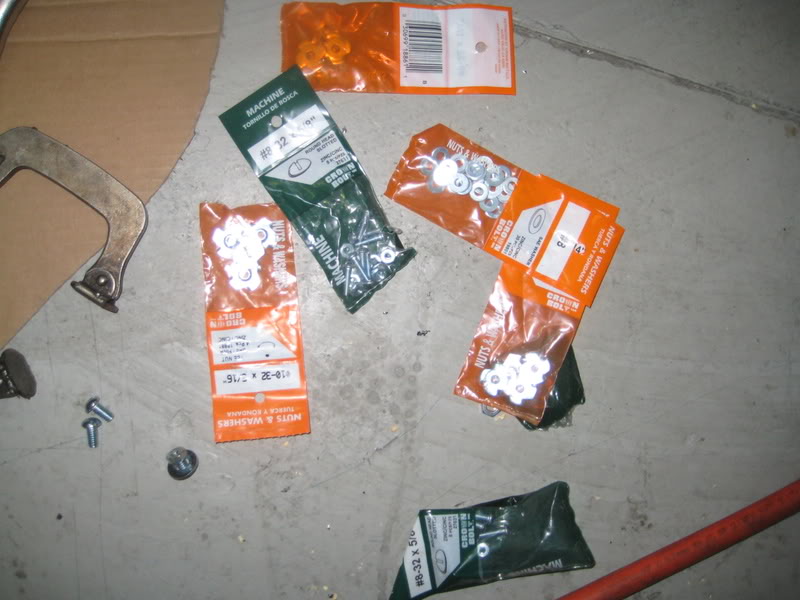
$10-15, the only money spent on this project and kinda went over board buying different sizes as I wasn't sure what would work best until I put it all together
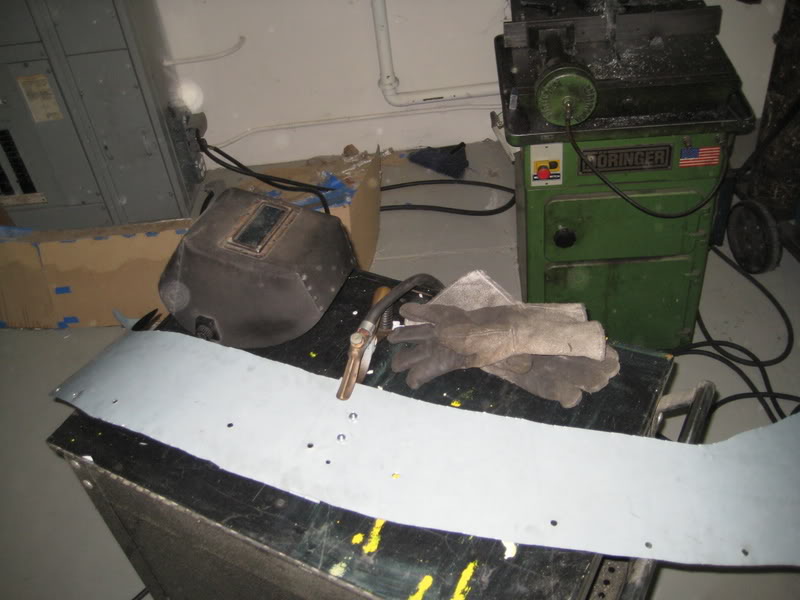
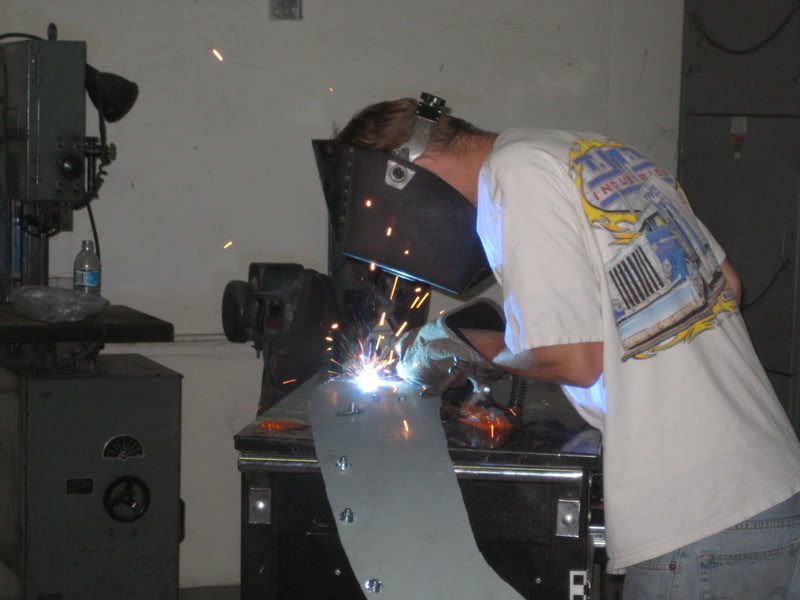
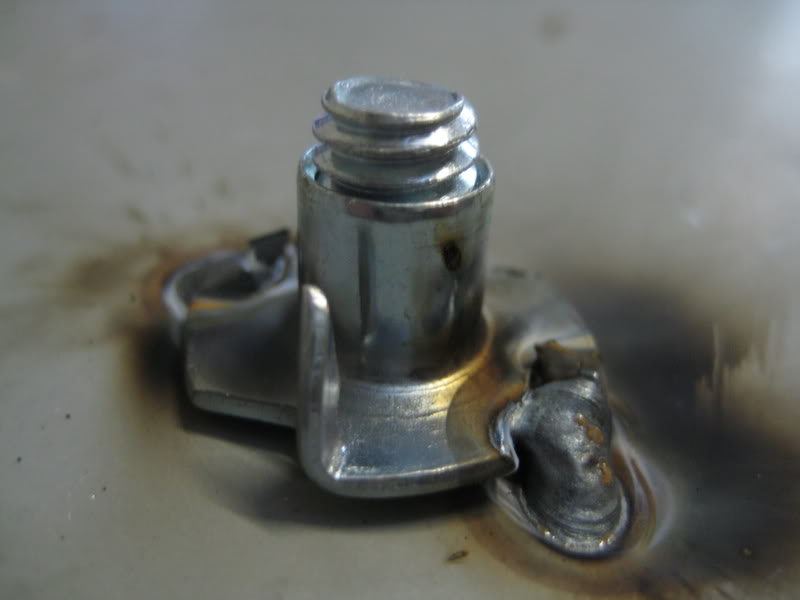
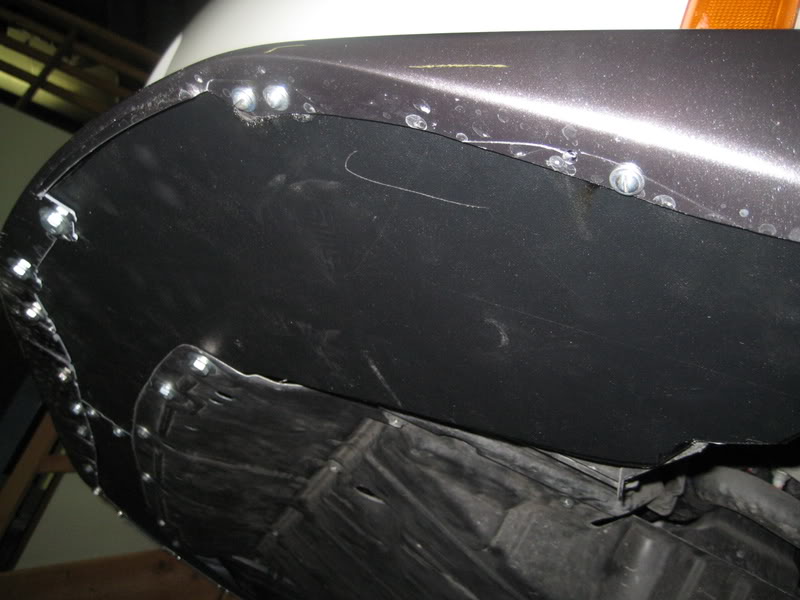
Some of you may not have a welding machine laying around in your garage's, but it is best to make your diffuser removable. We welded on female screw inputs(don't know the real name) so that I would easy to screw the body panal on and off if needed. (ie oil changes)
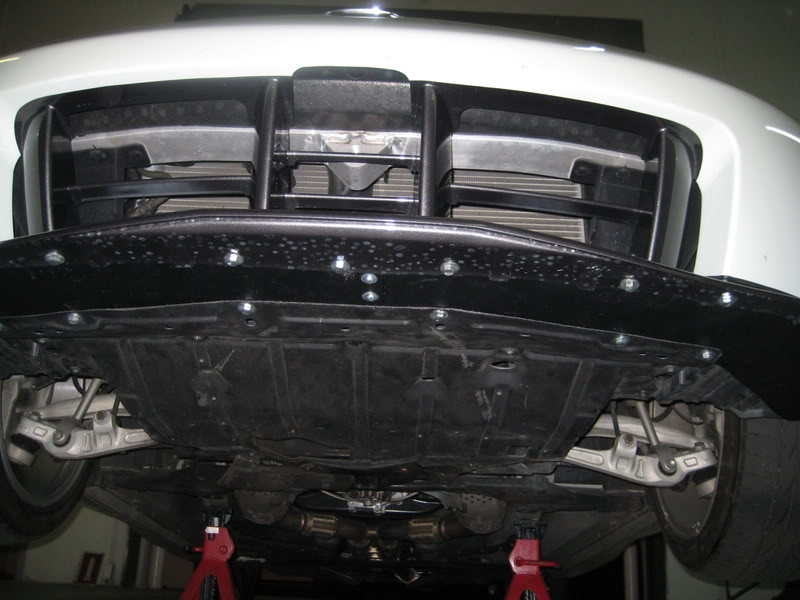
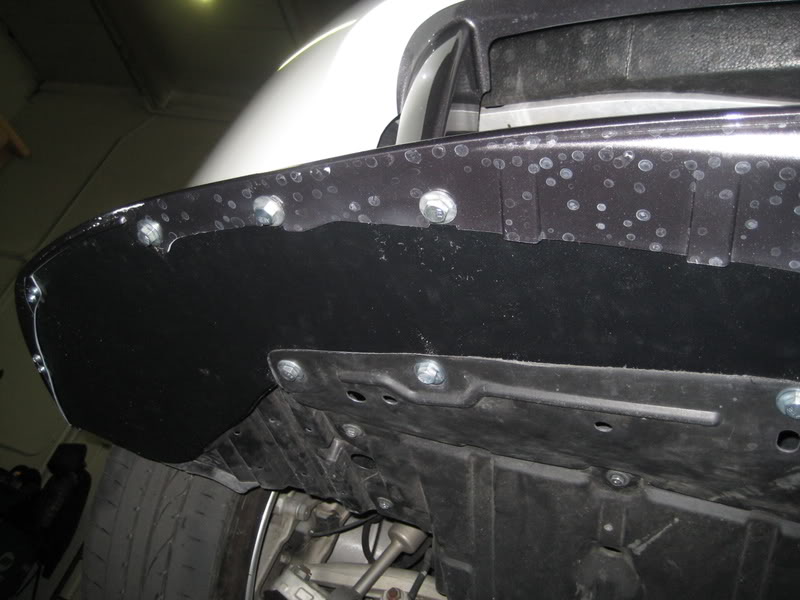
We could have made it look pretty but I just needed something basic and easy to remove if needed. Make sure to attach your diffuser underneath your front bumper so you don't catch drag.
Good luck!
Last edited by evil_tt; Feb 25, 2010 at 05:15 AM.

 LMFAO!...Thanks for the write up!


Trending Topics


Originally Posted by Escobar
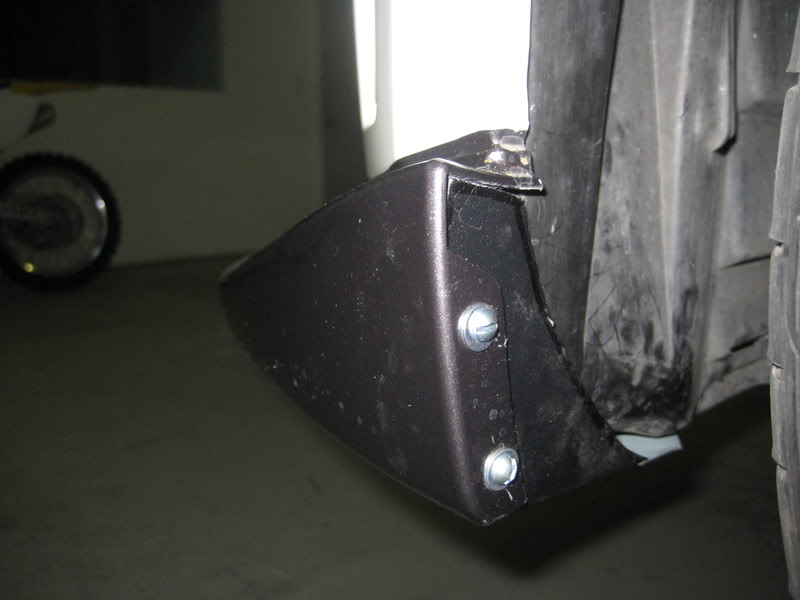
more pics of it finished!


Registered User
Joined: Apr 2009
Posts: 85
Likes: 1
From: Lafayette Louisiana
Nice creative work, but the problem with that setup is that you're missing half the diffuser. the nismo piece didnt cost me $400, and it actually adds a thickness to the bottom side of the diffuser. Also, the reason nissan made it that way was because if you do accidently pull to far forward, hit road debris, or whatever, Its ABS plastic and is very flexible, this allows for it to absorb the hit and not damage you're expensive bumper cover. it also comes with a rubber corner cover that protect the inside of the wheel well. I could already see damage in that area in your last picture. But it works. Im just pointing out the reasons for using that part. Nice write up though.
Last edited by tenn2200; Apr 7, 2009 at 12:19 AM.

Registered User
Joined: Sep 2008
Posts: 11
Likes: 0
From: USA
very impressive diy..now I have the guts to make my own front diffuser..but before it id install my CRE Rocker Flares first..
Last edited by kurtdaniel; Oct 12, 2009 at 05:55 PM.


Thread
Thread Starter
Forum
Replies
Last Post
xirtam
Zs & Gs For Sale
5
Oct 3, 2015 02:06 PM
hardkicks
Zs & Gs For Sale
0
Sep 20, 2015 12:28 PM