
DIY: How to install Aerocatch hood pins!!


well i thought it would be a good idea to do a DIY on how to install aerocatch hood pins,since so many people asking on how to do(it�s not that hard as it looks like).
i didn�t had a camera near by as i installed the hood pins, so i�ll use several pics of cars with them on.but enough talked now we�ll go on.
TOOLS NEEDED: a Dremel, several drills and some tools to tighten the hood pins
STEP 1: remove your stock hood and put your new aftermarket hood on by loosen the 4 nuts (ask someone for help, cause it�s nearly impossible to do this on your own).
STEP 2: now through on your new hood and make sure it cleares the strut and other parts of the engine bay.take a look on how the surface bend or not(a helping hand is also needed a second wrench is also very helpfull)
STEP 3: if the hood cleares just try to lock the hood, just to make sure it locks at all. if not take a closer look at the clearence of the hood (maybe you have to cut out some portions of it, if you wnat to.if not use some washers to raise to hood a little bit or just adjust the hood lock assembly)
STEP 4: now would be a good time to have a closer look on where to install the studs at.nissan did a great job on that just use the 2 holes allready drilled (marked on the pic)

STEP 5: put the studs in the holes (the driver side pin needs to be cut down to fit. about 1 cm).you don�t have to tighten them. just trough them in and fine for now.
STEP 6: (hood open as shown on pic) now measure the distance(as shown on the pic).use the upper part of the stud and measure down to the front bumper and the head light(just mark the point where you measured at)

STEP 7: now close the hood and measure out the poitn where the stud should be (you need to remove the stud to be able to close the hood).mark the point and drill your first hole into the hood .it�s regardless what size the drill has, since you just need the hole to look where you have to place the hood pin template.be very carefull while drilling the hole, cause you don�t want to crack your hood(even more careful while drilling into cf.maybe use a drill for wood).now it should look like this.

STEP 8: now open the hood, through the sutds in the holes and close the hood(if it�s possible. if not you maybe have to drill bigger holes) if your fine go on to the next step.
STEP 9: now this is the most important step. now lay down the template which was provided with the aerocatch hood pins (maybe tape it down).
the cross hair has to aim at the center of the stud�s head.
and this is the point where i "failed" at. you don�t have to forget that the aerocatch assembly will sit 2cm lower then the template!!!! which means that you have to place the cross hair a little bit more towards the windshield of the car(more off center of the stud).don�t ask me how far, cause i don�t have a f+#king clue .
.
could be just some mm or even some cm.guess you have to figure out how much or you have to modify the aerocatch hood pins to fit.
STEP 10: now cut out the hole for the aerocatch hood pins using the dremel.
i had to cut trough two seperate layers of fibre glass on my ING`S hood.be carefull while you�re cutting not to damag the hood.just take little by little or the hole could be to big for the aerocatch.
STEP 11: now the moment of truth . this is the point where you�ll see if all worked out fine or you just failed. through in the studs (adjust the hight of the stud), tighten them (you have to remove the air box and the water tank to tighten the studs), close the hood and put the aerocatch (in open position) into the hood and have a look if everything fits just fine.if not don�t get pissed, there�s still a way to fix it(so i did).just modify the aerocatch and the stud (maybe bend it or just remove some material from it).this step could use some time since it�s a try and error one . it took me about 1 h for each side .
.
STEP 12: now that the aerocatch fits and works fine it�s time to bolt them down.close the hood, through the aerocatch in and close it.mark the 6 holes and carefully drill them.after you�re done use the provided bolts and bolt the aerocatch to your hood.
STEP 13: have a look at your work
should look like this
now you�re done. you�ll maybe have to do some adjustments and you�re really done with it, but that�s it.
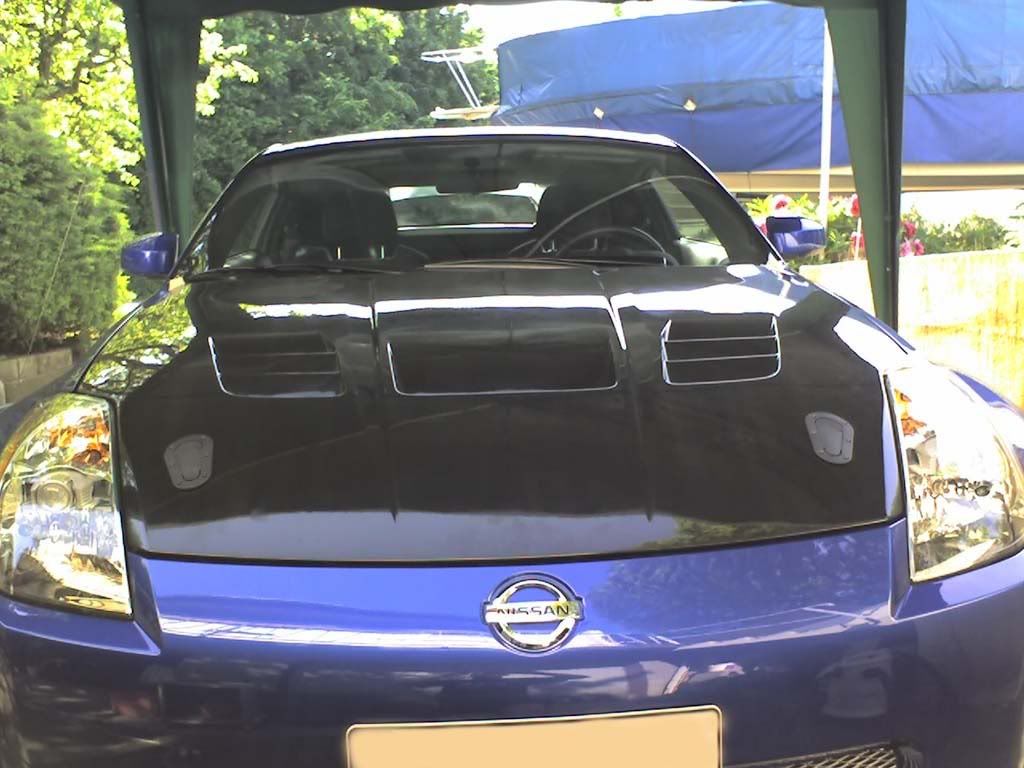
here is a litlle reference how the installed studs should look like.

i hope it�s understandable (sorry for my poor english).
it�s not that hard to install them if you have the right tools by hand and some time to do install.
if there�re still some questions or i just forgot something, just let me know.
cheers and have fun
i didn�t had a camera near by as i installed the hood pins, so i�ll use several pics of cars with them on.but enough talked now we�ll go on.
TOOLS NEEDED: a Dremel, several drills and some tools to tighten the hood pins
STEP 1: remove your stock hood and put your new aftermarket hood on by loosen the 4 nuts (ask someone for help, cause it�s nearly impossible to do this on your own).
STEP 2: now through on your new hood and make sure it cleares the strut and other parts of the engine bay.take a look on how the surface bend or not(a helping hand is also needed a second wrench is also very helpfull)
STEP 3: if the hood cleares just try to lock the hood, just to make sure it locks at all. if not take a closer look at the clearence of the hood (maybe you have to cut out some portions of it, if you wnat to.if not use some washers to raise to hood a little bit or just adjust the hood lock assembly)
STEP 4: now would be a good time to have a closer look on where to install the studs at.nissan did a great job on that
just use the 2 holes allready drilled (marked on the pic)STEP 5: put the studs in the holes (the driver side pin needs to be cut down to fit. about 1 cm).you don�t have to tighten them. just trough them in and fine for now.
STEP 6: (hood open as shown on pic) now measure the distance(as shown on the pic).use the upper part of the stud and measure down to the front bumper and the head light(just mark the point where you measured at)
STEP 7: now close the hood and measure out the poitn where the stud should be (you need to remove the stud to be able to close the hood).mark the point and drill your first hole into the hood
.it�s regardless what size the drill has, since you just need the hole to look where you have to place the hood pin template.be very carefull while drilling the hole, cause you don�t want to crack your hood(even more careful while drilling into cf.maybe use a drill for wood).now it should look like this.STEP 8: now open the hood, through the sutds in the holes and close the hood(if it�s possible. if not you maybe have to drill bigger holes) if your fine go on to the next step.
STEP 9: now this is the most important step. now lay down the template which was provided with the aerocatch hood pins (maybe tape it down).
the cross hair has to aim at the center of the stud�s head.
and this is the point where i "failed" at. you don�t have to forget that the aerocatch assembly will sit 2cm lower then the template!!!! which means that you have to place the cross hair a little bit more towards the windshield of the car(more off center of the stud).don�t ask me how far, cause i don�t have a f+#king clue
.could be just some mm or even some cm.guess you have to figure out how much or you have to modify the aerocatch hood pins to fit.
STEP 10: now cut out the hole for the aerocatch hood pins using the dremel.
i had to cut trough two seperate layers of fibre glass on my ING`S hood.be carefull while you�re cutting not to damag the hood.just take little by little or the hole could be to big for the aerocatch.
STEP 11: now the moment of truth
. this is the point where you�ll see if all worked out fine or you just failed. through in the studs (adjust the hight of the stud), tighten them (you have to remove the air box and the water tank to tighten the studs), close the hood and put the aerocatch (in open position) into the hood and have a look if everything fits just fine.if not don�t get pissed, there�s still a way to fix it(so i did).just modify the aerocatch and the stud (maybe bend it or just remove some material from it).this step could use some time since it�s a try and error one . it took me about 1 h for each side .STEP 12: now that the aerocatch fits and works fine it�s time to bolt them down.close the hood, through the aerocatch in and close it.mark the 6 holes and carefully drill them.after you�re done use the provided bolts and bolt the aerocatch to your hood.
STEP 13: have a look at your work
should look like this
now you�re done. you�ll maybe have to do some adjustments and you�re really done with it, but that�s it.
here is a litlle reference how the installed studs should look like.
i hope it�s understandable (sorry for my poor english).
it�s not that hard to install them if you have the right tools by hand and some time to do install.
if there�re still some questions or i just forgot something, just let me know.
cheers and have fun
Last edited by XM 1; Jun 7, 2008 at 09:51 AM.


This is awesome man! Thanks a lot for this write up!
Oddly enough, I bought the same hood, and I should have it in my greedly little hands by the end of the month!
Where'd you get the aerocatch pins from? I'm looking for a set right now!
Oddly enough, I bought the same hood, and I should have it in my greedly little hands by the end of the month!
Where'd you get the aerocatch pins from? I'm looking for a set right now!

that's those damned hood pins!... i've been trying to figure out what the hell those were for the longest time (trying to figure what kind of hood pin not simply that they were hood pins)... thanks for that... i have my hood (the evil POS that is it) pinned on at all four corners with cam-pin locking hoodpins... the front ones were easy enough... though we made and mounted some brackets to tilt the stud perpendicular to that part of the hood... the back ones were a little more interesting though... maybe i'll do a right up on that sometime

Trending Topics


Thread
Thread Starter
Forum
Replies
Last Post