Notices

DIY: Black Housing

Thread Tools
 
Search this Thread
 
Old 07-28-2007, 08:07 AM
  #61  
ryan350z
Registered User
iTrader: (18)
 
ryan350z's Avatar
 
Join Date: Dec 2003
Location: Cape Coral Florida
Posts: 538
Likes: 0
Received 0 Likes on 0 Posts
Default

Originally Posted by Qwiksillva
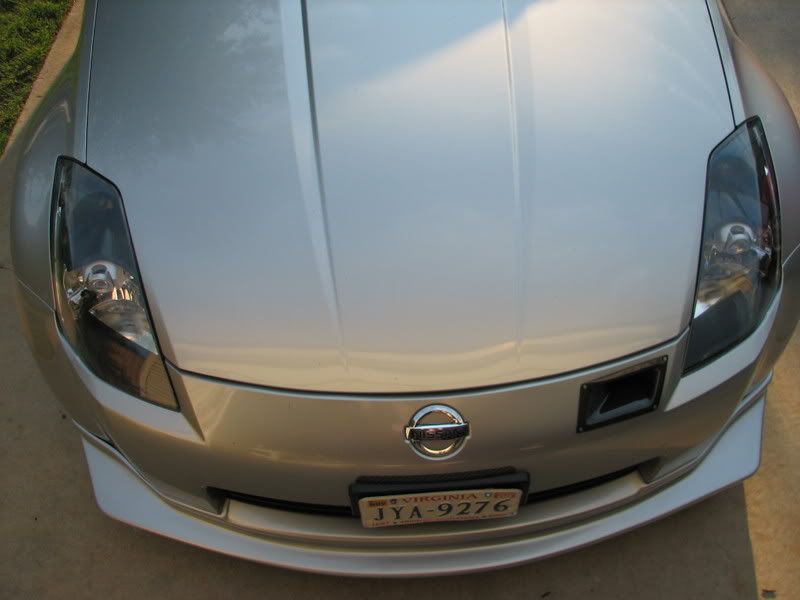
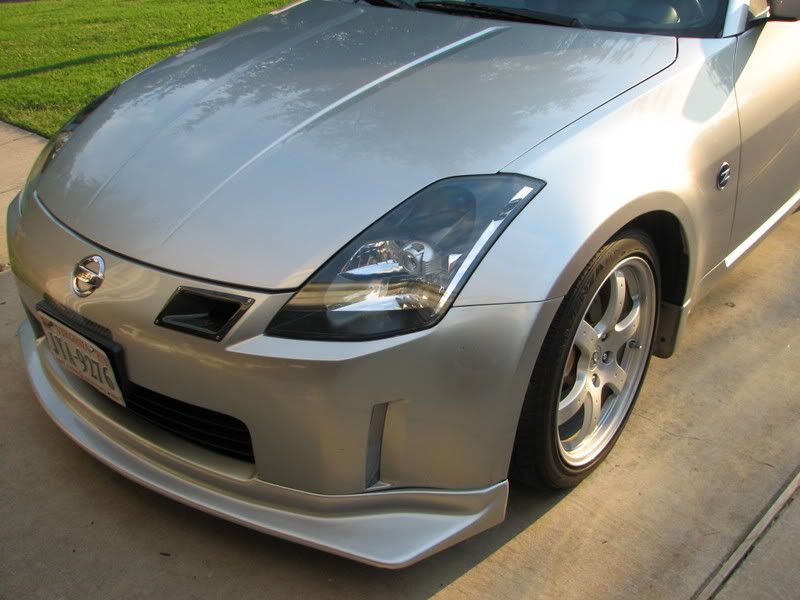
I finally got mine done. I like it a lot.


Looks great!! I had to re-do my left headlamp as it appears I am not so perfect after all, lol. Got some water in there.
Old 07-28-2007, 11:13 AM
  #62  
ill350
Registered User
iTrader: (1)
 
ill350's Avatar
 
Join Date: Mar 2007
Location: Maryland
Posts: 135
Likes: 0
Received 0 Likes on 0 Posts
Default

Help Quick-

I have the headlights apart and painted (drying) - but where do you get the clear strips from to replace the orange one's!!

Thanks
Old 07-28-2007, 12:04 PM
  #63  
pinktuscani03
Registered User
 
pinktuscani03's Avatar
 
Join Date: May 2007
Location: Jonesboro, Arkansas
Posts: 44
Likes: 0
Received 0 Likes on 0 Posts
Default

great write up..im also wondering about the orange strip...
Old 07-28-2007, 12:47 PM
  #64  
ryan350z
Registered User
iTrader: (18)
 
ryan350z's Avatar
 
Join Date: Dec 2003
Location: Cape Coral Florida
Posts: 538
Likes: 0
Received 0 Likes on 0 Posts
Default

i think you can get them from clear corners, do a search adn I am sure there are more suppliers out there.
Old 07-28-2007, 04:40 PM
  #65  
cheshirecat79
New Member
iTrader: (9)
 
cheshirecat79's Avatar
 
Join Date: Apr 2007
Location: Port St. Lucie, FL
Posts: 15,936
Likes: 0
Received 4 Likes on 4 Posts
Default

From what I understand (i have an 06 but pretty sure I read it somewhere) people have been able to scrape the orange stripe thing off somehow. I could be wrong.

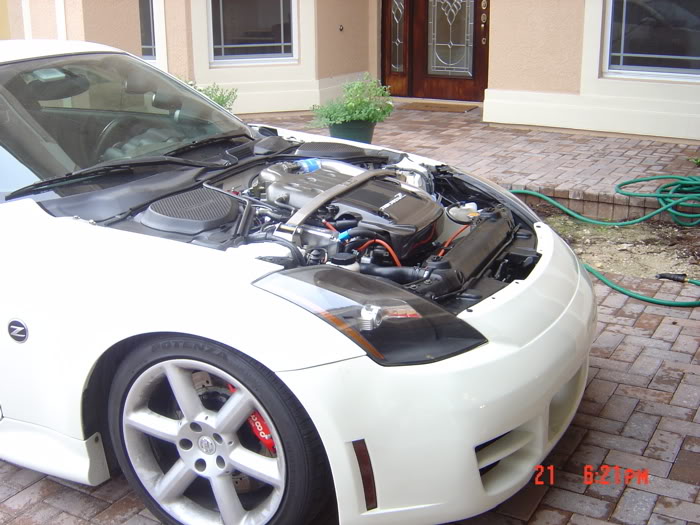
I've also got my headlights apart right now. Plan on finishing them tomorrow. Got some water in the ballast, but drained and dried it and it's working good as new, thank god.
Old 07-29-2007, 04:43 PM
  #66  
cheshirecat79
New Member
iTrader: (9)
 
cheshirecat79's Avatar
 
Join Date: Apr 2007
Location: Port St. Lucie, FL
Posts: 15,936
Likes: 0
Received 4 Likes on 4 Posts
Default

Finished redoing mine this afternoon. Took some pictures around sunset, so this one might be a little dark. Just another example to add to the gallery.

Old 07-30-2007, 11:44 AM
  #67  
brandonanix
Registered User
iTrader: (8)
 
brandonanix's Avatar
 
Join Date: Oct 2006
Location: OC and Rancho Cucamonga, CA
Posts: 671
Likes: 0
Received 0 Likes on 0 Posts
Default

Originally Posted by almond1294
your car looks tight!!! is there a lot of prep work needed? or is it just pretty much a disassemble and spray job? and u recommend satin, right?

I did no prep at all, just took them apart, and sprayed them, and yes, Satin black ftw!
Old 07-30-2007, 11:48 AM
  #68  
ZCor
Registered User
 
ZCor's Avatar
 
Join Date: Jun 2007
Location: somerset KY
Posts: 84
Likes: 0
Received 0 Likes on 0 Posts
Default

so you can do this to the stock headlights right...and they wont melt if you do it right?!
Old 07-30-2007, 01:07 PM
  #69  
LaoSiFu
Registered User
Thread Starter
iTrader: (97)
 
LaoSiFu's Avatar
 
Join Date: Jun 2003
Location: Los Angeles County
Posts: 2,820
Likes: 0
Received 0 Likes on 0 Posts
Default

Originally Posted by ZCor
so you can do this to the stock headlights right...and they wont melt if you do it right?!
These instruction I provided was for the stock headlights. I don't know if there are afktmkt headlights out there but correct me if I am wrong. and yes, they shouldn't melt if you do it right.

~Robert
Old 07-30-2007, 01:21 PM
  #70  
ZCor
Registered User
 
ZCor's Avatar
 
Join Date: Jun 2007
Location: somerset KY
Posts: 84
Likes: 0
Received 0 Likes on 0 Posts
Default

ok thanks alot Robert!
Old 07-30-2007, 02:30 PM
  #71  
LaoSiFu
Registered User
Thread Starter
iTrader: (97)
 
LaoSiFu's Avatar
 
Join Date: Jun 2003
Location: Los Angeles County
Posts: 2,820
Likes: 0
Received 0 Likes on 0 Posts
Default

Originally Posted by ZCor
ok thanks alot Robert!
NP and feel free to ask if you get stuck somewhere.

~Robert
Old 07-31-2007, 06:42 AM
  #72  
kilswitchengage
Registered User
iTrader: (2)
 
kilswitchengage's Avatar
 
Join Date: Jul 2006
Location: houston
Posts: 91
Likes: 0
Received 0 Likes on 0 Posts
Default

any fog yet?
Old 08-01-2007, 01:12 AM
  #73  
mw9
Registered User
iTrader: (51)
 
mw9's Avatar
 
Join Date: Oct 2006
Location: cincinnati
Posts: 2,405
Likes: 0
Received 5 Likes on 5 Posts
Default

good work, I'll have to try it
Old 08-08-2007, 06:33 PM
  #74  
ryan350z
Registered User
iTrader: (18)
 
ryan350z's Avatar
 
Join Date: Dec 2003
Location: Cape Coral Florida
Posts: 538
Likes: 0
Received 0 Likes on 0 Posts
Default

Name:  blackhead.jpg
Views: 391
Size:  80.3 KB

A pic for you all
Old 10-19-2007, 06:29 PM
  #75  
12v_dub
Registered User
 
12v_dub's Avatar
 
Join Date: Sep 2007
Location: Atlanta, GA
Posts: 13
Likes: 0
Received 0 Likes on 0 Posts
Default

Got some spare time to do my headlights on 06' 350. first headlight took me a while to figure out how things come off and being careful not to break anything. painted mine flat black with 3 coats and it came out as i thought it would. thanks for a great write up!

Here's some pics of my work ....


Old 10-19-2007, 09:56 PM
  #76  
LaoSiFu
Registered User
Thread Starter
iTrader: (97)
 
LaoSiFu's Avatar
 
Join Date: Jun 2003
Location: Los Angeles County
Posts: 2,820
Likes: 0
Received 0 Likes on 0 Posts
Default

^ sweet, glad my instruction came handy.

~Robert
Old 10-20-2007, 11:59 AM
  #77  
12v_dub
Registered User
 
12v_dub's Avatar
 
Join Date: Sep 2007
Location: Atlanta, GA
Posts: 13
Likes: 0
Received 0 Likes on 0 Posts
Default

thanks, here's one more of the car

Old 10-23-2007, 11:19 AM
  #78  
usmanasif
Registered User
iTrader: (4)
 
usmanasif's Avatar
 
Join Date: Aug 2005
Location: Mile High City
Posts: 4,046
Likes: 0
Received 1 Like on 1 Post
Default

Originally Posted by 12v_dub
Got some spare time to do my headlights on 06' 350. first headlight took me a while to figure out how things come off and being careful not to break anything. painted mine flat black with 3 coats and it came out as i thought it would. thanks for a great write up!
Good job but removing the diffuser for the blinker bulb gives a much better look; shows off the entire headlight. And with the housing painted, the blinker is pretty much toast during the day anyway, diffuser can't help it much.
Old 10-24-2007, 06:36 AM
  #79  
12v_dub
Registered User
 
12v_dub's Avatar
 
Join Date: Sep 2007
Location: Atlanta, GA
Posts: 13
Likes: 0
Received 0 Likes on 0 Posts
Default

Originally Posted by usmanasif
Good job but removing the diffuser for the blinker bulb gives a much better look; shows off the entire headlight. And with the housing painted, the blinker is pretty much toast during the day anyway, diffuser can't help it much.
Did not think of that, thanks for the input. What does it do for the bulb? gives it more light?
Old 10-24-2007, 08:32 AM
  #80  
imonlykidden
Registered User
iTrader: (11)
 
imonlykidden's Avatar
 
Join Date: Apr 2006
Location: My own world!
Posts: 7,723
Likes: 0
Received 0 Likes on 0 Posts
Default

Looks great, wish i had the 06 lights so i could have it all black.
mines just the bottom part and sides of the 05 lights. oh well. still looks good either way.

good job.


Quick Reply: DIY: Black Housing


All times are GMT -8. The time now is 10:07 AM.