
370Z to 350Z Transmission Conversion


Thread Starter
Registered User
Joined: Mar 2009
Posts: 28
Likes: 0
From: Arkansas
A few months ago I found a 370Z transmission for sale for $600 brand new. When I purchased it, I already knew the bellhousing bolt pattern would be different, not to mention the concentric slave setup.
Having a 2004 350Z with grinding gears, and new transmissions being $2k, I thought it would be worth a shot. My plan was to mount my 350Z bellhousing and front cover to the guts of the 370Z transmission. I should just be able to swap bellhousings right?
While awaiting delivery from my freight shipper, I started to do extensive research on the internal component differences. The NISSAN FAST software was very useful in this.
Not long did it take me to realize, that the input shaft bearing may be different sizes among the different year models. Although the software did not specifically state sizes and such, it did list different part numbers, so I could only assume.
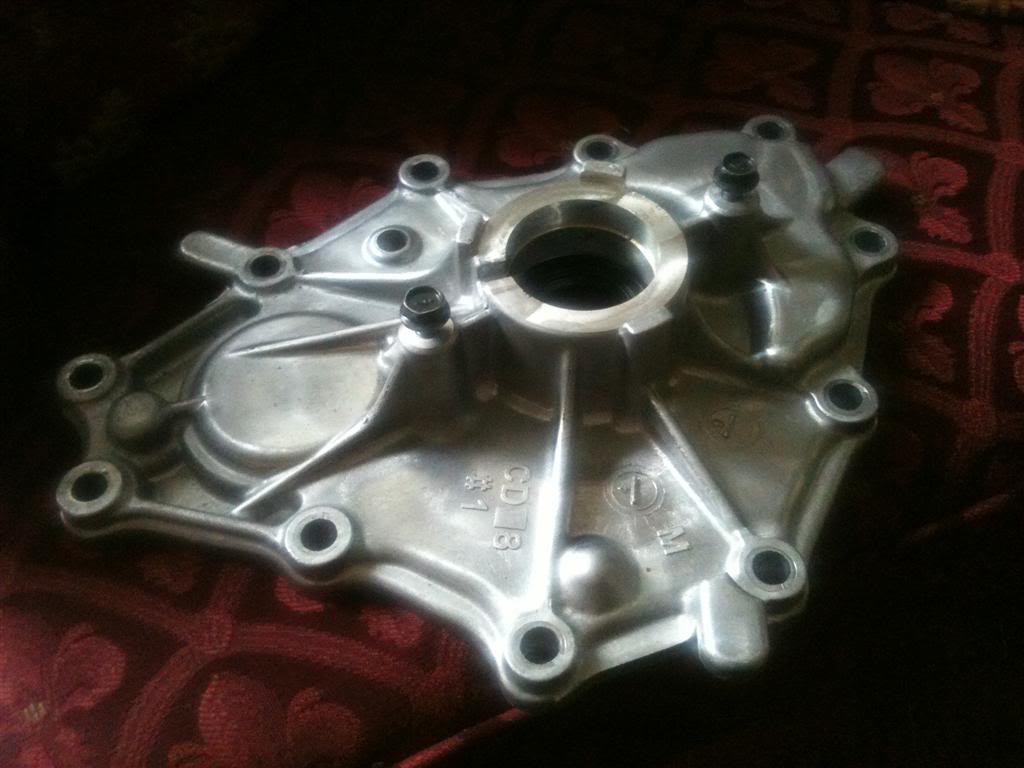
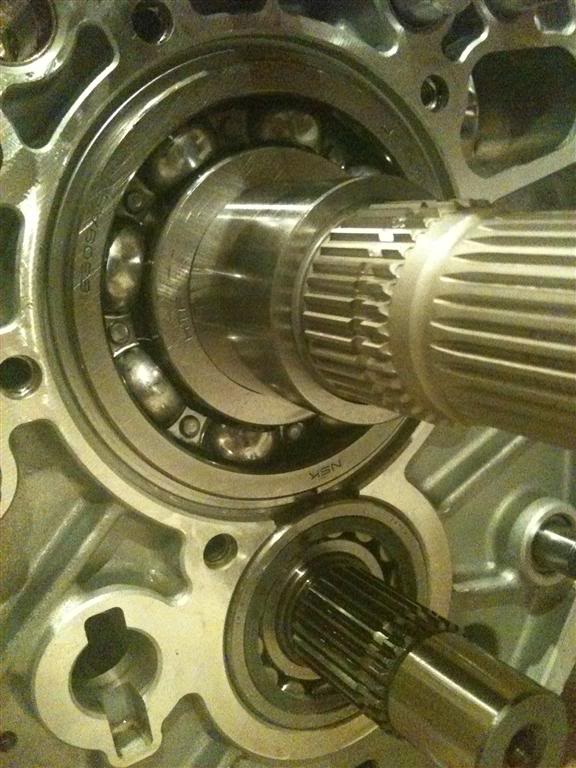
Few days later, my 370Z trans showed up on my doorstep. First thing I did was remove the front cover. Here is what I found:
370Z Front Cover:
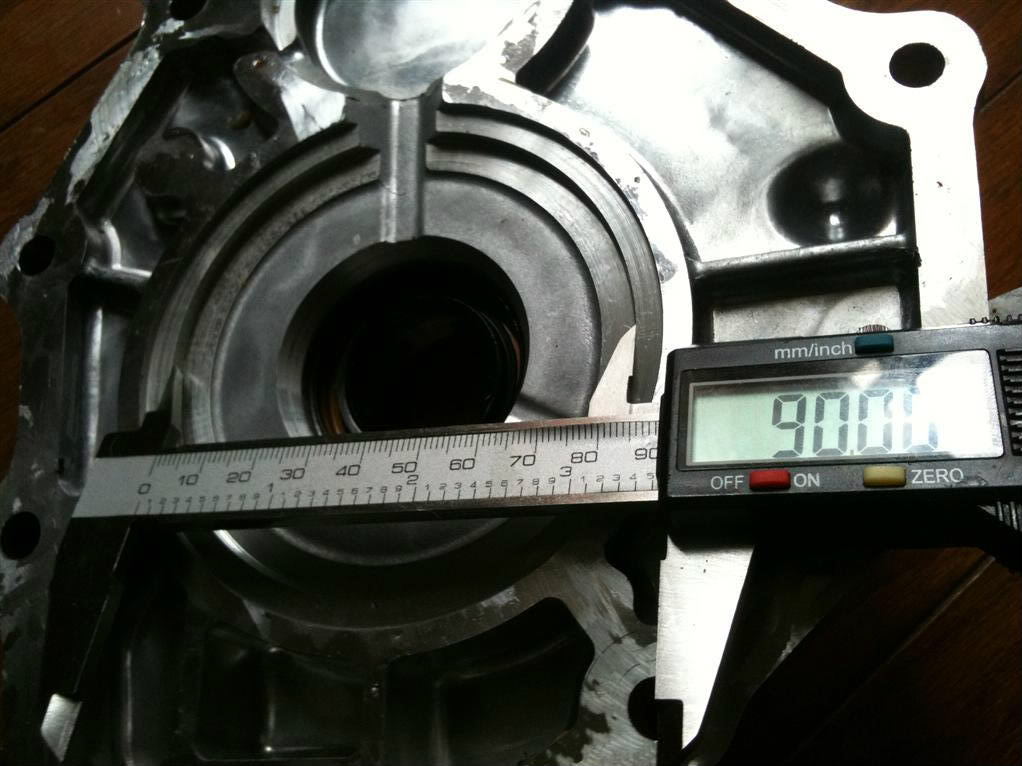
370Z Front Cover (bearing size):
370Z Bearing:
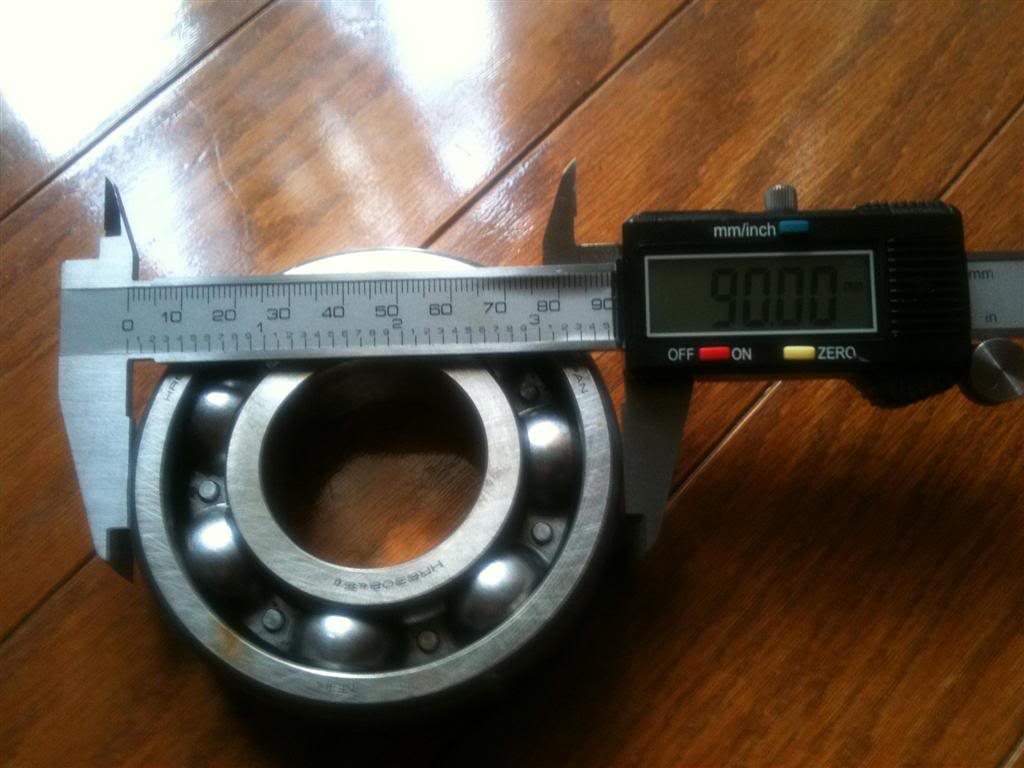
As you can see the bearing size is 90mm. This was not good as my 2004 350Z has a 100mm bearing size:
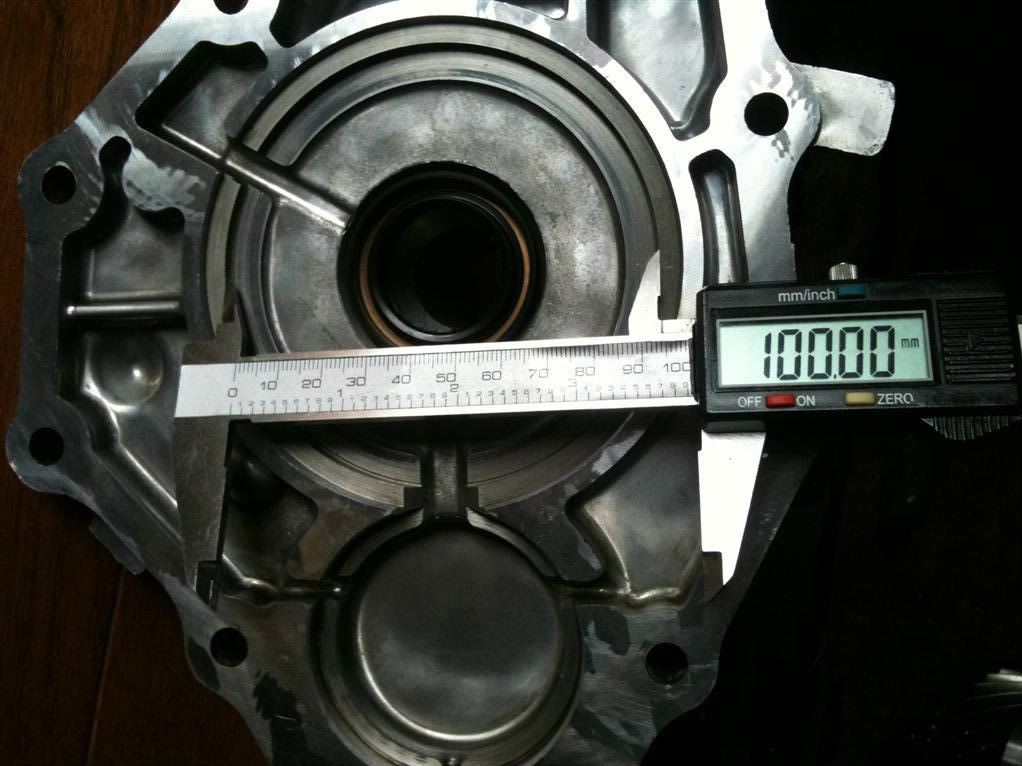
350Z Front Cover (bearing size)
350Z Bearing:
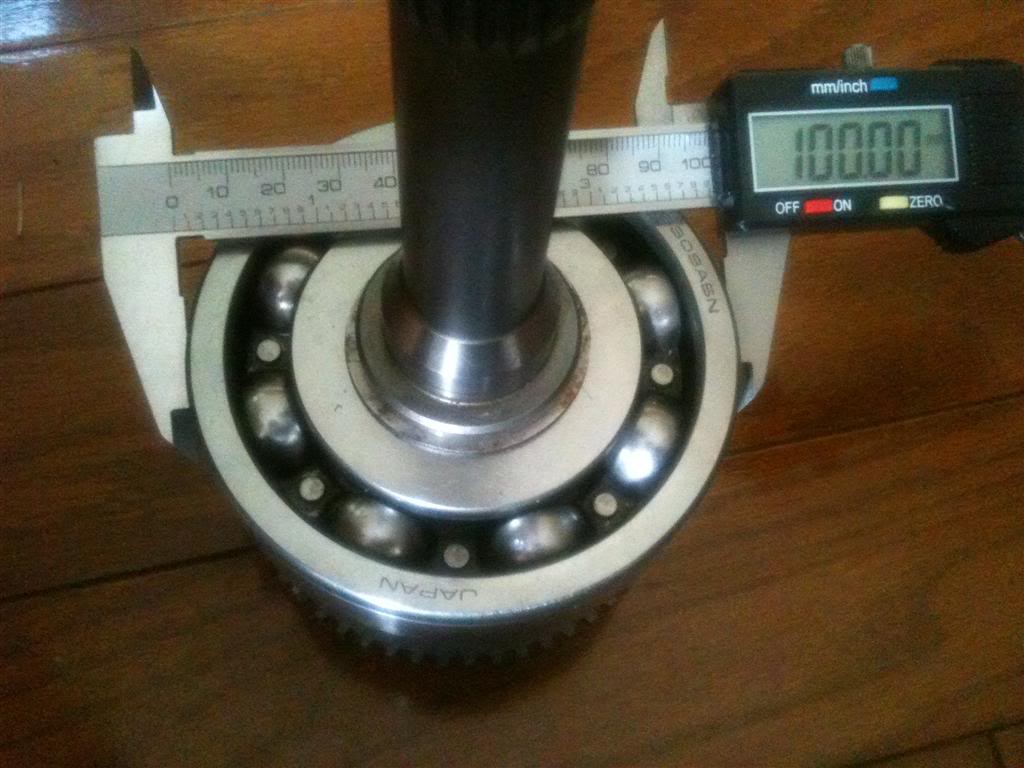
If you hadn't already noticed, this means I can't just swap bellhousings. The 370Z bearing and shaft will fit into my bellhousing. My front cover will also fit. The problem is that my front cover is 100mm and the bearing going in it is only 90mm. That would never work. There would be nothing supporting the bearing.
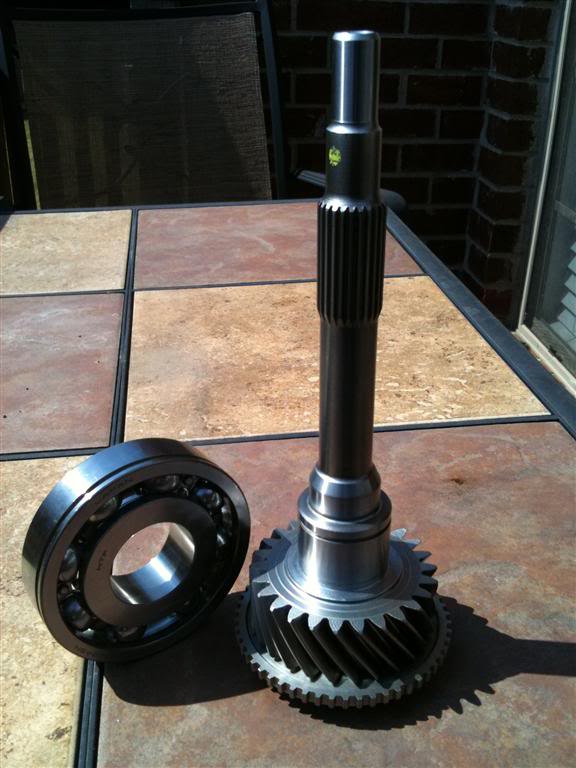
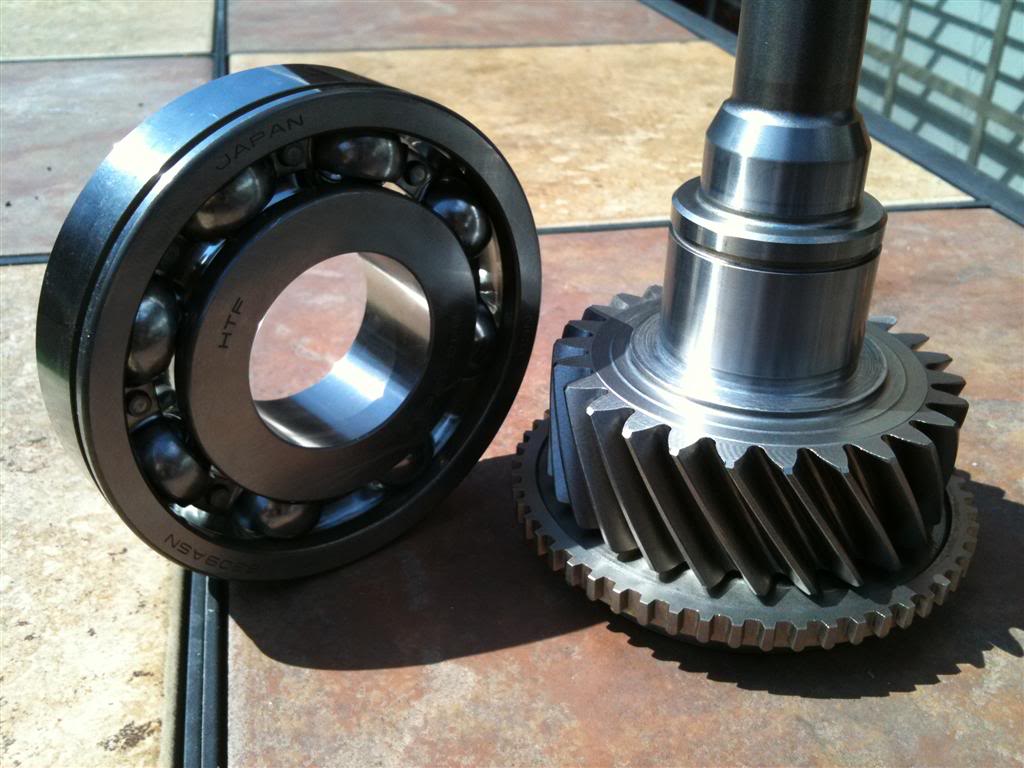
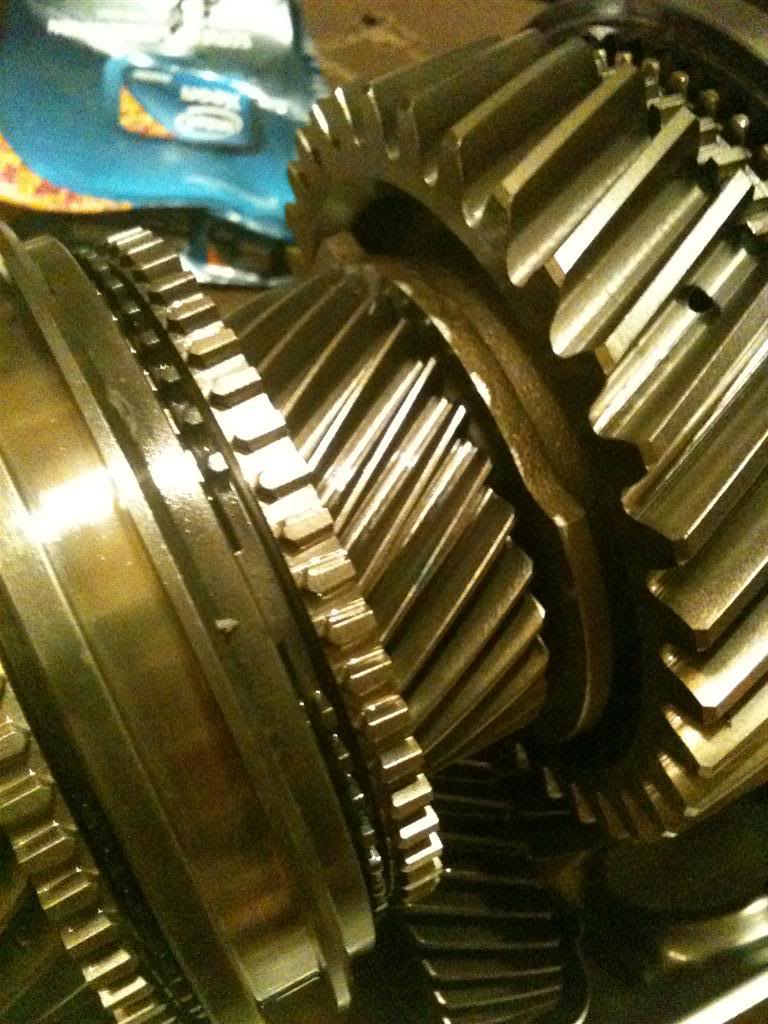
After removing the 370Z bellhousing and studying the differences between my trans and the new trans, I noticed that the input shafts were different. The 370Z input shaft had a tall lip under the bearing to make up for the 2mm difference in thickness. The bottom of the shaft where the baulk ring sits was also revised. This made me shy away from just ordering a new 350Z input shaft and sticking it in. I wanted the updated part.
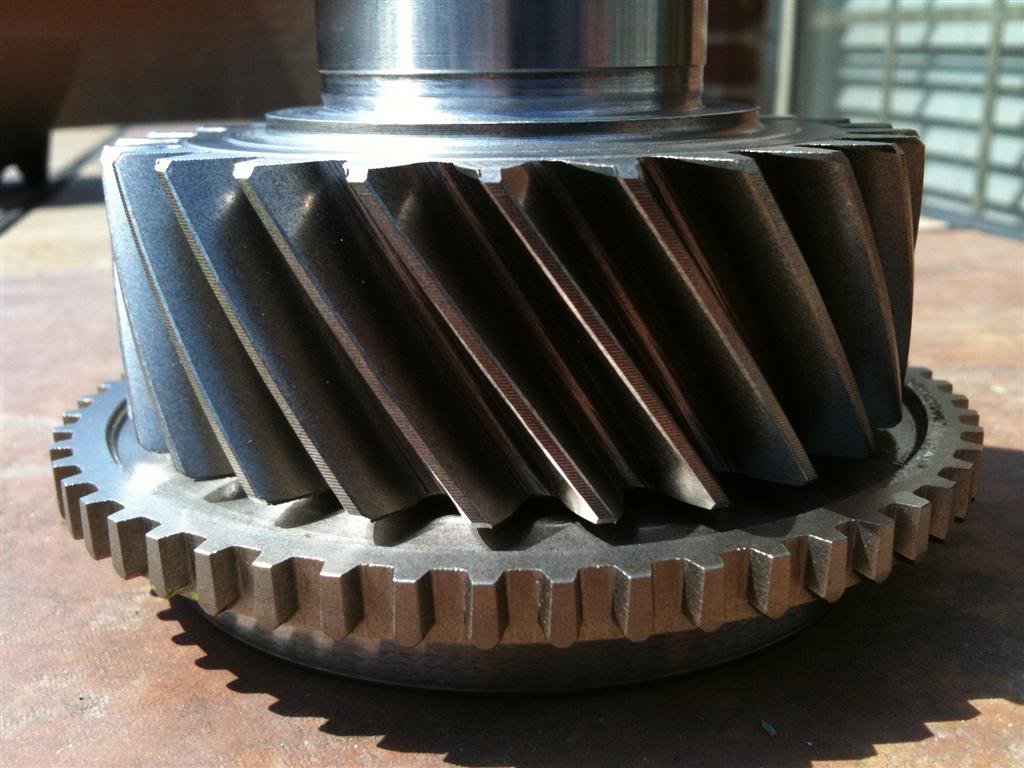
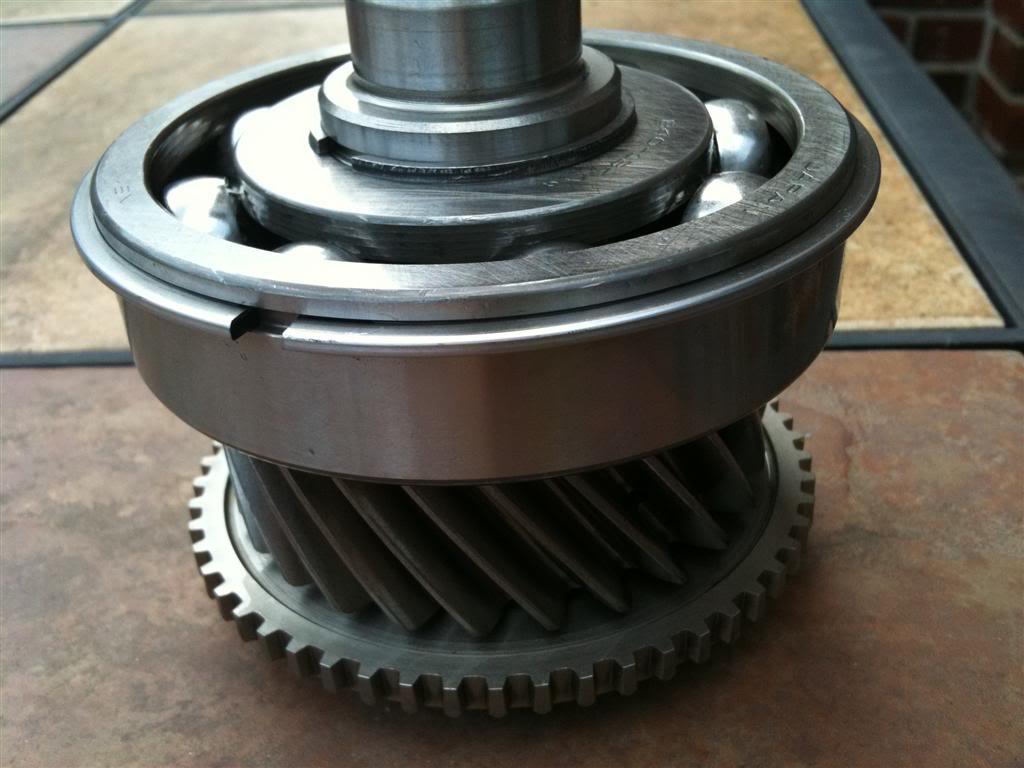
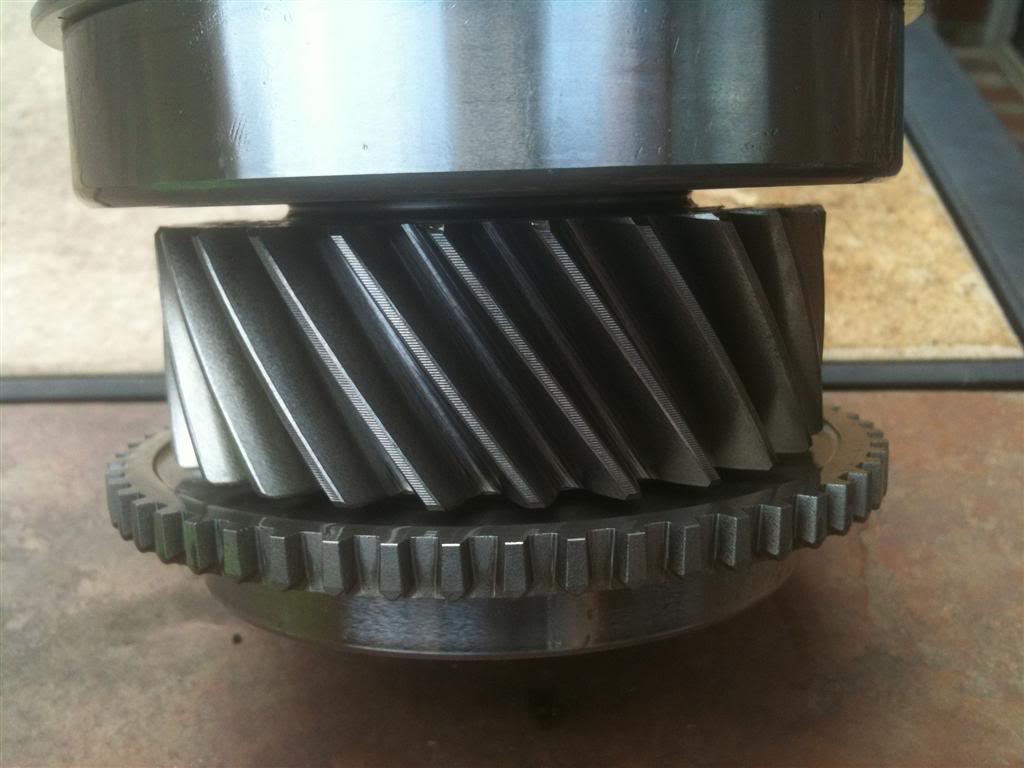
Bottom of 370Z Input Shaft (5th gear):

The bottom of the gear where the gear selector (FSM calls it coupling sleeve) engages is thicker. The top ledge is in the same location relative to the top of the shaft, but the bottom of it is brought down towards gear selector. I'm guessing this improved 5th gear grinds, by bringing the gear closer to the selector, as this was the exact problem in my 350Z.
At this point I went back to the NISSAN FAST software. Apparently the 5th baulk ring changed in 09/04 and it is currently still the latest revision. This made me think really hard about just ordering a 350Z input shaft, and hoping for the best. After speaking with courtesy parts, and getting a price of $180ish, I decided to go a different route.
Anyone who has ever taken apart a 350Z trans knows, that it is impossible to remove the input shaft without further disassembly. (as in, you can't just remove the bellhousing). The bottom of the input shaft gear hangs on the counter shaft. Removing it requires use of a gear puller and a little patience.
The manual basically says that you must fully disassemble the transmission, remove all check *****, shift forks, etc., and remove both the main and counter shafts from the adapter plate as one piece. At this point, I really did NOT want to tear down my brand new 370Z transmission even more, so I came up with a different way.
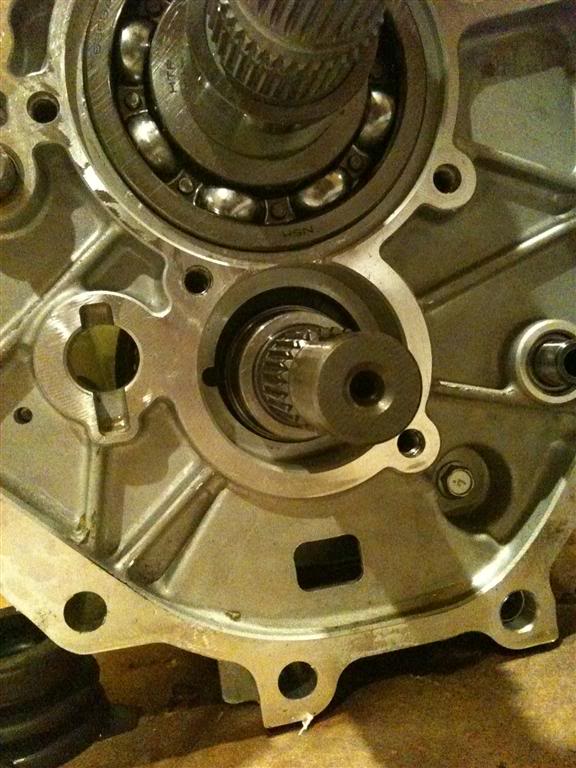
First thing I did was remove the reverse hub assembly and reverse counter gear.
Reverse Hub Assembly and Reverse Counter Gear Removed:
Then I used a rubber mallet and gently tapped the side of the adapter plate until the reverse counter gear bearing came out:
Out comes the reverse counter gear bearing:
Reverse Counter Gear Bearing:
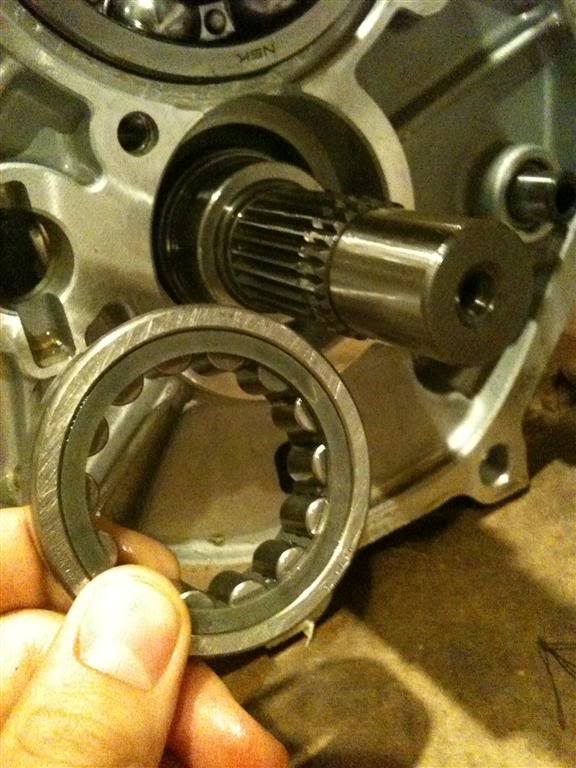
This allowed the counter shaft to swing down far enough and allow the bottom of the input shaft to clear. Then the input shaft just slides right out.
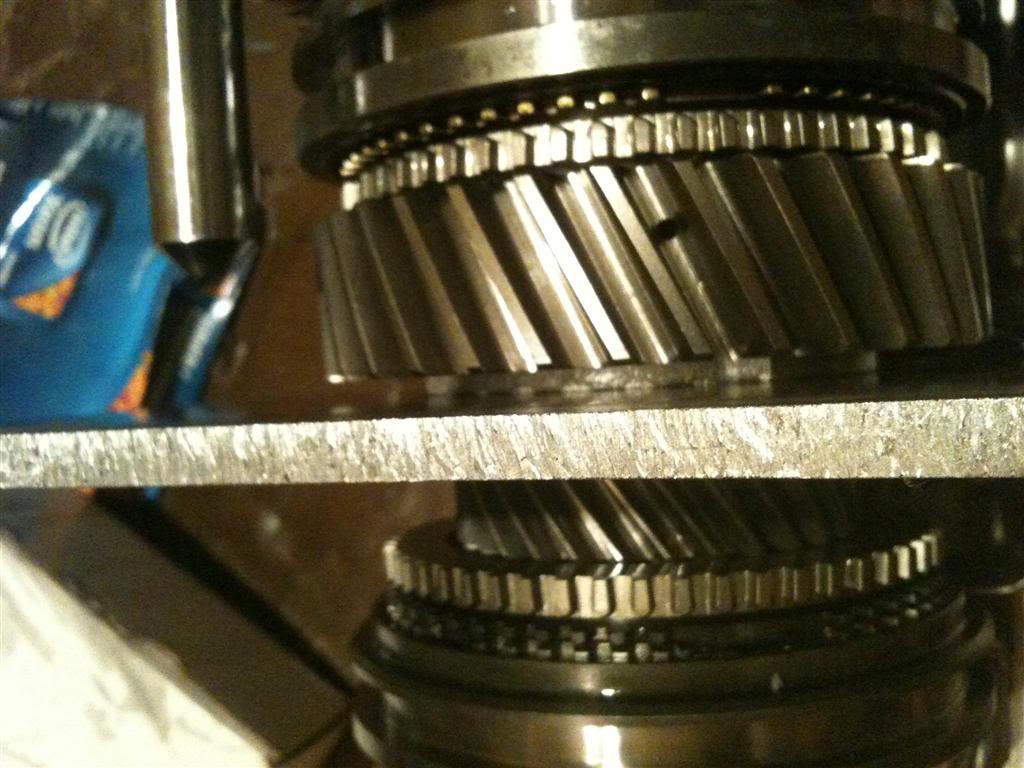
After taking a few measurements and further comparing my old input shaft and the new one, I confirmed that top of the bearing were in the exact same spot on the 2 shafts. What I mean is, if you place both shafts bottom down on a table, the top of the bearings are perfectly level across.
This meant all I had to do was pull the bearing off the 370Z shaft, and have the lip milled down exactly 2mm. This way I can press on a 100mm OD 350Z bearing. Here is the result after being at the machine shop:
370Z shaft milled to fit 350Z bearing:
370Z shaft milled to fit 350Z bearing:
370Z shaft milled to fit 350Z bearing:
As you can see, the actual race where the bearing gets pressed on was not milled, just the lip that sits behind the bearing. I didn't take any pictures before the milling, sorry. Also the milling may look a bit rough because I took a metal file and fine tuned the clearances (8 hours of work with the file right there )
)
Next I went to harbor freight and bought a shop press. Everyone local wanted $80 to press on a damn bearing. Got the press for the same price with coupon, plus I'm sure it will come in useful for doing wheel bearings.
Bearing Pressed On Input Shaft:
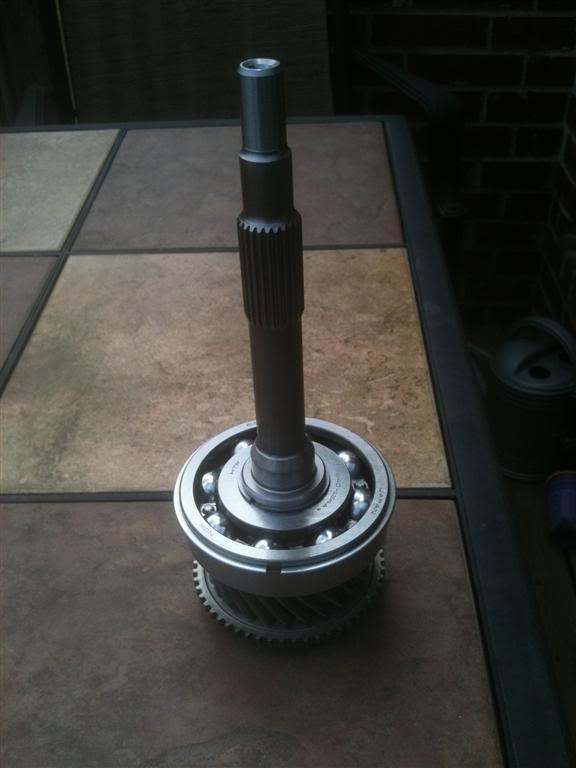
Bearing Pressed On Input Shaft:
Another look at the lip between the Bearing and Input Shaft:
Original thickness snap ring fit perfectly with 0.00mm clearance. This tells me my bearing is in the exact same spot as from Nissan. All that filing was worth ti Nice!
Bearing Snap Ring:
Next it was time to reassemble the tranny. I won't go too in depth and bore you more than I already have showing you how to reassemble it.
Input shaft back in place. Doesn't she look happier now?:
(had to get the foot pic in...every good build has one right? )
)
Now was time to press back on the Reverse Hub Assembly and Reverse Counter Gear. Let me just be completely honest with you guys. It was a complete and total nightmare. Not only does it require special tools, but you must lift the entire tranny onto your shop press. Again, complete nightmare.
Pressing these back on requires special kent-moore tools. For one, you need the collars, thats easy, pipe or sockets work for that. What is not easy is the kent-moore press plate that the manual calls for. I could order it from kent-moore for $200, or me and a friend could spend our Friday night making our own:
Press plate template made to FSM measurements (thank god they give us measurements in there for the kent-moore tools):
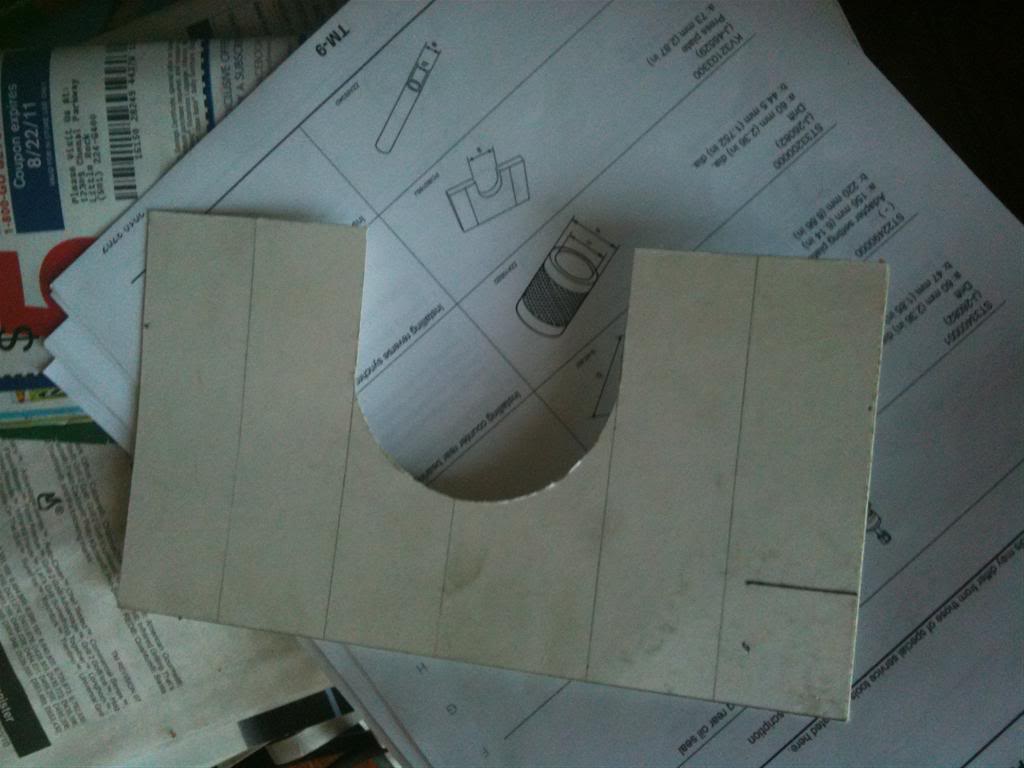
Press plate after cutting and filing to specs:
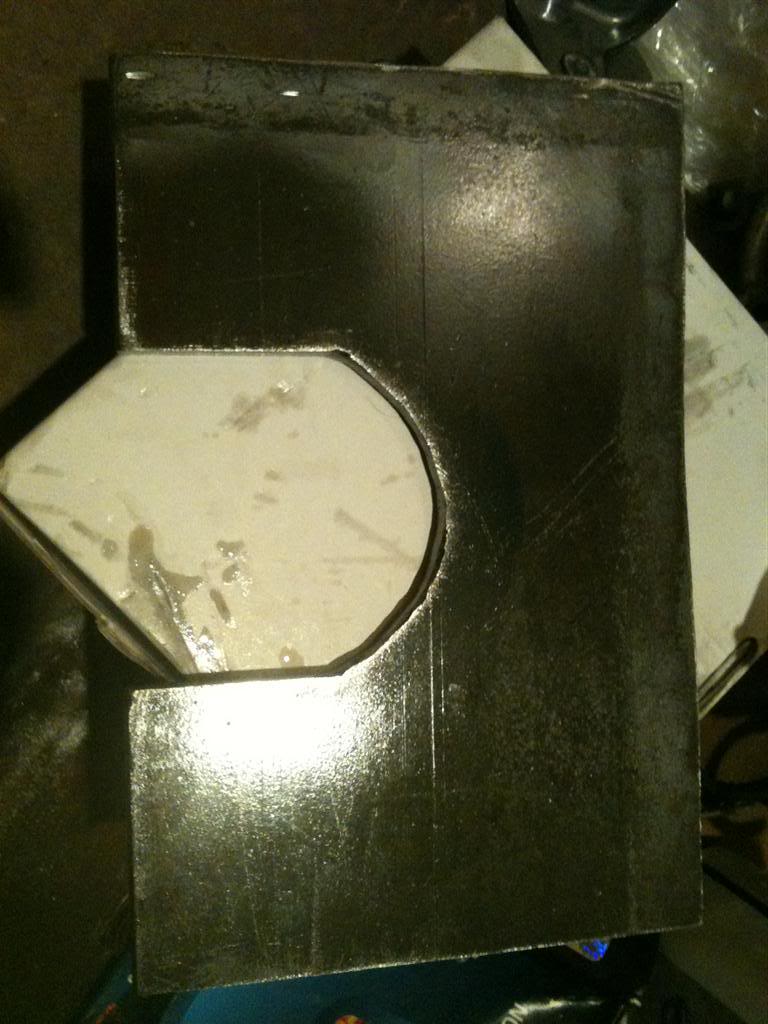
Checking fit:
The plate is supposed to rest on the ledge that is made into the main shaft. You want all your pressure being applied here when you are pressing back on the Reverse Hub Assembly. Otherwise, you would have to apply the pressure to the main input shaft, which would crush the needle bearing that it rest on.
Ledge it has to rest on:
Custom press plate (back yard welding, lol):
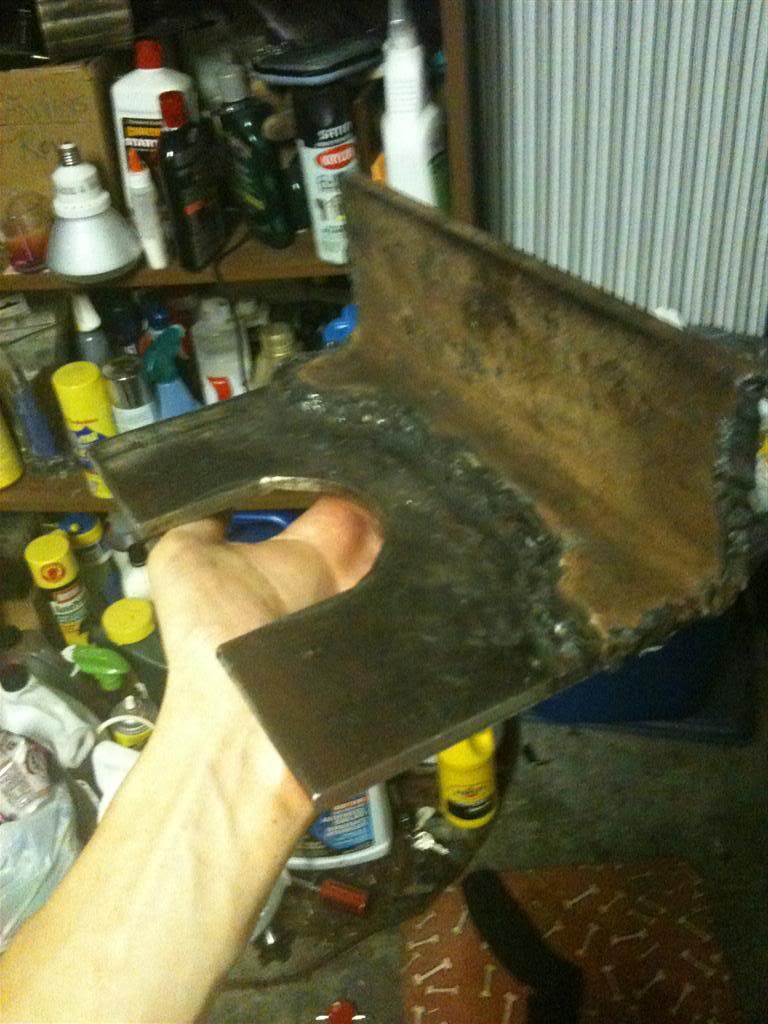
We had to weld reinforcements after the damn thing started to bend. I want to let everyone know, this is not my welding. Friend of mine did this half wasted.
continued (post limit reached).....
Having a 2004 350Z with grinding gears, and new transmissions being $2k, I thought it would be worth a shot. My plan was to mount my 350Z bellhousing and front cover to the guts of the 370Z transmission. I should just be able to swap bellhousings right?
While awaiting delivery from my freight shipper, I started to do extensive research on the internal component differences. The NISSAN FAST software was very useful in this.
Not long did it take me to realize, that the input shaft bearing may be different sizes among the different year models. Although the software did not specifically state sizes and such, it did list different part numbers, so I could only assume.
Few days later, my 370Z trans showed up on my doorstep. First thing I did was remove the front cover. Here is what I found:
370Z Front Cover:
370Z Front Cover (bearing size):
370Z Bearing:
As you can see the bearing size is 90mm. This was not good as my 2004 350Z has a 100mm bearing size:
350Z Front Cover (bearing size)
350Z Bearing:
If you hadn't already noticed, this means I can't just swap bellhousings. The 370Z bearing and shaft will fit into my bellhousing. My front cover will also fit. The problem is that my front cover is 100mm and the bearing going in it is only 90mm. That would never work. There would be nothing supporting the bearing.
After removing the 370Z bellhousing and studying the differences between my trans and the new trans, I noticed that the input shafts were different. The 370Z input shaft had a tall lip under the bearing to make up for the 2mm difference in thickness. The bottom of the shaft where the baulk ring sits was also revised. This made me shy away from just ordering a new 350Z input shaft and sticking it in. I wanted the updated part.
Bottom of 370Z Input Shaft (5th gear):
The bottom of the gear where the gear selector (FSM calls it coupling sleeve) engages is thicker. The top ledge is in the same location relative to the top of the shaft, but the bottom of it is brought down towards gear selector. I'm guessing this improved 5th gear grinds, by bringing the gear closer to the selector, as this was the exact problem in my 350Z.
At this point I went back to the NISSAN FAST software. Apparently the 5th baulk ring changed in 09/04 and it is currently still the latest revision. This made me think really hard about just ordering a 350Z input shaft, and hoping for the best. After speaking with courtesy parts, and getting a price of $180ish, I decided to go a different route.
Anyone who has ever taken apart a 350Z trans knows, that it is impossible to remove the input shaft without further disassembly. (as in, you can't just remove the bellhousing). The bottom of the input shaft gear hangs on the counter shaft. Removing it requires use of a gear puller and a little patience.
The manual basically says that you must fully disassemble the transmission, remove all check *****, shift forks, etc., and remove both the main and counter shafts from the adapter plate as one piece. At this point, I really did NOT want to tear down my brand new 370Z transmission even more, so I came up with a different way.
First thing I did was remove the reverse hub assembly and reverse counter gear.
Reverse Hub Assembly and Reverse Counter Gear Removed:
Then I used a rubber mallet and gently tapped the side of the adapter plate until the reverse counter gear bearing came out:
Out comes the reverse counter gear bearing:
Reverse Counter Gear Bearing:
This allowed the counter shaft to swing down far enough and allow the bottom of the input shaft to clear. Then the input shaft just slides right out.
After taking a few measurements and further comparing my old input shaft and the new one, I confirmed that top of the bearing were in the exact same spot on the 2 shafts. What I mean is, if you place both shafts bottom down on a table, the top of the bearings are perfectly level across.
This meant all I had to do was pull the bearing off the 370Z shaft, and have the lip milled down exactly 2mm. This way I can press on a 100mm OD 350Z bearing. Here is the result after being at the machine shop:
370Z shaft milled to fit 350Z bearing:
370Z shaft milled to fit 350Z bearing:
370Z shaft milled to fit 350Z bearing:
As you can see, the actual race where the bearing gets pressed on was not milled, just the lip that sits behind the bearing. I didn't take any pictures before the milling, sorry. Also the milling may look a bit rough because I took a metal file and fine tuned the clearances (8 hours of work with the file right there
)Next I went to harbor freight and bought a shop press. Everyone local wanted $80 to press on a damn bearing. Got the press for the same price with coupon, plus I'm sure it will come in useful for doing wheel bearings.
Bearing Pressed On Input Shaft:
Bearing Pressed On Input Shaft:
Another look at the lip between the Bearing and Input Shaft:
Original thickness snap ring fit perfectly with 0.00mm clearance. This tells me my bearing is in the exact same spot as from Nissan. All that filing was worth ti Nice!
Bearing Snap Ring:
Next it was time to reassemble the tranny. I won't go too in depth and bore you more than I already have showing you how to reassemble it.
Input shaft back in place. Doesn't she look happier now?:
(had to get the foot pic in...every good build has one right?
)Now was time to press back on the Reverse Hub Assembly and Reverse Counter Gear. Let me just be completely honest with you guys. It was a complete and total nightmare. Not only does it require special tools, but you must lift the entire tranny onto your shop press. Again, complete nightmare.
Pressing these back on requires special kent-moore tools. For one, you need the collars, thats easy, pipe or sockets work for that. What is not easy is the kent-moore press plate that the manual calls for. I could order it from kent-moore for $200, or me and a friend could spend our Friday night making our own:
Press plate template made to FSM measurements (thank god they give us measurements in there for the kent-moore tools):
Press plate after cutting and filing to specs:
Checking fit:
The plate is supposed to rest on the ledge that is made into the main shaft. You want all your pressure being applied here when you are pressing back on the Reverse Hub Assembly. Otherwise, you would have to apply the pressure to the main input shaft, which would crush the needle bearing that it rest on.
Ledge it has to rest on:
Custom press plate (back yard welding, lol):
We had to weld reinforcements after the damn thing started to bend. I want to let everyone know, this is not my welding. Friend of mine did this half wasted.
continued (post limit reached
).....
Thread Starter
Registered User
Joined: Mar 2009
Posts: 28
Likes: 0
From: Arkansas
Now that making that pesky plate was all over with, it was time to put it to use. To get the press plate on, you must remove the 5th and 6th and 1st and 2nd shift forks.
Tranny on press plate and press:
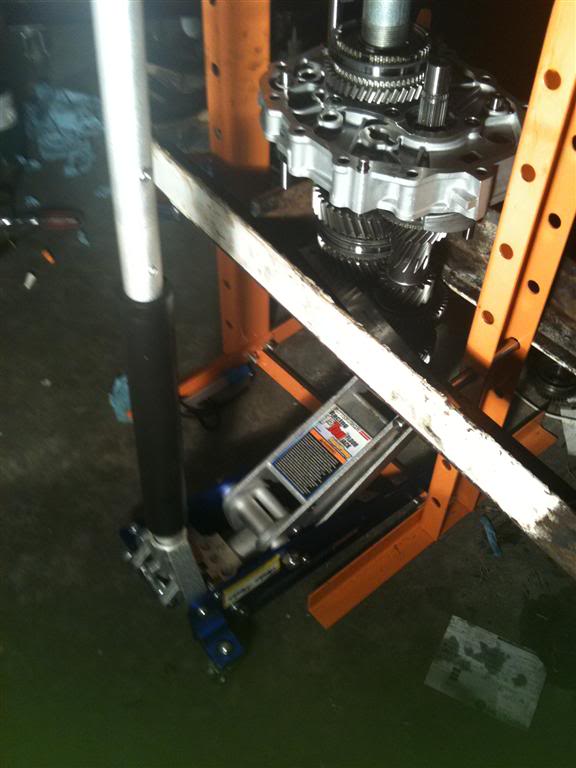
First, sorry for the crappy pic. This shows the Reverse Hub Assembly going on. (top right of pic) This is the only picture I have of this part. It was a nightmare getting that thing on there by myself. I used my jack to help steady it by placing it on the counter shaft to hold it upright. That allowed me to maneuver it around a bit.
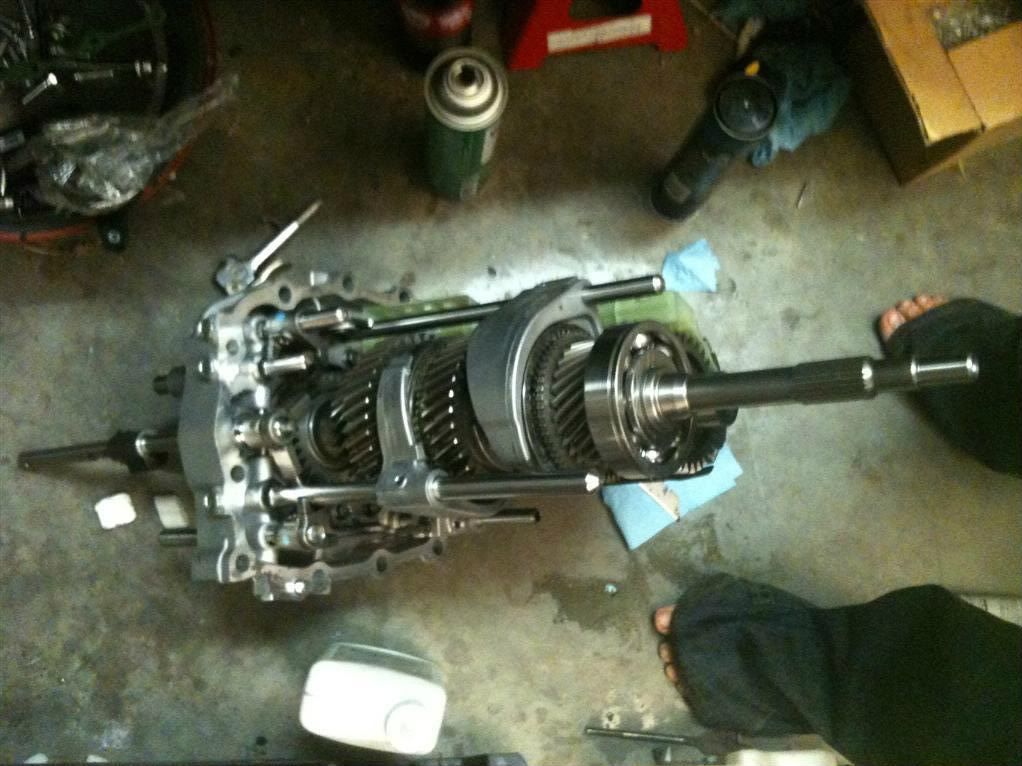
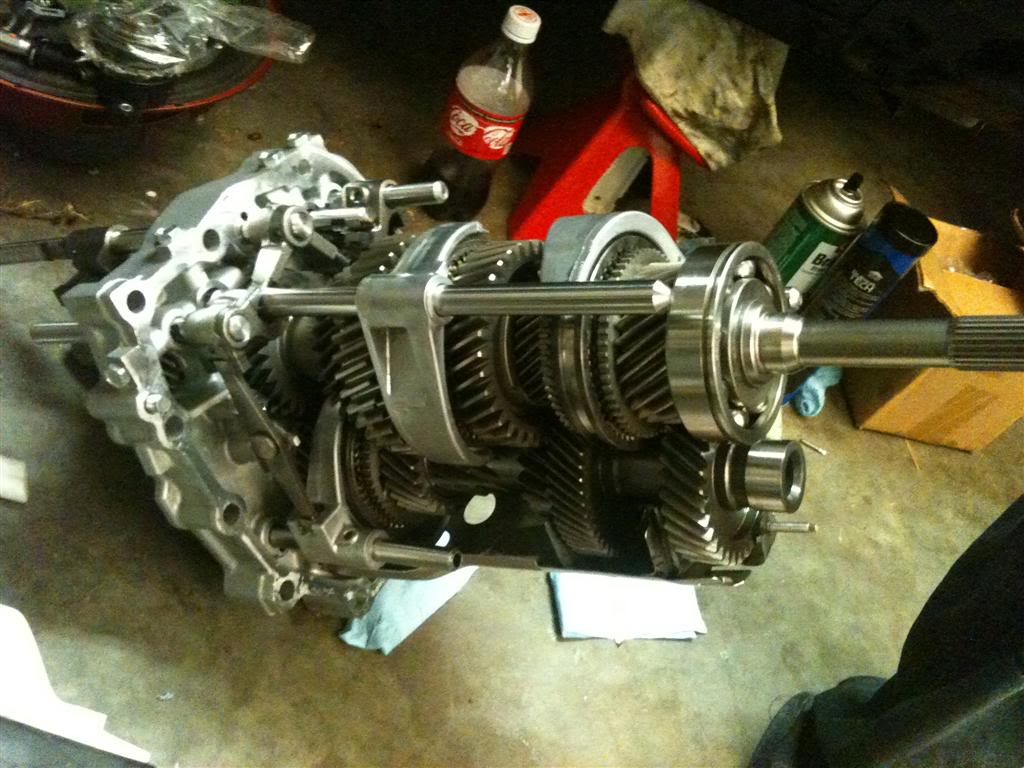
Here is the tranny internals all back together. At this point I have everything pressed back on, couple check ***** back in, shift forks reinstalled, baffle plate, oil gutter, etc.
Tranny internals assembled:
One thing interesting to note from this build was the way the oil gutter system is designed in the new tranny. I am not positive but I believe Nissan did not change this until sometime in 2008, and as far as I know only comes in the HR/VHR trans. Someone want to open up there CD009 and find out?
Oil gutter system in new 370Z transmission and newer HR transmissions:
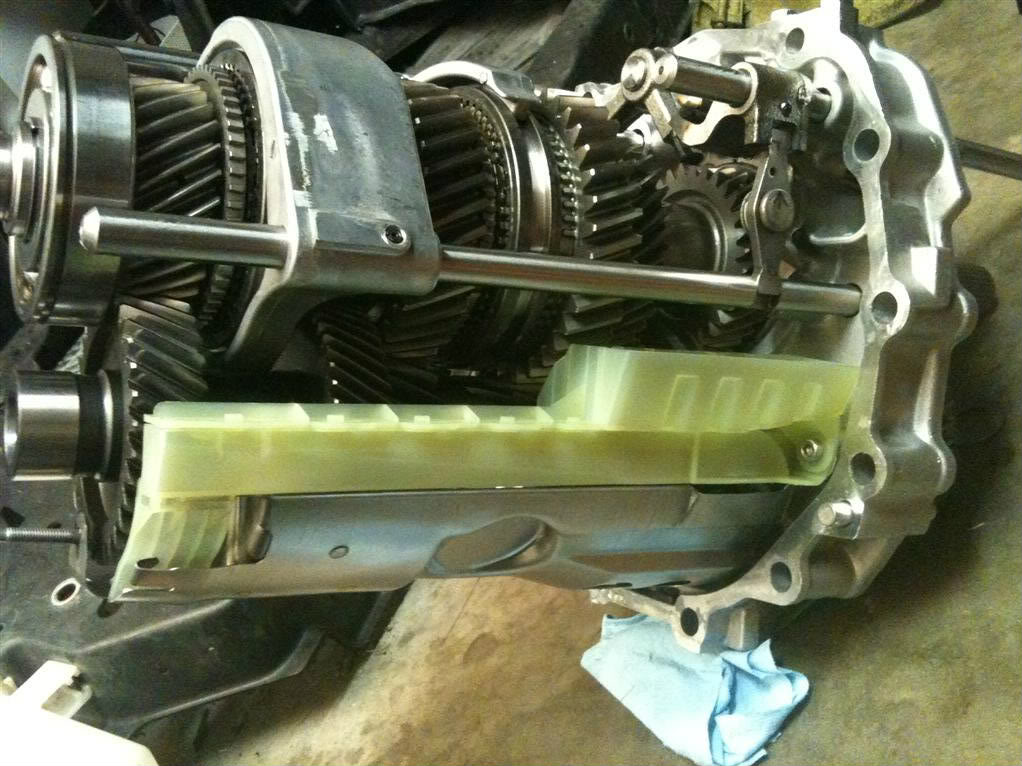
Oil gutter system in new 370Z transmission and newer HR transmissions:
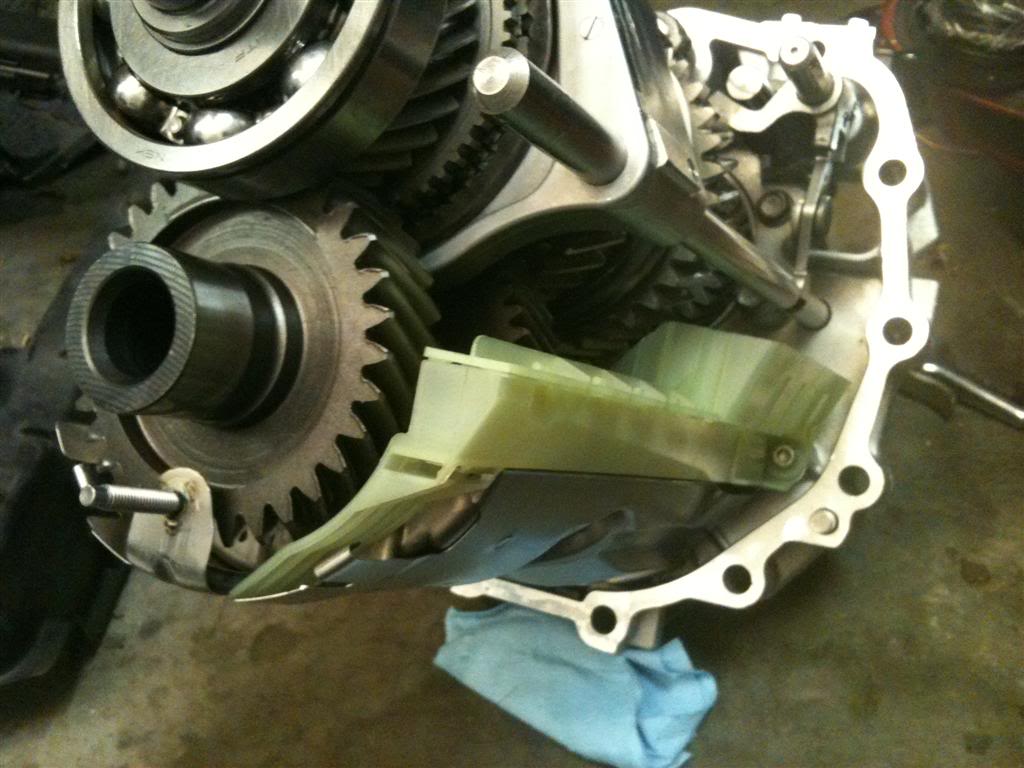
Here is the old system:
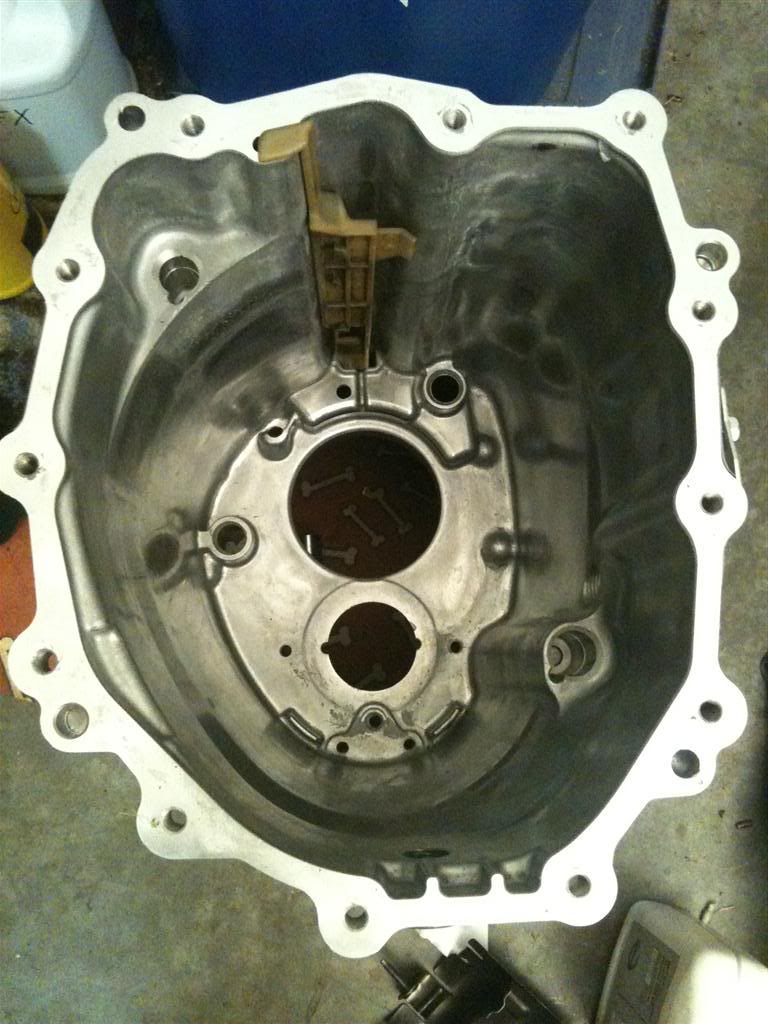
It doesn't use the green oil gutter at all. While the new oil gutter connects directly to the baffle plate, the old one has progs on it and it just sticks into a cavity in the casting. Don't let that picture confuse you. That is the new 370Z bellhousing with the old gutter stuck in it, as I had already put the new tranny back together.
Nissan did not bother removing the cavity in the casting for the old gutter. So technically you could use both. I wasn't sure if this would get in the way of how the new system is set to flow fluids, so I left it out.
And FINALLY. Here is the transmission completely reassembled:
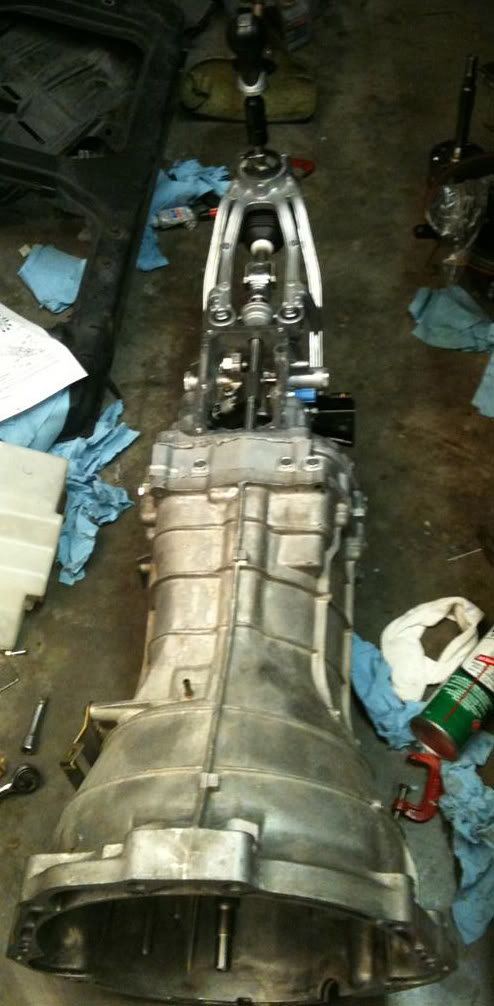
Only thing reused was the actual bellhosuing, and the front cover for the throwout bearing.
All in all this was a fun project. It was a lot of headaches for sure. I'm just glad everything worked out in the end. I have to give a big thanks to Billy @ Courtesy Nissan for helping me order all the parts required for this build. He helped me get all new seals/gaskets, input bearing, snap rings, etc.
If you guys want to see more pictures not listed here, I am uploading more to my photobucket album HERE.
Any questions or comments are welcomed.
-derektm
Tranny on press plate and press:
First, sorry for the crappy pic. This shows the Reverse Hub Assembly going on. (top right of pic) This is the only picture I have of this part. It was a nightmare getting that thing on there by myself. I used my jack to help steady it by placing it on the counter shaft to hold it upright. That allowed me to maneuver it around a bit.
Here is the tranny internals all back together. At this point I have everything pressed back on, couple check ***** back in, shift forks reinstalled, baffle plate, oil gutter, etc.
Tranny internals assembled:
One thing interesting to note from this build was the way the oil gutter system is designed in the new tranny. I am not positive but I believe Nissan did not change this until sometime in 2008, and as far as I know only comes in the HR/VHR trans. Someone want to open up there CD009 and find out?
Oil gutter system in new 370Z transmission and newer HR transmissions:
Oil gutter system in new 370Z transmission and newer HR transmissions:
Here is the old system:
It doesn't use the green oil gutter at all. While the new oil gutter connects directly to the baffle plate, the old one has progs on it and it just sticks into a cavity in the casting. Don't let that picture confuse you. That is the new 370Z bellhousing with the old gutter stuck in it, as I had already put the new tranny back together.
Nissan did not bother removing the cavity in the casting for the old gutter. So technically you could use both. I wasn't sure if this would get in the way of how the new system is set to flow fluids, so I left it out.
And FINALLY. Here is the transmission completely reassembled:
Only thing reused was the actual bellhosuing, and the front cover for the throwout bearing.
All in all this was a fun project. It was a lot of headaches for sure. I'm just glad everything worked out in the end. I have to give a big thanks to Billy @ Courtesy Nissan for helping me order all the parts required for this build. He helped me get all new seals/gaskets, input bearing, snap rings, etc.
If you guys want to see more pictures not listed here, I am uploading more to my photobucket album HERE.
Any questions or comments are welcomed.
-derektm

Wow, good work. Seems to be a lot more headaches than necessary seeing as you can buy cd009 for 700 or so, but always appreciate the creativity and time put in for yet another option
Thread Starter
Registered User
Joined: Mar 2009
Posts: 28
Likes: 0
From: Arkansas
The tranny above was wrapped in factory Nissan packaging though, and for $600 and maybe $200 in parts, I saved around a thousand bucks. Plus I learned a lot for sure.

Trending Topics


Thanks. I was thinking it would be worth the $1900 to just buy a new one after I went through all of this
The tranny above was wrapped in factory Nissan packaging though, and for $600 and maybe $200 in parts, I saved around a thousand bucks. Plus I learned a lot for sure.
The tranny above was wrapped in factory Nissan packaging though, and for $600 and maybe $200 in parts, I saved around a thousand bucks. Plus I learned a lot for sure.
great work. i wish i had half of your knowledge.

Thread Starter
Registered User
Joined: Mar 2009
Posts: 28
Likes: 0
From: Arkansas
Smooth as butter. Can put it in any gear with your pinky lol.
Yeah I wish.... this is the base 370Z trans, and even if it were the rev match trans thats all done through ecu software, which would be hard to implement without some custom coding or something.
Thanks for looking guy's. 350Z's have some very well laid out transmissions.


