
DIY plenum porting


Although Tony won't fully admit it, he basically gave it away, way earlier back in this same thread. But I have heard from other sources that the front two runners are lowered 5mm on the Motordyne MREV2.
I did the same thing while I lowered mine. I used a caliper and measured it before I started, then just kept measuring as I worked until the number decreased, and in the end I took off about 6mm actually.
Have fun man! Hahaha It's a pain, but I'm glad I did it. Peace of mind, if you will. If you do get a dremel, be careful when working on large, flat areas. Using the dremel for those will create waves in the metal if you're not careful.
I picked up a non revup lower plenum to port out a bit. How much should I take down the front runner? Two posts up says the mrev is shaved down 5mm, is that the 'best' or optimum amount?
Work from pfregeolle above looks awesome. Might have to buy a dremel now, was gonna tackle this with a grinder, files, and sandpaper.
Work from pfregeolle above looks awesome. Might have to buy a dremel now, was gonna tackle this with a grinder, files, and sandpaper.
Have fun man! Hahaha It's a pain, but I'm glad I did it. Peace of mind, if you will. If you do get a dremel, be careful when working on large, flat areas. Using the dremel for those will create waves in the metal if you're not careful.


New Member
Joined: Apr 2011
Posts: 65
Likes: 2
From: Maryland
Someone a few pages back went ahead and ground down all runners, instead of just the front two. I'm wondering if this would possibly totally negate the need for a spacer also.
This is going to go on my 06 revup engine, and the dynos I find from that 'other' product shows most of the gain from just the plenum, with a little bit gained at the top end by adding the spacer. Would knocking down all runners have the same effect, or does that mess up the flow characteristics?
Thanks for the tip. Picked up some 2" sanding pads today. We'll see how aggravated I get trying to knock down the cast lines in the runner tubes by hand.
one would think that by knocking down all the runners by 5/16", it would be the same as using a 5/16" motordyne spacer. But only dyno testing would provide a definite answer.
if you already have a spacer, id just knock down the front runners 5mm.
Get a measuring caliper so that you can keep track of how much you are cutting.
Id also suggest when using the aggressive grits of sanding media (sand paper or sanding pads or whatever) only cut it down 4mm, then when using your smoother grits you can take down the final mm.
If you sand the whole 5mm with the aggressive grit, by the time you are done with the smooth grit you would have already past the 5mm point.


IMHO. Adding the spacer add volume to the entire plenum and just doesn't add space inbetween the top of the runners and the bottom of the upper plenum. Don't know if that makes a dif or not.
New Member
Joined: Apr 2011
Posts: 65
Likes: 2
From: Maryland
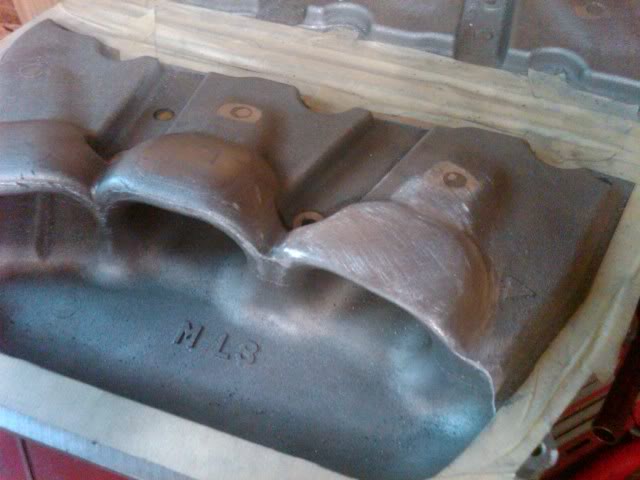
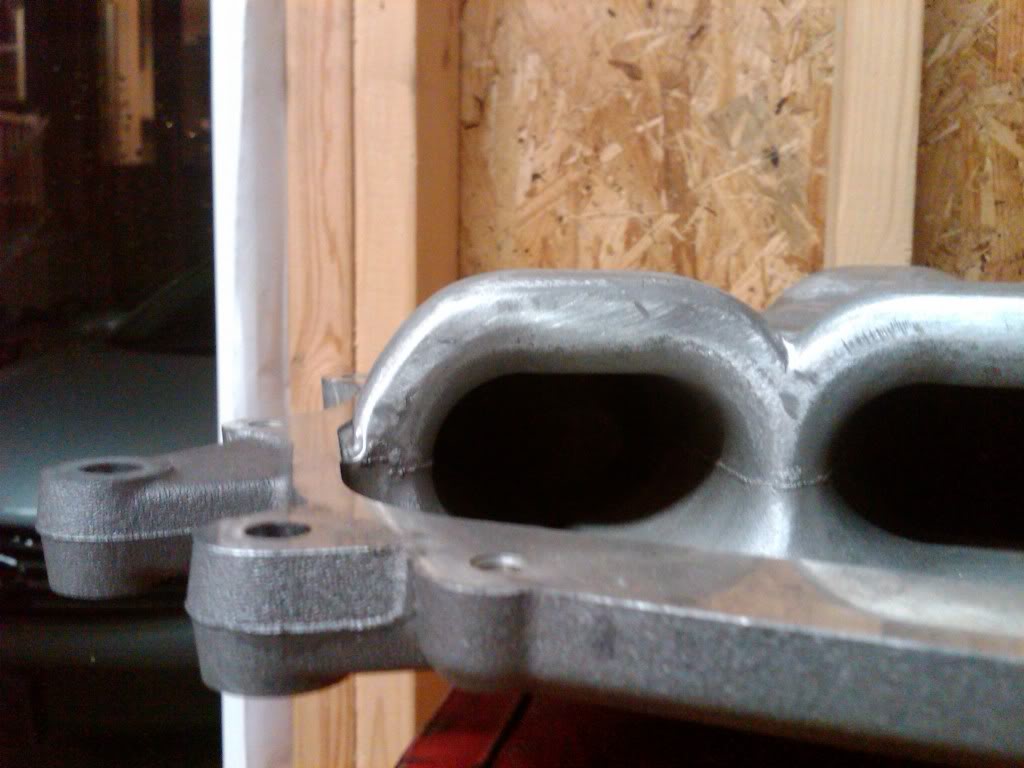
Worked on it some more last night. Knocked down the 2 front runners about 7/32" which is about 5.5mm. Don't have a measuring caliper, so did it with a ruler and eyeball, tops were at 2" so I knocked 7/32" off that. Then I used a DA with 180 grit so smooth things out, smoothed out the other runners and smoothed out the nasty casting line along the front edge of the runners. I might reshape the fronts a little better.
I'm talking to a guy selling a spacer and the whole plenum, so I might have another one to play with soon. Don't have access to a dyno, so might just stick with the 'tested' grinding of front 2 plus a spacer.
I'm talking to a guy selling a spacer and the whole plenum, so I might have another one to play with soon. Don't have access to a dyno, so might just stick with the 'tested' grinding of front 2 plus a spacer.
Last edited by LoSt; May 8, 2011 at 04:14 AM.

^Love your avatar man hahahaha
As far as shaving down the tops of all the runners, what you guys have to remember is the reason WHY Motordyne made the MREV2 with the lowered front runners. It's because those two front cylinders get starved for air due to the design of the upper plenum (downward sloping shape). So you can go ahead and lower all of the runners to the same height, but you will run into the same problem again. Which is most likely that the two front runners won't get as much air as the center and rear runners. This is why the MREV2 / Spacer combo work so well together; it's adding volume to the inside of the plenum as well as evening out the distribution of incoming air for the most part to all 6 runners.
Bikinilust; I have been driving the car everyday just wasn't able to get on it a lot due to rain. It was nice yesterday evening and this morning. Going WOT sounds awesome now. It's kinda hard to tell if it changed the intake sound on the engine because I also just installed that exhaust, but I can definitely tell that it sounds different, almost a more raspy sound actually. I only had the exhaust system on 4 days before installing the intake manifold and plenums etc so it was really hard to tell any difference since I was breaking that in at the same time. But I can tell you that the car sounds SICK, and I even got a thumbs up from a dude in an F150 the other day on my way home from work haha He said "You got that thing sounding right, man!" As far as it feeling any faster....unfortunately to say I can't feel a HUGE difference like I was really hoping. But I CAN definitely tell that it pulls harder. I'm spinning like all the way through first and into 2nd easily which I wasn't doing before. I really want to get a COBB AP now though and have it tuned so I can get the most out of it.
Anyway, I will try and get a video up really soon. There's usually a spot where I go near my house where I can just kind of unload on the car and rev the engine, etc and no one cares. I'll edit it and post it up as soon as I can.
Last edited by pfregeolle; May 5, 2011 at 04:51 AM.
which engine do you have?
from what ive heard, doing the mrev2 mod on a non revup engine actually makes the car run a bit lean.
for a car that is about to be tuned, that is advantageous bc the tuner just needs to add fuel to the lean areas [under the power band curve] and you'll obviously get power.
But if the car is not going to be getting tuned, being lean isnt exactly a good thing.


New Member
Joined: Apr 2011
Posts: 65
Likes: 2
From: Maryland
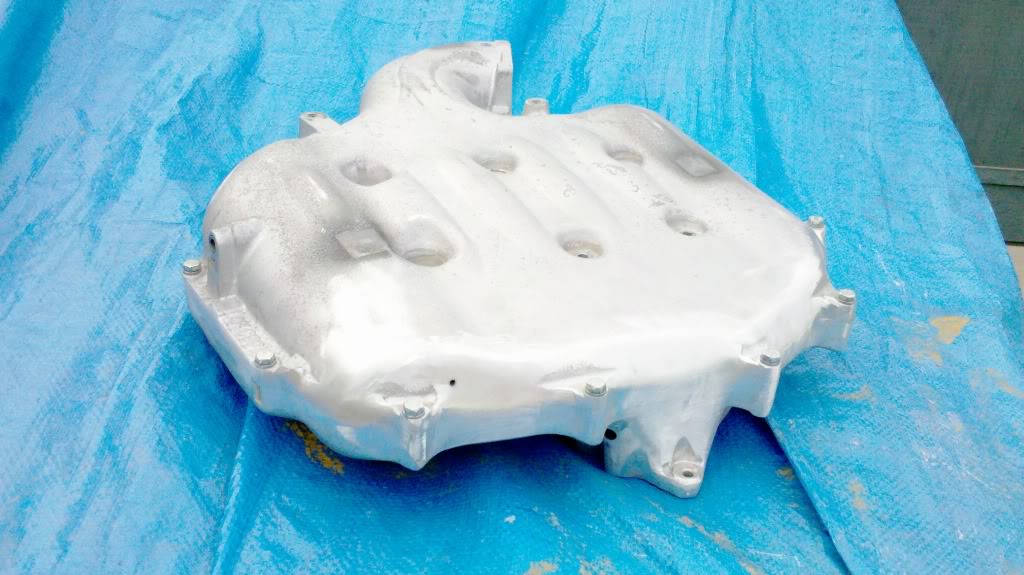
^^^It's so shiny! How does it run?
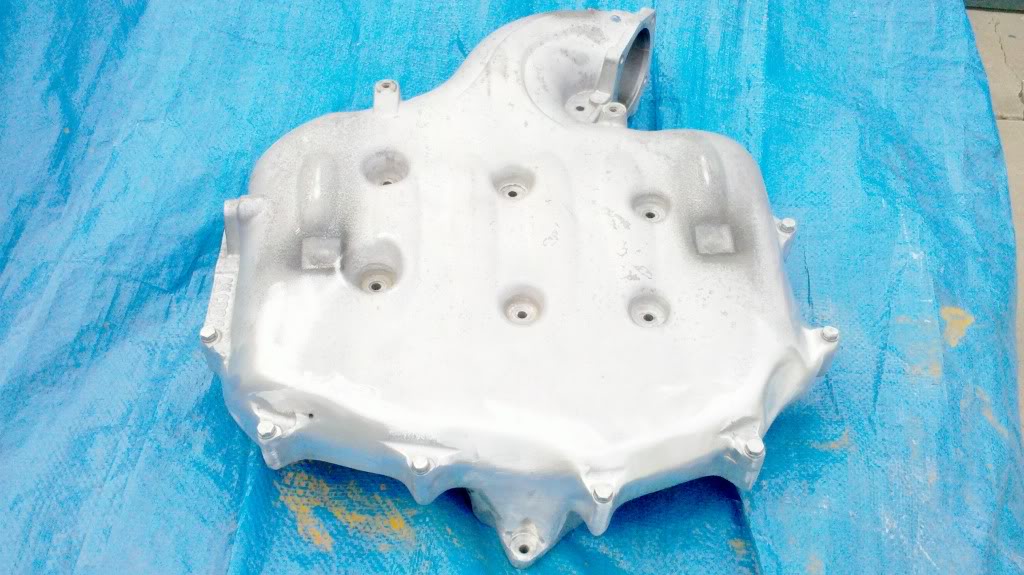
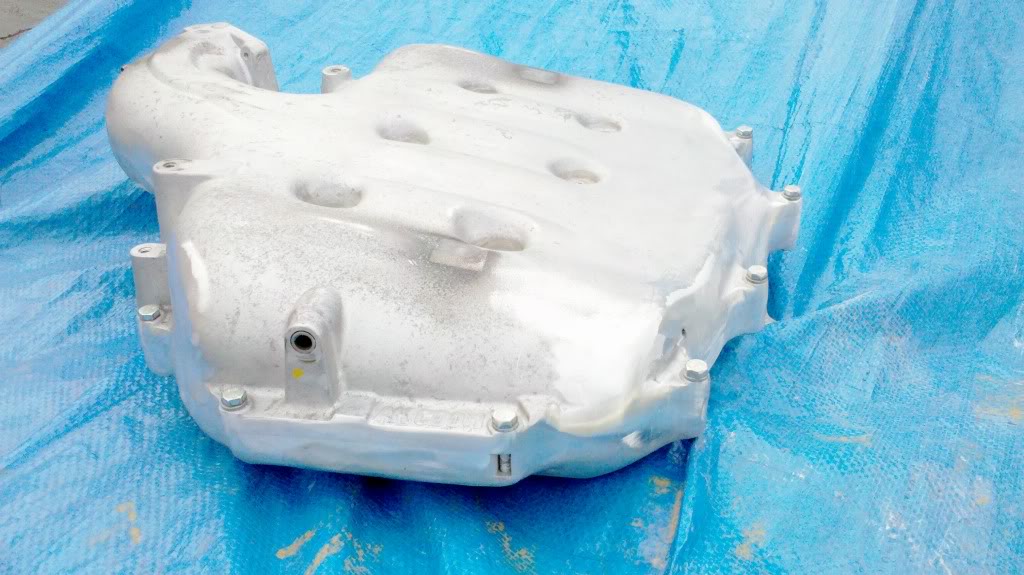
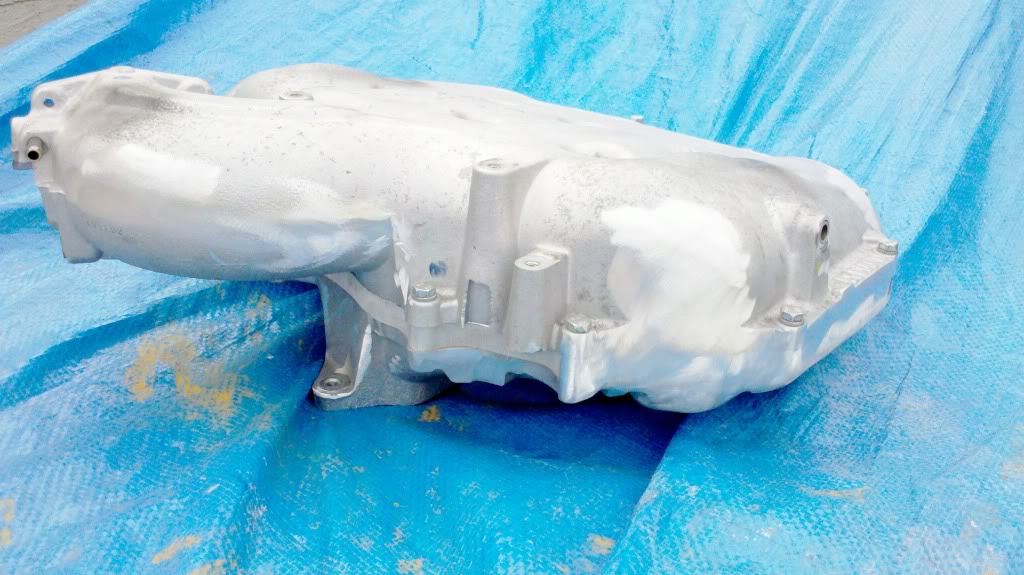
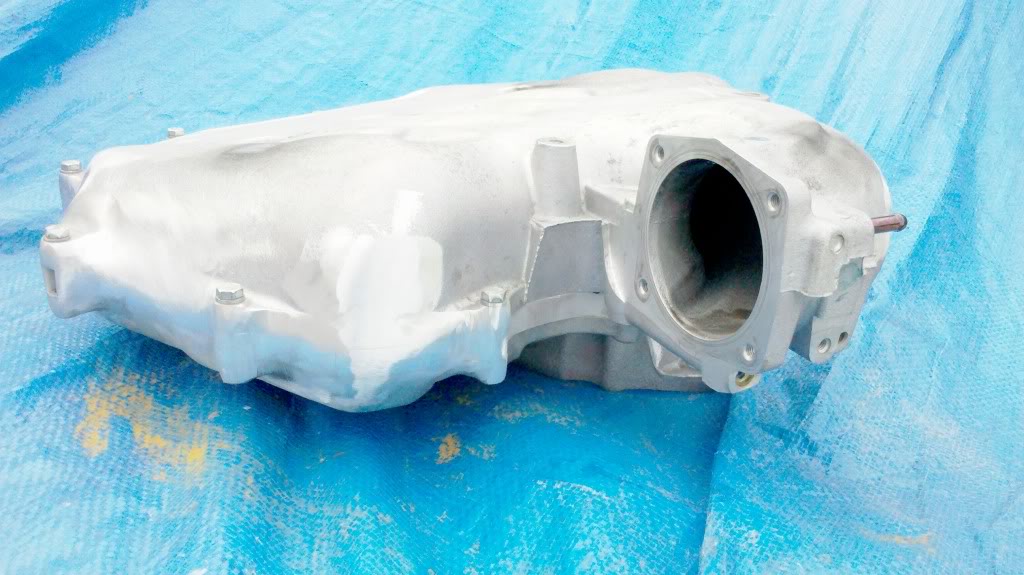
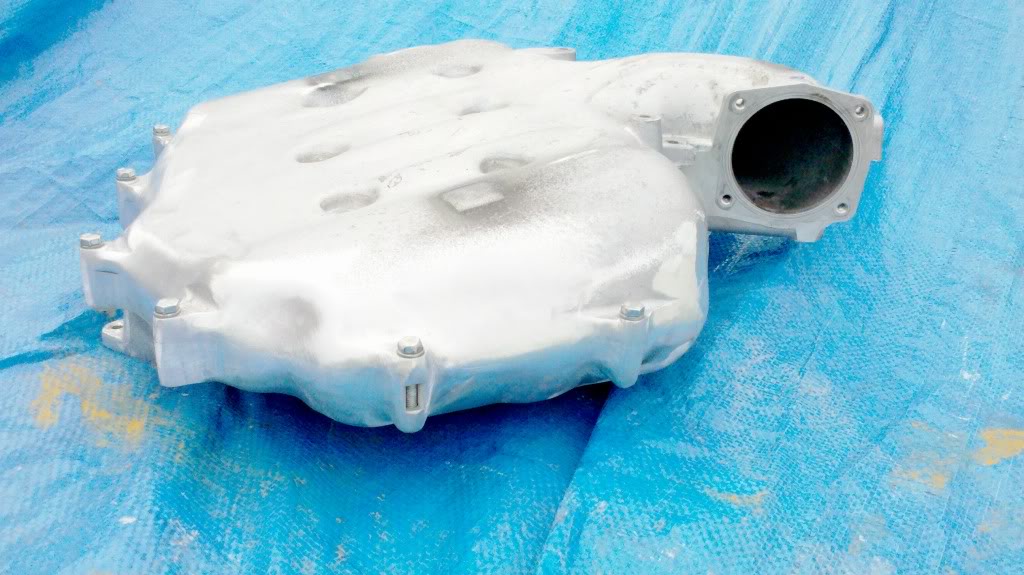
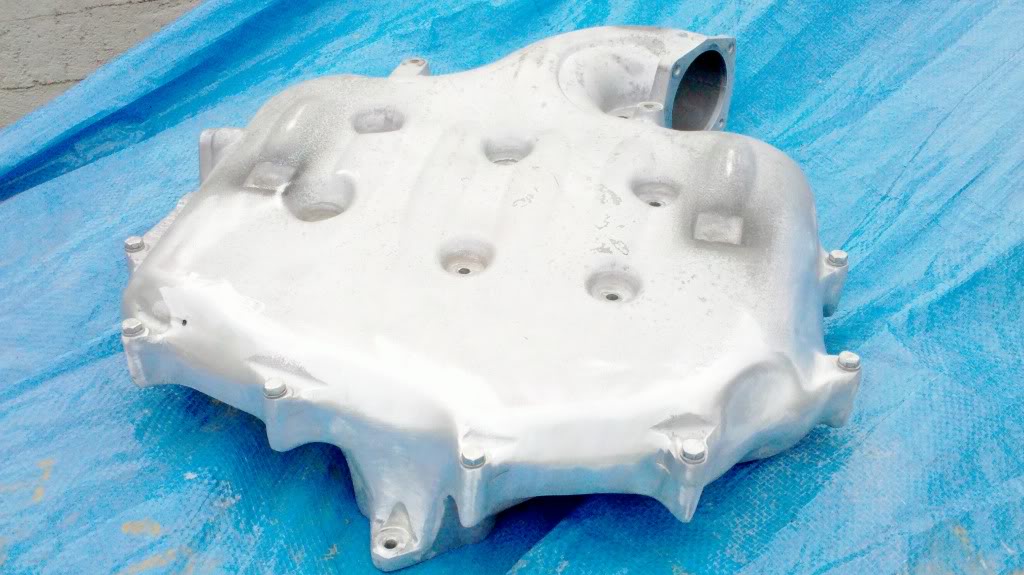
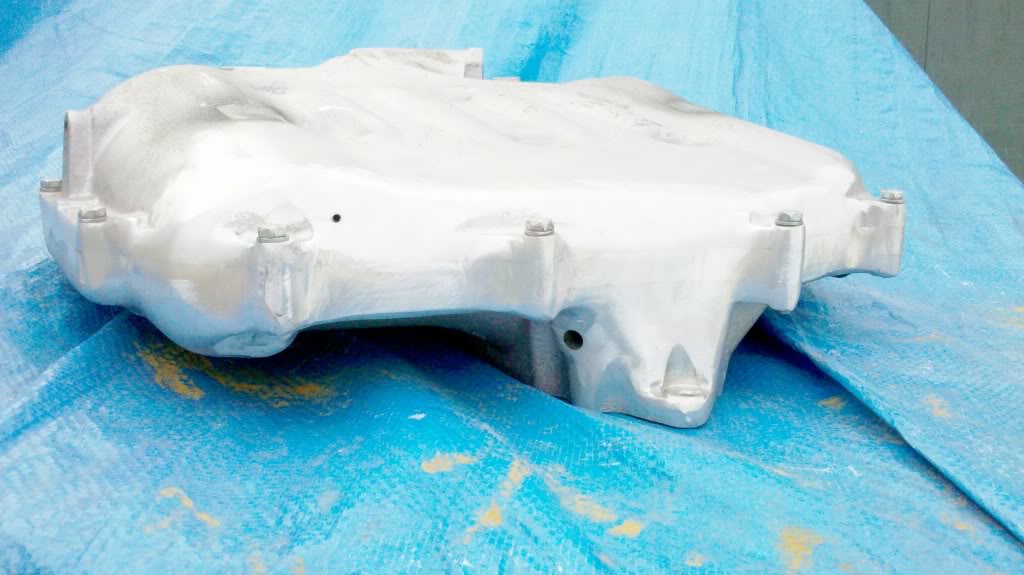
I pretty much just smoothed out the humps and inputs to the ports. Also shaved down the side of the runner in the back (#6?), it looked close to the top plenum wall, so I'm thinking it will help airflow a little around the side of that runner. Need to pick up a spacer and get this thing installed.
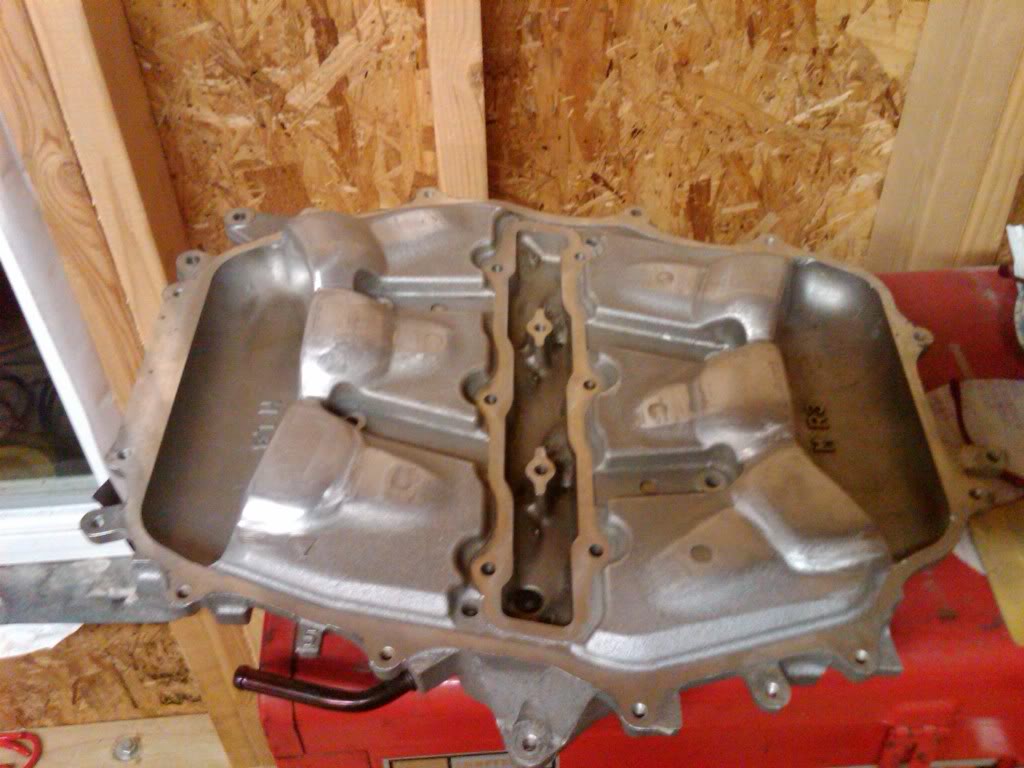
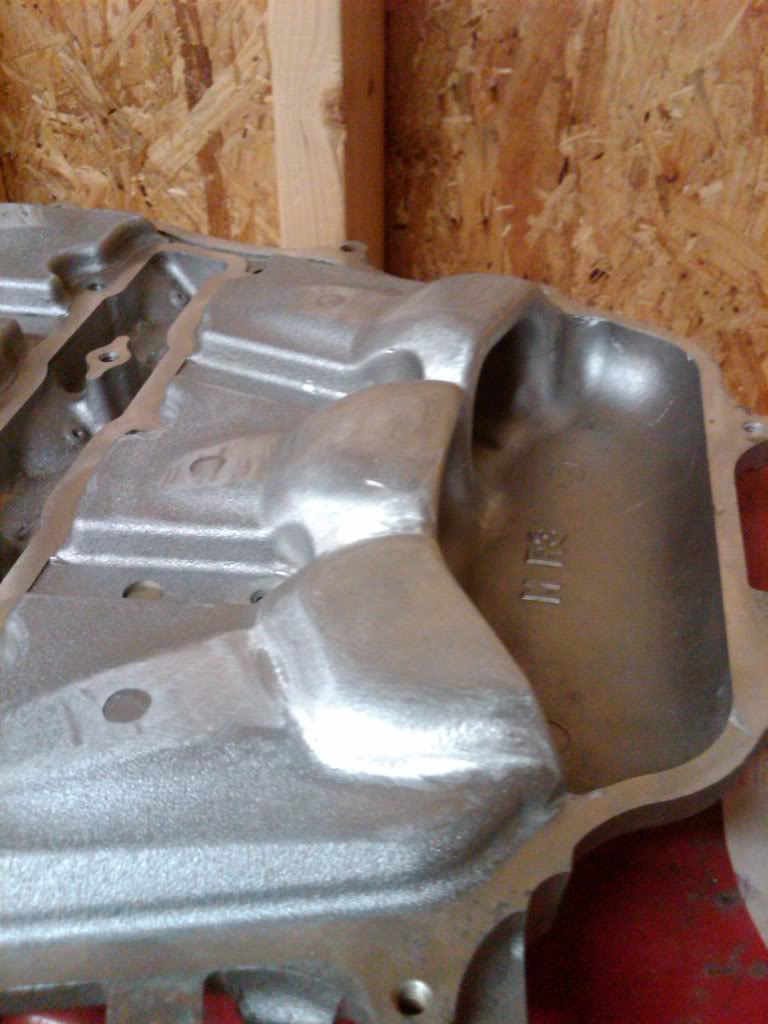
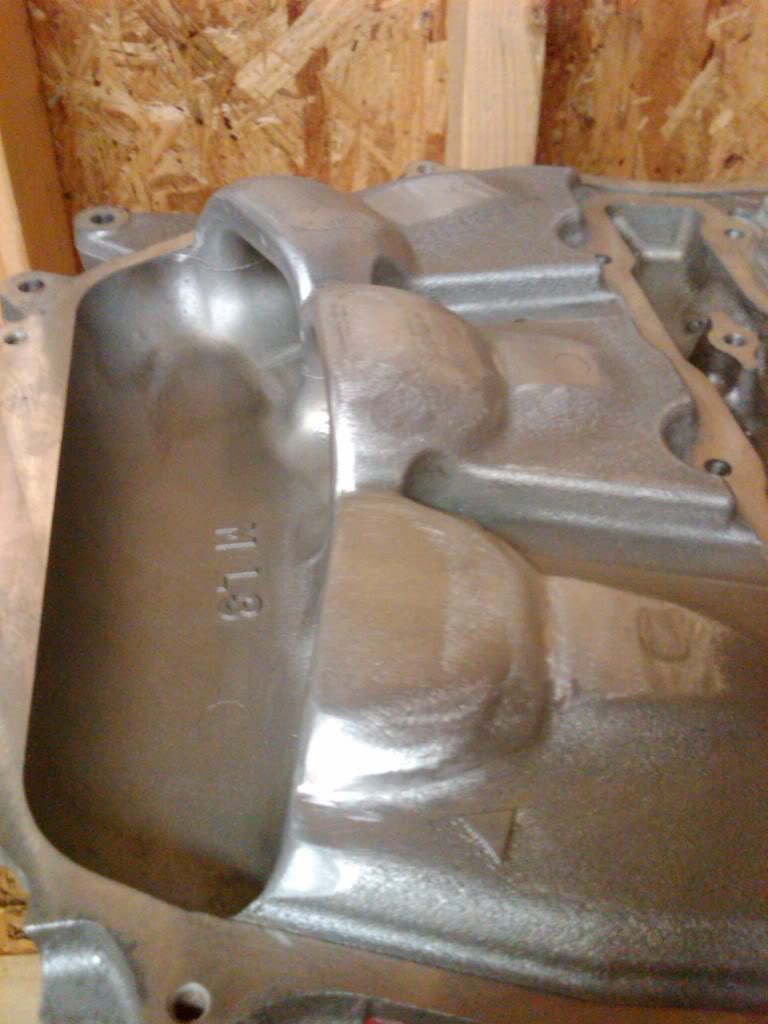

I pretty much just smoothed out the humps and inputs to the ports. Also shaved down the side of the runner in the back (#6?), it looked close to the top plenum wall, so I'm thinking it will help airflow a little around the side of that runner. Need to pick up a spacer and get this thing installed.


Relocating the Brake Boost vac inlet and the crankcase vac inlet
to be hidden in the back
Smoothed all the sides with my plenum spacer in place.
Still got to weld some holes up and a lot more smoothing to do.
Then gonna Powder Coat
to be hidden in the back
Smoothed all the sides with my plenum spacer in place.
Still got to weld some holes up and a lot more smoothing to do.
Then gonna Powder Coat
Last edited by bikinilust; May 8, 2011 at 05:32 PM.
