When you click on links to various merchants on this site and make a purchase, this can result in this site earning a commission. Affiliate programs and affiliations include, but are not limited to, the eBay Partner Network.
This past weekend I was doing CJM Stage 2 upgarde installation and since the kit comes with no instructions whatsoever I looked for help online with no luck. So I decided to make this DIY guide.
Start the job on Saturday to have Sunday in case you can't finish it the same day. It took me over 8 hours to do it.
Rise the car on the 4 stands and remove front and rear crossmembers under the car. Then remove intake manifold and fuel rails.
2. Installation
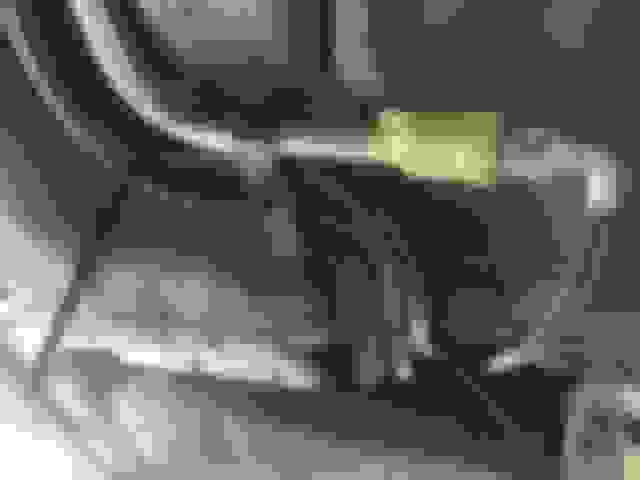
In the picture below:
#1 is your P-Regulator -> Front side Fuel rails line
#2 Fuel rails
#3 Two short lines that going from a back of your fuel rails to the Y adapter
#4 Y adapter
#5 Braided line (wrapped in insulation on the pic) that goes from Y adapter down to the hard pipe.
There is one more line that is not on the picture that goes from the hard line to the fuel pump at the gas tank side.
Remove and discard fuel rails with dampeners and metal bracket, we not gonna use any of it. Next, remove the old hardpipe. This is a hardest part. First unclip the line from plastic brackets, then it's a lot of twisting and pulling. You don't have to remove the fuel tank unless you want to preserve original fuel line. I literally destroyed my stock line by twisting and bending it under the car trying to get it out. After the stock line removed, you can start by putting a new hard pipe into the place.
This is how the line looks under the car.
Tank side.
Front of the car.
Middle.
After you done installing the pipe you can now drop the line from a pump assembly down to the hardpipe. There is single connector comes with a kit and has cut through nut in it. You will use it to connect this line and a pump assembly.
Connector with cut through nut on the pump assembly.
Now you can do your rails. You have to install your injectors into the rails first. Then you can install the rails. Now connect #1 line to the front side of your injectors. I put the line a long the sides of the rails and cross them on front of the engine block. See pic below:
Front side of the engine. Left line to the right rails and a right line to the left rail.
Connect another side with a T to your pressure regulator.
Now connect Y adapter #4 on to straight connector on the braided line. Drop the line down the firewall and connect two short lines #3 to the Y adapter. Now connect them to the back of your rails.
Go under your car and connect braided line #5 with 45 degree connector to the hard pipe.
Go over and tighten all the connections. Those that connect to the hard pipe tight very hard because they will leak.
Put you intake manifold back, connect two evac line together, reconnect all the connectors that you disconnected. Check everything one more time and now you can start your car. While it's running go over and check every connection on the fuel lines, because something will leak. Put your crossmembers back and drop the car.
Let me know if something is confusing and I will fix it.
P.S. This post is for informative purposes only. You do all the work at your own risk. Happy modding.
Last edited by Staisman; Mar 14, 2016 at 10:44 AM.
The CJM rails are not available without dampers since they were updated 3-4 years ago
Ok I was curious because conceptZ lists it as an option when you order the stage 1 and 2 kits. I thinks it's like a $50 option. But I will definitely remember that.
If you ordered the kit without the dampers, they would still be required, just not included. You would have to spend $50 at the Nissan dealer to get them in order to plug the damper holes in the rails. So the option was just eliminated for the sake of simplification.