
Center Console Blacked Out


Not a big fan of the silver trim located throughout the interior so I'm blacking out as much of it as I can. Also wanted to clean up the console, get rid of the scratches.
Posted the lower half of the center console last week. Here's the results of doing the upper half today.
The cubby door BEFORE - notice my lame attempt at fix with Sharpy
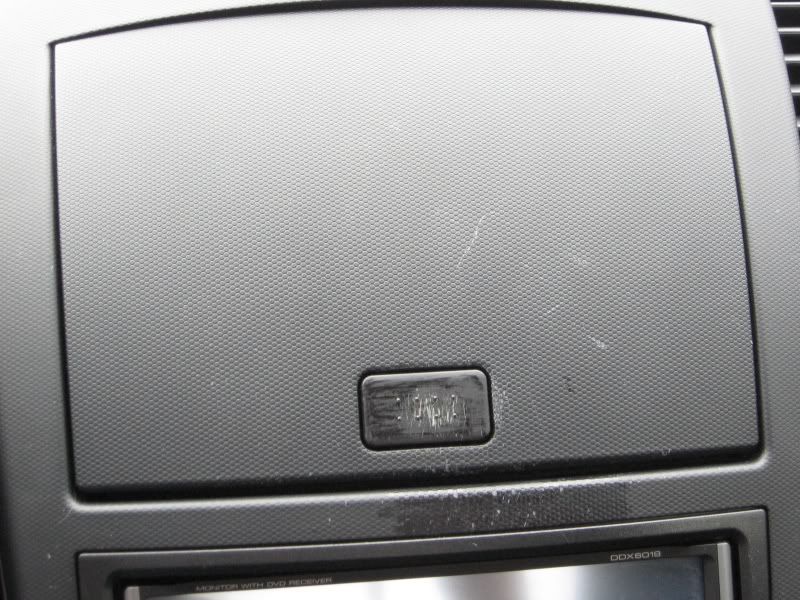
The cubby door AFTER - I need to get a better pic I know The little bumps on the door release button are sanded off.

Lower Half from last weekend

Gauge cluster detail

The entire console

Color comparison between the newly painted upper console and the passenger side of the dashboard

Comparison lower down to the left of where passenger's legs go - out of focus but you can see the color is pretty close match

Another shot of the entire console but more straight on relative to the gauges.

The paint is a bit more reflective than stock but not a whole lot more. Also, I'd like to figure out now to make it smoother to the touch. As it is spray paint, it's not as smooth to the touch as factory... I figure to let it go for a week or so and then maybe rub it down with soft cloth or something... I'm open to suggestions. Overall, I'm happy with the results and will post a procedure later today.
Doing the doors next week.
Posted the lower half of the center console last week. Here's the results of doing the upper half today.
The cubby door BEFORE - notice my lame attempt at fix with Sharpy
The cubby door AFTER - I need to get a better pic I know The little bumps on the door release button are sanded off.
Lower Half from last weekend
Gauge cluster detail
The entire console
Color comparison between the newly painted upper console and the passenger side of the dashboard
Comparison lower down to the left of where passenger's legs go - out of focus but you can see the color is pretty close match
Another shot of the entire console but more straight on relative to the gauges.
The paint is a bit more reflective than stock but not a whole lot more. Also, I'd like to figure out now to make it smoother to the touch. As it is spray paint, it's not as smooth to the touch as factory... I figure to let it go for a week or so and then maybe rub it down with soft cloth or something... I'm open to suggestions. Overall, I'm happy with the results and will post a procedure later today.
Doing the doors next week.


Trending Topics
No prep other than to wash with a wet soapy cloth and dry.
Because I wanted to retain the texture, I wasn't going to sand or do anything abrasive. Time will tell if it starts to flake but so far the bottom half, at one week, is good to go with no cracks. If it starts to flake, crack or otherwise get messy, I will post a follow up.
Paint used: DupliColor Fabric and Vinyl - Flat Black. I got it at Pep Boys for around $7 / can. Took two cans to do both the top and bottom. I probablyl used more than needed but wanted to make sure I hit all the angles.
I do intend to do the rest of the interior. Found a procedure for removing the main gauge cluster over the steering wheel, have that off now and just finished painting the silver plate that sits on the front. Should be able to re-assemble and remount it before dark.
Looking to pull those two silver pieces off the steering wheel but not sure what the relatinonship is to the airbag. I assume they are just trim and after removing the single screw in the back, should pop off with a tape covered flat blade. Anybody know anything about those? Just trim is all? Last thing I want is a heart attack and $$ to replace the airbag as a result of a project like this.
Next week I will be doing the doors, all the silver trim except the door locks, will leave those as is.. I hate that silver strip in the passenger side door grip. Also, the drivers' side door control panel is scuffed up so I will pull that, sand it some to get rid of the scratches and paint it.
I already have black replacements for the door sill guards so that's already done.
The rear strut brace cover will be the last thing. Anybody know what year they switched from the silver cover to a darker one and whether or not it will fit an 05?


Registered User
Joined: Jun 2007
Posts: 260
Likes: 0
From: NJ
No prep other than to wash with a wet soapy cloth and dry.
Because I wanted to retain the texture, I wasn't going to sand or do anything abrasive. Time will tell if it starts to flake but so far the bottom half, at one week, is good to go with no cracks. If it starts to flake, crack or otherwise get messy, I will post a follow up.
Paint used: DupliColor Fabric and Vinyl - Flat Black. I got it at Pep Boys for around $7 / can. Took two cans to do both the top and bottom. I probablyl used more than needed but wanted to make sure I hit all the angles.
I do intend to do the rest of the interior. Found a procedure for removing the main gauge cluster over the steering wheel, have that off now and just finished painting the silver plate that sits on the front. Should be able to re-assemble and remount it before dark.
Looking to pull those two silver pieces off the steering wheel but not sure what the relatinonship is to the airbag. I assume they are just trim and after removing the single screw in the back, should pop off with a tape covered flat blade. Anybody know anything about those? Just trim is all? Last thing I want is a heart attack and $$ to replace the airbag as a result of a project like this.
Next week I will be doing the doors, all the silver trim except the door locks, will leave those as is.. I hate that silver strip in the passenger side door grip. Also, the drivers' side door control panel is scuffed up so I will pull that, sand it some to get rid of the scratches and paint it.
I already have black replacements for the door sill guards so that's already done.
The rear strut brace cover will be the last thing. Anybody know what year they switched from the silver cover to a darker one and whether or not it will fit an 05?
Because I wanted to retain the texture, I wasn't going to sand or do anything abrasive. Time will tell if it starts to flake but so far the bottom half, at one week, is good to go with no cracks. If it starts to flake, crack or otherwise get messy, I will post a follow up.
Paint used: DupliColor Fabric and Vinyl - Flat Black. I got it at Pep Boys for around $7 / can. Took two cans to do both the top and bottom. I probablyl used more than needed but wanted to make sure I hit all the angles.
I do intend to do the rest of the interior. Found a procedure for removing the main gauge cluster over the steering wheel, have that off now and just finished painting the silver plate that sits on the front. Should be able to re-assemble and remount it before dark.
Looking to pull those two silver pieces off the steering wheel but not sure what the relatinonship is to the airbag. I assume they are just trim and after removing the single screw in the back, should pop off with a tape covered flat blade. Anybody know anything about those? Just trim is all? Last thing I want is a heart attack and $$ to replace the airbag as a result of a project like this.
Next week I will be doing the doors, all the silver trim except the door locks, will leave those as is.. I hate that silver strip in the passenger side door grip. Also, the drivers' side door control panel is scuffed up so I will pull that, sand it some to get rid of the scratches and paint it.
I already have black replacements for the door sill guards so that's already done.
The rear strut brace cover will be the last thing. Anybody know what year they switched from the silver cover to a darker one and whether or not it will fit an 05?
I want to try changing the bezel in mine and cleaning the dust inside but have yet to find anything that offers a clue on the cluster removal.
i've used duplicolor on a lot of friend's car. Flat black is the one to get. the gloss one is really glossy and looks bad. But i would advise others to get duplicolor adhesion promotor. It helps a lot with plastic.

I'll be including the gauge removal in my procedure but here's the link I found:
https://my350z.com/forum/exterior-an...e-cluster.html
https://my350z.com/forum/exterior-an...e-cluster.html
I just finished the steering wheel gauge cluster and got it remounted. Dark out so no pics but first thing in the morning I'll have a pic up and then later the procedure.
Last edited by lbz; Mar 14, 2009 at 07:28 PM.


 )
)
Thread
Thread Starter
Forum
Replies
Last Post