
Interior LED Conversion


Started this project using your write up! Thanks a ton for all the info! I didn't order any of the right angle LEDs or whatever so those are still orange. I still have to order the gauges faces and then do the rest. his is what i have thus far plus the doors.
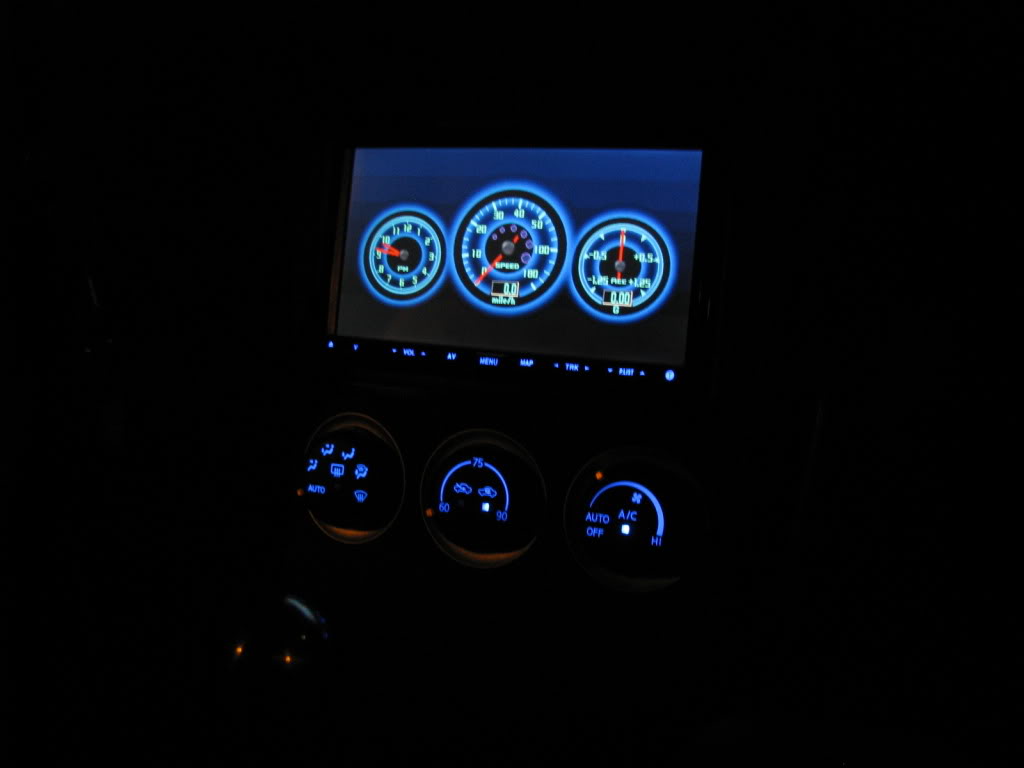

^ Looking good man. I kind of like the look of the different color on the pointer. Wonder what red pointer on white gauges would look like?
If you are going to do a custom order for your faceplate you might want to order sooner then later, since they are taking forever with mine.
If you are going to do a custom order for your faceplate you might want to order sooner then later, since they are taking forever with mine.
Also i like the diff color too and was thinking white perhaps or red maybe to complement the red needles...

NICE. I think white pointers would be cool, or red would compliment the needles, like you say. I may change out my blue right angles for red...
If you can't find the right angle LEDs listed in the write up, look for 1206 style LEDs. These are smaller, they just barely reach both contacts, but you can lay them on their side and they do the same thing.
Also, for the 3mm LEDs in the switches on either side of the speedo cluster, send an email sales@lsdiodes.com for a quote. Last I checked with them they still had plenty of blue ones (5500 mcd) left. $.45 / each + shipping. Maybe buy a few extra just in case. They have taken their web site down but will respond to emails and accept PayPal.
Last edited by lbz; Jun 23, 2009 at 08:22 PM.
My experiments have revealed that the only place you need a diffusing gel is for the center console trip computer LCD. The stock diffuser is yellow and should be replaced. I got the best results using Roscolux #103 White which you can find by searching for "Roscolux" on E-Bay. I used two layers of that.
The stock diffuser for the odometer LCD has worked out better than the thin diffusers.
In addition to the PLCC-2 LEDs, you will need either right angle or type 1206 LEDs for the A/C control **** pointers (03 - 05) or 0603 type LEDs (06 - 08). QTY of 12 either way. For 06-08, I've not yet converted the amber pointer.
The LED for the 06 - 08 pointer is buried inside the **** and the light tube has an amber coating or is possibly amber colored.
If you want all the details read from page 1 of this thread. The only thing missing is the last section that covers the speedo cluster. I'm working on finishing that, should have it up over the weekend.
 Not 100% sure this is what I want, but it is a start.
Last edited by brettrr; Jun 24, 2009 at 12:40 AM.

My experiments have revealed that the only place you need a diffusing gel is for the center console trip computer LCD. The stock diffuser is yellow and should be replaced. I got the best results using Roscolux #103 White which you can find by searching for "Roscolux" on E-Bay. I used two layers of that.
The stock diffuser for the odometer LCD has worked out better than the thin diffusers.
In addition to the PLCC-2 LEDs, you will need either right angle or type 1206 LEDs for the A/C control **** pointers (03 - 05) or 0603 type LEDs (06 - 08). QTY of 12 either way. For 06-08, I've not yet converted the amber pointer.
The LED for the 06 - 08 pointer is buried inside the **** and the light tube has an amber coating or is possibly amber colored.
If you want all the details read from page 1 of this thread. The only thing missing is the last section that covers the speedo cluster. I'm working on finishing that, should have it up over the weekend.
The stock diffuser for the odometer LCD has worked out better than the thin diffusers.
In addition to the PLCC-2 LEDs, you will need either right angle or type 1206 LEDs for the A/C control **** pointers (03 - 05) or 0603 type LEDs (06 - 08). QTY of 12 either way. For 06-08, I've not yet converted the amber pointer.
The LED for the 06 - 08 pointer is buried inside the **** and the light tube has an amber coating or is possibly amber colored.
If you want all the details read from page 1 of this thread. The only thing missing is the last section that covers the speedo cluster. I'm working on finishing that, should have it up over the weekend.

NICE. I think white pointers would be cool, or red would compliment the needles, like you say. I may change out my blue right angles for red...
If you can't find the right angle LEDs listed in the write up, look for 1206 style LEDs. These are smaller, they just barely reach both contacts, but you can lay them on their side and they do the same thing.
Also, for the 3mm LEDs in the switches on either side of the speedo cluster, send an email sales@lsdiodes.com for a quote. Last I checked with them they still had plenty of blue ones (5500 mcd) left. $.45 / each + shipping. Maybe buy a few extra just in case. They have taken their web site down but will respond to emails and accept PayPal.
If you can't find the right angle LEDs listed in the write up, look for 1206 style LEDs. These are smaller, they just barely reach both contacts, but you can lay them on their side and they do the same thing.
Also, for the 3mm LEDs in the switches on either side of the speedo cluster, send an email sales@lsdiodes.com for a quote. Last I checked with them they still had plenty of blue ones (5500 mcd) left. $.45 / each + shipping. Maybe buy a few extra just in case. They have taken their web site down but will respond to emails and accept PayPal.
Thanks for the info. Those 0603's are a b*tch to work with.
You will need 4 of the 3mm LEDs. Right angle LEDs available from Mouser.com.
Plug in the part number given at the beginning of the procedure posts, you can order them direct.
Plug in the part number given at the beginning of the procedure posts, you can order them direct.
I've decided to keep my odometer reversal. I've grown to like the way the dark background supports a continuity in the bottom of the speedo. It is rather dim during the day but it's not something I look at all that much anyway.
Working on something that I think (hope) will be very cool for the blinker indicator overlays. Will know more by the weekend and will post.
Working on something that I think (hope) will be very cool for the blinker indicator overlays. Will know more by the weekend and will post.

I was thinking of adding a gradient effectt to the right angle AC ***** too...just for the temperature one...like a blue to red...should work huh? Just 2 blue ones on one side and 2 red on the other?
Well here is the picture I promised. What I did was use a flashlight to shine thought the cover, so I was able to see where I wanted to place the film.
Waiting for some red leds to experiment with them, and see what I can do differently with the climate control.
Waiting for some red leds to experiment with them, and see what I can do differently with the climate control.