Notices
Exterior & Interior 350Z Body modification, interior styling and lighting

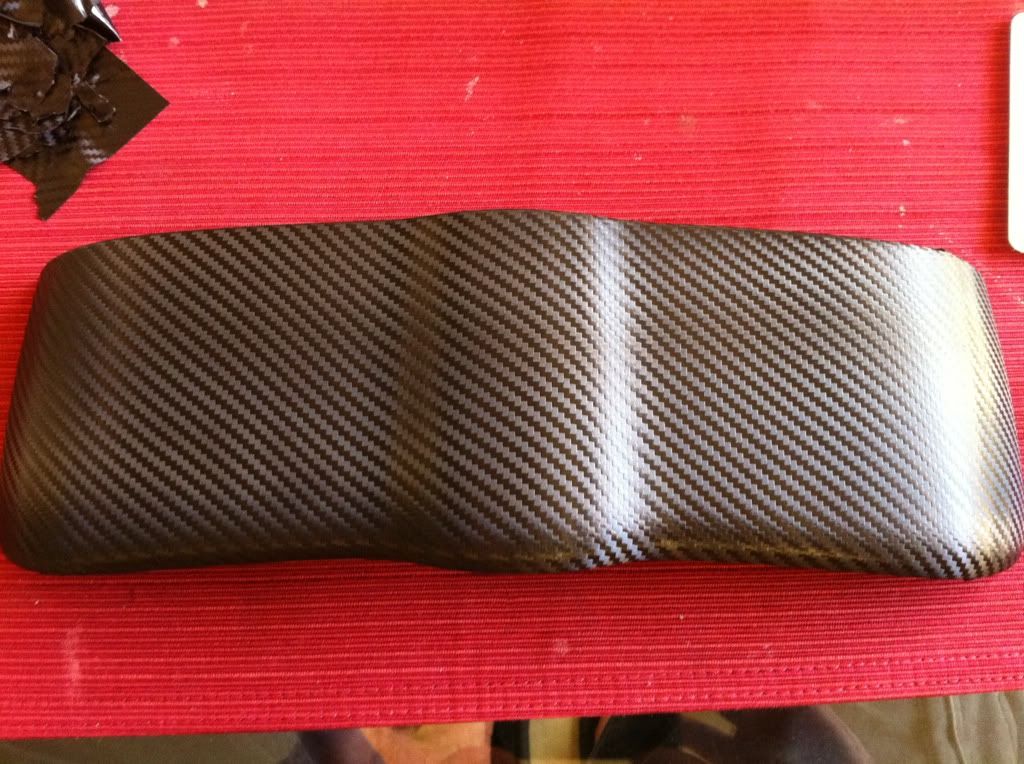
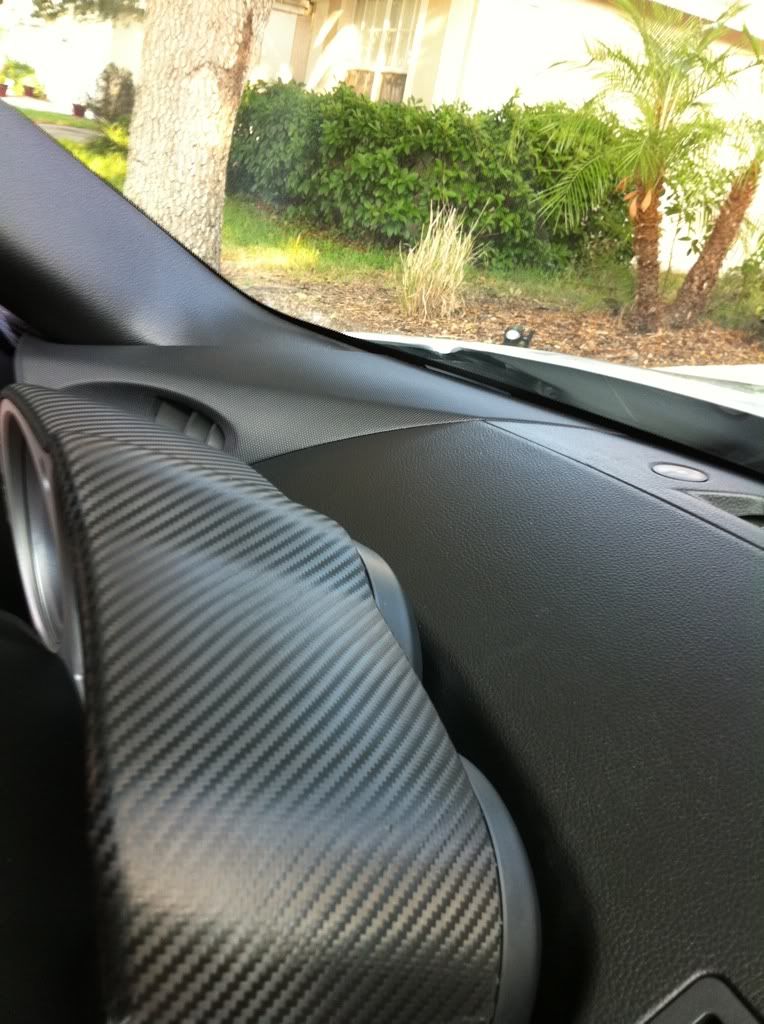
3M ScotchPrint Black Carbon Fiber Vinyl on Interior!

Old May 14, 2013 | 05:25 PM
  #101  
TunnyZ's Avatar
TunnyZ
New Member
iTrader: (3)
 
Joined: Oct 2010
Posts: 150
Likes: 0
From: Indiana
Default

just bought a giant roll, should be interesting.

Do you guys wrap just the stuff you can see or do you do it all the way around? I'm a little confused on how your cutting and placing it.
Reply
Old May 15, 2013 | 10:33 AM
  #102  
TPete19's Avatar
TPete19
Registered User
iTrader: (15)
 
Joined: Feb 2010
Posts: 1,422
Likes: 0
From: Seattle
Default

Originally Posted by TunnyZ
just bought a giant roll, should be interesting.

Do you guys wrap just the stuff you can see or do you do it all the way around? I'm a little confused on how your cutting and placing it.
I always wrap about .5-1" around the backside of each piece. Since you are stretching the material, it tends to want to shrink back to the original size. If you don't wrap around the edge, you run the risk of have gaps open up.
Reply
Old May 16, 2013 | 10:02 AM
  #103  
fzero's Avatar
fzero
Registered User
iTrader: (1)
 
Joined: Apr 2013
Posts: 109
Likes: 0
From: California
Default

I just bought a roll of scotchprint, but decided to do my own real carbon fiber overlay, it cost a little more and there's more labor involved, but I think it's doable. I'm gonna copy your cubby and storage door with suede and red stitching instead Tpete, I tried getting the same suede that you recommended, but the hancock fabrics discontinued that solid black micro suede. What do you think about this fabric? It's UV treated and foam backed http://www.yourautotrim.com/suheobl.html, would this be good to wrap my dash, cubby door as well since i'm planning to wrap my headliner?

Last edited by fzero; May 16, 2013 at 10:06 AM. Reason: sp
Reply
Old May 16, 2013 | 10:14 AM
  #104  
TPete19's Avatar
TPete19
Registered User
iTrader: (15)
 
Joined: Feb 2010
Posts: 1,422
Likes: 0
From: Seattle
Default

Originally Posted by fzero
I just bought a roll of scotchprint, but decided to do my own real carbon fiber overlay, it cost a little more and there's more labor involved, but I think it's doable. I'm gonna copy your cubby and storage door with suede and red stitching instead Tpete, I tried getting the same suede that you recommended, but the hancock fabrics discontinued that solid black micro suede. What do you think about this fabric? It's UV treated and foam backed http://www.yourautotrim.com/suheobl.html, would this be good to wrap my dash, cubby door as well since i'm planning to wrap my headliner?
I haven't seen it in person, so I can't really give too much insight. I'd worry about it looking too 'puffy' with the foam backing. Also when wrapping the cubby door, you have to shave the edges down a bit, so the extra thickness means more material that needs to be removed to keep the door moving properly. UV protection on the fabric is a bit of a non-issue unless you park outside in the sun all the time. Mine hasn't faded yet at all.
Reply
Old May 30, 2013 | 07:11 AM
  #105  
Cujo159's Avatar
Cujo159
Registered User
iTrader: (3)
 
Joined: Jul 2009
Posts: 136
Likes: 1
From: Grand Forks, ND
Default

How has this held up in the two years that you've had it on the car? Any fading, bubling, or pealing?

I'm looking to do this on my 07 nismo.

Also curious to know if anyone has done all the rear plastic pieces in this or any other resurfacing job.

Where can you buy the suede overlay?
Reply
Old May 30, 2013 | 08:25 AM
  #106  
TPete19's Avatar
TPete19
Registered User
iTrader: (15)
 
Joined: Feb 2010
Posts: 1,422
Likes: 0
From: Seattle
Default

No bubbling or peeling on mine.

The place to buy is already in this thread.
Reply
Old Jun 7, 2013 | 03:09 PM
  #107  
TunnyZ's Avatar
TunnyZ
New Member
iTrader: (3)
 
Joined: Oct 2010
Posts: 150
Likes: 0
From: Indiana
Default

Just got done at my first attempt at this on the center stuff. Doors and what not next. Not too shabby for a beginner.


Reply
Old Jun 7, 2013 | 07:04 PM
  #108  
ksuberk54's Avatar
ksuberk54
New Member
iTrader: (2)
 
Joined: Jul 2011
Posts: 1,122
Likes: 3
From: Not here
Default

Can't see s*** bruh
Reply
Old Jun 9, 2013 | 04:03 PM
  #109  
TunnyZ's Avatar
TunnyZ
New Member
iTrader: (3)
 
Joined: Oct 2010
Posts: 150
Likes: 0
From: Indiana
Default

whoops here try these. pics where just taken with my phone.

Name:  20130527_164808_zps472cd050.jpg
Views: 221
Size:  103.3 KB

Name:  20130527_164817_zps9ff017d8.jpg
Views: 208
Size:  102.7 KB
Reply
Old Jun 9, 2013 | 04:09 PM
  #110  
CannMann21's Avatar
CannMann21
Registered User
 
Joined: Apr 2011
Posts: 445
Likes: 0
From: BC
Default

How do you take out the plastic (center console, 2 arm rest pieces and 2 steering wheel pieces)?
Reply
Old Jun 9, 2013 | 05:03 PM
  #111  
TunnyZ's Avatar
TunnyZ
New Member
iTrader: (3)
 
Joined: Oct 2010
Posts: 150
Likes: 0
From: Indiana
Default

Originally Posted by CannMann21
How do you take out the plastic (center console, 2 arm rest pieces and 2 steering wheel pieces)?
There's multiple threads on how to do that already in the DIY. here's the "how to get the center out diy"

https://my350z.com/forum/body-interi...-guages-4.html

You can find the others in the DIY sections.
Reply
Old Jun 9, 2013 | 07:22 PM
  #112  
SR71's Avatar
SR71
Lead Super Moderator
MY350Z.COM
iTrader: (1)
 
Joined: Apr 2005
Posts: 5,807
Likes: 305
From: MN
Default

Pretty good but the weave going the opposite direction on the cubby door is throwing it off.
Reply
Old Jun 9, 2013 | 08:07 PM
  #113  
Jbakes727's Avatar
Jbakes727
Registered User
iTrader: (3)
 
Joined: Aug 2012
Posts: 480
Likes: 0
From: Palm Harbor, Florida
Default

For those that payed to get only their waterfall and shifter plastic done, how much did you guys pay?
Reply
Old Jun 10, 2013 | 04:01 AM
  #114  
Diesel350's Avatar
Diesel350
Thread Starter
Registered User
iTrader: (6)
 
Joined: May 2003
Posts: 8,378
Likes: 1
From: Tampa
Default

Originally Posted by 727FL350z
For those that payed to get only their waterfall and shifter plastic done, how much did you guys pay?
I believe I paid in the $125 range
Reply
Old Jul 11, 2013 | 10:16 AM
  #115  
str8stuntinz33's Avatar
str8stuntinz33
Registered User
 
Joined: Jul 2013
Posts: 1
Likes: 0
From: seattle
Default

I have some cf wrap coming in for my roof and i have plenty left over so I can do other peices. I was wondering if I do my concole should I sand it to make it smoth before applying or does it stick just fine.
Reply
Old Jul 11, 2013 | 12:12 PM
  #116  
rotaryDial's Avatar
rotaryDial
New Member
 
Joined: Jun 2013
Posts: 53
Likes: 9
From: Centerton Arkansas
Default

I am considering using the red carbon fiber vinyl it to accent the interior of my Z, considering there is already some red in it. I've orderd a sample to see how it will look, but was wondering if anyone else has used the red?
Reply
Old Jul 16, 2013 | 09:22 AM
  #117  
TPete19's Avatar
TPete19
Registered User
iTrader: (15)
 
Joined: Feb 2010
Posts: 1,422
Likes: 0
From: Seattle
Default

Originally Posted by str8stuntinz33
I have some cf wrap coming in for my roof and i have plenty left over so I can do other peices. I was wondering if I do my concole should I sand it to make it smoth before applying or does it stick just fine.
That's way too much work.

Without sanding it, it looks fine, just slightly textured.
Reply
Old Jul 17, 2013 | 05:16 PM
  #118  
Jakoby's Avatar
Jakoby
Registered User
 
Joined: Jan 2013
Posts: 59
Likes: 0
From: Green Bay, WI
Default

Decided to do some of the other interior trim pieces myself.
@diesel350 how did you get that triangler plastic peice where the tweeter is located out? i really want to do mine. and also the the part where the vent it. thanks
Reply
Old Aug 14, 2013 | 08:11 AM
  #119  
dcains's Avatar
dcains
Registered User
iTrader: (15)
 
Joined: Aug 2009
Posts: 5,126
Likes: 436
From: Lutz, FL
Default

Originally Posted by Diesel350
Decided to do another piece on my car. This piece was EXTREMELY difficult due to the curves on this trim piece. Unfortunately it did not come out as perfect as I would have like to.


How do you remove this piece? I'm getting some pieces hydrodipped and this is the only piece I haven't yet figured out how to remove - didn't want to break anything. Thanks.
Reply
Old Aug 14, 2013 | 06:22 PM
  #120  
Diesel350's Avatar
Diesel350
Thread Starter
Registered User
iTrader: (6)
 
Joined: May 2003
Posts: 8,378
Likes: 1
From: Tampa
Default

Originally Posted by dcains
How do you remove this piece? I'm getting some pieces hydrodipped and this is the only piece I haven't yet figured out how to remove - didn't want to break anything. Thanks.
To be honest I don't remember. I believe you take a flat head to the side and it should pop up and then I believe there are two screws you need to get to inside that holds that piece into place.
Reply

Thread Tools
Search this Thread

All times are GMT -8. The time now is 09:24 AM.