My soon to be 350z in S14 240sx clothing


 04-02-2009, 05:41 PM
#567
Registered User
Thread Starter
iTrader: (5)

Join Date: Apr 2008
Location: Cincinnati, Ohio
Posts: 230
Likes: 0
Received 0 Likes
on
0 Posts
Intake manifold carnage!
Ok as you all know I decided to use a VQ30DET intake manifold on my VQ35DE(T). Well after weeks of roaming around the Maxima forum I found a guy willing to sell me one so I snagged it up. As you all know the plan is to cut the back side of the intake manifold off and re-angle it to come in through the passenger side rather than the drivers side, well I took it a little further than that, I got carried away with the cut off wheel....
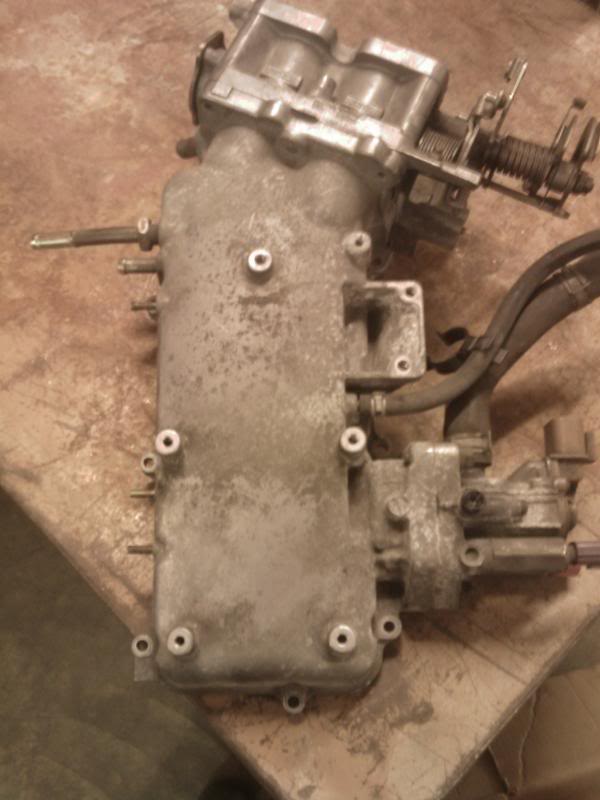
Here is how she looked when she arrived:
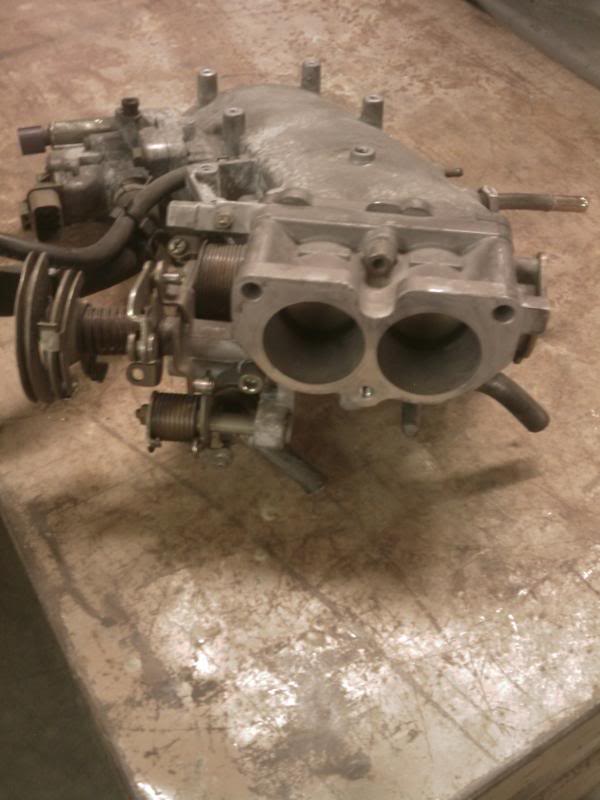
Bye Bye cable driven, dual inlet throttle body:
Twin inlets...Dont need those anymore...
Carefully marked for surgery:
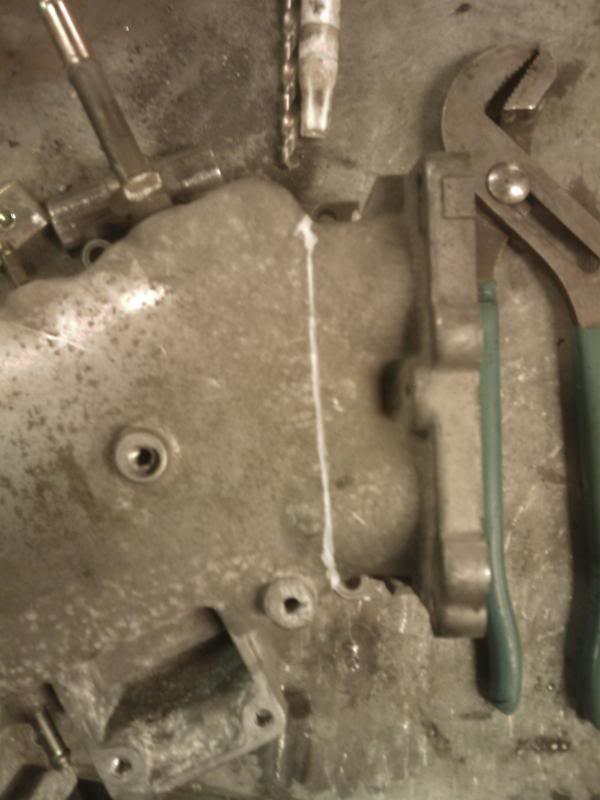
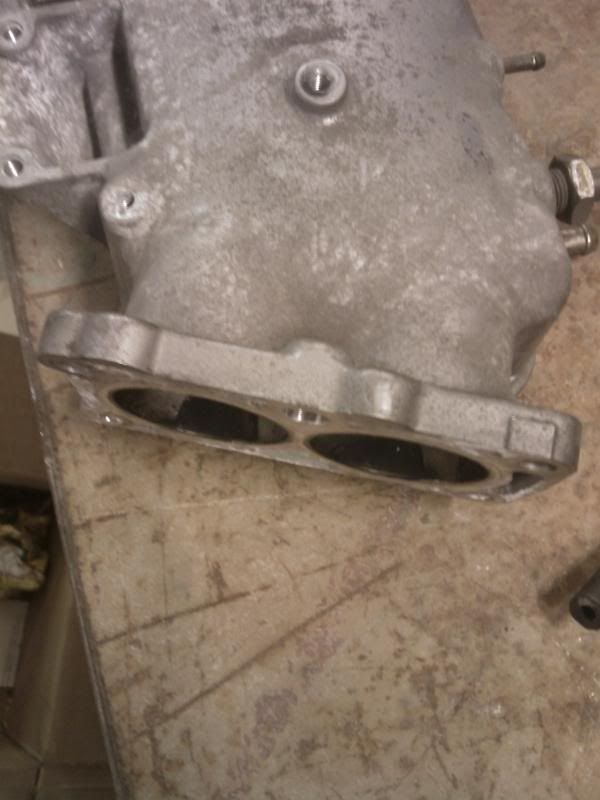
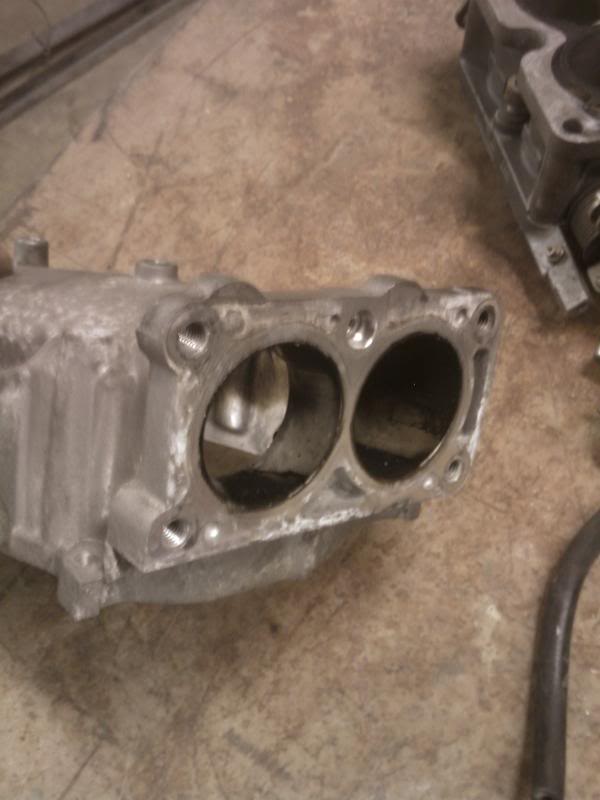
Picked up the cut off wheel and went to work, 30 mins later plus some grinding I came up with this:

AICV Delete:
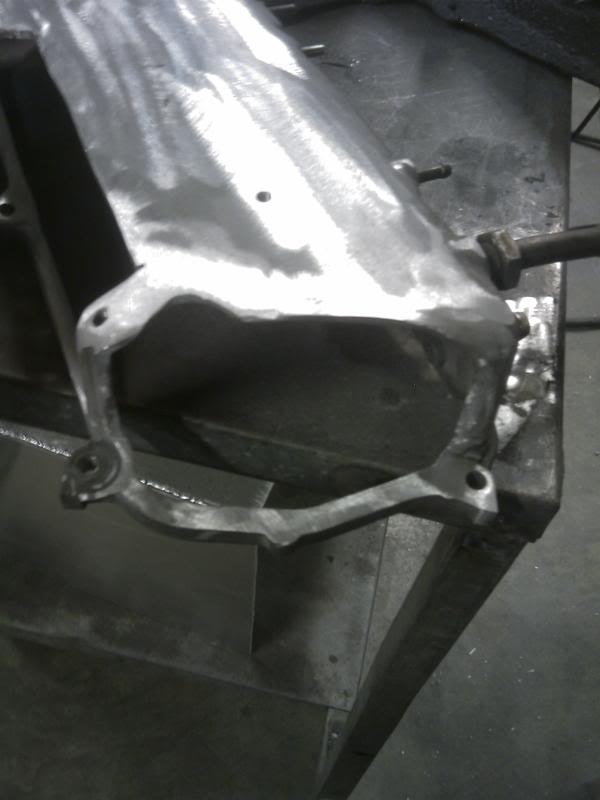
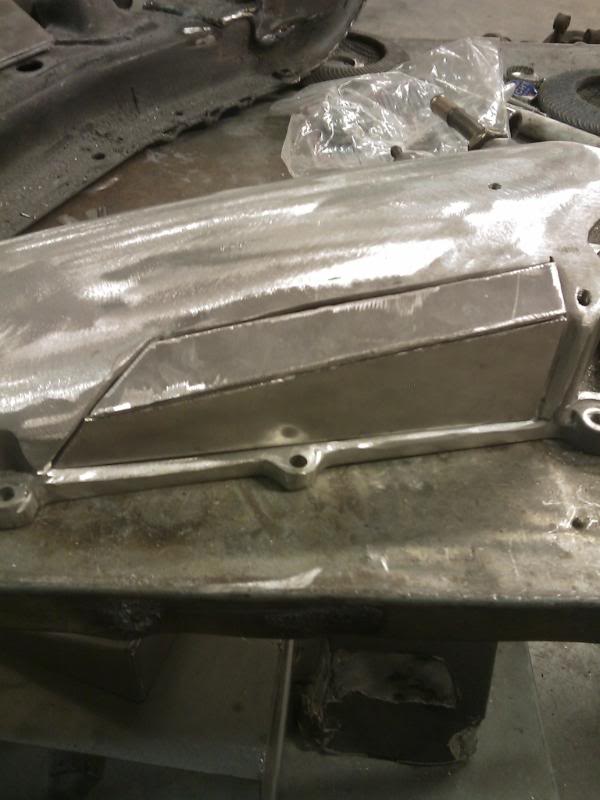
Now for reconstructive surgery, picked up some Aluminum-num-num and went to work, came up with this:

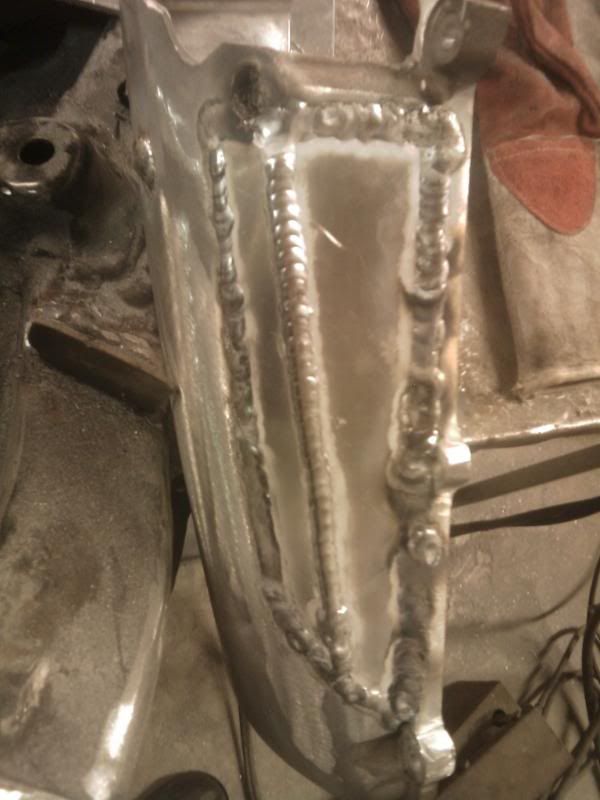
"Hey Mike can you weld this for me?" (It's not like I had to twist his arm aluminum is his favorite to weld, but he doesnt like welding cast aluminum to aluminum, welds dont come out as pretty)
Here is the result of the button up, notice around the perimeter the welds arent as clean, or "stacked up like nickles" as Mike would say, because of the cast aluminum. Its dirty and difficult to clean. Evidently I didnt grind and clean the metal enough, because alumium is so soft even when you grind the metal clean its not completely clean. If that makes sense. The weld bead joining the two pieces of new, clean aluminum is perfect compared to the rest but its all good you wont see any of this when I am finished:
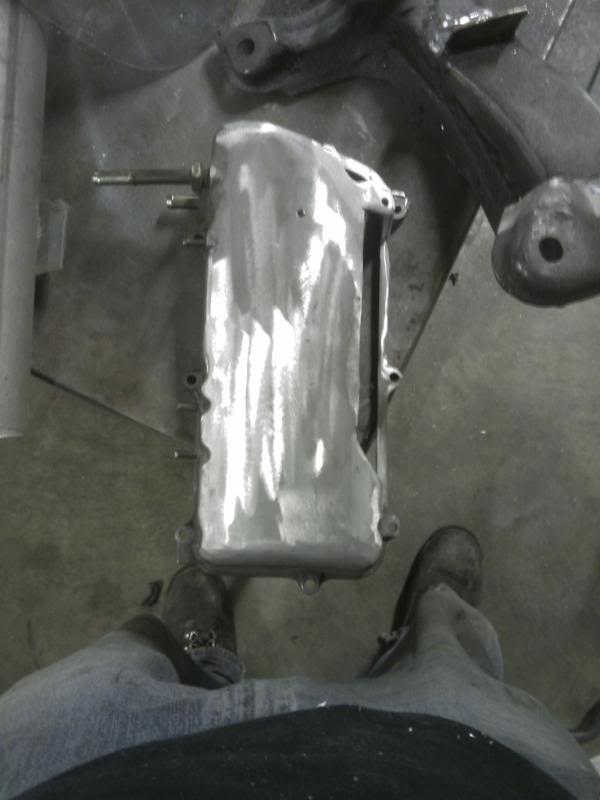
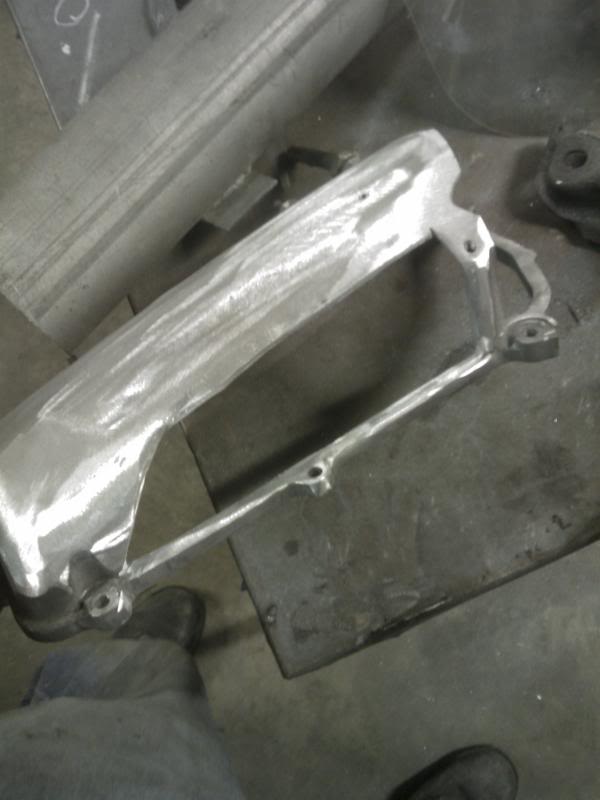
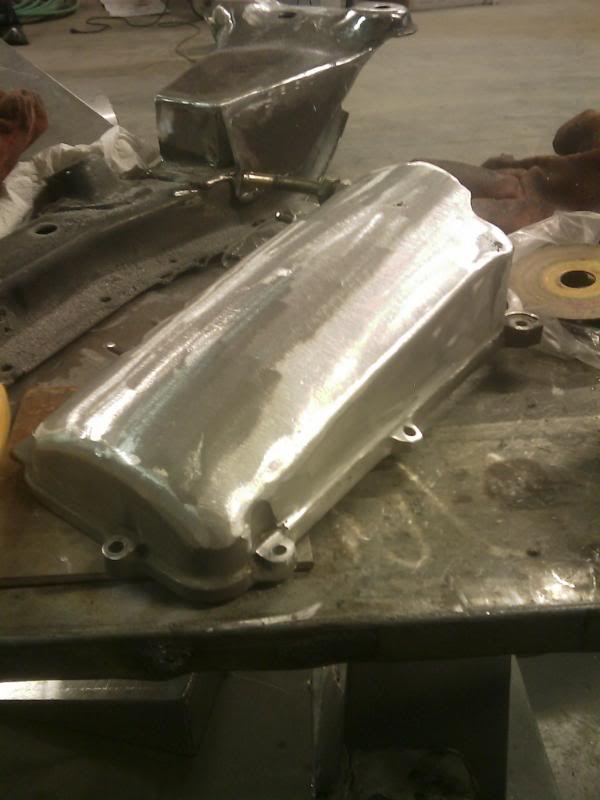
Out comes the handy grinder and back to work I went, and I am pleased to show the results:
Now I have to work on buttoning up the back side, I need to cut the aluminum and piece it all back together and Mike is going to get more gas for the tig since its running on empty.
That is all for now.
Ok as you all know I decided to use a VQ30DET intake manifold on my VQ35DE(T). Well after weeks of roaming around the Maxima forum I found a guy willing to sell me one so I snagged it up. As you all know the plan is to cut the back side of the intake manifold off and re-angle it to come in through the passenger side rather than the drivers side, well I took it a little further than that, I got carried away with the cut off wheel....
Here is how she looked when she arrived:
Bye Bye cable driven, dual inlet throttle body:
Twin inlets...Dont need those anymore...
Carefully marked for surgery:
Picked up the cut off wheel and went to work, 30 mins later plus some grinding I came up with this:
AICV Delete:
Now for reconstructive surgery, picked up some Aluminum-num-num and went to work, came up with this:
"Hey Mike can you weld this for me?" (It's not like I had to twist his arm aluminum is his favorite to weld, but he doesnt like welding cast aluminum to aluminum, welds dont come out as pretty)
Here is the result of the button up, notice around the perimeter the welds arent as clean, or "stacked up like nickles" as Mike would say, because of the cast aluminum. Its dirty and difficult to clean. Evidently I didnt grind and clean the metal enough, because alumium is so soft even when you grind the metal clean its not completely clean. If that makes sense. The weld bead joining the two pieces of new, clean aluminum is perfect compared to the rest but its all good you wont see any of this when I am finished:
Out comes the handy grinder and back to work I went, and I am pleased to show the results:
Now I have to work on buttoning up the back side, I need to cut the aluminum and piece it all back together and Mike is going to get more gas for the tig since its running on empty.
That is all for now.


 04-09-2009, 06:19 PM
#575
Registered User
Thread Starter
iTrader: (5)
Join Date: Apr 2008
Location: Cincinnati, Ohio
Posts: 230
Likes: 0
Received 0 Likes
on
0 Posts
Still working on it lol, still out of gas. Neither of us have had a chance to take the tank and exchange it with our busy work schedules.
I have not done much to the car, been waiting on parts to come in for it. I have also been working on the SR16VE head with a GTI-R SR20DET bottom end motor build for my NX2000. Ultimately giving me one strong *** SR20VE-T. Waiting on my head bolts and headgasket for that. Then I just need a new oil pump, fuel rail, intake mani gasket set, AICV valve and MSD RPM switch and the NX will be alive!
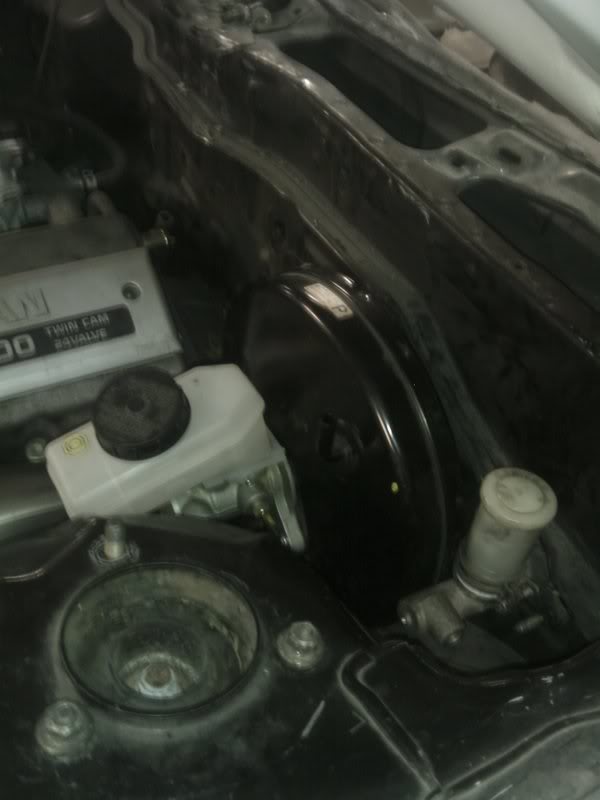
I found out something interesting today which further makes me love Nissan, 350z/G35 brake booster and master cylinder go right into place on the firewall only two small issues I ran into. 1. The 350z/G35 brake booster is a whole lot thinner than the stock 240sx brake booster. No the MC wont bont up to the stock 240sx brake booster, designs are different. Being that it is thinner it is alot wider in diameter. This makes for a slight clearance issue with the stock 240sx clutch master cylinder. I found that where the brake booster was hitting the clutch master cylinder was so slight that all that is needed is to take a hammer and dent in the outer lip of the 350z/G35 brake booster and no more clearance issues. So I did and it worked out. Then I ran into problem 2. The studs on the stock 240sx brake booster are longer than that of the 350z/G35. No worries tho, I plan to shorten down the studs, install some rod couplings and then some longer studs to make up for it.
Now I will have proper brake proportion for the ABS module and the calipers and it moves the MC closer to the firewall and not so close to the downpipe.
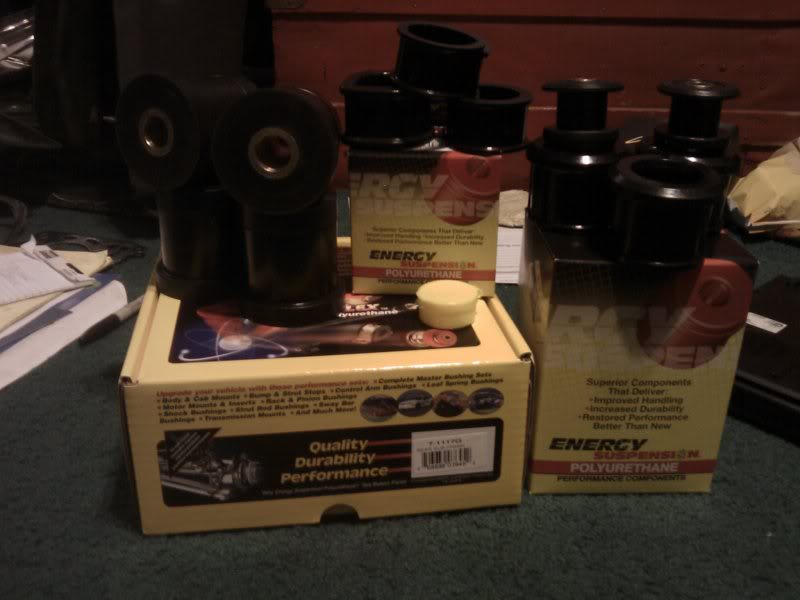
Went home and found some goodies sitting on my porch. Energy suspension sub frame bushing set, (Since my stock rubber bushings decided to disintegrate when I removed the sub frame) had to wait 2 weeks for these bad boys since they were on back order, Differential mounts (Too bad I can only use one mount out of this whole set) and steering rack bushings. I originally wanted to buy all Nismo mounts till I saw their pricing. I cant see there being much of a difference in their polyurethane bushings and these and for the price you cant beat it. I got all of this for less than half of what I would have paid for just one set of Nismo sub frame mounts. So now I can finally get an accurate measurement on my driveshaft length and get it over to my driveshaft maker and finally have my 1 piece aluminum driveshaft made.

I have not done much to the car, been waiting on parts to come in for it. I have also been working on the SR16VE head with a GTI-R SR20DET bottom end motor build for my NX2000. Ultimately giving me one strong *** SR20VE-T. Waiting on my head bolts and headgasket for that. Then I just need a new oil pump, fuel rail, intake mani gasket set, AICV valve and MSD RPM switch and the NX will be alive!
I found out something interesting today which further makes me love Nissan, 350z/G35 brake booster and master cylinder go right into place on the firewall only two small issues I ran into. 1. The 350z/G35 brake booster is a whole lot thinner than the stock 240sx brake booster. No the MC wont bont up to the stock 240sx brake booster, designs are different. Being that it is thinner it is alot wider in diameter. This makes for a slight clearance issue with the stock 240sx clutch master cylinder. I found that where the brake booster was hitting the clutch master cylinder was so slight that all that is needed is to take a hammer and dent in the outer lip of the 350z/G35 brake booster and no more clearance issues. So I did and it worked out. Then I ran into problem 2. The studs on the stock 240sx brake booster are longer than that of the 350z/G35. No worries tho, I plan to shorten down the studs, install some rod couplings and then some longer studs to make up for it.
Now I will have proper brake proportion for the ABS module and the calipers and it moves the MC closer to the firewall and not so close to the downpipe.
Went home and found some goodies sitting on my porch. Energy suspension sub frame bushing set, (Since my stock rubber bushings decided to disintegrate when I removed the sub frame) had to wait 2 weeks for these bad boys since they were on back order, Differential mounts (Too bad I can only use one mount out of this whole set) and steering rack bushings. I originally wanted to buy all Nismo mounts till I saw their pricing. I cant see there being much of a difference in their polyurethane bushings and these and for the price you cant beat it. I got all of this for less than half of what I would have paid for just one set of Nismo sub frame mounts. So now I can finally get an accurate measurement on my driveshaft length and get it over to my driveshaft maker and finally have my 1 piece aluminum driveshaft made.
Last edited by SinisterSntra91; 04-09-2009 at 06:54 PM.
04-10-2009, 02:52 PM
#576
Registered User

Join Date: Apr 2009
Location: London
Posts: 5
Likes: 0
Received 0 Likes
on
0 Posts
Hey man, AWESOME build! I've just recently picked up a S14 that needs a bit of work, but nothing like the scale you guys are doing! I was planning to keep the car as stock (cuss word I know) as possible, mainly because the insurance over here in the UK is extortionate and any modding just adds to the cost. However, even though I'm pretty much a total noob at car mods, your build has inspired me to do more with my little beastie then I had originally planned.
Good luck with the rest of the build I'll be watching closely to see how it all works out.
Good luck with the rest of the build I'll be watching closely to see how it all works out.


