
My soon to be 350z in S14 240sx clothing
 07-24-2008, 12:22 PM
#1
Registered User
Thread Starter
iTrader: (5)

Join Date: Apr 2008
Location: Cincinnati, Ohio
Posts: 230
Likes: 0
Received 0 Likes
on
0 Posts
I never finished this project, so if your a first time reader, know that I switched chassis due to lack of interest before reading everything, a link to the new build will be posted soon.
I copied and posted this here, because I do not want to retype everything so here goes:
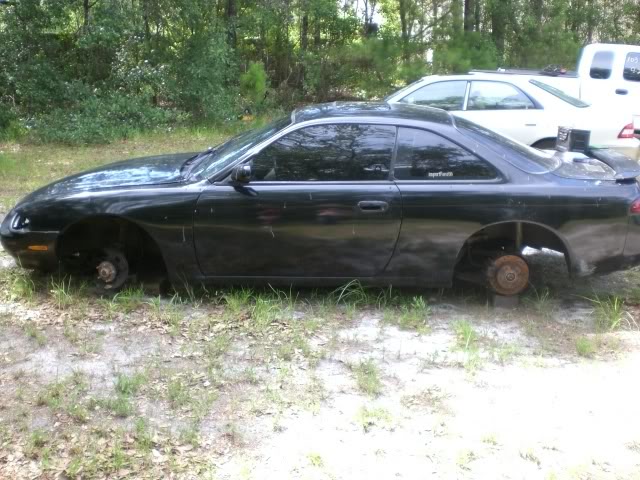
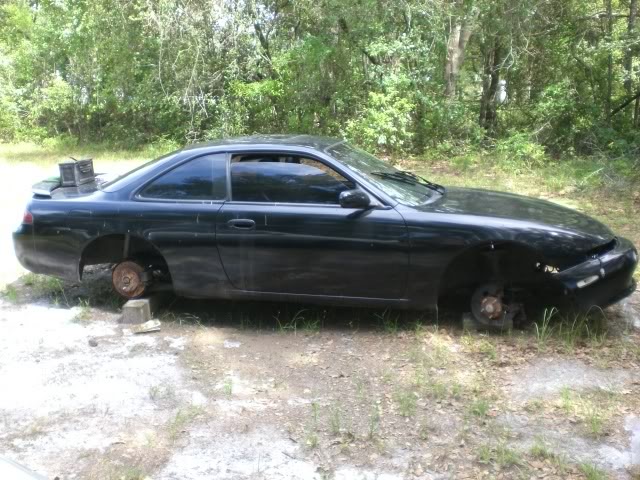
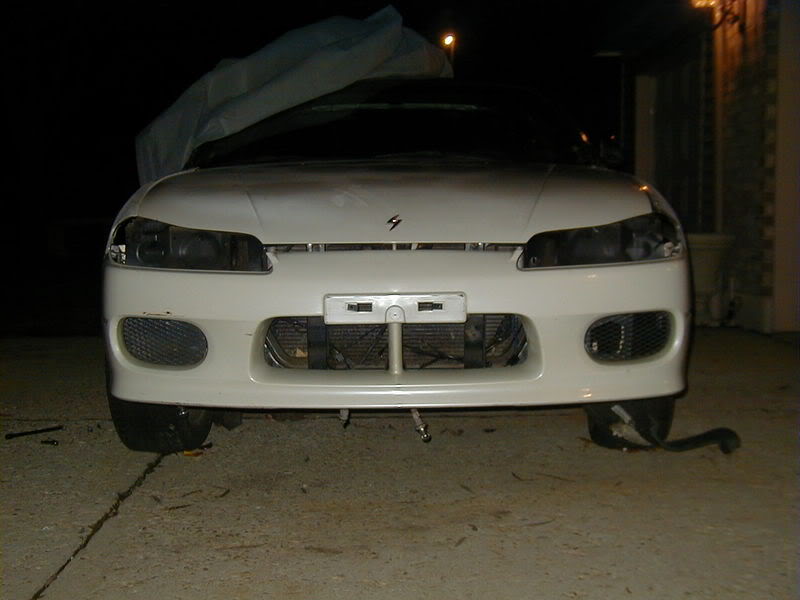
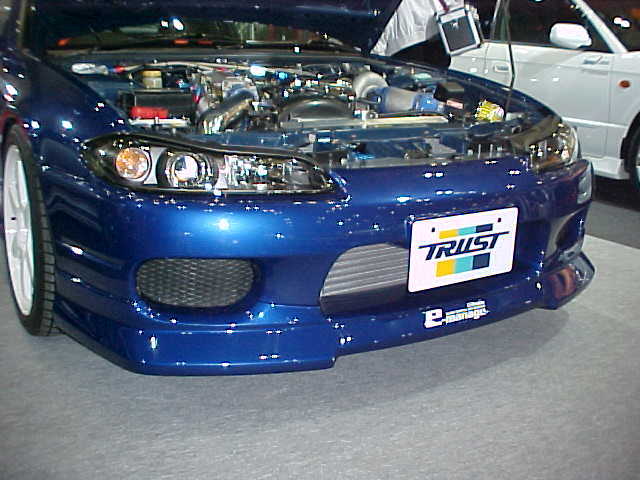
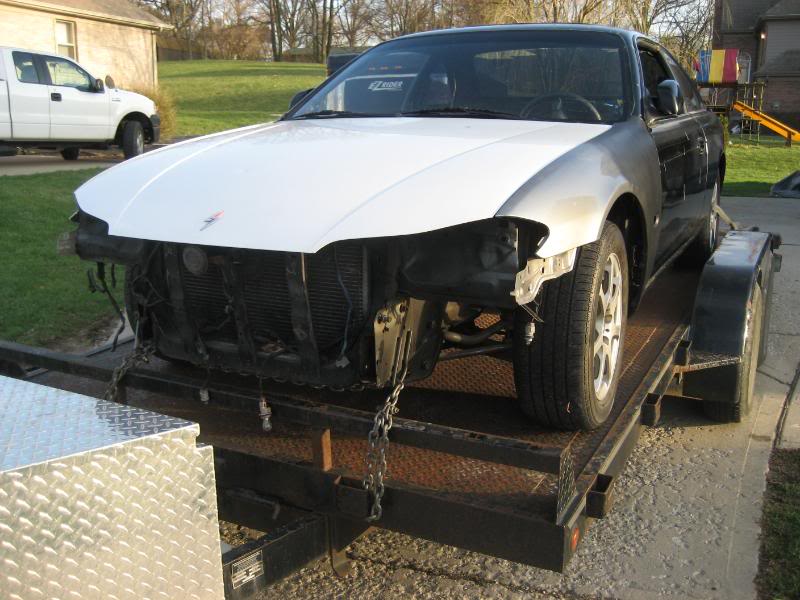
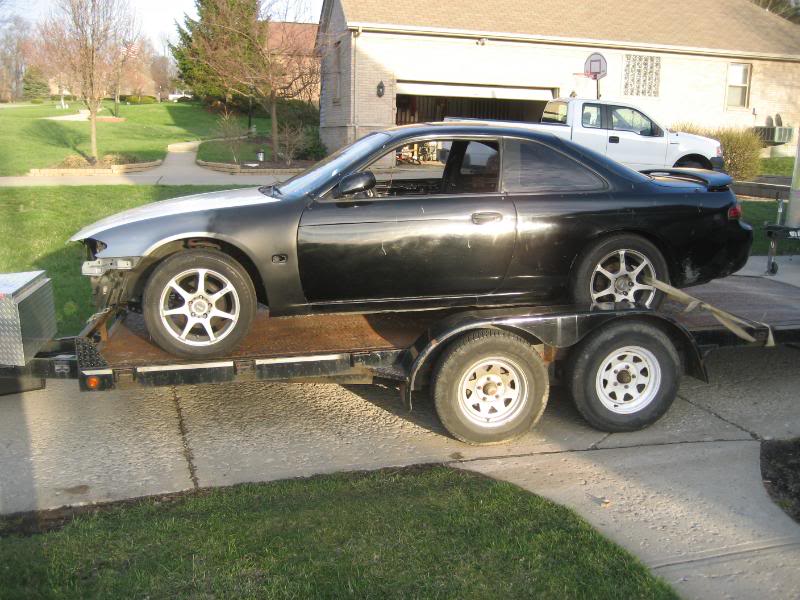
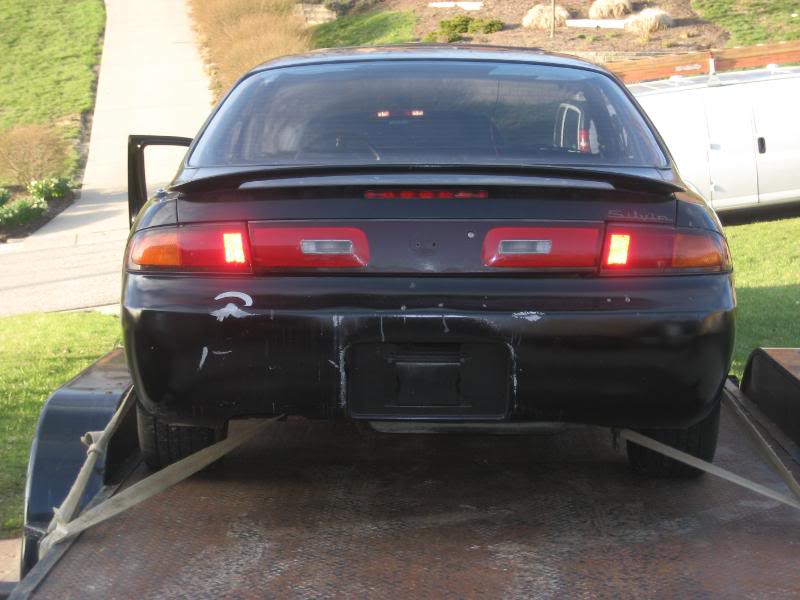
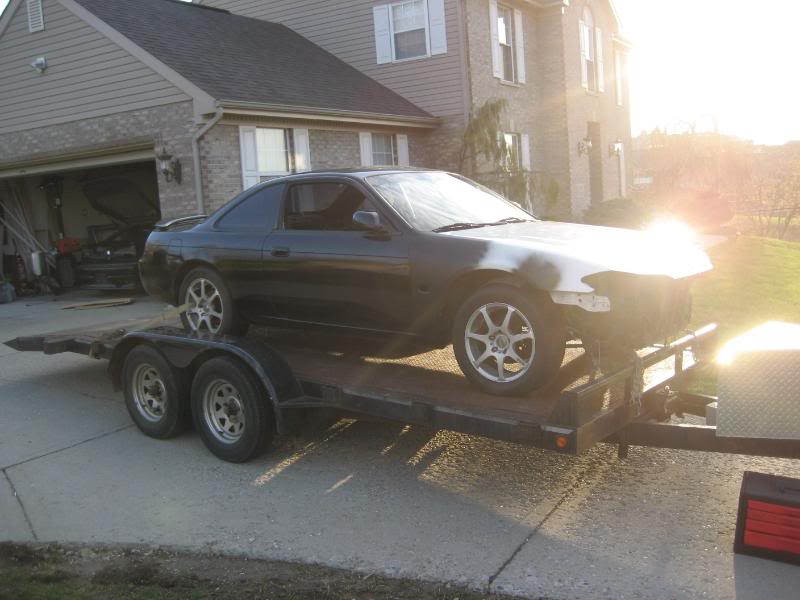
Well some of you already know that I picked up an S14 not to long ago, she was used and abused, but now its time for her to be restored. I got her off a guy on ebay, drove all the way to florida to pick her up and drug her *** back to ohio via my frontier. This is how she looked when I got her:
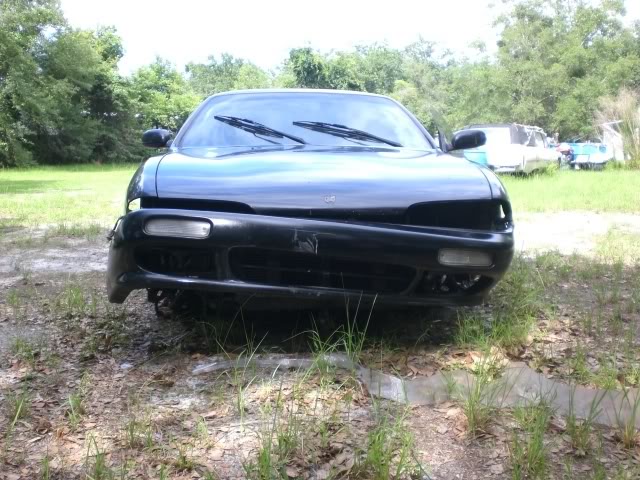

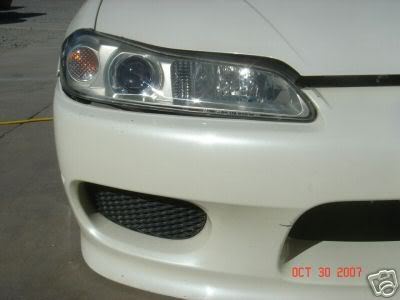
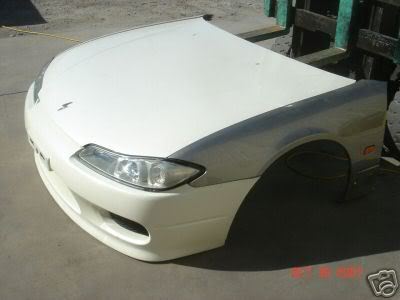
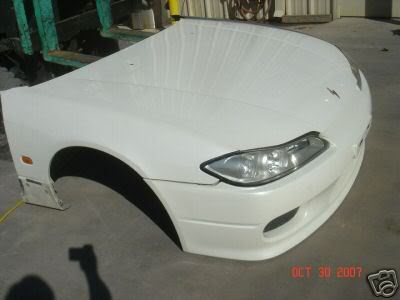
Im not a fan of the stock Zenki front end, so roaming ebay one day I found this, S15 Baby! Full metal and urethane (Just say no to fiberglass):
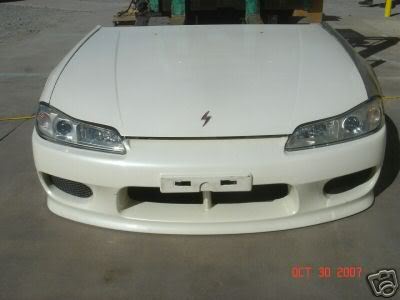
Silver housing projectors, from what I have heard they are rare...
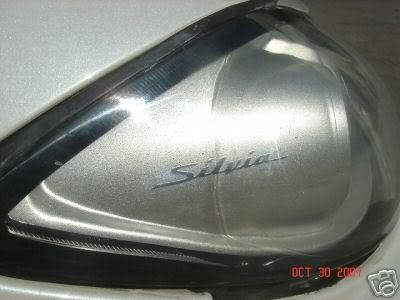
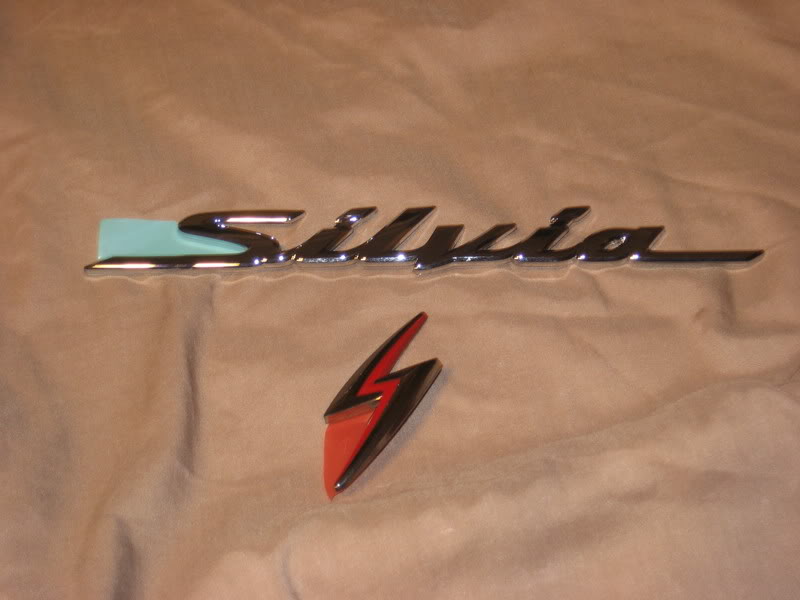
Silvia badge on the inside...** sex
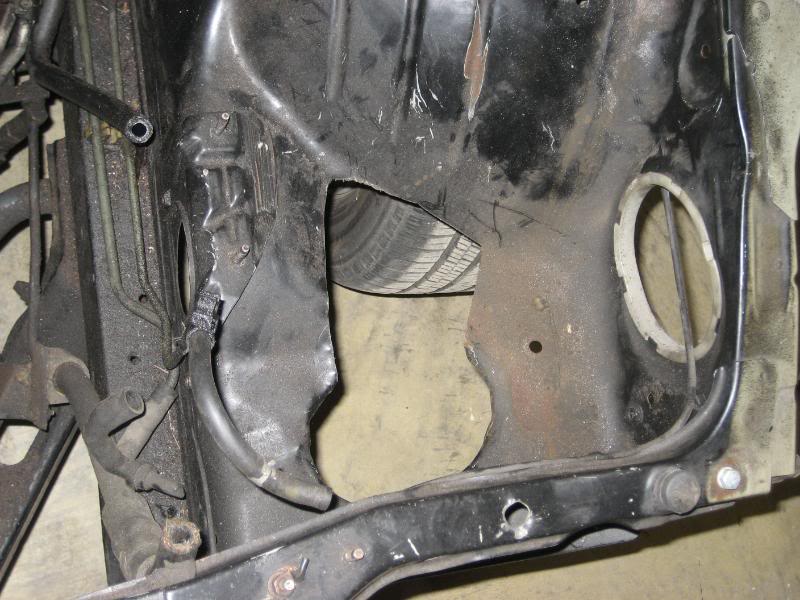
Well S15 fenders are not just a bolt on application, well they are but they arent, they line up with every bolt hole except for one the problem is where they meet the doors, it is slightly different, but different enough to where the ends have to be cut off each fender, swapped and welded back together. The hood on the other hand bolts right on. For those of you who want to know what is all involved in getting the real metal S15 fenders to fit, I took some pics and I will describe as best as I can.
First remove the S14 fenders from the car:
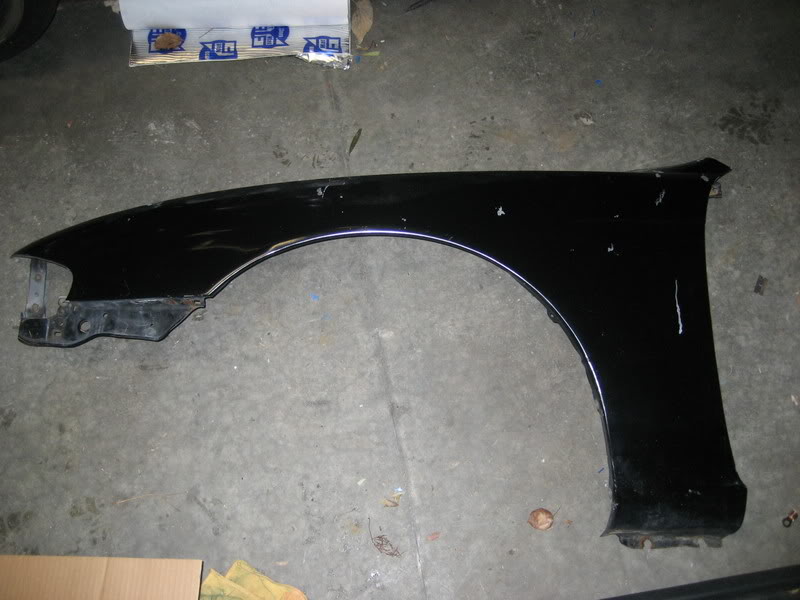
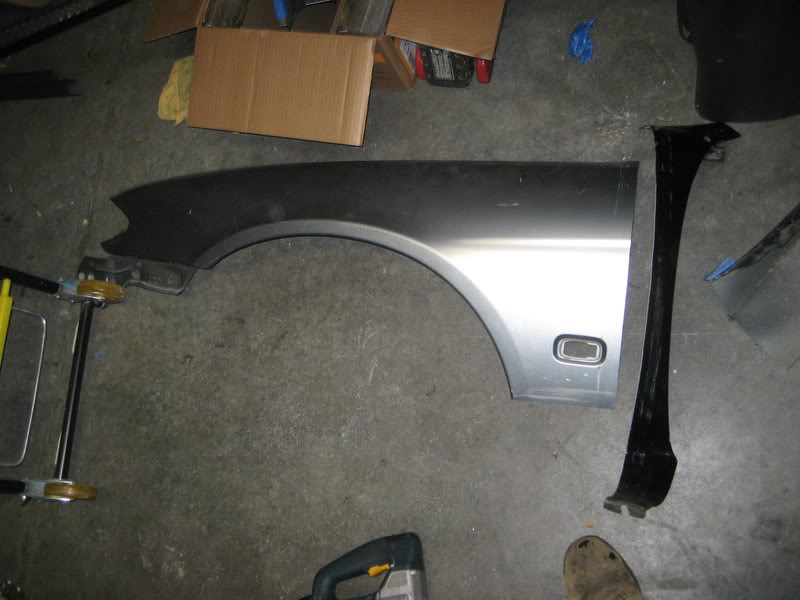
Then get your S15 fenders:

If you examine the fenders you will see that almost every bolt hole is the same as the S14 fender except for one. But this one bolt hole can be used you just have to drill a hole and run a bolt threw it.
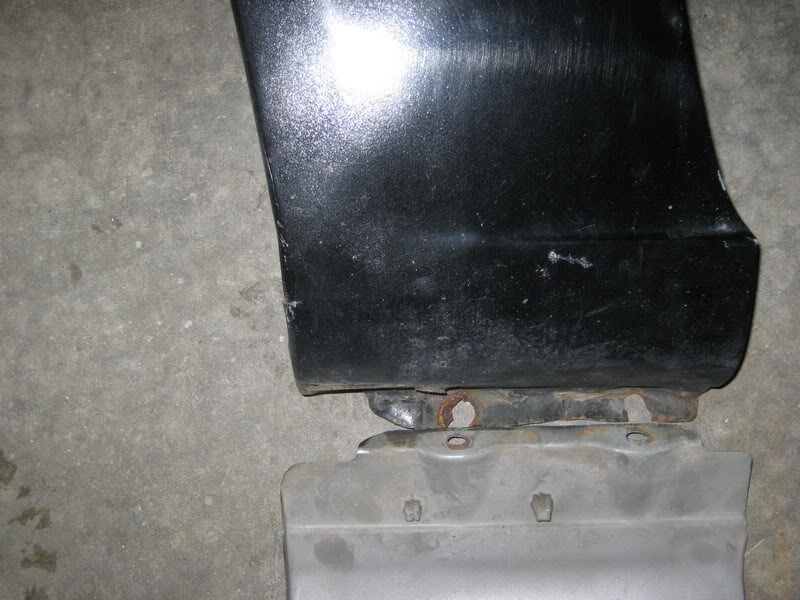
Lower bolt hole comparrison:
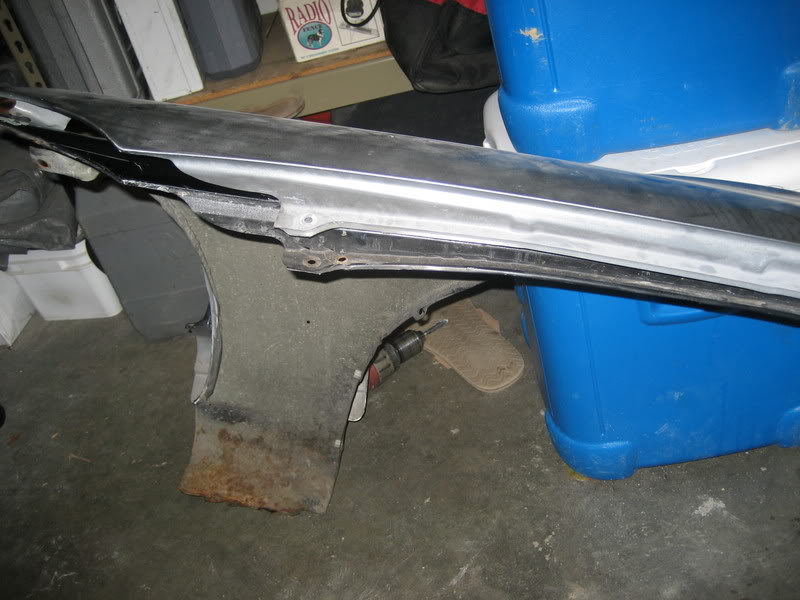
Upper bolt hole comparrison:
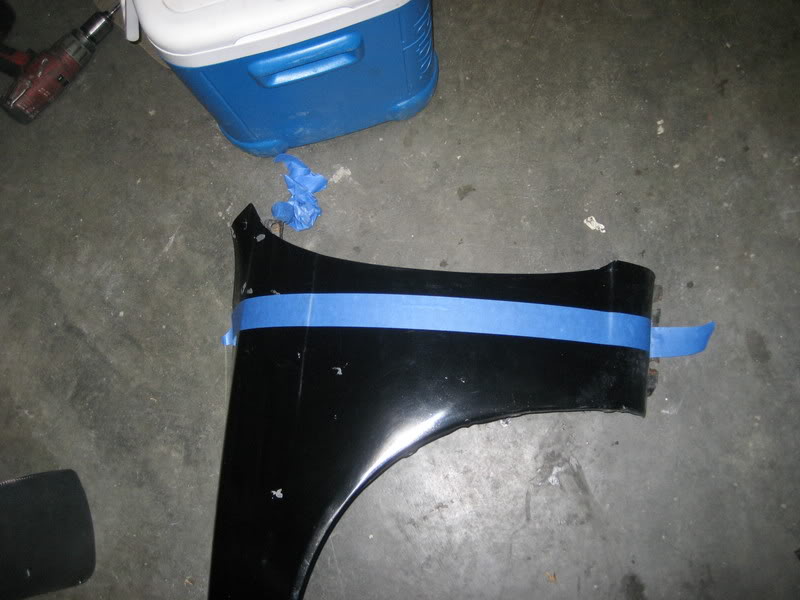
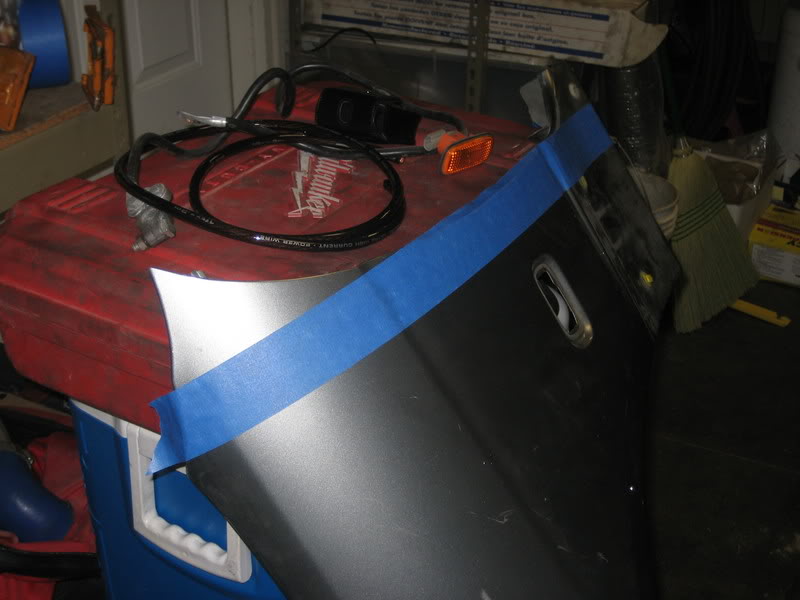
One would think these fenders should bolt right on, but they dont. There is a slight difference in the shape of the doors and how high the fender goes up the A-pillar on the S15. Also the hood is wider on a S15, so if you bolt the S15 hood on with the S14 fenders the hood will overlap the fenders near the front. So the method to make these fit is either cut and weld, which will give you better durability and fit, or buy fiberglass conversion fenders which often dont fit right and crack from stress. Since I have had enough of fiberglass I paid the extra money for the metal OEM fenders. So here is my method on how I made the metal conversion happened. Using the points, (it comes to an actual point) where both fenders meet the A pillar and the lower bolt holes as reference points, I took masking tape and strung it from point to bolt holes in order to cut a straight line on a curved surface. I left about a half inch more than I needed on each section, so they will overlap. So the S14 fender is taped up like so:
Repeat the same process on the S15 fenders:
Now if you look at both fenders near the bottom you will notice the S14 fender curves in more radically than the S15 fender. So what I did is cut the S15 fender right above the lower body line. So the S15 fender will look like this once taped up and ready to cut:
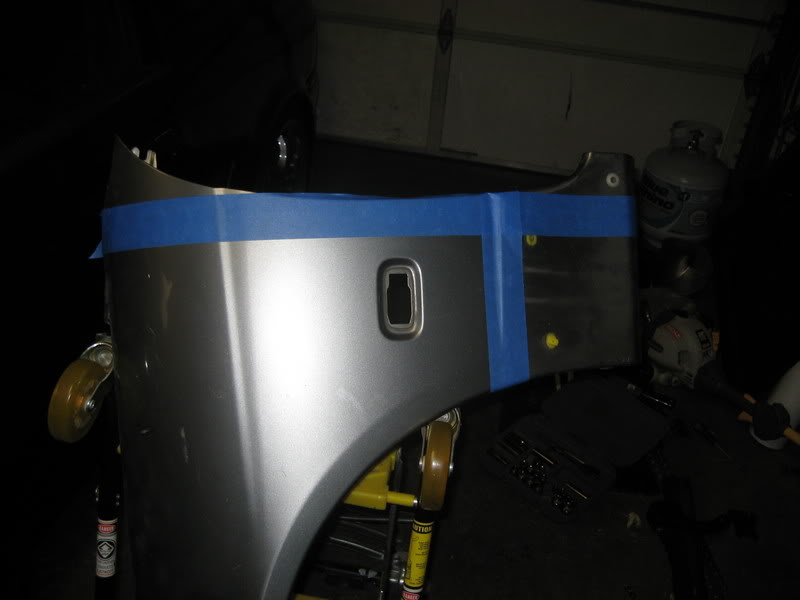
Now using a jigsaw with a metal cutting blade cut both fenders along the tape edge, once finished they will look like so:
You can throw whats left of the S15 fender away, put whats left of the S14 fender to the side. Make sure the S15 hood is mounted to your vehicle, this will help in making sure the fenders properly line up with the body lines. Bolt both sections of the S15 fender and S14 fender to the car. Unfortunately my camera battery died at this point so all I can do is describe from this point. 3 out of 4 bolt holes on the S15 fender should line up on the dog house, the only one that does not lines up with a bolt hole that does not exist. Bolt the S14 fenders as it normally bolts up. The fenders should overlap eachother if they are cut right. Now this is where you need welding skills or someone who has welding skills. Paying attention to where the fenders line up with the car start from the top and tack weld the fenders together working your way down. Once you get to the point where you need the lower section of the S14 fender to complete the fender, Grab whats left of the S14 fender and hold it up to the fender on the car. Mark the fender on both sides. Using the masking tape, stretch a piece from point to point and cut. Make sure you leave enough to overlap on all sides again. Making sure you pay attention to the body lines once more. Take that section weld it up. Now remove the fender from the car, should look like this:

Here are some pics I have of the passenger side being done:
My buddy Mike working his magic:
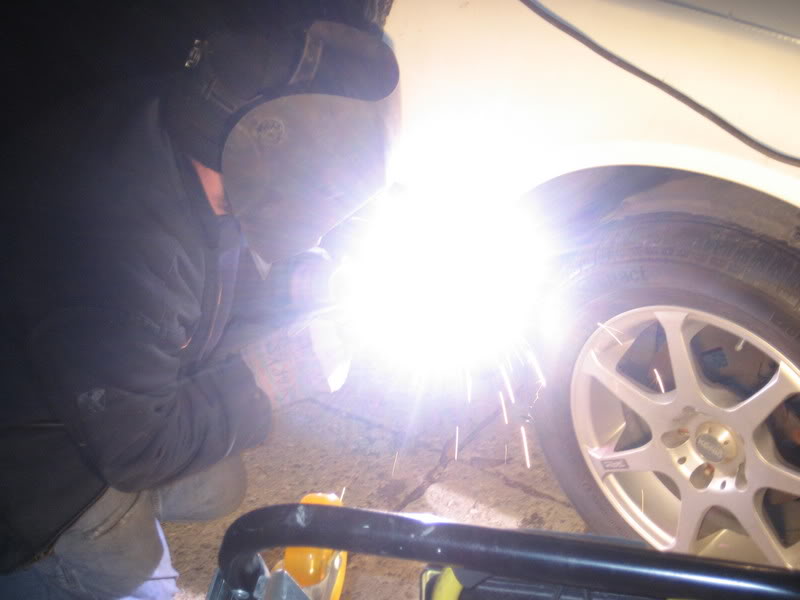
Checking the welds:

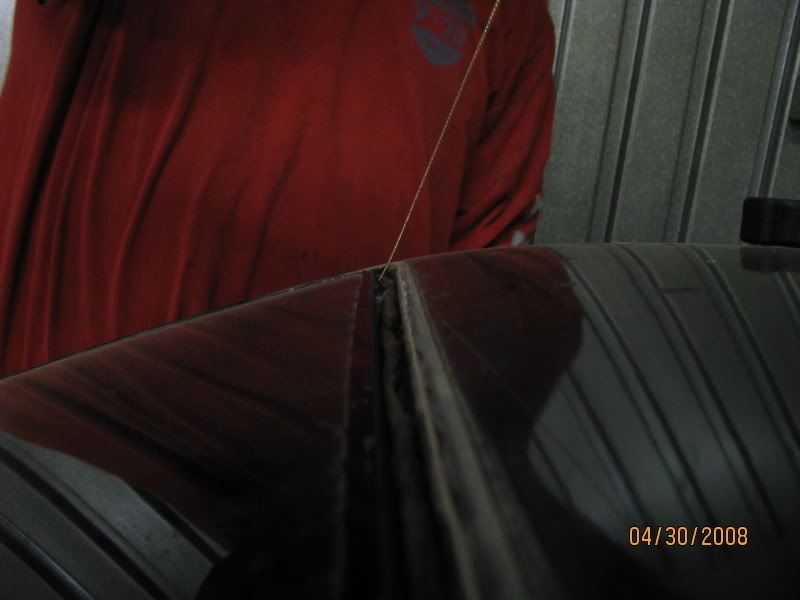
The end result and how it looks on the car:
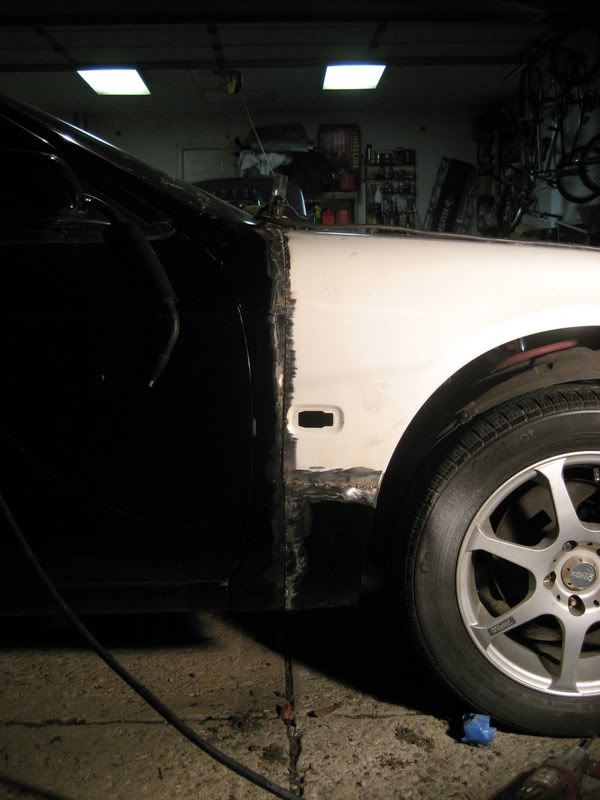
Take it to a good body man and have him smooth out the welds and fade in the sections and your good to go. My body lines did not line up which I am ok with, I hate body lines they will get shaved off my car. With a little more cutting and welding you can get the body lines to line up, so you can retain them. Do not I repeat DO NOT cut the fenders at the wheel arches and expect them to line up, S15 fenders are wider. You can cut the section off the fenders that go around the lights and swap them using the same welding method, But I opted for the wider S15 fenders, as I plan for wide body rear and I wanted to retain the turn signal lamps.
All I have to do now is cut out my S14 core support and weld in a S15 one. You can modify your existing S14 core support and finish the conversion after you rewire the headlights, but mine is bent all to hell on top and I want a cleaner factory look, so stay tuned for that install.
Hope that helps anyone who is pondering this conversion.
I copied and posted this here, because I do not want to retype everything so here goes:
Well some of you already know that I picked up an S14 not to long ago, she was used and abused, but now its time for her to be restored. I got her off a guy on ebay, drove all the way to florida to pick her up and drug her *** back to ohio via my frontier. This is how she looked when I got her:
Im not a fan of the stock Zenki front end, so roaming ebay one day I found this, S15 Baby! Full metal and urethane (Just say no to fiberglass):
Silver housing projectors, from what I have heard they are rare...
Silvia badge on the inside...** sex
Well S15 fenders are not just a bolt on application, well they are but they arent, they line up with every bolt hole except for one the problem is where they meet the doors, it is slightly different, but different enough to where the ends have to be cut off each fender, swapped and welded back together. The hood on the other hand bolts right on. For those of you who want to know what is all involved in getting the real metal S15 fenders to fit, I took some pics and I will describe as best as I can.
First remove the S14 fenders from the car:
Then get your S15 fenders:
If you examine the fenders you will see that almost every bolt hole is the same as the S14 fender except for one. But this one bolt hole can be used you just have to drill a hole and run a bolt threw it.
Lower bolt hole comparrison:
Upper bolt hole comparrison:
One would think these fenders should bolt right on, but they dont. There is a slight difference in the shape of the doors and how high the fender goes up the A-pillar on the S15. Also the hood is wider on a S15, so if you bolt the S15 hood on with the S14 fenders the hood will overlap the fenders near the front. So the method to make these fit is either cut and weld, which will give you better durability and fit, or buy fiberglass conversion fenders which often dont fit right and crack from stress. Since I have had enough of fiberglass I paid the extra money for the metal OEM fenders. So here is my method on how I made the metal conversion happened. Using the points, (it comes to an actual point) where both fenders meet the A pillar and the lower bolt holes as reference points, I took masking tape and strung it from point to bolt holes in order to cut a straight line on a curved surface. I left about a half inch more than I needed on each section, so they will overlap. So the S14 fender is taped up like so:
Repeat the same process on the S15 fenders:
Now if you look at both fenders near the bottom you will notice the S14 fender curves in more radically than the S15 fender. So what I did is cut the S15 fender right above the lower body line. So the S15 fender will look like this once taped up and ready to cut:
Now using a jigsaw with a metal cutting blade cut both fenders along the tape edge, once finished they will look like so:
You can throw whats left of the S15 fender away, put whats left of the S14 fender to the side. Make sure the S15 hood is mounted to your vehicle, this will help in making sure the fenders properly line up with the body lines. Bolt both sections of the S15 fender and S14 fender to the car. Unfortunately my camera battery died at this point so all I can do is describe from this point. 3 out of 4 bolt holes on the S15 fender should line up on the dog house, the only one that does not lines up with a bolt hole that does not exist. Bolt the S14 fenders as it normally bolts up. The fenders should overlap eachother if they are cut right. Now this is where you need welding skills or someone who has welding skills. Paying attention to where the fenders line up with the car start from the top and tack weld the fenders together working your way down. Once you get to the point where you need the lower section of the S14 fender to complete the fender, Grab whats left of the S14 fender and hold it up to the fender on the car. Mark the fender on both sides. Using the masking tape, stretch a piece from point to point and cut. Make sure you leave enough to overlap on all sides again. Making sure you pay attention to the body lines once more. Take that section weld it up. Now remove the fender from the car, should look like this:
Here are some pics I have of the passenger side being done:
My buddy Mike working his magic:
Checking the welds:
The end result and how it looks on the car:
Take it to a good body man and have him smooth out the welds and fade in the sections and your good to go. My body lines did not line up which I am ok with, I hate body lines they will get shaved off my car. With a little more cutting and welding you can get the body lines to line up, so you can retain them. Do not I repeat DO NOT cut the fenders at the wheel arches and expect them to line up, S15 fenders are wider. You can cut the section off the fenders that go around the lights and swap them using the same welding method, But I opted for the wider S15 fenders, as I plan for wide body rear and I wanted to retain the turn signal lamps.
All I have to do now is cut out my S14 core support and weld in a S15 one. You can modify your existing S14 core support and finish the conversion after you rewire the headlights, but mine is bent all to hell on top and I want a cleaner factory look, so stay tuned for that install.
Hope that helps anyone who is pondering this conversion.
Last edited by SinisterSntra91; 01-20-2011 at 06:11 AM.
 07-24-2008, 12:23 PM
#2
Registered User
Thread Starter
iTrader: (5)
Join Date: Apr 2008
Location: Cincinnati, Ohio
Posts: 230
Likes: 0
Received 0 Likes
on
0 Posts
Some other goodies I got for the project:
JDM S14 power folding mirrors.....baller!:
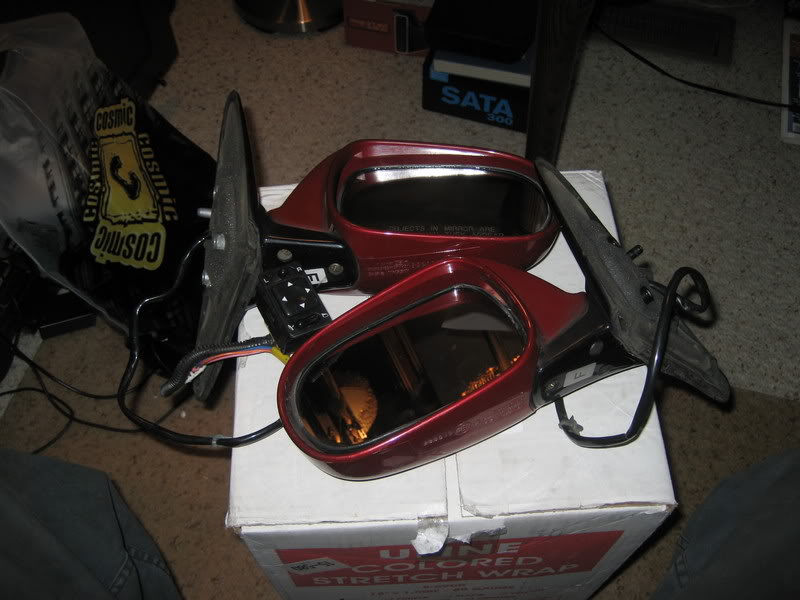
I even changed them over for LHD application.
New OEM S15 Badges:
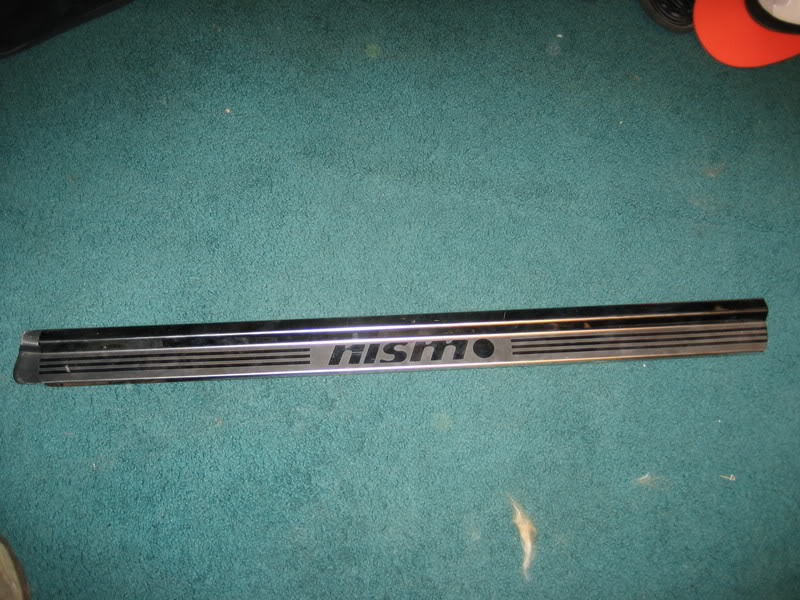
Nismo Door Sills:
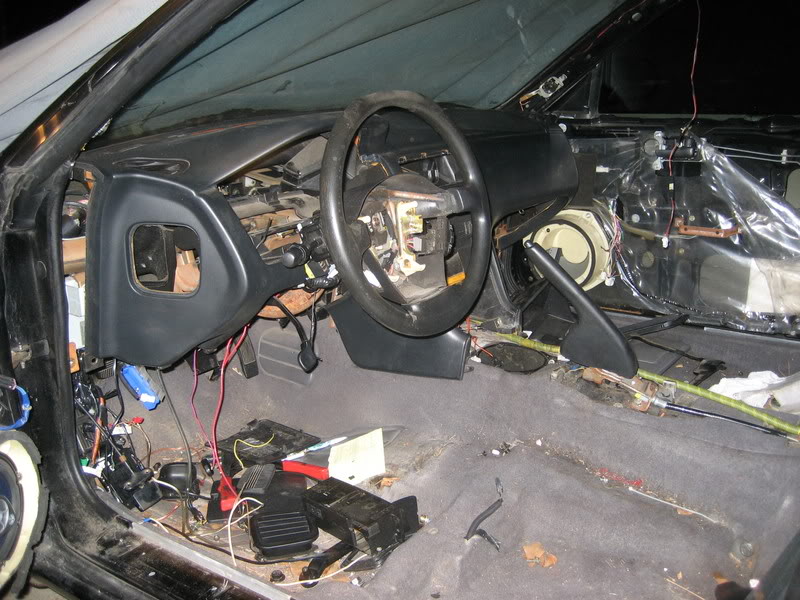
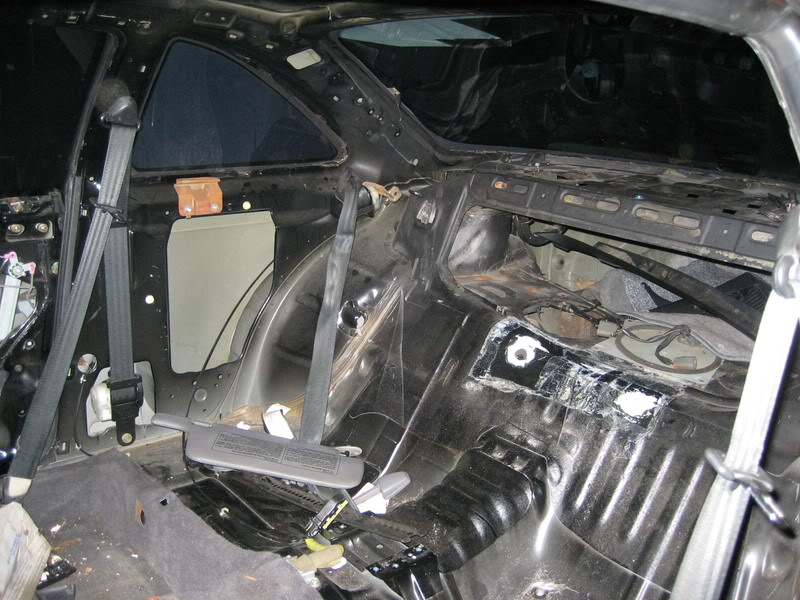
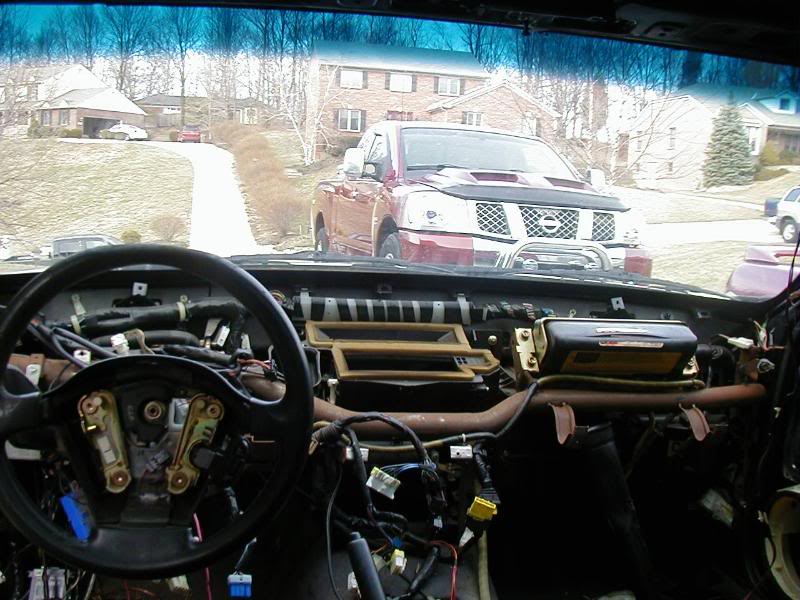
And here are some shots of the interior as its being removed for total over haul:
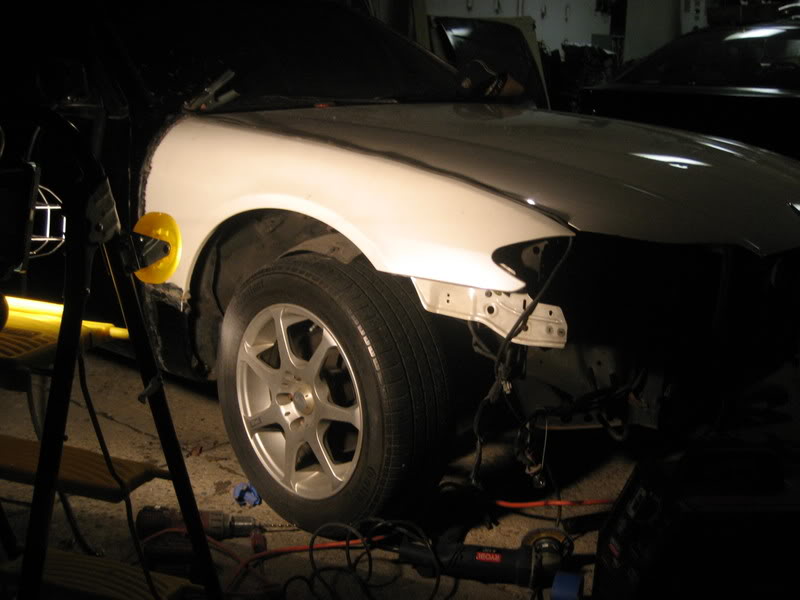
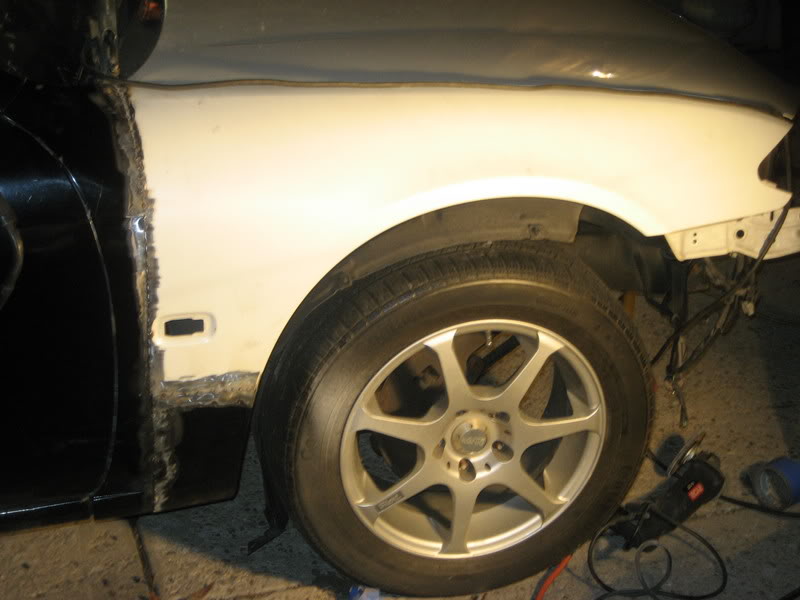
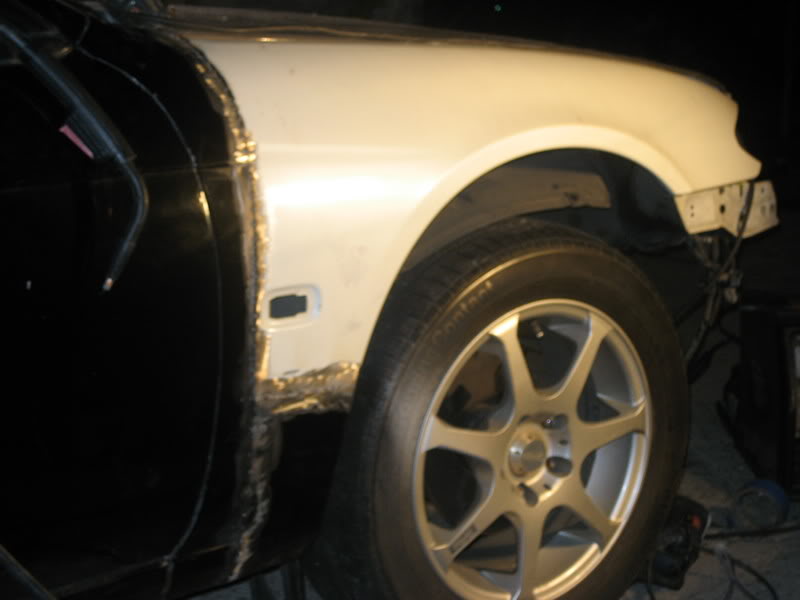
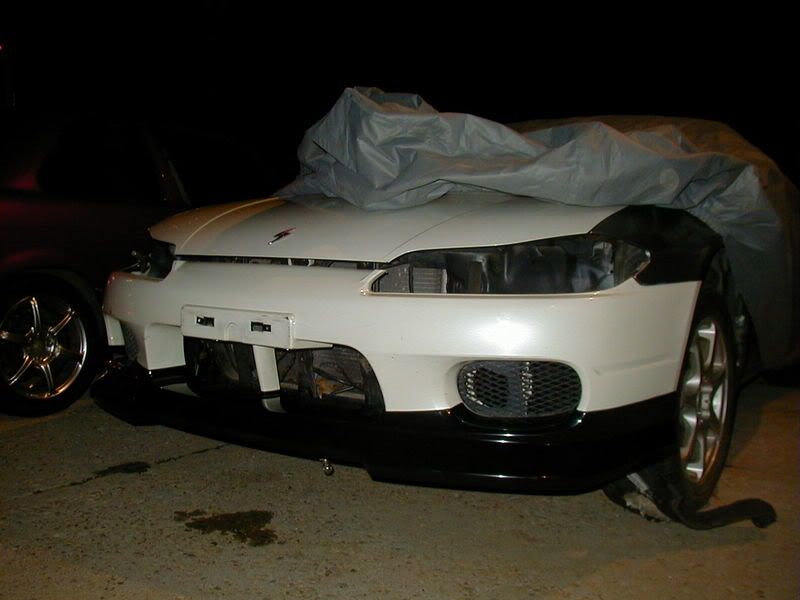
Got my fenders back from my grandpa today and boy am I pleased/excited with the results, he added a high strength glue to them before he smoothed them out so they are extra sturdy. Fitment is awesome, here are some pics of the test fit:

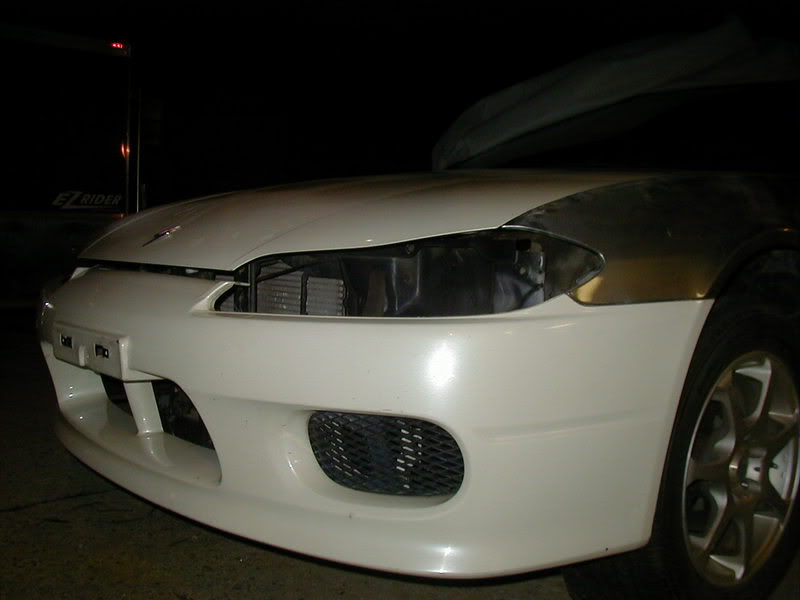

Now all I need is to weld in a S15 core support, S15 headlight brackets and find a way to lift the hood near the windshield so all the panels will line up perfectly (it sags down a little in the rear) As soon as I can get this baby indoors the real build will begin.....
Not much has changed due to winter and not having room to work on the car, but these items came in today:
Hmm some greddy goodness:
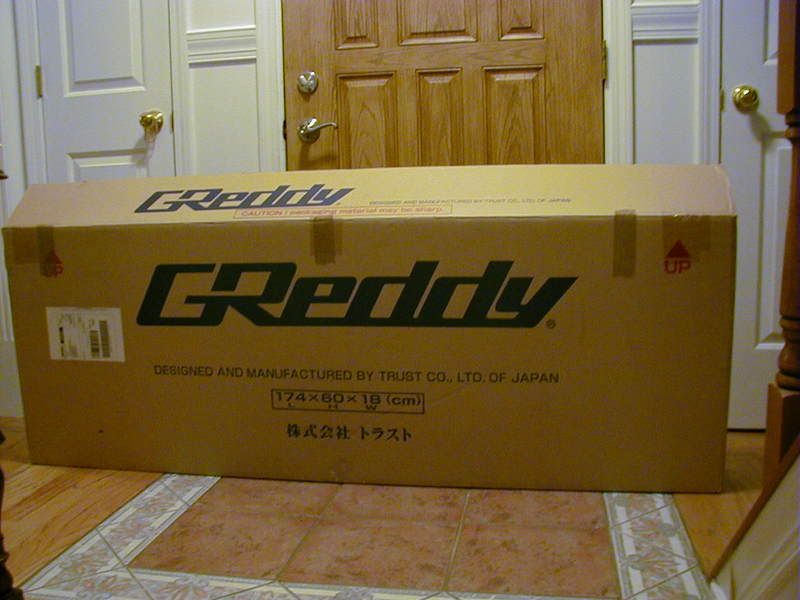
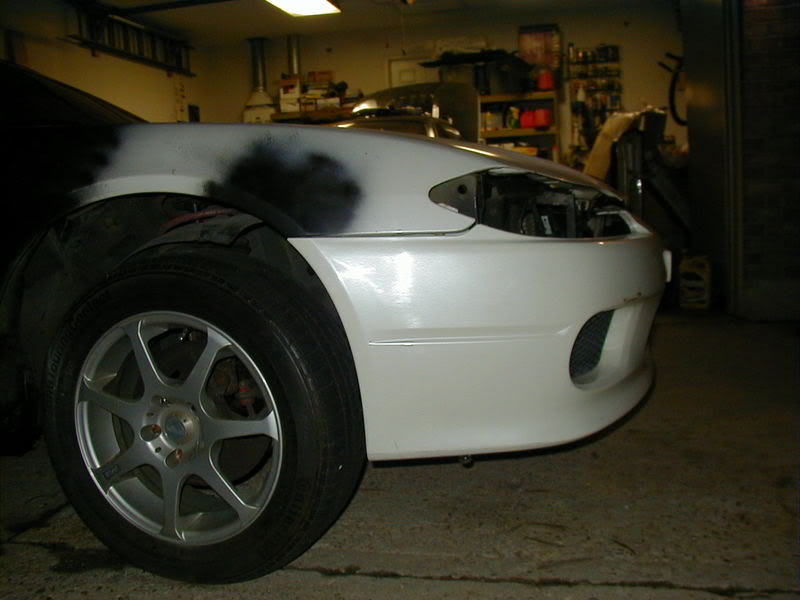
And the Greddy item is.....S15 Gracer Urethane lip, no fiberglass for this car, here is the test fit:
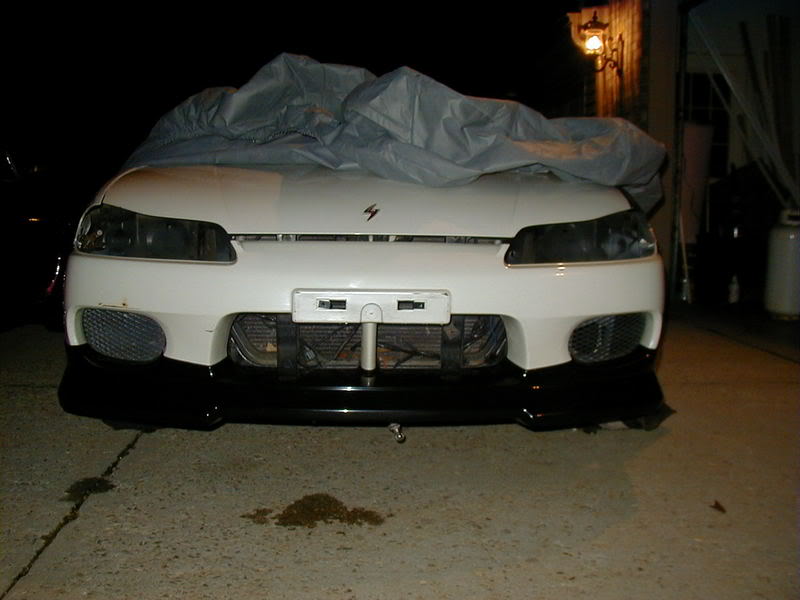
Flawless fitment :bigthumbup: And thats just sitting on the bumper, no screws!
Looks like this when painted:
Factory S15 fog lights, chyeah!

JDM S14 power folding mirrors.....baller!:
I even changed them over for LHD application.
New OEM S15 Badges:
Nismo Door Sills:
And here are some shots of the interior as its being removed for total over haul:
Got my fenders back from my grandpa today and boy am I pleased/excited with the results, he added a high strength glue to them before he smoothed them out so they are extra sturdy. Fitment is awesome, here are some pics of the test fit:
Now all I need is to weld in a S15 core support, S15 headlight brackets and find a way to lift the hood near the windshield so all the panels will line up perfectly (it sags down a little in the rear) As soon as I can get this baby indoors the real build will begin.....
Not much has changed due to winter and not having room to work on the car, but these items came in today:
Hmm some greddy goodness:
And the Greddy item is.....S15 Gracer Urethane lip, no fiberglass for this car, here is the test fit:
Flawless fitment :bigthumbup: And thats just sitting on the bumper, no screws!
Looks like this when painted:
Factory S15 fog lights, chyeah!
07-24-2008, 12:23 PM
#3
Registered User
Thread Starter
iTrader: (5)
Join Date: Apr 2008
Location: Cincinnati, Ohio
Posts: 230
Likes: 0
Received 0 Likes
on
0 Posts
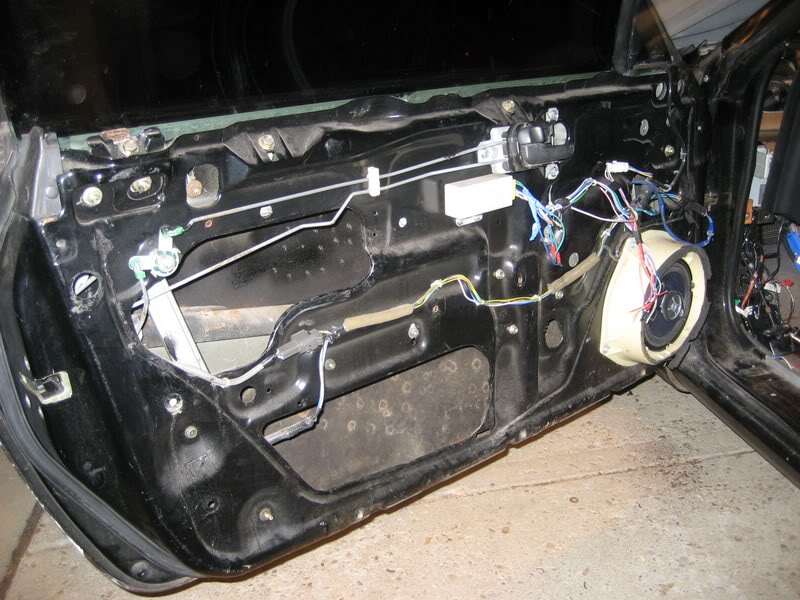
Well I removed the dash today only to find more things to shake my head at and curse the previous owner. There is not one harness on this car that is not cut somewhere. Luckily I found a guy on the Zilvia boards that has every harness I need so all of these cut up wires will get replaced with new ones. The bright side is all the new harnesses are out of a 96 manual S14, so I ont have to worry if the idiot before me did the proper re-wiring steps when he converted this car to manual.
The dash removed:
Some examples of my frustration in ruining such a beautiful car:
Cut ignition wires and such have no idea WTF he was tryin to do, possibly turbo timer who knows:
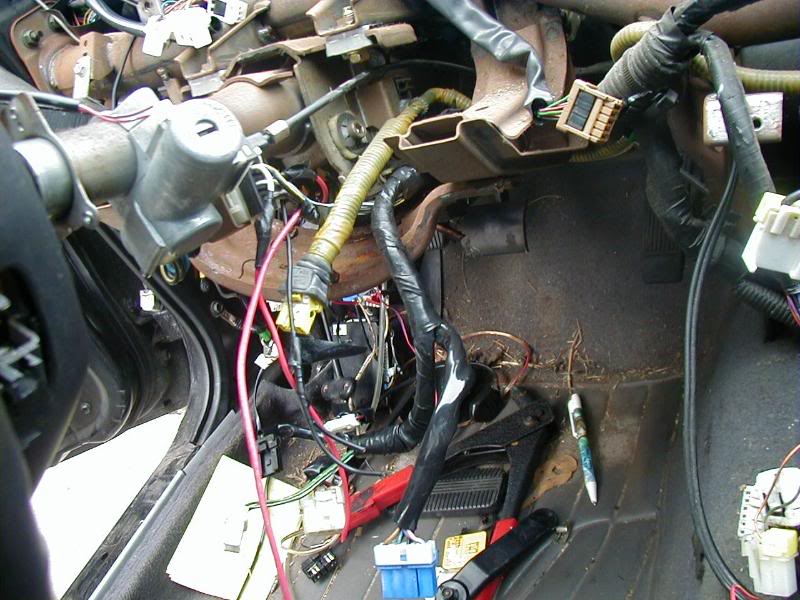
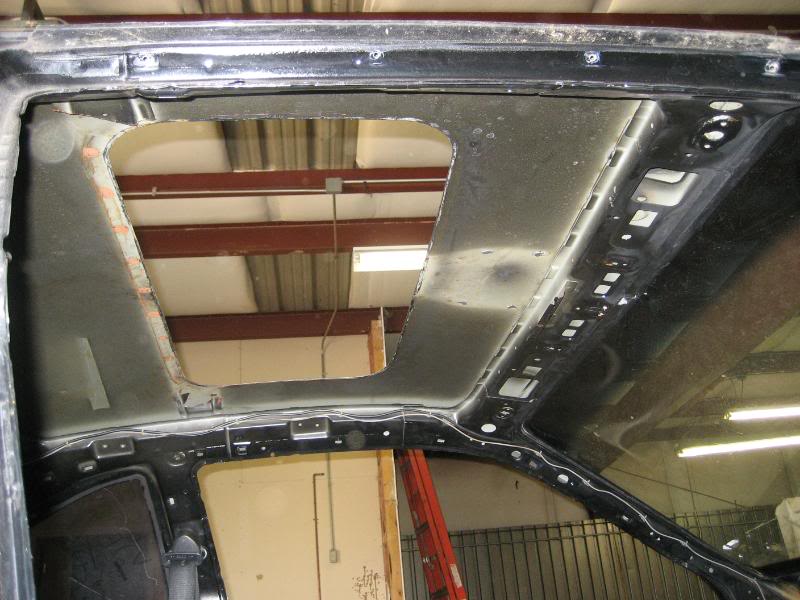
Cut factory power sunroof wiring and rear defroster wiring, seriously WTF? I guess the power sunroof wiring weighed so much that he had to cut it out instead of tucking it up under the headliner. Im talking about the headliner that came no where close to lining back up with the manual pop up sunroof he decided to CUT in because I dunno the factory power one wasnt big enough? Seriously WTF!?
So as you all I know I got this motor:
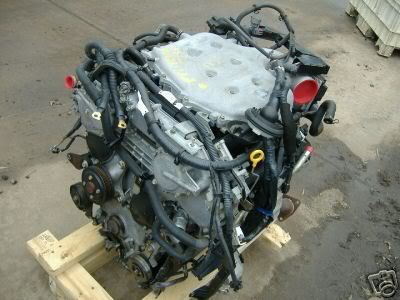
This is a motor out of a 05 Infiniti G35X, it had 28k on the od. I scored this off ebay for $400, yeah $400. But here is the catch it was damaged. The pictures werent real clear on the listing. So I took a chance, rolled the dice and came out on top. Turns out everything that was damaged is replaceable. And IF I were to purchase all the parts from the stealership it will run me $900 worse case scenario. I say worse case because I am not sure if this is the 300 hp motor, parts for that motor are more expensive. With the money I save it gives me a chance to build it a bit.
The good shots:
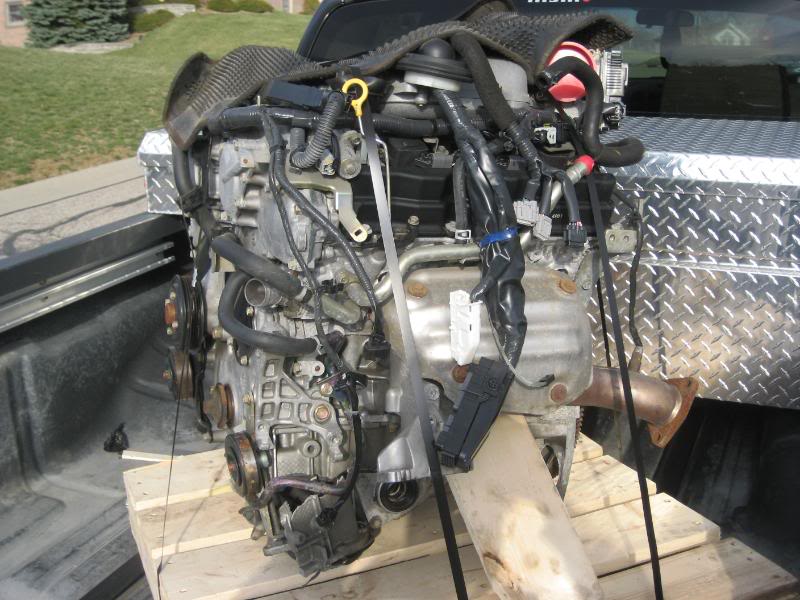

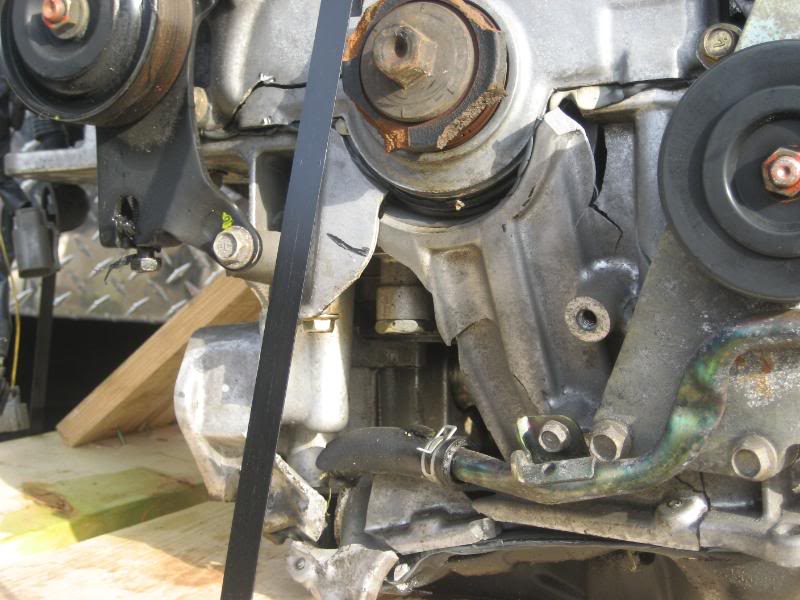
The bad:

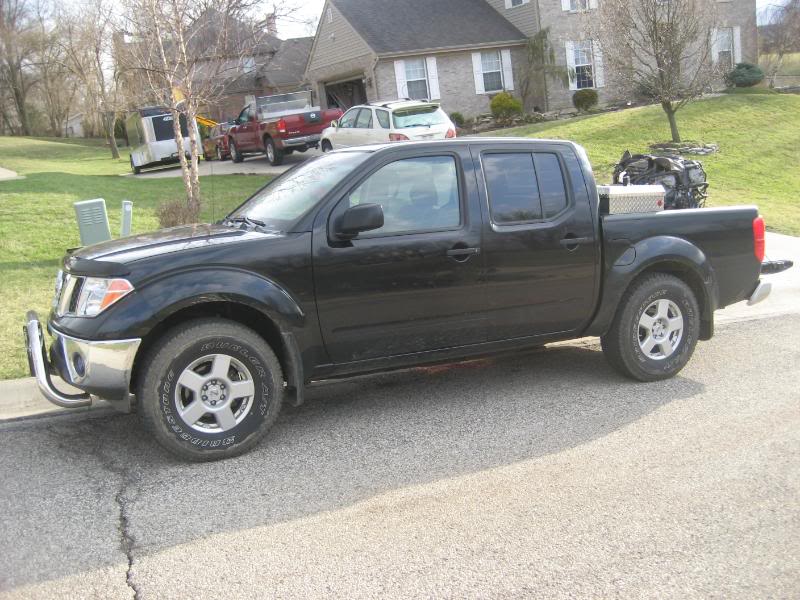
The money shot in its transporter to the shop:
All in all the crank turns just fine it seems to have great compression, it just took a good licking to the outer components. I am happy, it was what I was wanting it to be.
Well the car has finally been moved out of my driveway and into its new home at my company shop. Now that its indoors its time to get cracking :bigthumbup:
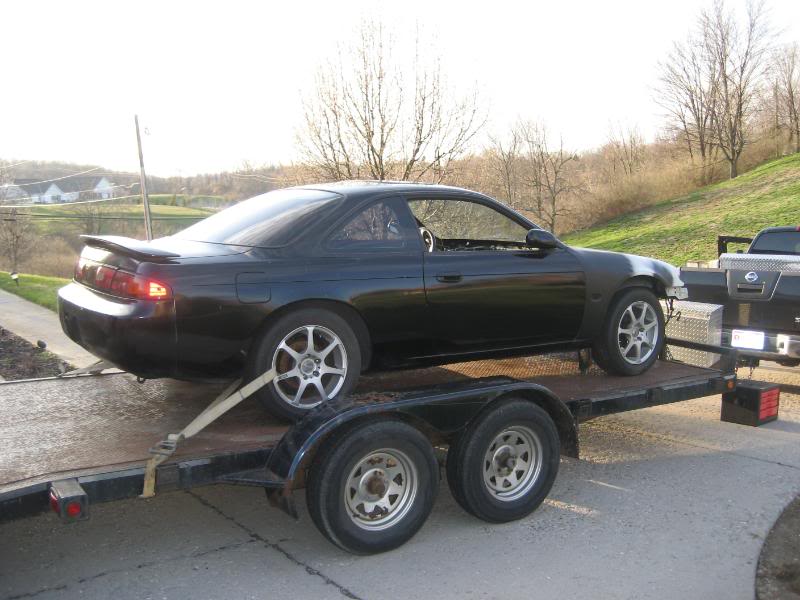
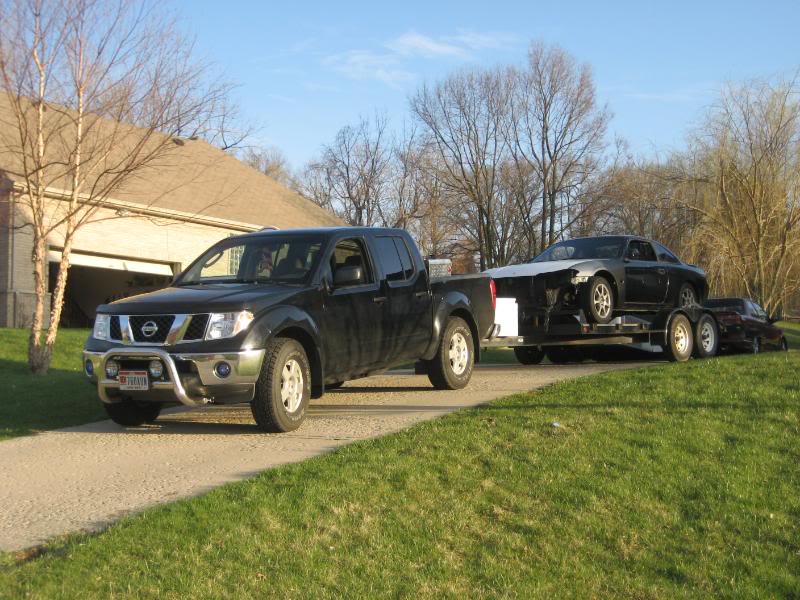
Loaded up on the trailer ready to go to its new home.....
Her escort, and my work horse......
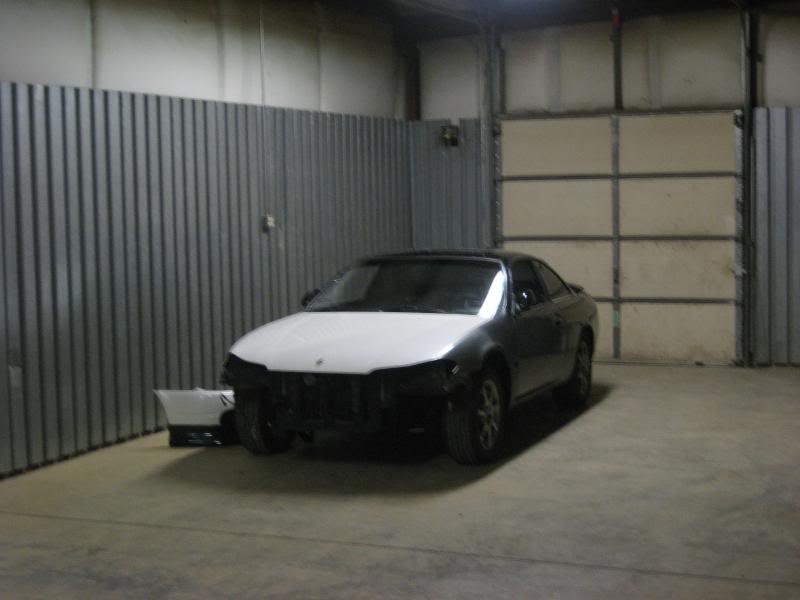
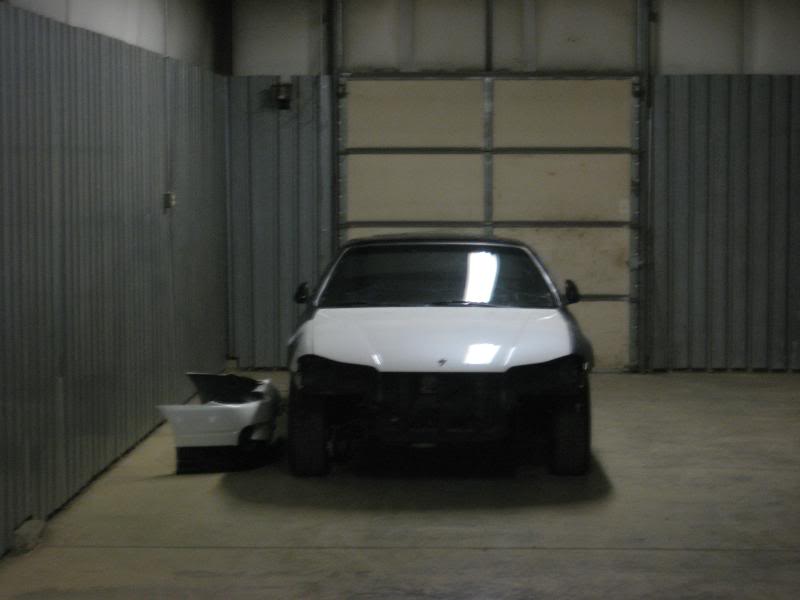
All settled in the shop ready for dissassembly....
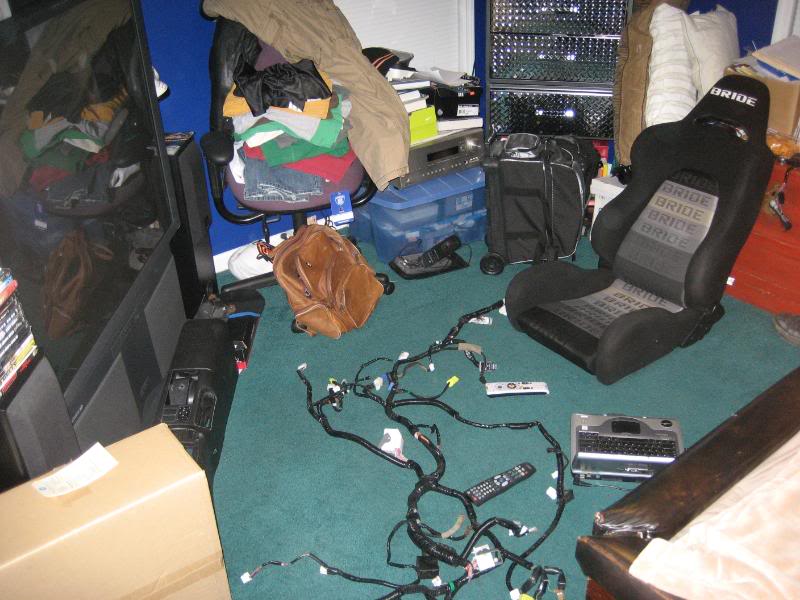
Got my 350z harnesses today, here is where I begin, main harness:
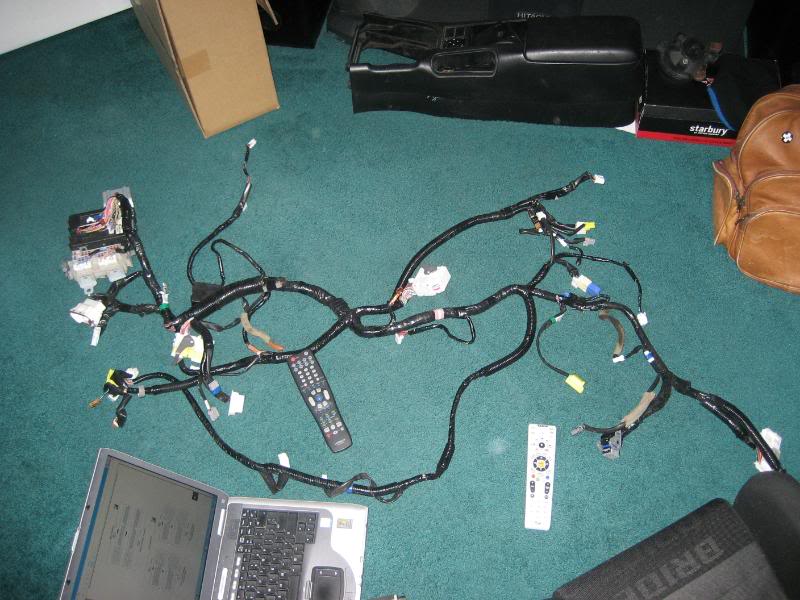
Here is my command station while I fumble through my factory FSMs on my lap top while labeling plugs and watching tv :biggthump
The dash removed:
Some examples of my frustration in ruining such a beautiful car:
Cut ignition wires and such have no idea WTF he was tryin to do, possibly turbo timer who knows:
Cut factory power sunroof wiring and rear defroster wiring, seriously WTF? I guess the power sunroof wiring weighed so much that he had to cut it out instead of tucking it up under the headliner. Im talking about the headliner that came no where close to lining back up with the manual pop up sunroof he decided to CUT in because I dunno the factory power one wasnt big enough? Seriously WTF!?
So as you all I know I got this motor:
This is a motor out of a 05 Infiniti G35X, it had 28k on the od. I scored this off ebay for $400, yeah $400. But here is the catch it was damaged. The pictures werent real clear on the listing. So I took a chance, rolled the dice and came out on top. Turns out everything that was damaged is replaceable. And IF I were to purchase all the parts from the stealership it will run me $900 worse case scenario. I say worse case because I am not sure if this is the 300 hp motor, parts for that motor are more expensive. With the money I save it gives me a chance to build it a bit.
The good shots:
The bad:
The money shot in its transporter to the shop:
All in all the crank turns just fine it seems to have great compression, it just took a good licking to the outer components. I am happy, it was what I was wanting it to be.
Well the car has finally been moved out of my driveway and into its new home at my company shop. Now that its indoors its time to get cracking :bigthumbup:
Loaded up on the trailer ready to go to its new home.....
Her escort, and my work horse......
All settled in the shop ready for dissassembly....
Got my 350z harnesses today, here is where I begin, main harness:
Here is my command station while I fumble through my factory FSMs on my lap top while labeling plugs and watching tv :biggthump
07-24-2008, 12:24 PM
#4
Registered User
Thread Starter
iTrader: (5)
Join Date: Apr 2008
Location: Cincinnati, Ohio
Posts: 230
Likes: 0
Received 0 Likes
on
0 Posts
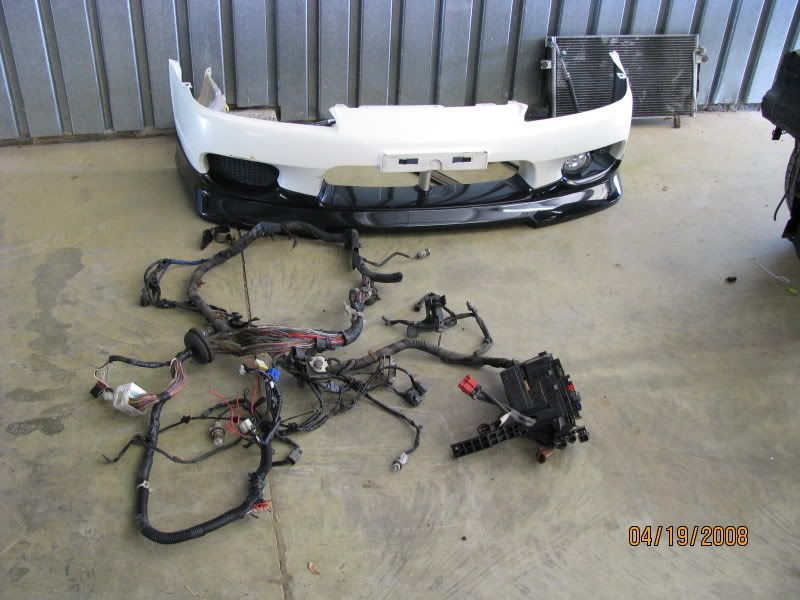
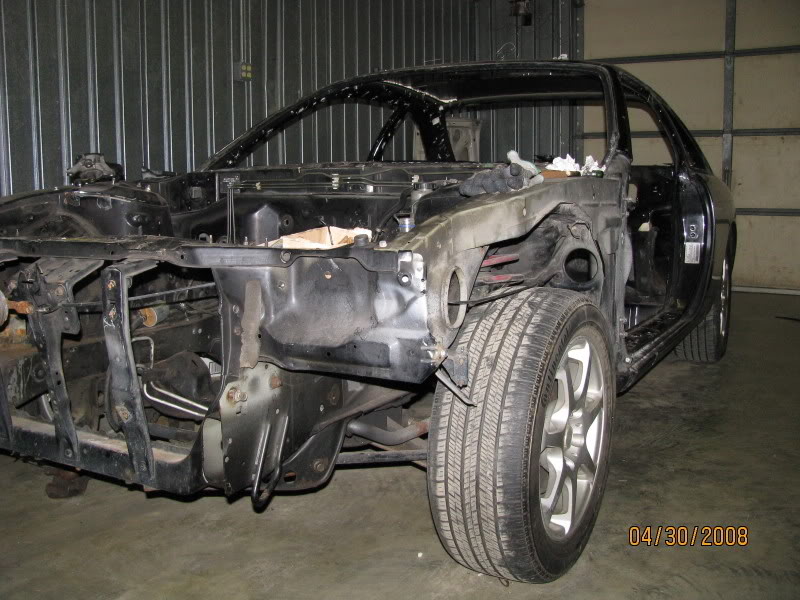
Well im sticking with the VQ35, my buddy decided to let the insurance company take his car away and take the insurance check, oh well no biggie. On with an update, we got alot done this weekend. Ameen (xxtokesxx), my brother and I all went up to my shop and started taking what will eventually be the beast apart. Here is some pics of the distruction:
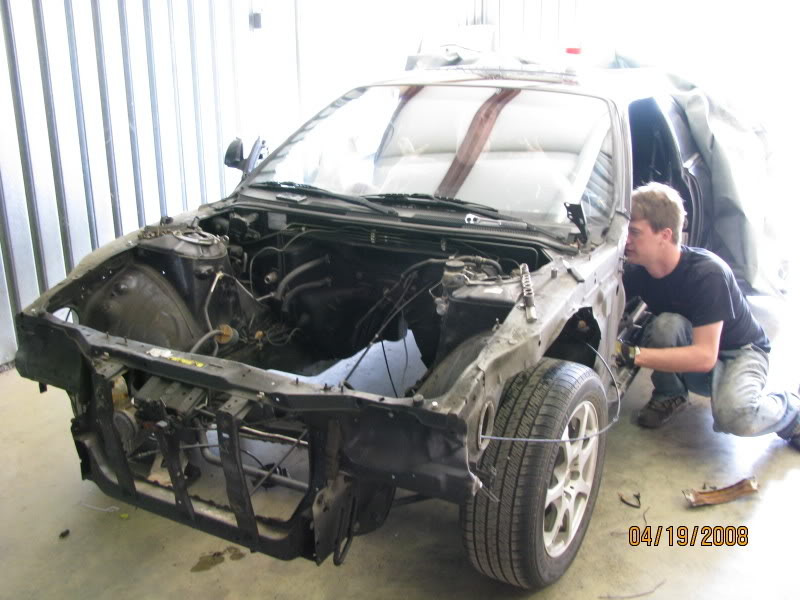
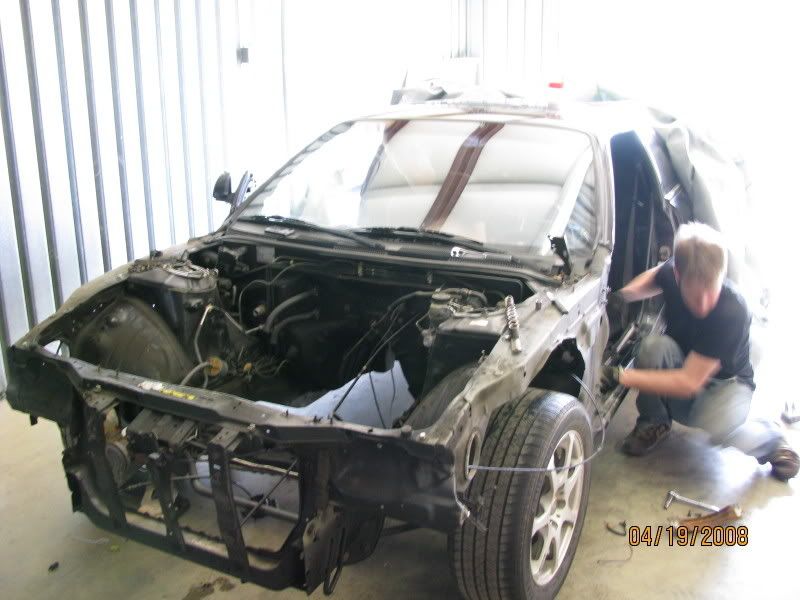
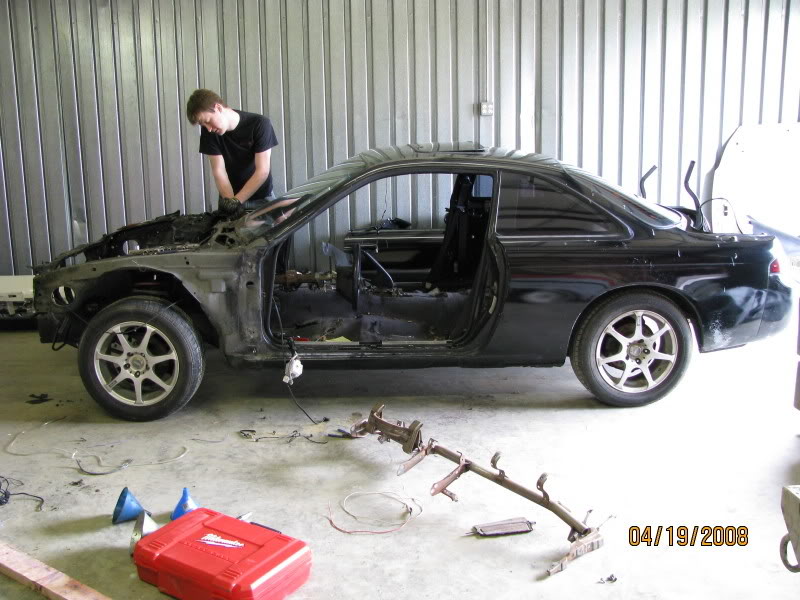
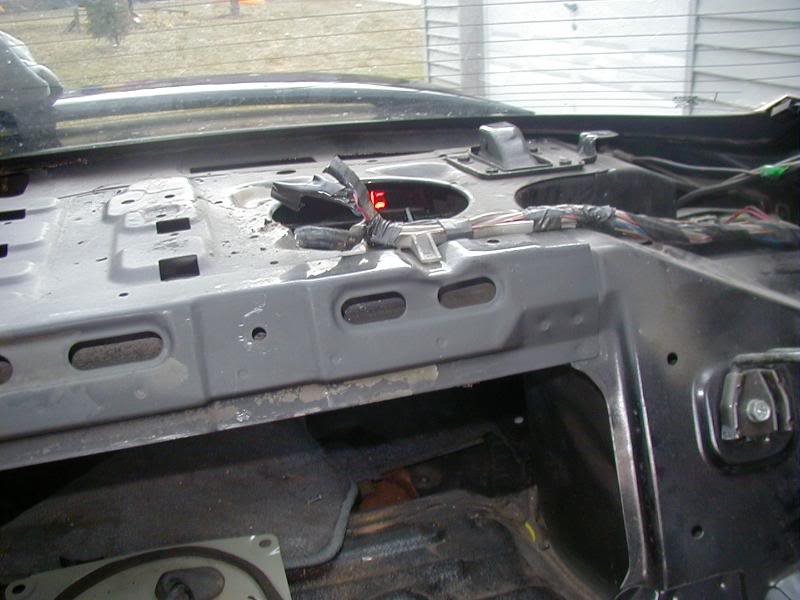
My brother and I removing the body harness:

The biatch removed:
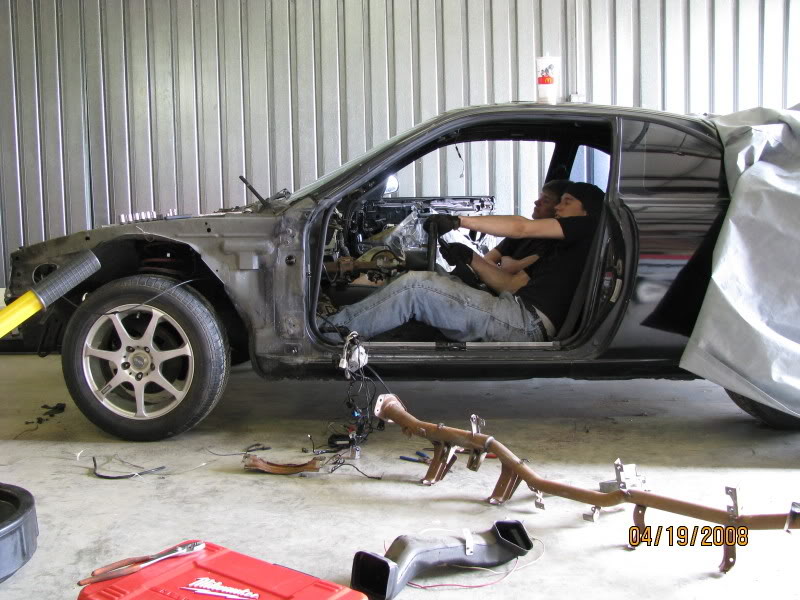
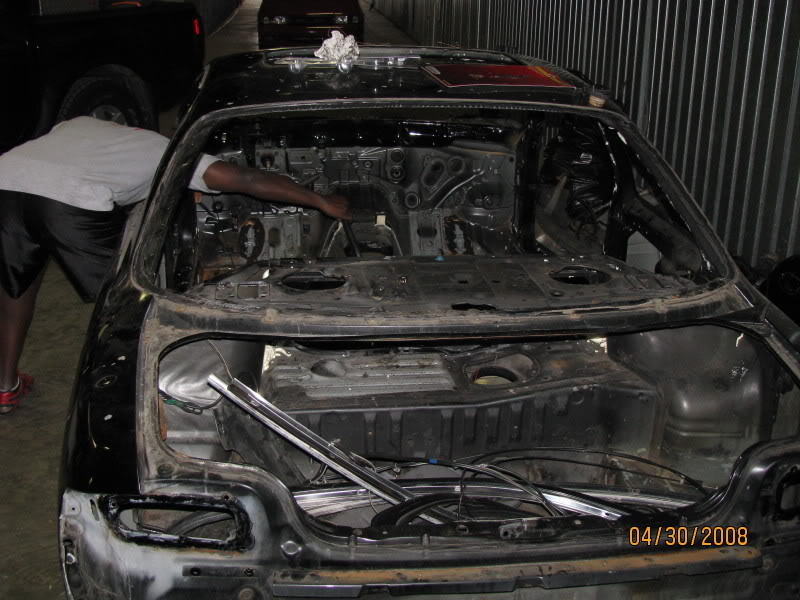
The result with the super low steering column:

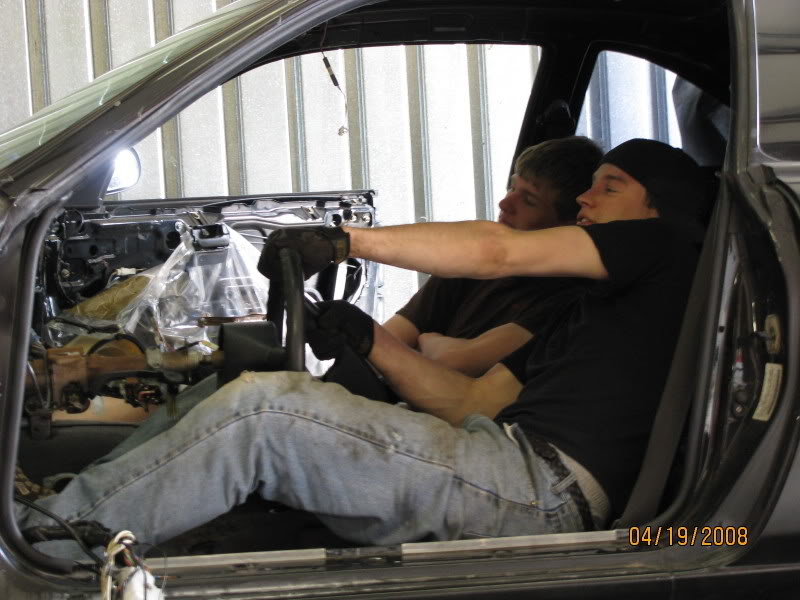
Me getting my gangsta lean on in my whip wit my super low steering column, my brother stuntin on the passenger side:
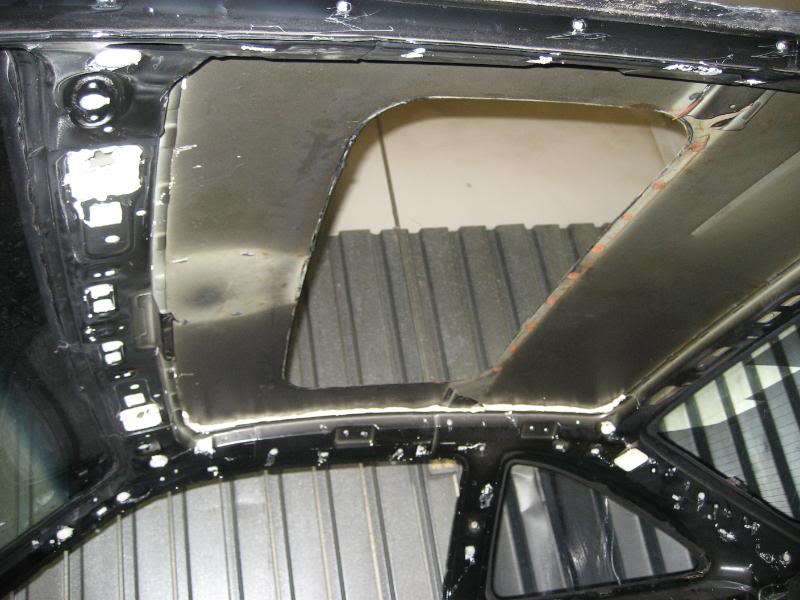
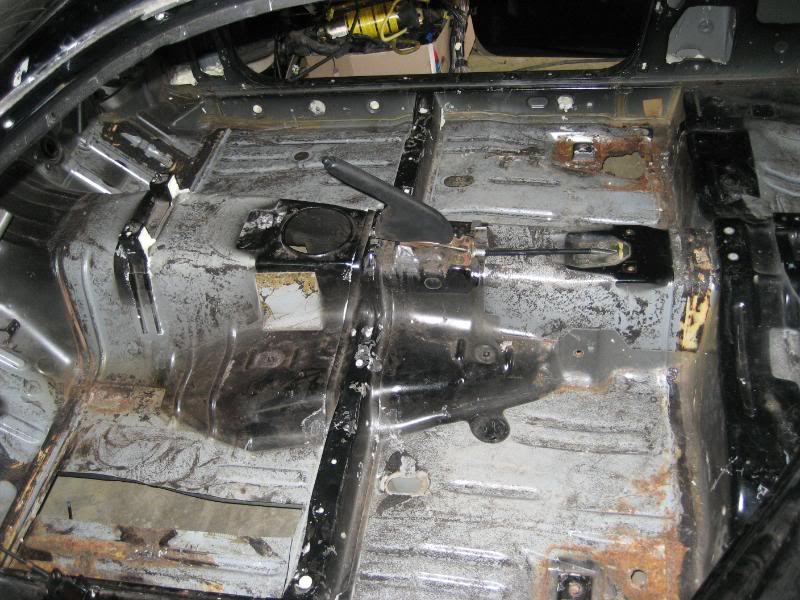
Factory sound deadining removal via dry ice..........check!
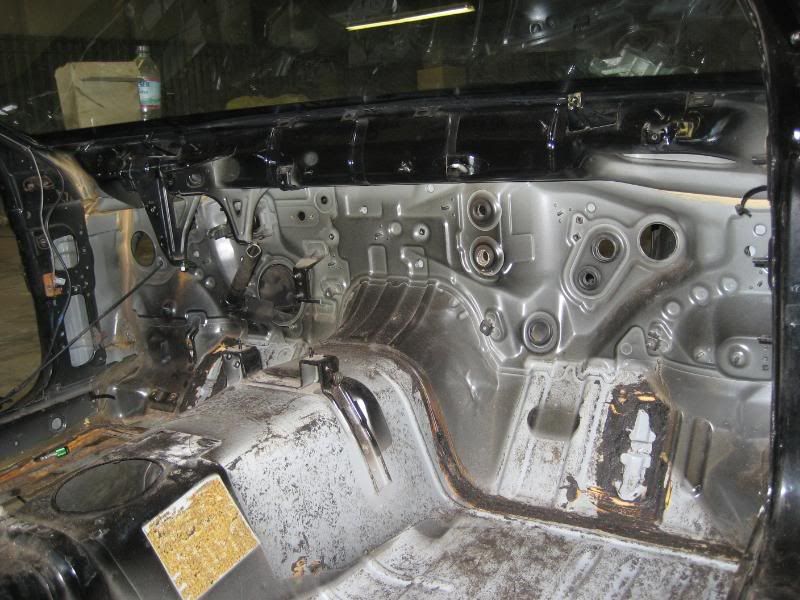

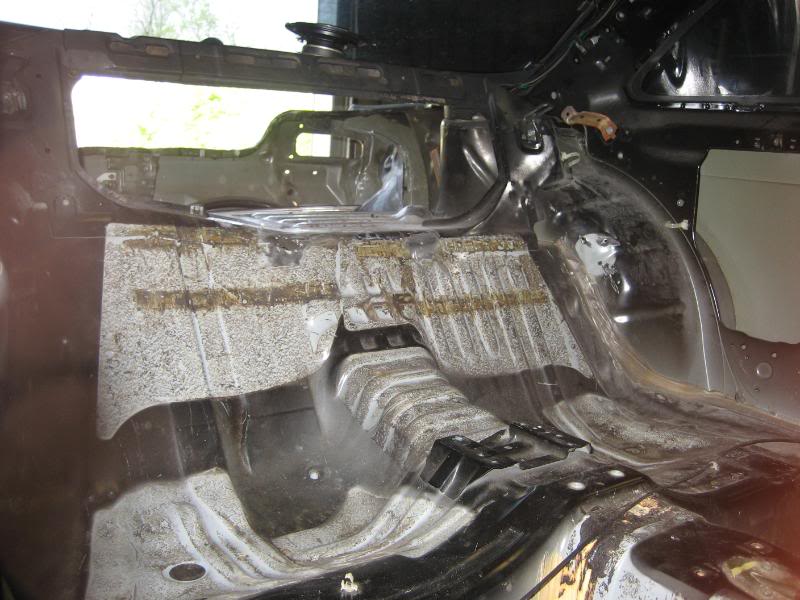
Uncovered some bad spots on the floor boards:
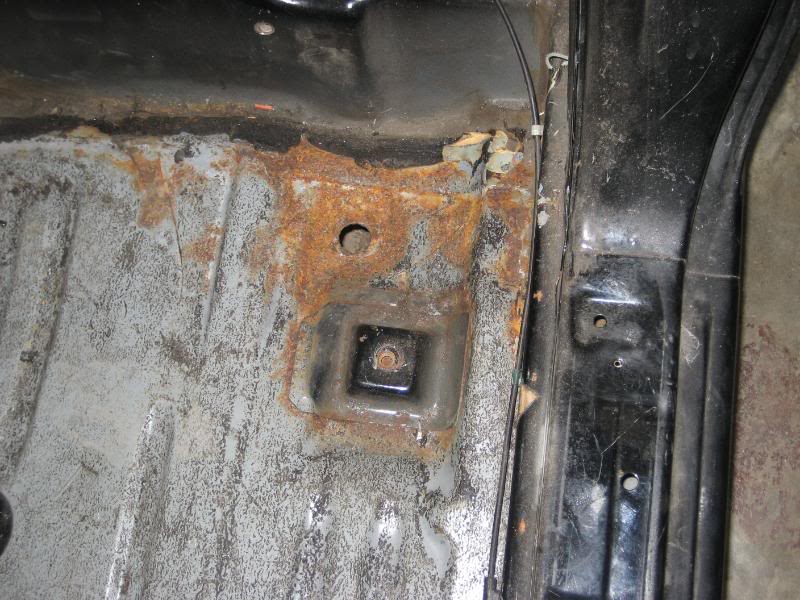
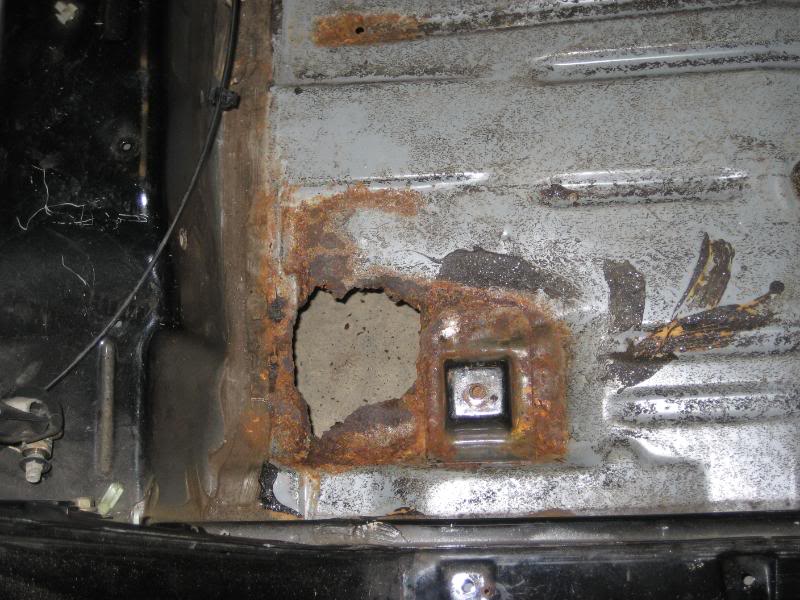
The start of the removal of the rust:
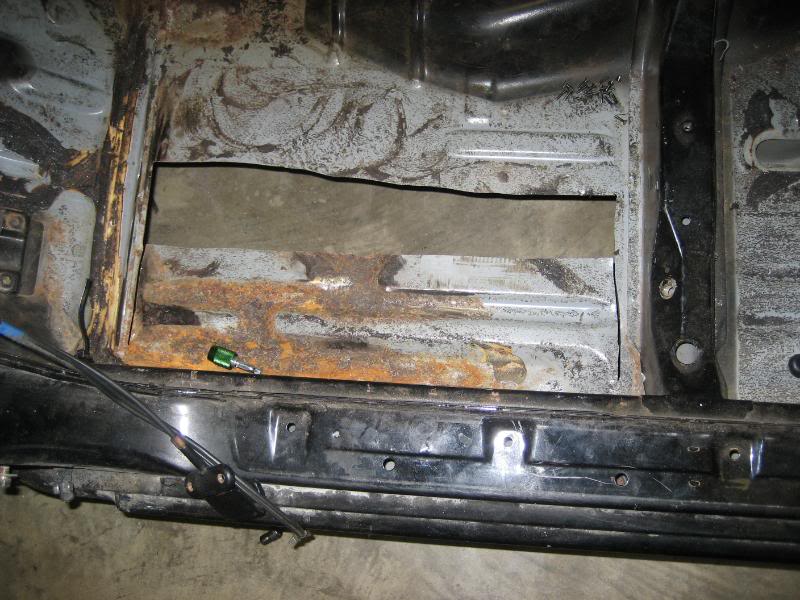
The dumb **** I have to fix:


The rear view:

Air view:
Seals removed for the next phase:

Shot of one of the windows to be removed:

My brother and I removing the body harness:
The biatch removed:
The result with the super low steering column:
Me getting my gangsta lean on in my whip wit my super low steering column, my brother stuntin on the passenger side:
Factory sound deadining removal via dry ice..........check!
Uncovered some bad spots on the floor boards:
The start of the removal of the rust:
The dumb **** I have to fix:
The rear view:
Air view:
Seals removed for the next phase:
Shot of one of the windows to be removed:
07-24-2008, 12:25 PM
#5
Registered User
Thread Starter
iTrader: (5)
Join Date: Apr 2008
Location: Cincinnati, Ohio
Posts: 230
Likes: 0
Received 0 Likes
on
0 Posts
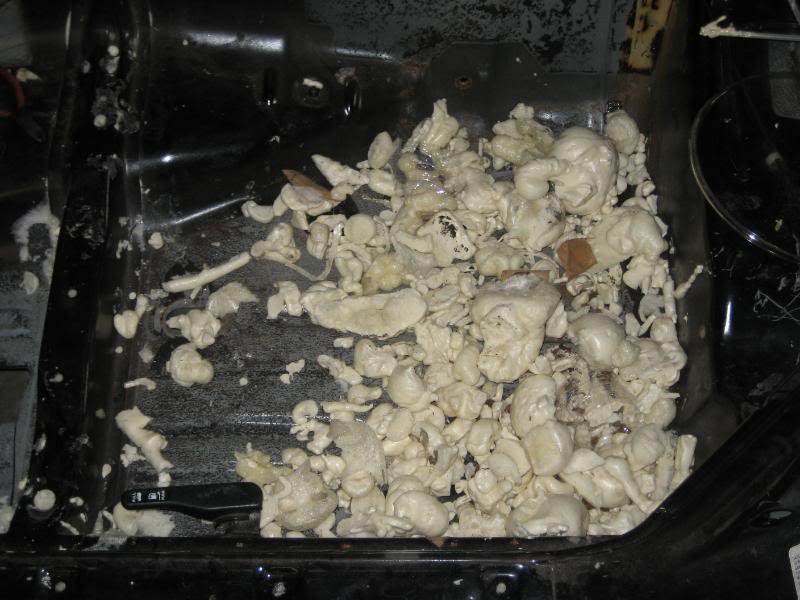
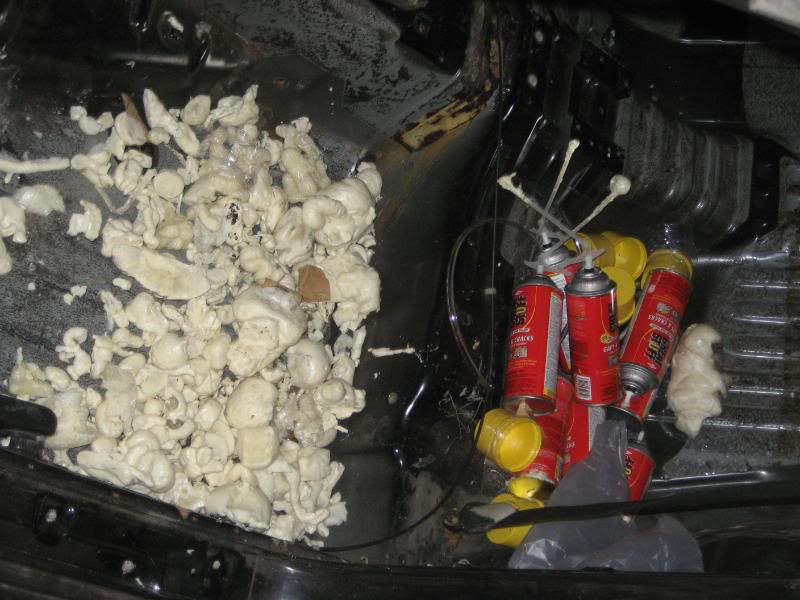
You know that Ford truck commercial where they boast about there quietness of their interior due in part to the "heat activated foam" inside the dead areas of the car? I can do that too and my "heat activated foam" is aka Great Stuff, about 12 cans to be exact. Take that Ford.
Here are some pics of the mess, I would highly recommend having no interior while doing this chit gets everywhere! These are pics after the foam has cured, I forgot my camera when I went to inject everything.

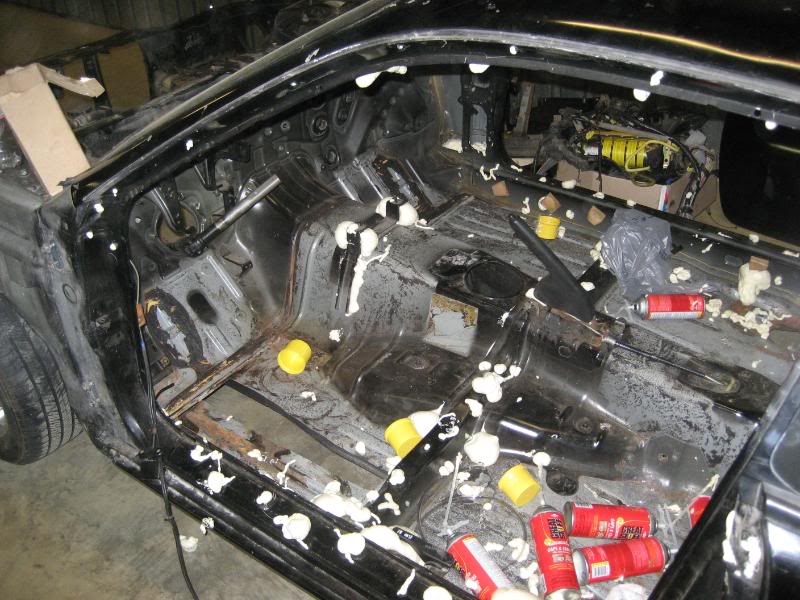

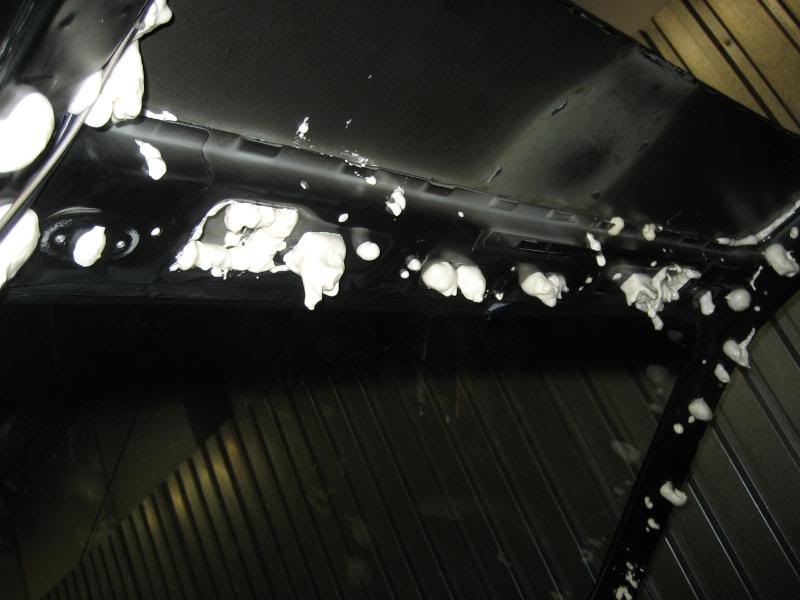
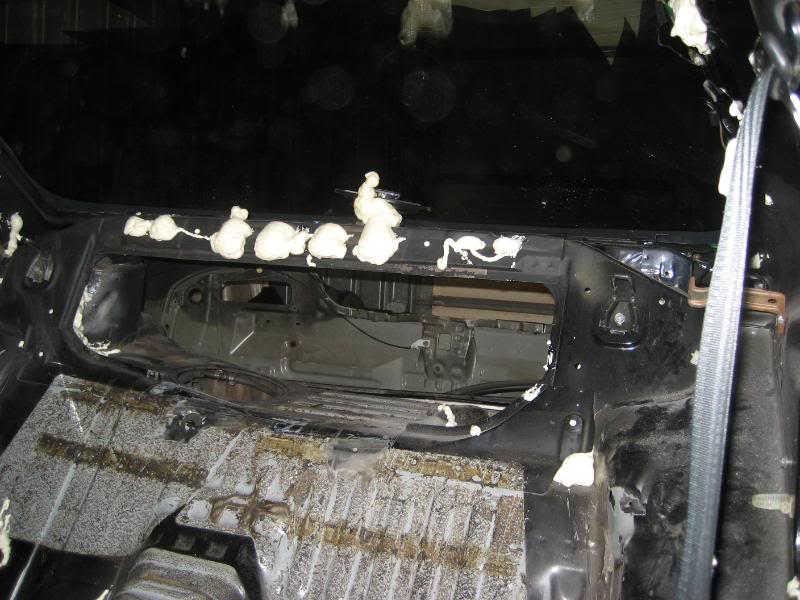
This should take care of the roof rattle I have seen alot of S14 guys complain about.
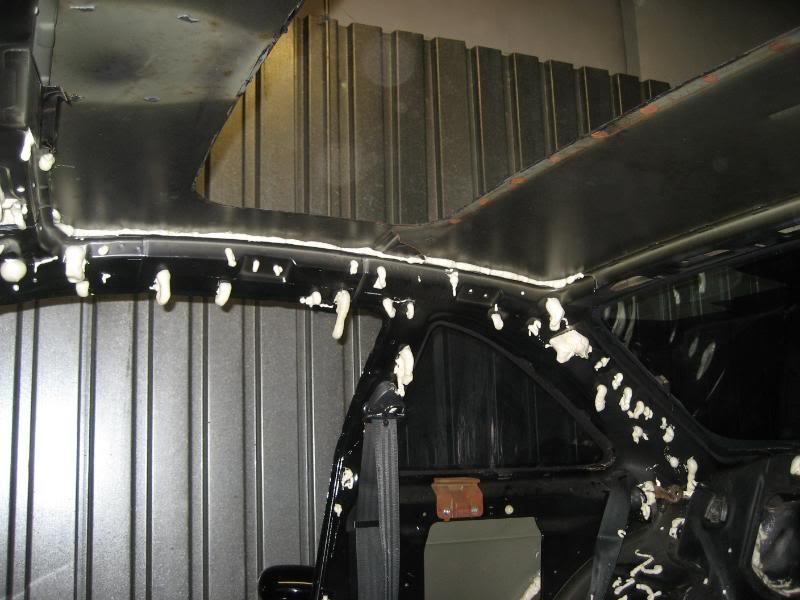
Great stuff is easliy trimmed/broken away so all your interior pieces can be put back in or if your interior is gutted for cleanliness. You dont have to worry much about weight as it is super light. It also is a sealent so it has its advantages in stopping rust from forming in places we cant get to if we tried. I went ahead and did this for all of the above reasons and I wanted to do it before the car gets blasted to keep glass bead from getting into areas I cant vacume out.
Here are some pics of the clean up:
Everything trimmed and the interior gutted free of everything:
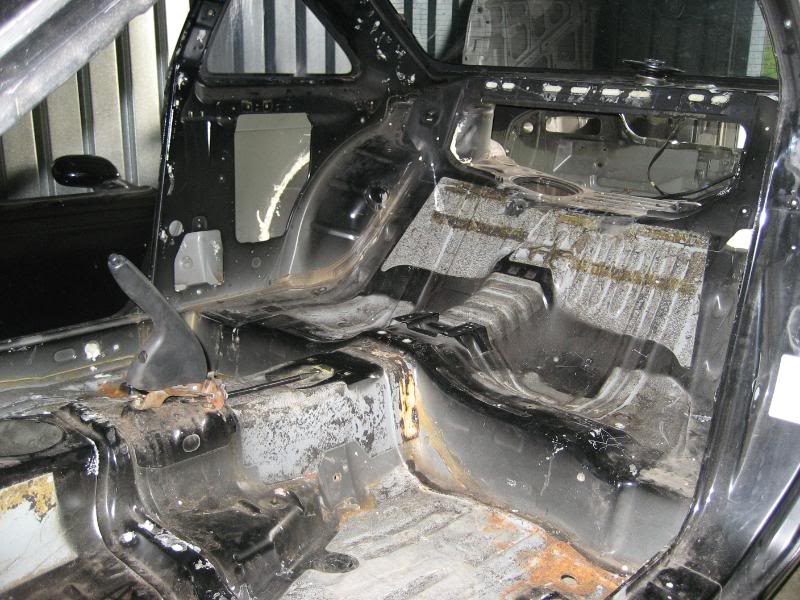
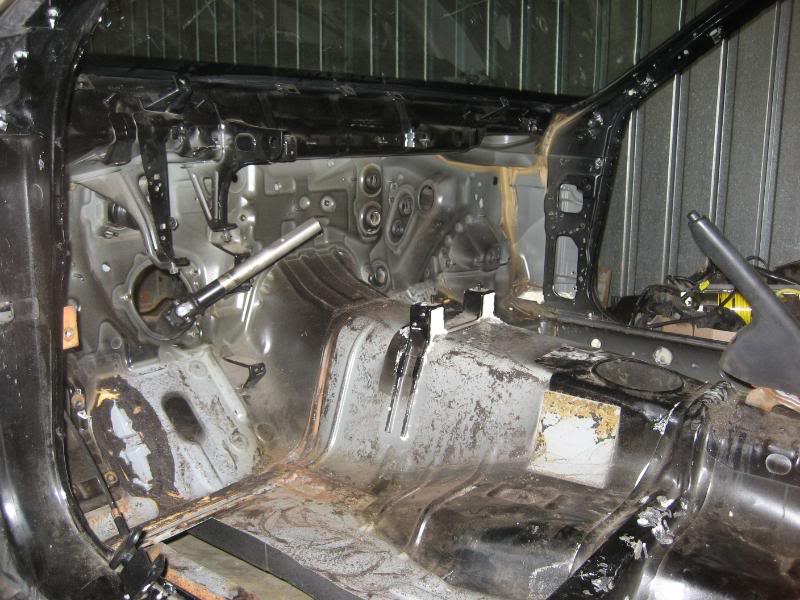
This is just the first phase of my noise control, I absolutely hate road noise, and since this will in no way be a track car, I am not to concerned about a little added weight to quiet down the cabin.
Another update:
Removed the windows tonight, getting closer and closer to sending her to the blast booth!
For those of you who have never removed windows from a car before its pretty easy, you just need wire cutter, buy a windshield removal kit, (Habor Freight $20 FTW!), 2 window suction cups (Harbor Freight again, $8 for both) grab a friend and do work son!
Remove seals:
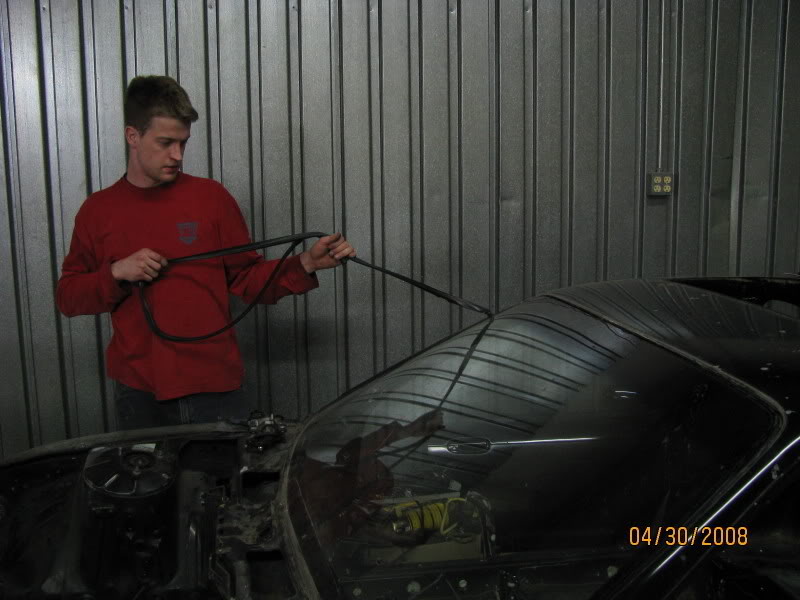
Cut a decently long length of the instrument wire thats included in the kit:
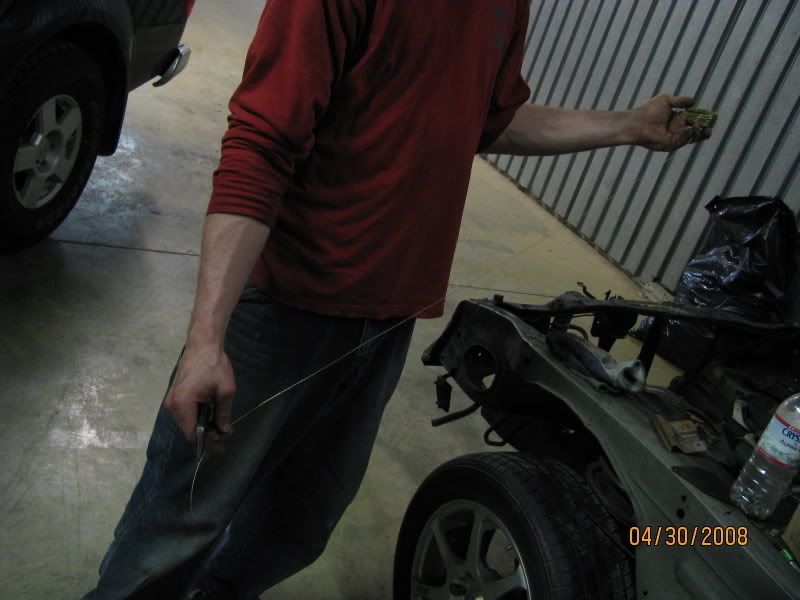

Push wire through the silicone seal between the window and the car with the pick type tool that is also included in the kit:
Thread both ends of wire through the handles included in the kit (see directions):

With you on the inside of the car and your buddy on the outside of the car or vice versa, pull on the handles back in forth in a sort of tug-o-war / lumber jack sawing motion, this will cut through the silicone seal freeing the glass from the car. Becareful not to go to fast as the wire heats up and the glass is tempered (take that advice, I cracked my perfectly good windshield doing this) you will know when its hot cause you will see smoke lol. Also try not to saw back and forth on one small area of the wire or it will wear down and snap, do long back and forth sawing motions.
Once you have gone around the perimeter of the glass attach the glass suction cups to the windshield on both sides and you and your buddy lift the glass of the car, make sure you hold one hand on the suction cup and the other on the bottom of the glass incase the suction cup is not on there as well as you thought. Store in a safe place till later use.

As the car sits, engine bay and suspension to be stripped completely next.


Stay tuned.....
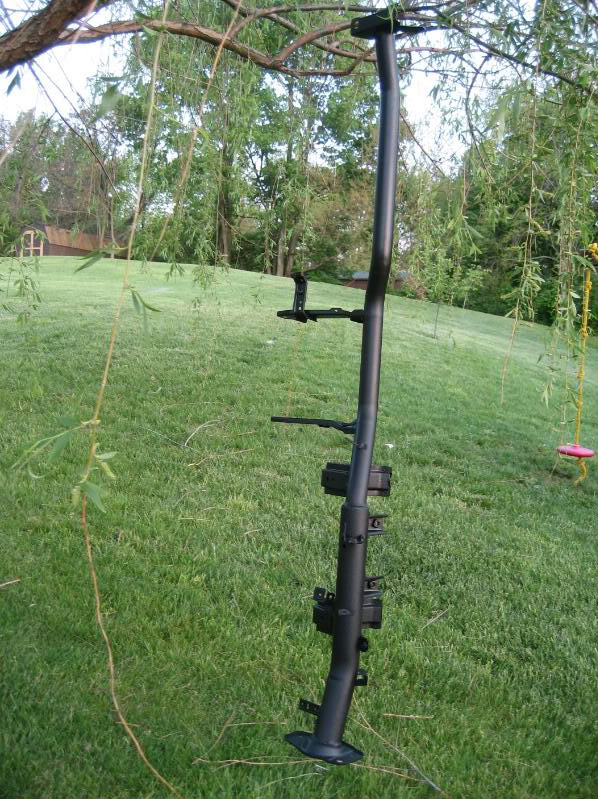
Got my under dash support bar back from the blaster, primed and ready for paint:
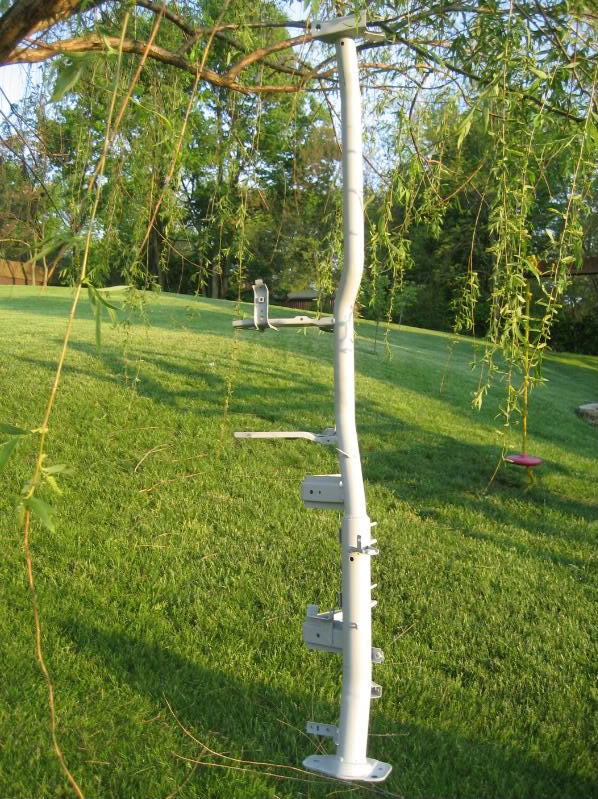
And the paint to be used...Truck bed liner ftw! Like my boy xxtokesxx uses...
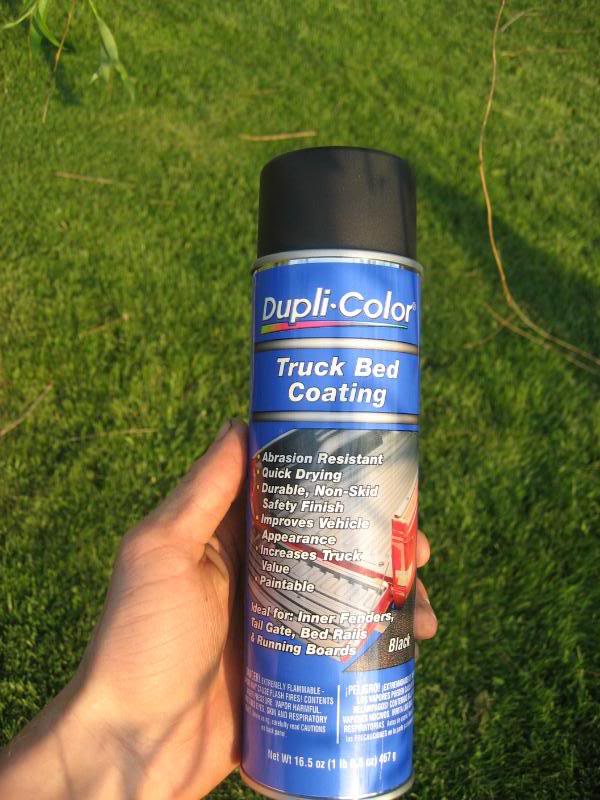
And the final product:
Just the start of the mission: No More Rust Ever Again!
Here are some pics of the mess, I would highly recommend having no interior while doing this chit gets everywhere! These are pics after the foam has cured, I forgot my camera when I went to inject everything.
This should take care of the roof rattle I have seen alot of S14 guys complain about.
Great stuff is easliy trimmed/broken away so all your interior pieces can be put back in or if your interior is gutted for cleanliness. You dont have to worry much about weight as it is super light. It also is a sealent so it has its advantages in stopping rust from forming in places we cant get to if we tried. I went ahead and did this for all of the above reasons and I wanted to do it before the car gets blasted to keep glass bead from getting into areas I cant vacume out.
Here are some pics of the clean up:
Everything trimmed and the interior gutted free of everything:
This is just the first phase of my noise control, I absolutely hate road noise, and since this will in no way be a track car, I am not to concerned about a little added weight to quiet down the cabin.
Another update:
Removed the windows tonight, getting closer and closer to sending her to the blast booth!
For those of you who have never removed windows from a car before its pretty easy, you just need wire cutter, buy a windshield removal kit, (Habor Freight $20 FTW!), 2 window suction cups (Harbor Freight again, $8 for both) grab a friend and do work son!
Remove seals:
Cut a decently long length of the instrument wire thats included in the kit:
Push wire through the silicone seal between the window and the car with the pick type tool that is also included in the kit:
Thread both ends of wire through the handles included in the kit (see directions):
With you on the inside of the car and your buddy on the outside of the car or vice versa, pull on the handles back in forth in a sort of tug-o-war / lumber jack sawing motion, this will cut through the silicone seal freeing the glass from the car. Becareful not to go to fast as the wire heats up and the glass is tempered (take that advice, I cracked my perfectly good windshield doing this) you will know when its hot cause you will see smoke lol. Also try not to saw back and forth on one small area of the wire or it will wear down and snap, do long back and forth sawing motions.
Once you have gone around the perimeter of the glass attach the glass suction cups to the windshield on both sides and you and your buddy lift the glass of the car, make sure you hold one hand on the suction cup and the other on the bottom of the glass incase the suction cup is not on there as well as you thought. Store in a safe place till later use.
As the car sits, engine bay and suspension to be stripped completely next.
Stay tuned.....
Got my under dash support bar back from the blaster, primed and ready for paint:
And the paint to be used...Truck bed liner ftw! Like my boy xxtokesxx uses...
And the final product:
Just the start of the mission: No More Rust Ever Again!
07-24-2008, 12:25 PM
#6
Registered User
Thread Starter
iTrader: (5)
Join Date: Apr 2008
Location: Cincinnati, Ohio
Posts: 230
Likes: 0
Received 0 Likes
on
0 Posts
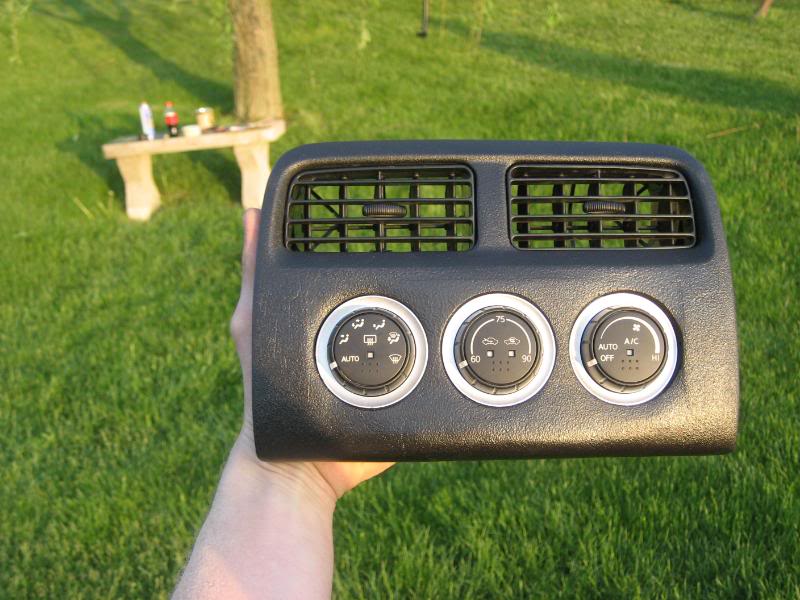
I finished my 350z climate control mold today to replace the old style lever controls, I was going to use the S14 digital climate controls but the complexity of the 350z wiring and incompatibility of the controls forces me to use these. I could probably get the S14 controls to work, but this is just plain easier and I like how the 350z controls look.
Started out with the two trim pieces, obviously the S14 trim on the left and the 350z on the right.
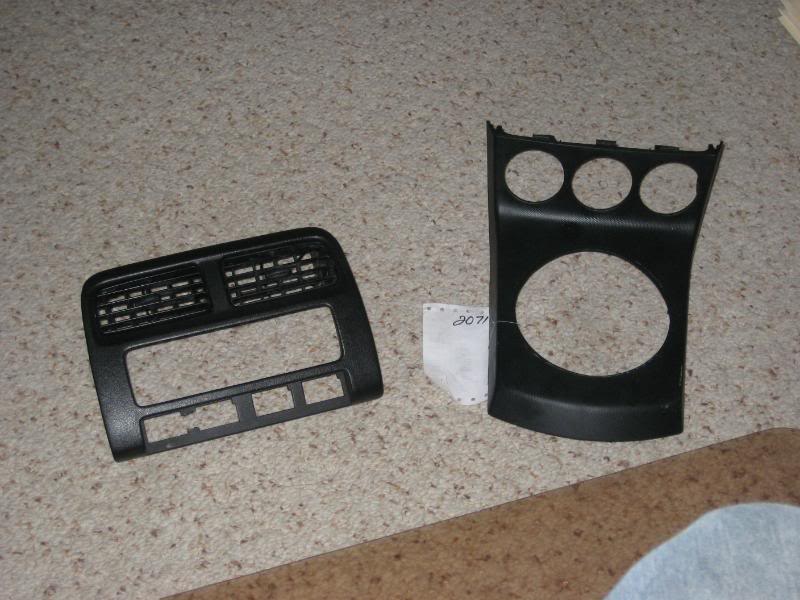
Roughly cut to fit and glued into place, all the while being careful to keep all mounting tabs in place.
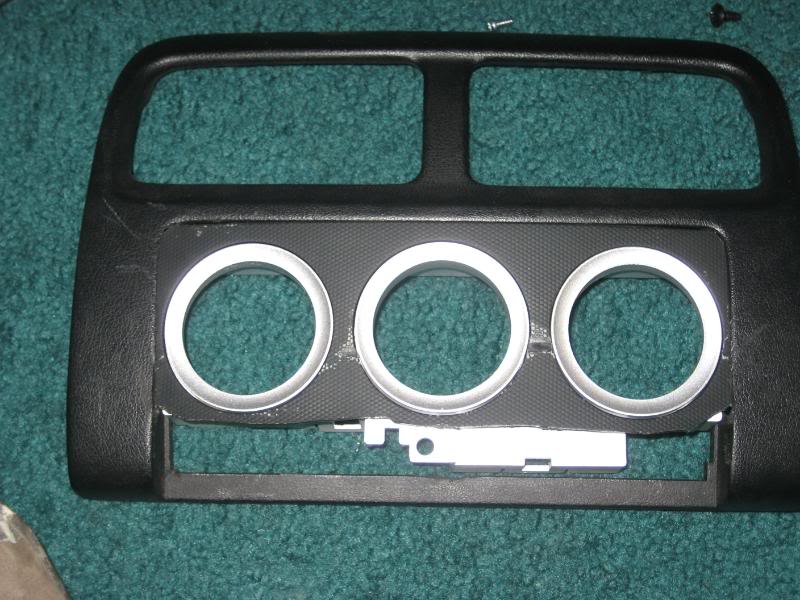
Molded and sanded smooth ready for paint:

Painted with the texture back on, truck bed liner ftw!
The final product :bigthumbup:
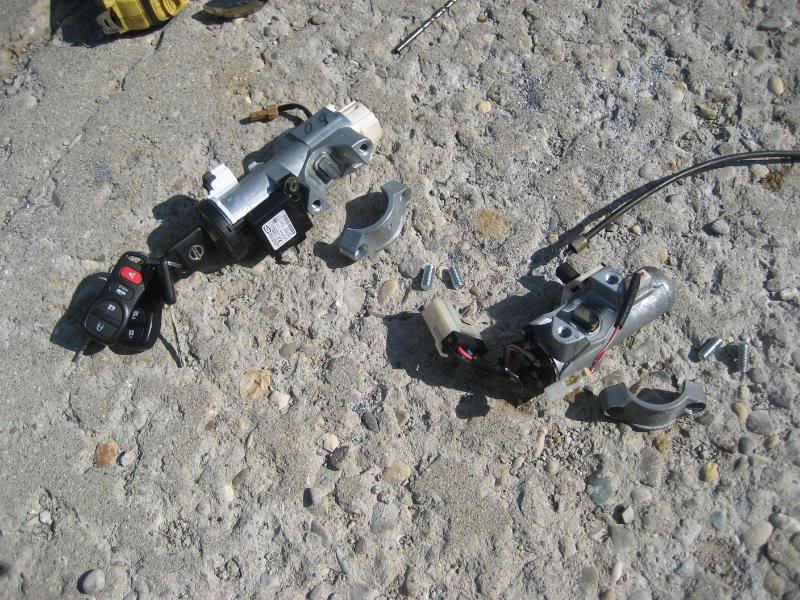
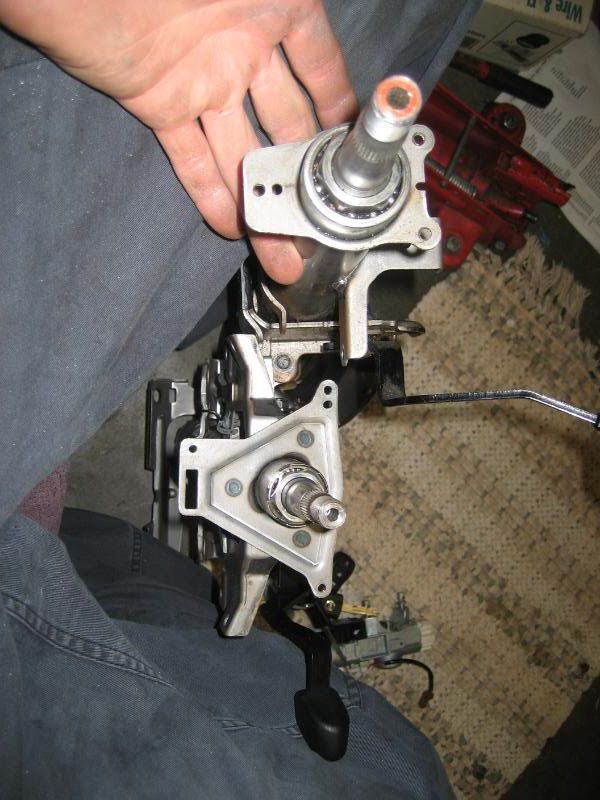
Finished my 350z/240sx hybrid column today. I landed a new used column off ebay for $15! I opted to combine the two columns because I needed to change out the lock cylinders for the nats security and I wanted the look and the feel of the newer multi controls and the newer keys lol.
Columns side by side (S14 up top 350z on bottom obviously):
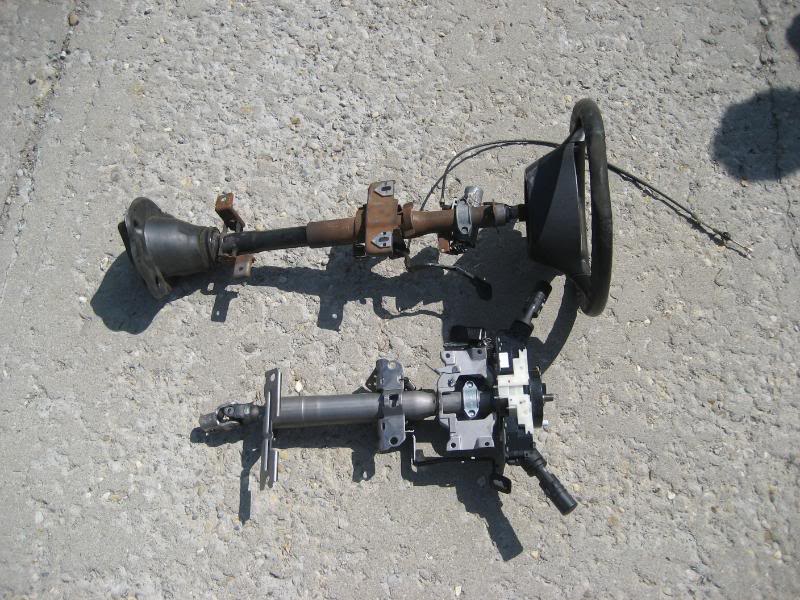
Columns would have swapped out almost perfectly if it wasnt for the ends being way different:
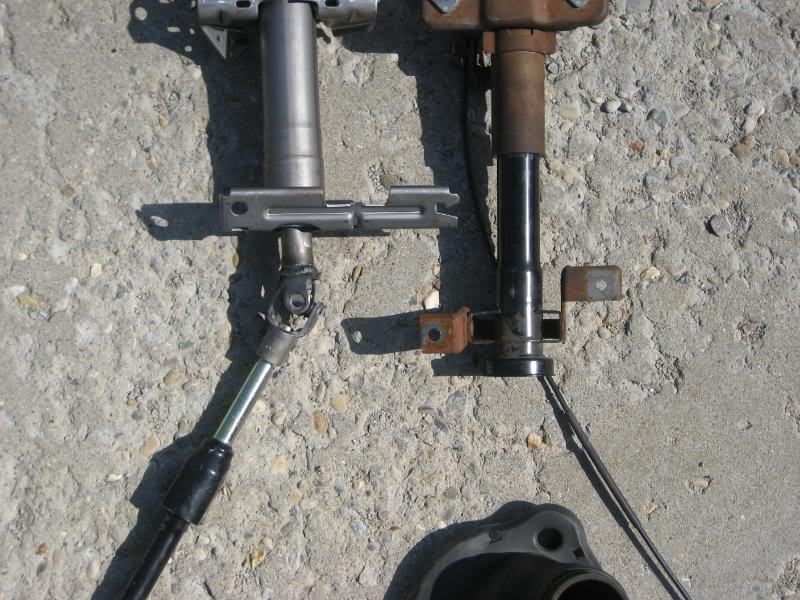
So after comparing and planning I decided to combine the two to make one...
Removed the locks for comparison:
Test fit of the 350z lock on the 240sx column:
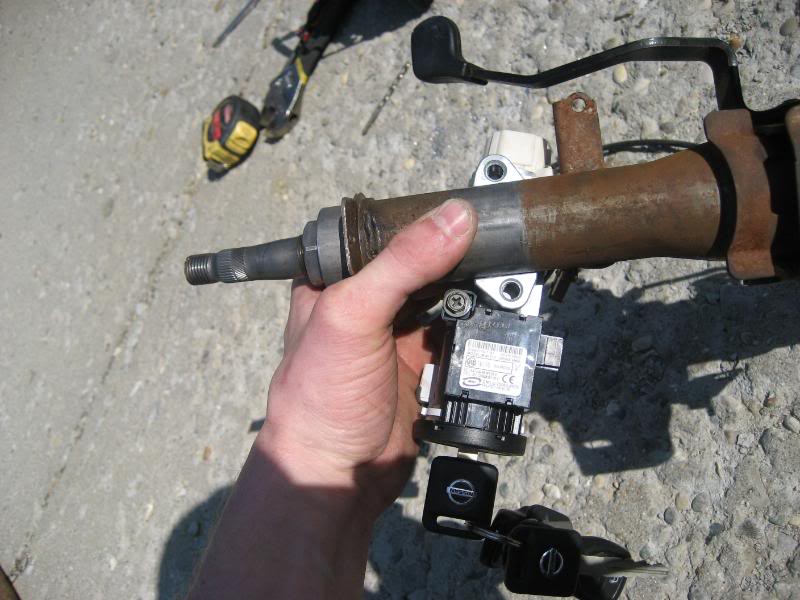
Found out that due to the different shapes of the slots the locks fit into the 350z lock did not sit flush into the 240sx slot.
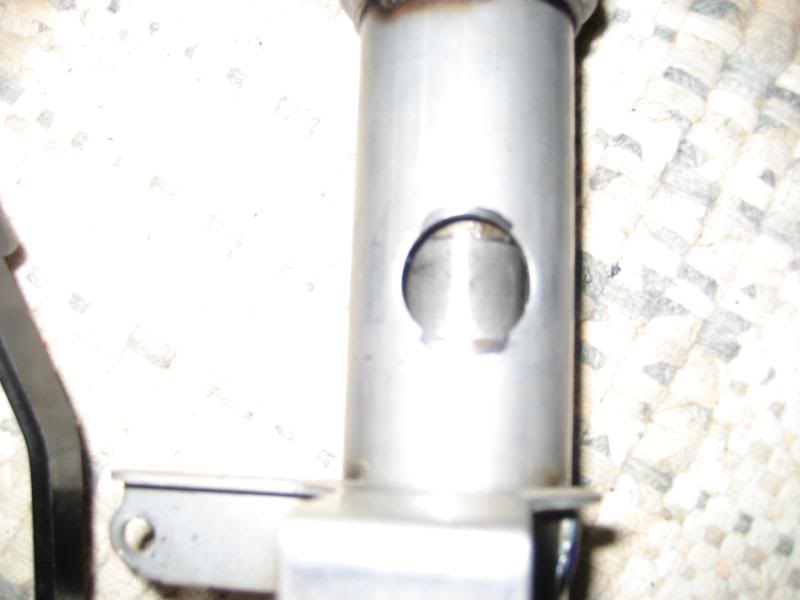
240sx one is round like so:
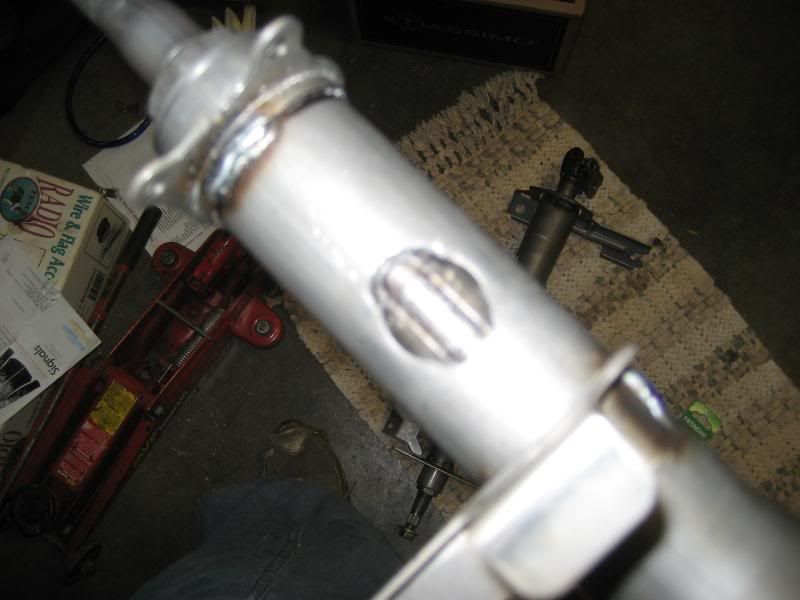
350z is oblonged like so:

But no problem, got out the drill with a metal file bit and went to town and got the lock to seat right:
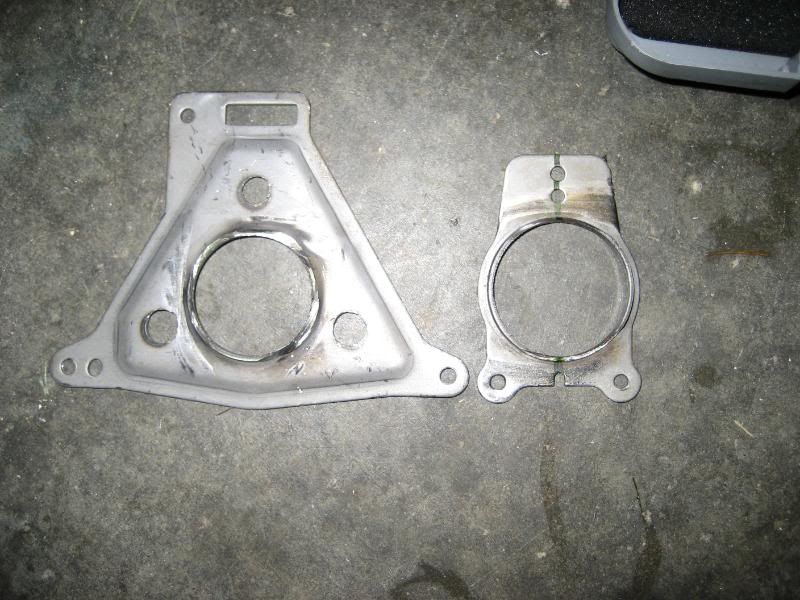
Now I needed to change the mounting plates for the multi controls in order to use the newer 350z type controls, these are actually controls out of an altima, the reason I used them is because they have a switch for the fog lights that I will hook up to control my factory S15 fogs.
Here is a picture of them to compare (S14 left 350z right):
As you can see the 350z plate is alot larger, but the S14 steering shaft is fatter, so I busted out the grinder took some measurements, made my marks and went to work grinding the welds off to free the plate. End result:
In order to get the 350z plate to fit onto the S14 column the hole in the center needed to be bigger, no sweat. I got out a hole saw some screws and a piece of wood to do the deed. My trick, anytime I want to widen a hole in metal, either to make the circular hole bigger or just to turn a hole that is not circular into a clean circle, is to screw a piece of wood to the back side of the metal and use the wood to keep my drill straight to make a nice clean, circular hole. I did this like so:

After the hole was drilled I lined my bracket up with my marks I put on the column, went down to my buddies house and had him weld it back into place for me. Re-installed the lock cylinder with new shear screws from the $tealer$hip and here is the final product:
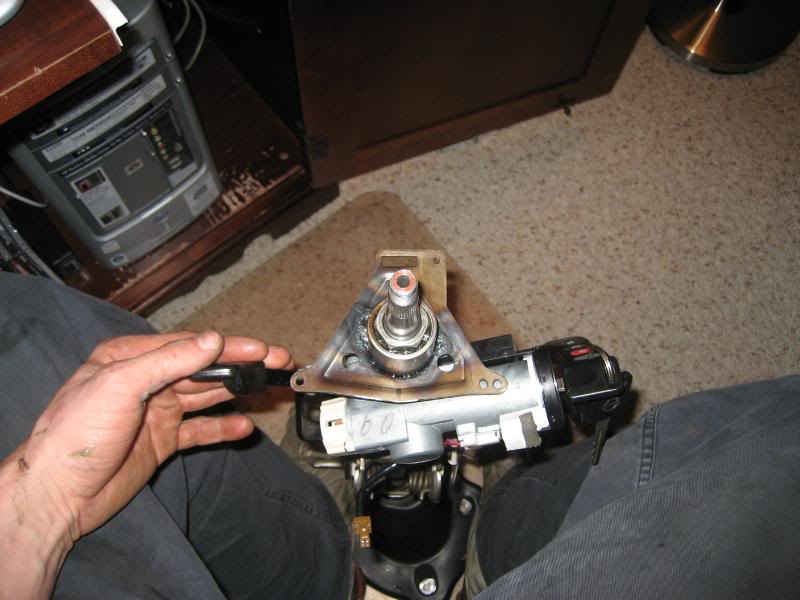
And the test fit with the new multi controls:
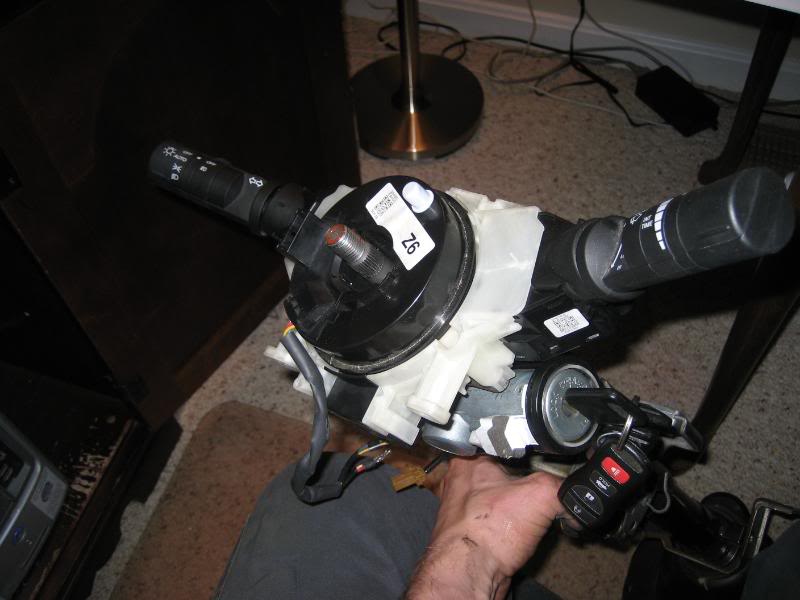
Steering column.............CHECK! :bigthumbup:
Started out with the two trim pieces, obviously the S14 trim on the left and the 350z on the right.
Roughly cut to fit and glued into place, all the while being careful to keep all mounting tabs in place.
Molded and sanded smooth ready for paint:
Painted with the texture back on, truck bed liner ftw!
The final product :bigthumbup:
Finished my 350z/240sx hybrid column today. I landed a new used column off ebay for $15! I opted to combine the two columns because I needed to change out the lock cylinders for the nats security and I wanted the look and the feel of the newer multi controls and the newer keys lol.
Columns side by side (S14 up top 350z on bottom obviously):
Columns would have swapped out almost perfectly if it wasnt for the ends being way different:
So after comparing and planning I decided to combine the two to make one...
Removed the locks for comparison:
Test fit of the 350z lock on the 240sx column:
Found out that due to the different shapes of the slots the locks fit into the 350z lock did not sit flush into the 240sx slot.
240sx one is round like so:
350z is oblonged like so:
But no problem, got out the drill with a metal file bit and went to town and got the lock to seat right:
Now I needed to change the mounting plates for the multi controls in order to use the newer 350z type controls, these are actually controls out of an altima, the reason I used them is because they have a switch for the fog lights that I will hook up to control my factory S15 fogs.
Here is a picture of them to compare (S14 left 350z right):
As you can see the 350z plate is alot larger, but the S14 steering shaft is fatter, so I busted out the grinder took some measurements, made my marks and went to work grinding the welds off to free the plate. End result:
In order to get the 350z plate to fit onto the S14 column the hole in the center needed to be bigger, no sweat. I got out a hole saw some screws and a piece of wood to do the deed. My trick, anytime I want to widen a hole in metal, either to make the circular hole bigger or just to turn a hole that is not circular into a clean circle, is to screw a piece of wood to the back side of the metal and use the wood to keep my drill straight to make a nice clean, circular hole. I did this like so:
After the hole was drilled I lined my bracket up with my marks I put on the column, went down to my buddies house and had him weld it back into place for me. Re-installed the lock cylinder with new shear screws from the $tealer$hip and here is the final product:
And the test fit with the new multi controls:
Steering column.............CHECK! :bigthumbup:
07-24-2008, 12:26 PM
#7
Registered User
Thread Starter
iTrader: (5)
Join Date: Apr 2008
Location: Cincinnati, Ohio
Posts: 230
Likes: 0
Received 0 Likes
on
0 Posts
Ok so I bought this black leather covered steering wheel from a 05 Maxima off ebay for $25.00, to go along with my newer theme, going to make all the controls on the wheel work too.
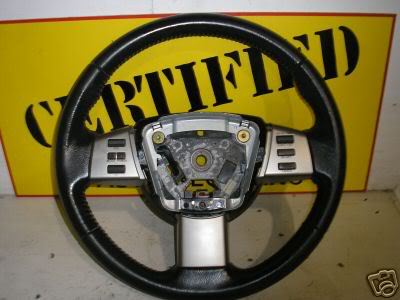
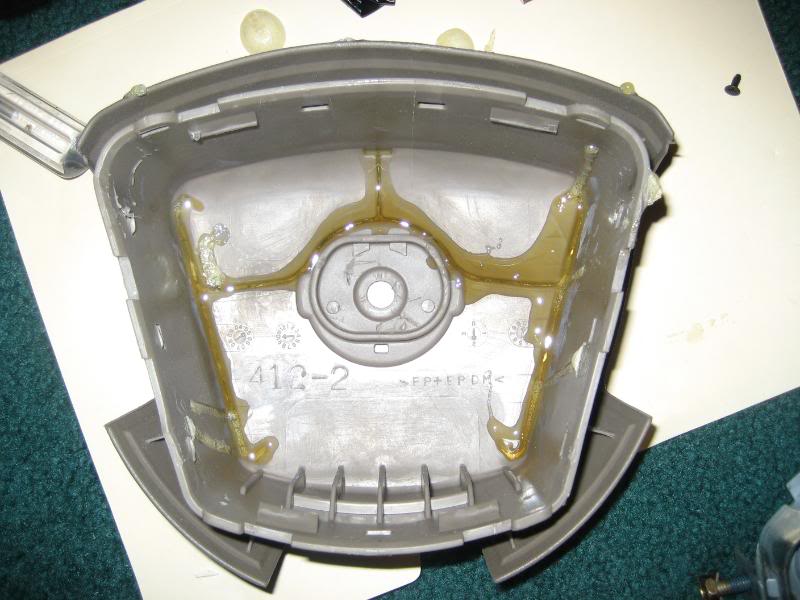
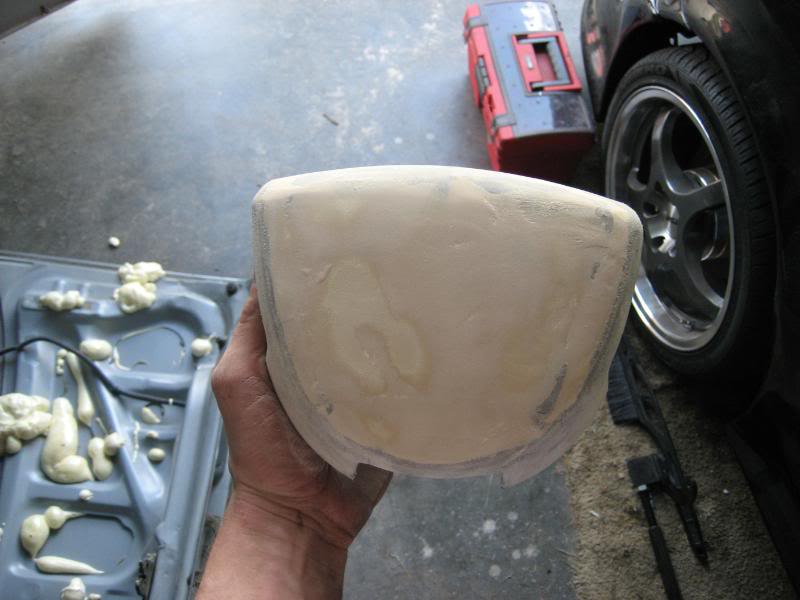
As you can see it comes with no air bag, well I looked up pricing for a used, unactivated air bag and the price starts around $400. So I was like hell-to-the-NO! Especially since I am not putting air bags in this car and I was planning to gut the air bag out. So I went to the local bone yard and got a deployed air bag center for free and went to work. Here is how it looked when I got it:
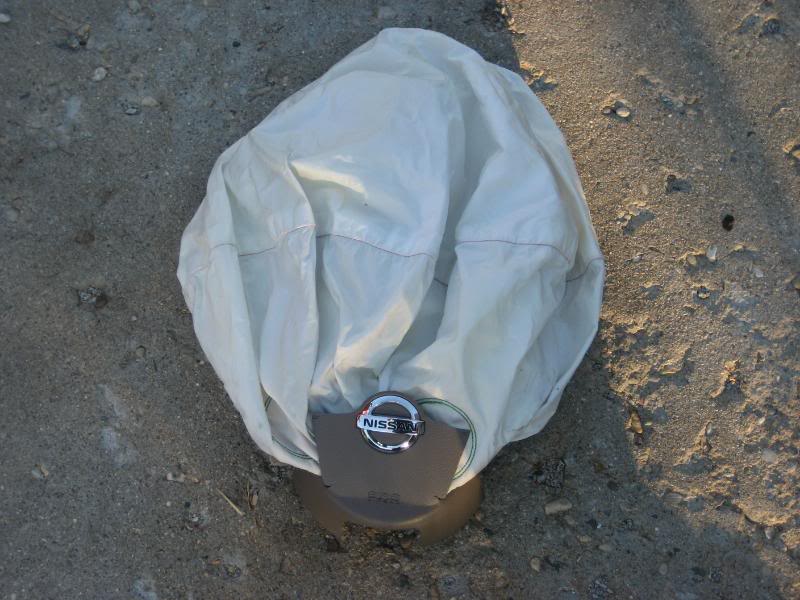

Removed the air bag and the exploeded device thing:
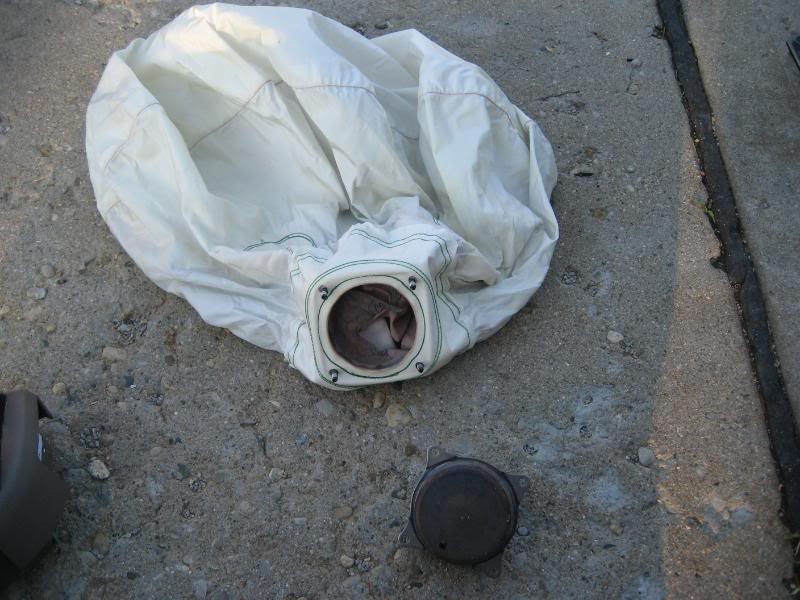
What was left:
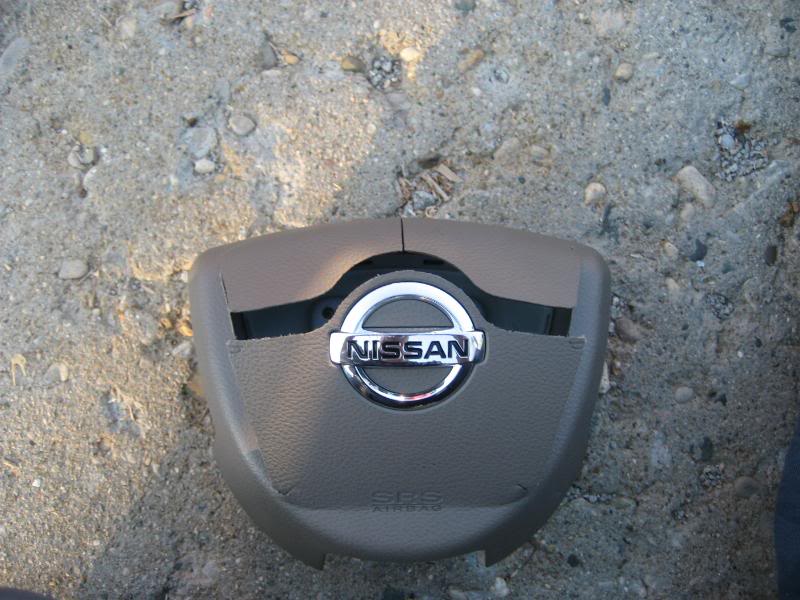
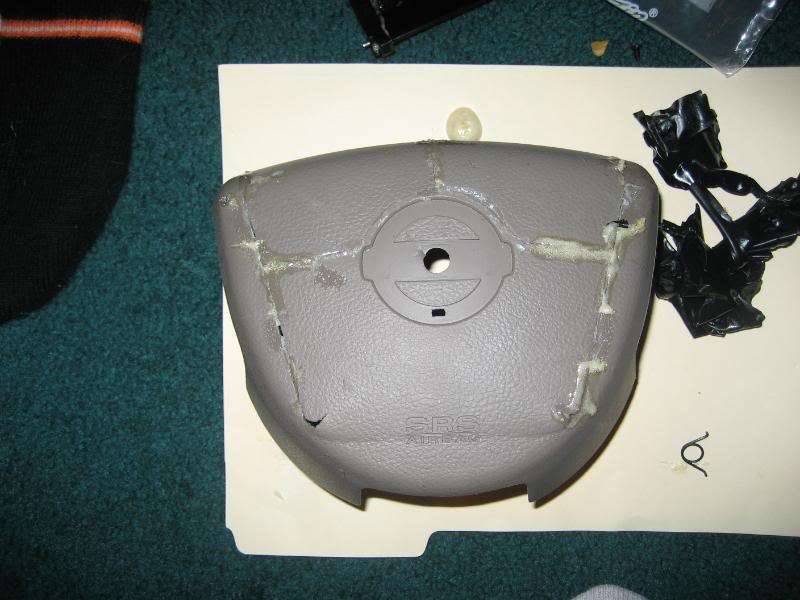
Used super glue to temporarly hold everything back in place while the good stuff ( gorilla glue ) did the permanent bonding and held it all in place with tape for the facial reconstruction:

The result:
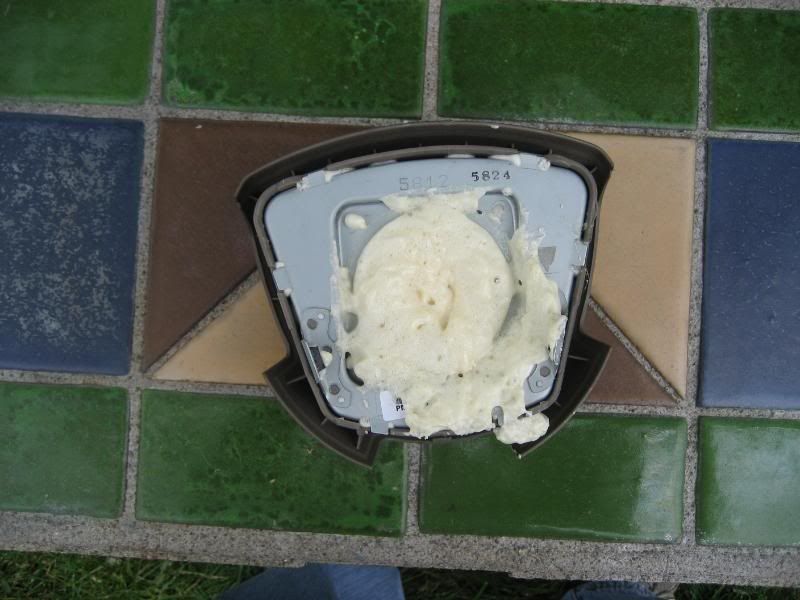
Put the metal frame back in for the next step:

Filled her up with light weight expanding great stuff to support it (god I love that stuff)
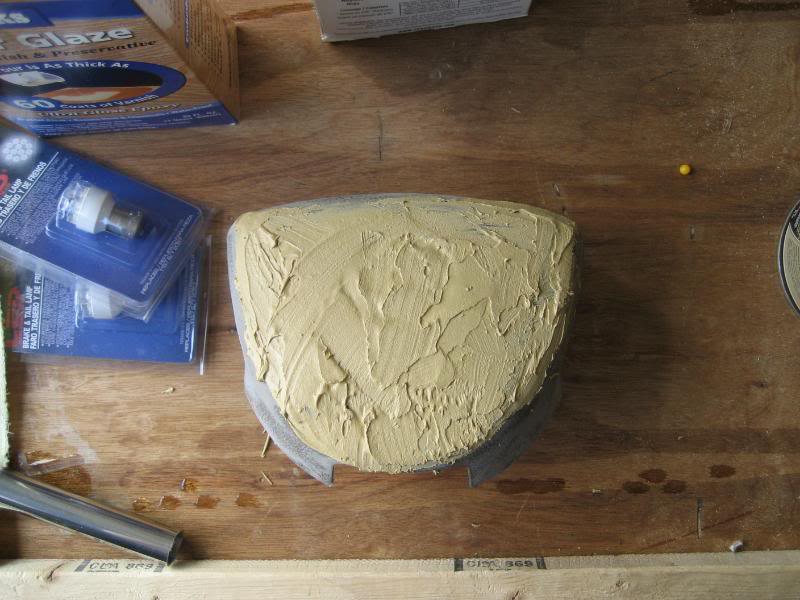
Prepped for some filling and smoothing:

Smoothing it over to hide the creases and cracks from the air bag deployment:
All sanded and ready for final covering:
Black leather to do the deed and match the steering wheel:

Stretching the leather for the clean look:
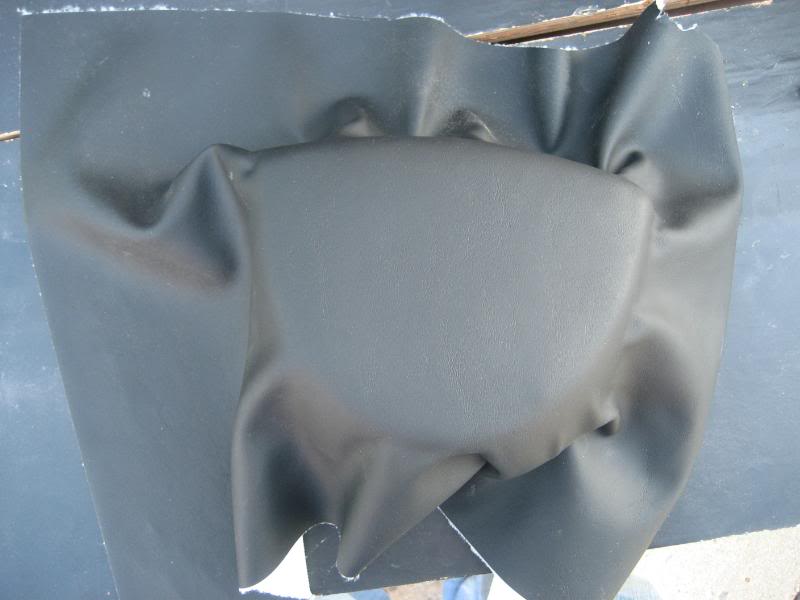
The result:
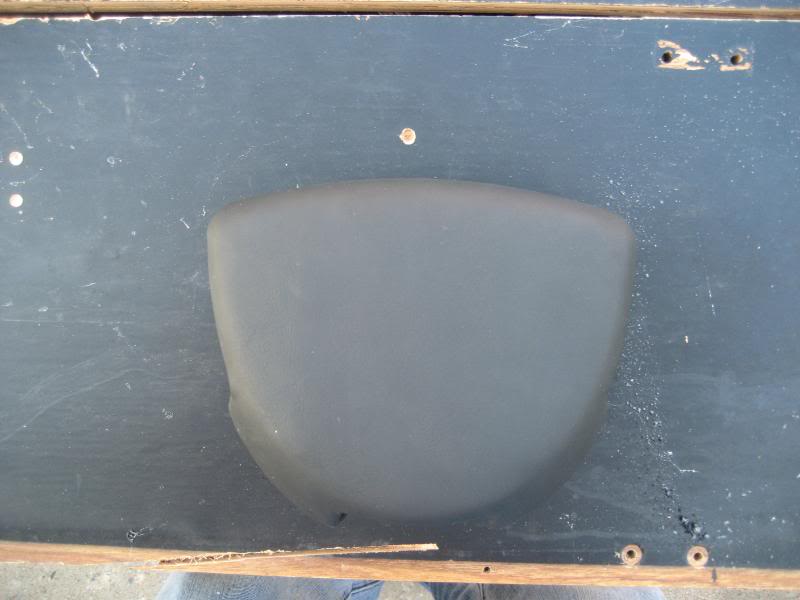
And the final touch to complete the new silvia feel:
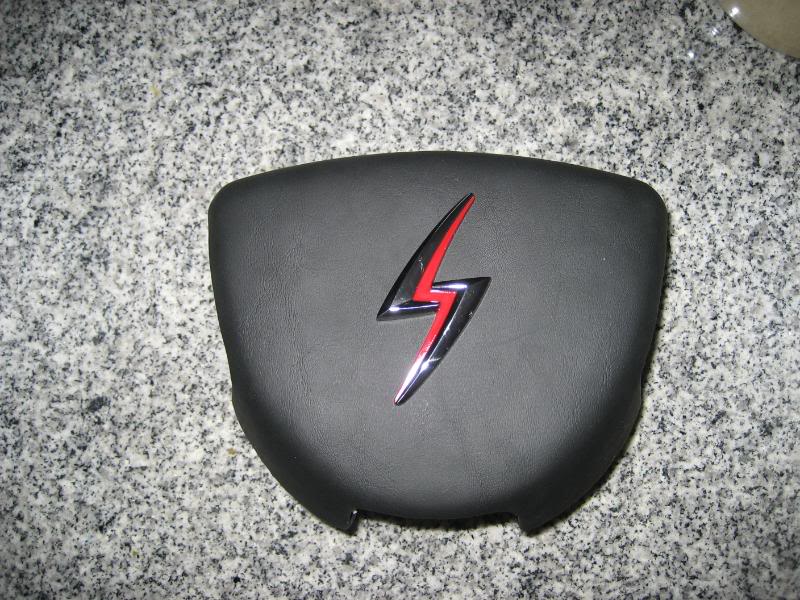
Got the wheel in today, the final product:

Now to change up how the dash will look.....
Just some dicking around while I am waiting for some parts to come in so I can continue....
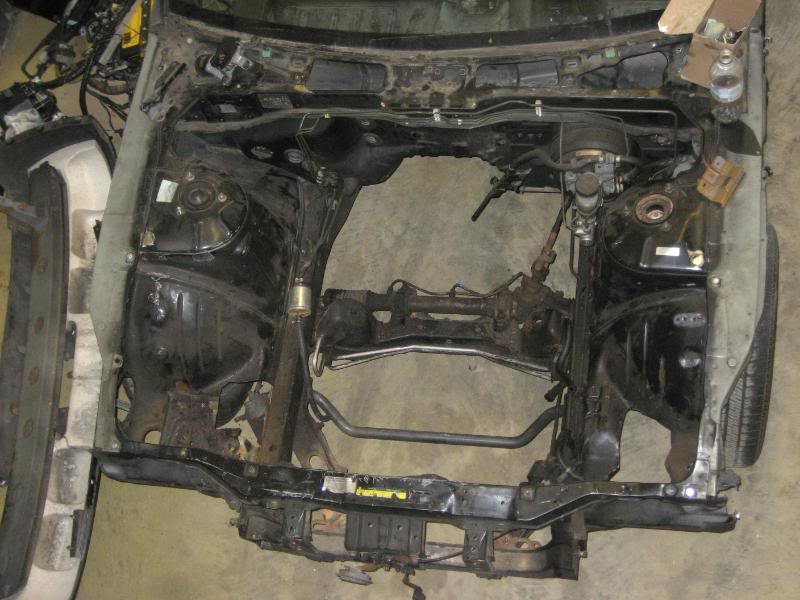
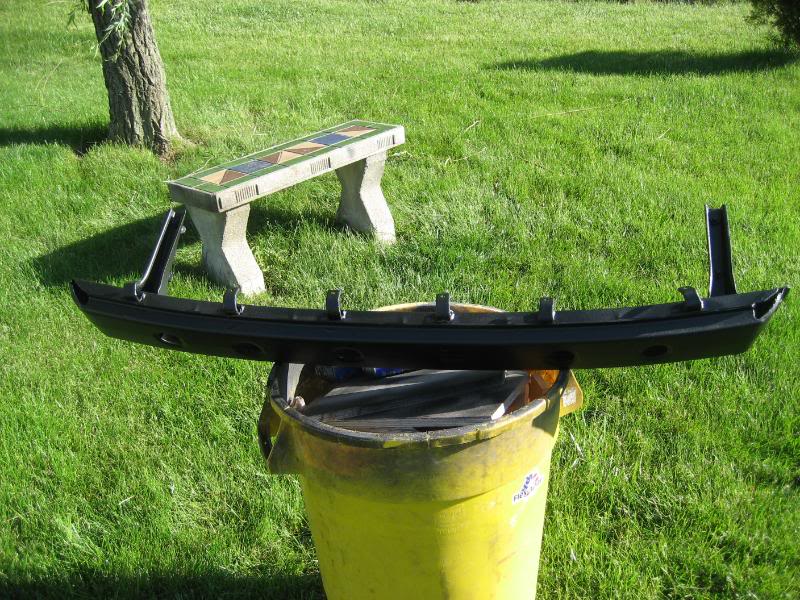
I need a S15 front support....anyone know where I can buy one?
How about a better than new rear support?
Blasted:
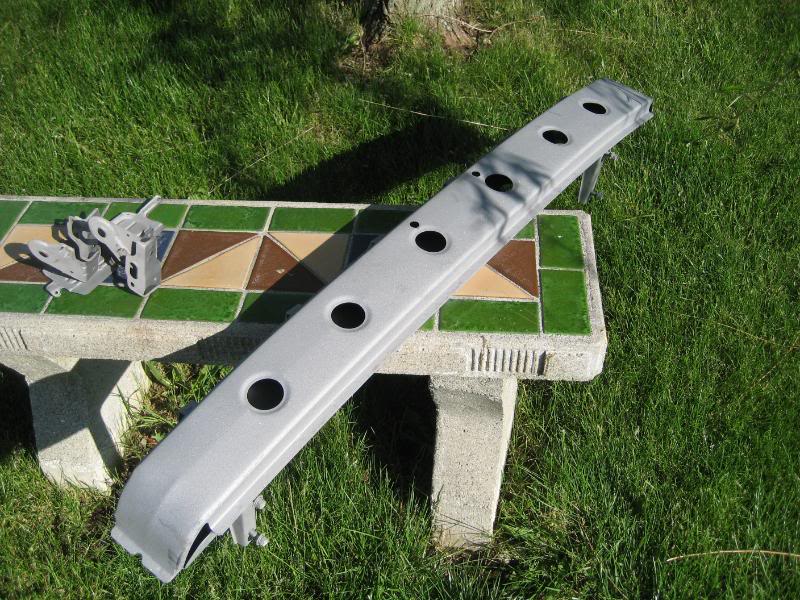
Coated With Truck Bed Liner:
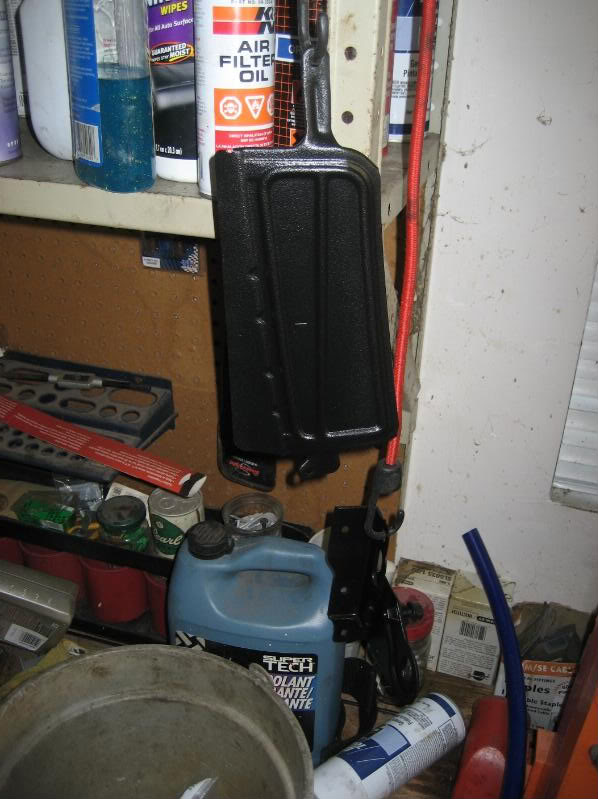
Misc. Parts Blasted:
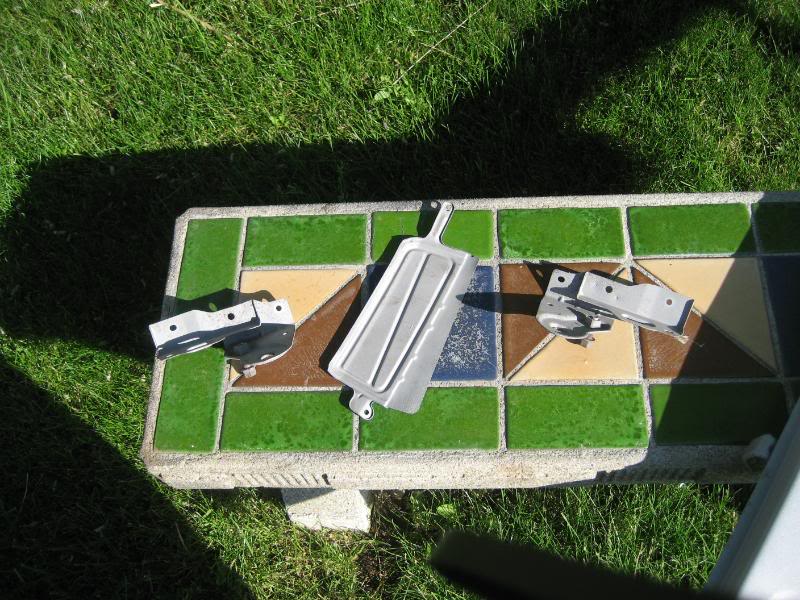
And Coated:

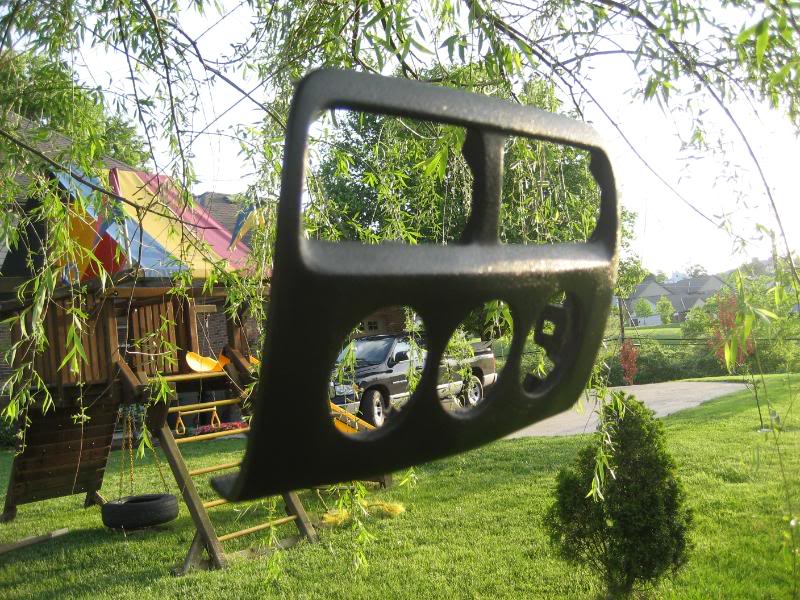
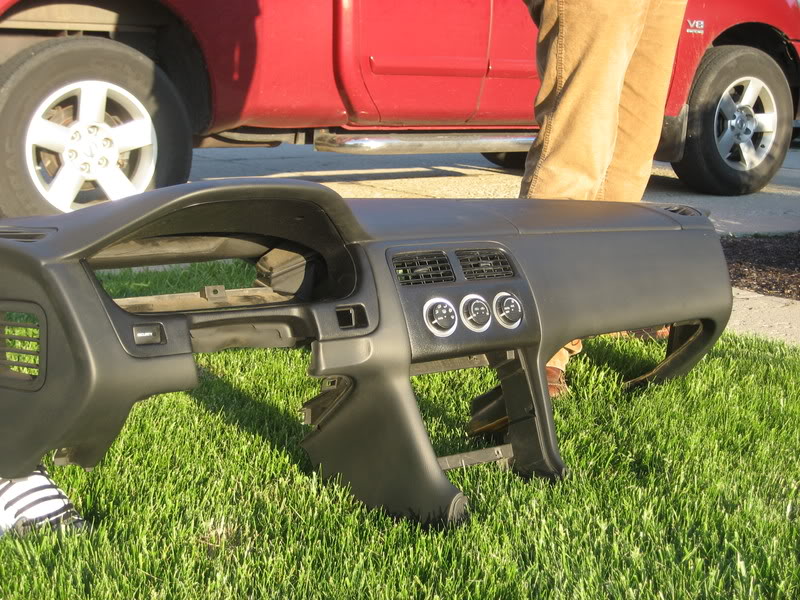
And for those of you who asked what the HVAC controls look like on in the dash:
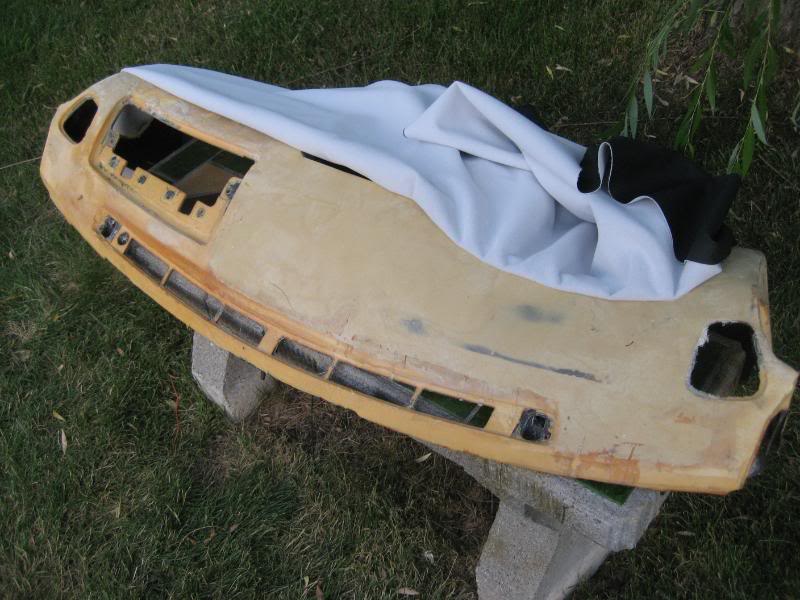
Decided if I am going to go all out, go all out. So leather dash it is....
Started by taking out the guts for cleaning of the ducts to get the former owner smoke and *** matter smell out of the vents, it didnt stink or anything you just never know what mystery smells can come from inside those ducts once you get the heat blasting....
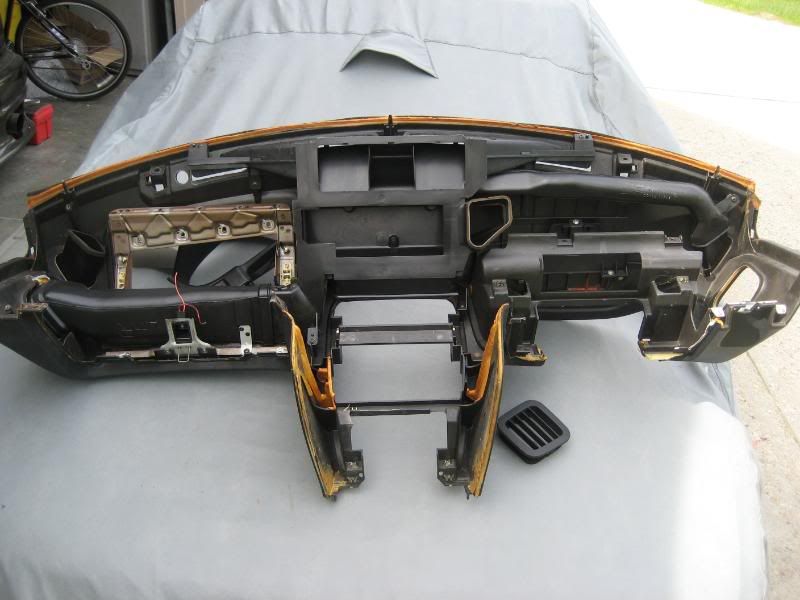
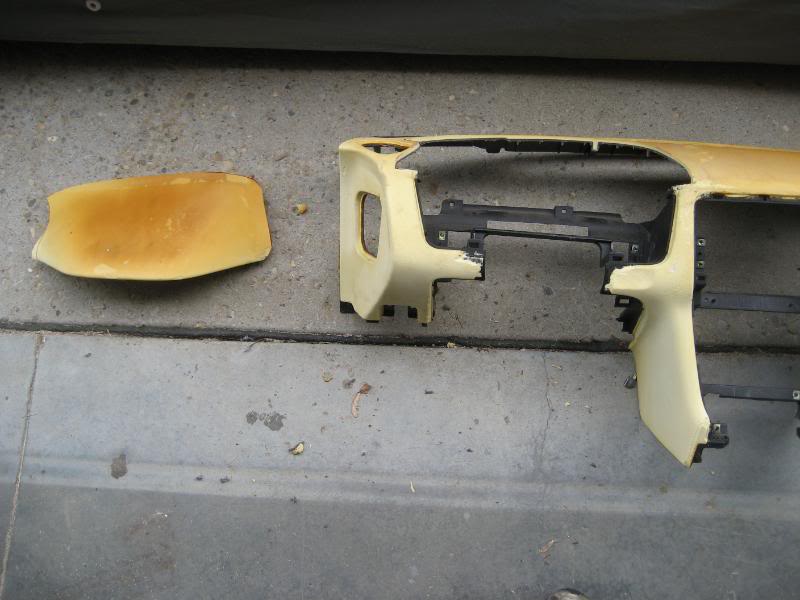
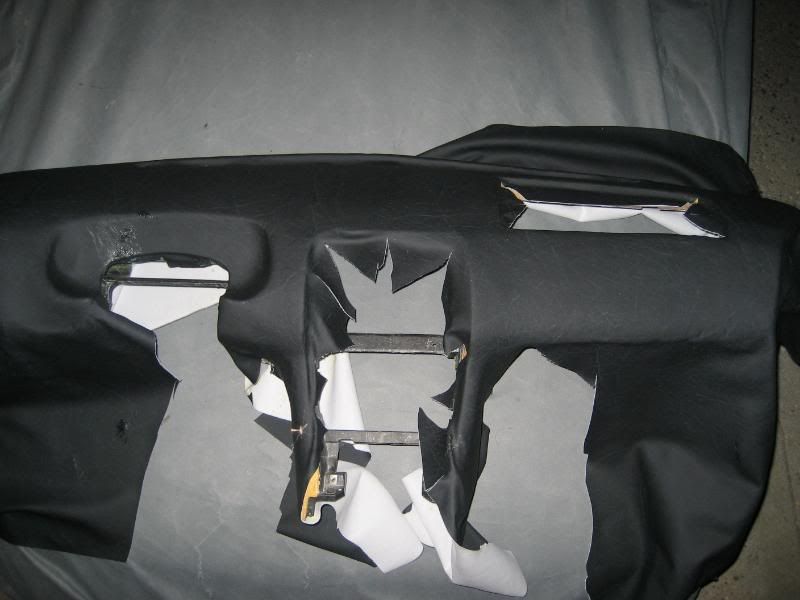
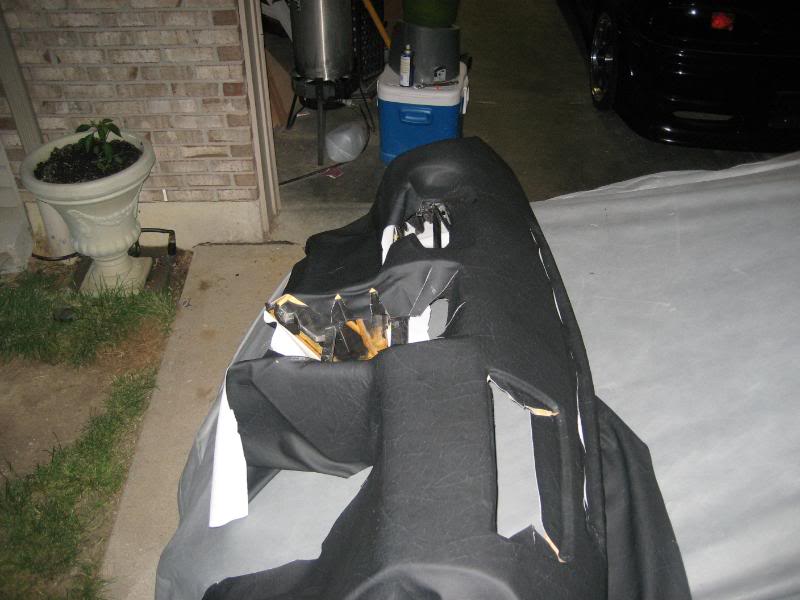
Started removal of the 13 year old dried up vinyl, $hit is like wallpaper, looks ok, but when its time to remove it all it sucks *****.
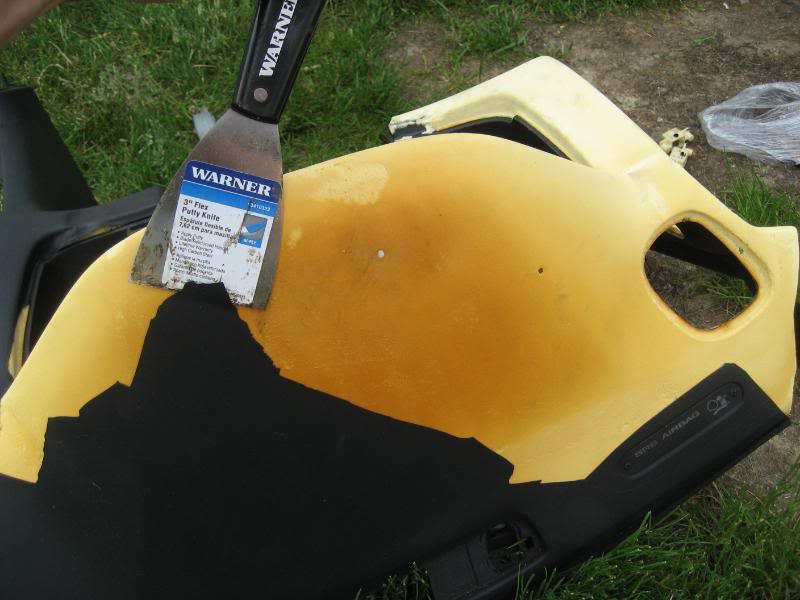
All removed:
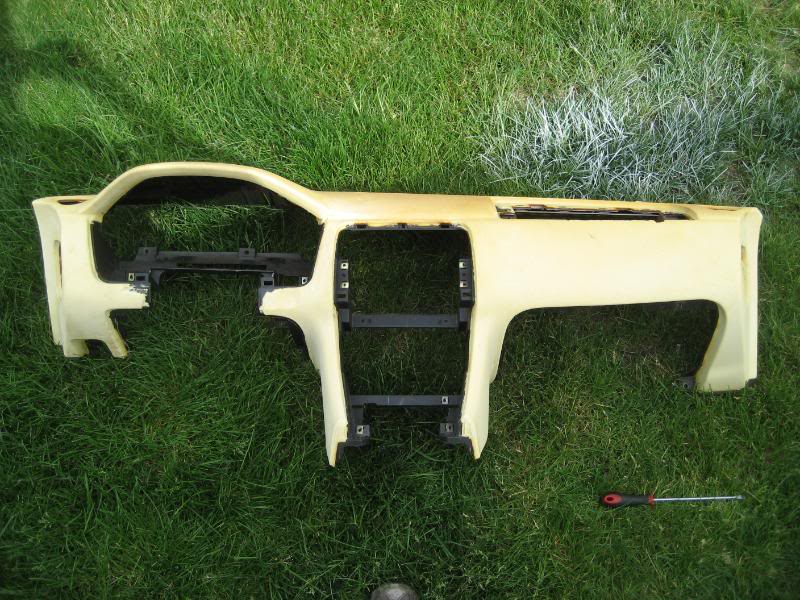
The remains:
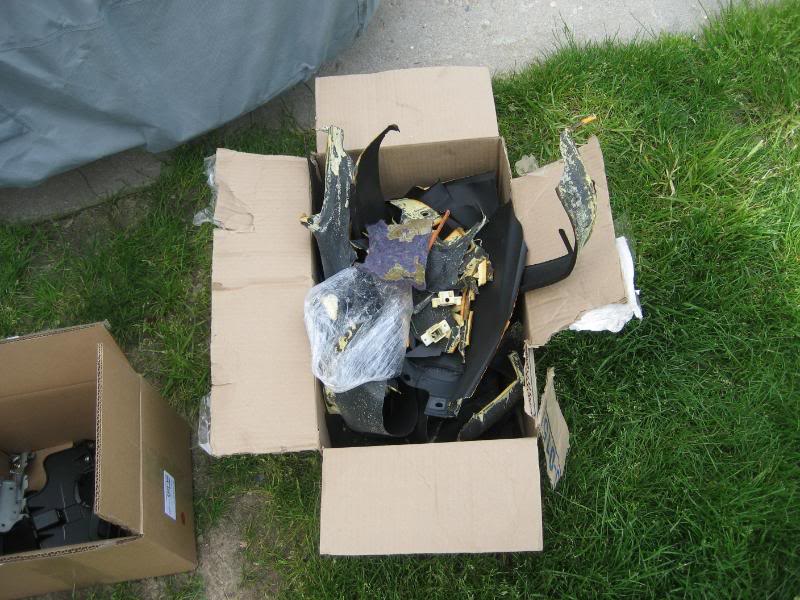
And the teaser..."Uh oh! Someone cut a hole in my dash!"
And my homeboy link I got in today (Homelink for those of you that dont know):

Some goodies came in today while I am waiting on the parts I need to complete my dash.
VQ swap kit:
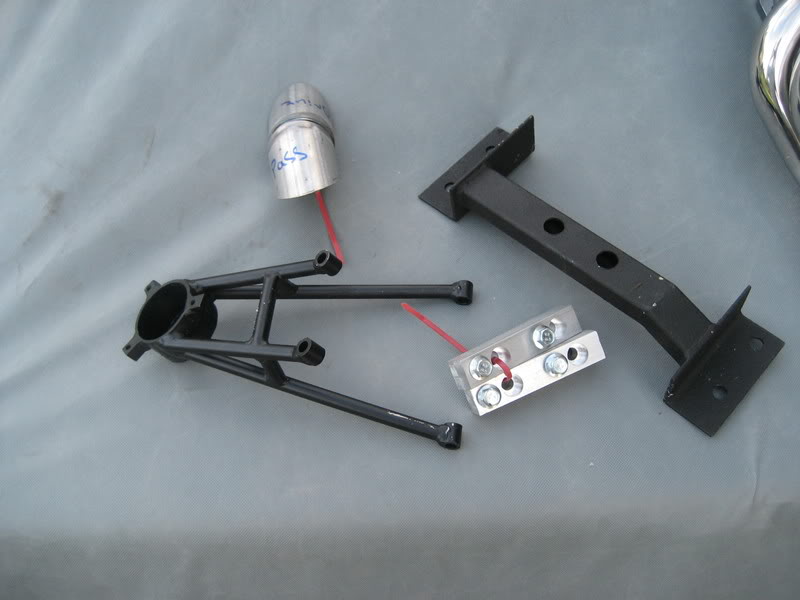
With megan racing headers I dont need so they are for sale:
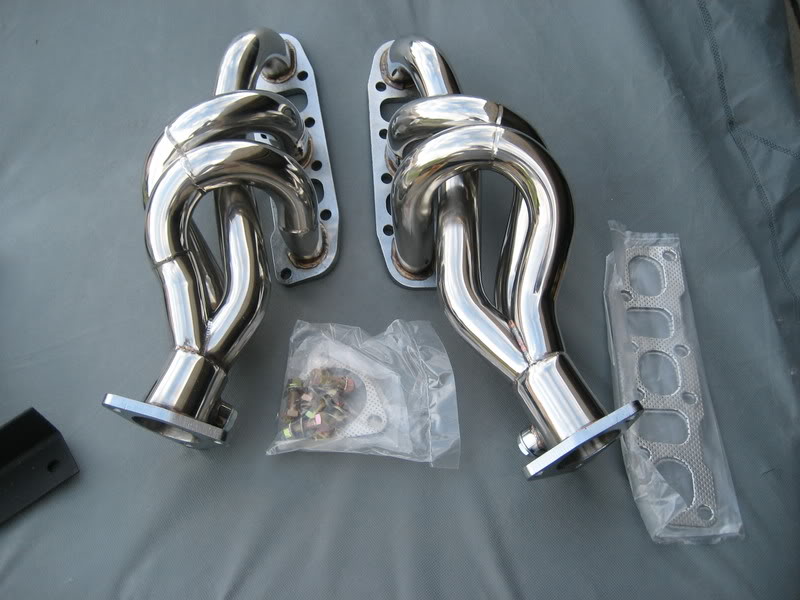
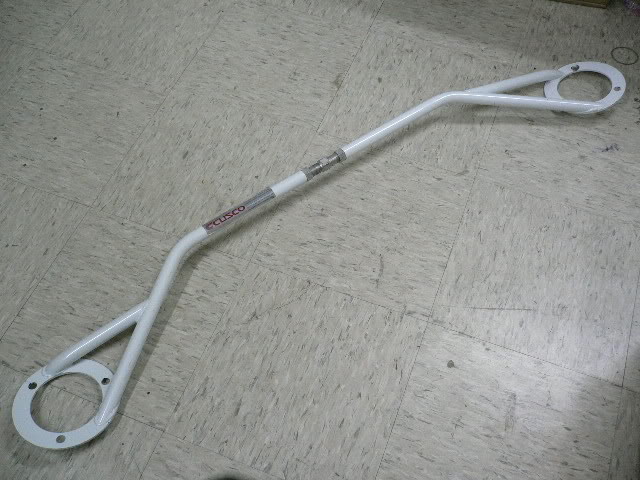
And my cusco st bar I got off ebay, my favorite series cusco bar have them on my Sentra and my NX2000. Hopefully it will clear my VQ.
As you can see it comes with no air bag, well I looked up pricing for a used, unactivated air bag and the price starts around $400. So I was like hell-to-the-NO! Especially since I am not putting air bags in this car and I was planning to gut the air bag out. So I went to the local bone yard and got a deployed air bag center for free and went to work. Here is how it looked when I got it:
Removed the air bag and the exploeded device thing:
What was left:
Used super glue to temporarly hold everything back in place while the good stuff ( gorilla glue ) did the permanent bonding and held it all in place with tape for the facial reconstruction:
The result:
Put the metal frame back in for the next step:
Filled her up with light weight expanding great stuff to support it (god I love that stuff)
Prepped for some filling and smoothing:
Smoothing it over to hide the creases and cracks from the air bag deployment:
All sanded and ready for final covering:
Black leather to do the deed and match the steering wheel:
Stretching the leather for the clean look:
The result:
And the final touch to complete the new silvia feel:
Got the wheel in today, the final product:
Now to change up how the dash will look.....
Just some dicking around while I am waiting for some parts to come in so I can continue....
I need a S15 front support....anyone know where I can buy one?
How about a better than new rear support?
Blasted:
Coated With Truck Bed Liner:
Misc. Parts Blasted:
And Coated:
And for those of you who asked what the HVAC controls look like on in the dash:
Decided if I am going to go all out, go all out. So leather dash it is....
Started by taking out the guts for cleaning of the ducts to get the former owner smoke and *** matter smell out of the vents, it didnt stink or anything you just never know what mystery smells can come from inside those ducts once you get the heat blasting....
Started removal of the 13 year old dried up vinyl, $hit is like wallpaper, looks ok, but when its time to remove it all it sucks *****.
All removed:
The remains:
And the teaser..."Uh oh! Someone cut a hole in my dash!"
And my homeboy link I got in today (Homelink for those of you that dont know):
Some goodies came in today while I am waiting on the parts I need to complete my dash.
VQ swap kit:
With megan racing headers I dont need so they are for sale:
And my cusco st bar I got off ebay, my favorite series cusco bar have them on my Sentra and my NX2000. Hopefully it will clear my VQ.
Trending Topics
07-24-2008, 12:27 PM
#8
Registered User
Thread Starter
iTrader: (5)
Join Date: Apr 2008
Location: Cincinnati, Ohio
Posts: 230
Likes: 0
Received 0 Likes
on
0 Posts
Ok a little update of where I am now....
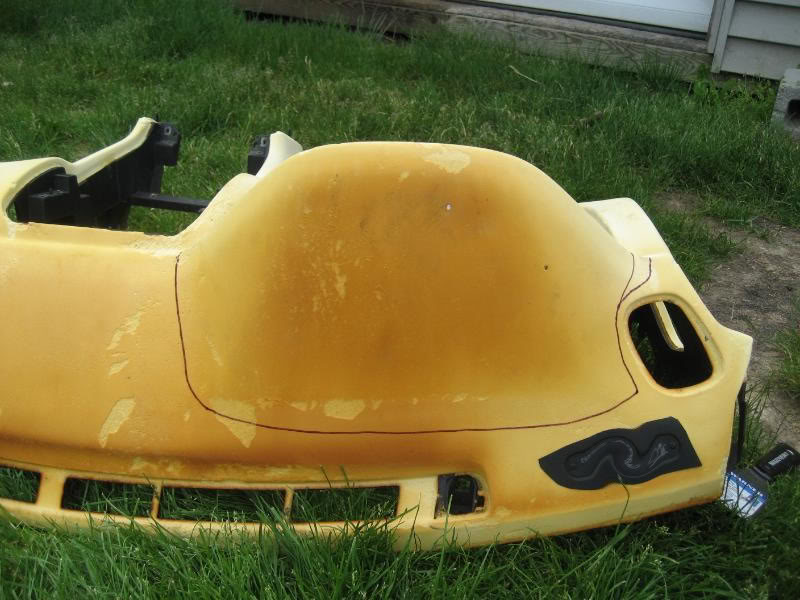
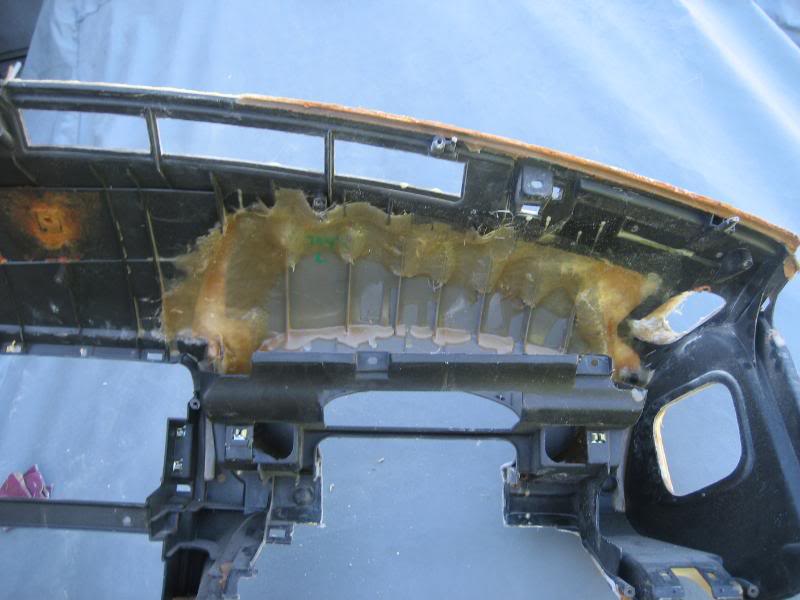
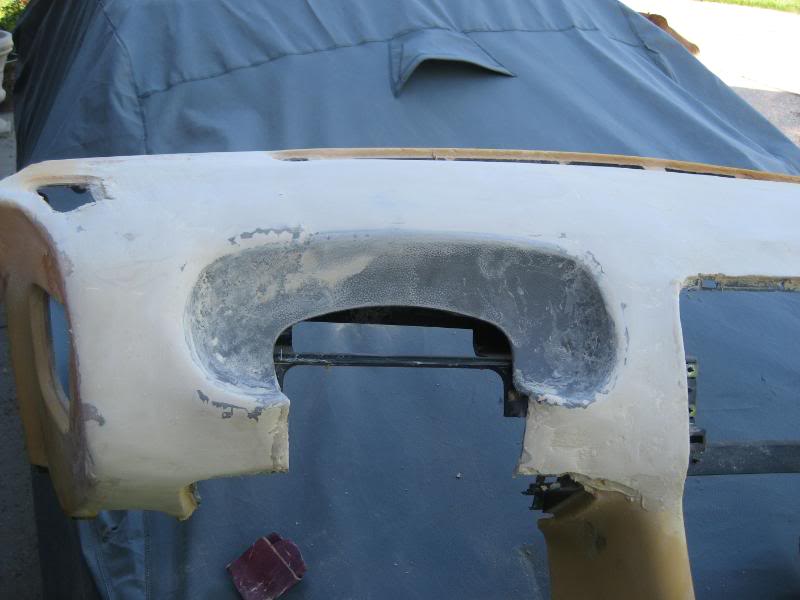
Started with this (Dash completely stripped):

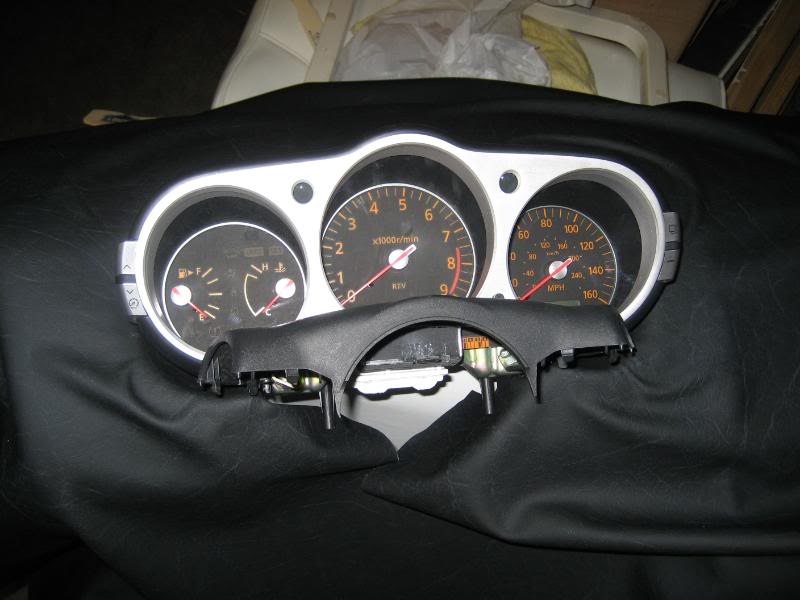
And this (Panel that craddles the 350z cluster on a 350z):
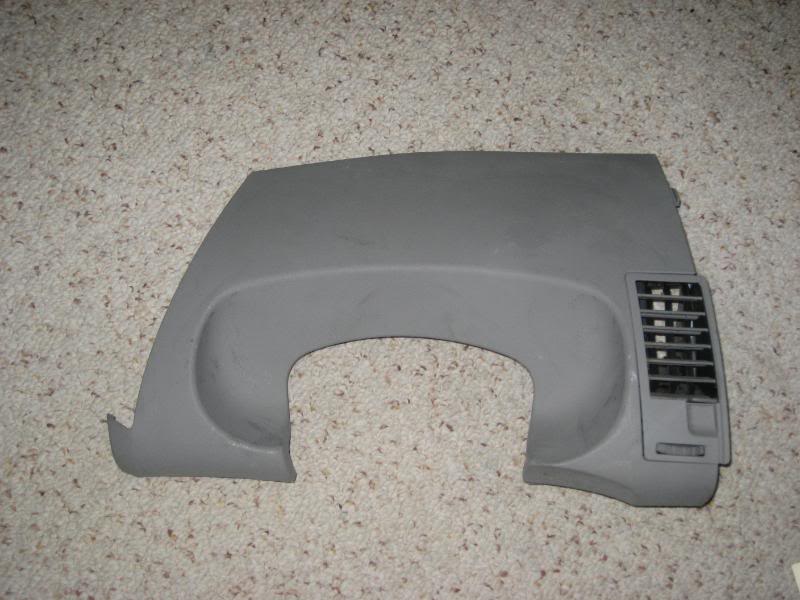
Old cluster hump has to go so I traced around the hump to cut as little as possible:
Got out the jig saw, mustered up some nerve, took a deep breath and went to town. Ended up with this:

Trimmed up the 350z panel went to the shop where the S14 is sitting. Bolted in the dash cross bar, and my S14/350 hybrid column. Fitted the panel for the right angle and clearance for viewing and tilt steering. Came up with this:
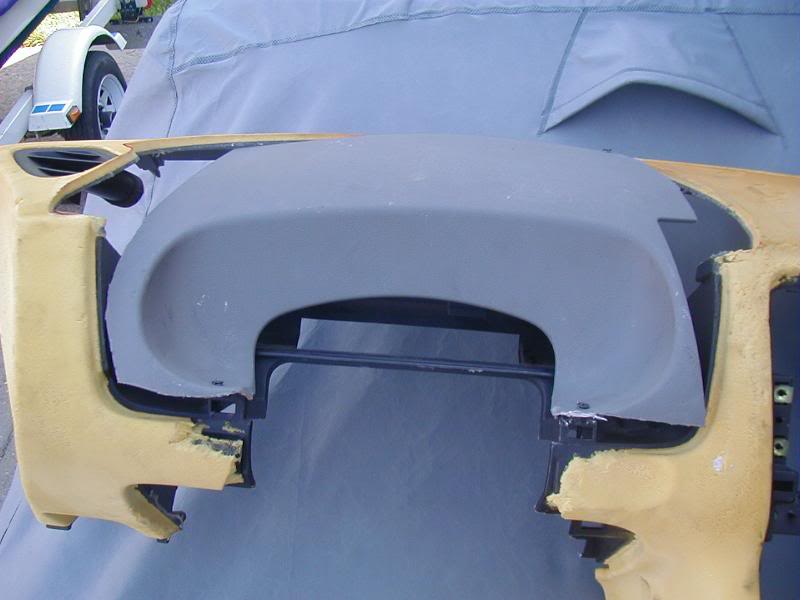
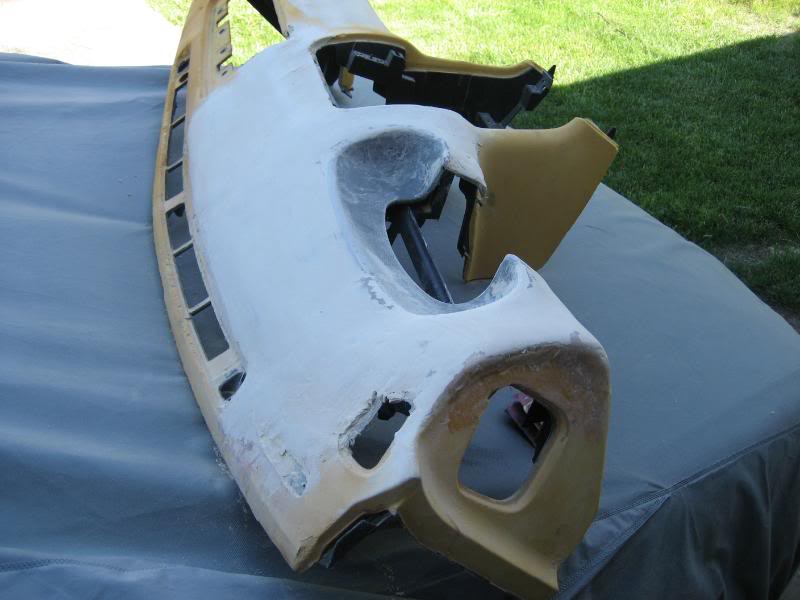
Got some fiberglass resin and some fiberglass matting. With some cutting and fitting, I formed the matting around the areas that needed to be filled in. Held in place by some spray adhesive:
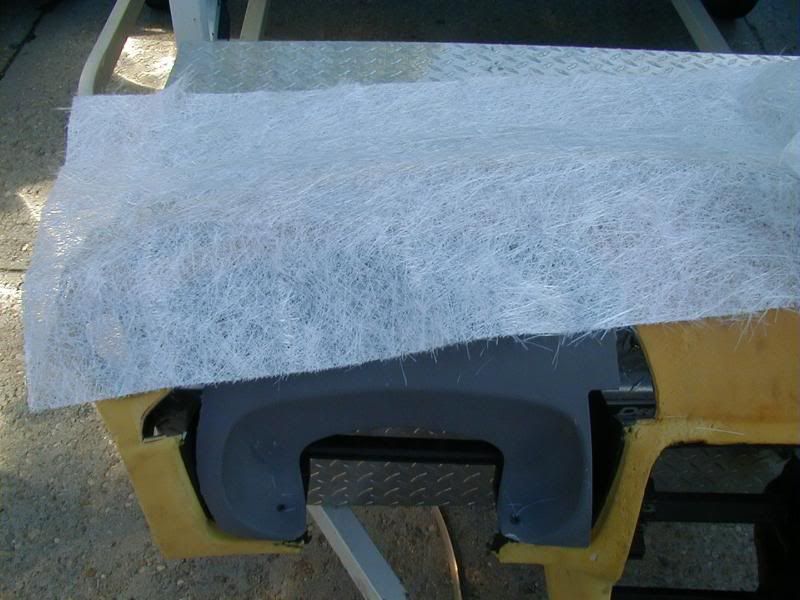
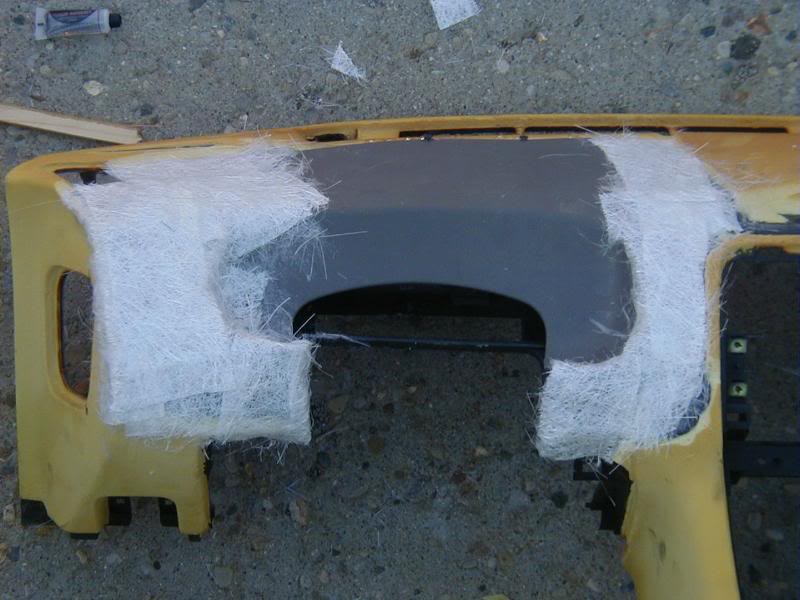
Mixed up the resin and spread her on:
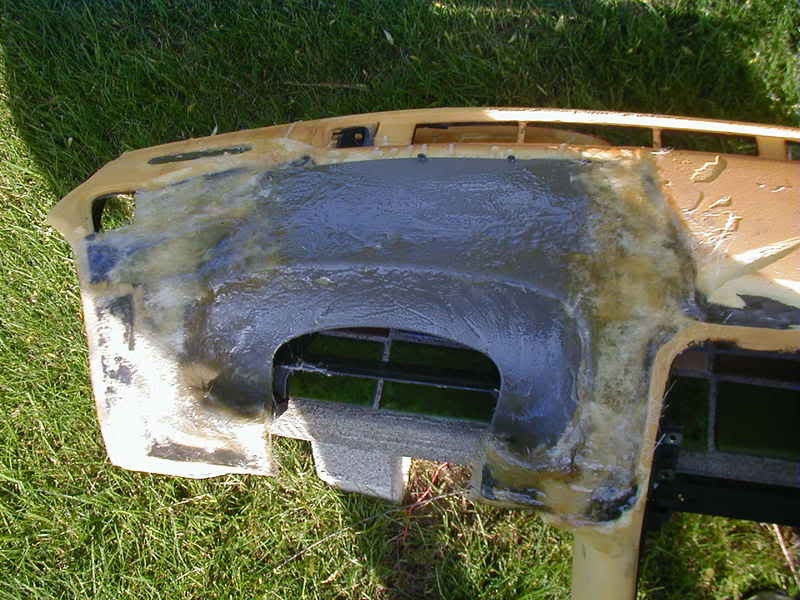
Reinforced the underside using the same method:
Got out the body filler and went to town filling and sanding which is where I am now. This is my first time doing such a task so its taking a little longer than expected but I am pleased with the results I am starting to see. Once I am finished its on with the black leather!
Started with this (Dash completely stripped):
And this (Panel that craddles the 350z cluster on a 350z):
Old cluster hump has to go so I traced around the hump to cut as little as possible:
Got out the jig saw, mustered up some nerve, took a deep breath and went to town. Ended up with this:
Trimmed up the 350z panel went to the shop where the S14 is sitting. Bolted in the dash cross bar, and my S14/350 hybrid column. Fitted the panel for the right angle and clearance for viewing and tilt steering. Came up with this:
Got some fiberglass resin and some fiberglass matting. With some cutting and fitting, I formed the matting around the areas that needed to be filled in. Held in place by some spray adhesive:
Mixed up the resin and spread her on:
Reinforced the underside using the same method:
Got out the body filler and went to town filling and sanding which is where I am now. This is my first time doing such a task so its taking a little longer than expected but I am pleased with the results I am starting to see. Once I am finished its on with the black leather!
07-24-2008, 12:28 PM
#9
Registered User
Thread Starter
iTrader: (5)
Join Date: Apr 2008
Location: Cincinnati, Ohio
Posts: 230
Likes: 0
Received 0 Likes
on
0 Posts
Ok so the first time I did my dash I kinda rushed it which resulted in me not being happy with it. So I ripped the cover off and started over. This time I had my camera ready for those of you who wish to have some kind of direction when attempting to do this yourself.
I do warn you this is not an easy task. If you have any doubts of your personal skills do not attempt this.
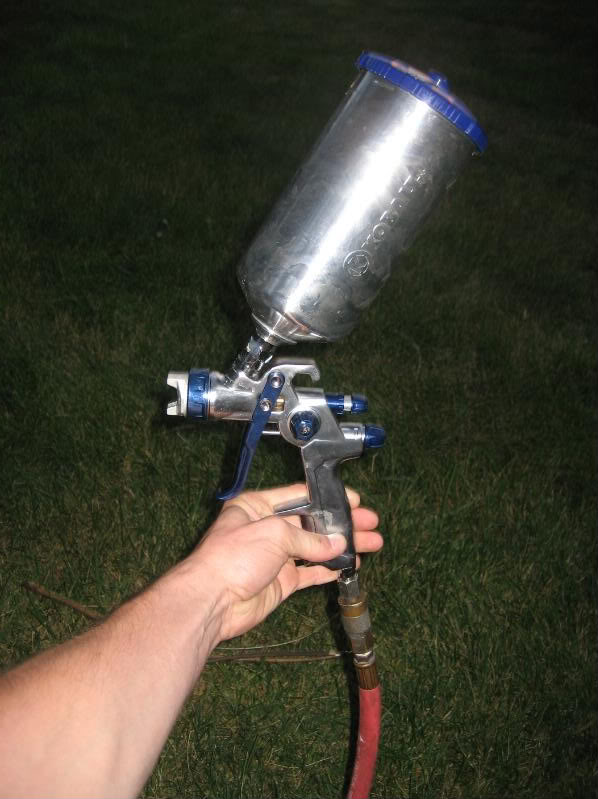
The tools and material used:

Decent spray gun, weldwood contact cement, disposable paint brush, paint stick, and the material you wish to use on your dash, alot of it. Other items not pictured: air compressor, odorless mineral spirits, rags, razor blade and spray adhesive.
First thing, have PATIENCE this is in no way a easy task. TAKE YOUR TIME, if you rush you will not be pleased with the results. My dash has taken a period of three days to do.
Ok now best place to start is the curviest place on the dash as it can be the hardest to form. During this process there will be a lot of peeling up, stretching and putting back down until you get it right. The best way to tell the hard part is to stretch the material over the areas of concern and see how easily the material will take the form of the dash. I choose to start here:
Obviously none of you will have this PITA to mold unless your doing a dash like mine or a 350z dash. In this area I will use the disposable paint brush to apply the glue. The trick is to apply the glue sparingly and let it tack up a bit before trying to form the material into the target area. You want to stir up the glue really well with the paint stick:
Apply with a the brush as stated above and start forming the material, mine turned out like this:

I let that area sit over night, I used the cluter as a weight to hold it down:
That was day 1.
Day 2
I picked the cluster up off the dash to examine under it, not to bad some spots had lifted but its no big deal since those spots will never be seen. I then prepared to mold the top part of the dash which is the flatest. With the S14 dash or even the S13 dash I would recomend doing the bottom part before I do the top. Its trickier, and takes a little more time. It also allows you to have more movement with the material since the top part is free moving. Anyway back to the dash. I got out my paint gun and with the air compressor attached to it ready to go:
Poured the contact cement into it after I stirred it up once again. Peeled back the material all the way up to the point where the already glued down material starts:
Sprayed the full flat area, let it tack up and started stretching the material, making sure I got out all the wrinkles, looked like so when finished:

As you will see there are slits in the material, I did this with the razor blade to take some of the tension out of the stretched material to make it easier to work with. I used a leather alante. Its not real leather but it looks and feels like leather. Its just easier to work with and it wont dry out, shrink, or crack like leather. Its what they use in BMWs and such.
That was Day 2, and how it sits as of the moment.
Day 3
Tomorrow I will repeat the same process as day 2, just on the lower half. I will most likely let that sit over night then trim the excess material off and secure it to the back side with spray adhesive.
To clean your gun out dump some mineral spirits in the tank and shake it up, with some rags you can wipe out the inside of the tank because the cement will almost instantly turn into a gum like substance and is easily removed. I sprayed some of the mineral spirits through the gun to keep the tip from clogging. I would let the mineral spirits sit inside the canister that way it will keep the gun from clogging.
The mineral spirits is also great for clean up, and if your using a leather or a vinyl you wont have to worry about overspray on your material because it will come right off with the mineral spirits.
I hope this helps anyone thinking of tackling such a project. If anyone has any questions, feel free to ask.
I do warn you this is not an easy task. If you have any doubts of your personal skills do not attempt this.
The tools and material used:
Decent spray gun, weldwood contact cement, disposable paint brush, paint stick, and the material you wish to use on your dash, alot of it. Other items not pictured: air compressor, odorless mineral spirits, rags, razor blade and spray adhesive.
First thing, have PATIENCE this is in no way a easy task. TAKE YOUR TIME, if you rush you will not be pleased with the results. My dash has taken a period of three days to do.
Ok now best place to start is the curviest place on the dash as it can be the hardest to form. During this process there will be a lot of peeling up, stretching and putting back down until you get it right. The best way to tell the hard part is to stretch the material over the areas of concern and see how easily the material will take the form of the dash. I choose to start here:
Obviously none of you will have this PITA to mold unless your doing a dash like mine or a 350z dash. In this area I will use the disposable paint brush to apply the glue. The trick is to apply the glue sparingly and let it tack up a bit before trying to form the material into the target area. You want to stir up the glue really well with the paint stick:
Apply with a the brush as stated above and start forming the material, mine turned out like this:
I let that area sit over night, I used the cluter as a weight to hold it down:
That was day 1.
Day 2
I picked the cluster up off the dash to examine under it, not to bad some spots had lifted but its no big deal since those spots will never be seen. I then prepared to mold the top part of the dash which is the flatest. With the S14 dash or even the S13 dash I would recomend doing the bottom part before I do the top. Its trickier, and takes a little more time. It also allows you to have more movement with the material since the top part is free moving. Anyway back to the dash. I got out my paint gun and with the air compressor attached to it ready to go:
Poured the contact cement into it after I stirred it up once again. Peeled back the material all the way up to the point where the already glued down material starts:
Sprayed the full flat area, let it tack up and started stretching the material, making sure I got out all the wrinkles, looked like so when finished:
As you will see there are slits in the material, I did this with the razor blade to take some of the tension out of the stretched material to make it easier to work with. I used a leather alante. Its not real leather but it looks and feels like leather. Its just easier to work with and it wont dry out, shrink, or crack like leather. Its what they use in BMWs and such.
That was Day 2, and how it sits as of the moment.
Day 3
Tomorrow I will repeat the same process as day 2, just on the lower half. I will most likely let that sit over night then trim the excess material off and secure it to the back side with spray adhesive.
To clean your gun out dump some mineral spirits in the tank and shake it up, with some rags you can wipe out the inside of the tank because the cement will almost instantly turn into a gum like substance and is easily removed. I sprayed some of the mineral spirits through the gun to keep the tip from clogging. I would let the mineral spirits sit inside the canister that way it will keep the gun from clogging.
The mineral spirits is also great for clean up, and if your using a leather or a vinyl you wont have to worry about overspray on your material because it will come right off with the mineral spirits.
I hope this helps anyone thinking of tackling such a project. If anyone has any questions, feel free to ask.
07-24-2008, 12:28 PM
#10
Registered User
Thread Starter
iTrader: (5)
Join Date: Apr 2008
Location: Cincinnati, Ohio
Posts: 230
Likes: 0
Received 0 Likes
on
0 Posts
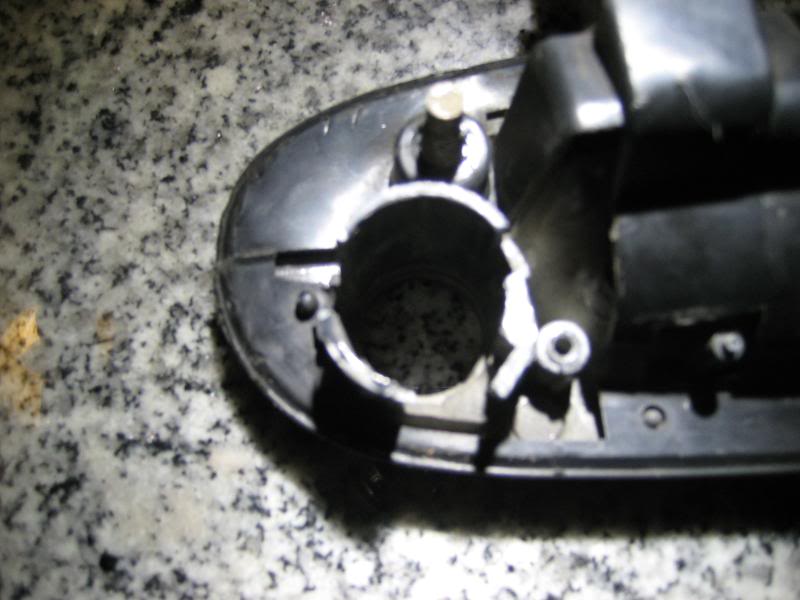
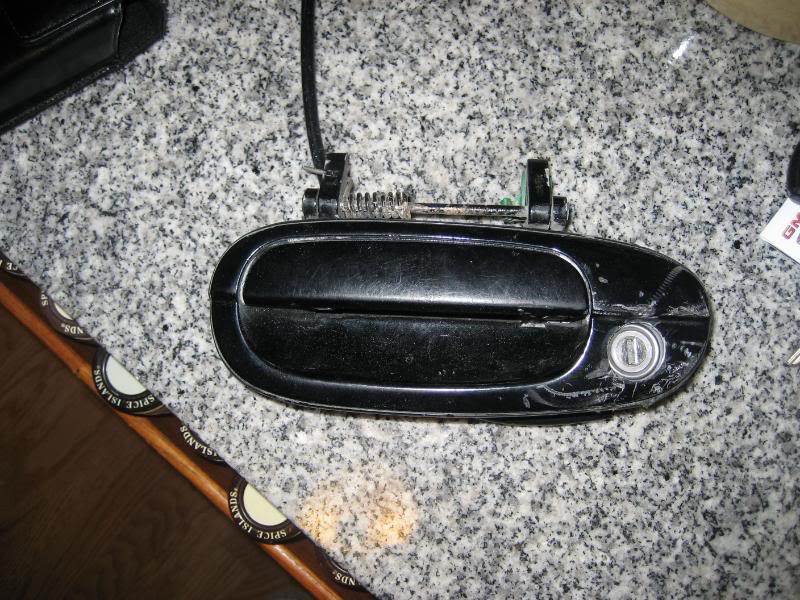
Well this next mod definitely tested my patience. I needed to modify the door lock to match the ignition. I really didnt need to but I wanted to, and I can, lol. Well first thing first was to remove the door handle from the door. I got the two bolts holding the handle to the door removed. I thought thats all I would have to do. After coming up with no way to get the lock off that was holding it, being pressed on time I got pissed pulled out my trusty BFH (Big ****ing hammer, for those of you that dont know) and a flat tip screw driver and beat the **** out of the lock till it broke out and I was left with the door handle that looked a little something like this from the back:
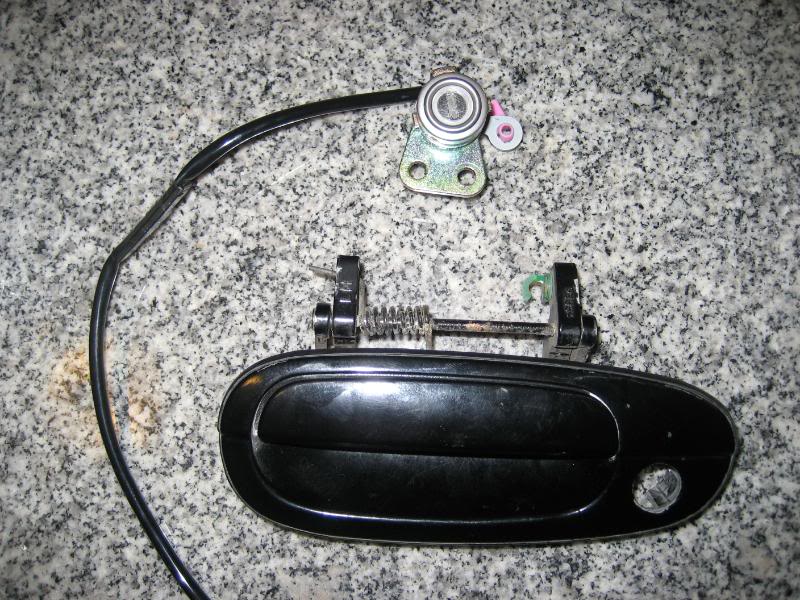
So now the task is to combine this 240sx door handle with this 350z lock:
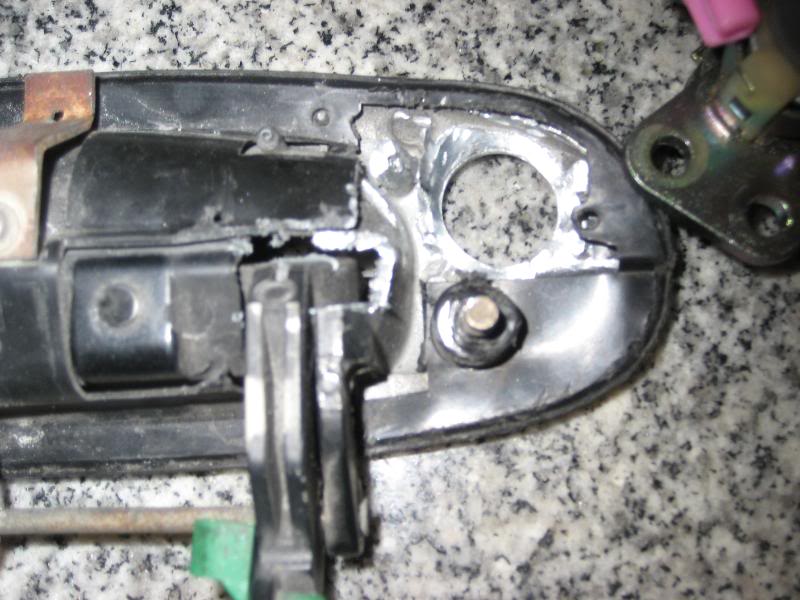
So I devised a plan and got out my dremel and went to work. I thought a diamond cutting blade would eat right through this metal but hell no it didnt. It took me FOREVER to get through this metal to cut out the bulk of it. I then got out my grinder and ate up as much metal as I could. Even that took forever. I even tried the grinding stone attachment for the dremel, still took forever to even make a dent. Suprisingly the most effective tool for this task was the mini drum sander attachment for the dremel which also happened to be the last thing I tried. Go figure. I underestimated this little attachment, luckily I had plenty of replacement sand paper covers for it, because I went through quite alot of them getting the metal down to this:
Test fitted the lock to see if my plan had panned out and I was happy to find out it did:
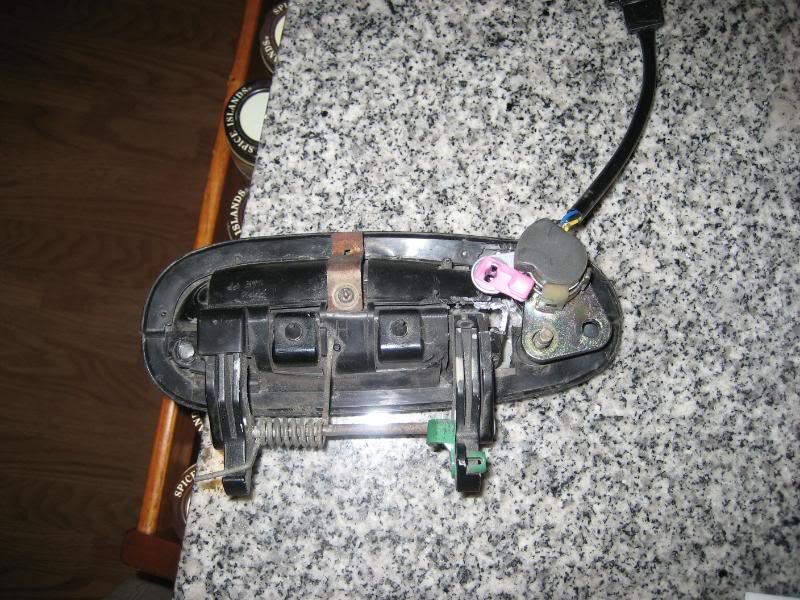
Did some additional grounding on the lock hole just a bit more to allow the 350z lock to fit in the slot better and cut out a section of the handle for proper clearance of the key swipe. If you dont get the idea, I will explain. As you can see the 350z lock mounting hole lines up with the stud that takes the nut that mounts the handle to the body. The idea is to break the stud out, put a longer one in so the lock mount can go between the door mounting hole and the nut that tightens it to the door. For stability I am going to add another stud through the other mounting hole, I will either have the stud welded to the back of the handle or I will drill one though the front of the handle which shouldnt be a big deal to cover up since I am shaving that body line that it will land on.
At the end of it all the handle turned out a little something like this:
(Ignore the scratched up look on the handle, it got so hot the paint melted during the grinding process. No worries it will get sandblasted clean)
Passenger side lock will get shaved for cleanliness.
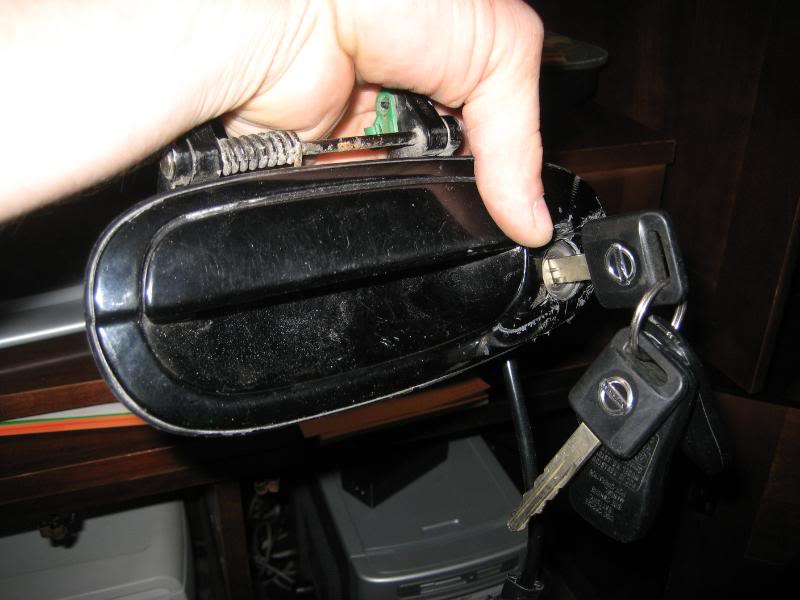
Bet your keys dont look like this :
:
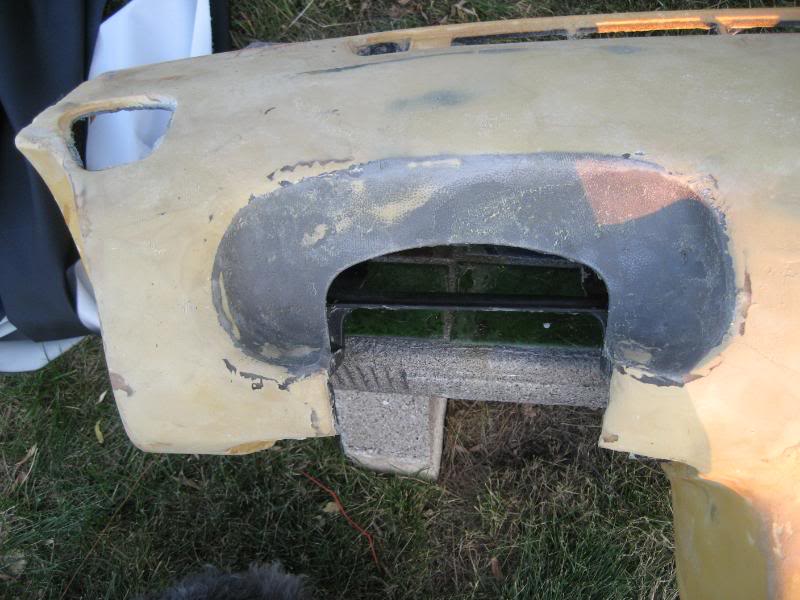
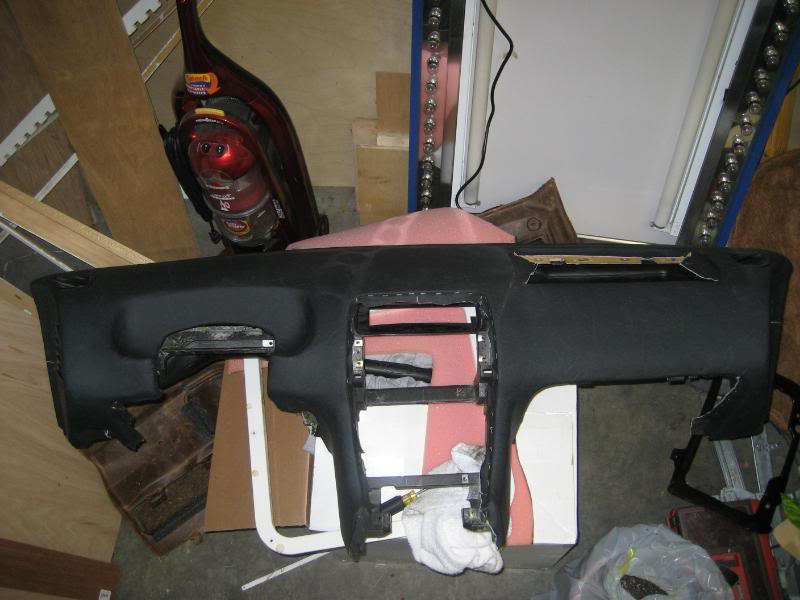
Ok thought I would put up an update, its not much but its something. Finished my dash, one dilema I had was since I cut out the hump where the old cluster went the drivers side upper vent didnt lie flat against the dash anymore because the vent overlays where the hump starts to form. So what to do? I thought maybe I could heat it up and form it but I was afraid it wouldnt form right and melt/bubble up so I got to thinkin and I came up with this:

I used a passenger side vent off a rhd S14, I figured it had to be the same as the passenger side vent on lhd S14s except mirrored and it was. So with that I put all the duct work under the dash back together. I was pleased to see that everything went right back to where it normally does stock:
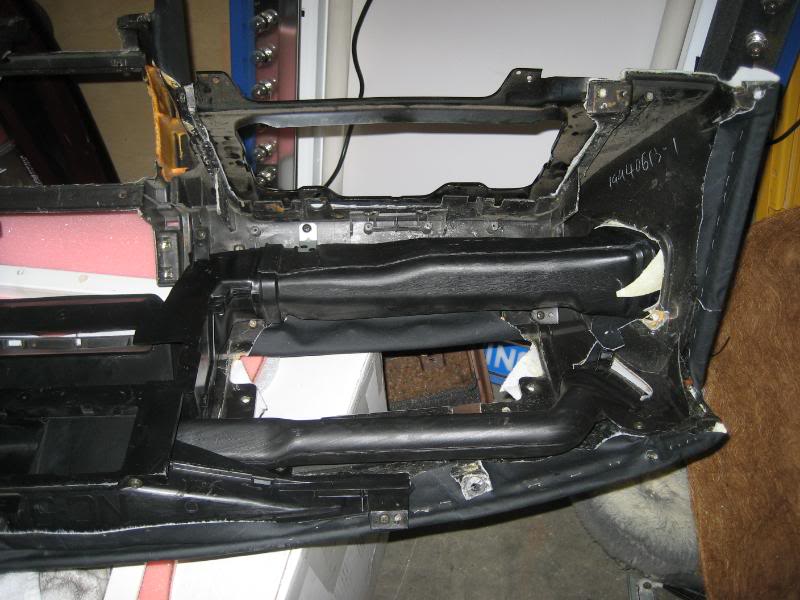
Passenger underside:
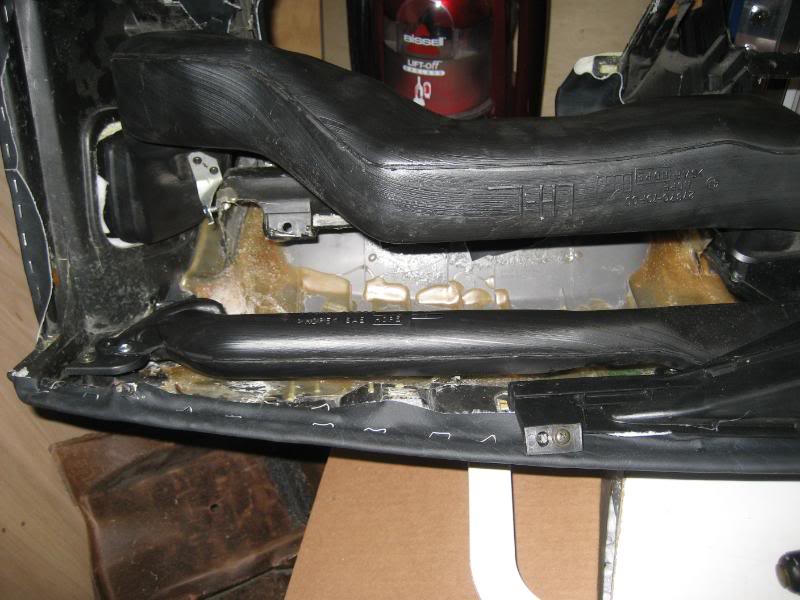
And the area I was worried about not going back together the same, the Driver underside:
As a whole:
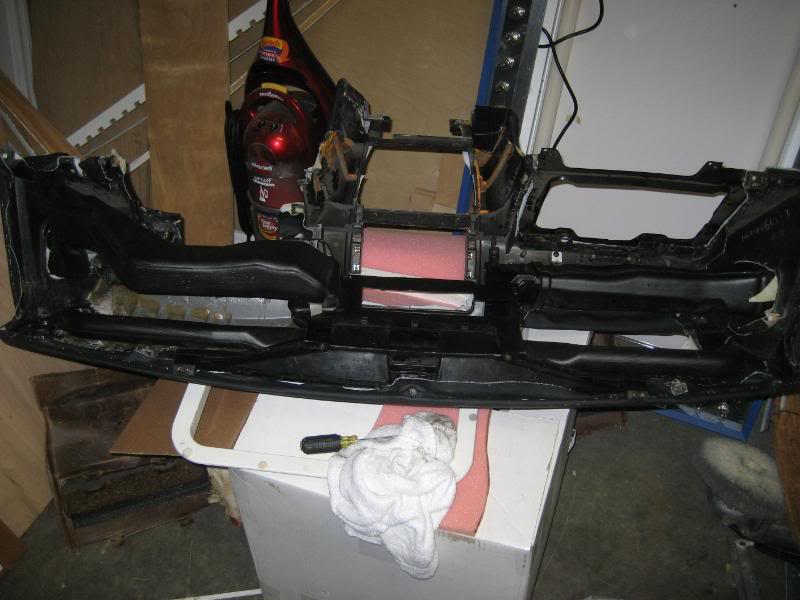
The only thing that didnt fit right is the duct end that feeds the drivers side upper vent since it wasnt the orginal vent. I heated it up with a torch and worked the plastic to take the new vent. It worked, its not pretty and I heated it up a little too much, but it works and you will never see it:
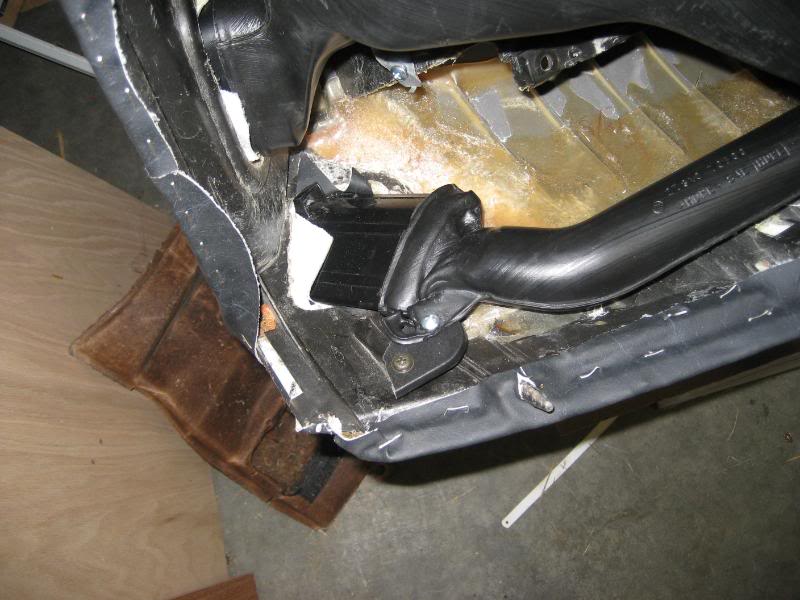
And the finished product:
So now the task is to combine this 240sx door handle with this 350z lock:
So I devised a plan and got out my dremel and went to work. I thought a diamond cutting blade would eat right through this metal but hell no it didnt. It took me FOREVER to get through this metal to cut out the bulk of it. I then got out my grinder and ate up as much metal as I could. Even that took forever. I even tried the grinding stone attachment for the dremel, still took forever to even make a dent. Suprisingly the most effective tool for this task was the mini drum sander attachment for the dremel which also happened to be the last thing I tried. Go figure. I underestimated this little attachment, luckily I had plenty of replacement sand paper covers for it, because I went through quite alot of them getting the metal down to this:
Test fitted the lock to see if my plan had panned out and I was happy to find out it did:
Did some additional grounding on the lock hole just a bit more to allow the 350z lock to fit in the slot better and cut out a section of the handle for proper clearance of the key swipe. If you dont get the idea, I will explain. As you can see the 350z lock mounting hole lines up with the stud that takes the nut that mounts the handle to the body. The idea is to break the stud out, put a longer one in so the lock mount can go between the door mounting hole and the nut that tightens it to the door. For stability I am going to add another stud through the other mounting hole, I will either have the stud welded to the back of the handle or I will drill one though the front of the handle which shouldnt be a big deal to cover up since I am shaving that body line that it will land on.
At the end of it all the handle turned out a little something like this:
(Ignore the scratched up look on the handle, it got so hot the paint melted during the grinding process. No worries it will get sandblasted clean)
Passenger side lock will get shaved for cleanliness.
Bet your keys dont look like this
:Ok thought I would put up an update, its not much but its something. Finished my dash, one dilema I had was since I cut out the hump where the old cluster went the drivers side upper vent didnt lie flat against the dash anymore because the vent overlays where the hump starts to form. So what to do? I thought maybe I could heat it up and form it but I was afraid it wouldnt form right and melt/bubble up so I got to thinkin and I came up with this:
I used a passenger side vent off a rhd S14, I figured it had to be the same as the passenger side vent on lhd S14s except mirrored and it was. So with that I put all the duct work under the dash back together. I was pleased to see that everything went right back to where it normally does stock:
Passenger underside:
And the area I was worried about not going back together the same, the Driver underside:
As a whole:
The only thing that didnt fit right is the duct end that feeds the drivers side upper vent since it wasnt the orginal vent. I heated it up with a torch and worked the plastic to take the new vent. It worked, its not pretty and I heated it up a little too much, but it works and you will never see it:
And the finished product:


 07-24-2008, 01:25 PM
#17
Registered User
iTrader: (18)

Join Date: Oct 2005
Location: Overland Park, KS
Posts: 2,006
Likes: 0
Received 0 Likes
on
0 Posts
Damn, that is crazy. You must got some serious guts, skill, and knowledge to do all this thing. Mind if I asking how much you plan to spend on this project?
