
Turbo VR6 in 350Z


Thread Starter
Registered User
Joined: Jan 2013
Posts: 154
Likes: 3
From: Florida
Ok update on the cams. to be fair MJM was tring to get info for me. TT had them on back order. They should be showing up this week. I wish they would have just told me that. I would have no issue with that as long as i know what is going on.


Registered User
Joined: Jun 2011
Posts: 40
Likes: 0
From: PA
heres a vr swapped s4, e98 and 35lbs of boost
he has the front diff disconnected awd normally
http://www.audizine.com/forum/showth...sion-yesterday
he has the front diff disconnected awd normally
http://www.audizine.com/forum/showth...sion-yesterday
Thread Starter
Registered User
Joined: Jan 2013
Posts: 154
Likes: 3
From: Florida
Hey guys, here is the schematic I have come up with for installing a VR6 engine in the 350z using the stock harness. It�s nice because the harness is already integrated into the car�s relay, power and grounding systems, you just have to run the signal wires and trigger the relays as you want. You just undo the harness after the coolant temp sensor and knock sensor connector and rewire it to your new engine. You can remove any wires you don�t need. This may also help you guys doing LSx swaps if you want to reuse the 350 harness in your swap.
This is not released yet but will do after the car is wired up. It should be correct. Please let me know if anyone spots any issues and I'll make a rev change, hell I'll make an LSx version if someone feeds me the info they would like to see.
(New schematic Update 3/1/2013)!!!!
Rev X3 is updated to wiring in a megasquirt 3 pro module inside the 350z ECU housing.
For those that do not know, you can zoom in and out on the PDF if you hold down Ctrl and use your mouse wheel.
Last edited by 350VRz; Mar 1, 2013 at 07:58 AM.
Thread Starter
Registered User
Joined: Jan 2013
Posts: 154
Likes: 3
From: Florida
heres a vr swapped s4, e98 and 35lbs of boost
he has the front diff disconnected awd normally
http://www.audizine.com/forum/showth...sion-yesterday
he has the front diff disconnected awd normally
http://www.audizine.com/forum/showth...sion-yesterday
Thread Starter
Registered User
Joined: Jan 2013
Posts: 154
Likes: 3
From: Florida
FYI, I have updated the wiring schematic a few posts up. I will always put the latest Rev in that post.
Here is a shots of the wiring pulled apart. As you can see you have more then plenty to do what you need. This would wire up an RB or LSx too.
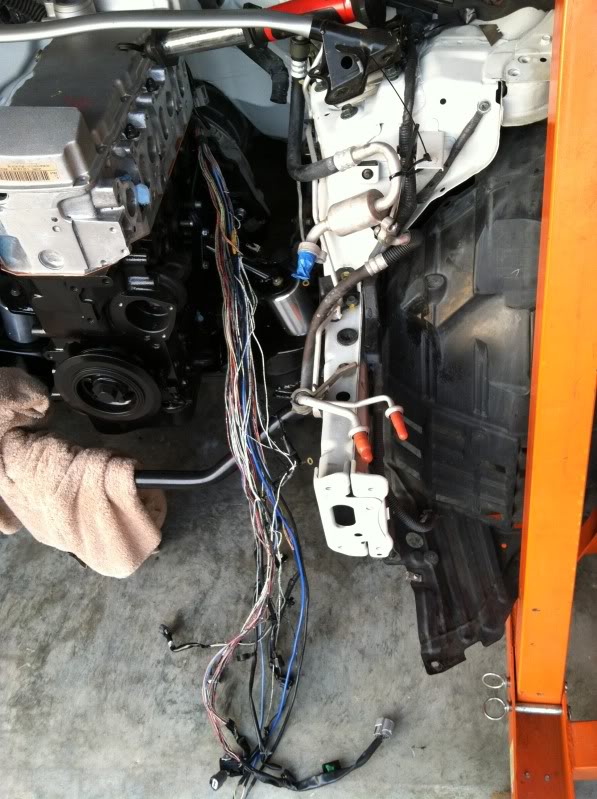
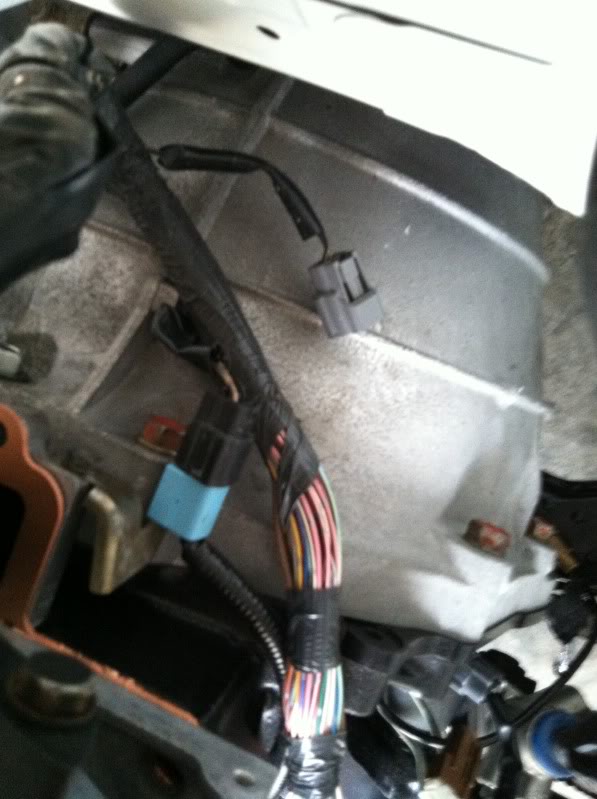
This is what you'll see of the wire harness when it's all done. All the rest will be hiden under the intake manifold.
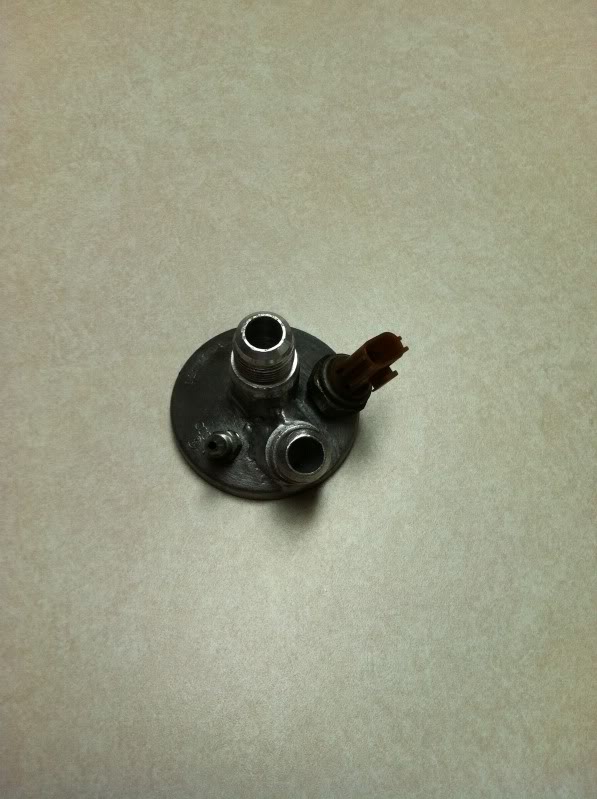
To solve my oil filter relocation, I welded AN-10 fittings to the oil cooler cover. I also added an AN-3 fitting for the turbo and the 350z oil pressure sensor. I also had to tig weld up the holes in the threaded tube that threads into the block.
I should get the cams this week from what Techtonics Tuning told me. They shipped this past Tuesday from the west coast.
Here is a shots of the wiring pulled apart. As you can see you have more then plenty to do what you need. This would wire up an RB or LSx too.
This is what you'll see of the wire harness when it's all done. All the rest will be hiden under the intake manifold.
To solve my oil filter relocation, I welded AN-10 fittings to the oil cooler cover. I also added an AN-3 fitting for the turbo and the 350z oil pressure sensor. I also had to tig weld up the holes in the threaded tube that threads into the block.
I should get the cams this week from what Techtonics Tuning told me. They shipped this past Tuesday from the west coast.
Thread Starter
Registered User
Joined: Jan 2013
Posts: 154
Likes: 3
From: Florida
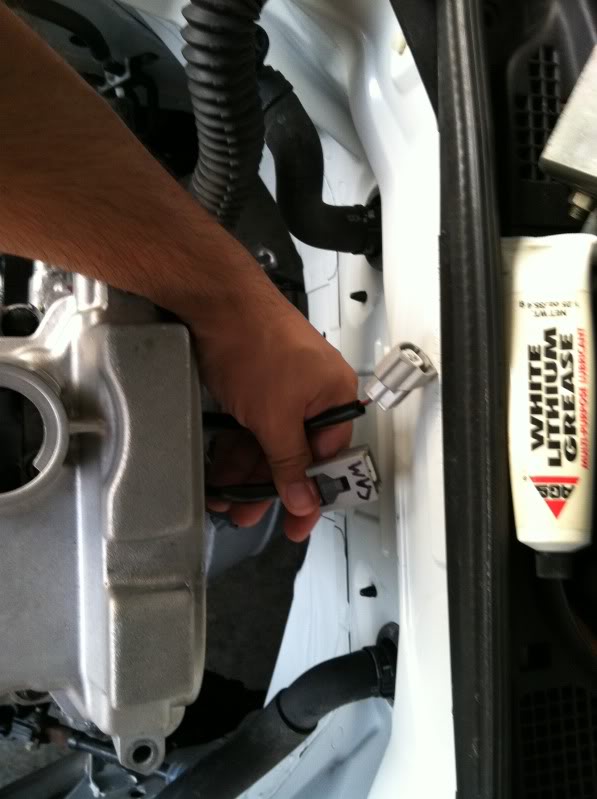
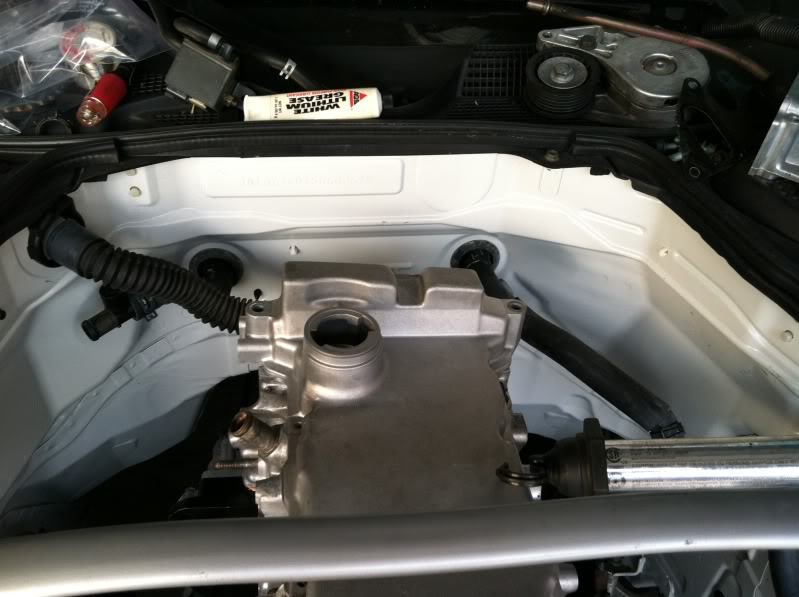
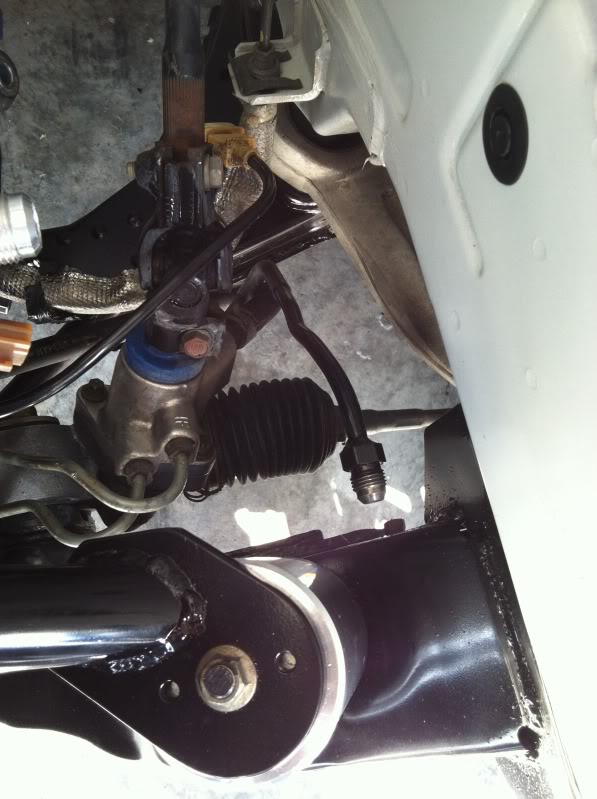
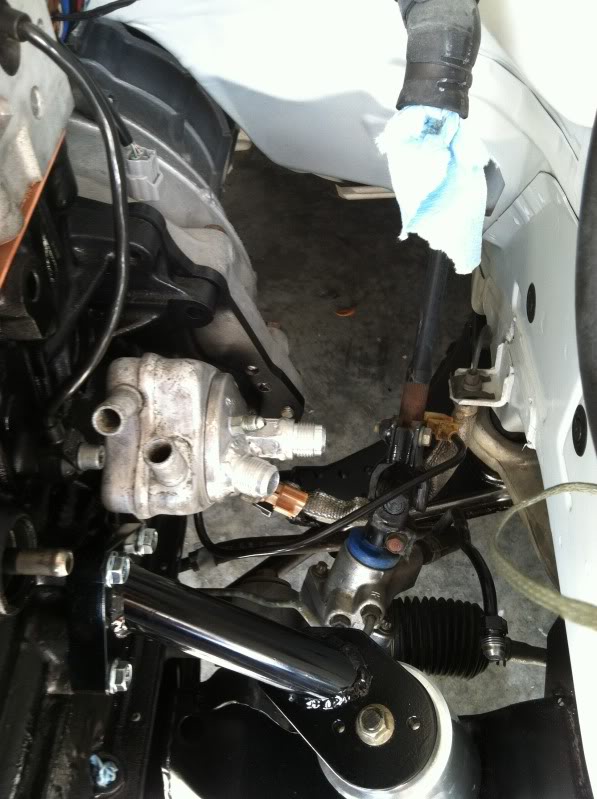
Here is the stock 350z Power Steering line I rotated and welded an AN-6 fitting too.
Here is the oil cooler with the fittings and oil pressure sensor. It turned out better than I thought. I plan to mount the filter near the firewall where it's easy to get to.
Here is the oil cooler with the fittings and oil pressure sensor. It turned out better than I thought. I plan to mount the filter near the firewall where it's easy to get to.

Thread Starter
Registered User
Joined: Jan 2013
Posts: 154
Likes: 3
From: Florida
Thanks!
So the 276 cams finally came in yesterday and I got them installed and the upper timing cover on.
I decided to build my own intake manifold instead of paying $550-$1200 for one. The stock manifold is probably fine for 90% of builds, but for the power level I�m looking to reach it just won't cut it.
As the base, I'm starting with the lower half of the stock intake manifold. I have calculated the volume of the plenum and have a 5" aluminum tube on the way ($36). For the back cover of the plenum I selected a vintage 5" decorative aluminum bowl ($20) and for the transition from the plenum to the TB, I purchased and 5" industrial aluminum funnel I'll cut to fit the TB flange ($9).
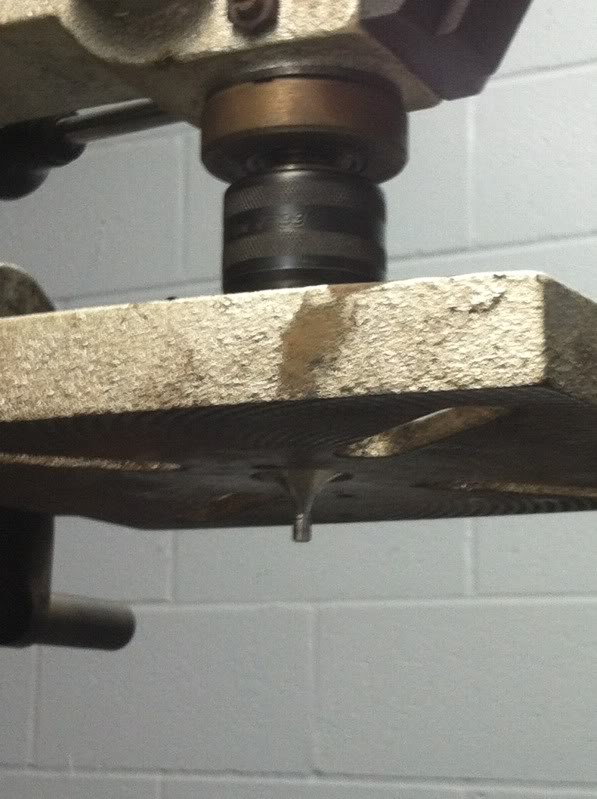
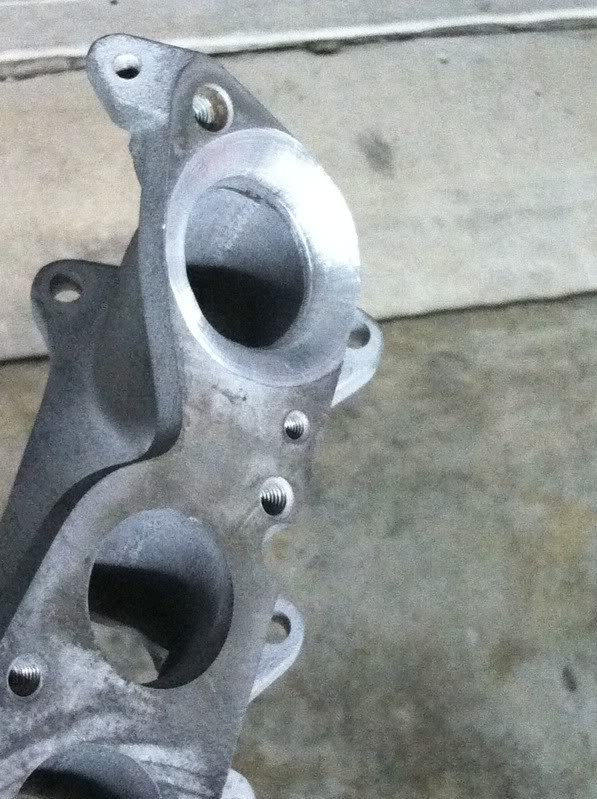
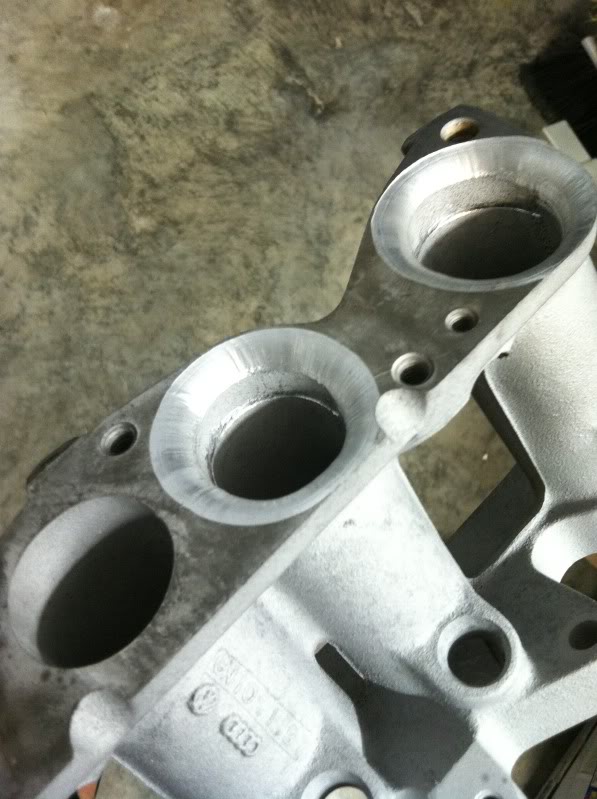
To maximize air flow and efficiency, I have turned my drill press into a Milling machine so I can put a velocity stack like edge to the intake ports ($8 for the router bit set). I cut at about 900rpm and it got the job done. Here are some pics of the rough cut; I still need to clean the ports up and smooth everything out.
So the 276 cams finally came in yesterday and I got them installed and the upper timing cover on.
I decided to build my own intake manifold instead of paying $550-$1200 for one. The stock manifold is probably fine for 90% of builds, but for the power level I�m looking to reach it just won't cut it.
As the base, I'm starting with the lower half of the stock intake manifold. I have calculated the volume of the plenum and have a 5" aluminum tube on the way ($36). For the back cover of the plenum I selected a vintage 5" decorative aluminum bowl ($20) and for the transition from the plenum to the TB, I purchased and 5" industrial aluminum funnel I'll cut to fit the TB flange ($9).
To maximize air flow and efficiency, I have turned my drill press into a Milling machine so I can put a velocity stack like edge to the intake ports ($8 for the router bit set). I cut at about 900rpm and it got the job done. Here are some pics of the rough cut; I still need to clean the ports up and smooth everything out.


Another alternative to velocity stacks are carb horn things. You can get them in all sizes and machined real cleanly for not too much. More than machining them into your ports, but it's a thought.
Thread Starter
Registered User
Joined: Jan 2013
Posts: 154
Likes: 3
From: Florida
Here is a video of the starter turning the engine over. Battery was a little low but shows the starter engagement with the flywheel is perfect. Sorry it came out sideways!
http://s40.photobucket.com/albums/e2...ps65fba602.mp4
http://s40.photobucket.com/albums/e2...ps65fba602.mp4
Thread Starter
Registered User
Joined: Jan 2013
Posts: 154
Likes: 3
From: Florida
Yes but i could not find a size to fit both port diameters they use on this engine to compensate for runner length.

curious what yah did to convert the drill press to a mill and how well its worked? always my understanding bearings wont hold up to the side loading but $300 for drill press vs $1200 or more for a drill/mill is still a huge difference lol
Thread Starter
Registered User
Joined: Jan 2013
Posts: 154
Likes: 3
From: Florida
The drill press had no issues from what I could tell. I had to remove the toothed bar and retainer ring so I could slide the deck up high enough. I flipped the deck upside down so I could run the manifold on the flat side with the bit set just right. Set it for 900rpm and I slowely went at it. Once you get the bit cut in on one side I slowely cut in a rotating fashion. I did not push hard.
Thread Starter
Registered User
Joined: Jan 2013
Posts: 154
Likes: 3
From: Florida
I thought people would be interested in this. The aluminum funnel I got was way too thin so I found this on eBay.
http://cgi.ebay.com/ws/eBayISAPI.dll...m=261027957773
So my dremel took a dump so I have to wait on new motor brushes before i can finish the manifold. My buddy may loan me his so i can keep going.
http://cgi.ebay.com/ws/eBayISAPI.dll...m=261027957773
So my dremel took a dump so I have to wait on new motor brushes before i can finish the manifold. My buddy may loan me his so i can keep going.