
one more update...

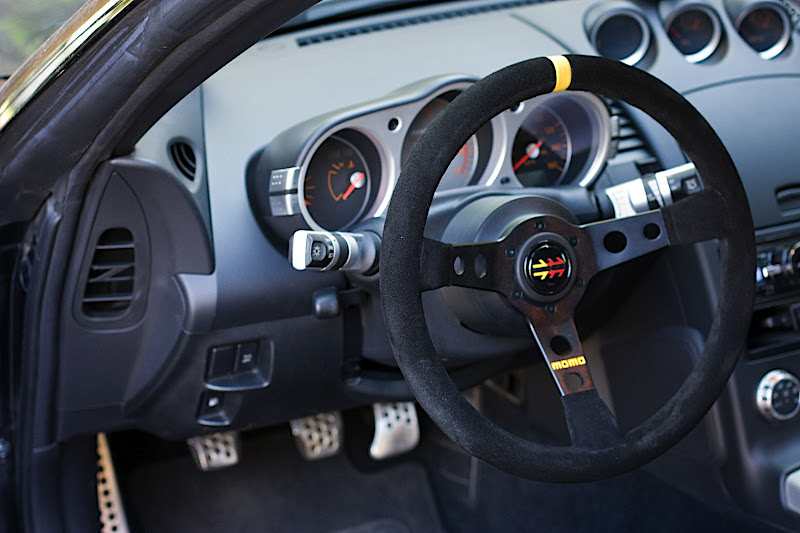
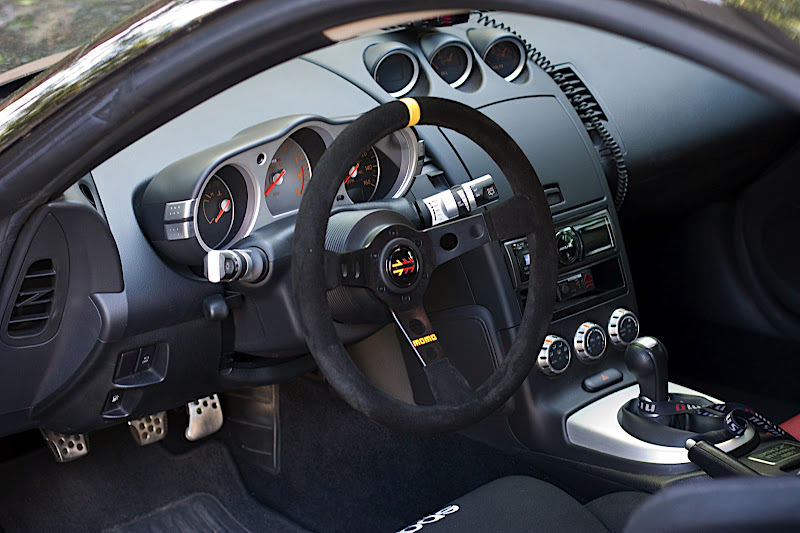

 and no SRS errors.

Trending Topics

Joined: Feb 2008
Posts: 13,406
Likes: 130
From: MexiCali dodging potholes
I don't remeber where I saw it, but didn't someone who swapped out there steering wheel...take the cruise control, and rewired it to the opposite side of where the TCS is???
or am I crazy...
or am I crazy...


Thread Starter
Registered User
iTrader: (19)
Joined: Apr 2007
Posts: 1,395
Likes: 0
From: Houston,TX

Thread Starter
Registered User
iTrader: (19)
Joined: Apr 2007
Posts: 1,395
Likes: 0
From: Houston,TX
yes... is about 1/2 hour job... 40 minutes top.
1) open the window, put the steering wheel straight (this one isn't necessary, the hub has a "forced" fitting,)
2) disconnect the battery (negative first)
3) purge the capacitors (pump on the brakes)
4) remove the airbag module (2 T30 tamperproof torx on the side of the steering wheel, there are 2 plastic covers to remove with a small flat blade screwdriver)
5) disconnect the airbag connectors (orange and yellow).. lift the black "safety" with a small flat screwdriver and pull them out
6) disconnect the cruise/horn/radio connector (grey) you have to push the lock with the same small flat screwdriver and pull the connector out
7) remove the steering wheel. 19mm hex, you'll need a decent extension for the socket.
8) connect the horn harness (grey connector) comes with the hub
9) connect the airbag resistors (blue one on orange connector, yellow one on yellow connector)
10) remove the hub cover and put the hub in. use the new bolt and the locking washer (they comes with the hub).
11) bring the horn connector inside the hub and fix the airbag ones outside (I used electrical tape and a zip tie)
12) put the hub cover on
13) put the wheel on, the bolts are with the hub
14) connect the horn and put it on.
15) reconnect the battery (positive first, negative last)
16) drive a little and check that the wheel isn't coming loose or have any play.
17) take pictures
18) enjoy
et voila'. done.
again:
tools needed:
small flat head screwdriver
T30 tamper proof torx
19mm socket + extension + ratchet
10mm open wrench for the battery
electrical tape
zip ties
the small hex for the wheel bolts comes with the hub.
the resistors for the airbag are just "plug in"
So you completely eliminated the Cruise control? Not a big deal i guess.
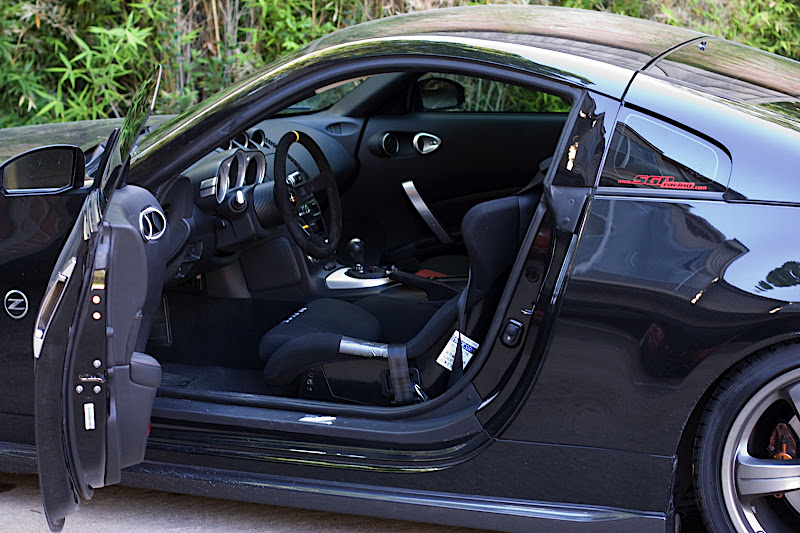
I am so use to having stereo functions on the steering wheel though. When I drive the Frontier I find myself missing those functions on the wheel. lol But it is nice to have a thin rim and more service area to grap onto...
I am so use to having stereo functions on the steering wheel though. When I drive the Frontier I find myself missing those functions on the wheel. lol But it is nice to have a thin rim and more service area to grap onto...

man, i didn't know the swap was so simple. so you could keep that stock steering wheel and swap it out when you go to the track or what not. I'm seriously considering this now...
yes... is about 1/2 hour job... 40 minutes top.
1) open the window, put the steering wheel straight (this one isn't necessary, the hub has a "forced" fitting,)
2) disconnect the battery (negative first)
3) purge the capacitors (pump on the brakes)
4) remove the airbag module (2 T30 tamperproof torx on the side of the steering wheel, there are 2 plastic covers to remove with a small flat blade screwdriver)
5) disconnect the airbag connectors (orange and yellow).. lift the black "safety" with a small flat screwdriver and pull them out
6) disconnect the cruise/horn/radio connector (grey) you have to push the lock with the same small flat screwdriver and pull the connector out
7) remove the steering wheel. 19mm hex, you'll need a decent extension for the socket.
8) connect the horn harness (grey connector) comes with the hub
9) connect the airbag resistors (blue one on orange connector, yellow one on yellow connector)
10) remove the hub cover and put the hub in. use the new bolt and the locking washer (they comes with the hub).
11) bring the horn connector inside the hub and fix the airbag ones outside (I used electrical tape and a zip tie)
12) put the hub cover on
13) put the wheel on, the bolts are with the hub
14) connect the horn and put it on.
15) reconnect the battery (positive first, negative last)
16) drive a little and check that the wheel isn't coming loose or have any play.
17) take pictures
18) enjoy
et voila'. done.
again:
tools needed:
small flat head screwdriver
T30 tamper proof torx
19mm socket + extension + ratchet
10mm open wrench for the battery
electrical tape
zip ties
the small hex for the wheel bolts comes with the hub.
the resistors for the airbag are just "plug in"
1) open the window, put the steering wheel straight (this one isn't necessary, the hub has a "forced" fitting,)
2) disconnect the battery (negative first)
3) purge the capacitors (pump on the brakes)
4) remove the airbag module (2 T30 tamperproof torx on the side of the steering wheel, there are 2 plastic covers to remove with a small flat blade screwdriver)
5) disconnect the airbag connectors (orange and yellow).. lift the black "safety" with a small flat screwdriver and pull them out
6) disconnect the cruise/horn/radio connector (grey) you have to push the lock with the same small flat screwdriver and pull the connector out
7) remove the steering wheel. 19mm hex, you'll need a decent extension for the socket.
8) connect the horn harness (grey connector) comes with the hub
9) connect the airbag resistors (blue one on orange connector, yellow one on yellow connector)
10) remove the hub cover and put the hub in. use the new bolt and the locking washer (they comes with the hub).
11) bring the horn connector inside the hub and fix the airbag ones outside (I used electrical tape and a zip tie)
12) put the hub cover on
13) put the wheel on, the bolts are with the hub
14) connect the horn and put it on.
15) reconnect the battery (positive first, negative last)
16) drive a little and check that the wheel isn't coming loose or have any play.
17) take pictures
18) enjoy
et voila'. done.
again:
tools needed:
small flat head screwdriver
T30 tamper proof torx
19mm socket + extension + ratchet
10mm open wrench for the battery
electrical tape
zip ties
the small hex for the wheel bolts comes with the hub.
the resistors for the airbag are just "plug in"


Thread
Thread Starter
Forum
Replies
Last Post