
Assembly of my new Built Short Block

Originally Posted by taurran
One thing (not sure if this was addressed).
Why go with the UR crank pulley with all the issues that have been reported with them on high hp setups? Not worth it in my opinion...
Why go with the UR crank pulley with all the issues that have been reported with them on high hp setups? Not worth it in my opinion...
Ok, there has only been 1 report of how many installed??????
")
Originally Posted by taurran
One thing (not sure if this was addressed).
Why go with the UR crank pulley with all the issues that have been reported with them on high hp setups? Not worth it in my opinion...
Why go with the UR crank pulley with all the issues that have been reported with them on high hp setups? Not worth it in my opinion...
Originally Posted by jonb7007
Ok, there has only been 1 report of how many installed??????
I don't believe the possible gains from an underdrive pulley are even worth the "small" risk associated with them. There's a reason engine builders have been installing harmonic dampers for all these years. Besides, I don't see the UR pulley providing much, if any, power gains. There are safer, proven methods for that.
Originally Posted by rrmedicx
Well, I built the engine for better performance. I don't drag race, so hopefully that really won't be a problem. But thanks for mentioning Taurran...You are not the first to suggest that.
Best of luck whichever way you go!
First objective of the day..If the car has to be high, make it safe...
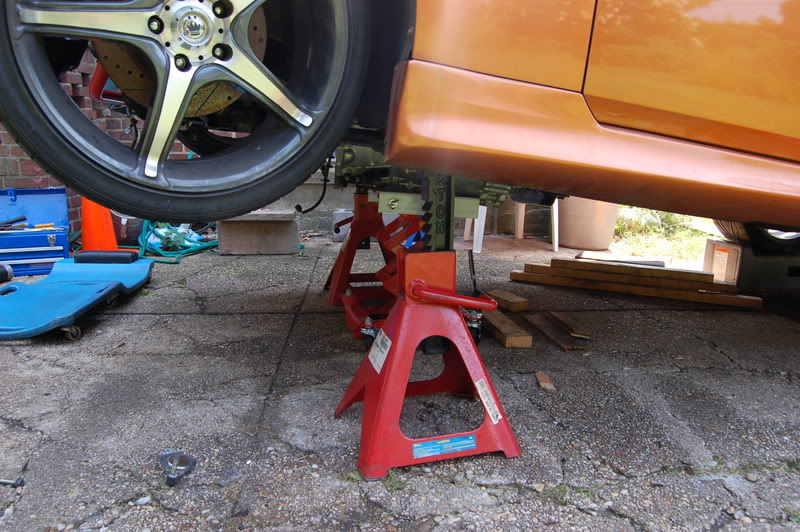
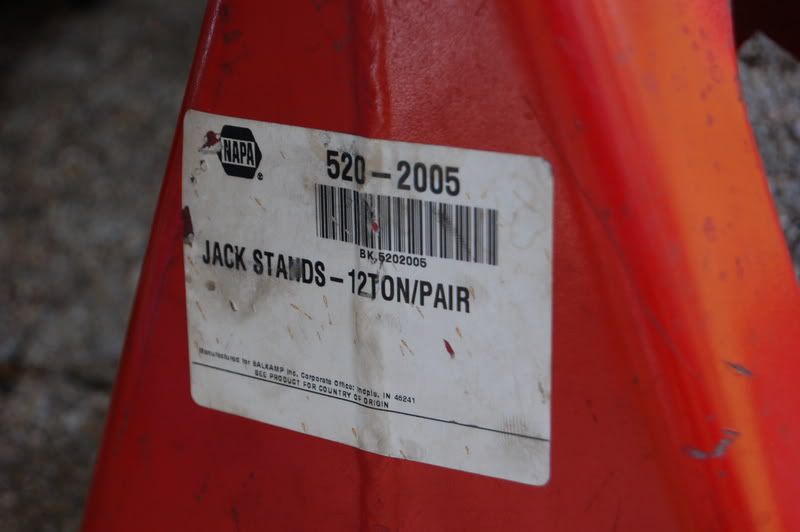
12 Ton jack ought to handle it.
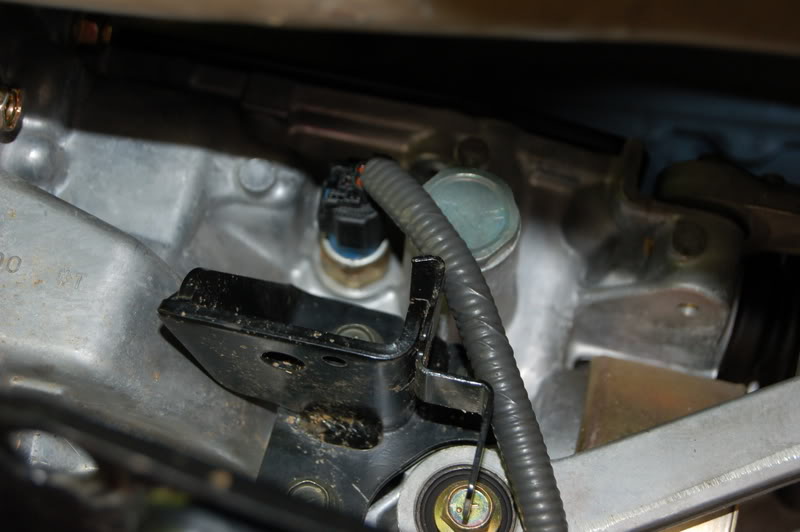
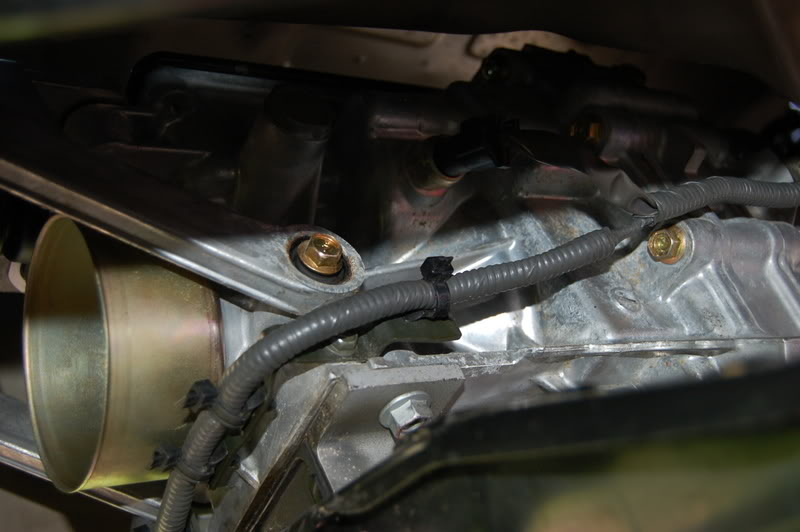
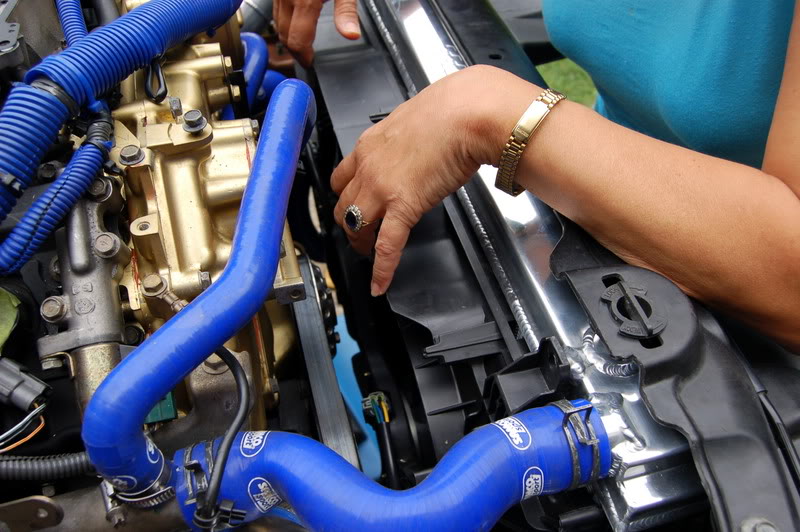
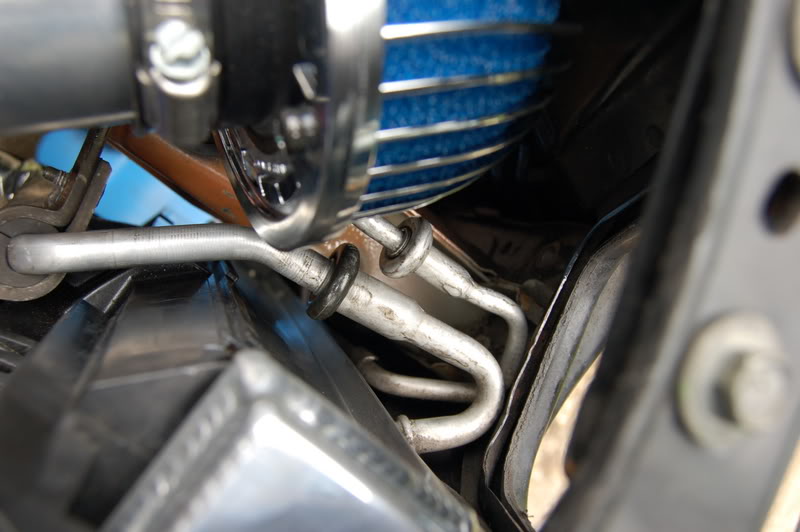
Re-Align the Oil feed lines to the Turbo...recommended by another forum member.
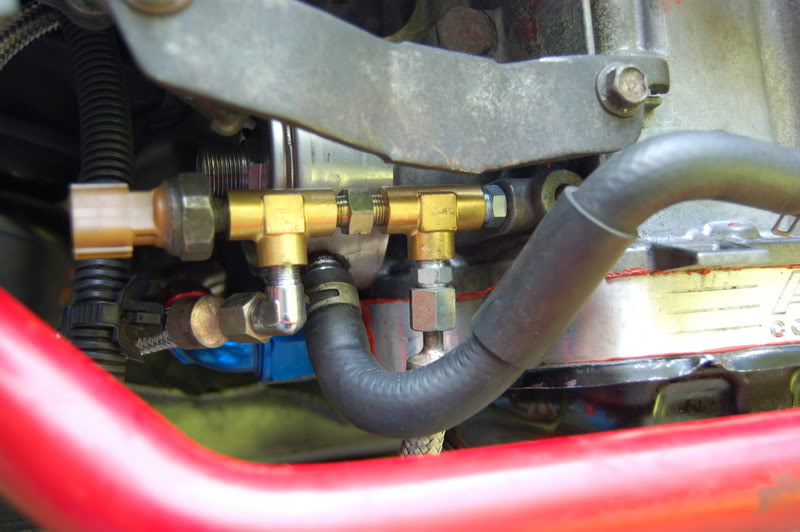
Not so crazy about running the line under neath the oil pan, but it is definitely better than cutting thru other parts of the car. Stainless Steel lines tend to do just that.
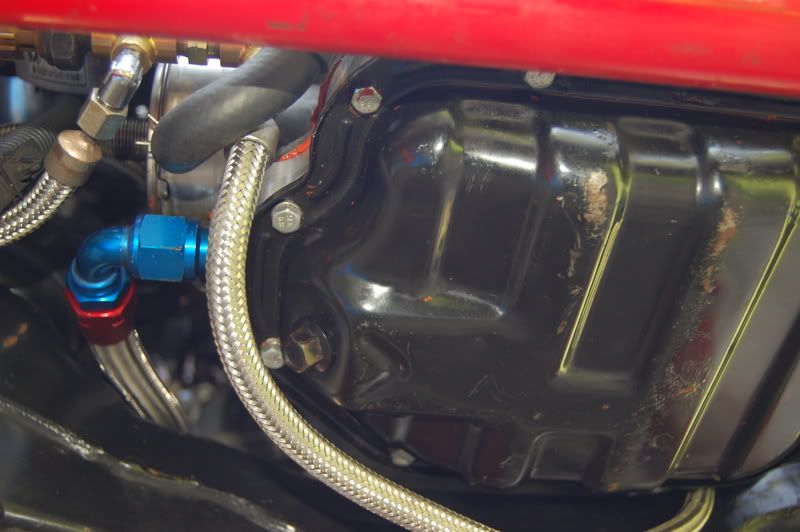
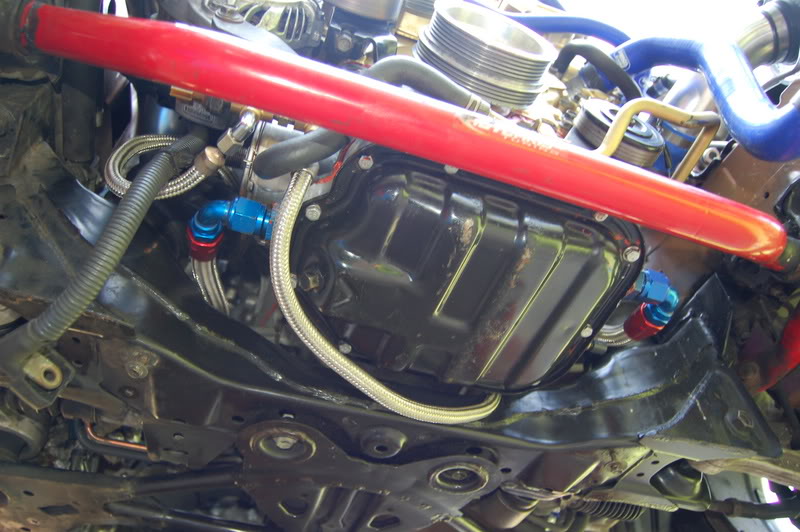
I took some time to shorten the return lines, so they didn't have any unwanted bends or curves that would impede a smooth flow of oil back to the pan.
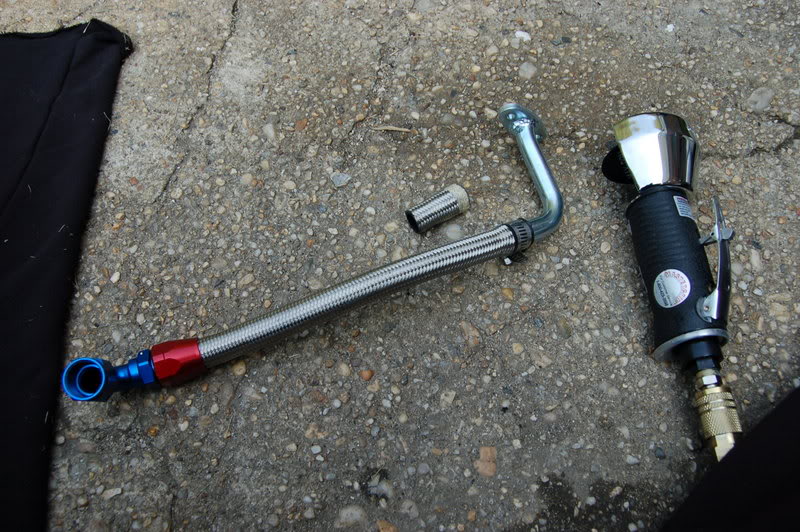
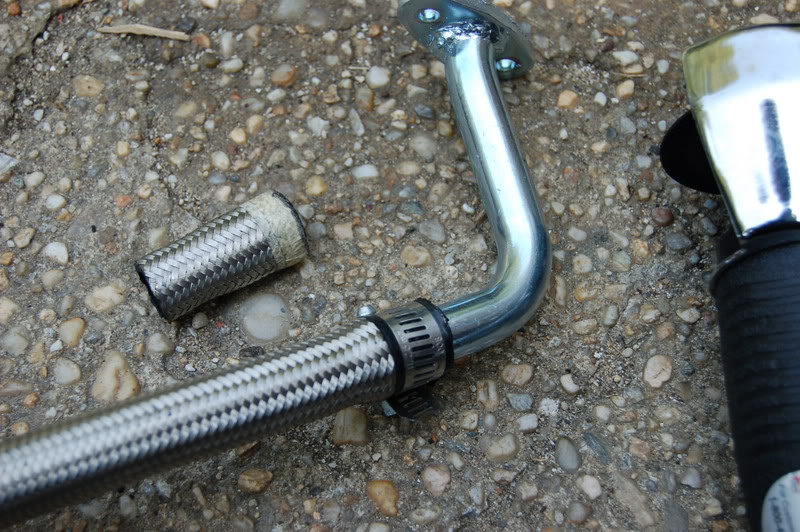
You can see here how much I had to cut off.
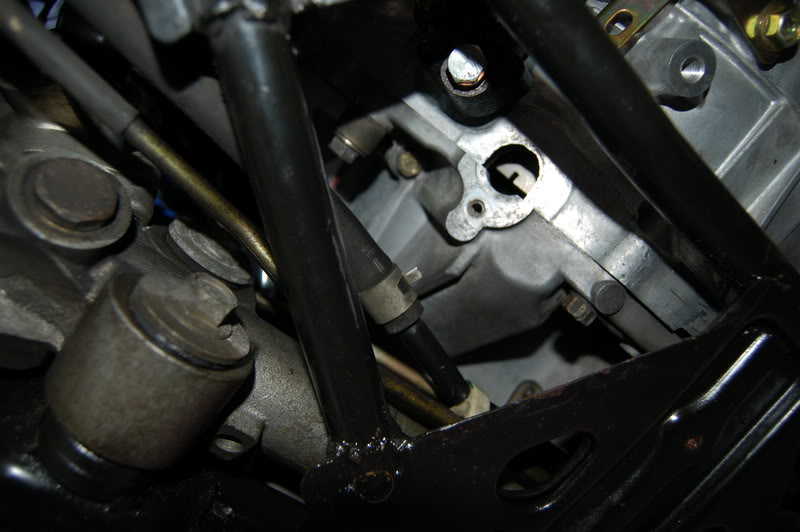
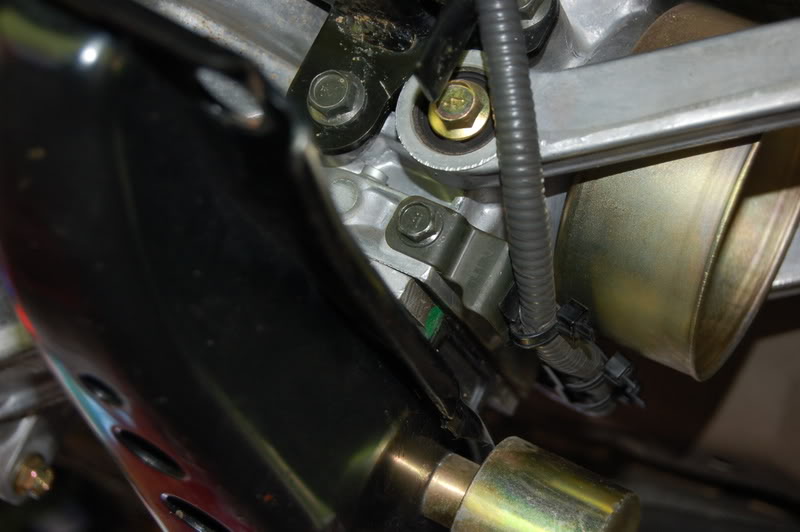
This is an interesting angle. From underneath the driver wheel, facing the tranny, you can see the trany flush with the engine....SUCCESS!!!!
Hook up all of the tranny connections:
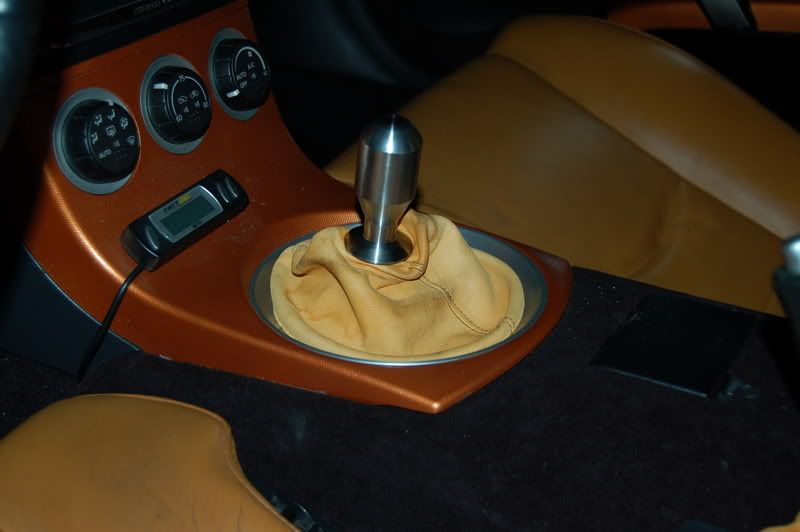
Now that the tranny is installed, I can re-install the shifter. Going back to stock shifter.
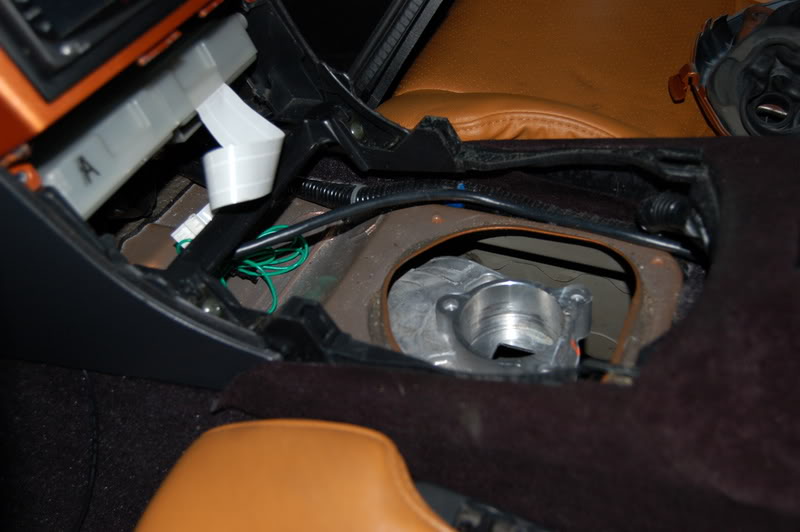
Back to normal
That was the mission for the day.
TO be continued.
12 Ton jack ought to handle it.
Re-Align the Oil feed lines to the Turbo...recommended by another forum member.
Not so crazy about running the line under neath the oil pan, but it is definitely better than cutting thru other parts of the car. Stainless Steel lines tend to do just that.
I took some time to shorten the return lines, so they didn't have any unwanted bends or curves that would impede a smooth flow of oil back to the pan.
You can see here how much I had to cut off.
This is an interesting angle. From underneath the driver wheel, facing the tranny, you can see the trany flush with the engine....SUCCESS!!!!
Hook up all of the tranny connections:
Now that the tranny is installed, I can re-install the shifter. Going back to stock shifter.
Back to normal
That was the mission for the day.
TO be continued.

Whats left to do:
Install AC Compressor and lines
Install Belts and tension then appropriately
Install Radiator
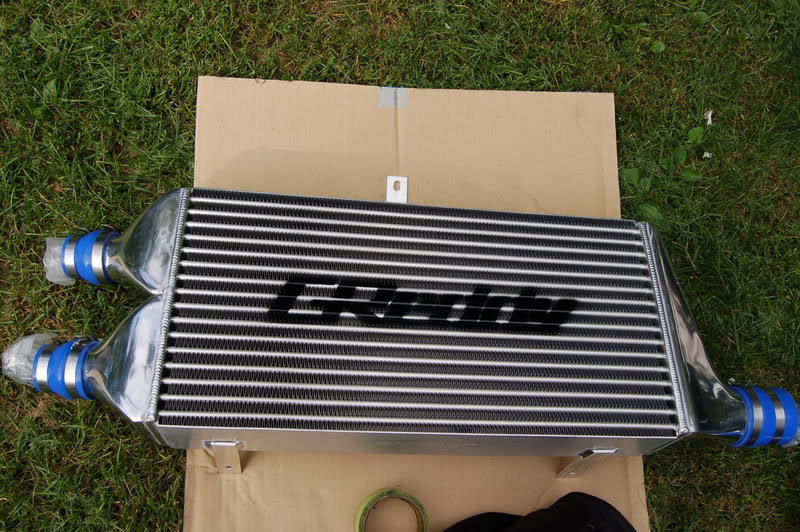
Install Inter-Cooler
Install remainder of Inter-cooler piping
Install Intake piping, plenum and intake manifold
Complete wiring harness connections
Add all of the necessary fluids...Hydraulic fluids, coolant, oil, tranny fluid...replace diff fluid (Why not)
Bleed all hydraulic pumps...steering & clutch
Start & Drive
Break in engine for 50 miles - drop oil and filter, run again for 1000 miles and drop oil again.
If anyone can see something I missed, please chime in.
Drive it to my friend to re-charge the AC, check for leaks.
Get it Tuned. Post Results.
Install AC Compressor and lines
Install Belts and tension then appropriately
Install Radiator
Install Inter-Cooler
Install remainder of Inter-cooler piping
Install Intake piping, plenum and intake manifold
Complete wiring harness connections
Add all of the necessary fluids...Hydraulic fluids, coolant, oil, tranny fluid...replace diff fluid (Why not)
Bleed all hydraulic pumps...steering & clutch
Start & Drive
Break in engine for 50 miles - drop oil and filter, run again for 1000 miles and drop oil again.
If anyone can see something I missed, please chime in.
Drive it to my friend to re-charge the AC, check for leaks.
Get it Tuned. Post Results.
Originally Posted by accordfreak
For first time start up, I would prime/start the engine, let it run for 15 minutes, change the oil, then use the new oil for break in.
I also have to install the Exhaust Greddy TT & the HKS EVC 6
With the list of things itemized as left to do above, that should take the majority of the day. But I live 20 minutes away from the car, so I can only get to it a couple of days a week. I think 1 week is reasonable. (In the back of my mind I'm thinking 1 more day)...LOL
Last edited by rrmedicx; Aug 25, 2007 at 12:19 PM.
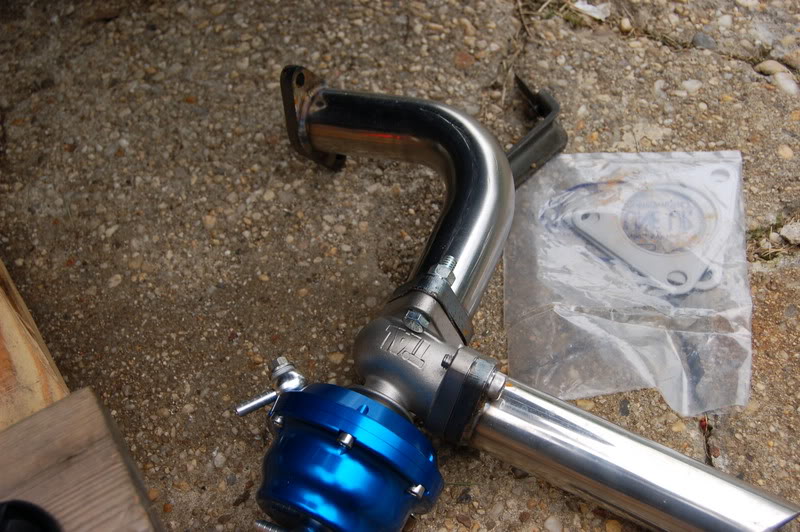
Now that the tranny is in, its time to install the new Greddy Wastegate relocator kit and open dump pipes.
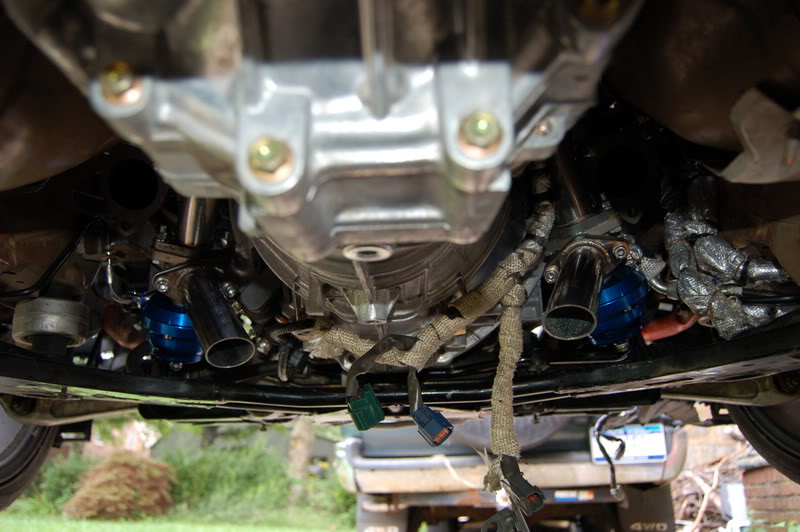
Here goes the left. And let me add these are a pain to install. Once the tranny is in, things get really tight. Getting the nuts on to fasten them on is ridiculous.

Here goes the right.

Rear side view:
Back up top to the intake components:

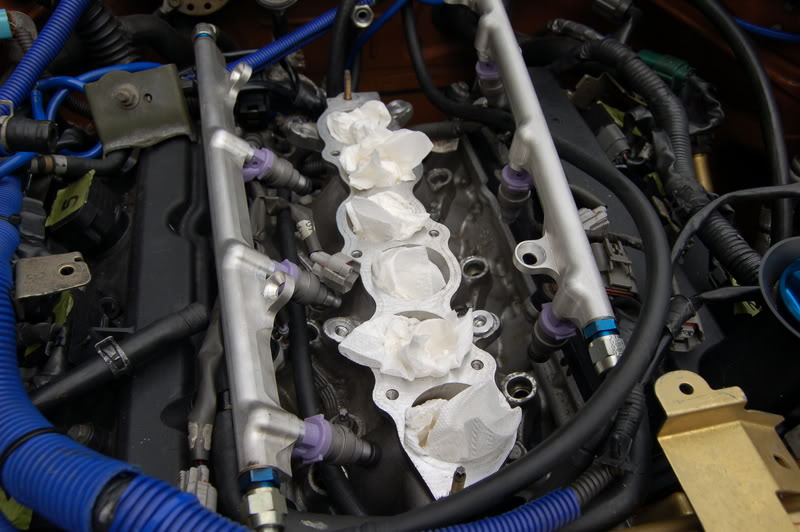
Fuel injectors and fuel rails...CJ Motorsports Fuel Rails

Make sure to play it safe and protect the intake so nothing falls in. I almost lost 2 rubber washers from the injectors from simple carelessness. Fortunately I was able to retrieve them with some medical forceps. See being a medic is handy afterall.
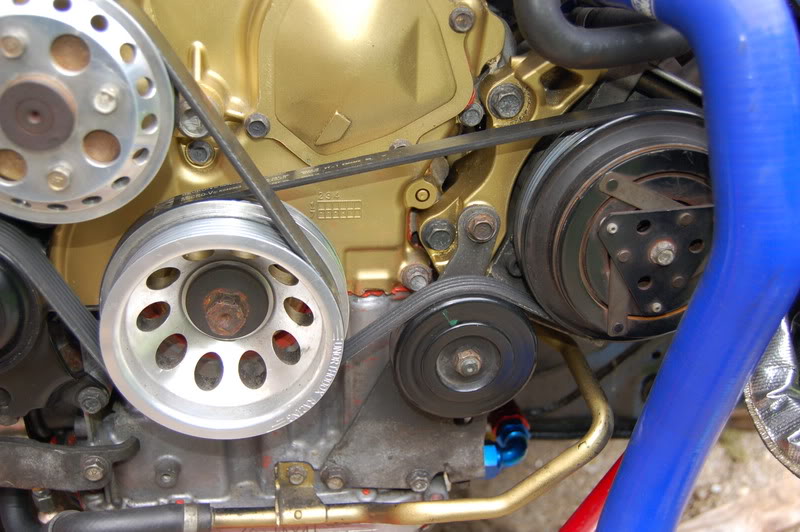
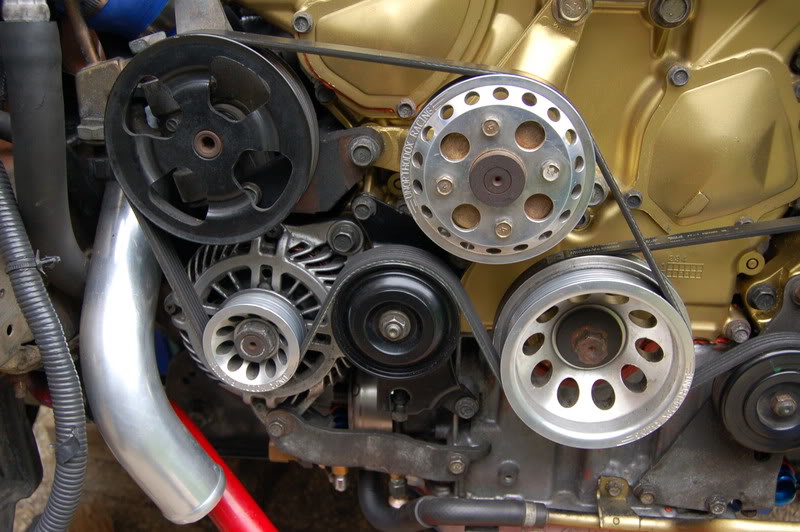
Lets finish off with the AC compressor and put the belts on
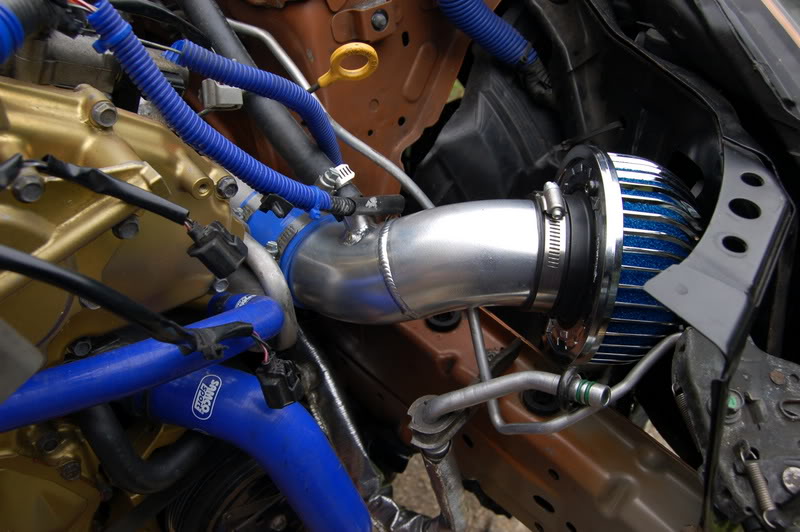
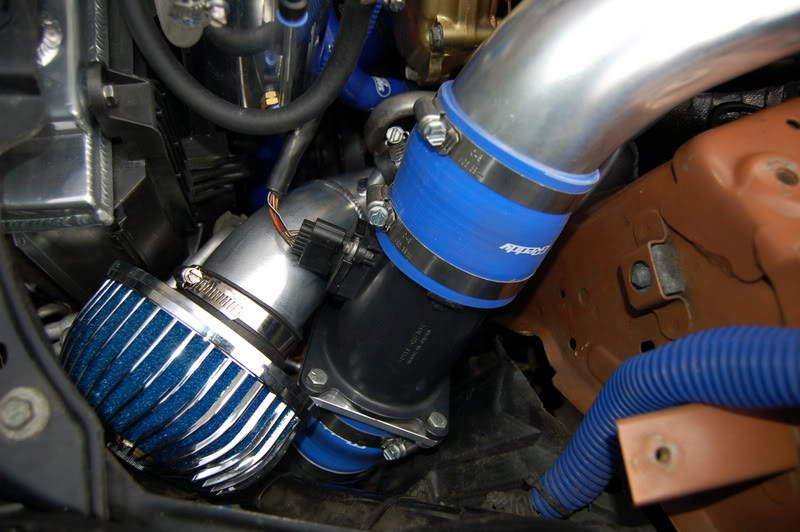
Back up top to add the intake air filter
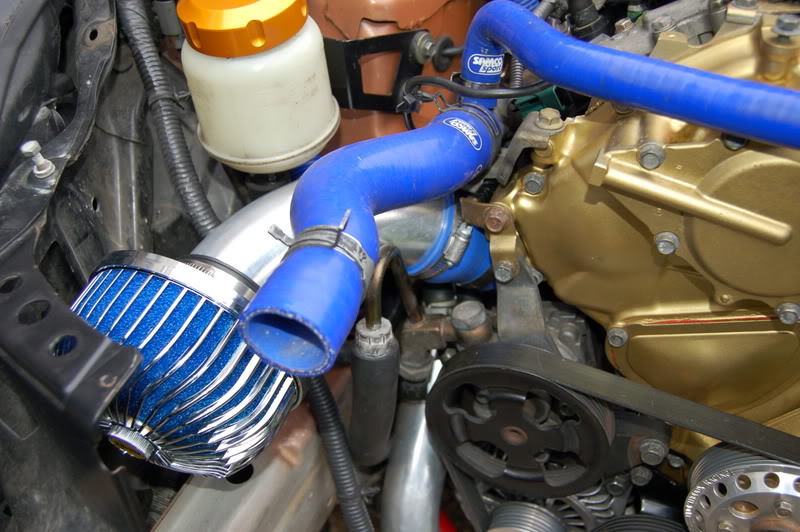
Here is the driver side:
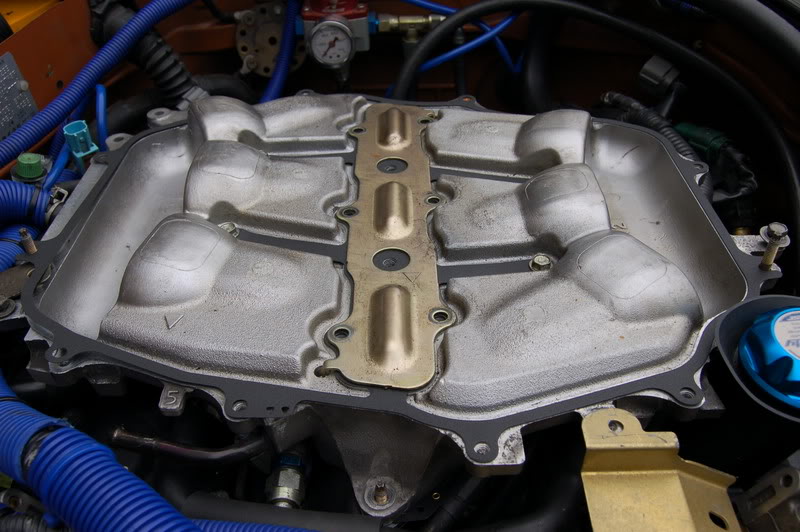
Lower Plenum
And Yes MOMMA ZMEDIC is in the building making an encore presentation:
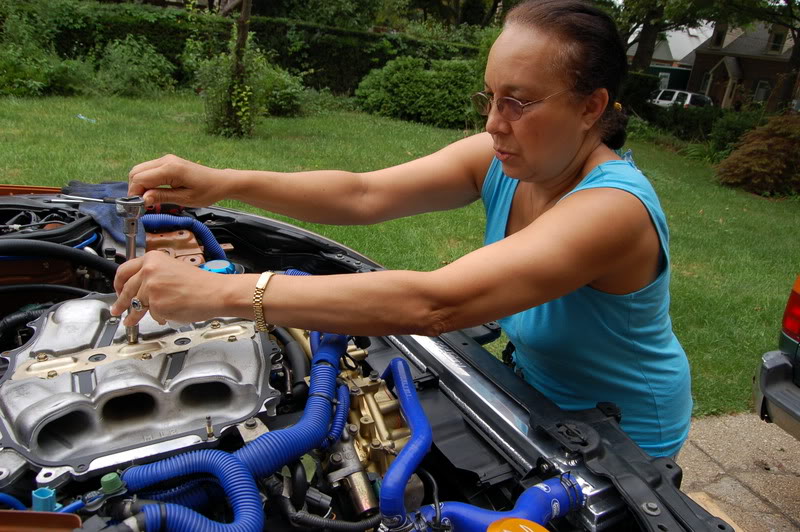

No I really didn't let her do much, but she kept me company as I worked.
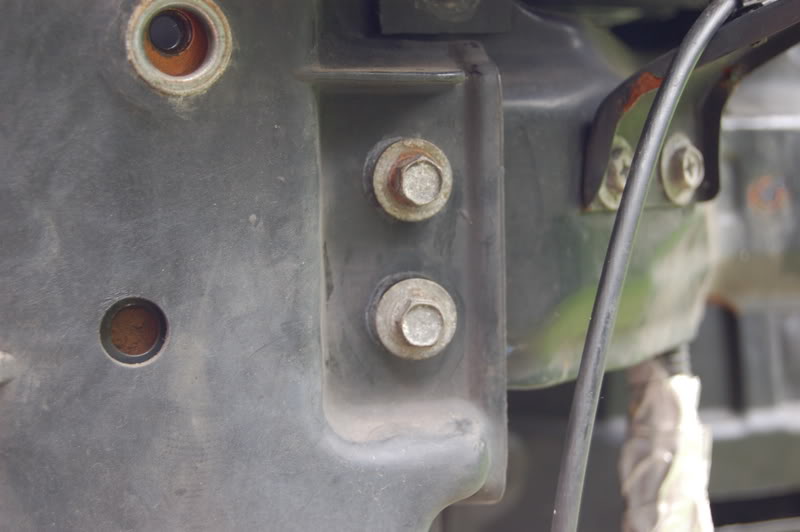
Radiator Shroud in place
Fasten the bolts to the right and left
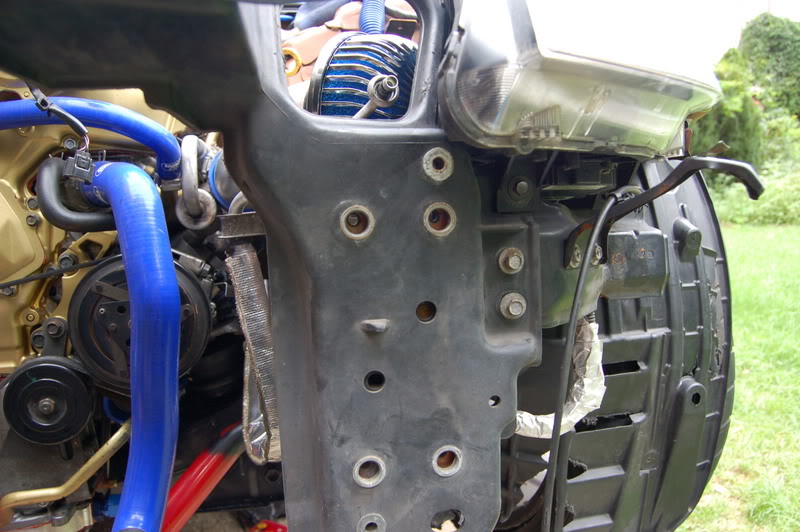
Like So.
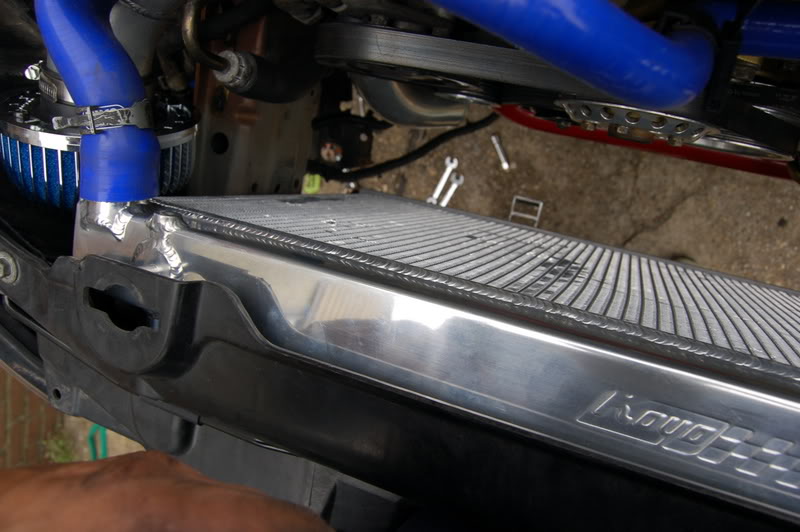
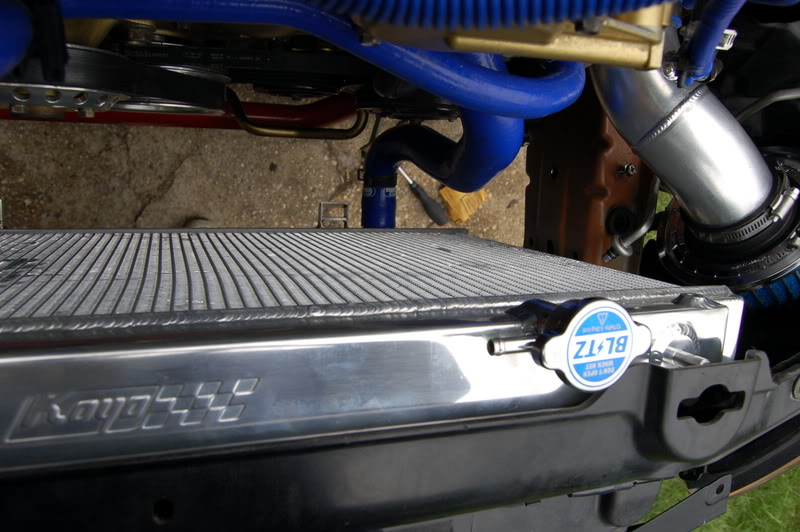
Add my New Koyo Radiator
Add the fans
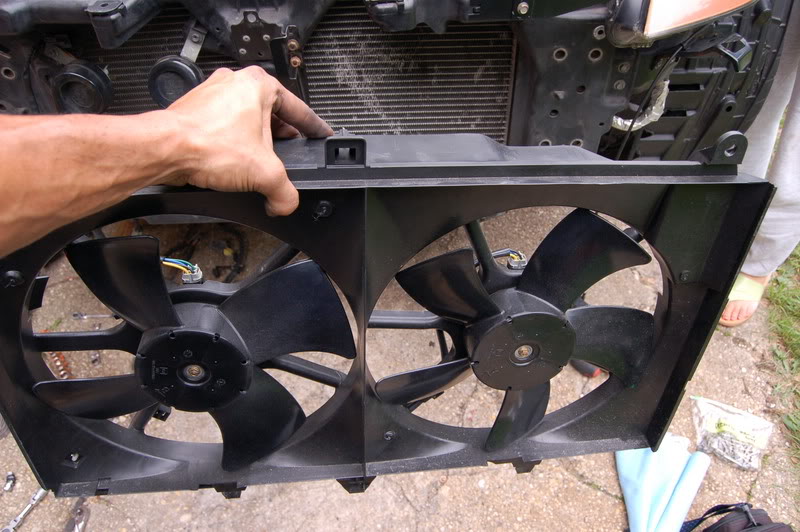
A little Momma Medic Helping hand
To be continued...
Here goes the left. And let me add these are a pain to install. Once the tranny is in, things get really tight. Getting the nuts on to fasten them on is ridiculous.
Here goes the right.
Rear side view:
Back up top to the intake components:
Fuel injectors and fuel rails...CJ Motorsports Fuel Rails
Make sure to play it safe and protect the intake so nothing falls in. I almost lost 2 rubber washers from the injectors from simple carelessness. Fortunately I was able to retrieve them with some medical forceps. See being a medic is handy afterall.
Lets finish off with the AC compressor and put the belts on
Back up top to add the intake air filter
Here is the driver side:
Lower Plenum
And Yes MOMMA ZMEDIC is in the building making an encore presentation:
No I really didn't let her do much, but she kept me company as I worked.
Radiator Shroud in place
Fasten the bolts to the right and left
Like So.
Add my New Koyo Radiator
Add the fans
A little Momma Medic Helping hand
To be continued...
Last edited by rrmedicx; Aug 27, 2007 at 03:59 AM.
Attach the AC components
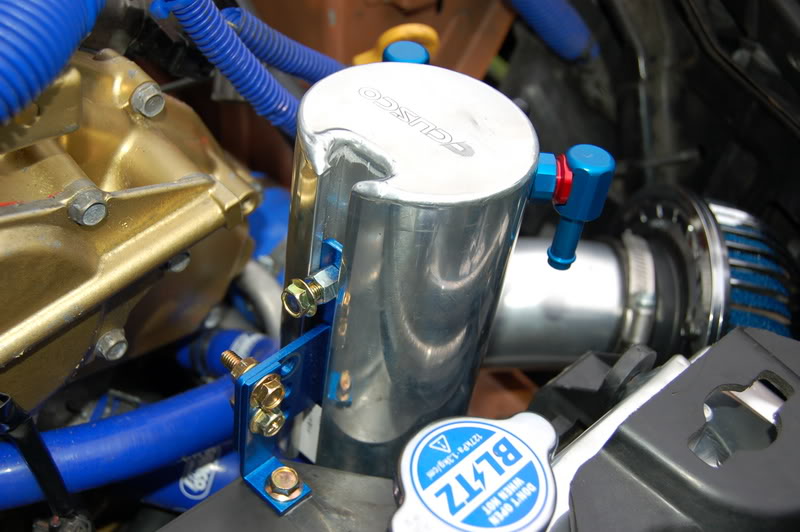
Before going any further I figured now would be a good time to install the Cusco oil catch can.
Next up is the Greddy TT Exhaust..which is chock full of surprises.
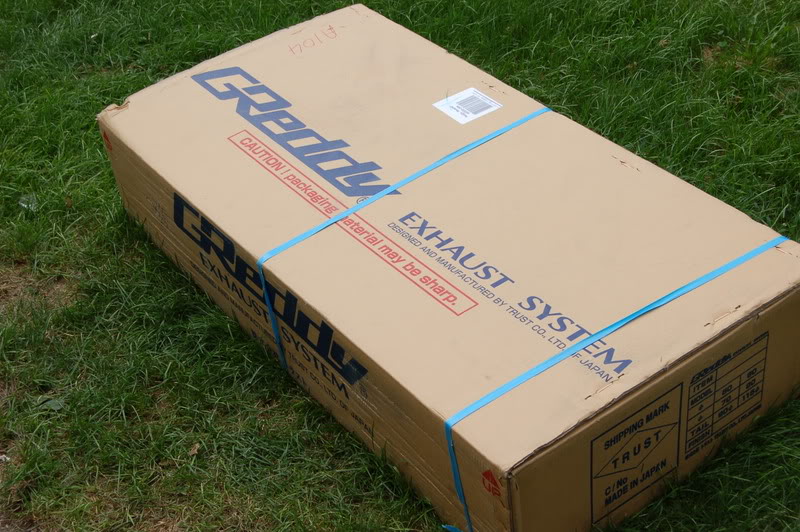
Open Box
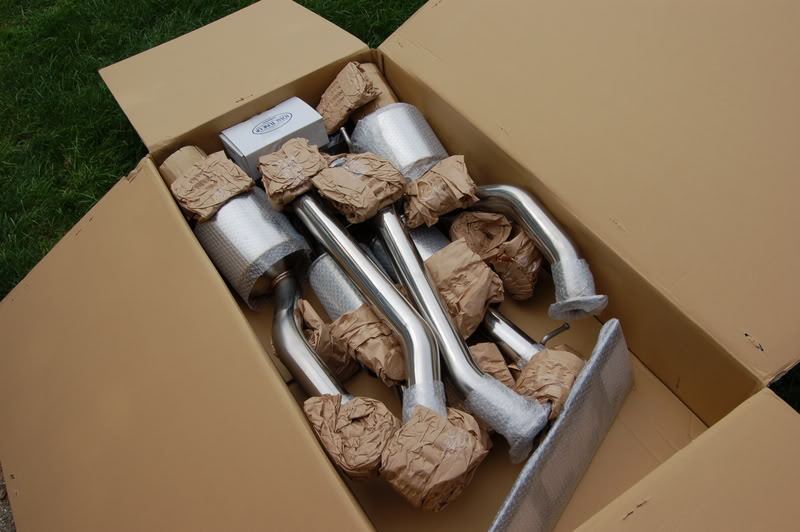
Well as usual, parts from Japan come with Absolutely no instructions.
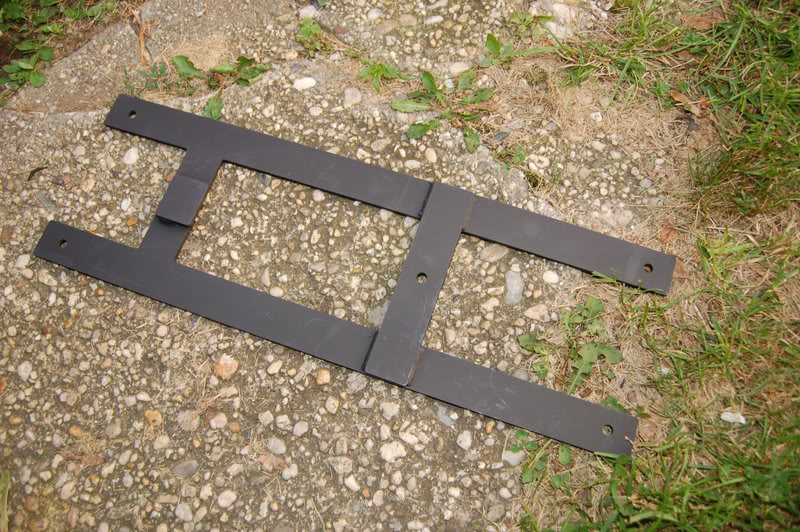
What the hell is this part...You'll find out.
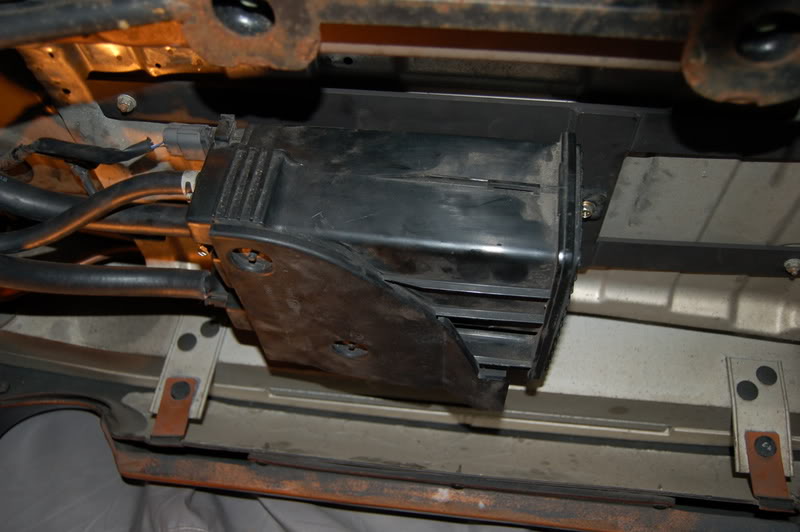
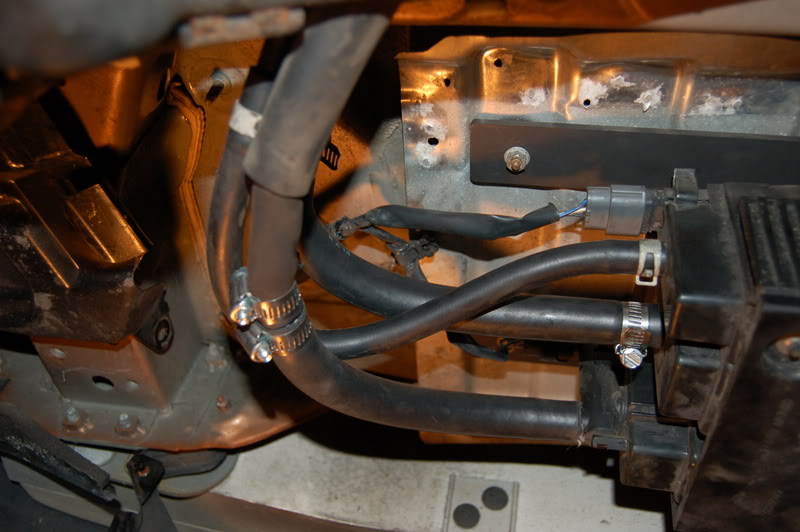
Here is the back of the car (underneath) Looks like chaos. Come to find out there are some important components...don't ask me what they are, but they involve two electrical connections, and 3 hoses.
Anyway, apparently the passenger side rear muffler won't fit without moving this unit and its hoses.
The unit in the picture below is what needs to move and be relocated.
The unit is located behind the passenger rear tire and must be twisted and remounted 180 degrees from where it originated. Its final resting place will be where the current OEM 350z muffler canister sits which explains the heat shields.
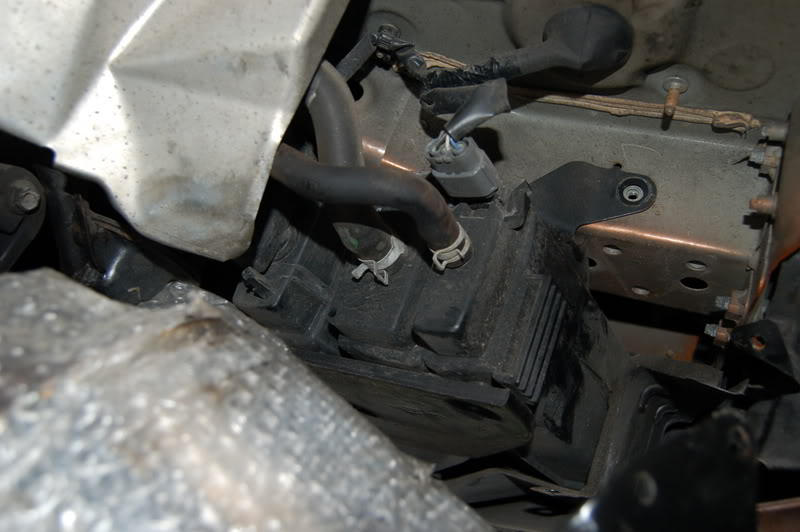
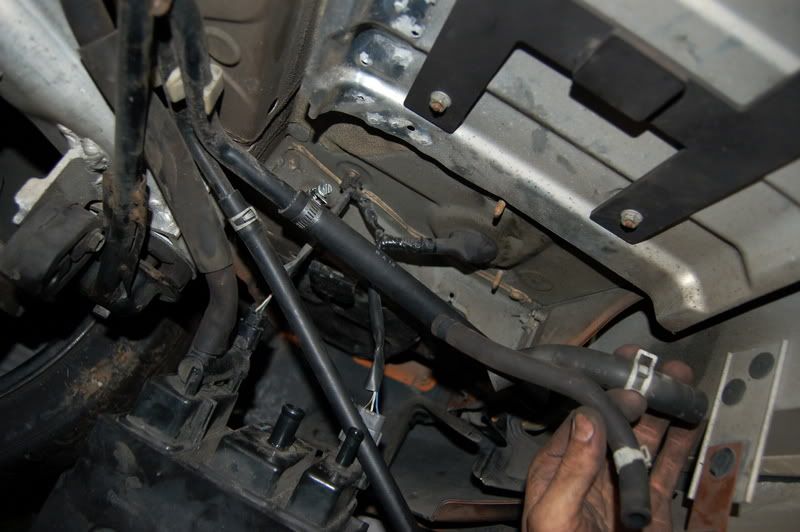
You can hopefully see in this picture how the muffler won't fit unless you move the unit.
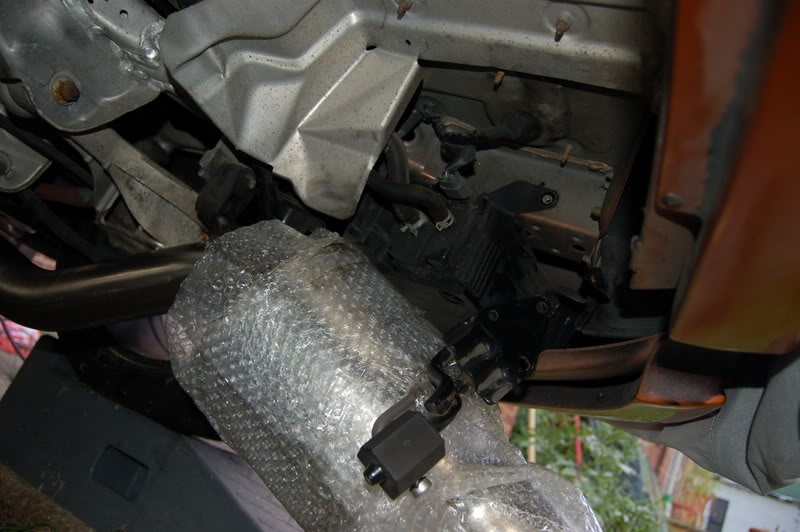
What a pain to release the unit. Here it is loose but still connected. You will now note that the hoses are not long enough to turn and relocate. That explains the 2 pieces of hose in the Exhaust box.
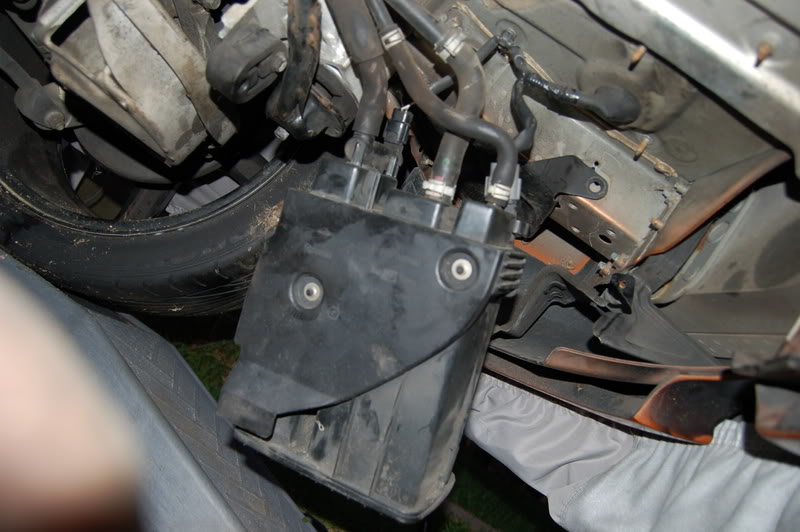
Here you see what the bracket is intended for:
Here is the unit in its new home with hoses extended.
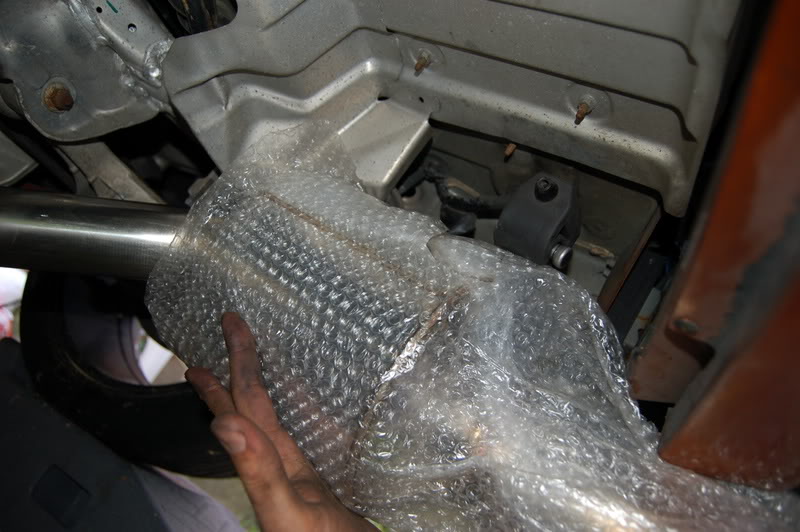
These hoses unfortunately now sit right on top of the passenger side muffler and need to be protected.
They provide a small piece of heat wrap. Thankfully I have a little extra laying around to protect the hoses a little better.
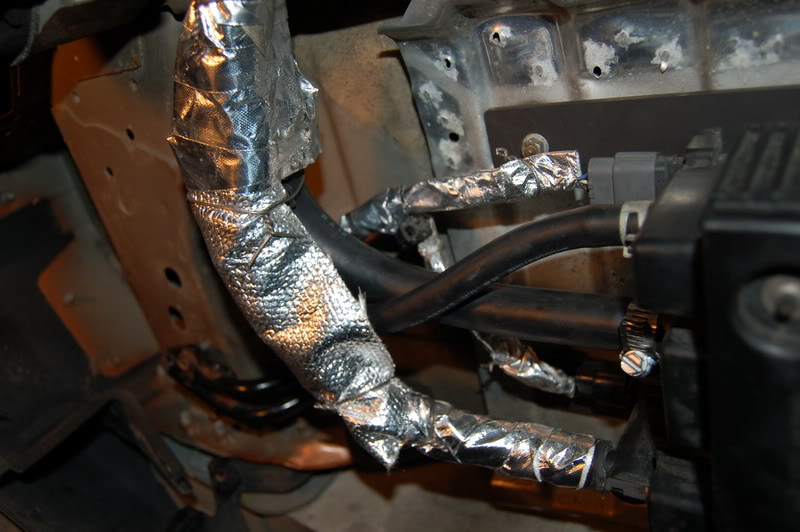
Now the muffler fits with ease and you are not in danger of burning hoses, as they are all heat wrapped.
Before going any further I figured now would be a good time to install the Cusco oil catch can.
Next up is the Greddy TT Exhaust..which is chock full of surprises.
Open Box
Well as usual, parts from Japan come with Absolutely no instructions.
What the hell is this part...You'll find out.
Here is the back of the car (underneath) Looks like chaos. Come to find out there are some important components...don't ask me what they are, but they involve two electrical connections, and 3 hoses.
Anyway, apparently the passenger side rear muffler won't fit without moving this unit and its hoses.
The unit in the picture below is what needs to move and be relocated.
The unit is located behind the passenger rear tire and must be twisted and remounted 180 degrees from where it originated. Its final resting place will be where the current OEM 350z muffler canister sits which explains the heat shields.
You can hopefully see in this picture how the muffler won't fit unless you move the unit.
What a pain to release the unit. Here it is loose but still connected. You will now note that the hoses are not long enough to turn and relocate. That explains the 2 pieces of hose in the Exhaust box.
Here you see what the bracket is intended for:
Here is the unit in its new home with hoses extended.
These hoses unfortunately now sit right on top of the passenger side muffler and need to be protected.
They provide a small piece of heat wrap. Thankfully I have a little extra laying around to protect the hoses a little better.
Now the muffler fits with ease and you are not in danger of burning hoses, as they are all heat wrapped.
Last edited by rrmedicx; Aug 27, 2007 at 05:57 AM.
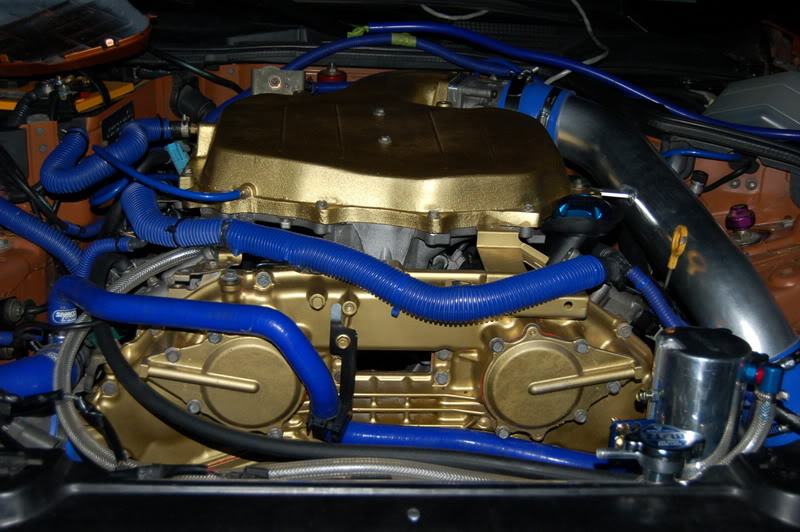
I've got the newly painted upper plenum installed, so now we attach the throttle body. Note I have included the AAM Throttle Body Spacer to help me keep the engine bay clean of a thousand vacuum lines. It has 3 vacuum ports in the back side.

Some of the intake piping:
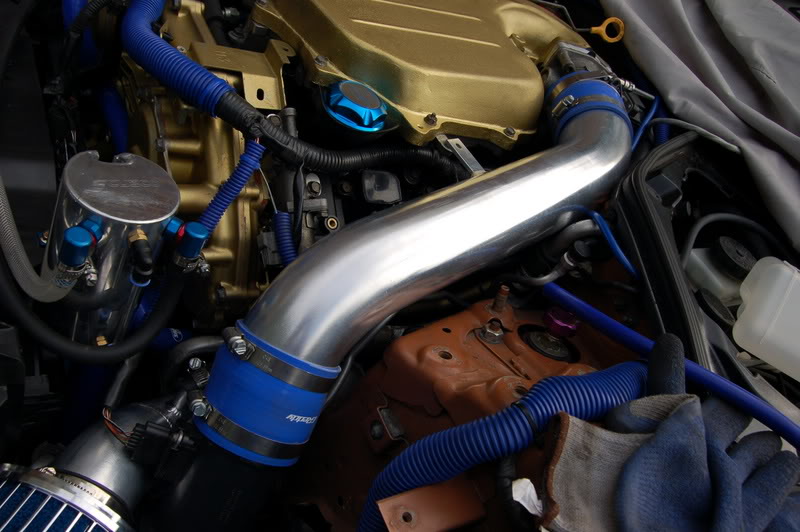
Insert from the bottom up. Note the HKS SQV Blow Off Valve.
Attach in the middle:
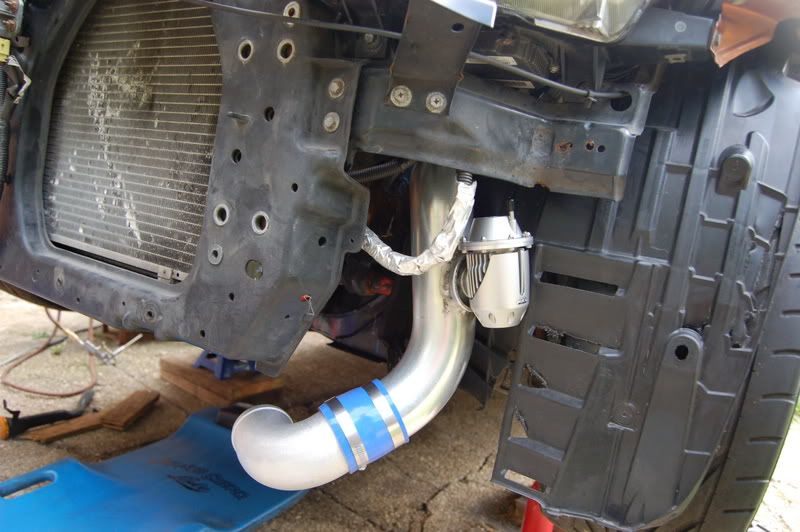
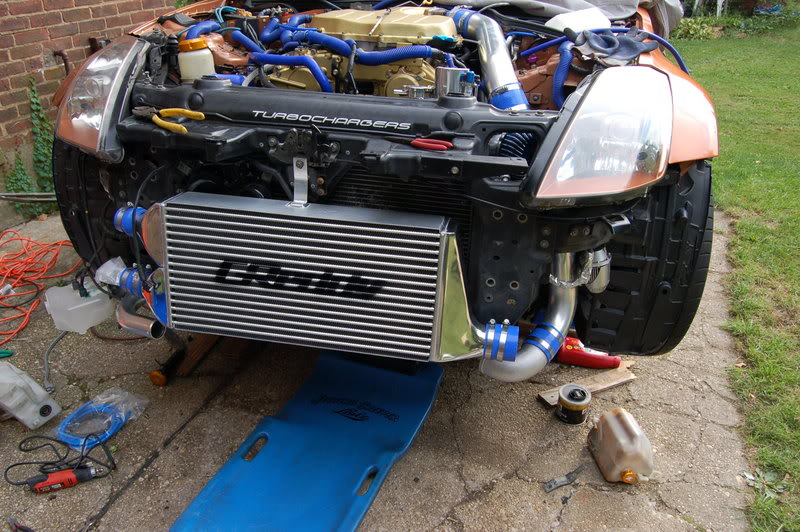
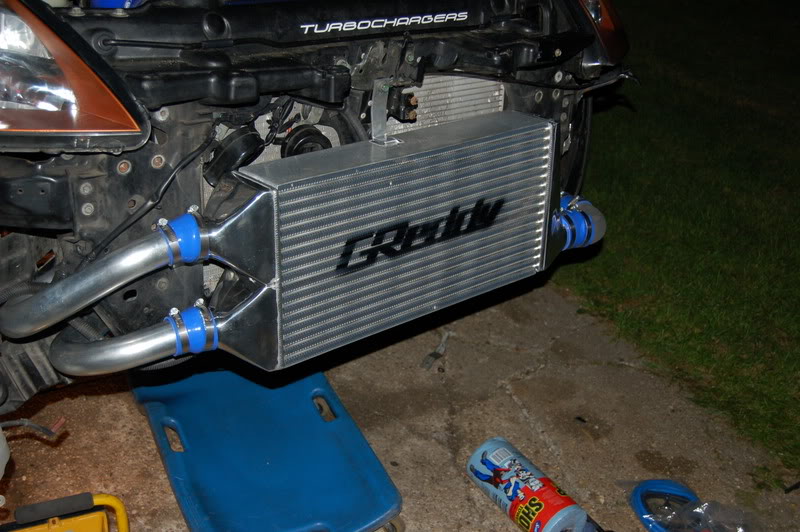
Inter-cooler mocked up in place. Still need to secure from below.
Some of the intake piping:
Insert from the bottom up. Note the HKS SQV Blow Off Valve.
Attach in the middle:
Inter-cooler mocked up in place. Still need to secure from below.
Last edited by rrmedicx; Aug 26, 2007 at 07:23 PM.
In regards to the windshield water fluid tank that gets replaced, I noticed there is a sensor to identify when the fluid is low. Any idea how to deal with that one??? I would love to keep it, but I don't want a stupid light on my dash indicating low fluid all the time. Any ideas? Does it even come on at all if left unplugged?


Originally Posted by rrmedicx
In regards to the windshield water fluid tank that gets replaced, I noticed there is a sensor to identify when the fluid is low. Any idea how to deal with that one??? I would love to keep it, but I don't want a stupid light on my dash indicating low fluid all the time. Any ideas? Does it even come on at all if left unplugged?
I ditched it.. No it doesnt come on for me at all while left unplugged..
Today was a quickie...Only a few hours a daylight to start...
I left off with the inter-cooler mounted but not attached.
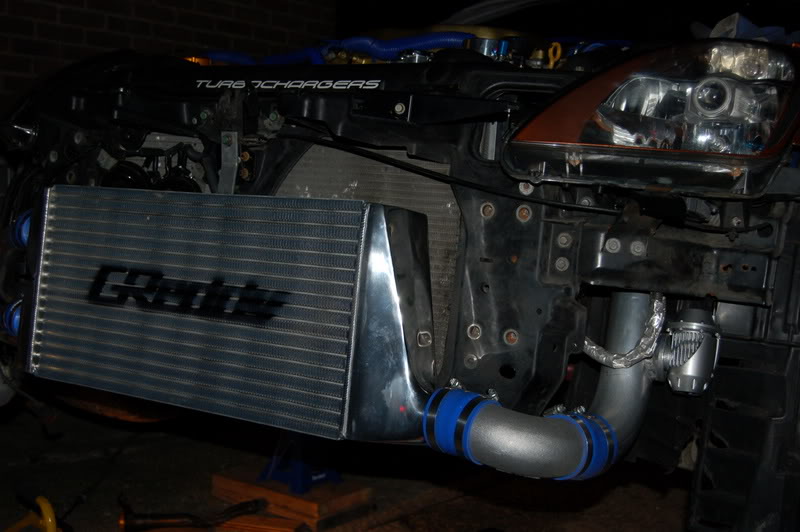
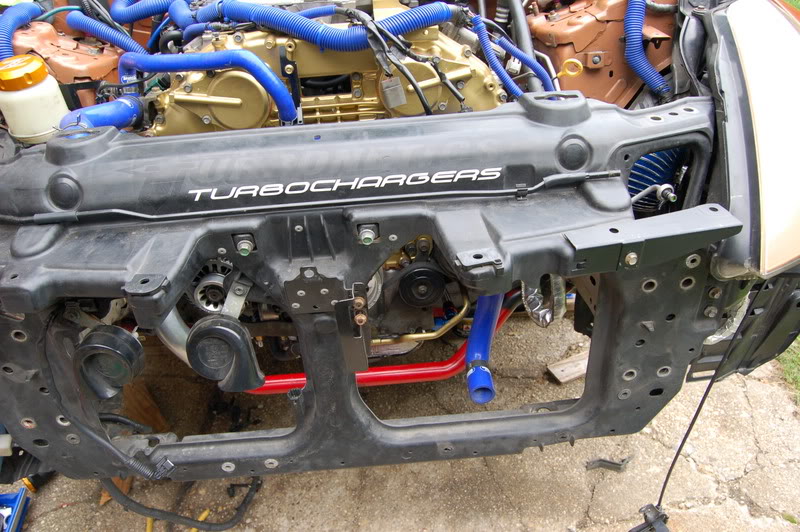
Just a quick shot of th engine bay so far:
I got the driveshaft in today, so the drivetrain is complete.
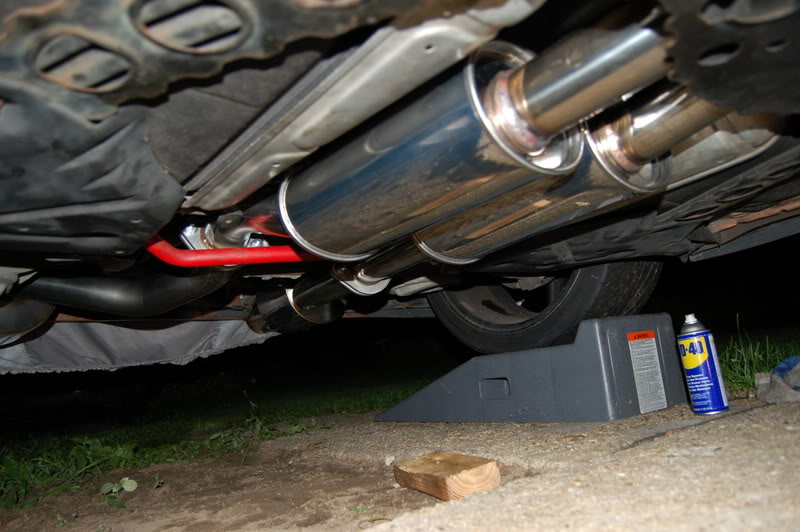
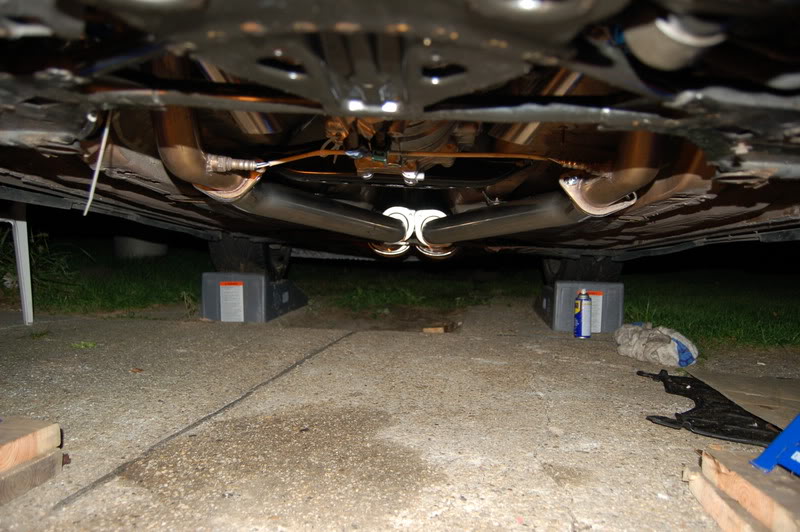
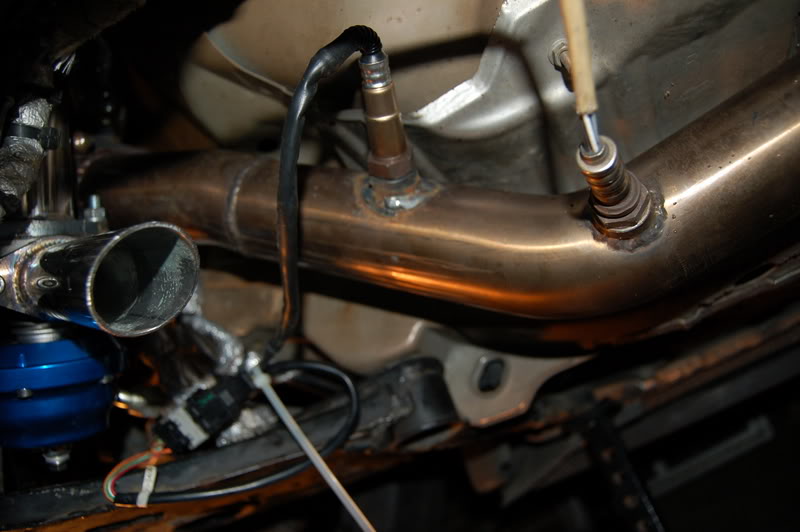
Here is the exhaust - Greddy TT:
I had an O2 sensor bung welded in today...lucky me, so I can hook up my Wideband.
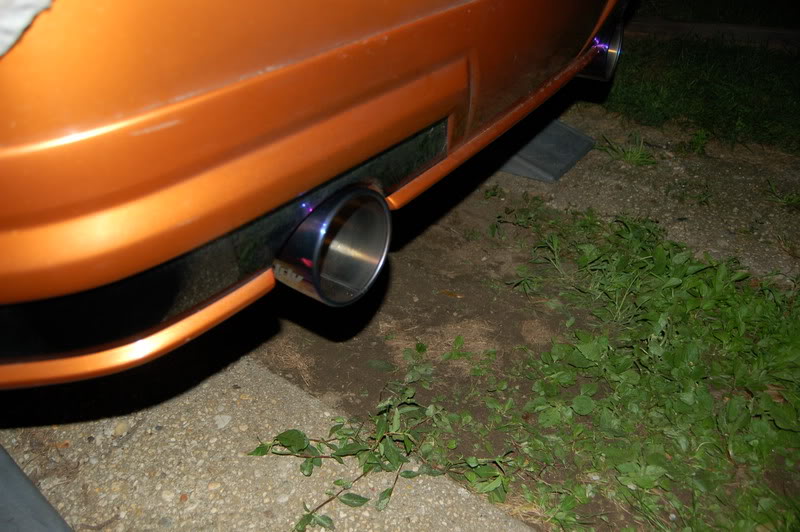
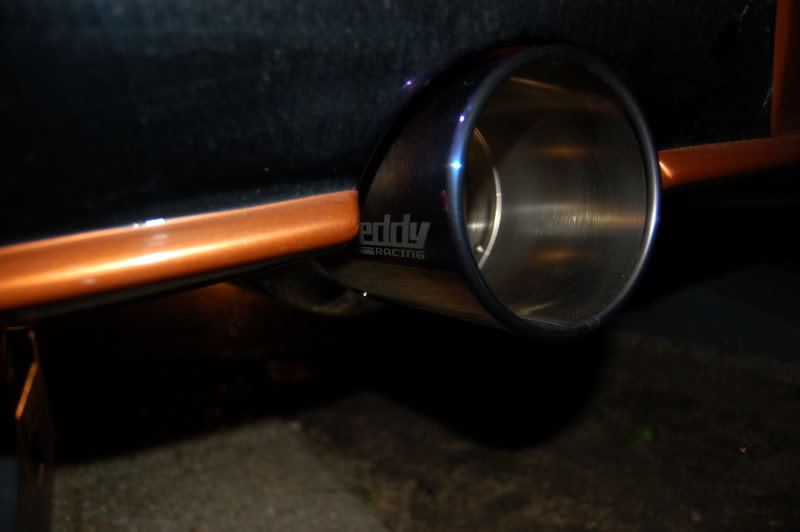
Here are the tails...Sweeeeet.
Darkness has fallen, until tomorrow.
I left off with the inter-cooler mounted but not attached.
Just a quick shot of th engine bay so far:
I got the driveshaft in today, so the drivetrain is complete.
Here is the exhaust - Greddy TT:
I had an O2 sensor bung welded in today...lucky me, so I can hook up my Wideband.
Here are the tails...Sweeeeet.
Darkness has fallen, until tomorrow.
Worked on the car again last night. Here is all that is left before starting.
- Finished with the exhaust, all gaskets are in.
- I connected the vacuum lines to run the stock 7 psi setting on waste-gate springs for now, until the car breaks in, (Later on I'll add the HKS EVC6 unit.)
- Mount the radiator overflow container.
- Finish mounting the windshield washer fluid reservoir.
- Added oil 6.5 Quarts (oil pan spacer & new engine)
- Added Power steering fluid
- Added clutch fluid DOT3 - gotta bleed it.
- Brake fluid OK (untouched)
- Replaced Transmission fluid
- Will change fuel - old gas sat unused for 4 months.
Last edited by rrmedicx; Aug 29, 2007 at 04:57 AM.