
Assembly of my new Built Short Block

Wow, this is gonna sound crazy...I am afraid of the results:
Short Block $4100 included complete gasket set, HKS HG, L19's
Replacement Tranny $900 CD 009...only 5K miles.
Greddy TT, Intercooler, Greddy Exhaust, OS Giken Clutch, HKS BOV $9??? Hook-up thru Sponsor GT-SPEC (don't ask)
800cc Injectors $700
Wastegate Relocators $200
Stage 2 upgrade $200 with a hook-up
Koyo Racing Radiator $330
That's the bulk of it.
The rest is little odds and ends...that do add up...like new Flywheel bolts, New Clutch Bearings, SS Return Lines, Coolant, Tranny Fluid,
Oil, RTV, More Oil , More RTV, ...Priceless
Please don't add it up...I feel my heart racing...One saving grace is that I sold my Single Turbo for $3500 and I got $1000 for my engine and tranny both Dead! I also sold numerous car parts...All of my CF stuff...Hood, Hatch, A & B-Pillars, and a bunch more parts to help offset the costs.
Last edited by rrmedicx; Sep 18, 2007 at 07:39 PM.
Originally Posted by SuperBlack350
can i ask where you got that 009 tranny for 900?
I won't know until I break the motor in and can then boost. Until then, I am staying out of boost to enhance the longevity of the engine while I try to do my best to get the rings to seat properly.
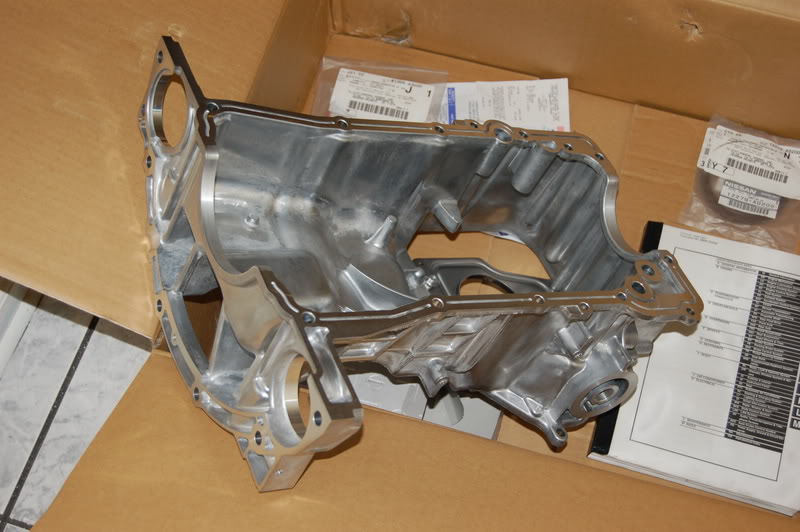
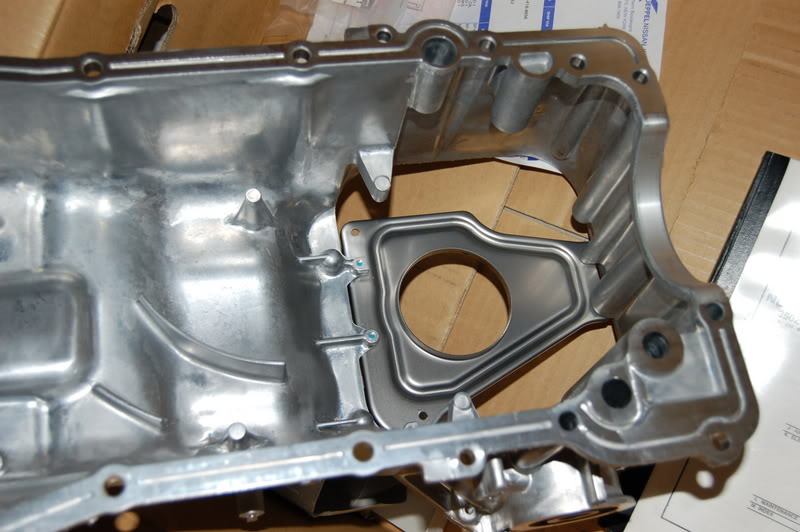
I just picked up a new upper oil pan, oil cooler (expensive), new rear main seal, and new o-rings for the last disassembly project...I hope. The new upper oil pan looks beautiful. I'll take a few pics. Can't wait to do this project.
Should be 1-2 days at most. 1 day to remove the engine & tranny. Hopefully the same day we can disassemble the motor from the tranny and replace the oil pan, and oil cooler. After that, I hope to replace the rear main seal. It hasn't leaked yet, but I got word from a couple of folks to take the precaution of replacing it since I will have the motor apart. After that, I am thinking of getting Sharif's cooling mod and a nismo thermostat. I would like to throw that in at the same time.
Should be 1-2 days at most. 1 day to remove the engine & tranny. Hopefully the same day we can disassemble the motor from the tranny and replace the oil pan, and oil cooler. After that, I hope to replace the rear main seal. It hasn't leaked yet, but I got word from a couple of folks to take the precaution of replacing it since I will have the motor apart. After that, I am thinking of getting Sharif's cooling mod and a nismo thermostat. I would like to throw that in at the same time.
Here we go:
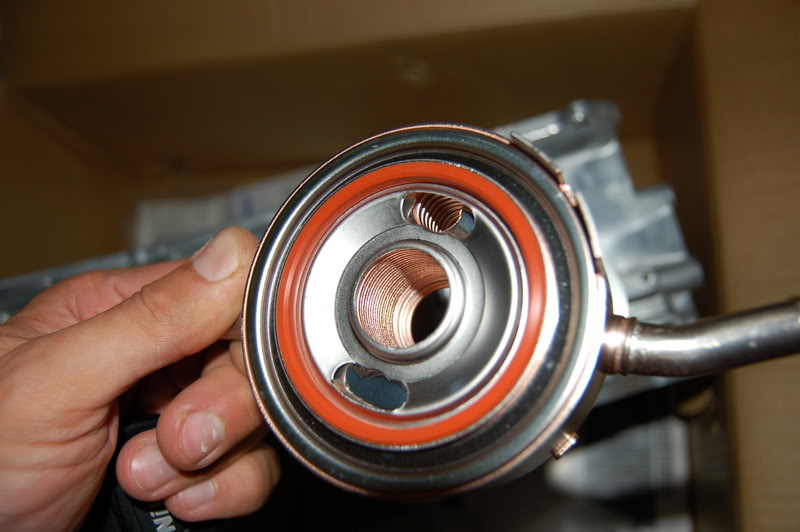
The new oil pan:
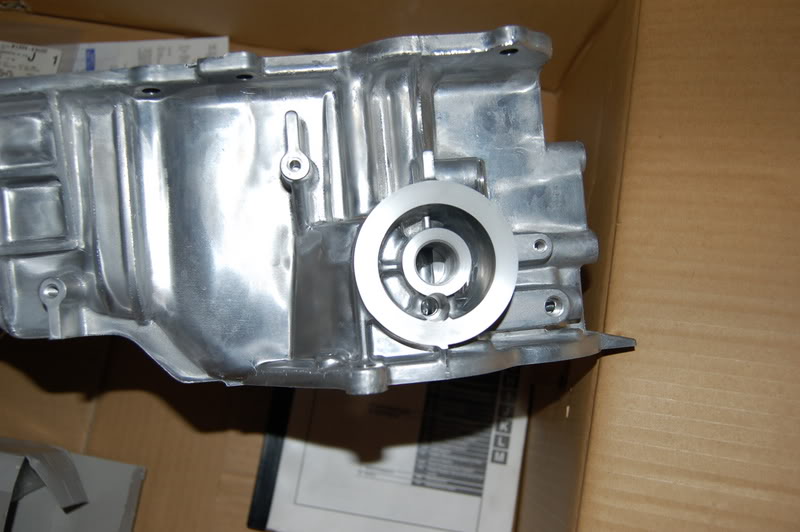
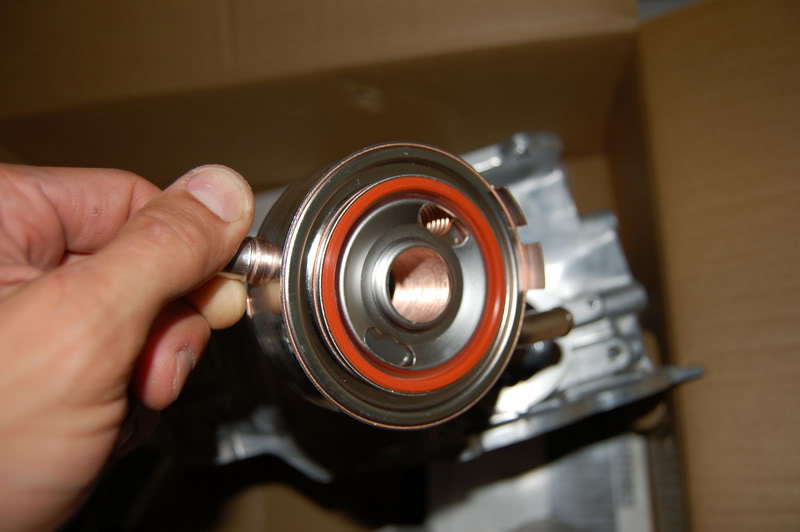
The new Oil Cooler/Warmer:
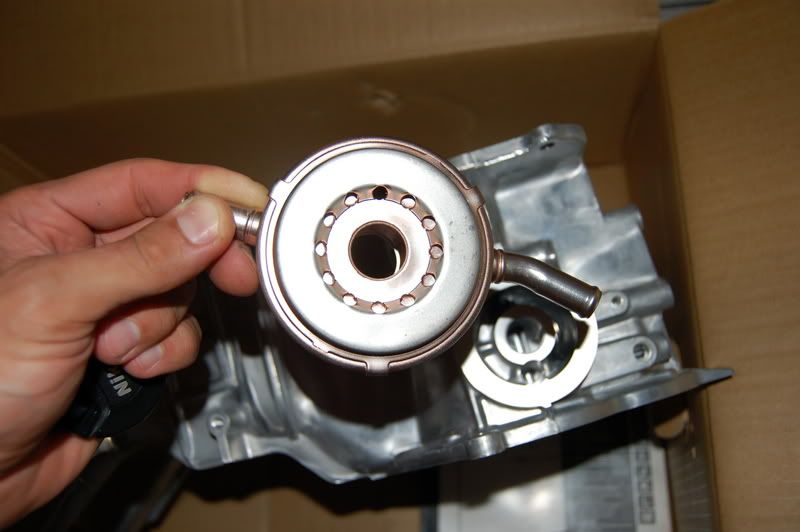
The inside of the cooler/warmer:
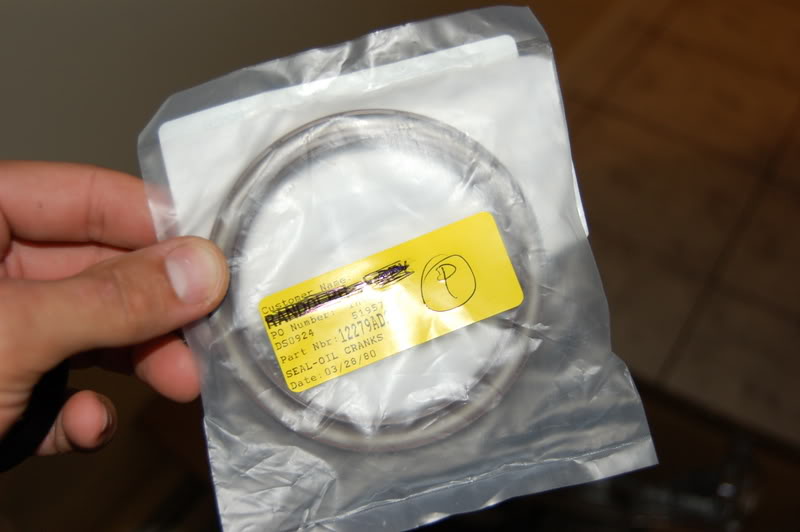
New rear main seal:

I also got the new o-rings for the oil pan and a new O-ring for the cooler.
I will be ready as soon as the new cooling mod and nismo thermostat arrive.
The new oil pan:
The new Oil Cooler/Warmer:
The inside of the cooler/warmer:
New rear main seal:
I also got the new o-rings for the oil pan and a new O-ring for the cooler.
I will be ready as soon as the new cooling mod and nismo thermostat arrive.
Only if I make big numbers. Otherwise its crap..LOL Lets hope for big numbers.
Actually I have already begun to receive calls to help install X, Y, & Z from a variety of local Z club members. And have completed a few small projects. Pretty cool. I am expecting a couple of calls to install Turbo's and Superchargers very soon. No Problem, since I have pretty much been there and done that...Lets see...ATI Procharger, Turbonetics Single, and now the Greddy TT. That covers a lot of territory. Not to mention all of the hundred little nick nacks in between.
I actually thought about teaming up with a couple of other guys that already have a shop but it would definitely be a side gig...not my primary job. They specialize in BMW's, so I would add the Z element to the shop. Nice.
I just enjoy saving lives too much...LOL...I'll sleep on it.
Sorry for the delays fellas. I just finished with that crazy oil leak situation. Well as it turns out, I had fixed the problem and then created another simultaneously.
As I was correcting the oil leak, I was required to remove the oil pan...obviously...Well the last attempt to replace the silicone seal between the oil pan and the block resulted in a little frustration as the layer of Grey RTV really held up tight. I was stuck using a hammer and a block of wood to try to dislodge the upper oil pan...Another Rookie Mistake. Technique in this case would have been better than brute force.
Considering my previous efforts were much easier to deal with. Maybe 2-3 wacks with the hammer and block of wood and the oil pan would fall free. Well the grey stuff held rock solid. It took me, no joke, at least 30 minutes of hacking to dislodge it. I essentially caused damage to the oil pan...unknowingly. I went ahead with the re-install only to be disappointed with another leak. Located at the base of the original oil pan, just where I was hammering...Not exactly Rocket Science.
Well all of that is behind me now. I purchased a new oil pan and a new oil cooler, since I beat up the previous one with all of my install and removal attempts.
Ready for my BASE dyno Tune. I will try to make an appointment for this week and get some miles on this bad boy. I wish I had some numbers to share today, but I didn't come this far to disappoint. Looking forward to a very good week.
Thanks everyone for your support. I hope this thing lives up to all of my expectations.
I purchased the cooling mod to provide coolant to the rear side of the engine. I will install this when I have some time. I also purchased the Fluidamper crank pulley to replace the UR. I figure why take chances. I also purchased he Nismo Thermostat. That will come in some time maybe next weekend.
See cooling mod by clicking here.:
http://www.forgedperformance.com/sto...cat=316&page=1
Crank Pulley here:
http://www.z1auto.com/prodmore.asp?m...ne&prodid=2764
Nismo Thermostat here:
http://www.z1auto.com/prodmore.asp?m...ine&prodid=850
See cooling mod by clicking here.:
http://www.forgedperformance.com/sto...cat=316&page=1
Crank Pulley here:
http://www.z1auto.com/prodmore.asp?m...ne&prodid=2764
Nismo Thermostat here:
http://www.z1auto.com/prodmore.asp?m...ine&prodid=850
Last edited by rrmedicx; Oct 14, 2007 at 11:41 AM.
Originally Posted by miamimax96
I know I'm kinda late to the party, but to anyone that's wondering, during assembly the outer timing cover goes on BEFORE the upper oil pan.
Unless I am forgetting something, but I don't think so.

The only reason we are talking about the oil pan now, is because I sprung a leak and had to remove it to fix the leak, which did not affect the timing cover.

Registered User
Joined: Jul 2004
Posts: 332
Likes: 1
From: South Fla.
Originally Posted by rrmedicx
It really doesn't matter.
For ease of install, if you install the upper oil pan first, at least you have something to rest the timing cover on as you assemble.
The only reason we are talking about the oil pan now, is because I sprung a leak and had to remove it to fix the leak, which did not affect the timing cover.
Sorry if you think the info was useless.
I have to laugh at some of the issues you ran into... Not because I think you went about anything wrong, but in relation to my engine build - I can deeply relate. I did a full tear down and rebuild soup to nuts. Everything from filing the piston rings and checking clearance on the bearings to assembling the block and install back into the chassis. YES - I had an oil leak too  Ended up being the oil cooler gasket (got pinched). Simple fix in my case.
Great work and be sure to post up you final results after it's all said and done.
Ended up being the oil cooler gasket (got pinched). Simple fix in my case.Great work and be sure to post up you final results after it's all said and done.
Got my base tune yesterday. Apparently I was running way rich, which was my main concern. After all I was utilizing a base map from the Turbo XS website set up for 750cc injectors. I didn't want to wash out my cylinders with too much fuel. So that was taken care of. I only put 150 or so miles since I got it up and running, so hopefully I didn't do too much damage if any to the cylinder rings. I really want to give them a chance to set in before I get it properly dyno tuned. I intend to run another 700 or so miles before the power tune. Should be there in about 1 week or so.
Originally Posted by TENGAI
I have to laugh at some of the issues you ran into... Not because I think you went about anything wrong, but in relation to my engine build - I can deeply relate. I did a full tear down and rebuild soup to nuts. Everything from filing the piston rings and checking clearance on the bearings to assembling the block and install back into the chassis. YES - I had an oil leak too Ended up being the oil cooler gasket (got pinched). Simple fix in my case.
Great work and be sure to post up you final results after it's all said and done.
Ended up being the oil cooler gasket (got pinched). Simple fix in my case.Great work and be sure to post up you final results after it's all said and done.