My first Double Din Navigation Installed -- Kenwood DNX8120
 06-19-2008, 12:33 PM
#1
Registered User
Thread Starter
iTrader: (1)

Join Date: Nov 2006
Location: Texas
Posts: 109
Likes: 0
Received 0 Likes
on
0 Posts
Hello Everyone,
I know there are plenty of threads on how-to install a DD stereo already. So I guess this thread will be more like a snapshot of the installation process that one will most likely go through if he/she decided to do their own radio installation.
Hope you guys find it useful.
Special Thanks to Spike, Mando, and Nazar for answering my questions to ease my installed.
Enjoy the pictures and the complete gallery --> HERE
The Planning and Researching gallery.
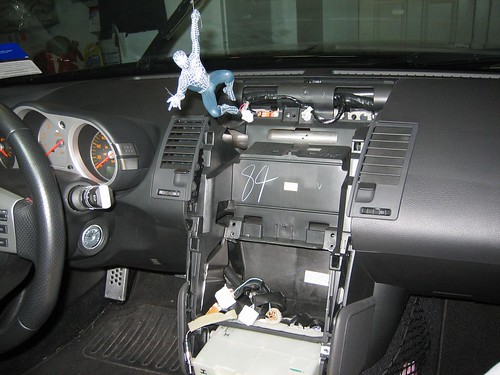
One last look before I replace the stock radio

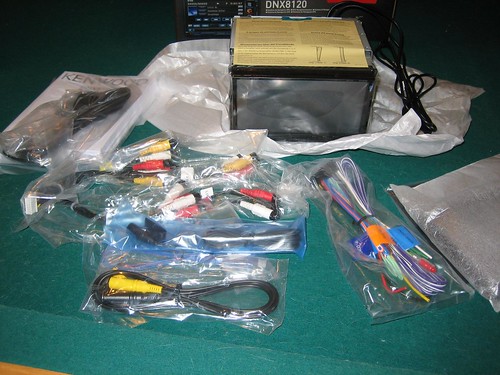
What's in the box?
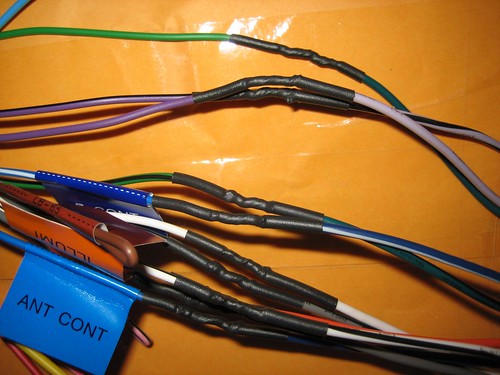
Solder & Shrink-Tubing
Is something missing?")
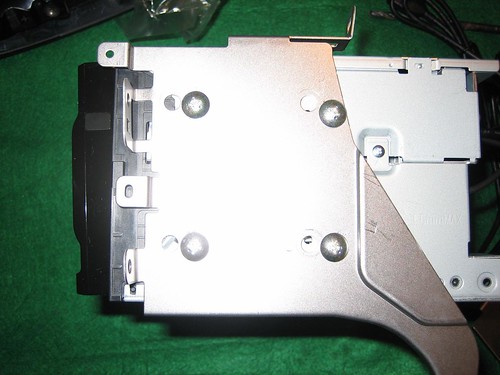
Drilled some hole to sit the unit deeper in so that it will be flush with the dash
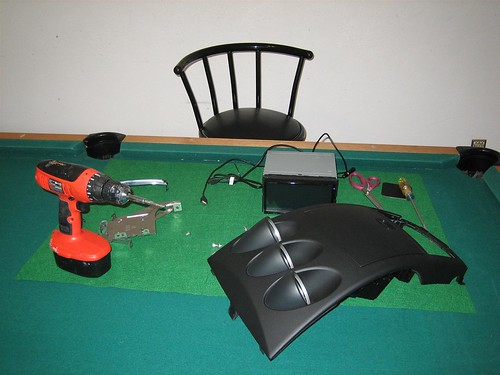
My Workshop

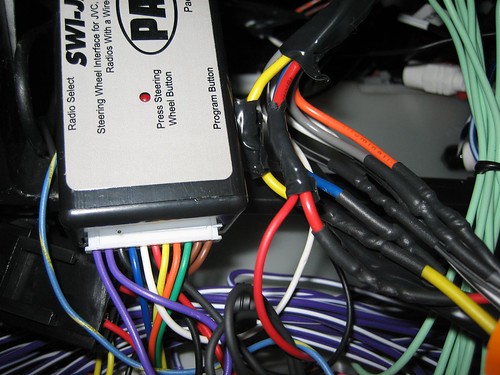
Optional if you want your steering wheel buttons to work with your HU

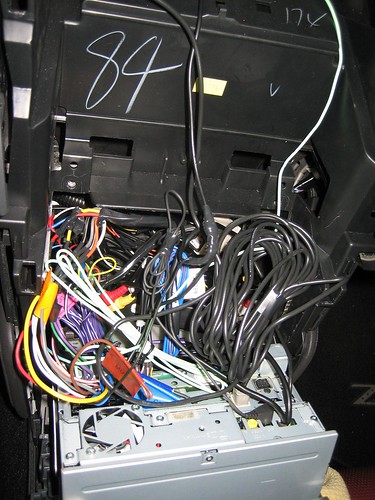
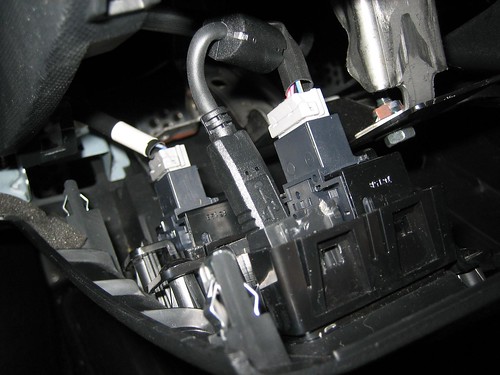
Take time to clean up the wires so that it will neatly tuck in behind the HU
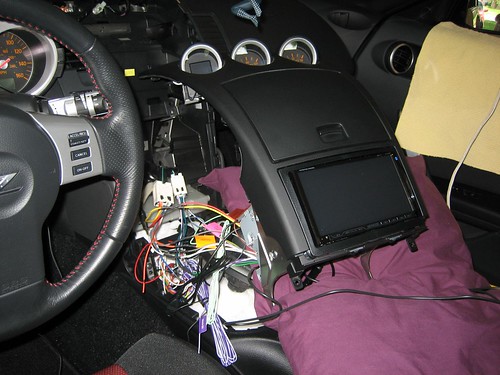
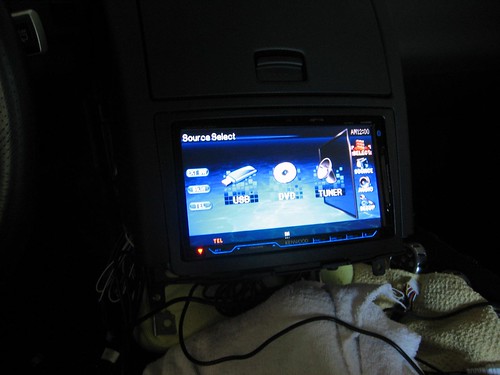
Test the HU for power before putting back the dash

Video
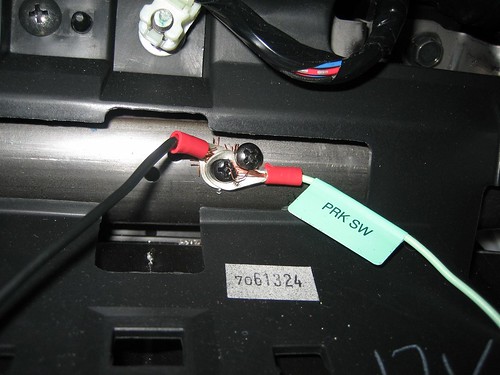
Grounding spot
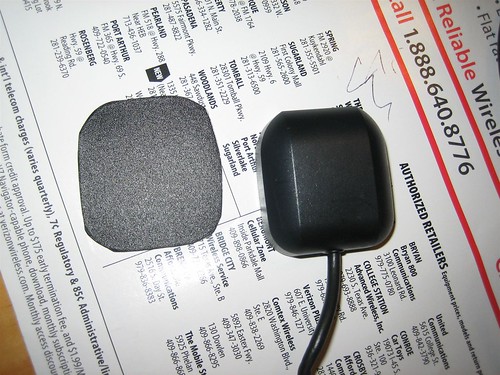
I cut the thin sheet metal plate to fit the GPS antennae in that tight spot
GPS Location

The sunlight glare isn't that bad
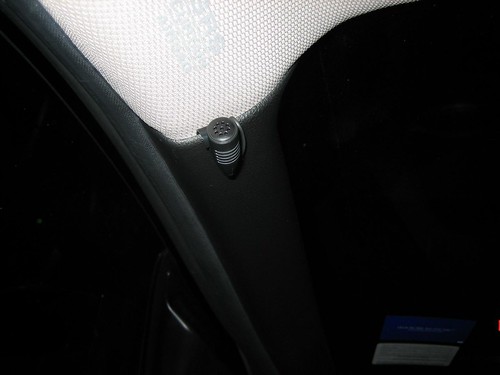
Microphone on the A-Pillar
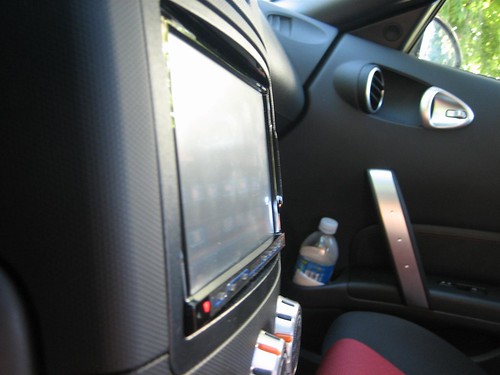
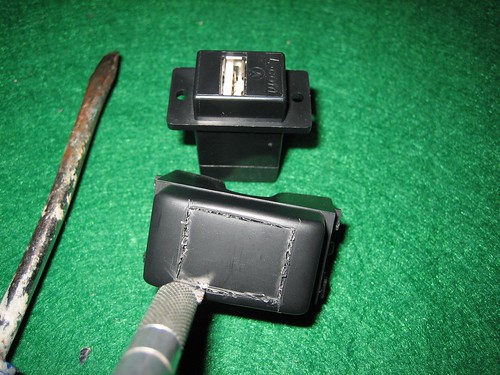
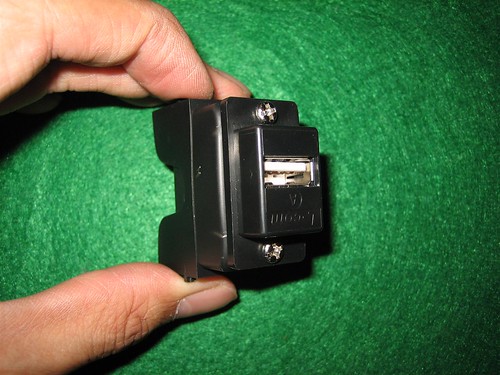
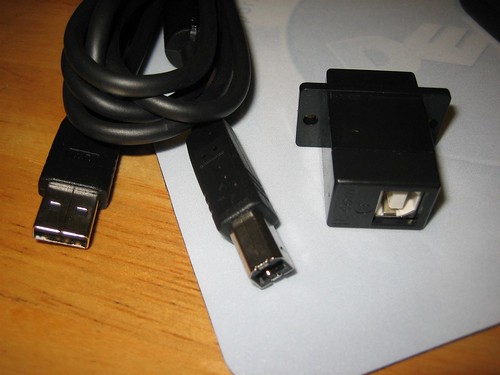
USB Port
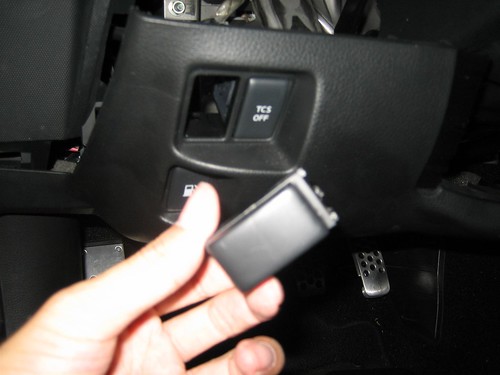
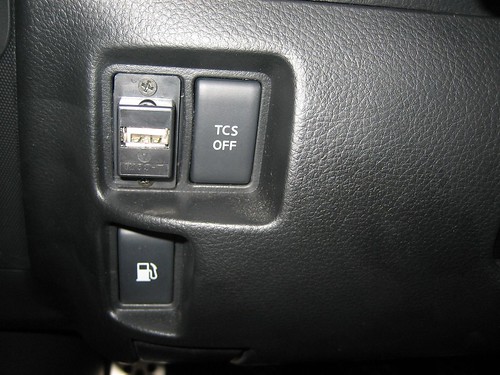
No More dangling USB Cable & safely away from the passenger
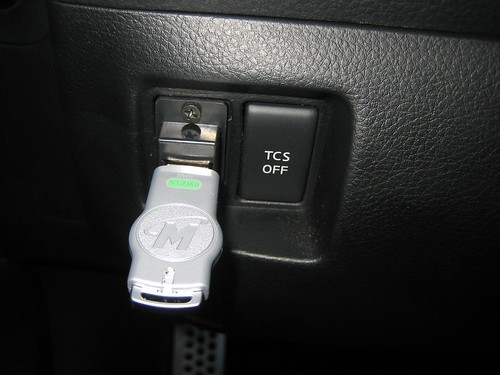
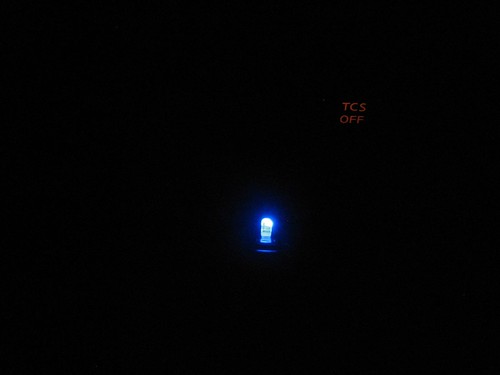
The USB LED will flashes pretty bright at night -- so you might want to get a non-LED USB if the blinking light bother you
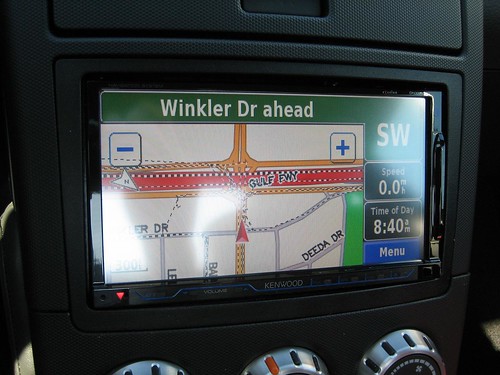
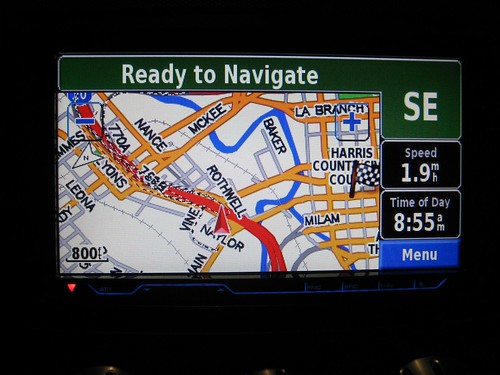
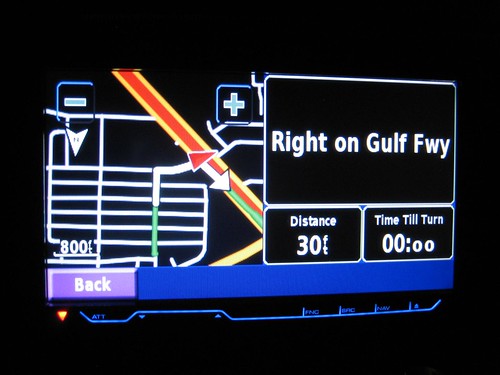
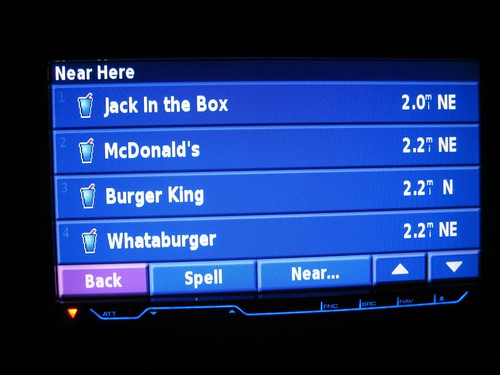
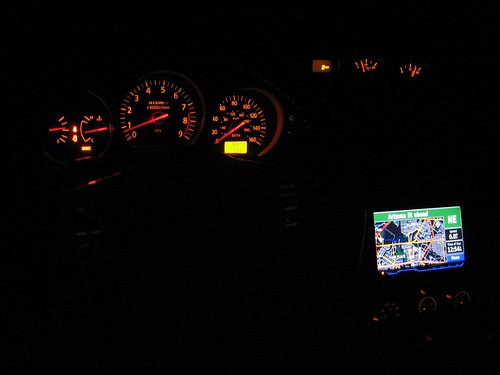
Now lets try to get lost LOL
What is nearby?
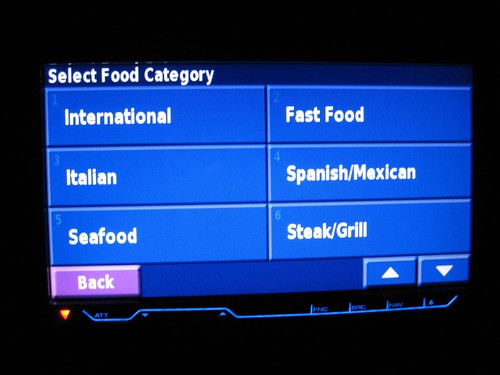
Guessing I am having fast food -- will be broke for awhile after this big purchase *laughing
More related pics where I posted on Nazar's Kenwood DNX8120 thread HERE
I know there are plenty of threads on how-to install a DD stereo already. So I guess this thread will be more like a snapshot of the installation process that one will most likely go through if he/she decided to do their own radio installation.
Hope you guys find it useful.
Special Thanks to Spike, Mando, and Nazar for answering my questions to ease my installed.
Enjoy the pictures and the complete gallery --> HERE
The Planning and Researching gallery.
One last look before I replace the stock radio
What's in the box?
Solder & Shrink-Tubing
Is something missing?
Drilled some hole to sit the unit deeper in so that it will be flush with the dash
My Workshop
Optional if you want your steering wheel buttons to work with your HU
Take time to clean up the wires so that it will neatly tuck in behind the HU
Test the HU for power before putting back the dash
Video
Grounding spot
I cut the thin sheet metal plate to fit the GPS antennae in that tight spot
GPS Location
The sunlight glare isn't that bad
Microphone on the A-Pillar
USB Port
No More dangling USB Cable & safely away from the passenger
The USB LED will flashes pretty bright at night -- so you might want to get a non-LED USB if the blinking light bother you
Now lets try to get lost LOL
What is nearby?
Guessing I am having fast food -- will be broke for awhile after this big purchase *laughing
More related pics where I posted on Nazar's Kenwood DNX8120 thread HERE
 06-19-2008, 01:36 PM
#4
Registered User
Thread Starter
iTrader: (1)
Join Date: Nov 2006
Location: Texas
Posts: 109
Likes: 0
Received 0 Likes
on
0 Posts
I saw a similar USB Dock thing on a Podium PC where I work and thought  it would be neat to have it in my Z. I have the link where I got it from for anyone who is interested.
it would be neat to have it in my Z. I have the link where I got it from for anyone who is interested.


 06-19-2008, 02:53 PM
#7
Registered User
Thread Starter
iTrader: (1)
Join Date: Nov 2006
Location: Texas
Posts: 109
Likes: 0
Received 0 Likes
on
0 Posts
Originally Posted by THEDUKE
Kenwood actually has a USB extension mounting kit. It is specifically for this exact mounting solution. The part number is CAU1EX
Edit: Ok I found that USB thing you were talking about.
Here is the direct link
CA-U1EX - USB Extension Mounting Kit
Here is the Instruction Manual
Last edited by kaspia; 06-19-2008 at 03:36 PM.
Trending Topics
06-19-2008, 06:32 PM
#8
New Member

Nice� looks very good� Your pictures and explanations are terrific as well.
I see there is no shortage of wires and connectors.
I really like your USB mount since it is away from the passenger seat and safe from an errant �knock.�
However, you need a workbench that is not covered in very expensive felt.
Congratulations on a good installation, and thanks for posting the pictures and your comments.
I know you spent hours researching this, but any idea on how much time it took to do the actual installation?
--Spike
I see there is no shortage of wires and connectors.
I really like your USB mount since it is away from the passenger seat and safe from an errant �knock.�
However, you need a workbench that is not covered in very expensive felt.
Originally Posted by kaspia
My Workshop
I know you spent hours researching this, but any idea on how much time it took to do the actual installation?
--Spike
06-19-2008, 06:57 PM
#10
Registered User
Thread Starter
iTrader: (1)
Join Date: Nov 2006
Location: Texas
Posts: 109
Likes: 0
Received 0 Likes
on
0 Posts
Originally Posted by Spike100
I know you spent hours researching this, but any idea on how much time it took to do the actual installation?
--Spike
--Spike
The things that slow or bog down my installation time was
- Preparing the Harness to the Kenwood's Harness; since soldering and shrink-tubing take a good 40 minutes. Electrical tape would have been faster
- Drilling those custom holes to give the HU a flush-look took awhile (30 mins or so) since I had to measure and align the holes a few times.
- Programing the steering wheel adapter took forever! Took a few breaks in between to keep me from going insane.
- The USB Mount took about 45 minutes. I couldn't pop out that blank button so easy. Then measuring and craving out the squared hole took patience.
So with all that just mentioned --
Assuming that the installer have all the proper tools and know where all the Z's harness plug, clips and screws. The installation will take about a good 6 hours+. I started last at night and didn't finish until the next day afternoon (took many breaks). I really REALLY took my time b/c it was my first DD install and no one love my Z more than me right? Sure I could have bring it into an installer and they will get it done in a matter of several hours, but I get to say that I installed it! lol
Oh and about the workbench -- I will look into it since I don't do this kind of stuff that often.

Last edited by kaspia; 06-19-2008 at 07:10 PM.
06-19-2008, 07:01 PM
#11
Registered User
Thread Starter
iTrader: (1)
Join Date: Nov 2006
Location: Texas
Posts: 109
Likes: 0
Received 0 Likes
on
0 Posts
Originally Posted by cbr900son
love the usb port! Did it plug right into the usb port comin from the HU or u needed some kind of adapter?
 06-19-2008, 08:26 PM
#12
New Member
I asked the question about the time (and extensibly the �degree of difficulty�) to do the physical installation because members here often ask if a non-professional installer can accomplish an installation similar to what you did. Certainly soldering wire connections and shrink-wrapping is the �gold standard,� and that may not be something you get unless you do the job yourself or take your project to a superior installer.
Reading your thread, it�s apparent that someone willing to do the preliminary research and take the time to do a careful install can accomplish this.
When doing a project as you did, it�s always important to do the preliminary research, and carefully spec the project before you do anything (including purchasing the components). That�s what you want to do even if you plan to hire a professional to do your installation.
The scary photos�
�but as you know, it�s only taking the time to figure out the harness and do the connections properly.
Your selection for a USB connection/location is very wise since it is in a �protected� position away from your passenger that prevents breaking the device or its attachment. I believe that will become a �standard� mounting position for USB flash-drives and dongles. Nissan picked that position for the VDC/TCS switch for the same reason.
And, your microphone position is perfect.
Question: Obviously you drilled a hole in the A-Pillar cover piece, but is the microphone held by simply friction, or did you use adhesive as well?
--Spike
Reading your thread, it�s apparent that someone willing to do the preliminary research and take the time to do a careful install can accomplish this.
When doing a project as you did, it�s always important to do the preliminary research, and carefully spec the project before you do anything (including purchasing the components). That�s what you want to do even if you plan to hire a professional to do your installation.
The scary photos�
Originally Posted by kaspia
Take time to clean up the wires so that it will neatly tuck in behind the HU
Your selection for a USB connection/location is very wise since it is in a �protected� position away from your passenger that prevents breaking the device or its attachment. I believe that will become a �standard� mounting position for USB flash-drives and dongles. Nissan picked that position for the VDC/TCS switch for the same reason.
Originally Posted by kaspia
No More dangling USB Cable & safely away from the passenger
Originally Posted by kaspia
Microphone on the A-Pillar
--Spike
06-20-2008, 05:19 PM
#14
Registered User
Thread Starter
iTrader: (1)
Join Date: Nov 2006
Location: Texas
Posts: 109
Likes: 0
Received 0 Likes
on
0 Posts
Originally Posted by Spike100
I asked the question about the time (and extensibly the �degree of difficulty�) to do the physical installation because members here often ask if a non-professional installer can accomplish an installation similar to what you did. Certainly soldering wire connections and shrink-wrapping is the �gold standard,� and that may not be something you get unless you do the job yourself or take your project to a superior installer.
Question: Obviously you drilled a hole in the A-Pillar cover piece, but is the microphone held by simply friction, or did you use adhesive as well?
--Spike
Question: Obviously you drilled a hole in the A-Pillar cover piece, but is the microphone held by simply friction, or did you use adhesive as well?
--Spike
I didn't drill my A-Pillar. Since I didn't know if that was the ideal location for the mic and wanted to test to see if I will have issue with it being there next the the window. I just clip it there and rotate the mic as needed. So far the mic is working pretty good.
 06-20-2008, 06:38 PM
#16
Registered User
iTrader: (4)
Join Date: Mar 2006
Location: Lafayette LA
Posts: 3,804
Likes: 0
Received 0 Likes
on
0 Posts
Originally Posted by kaspia
If I have to rate the degree of difficulty of the whole installation, I will give it a 7 out of 10 scale. I spent more time on the researching than the actually installation.
I didn't drill my A-Pillar. Since I didn't know if that was the ideal location for the mic and wanted to test to see if I will have issue with it being there next the the window. I just clip it there and rotate the mic as needed. So far the mic is working pretty good.
I didn't drill my A-Pillar. Since I didn't know if that was the ideal location for the mic and wanted to test to see if I will have issue with it being there next the the window. I just clip it there and rotate the mic as needed. So far the mic is working pretty good.

 06-27-2008, 09:20 PM
#20
Registered User
iTrader: (4)
Join Date: Mar 2006
Location: Lafayette LA
Posts: 3,804
Likes: 0
Received 0 Likes
on
0 Posts
I stole ur usb thing idea but instead i put it on the driver side about a inch to the right and left of that super tiny vent on the other side of the steering wheel. Had to cut a super small hole in the lower part of the dash. made a real small template of the usb port on cardboard then glued it to the inside where i wanted it (rubber cement ftw) and dremeled right around the edge and finished the cuts up with a raxor. Worked perfect.