
Homemade Splitter Design and Mounting

Thread Starter
New Member
iTrader: (21)
Joined: Sep 2006
Posts: 8,159
Likes: 107
From: London, Ontario, Canada
The first steel bracket will be done shortly. I've already had 1 PM from someone asking if they could buy a copy. I think I will have 2 incase the 1st one bends from going off. Then I can pull into the paddock and swap in 15 mins.
Would anyone else want a copy? And what would be a price you would be willing to pay for one? They aren't that complicated, but it's hours and hours of work if you were to make some on your own. Might be an idea to see if I can get them produced in limited numbers if anyone is interested.
Would anyone else want a copy? And what would be a price you would be willing to pay for one? They aren't that complicated, but it's hours and hours of work if you were to make some on your own. Might be an idea to see if I can get them produced in limited numbers if anyone is interested.


I would like to see some updates. I did start mine, will have it done soon for a Willow Springs event.
http://www.flickr.com/photos/61208532@N05/8503010354/http://www.flickr.com/photos/61208532@N05/8503010354/ by http://www.flickr.com/people/61208532@N05/, on Flickr
http://www.flickr.com/photos/61208532@N05/8503010354/http://www.flickr.com/photos/61208532@N05/8503010354/ by http://www.flickr.com/people/61208532@N05/, on Flickr
Thread Starter
New Member
iTrader: (21)
Joined: Sep 2006
Posts: 8,159
Likes: 107
From: London, Ontario, Canada
^ Sorry for the lack of updates. The template is still off with my friend who is having trouble finding time to weld up the first bolt on bracket. Once it's done I will post up some pictures. I may have time tonight to cut the alupanel to shape.
Thread Starter
New Member
iTrader: (21)
Joined: Sep 2006
Posts: 8,159
Likes: 107
From: London, Ontario, Canada
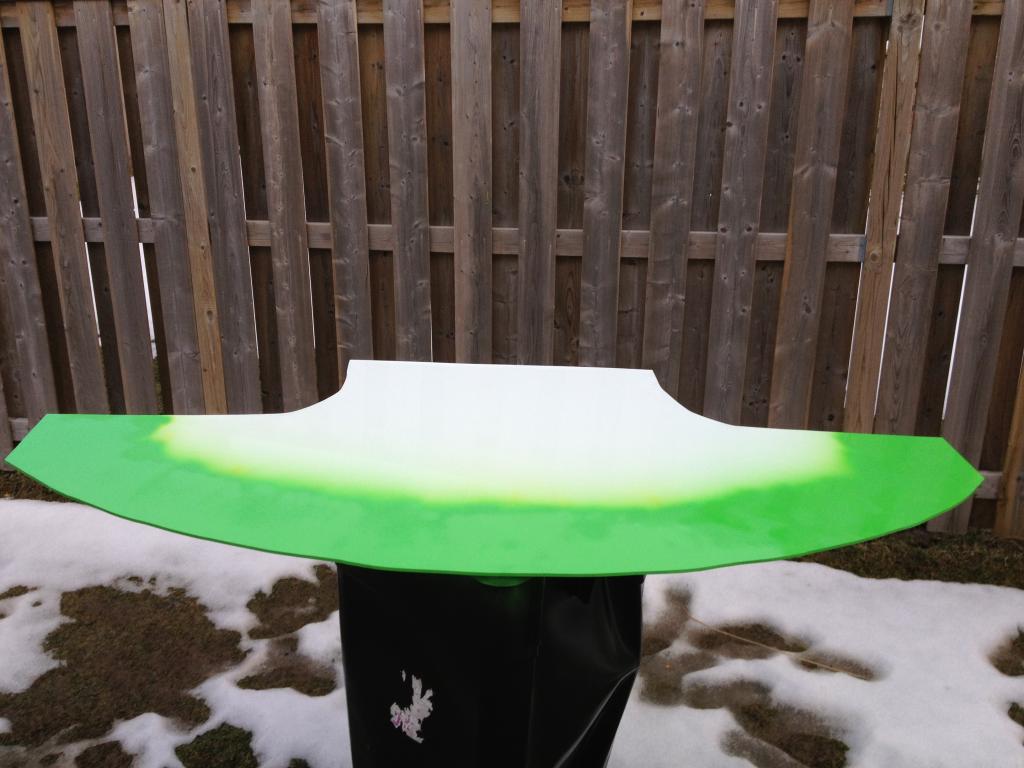
Splitter is done in alupanel and I coated the visible areas in neon green engine enamel... I extended the sides a bit similar to yours terrasmak. Just waiting on those brackets still. This is the problem with getting a friend to make them.
Thread Starter
New Member
iTrader: (21)
Joined: Sep 2006
Posts: 8,159
Likes: 107
From: London, Ontario, Canada
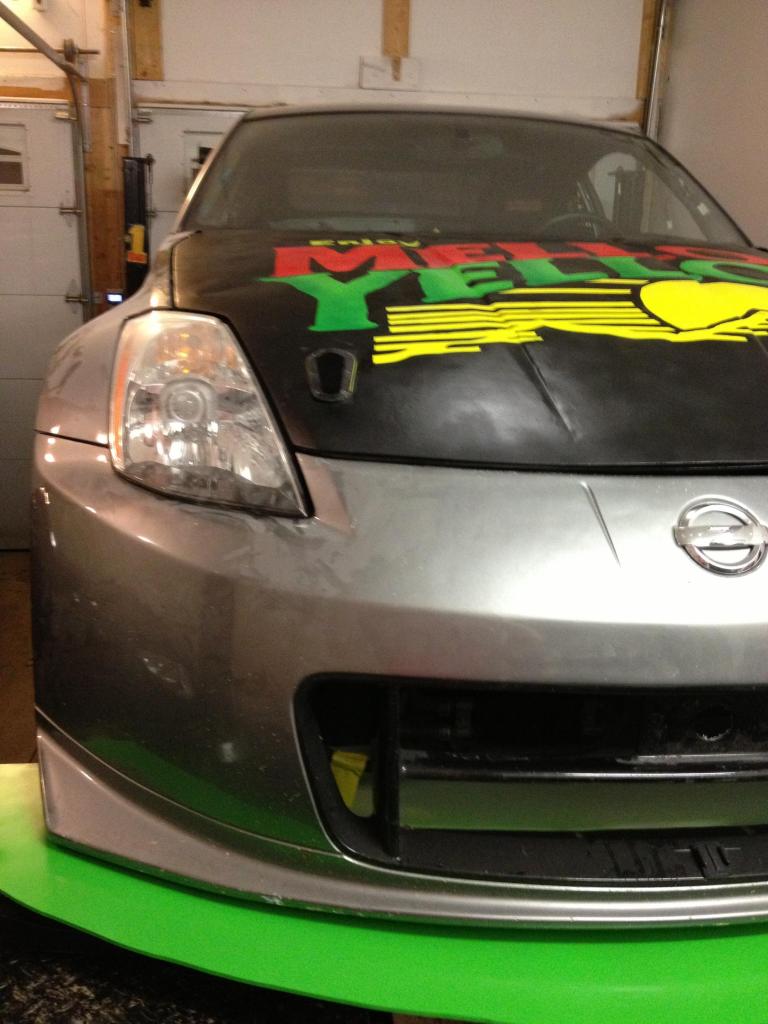
Kind of double posting from my build thread but its sitting together nicely. The metal brackets are finally out for plasma cutting. Should be ready for test fit soon. Then I would like to work on an air dam and some internal shrouds in the engine bay and wheel well to increase downforce potential. I am also considering making some small winglets on the back of the splitter.
Thread Starter
New Member
iTrader: (21)
Joined: Sep 2006
Posts: 8,159
Likes: 107
From: London, Ontario, Canada
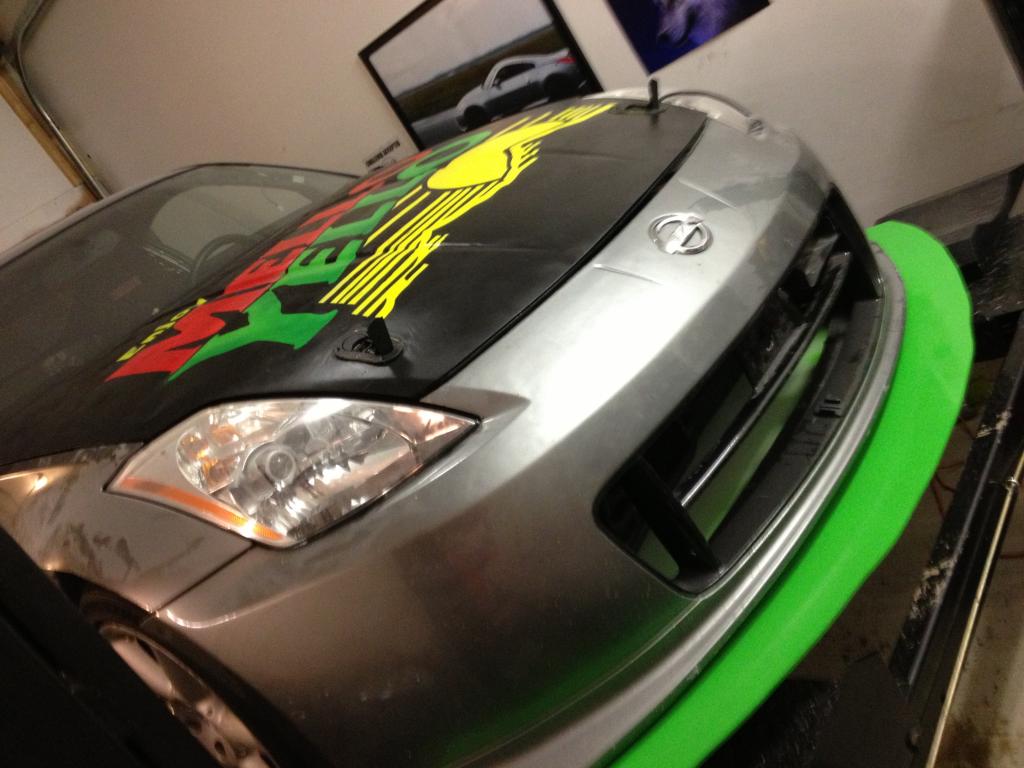
Yah. Coke trickle!
Really. It's a gutted oem hood. Was originally user juddz and it was a ruined turquoise colour. Then it was plastidipped and that was peeling. So I'm a pretty good artist. Decided if its gonna be ugly, might as well be funny. Because track car. Spray-painted a tooth on it because tooth power. But I felt it was kind of inappropriate so now this.
Really. It's a gutted oem hood. Was originally user juddz and it was a ruined turquoise colour. Then it was plastidipped and that was peeling. So I'm a pretty good artist. Decided if its gonna be ugly, might as well be funny. Because track car. Spray-painted a tooth on it because tooth power. But I felt it was kind of inappropriate so now this.
Time to touch it up a bit and add side spats. Worked well over the weekend, very well.
<a href="http://www.flickr.com/photos/61208532@N05/8591527956/" title="Untitled by terrasmak, on Flickr"><img src="http://farm9.staticflickr.com/8371/8591527956_c7dd645b09_c.jpg" width="800" height="600" alt="Untitled"></a>
<a href="http://www.flickr.com/photos/61208532@N05/8591527956/" title="Untitled by terrasmak, on Flickr"><img src="http://farm9.staticflickr.com/8371/8591527956_c7dd645b09_c.jpg" width="800" height="600" alt="Untitled"></a>
Last edited by terrasmak; Mar 25, 2013 at 06:16 PM.
Thread Starter
New Member
iTrader: (21)
Joined: Sep 2006
Posts: 8,159
Likes: 107
From: London, Ontario, Canada
Nice! what's it look like internally? How is it mounted in there? And what did you use as the air dam between the splitter and bumper? What are you making the side spats out of?
+1 on more info
Just curious, how do you determine the number and/or angle of the canards?
Just curious, how do you determine the number and/or angle of the canards?


The amount of grip, holy crap. I had to add about 4 degrees of AOA on the rear wing to balance the car. My setup is almost perfect, I still have a little bit of lower speed understeer to dial out now.
Last edited by terrasmak; Mar 26, 2013 at 09:11 PM.

Thread Starter
New Member
iTrader: (21)
Joined: Sep 2006
Posts: 8,159
Likes: 107
From: London, Ontario, Canada
From what I have discussed with others and read the verdict on canards is that they are for low speed downforce. Unlike wings they have a very high drag to downforce ratio.
In themselves they are not overly effective at creating downforce, but they do create a vortex at speed which acts like a barrier or curtain, and can impede air trying to get underneath the side of the car.
But the verdict is, no full undertray, and no functional side skirt, don't use canards. Full undertray is first.
I have also read that they are also used to direct the air over the wheel for better aero. Then also provide downforce but with high drag dependent on angle etc etc.
Thread Starter
New Member
iTrader: (21)
Joined: Sep 2006
Posts: 8,159
Likes: 107
From: London, Ontario, Canada
In theory, they act as a barrier to high pressure air around the car, impeding it's flow underneath the car.
It's all about creating an area of low pressure under the car.
This is done by limiting air that can get in there relative to the top and sides.
And by making sure air that does get in there is channelled in a fast, smooth, controlled path out the back of the car.
It's all about creating an area of low pressure under the car.
This is done by limiting air that can get in there relative to the top and sides.
And by making sure air that does get in there is channelled in a fast, smooth, controlled path out the back of the car.
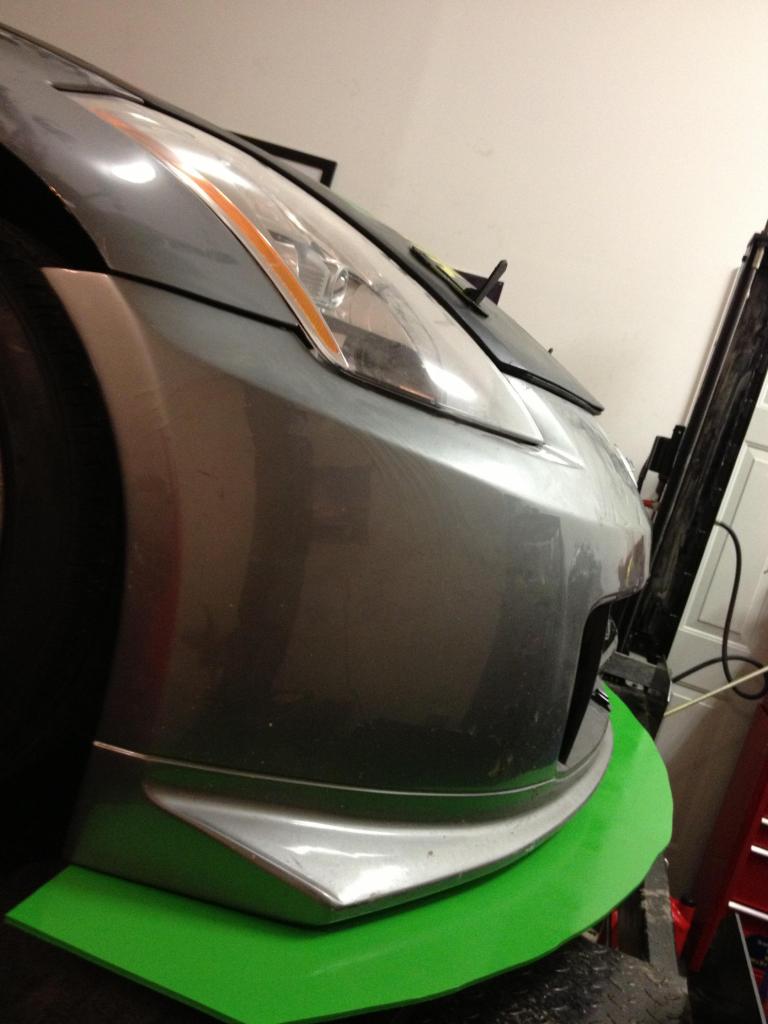
The outside brace
<a href="http://www.flickr.com/photos/61208532@N05/8597272950/" title="Untitled by terrasmak, on Flickr"><img src="http://farm9.staticflickr.com/8095/8597272950_1fb21670c8_c.jpg" width="600" height="800" alt="Untitled"></a>
Little dirty, need to hit a car wash before i really start tearing at apart.

If it takes a hit from below, i want the aluminum to bend. It only provides tension in one direction, if it bends from force in the other direction it will save my outer metal section of my headlight support.