VQ35de plenums installed on VQ40 Frontier
#1
I thought you guys might find this interesting. In my quest for power I've been looking at different intake options. We have a funky VIAS operated system that I feel doesn't allow my Cammed VQ40 to breathe correctly.
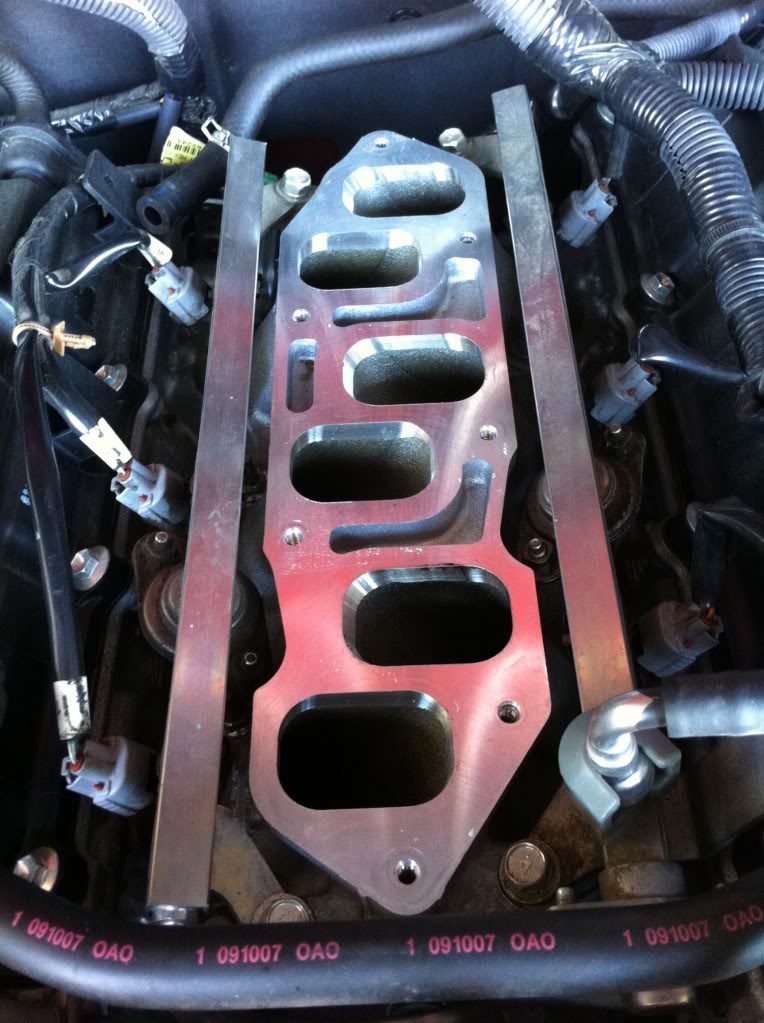
The tricky issue doing this mod was your vq35 plenums has round ports where the vq40 has squarish ports. I did this transition with a chunk of T6061 aluminum. I did it myself with lots have typical power tools, so yeah it could be prettier and probably smoother porting, but I did my best. I also figure since I was doing the Z plenum, i might as well putting in a Motordyne 5/16" spacer/
Just got it running today and it feels really good considering I haven't got retuned yet. I think this might be the ticket i was looking for. I will try to get my truck to Uprev this month so they can try to work some magic on my new setup.

Stock vq40 lower intake.

My "mid-intake" bolted in place.

Lower plenum & 5/16" spacer on.

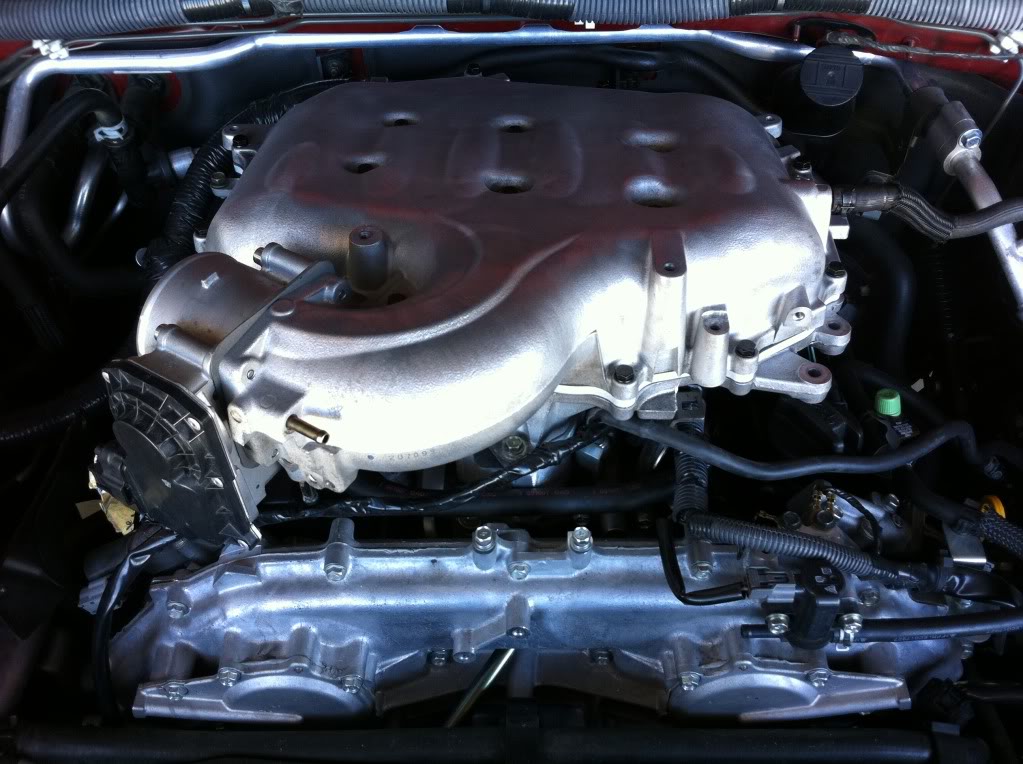
Upper plenum on.

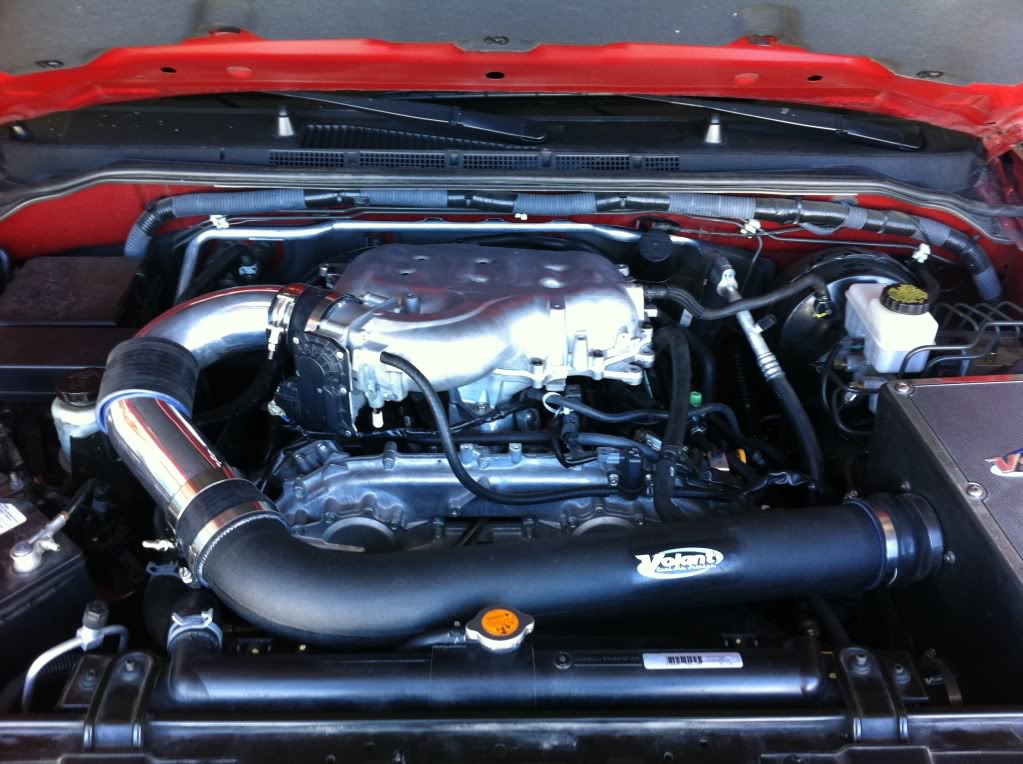
The finished product!
The tricky issue doing this mod was your vq35 plenums has round ports where the vq40 has squarish ports. I did this transition with a chunk of T6061 aluminum. I did it myself with lots have typical power tools, so yeah it could be prettier and probably smoother porting, but I did my best. I also figure since I was doing the Z plenum, i might as well putting in a Motordyne 5/16" spacer/
Just got it running today and it feels really good considering I haven't got retuned yet. I think this might be the ticket i was looking for. I will try to get my truck to Uprev this month so they can try to work some magic on my new setup.

Stock vq40 lower intake.

My "mid-intake" bolted in place.

Lower plenum & 5/16" spacer on.

Upper plenum on.

The finished product!
#3
Yeah, I was surprised to find out my Frontier didn't have near enough room in the back for the intake inlet. So yeah, the easy solution was to spin it 180 degrees. Fortunately we have more hood clearance than Z's do to allow the spin.
As for the lower intake, the z has a much narrower lower intake, so it too would need spacers of some sort at the heads.
As for the lower intake, the z has a much narrower lower intake, so it too would need spacers of some sort at the heads.
Last edited by rdrfronty; 02-05-2011 at 07:31 PM.
#5
Oh, the other fun issue was the throttle body. Our TB size is basically the same, but the Z has appx 1/4" shorted and narrower bolt pattern than my frontiers TB. So I had to bore my bolt pattern in tighter to fit the Z bolt pattern. Fortunatetly the TB had enough aluminum housing to allow me to do so.
I do have a question for you guys. Does the Z have any bracing going from the plenums to the block or timing cover. The reason I ask is that the Frontier plenum requires bracing. Though its a composite plenum and it hooks severely to one side. The Z plenum feels rock solid in my lower intake, so I'm not sure if it needs any extra bracing?
I do have a question for you guys. Does the Z have any bracing going from the plenums to the block or timing cover. The reason I ask is that the Frontier plenum requires bracing. Though its a composite plenum and it hooks severely to one side. The Z plenum feels rock solid in my lower intake, so I'm not sure if it needs any extra bracing?
#6
Was cutting at the plenum neck and rotating the TB/neck to face the driver's side not possible? It looks like a lot of unnecessary bends/pipe length. Very creative, though. I'm in for results.
And to answer your last question, the Z does not have any bracing for the plenum.
And to answer your last question, the Z does not have any bracing for the plenum.
#7
Actually all the intake tubing needed to fit was about 3/4's of a 3" 180deg bend. The long black tubing was my Frontiers standard Volant CAI. I put the 3" elbow on that tube and then straight onto the TB(with connector of course). The extra Black hose you see on the elbow is just as a cushion since it the elbow was slightly touching my power steering reservoir bracket. No cut there. Plus I was trying to not kill my Volant CAI tubing just in case the Z plenum just didn't work. The stock TB location for the Frontier is almost in the same place, just rotated about 90 deg counter clockwise from where it is now.
Thanks for the info on the bracing.
Thanks for the info on the bracing.
Trending Topics
#9
I'm not sure you understood what I meant.
Why not (see attached)? So, cut between the plenum and TB, rotate, then weld. Less bends, less tubing, less clutter.
Why not (see attached)? So, cut between the plenum and TB, rotate, then weld. Less bends, less tubing, less clutter.
#10
Modifying the upper plenum neck I'm sure would have added a few more hundred to the total since I do not have a TIG welder and don't know how to weld aluminum even if I did.
But that aside, i agree that would have made a much smoother & shorter inlet for the plenum. If it wasn't for the MAF mounted in the middle of my intake tubing I could have tried just a pop charger or something like that too.
Last edited by rdrfronty; 02-05-2011 at 09:48 PM.
#11
^ That makes sense. Still, props for you to try something different and a DIY at that.
#14
I will hopefully get on the dyno & get retuned at Uprev by next weekend. If they can squeeze me in.
#15
However that aside, I can have it back off in 30 minutes if I decide down the road to polish out a few of those little ripples out and etc. I might just do that once I've taken a little break. I was down for 3 weeks doing this mod, working at it every evening & weekend.
#17
Ok, did a few little clips yesterday and made a quick montage. Please forgive the clips--they were done by me-the driver, handheld, and impromptu. And remember I have a 4100lb truck and I haven't got it retuned yet. I will be in Austin Friday for a dyno retune to see what more they can squeeze out of it.
http://www.youtube.com/watch?v=07BwcWOKZTo
http://www.youtube.com/watch?v=07BwcWOKZTo


