
DIY Wire Tuck


Registered User
iTrader: (5)
Joined: Aug 2009
Posts: 159
Likes: 0
From: Halifax, Nova Scotia, Canada
That looks great man! I started opposite from you and did the body harness first since my motor is out, It's simple to do. I just hope my engine harness turns out as well as yours.


I started on the body harness...only doing the driver side so far. I didn't take the fender off or anything tho. I jacked up the driver side, took off the wheel and the inner fender liner, and am doing it that way. It'll be easy on the driver side, since there are only 2 connections and a ground wire. The ground wire is behind the headlight, but I still got it off no problem, then there's a connection to the headlight, and then one more in the engine fenderwell area (under the popcharger-a 2 wire connector)
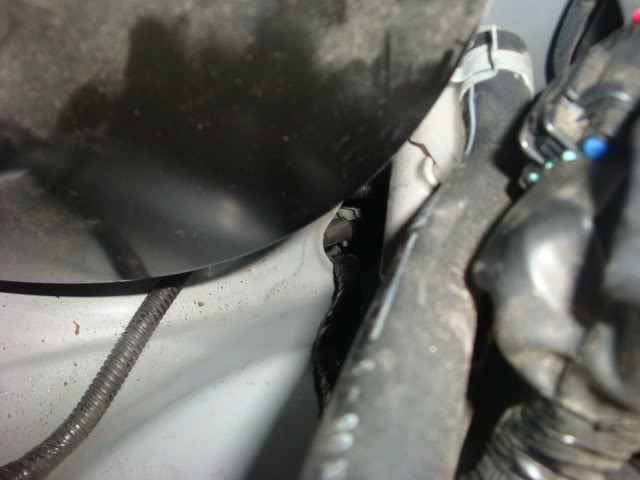
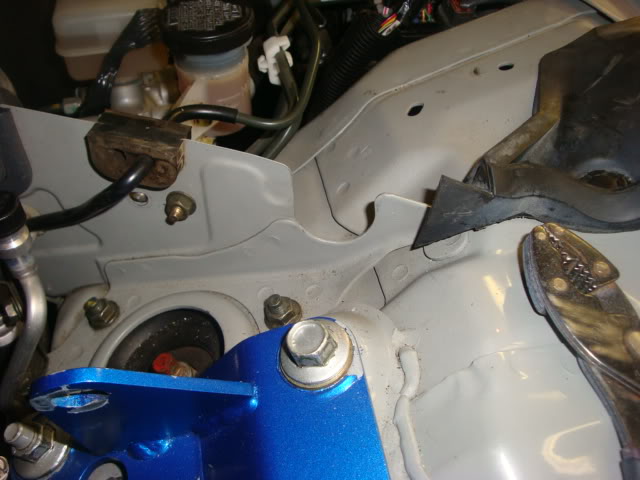
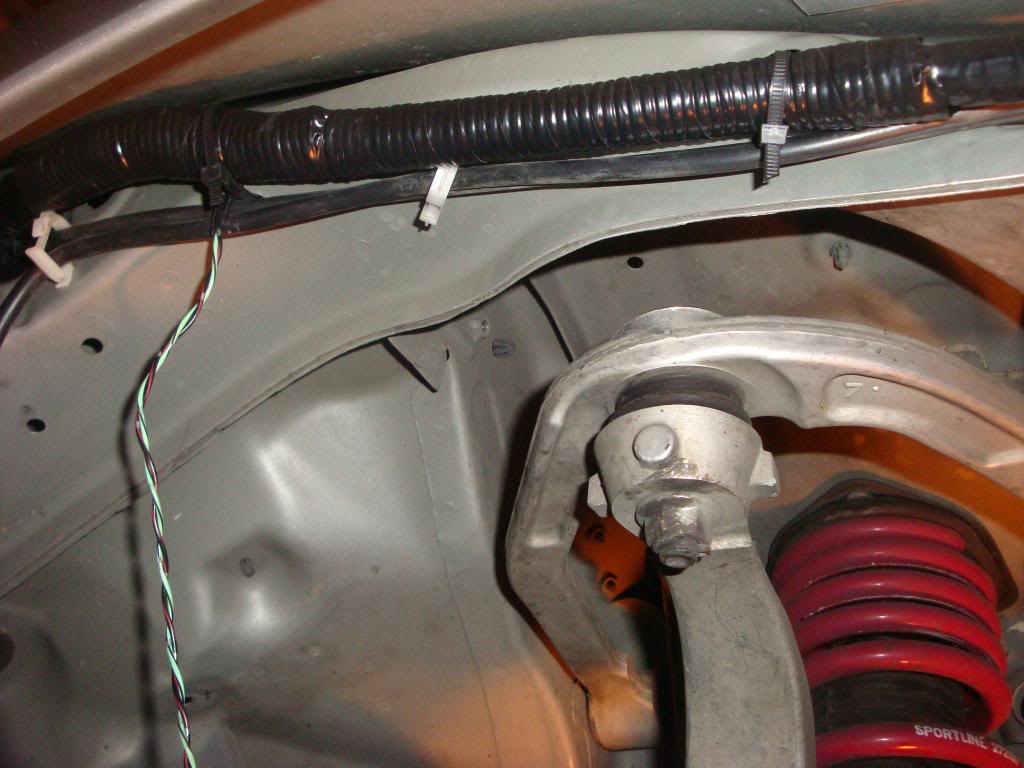
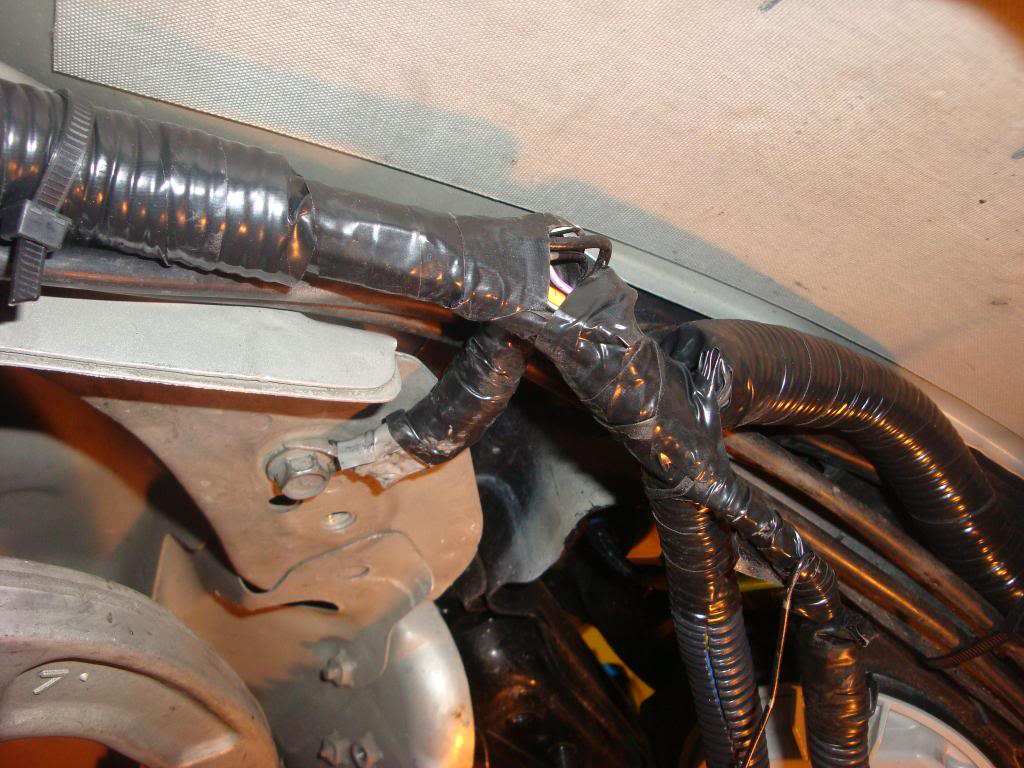
So, moving on...there's a fat rubber grommet that comes out from the brake fluid cover area. I took that out, disconnected the connectors and ran them under the fenderwell, but above the plastic fender liners.
In this pic there is a hole (you can barely see) in the very bottom under the master cylinder...this is where I ran my wires out at
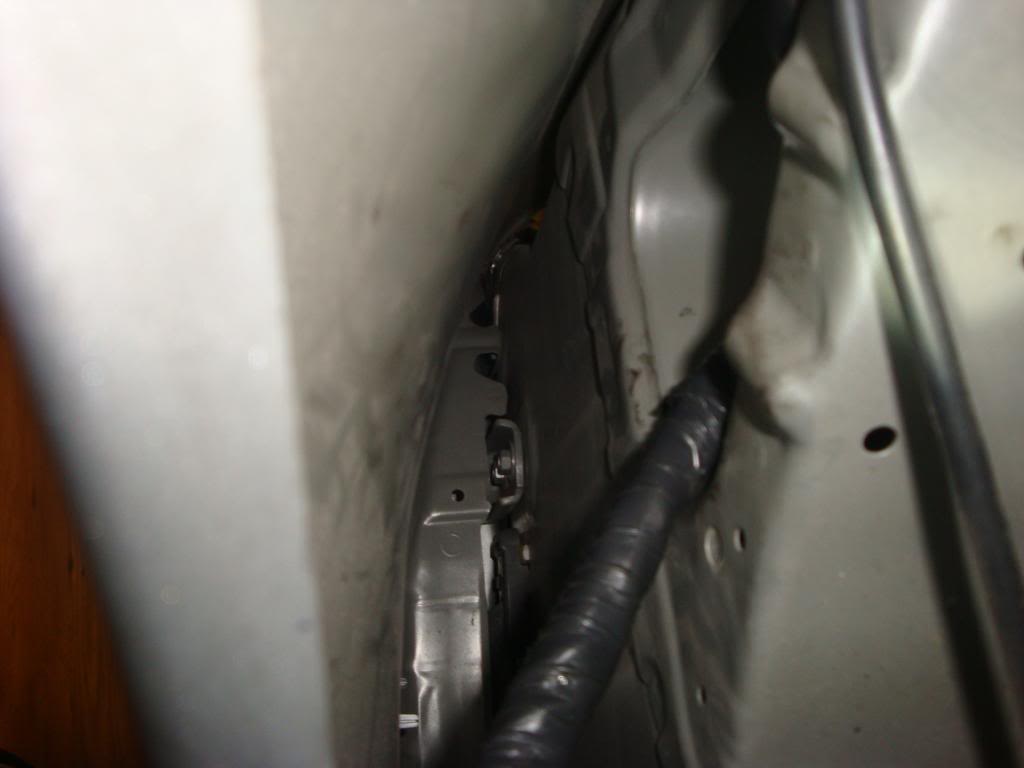
And a view from the fenderwell area where the harness comes out at
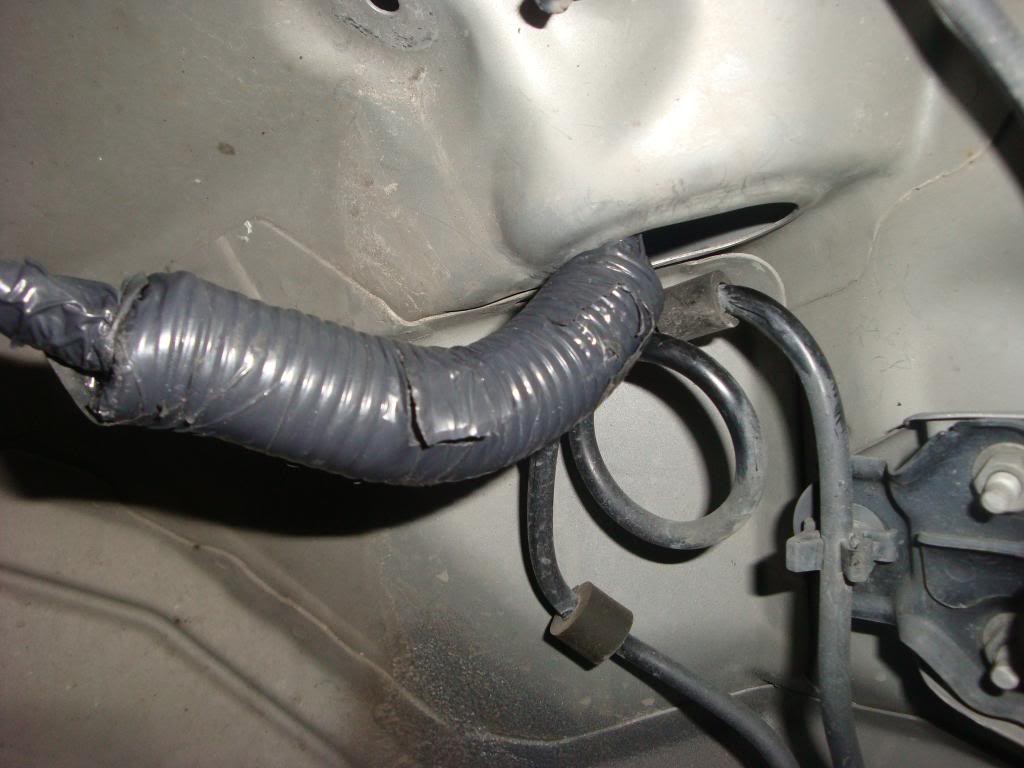
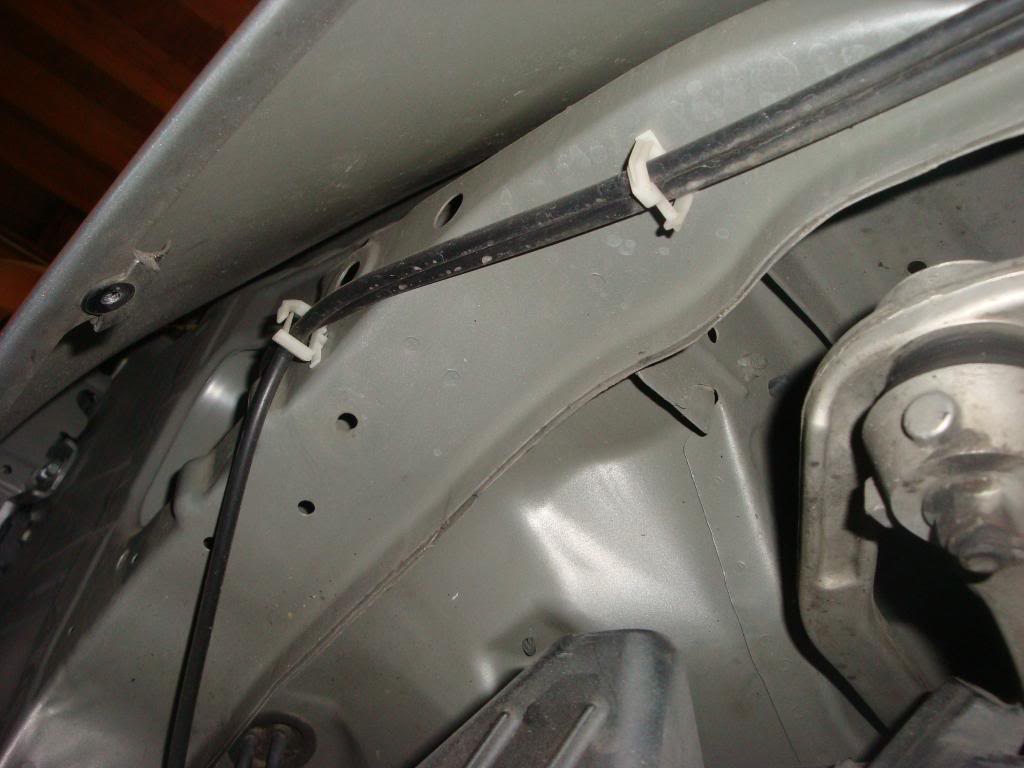
And there are some convenient plastic retainers that the hood release cable runs through...Ill run my harness through them as well.
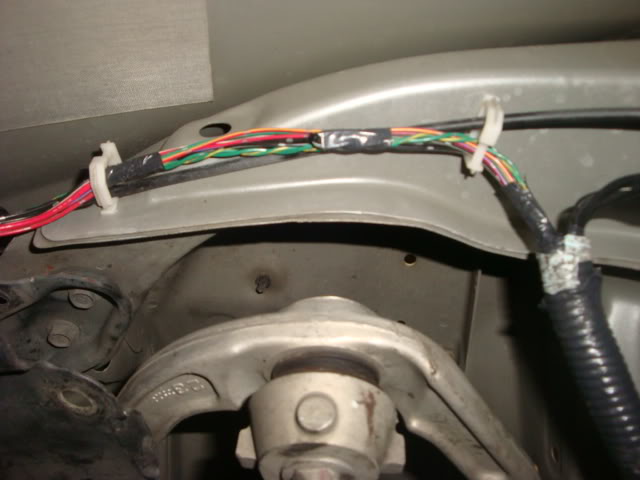
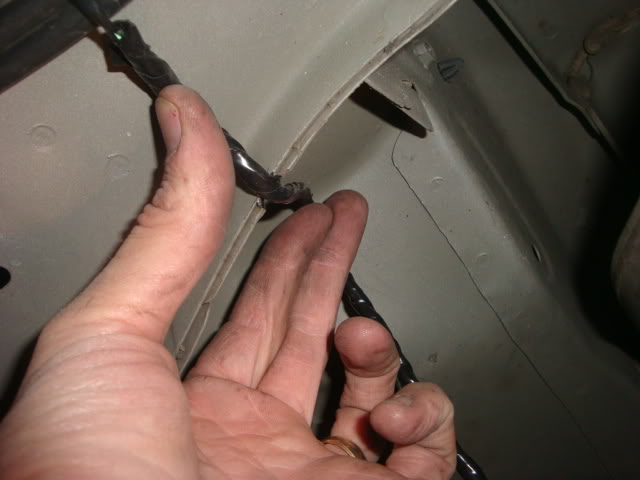
The bare wires ran through this ugly plastic thing...they will be loomed and taped up.
I won't have to cut any wires or anything on this side, the hard part was jacking up the car.
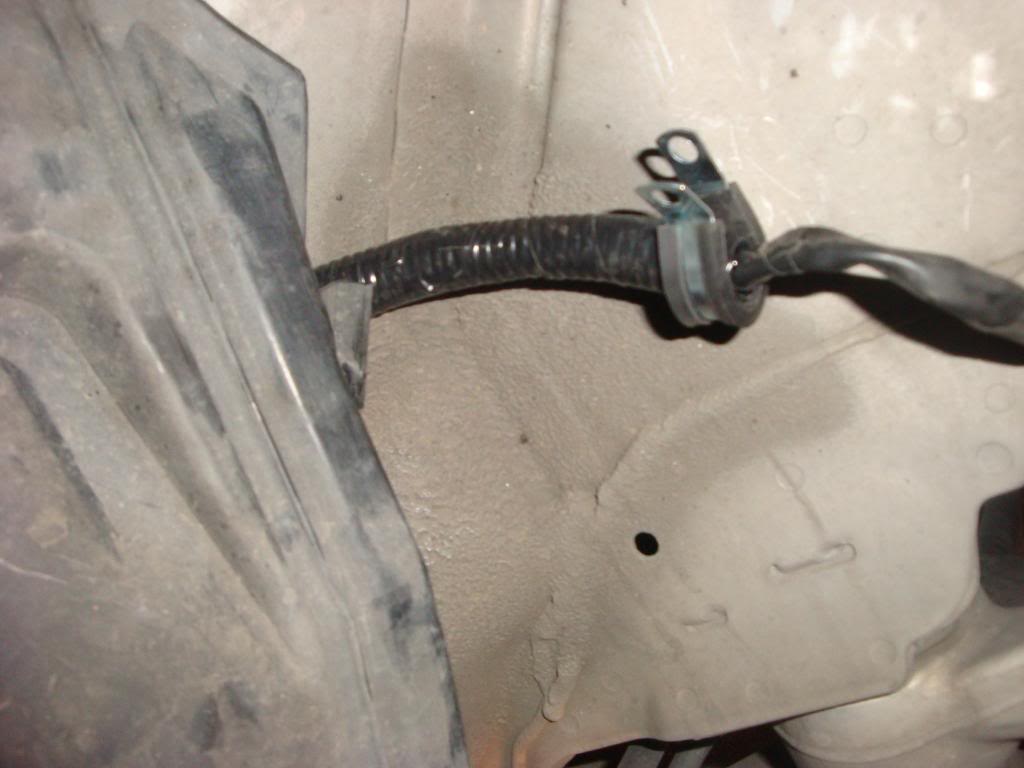
Here's a pic of the little 2 wire connector that was under the air filter box or popcharger or whatever you got as far as intakes go. I'll post more pics. later
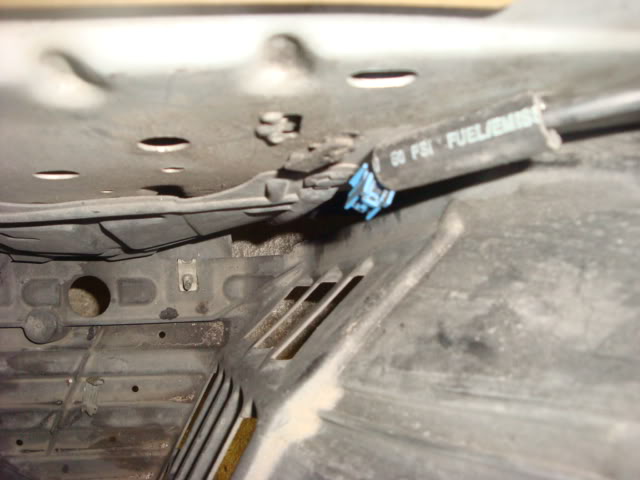
So, moving on...there's a fat rubber grommet that comes out from the brake fluid cover area. I took that out, disconnected the connectors and ran them under the fenderwell, but above the plastic fender liners.
In this pic there is a hole (you can barely see) in the very bottom under the master cylinder...this is where I ran my wires out at
And a view from the fenderwell area where the harness comes out at
And there are some convenient plastic retainers that the hood release cable runs through...Ill run my harness through them as well.
The bare wires ran through this ugly plastic thing...they will be loomed and taped up.
I won't have to cut any wires or anything on this side, the hard part was jacking up the car.
Here's a pic of the little 2 wire connector that was under the air filter box or popcharger or whatever you got as far as intakes go. I'll post more pics. later
Last edited by FATPUBUS; Jan 17, 2011 at 01:53 PM.

Registered User
Joined: Sep 2008
Posts: 908
Likes: 28
From: Winnipeg, MB

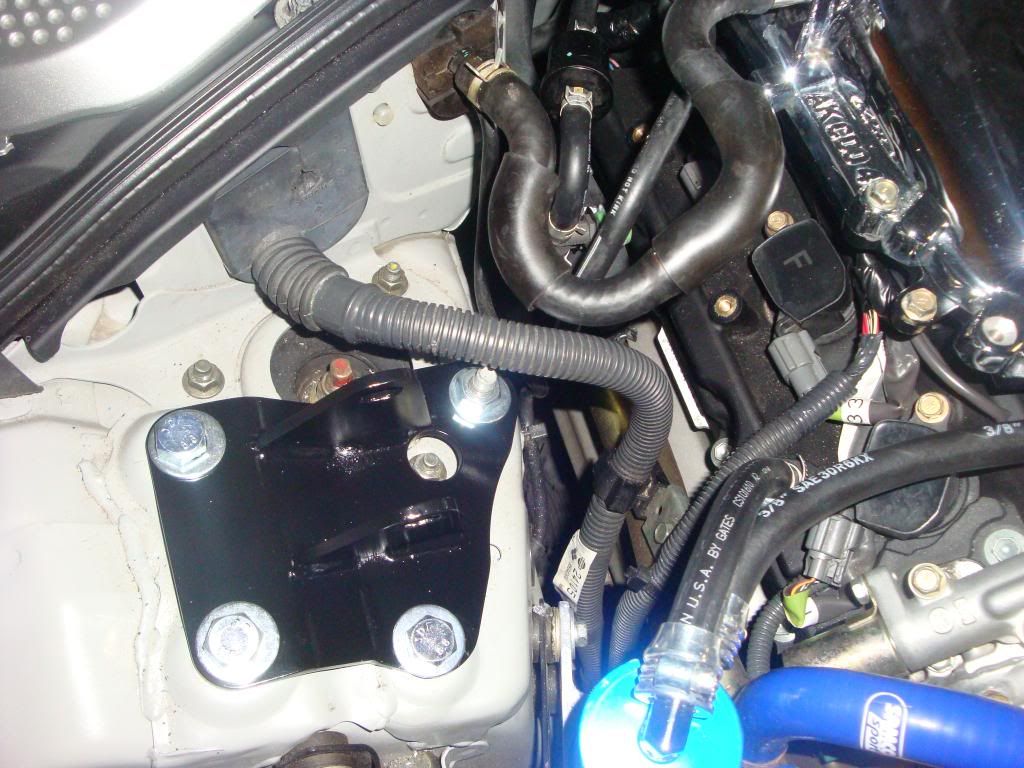
Rotate the tube with your MAF sensor in it so that the harness is hidden on the bottom.
Maf tube down is on the list as well! The driver side is finished up. All in all it was pretty easy.
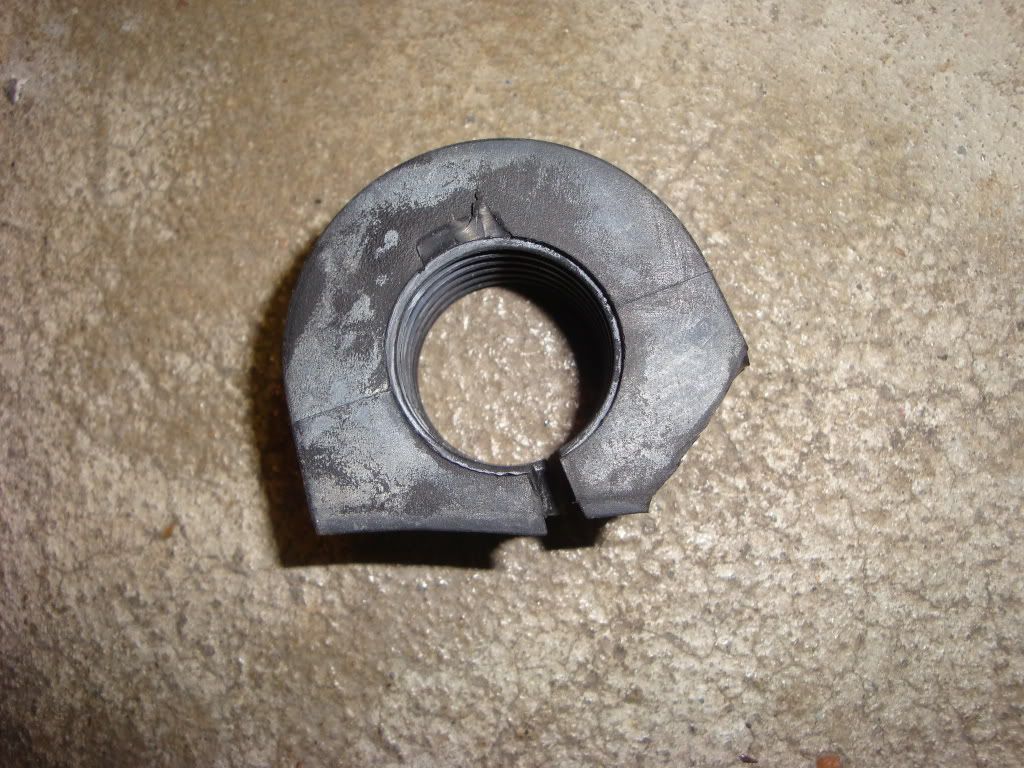
Ok, so remember the rubber grommet that the harness ran through from the brake cover. I cut a corner off of mine and used it to run the harness through that hole in the bottom of the master cylinder area. Fit really tight, but you can get it in there no worries.This pic is after I cut it.
Before

After
And that 2 wire connector pictured earlier turns out to be the wheel speed sensor which was a bit of a challenge without cutting and extending the wire. I didn't take a pic of how I did it, but it is run along the arm that the upper and lower control arms are connected to..can't remember what it's called . Anyway it's zip tied along there and then secured to the top of the fenderwell with a bolt. You don't see it through the wheel, and it isn't rubbing anything, and I can turn the wheels lock to lock no problem, so I may just leave it like that.
Moving along...the ground wire that was bolted behind the headlight I moved of course. The hole on the left I ran a bolt through and hooked my ground up here. The hole on the right is where one of the plastic clips secure the the battery cover trim ring.
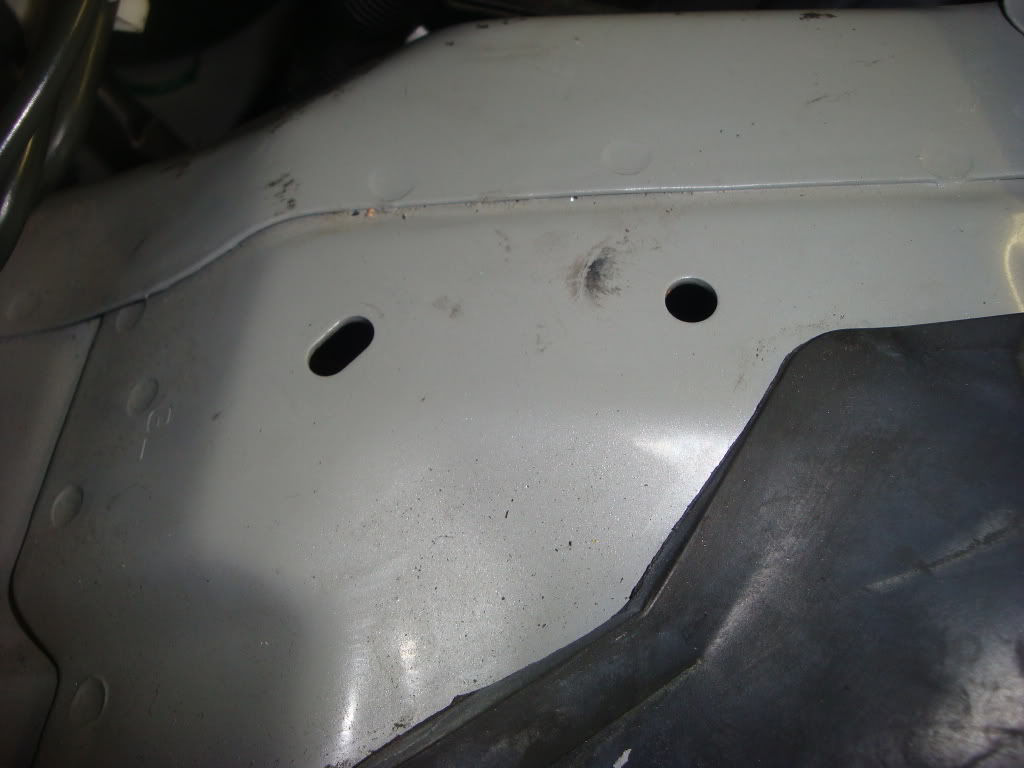
Another shot of my ground point. The one on the left that's elongated.
All back together and done!

Ok, so remember the rubber grommet that the harness ran through from the brake cover. I cut a corner off of mine and used it to run the harness through that hole in the bottom of the master cylinder area. Fit really tight, but you can get it in there no worries.This pic is after I cut it.
Before
After
And that 2 wire connector pictured earlier turns out to be the wheel speed sensor which was a bit of a challenge without cutting and extending the wire. I didn't take a pic of how I did it, but it is run along the arm that the upper and lower control arms are connected to..can't remember what it's called
. Anyway it's zip tied along there and then secured to the top of the fenderwell with a bolt. You don't see it through the wheel, and it isn't rubbing anything, and I can turn the wheels lock to lock no problem, so I may just leave it like that.Moving along...the ground wire that was bolted behind the headlight I moved of course. The hole on the left I ran a bolt through and hooked my ground up here. The hole on the right is where one of the plastic clips secure the the battery cover trim ring.
Another shot of my ground point. The one on the left that's elongated.
All back together and done!

Registered User
Joined: Sep 2008
Posts: 908
Likes: 28
From: Winnipeg, MB
That looks so much better! Good Job!
Once it's not -30 degrees outside I'll venture into the garage and wire tuck my body harnesses.
I've got a good friend who owns a body shop, so I'm seriously considering shaving and smoothing out the shock towers and all the holes left by the wire tuck..
Once it's not -30 degrees outside I'll venture into the garage and wire tuck my body harnesses.
I've got a good friend who owns a body shop, so I'm seriously considering shaving and smoothing out the shock towers and all the holes left by the wire tuck..
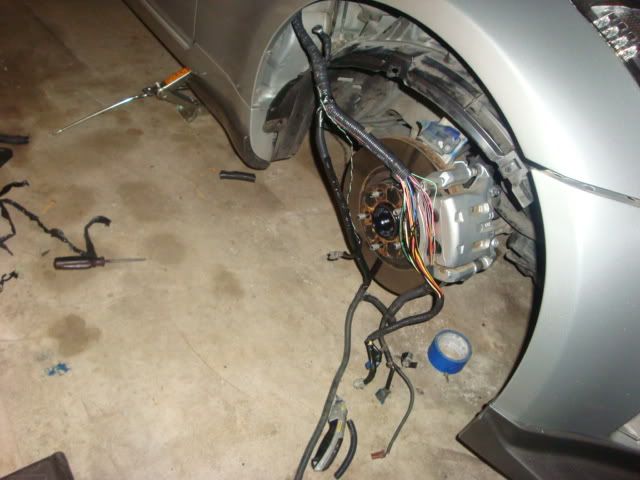
So on to the passenger side. This one was fairly straightforward as well, but way more of a PITA! First you have to deal with taking the front bumper off, or at least most of the passenger side. The wire harness holds 2 ground wires, a headlight connection, 3 connections to the washer fluid tank...WTF?!?, a wheel speed sensor, the fan on the passenger side, horns (2), and a couple other things behind the grill. So anyway, movin along. I again didn't remove the fender, only the wheel liner. The battery, wiper cowl were taken out tho, and after I found all the connections for the harness the fun began
I finally fished everything out from their locations and had the bundle on top of the engine. Once that was done, I went through the fenderwell again...this is why we take the battery out. There is a hole big enough to get the harness through. It gets to be a pita with all the plastic connections being bunched together, but it can be done. It was at this point I started to figure where and how to route the wires without having to cut anything...which I accomplished with patience...and 2317 F bombs lol.
Here's the hole where the harness comes out
And where I decided to run it. Thse two hoses are washer fluid lines.
Harness pulled through
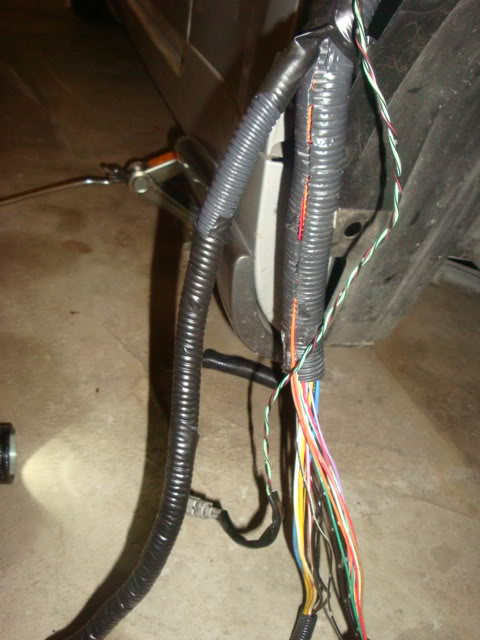
Some of the loom had to be pulled off, but not all. The fan harness was too short as well as the horns and everything in the grill area, and one skinny ground wire (the one in the battery compartment). So if you pull enough of the loom apart, you can get enough of each harness that was too short out, re-loom it and it'll be ok.
With that done and everything loomed back up, I started to route the newly re-loomed harness. To secure the harness that far up in the fender area, I drilled 2 small holes that were near holes that were there from the factory to run zip ties through.

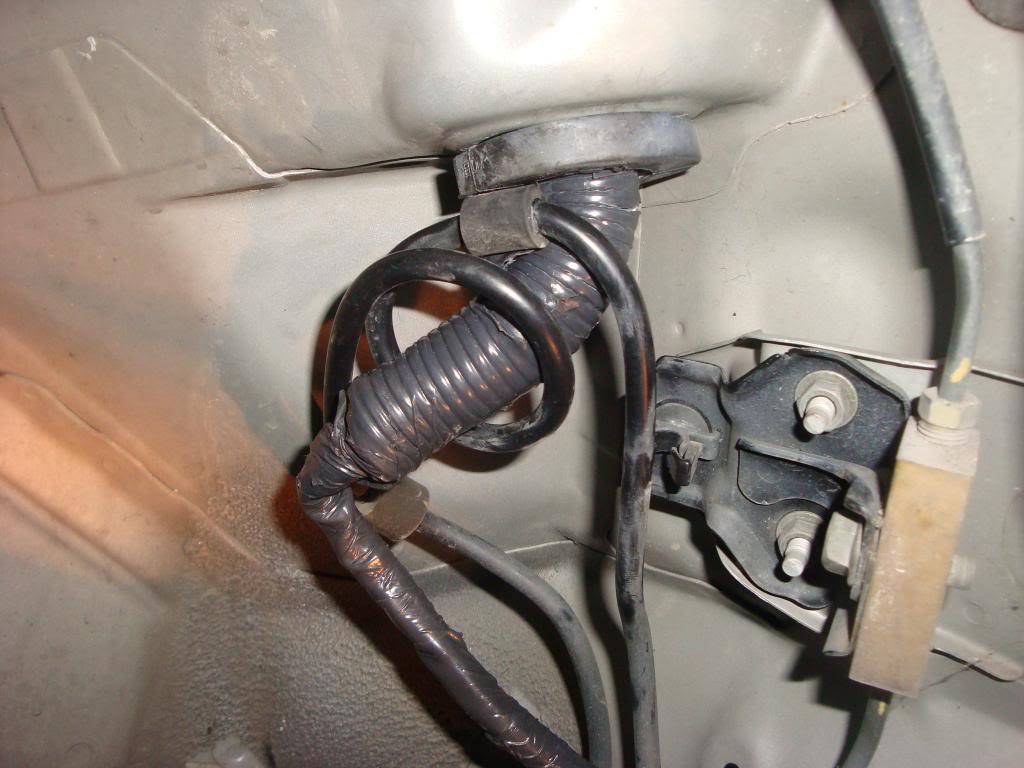
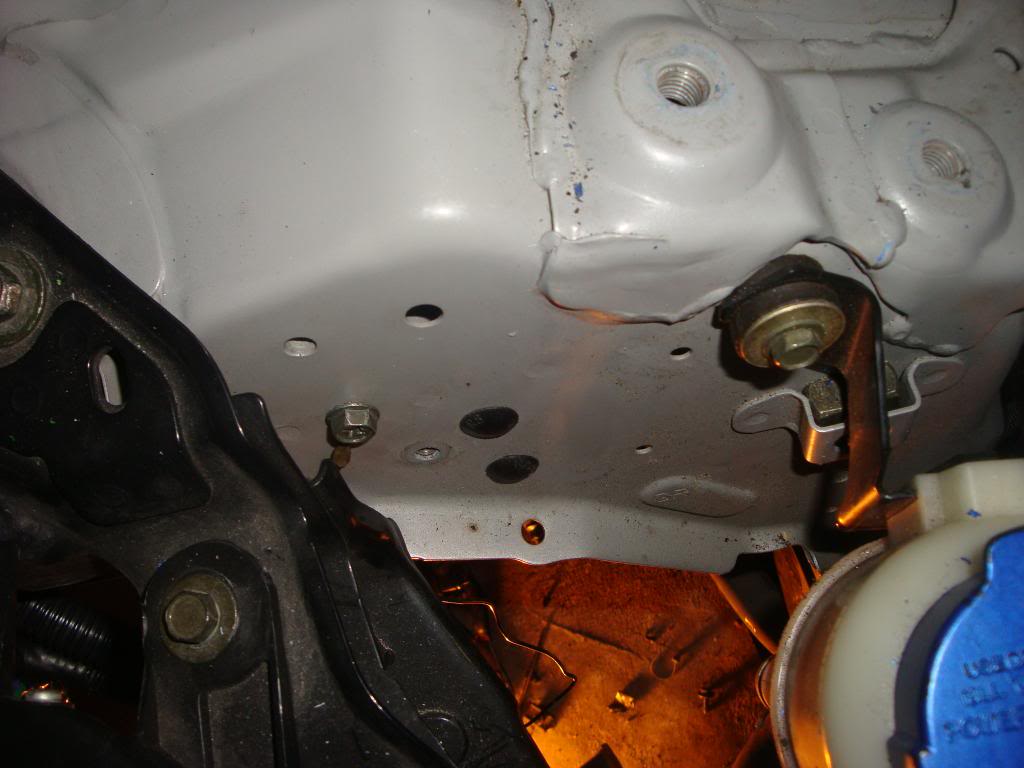
One of my new grounding locations...this is actually where the fatter ground was
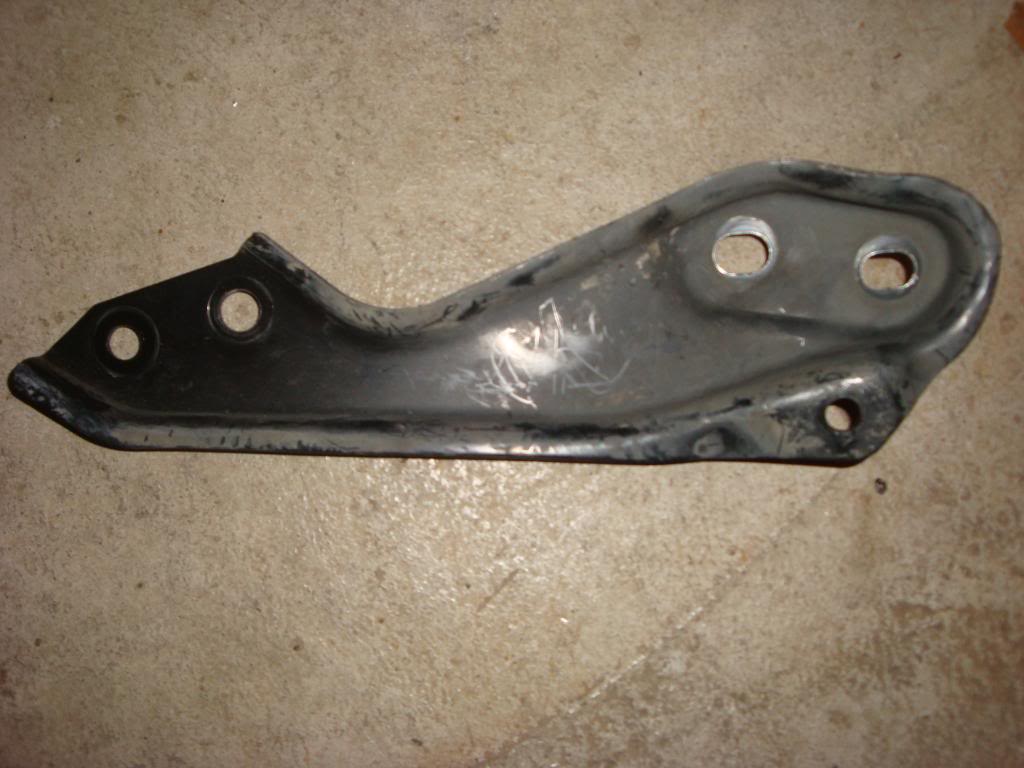
And I had to cut this bracket to put the other ground in place of one of it's bolt holes
The other ground in one of the bolt holes the bracket bolts up to.

The last one to work with was the wheel speed sensor. This 2 wire connection hanging down.
I dremeled a U shape in one of the pinch welds for the speed sensor wire to stay put in. I didn't want the fender liner putting too much pressure on the loom and wire, so I made a nice pocket for it to sit in.
Wires back in their places, uncut, and zip tying to wherever I can

More updates and pics later...gotta give the kid a bath lol.
I finally fished everything out from their locations and had the bundle on top of the engine. Once that was done, I went through the fenderwell again...this is why we take the battery out. There is a hole big enough to get the harness through. It gets to be a pita with all the plastic connections being bunched together, but it can be done. It was at this point I started to figure where and how to route the wires without having to cut anything...which I accomplished with patience...and 2317 F bombs lol.
Here's the hole where the harness comes out
And where I decided to run it. Thse two hoses are washer fluid lines.
Harness pulled through
Some of the loom had to be pulled off, but not all. The fan harness was too short as well as the horns and everything in the grill area, and one skinny ground wire (the one in the battery compartment). So if you pull enough of the loom apart, you can get enough of each harness that was too short out, re-loom it and it'll be ok.
With that done and everything loomed back up, I started to route the newly re-loomed harness. To secure the harness that far up in the fender area, I drilled 2 small holes that were near holes that were there from the factory to run zip ties through.
One of my new grounding locations...this is actually where the fatter ground was
And I had to cut this bracket to put the other ground in place of one of it's bolt holes
The other ground in one of the bolt holes the bracket bolts up to.
The last one to work with was the wheel speed sensor. This 2 wire connection hanging down.
I dremeled a U shape in one of the pinch welds for the speed sensor wire to stay put in. I didn't want the fender liner putting too much pressure on the loom and wire, so I made a nice pocket for it to sit in.
Wires back in their places, uncut, and zip tying to wherever I can
More updates and pics later...gotta give the kid a bath lol.
Ok, the kid is clean and in bed. Couple more things to cover. First is the wheel speed sensor wire. That's the one that I dremeled out a pocket for in the pinch weld because I'm running it out the wheel well liner...Anyway, I also notched out a spot in the fender liner so there won't be any pressure on it at all. Also you'll see a convenient little hole in the pic. I put a bracket to secure the wiring to that and when I find a screw that's just a bit bigger than the hole, I'll force it in there so it stays tight.
The speed sensor has 3 different points where it is secured with rubber cone shaped things...the inner fender, strut, and one in the spindle area I think. I only need to remove the one from the inner fender area, so I just zip tied it to yet another convenient hole.

The plastic retainer secured it to another point in the inner fender area...I just pulled it out, and...you guessed it...put it in another convenient hole. Convenient holes everywhere! Wish my wifes hole was like that lol.
 .
.
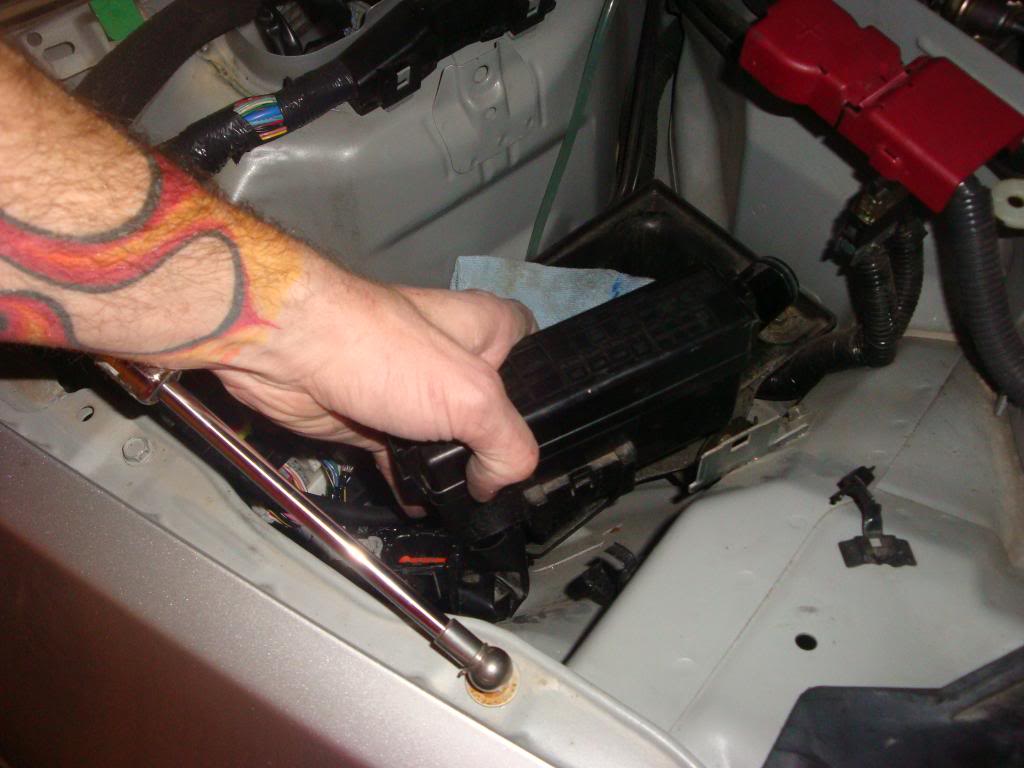
Last is back inside the battery compartment. Not much to do here, but since I had to pull the harness through as much as possible, this box had to move a couple inches as well. I'll just velcro it back to the wall it was mounted on.
The fender liner has a bit of pressure on it from the harness being so bulky, so these 2 holes where some of those plastic retainers go do not line up...oh well I say...I'll figure those out in a bit. They're only off about 1/2-1'' anyway.

Another pic of newly routed harness
Done and done!
[IMG]http://i679.photobucket.com/albums/vv156/tonymarcia/OurPictures2249.jpg[/IMG
All in all to do the whole thing...probably 20 hours. The whole car. It was all kinda trial and error tho, and I have a 3 year old and 3 WEEK old at home, so I had to do what I could when I had time. Hope this can make it easier for someone else who wants to tackle it. My best advise would be to remove the fenders!!! Wish I did!
Idunno what I'll do with the battery harness, but I'll fugure that one out too and post here when I do. Or if you know, post it here so I can do it.
It looks cool, but it sucked and I dunno if I'd wanna do it again. Good luck to those who wanna tackle it
The speed sensor has 3 different points where it is secured with rubber cone shaped things...the inner fender, strut, and one in the spindle area I think. I only need to remove the one from the inner fender area, so I just zip tied it to yet another convenient hole.
The plastic retainer secured it to another point in the inner fender area...I just pulled it out, and...you guessed it...put it in another convenient hole. Convenient holes everywhere! Wish my wifes hole was like that lol.
.Last is back inside the battery compartment. Not much to do here, but since I had to pull the harness through as much as possible, this box had to move a couple inches as well. I'll just velcro it back to the wall it was mounted on.
The fender liner has a bit of pressure on it from the harness being so bulky, so these 2 holes where some of those plastic retainers go do not line up...oh well I say...I'll figure those out in a bit. They're only off about 1/2-1'' anyway.
Another pic of newly routed harness
Done and done!
[IMG]http://i679.photobucket.com/albums/vv156/tonymarcia/OurPictures2249.jpg[/IMG
All in all to do the whole thing...probably 20 hours. The whole car. It was all kinda trial and error tho, and I have a 3 year old and 3 WEEK old at home, so I had to do what I could when I had time. Hope this can make it easier for someone else who wants to tackle it. My best advise would be to remove the fenders!!! Wish I did!
Idunno what I'll do with the battery harness, but I'll fugure that one out too and post here when I do. Or if you know, post it here so I can do it.
It looks cool, but it sucked and I dunno if I'd wanna do it again. Good luck to those who wanna tackle it
Last edited by FATPUBUS; Jan 20, 2011 at 05:43 PM.


Where do you get that "meshy" looking wire loom and what is it called? I've seen it used many times to re-loom but I can never find it. I wanna do a minor tuck and wrap some of the visible wires in that (I think it looks better than the ribbed plastic crap). TIA.


I would also like to know?

I haven't messed with the battery harness yet....no time as of late. kids... lol. But after looking at it, it seems it would be fairly easy and you'd just need a longer positive cable and a way to reroute it. Rerouting would be fairly easy I think.

Registered User
Joined: Sep 2008
Posts: 908
Likes: 28
From: Winnipeg, MB
I don't recall seeing any when I did my engine harness tuck last fall, but it was a while ago. I drove the car for a few months after before parking it for the winter and had no issues.
Cool. I ended up shortening the majority of the harness today and eliminating things I'm not using... it's in a 240sx with a VQ, but nonetheless a VQ... The only shielded wire groupings I found were 3 for the TB and 1 for the knock sensor. These are the only ones I haven't shortened. I'll probably crack them open tomorrow and take a peak. I'll also take pics when I'm done for you guys.

