

Carbon Fiber Vinyl Pattern Wrap Thread


 04-10-2009, 08:41 PM
#323
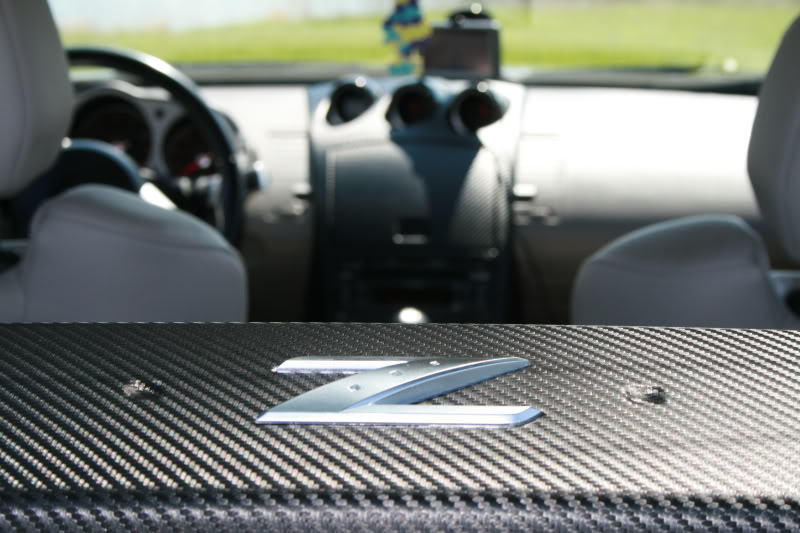
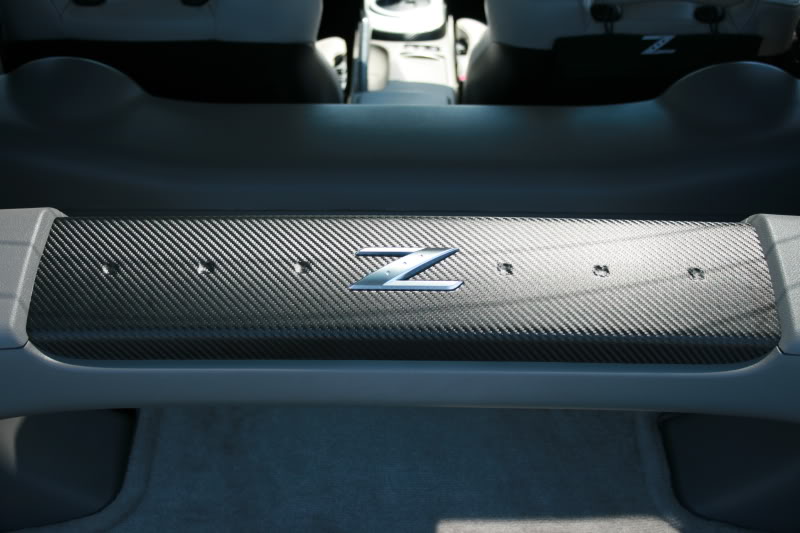
Very nice Duskywing, but I may suggest that you should wrap the cubby door too, so your center console wont look out of place. I removed all the CF fabric on my center console, but leave the cubby door alone. It looks very nice and goes with the CF on the shifter and other small trim inside the car.
04-10-2009, 08:52 PM
#324
Hardest Setting

iTrader: (3)
Join Date: Feb 2008
Location: MexiCali dodging potholes
Posts: 13,406
Received 130 Likes
on
102 Posts
Just finish reading this whole thread...
I'm always one for the real thing yet this is way better...
way way better if done tastefully
waiting for more pics of +07 interiors to be fully hooked into considering this..
just for three pieces
the two black plastic pieces & the silver trim around the shifter
I'm always one for the real thing yet this is way better...
way way better if done tastefully
waiting for more pics of +07 interiors to be fully hooked into considering this..
just for three pieces
the two black plastic pieces & the silver trim around the shifter
04-15-2009, 04:47 PM
#325
Registered User
iTrader: (87)

Join Date: Dec 2006
Location: Lexington, KY
Posts: 942
Likes: 0
Received 0 Likes
on
0 Posts
Hey guys,
I got soni to do this wrapping for me. His work is amazing. If you all want to have this done and you're afraid to attempt it yourself, contact Soni. He is a great guy and his work is top notch. He even overnighted my parts from Canada at no extra charge! I will have some better pictures in the future. The cubby door is a bit tight and required some trimming. I also had to trim down the inside of the AC control circles, but that was simple.
I also did the rear strut cover.
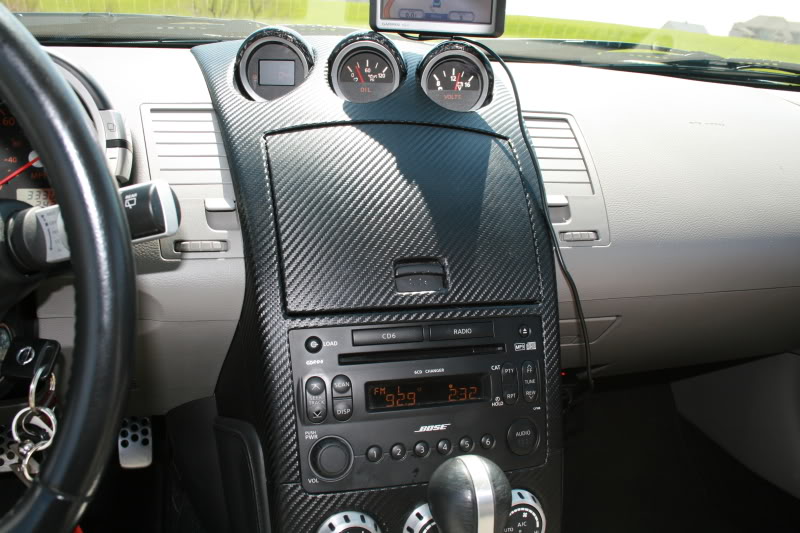
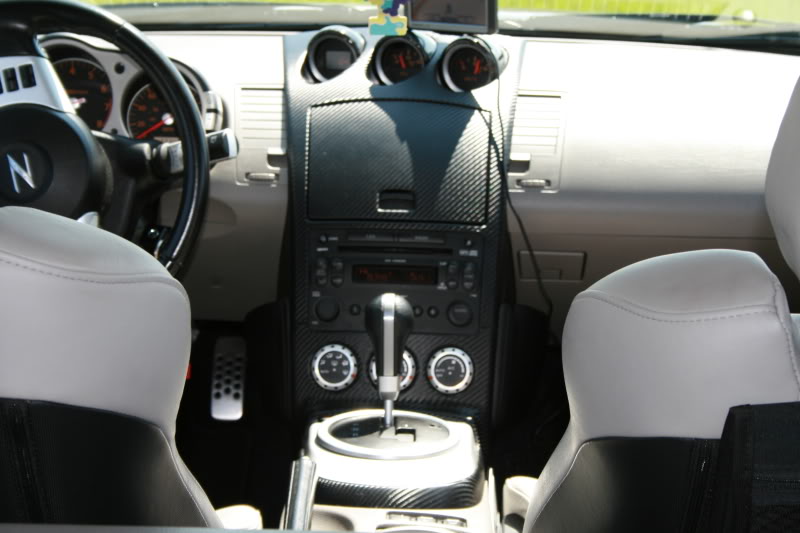
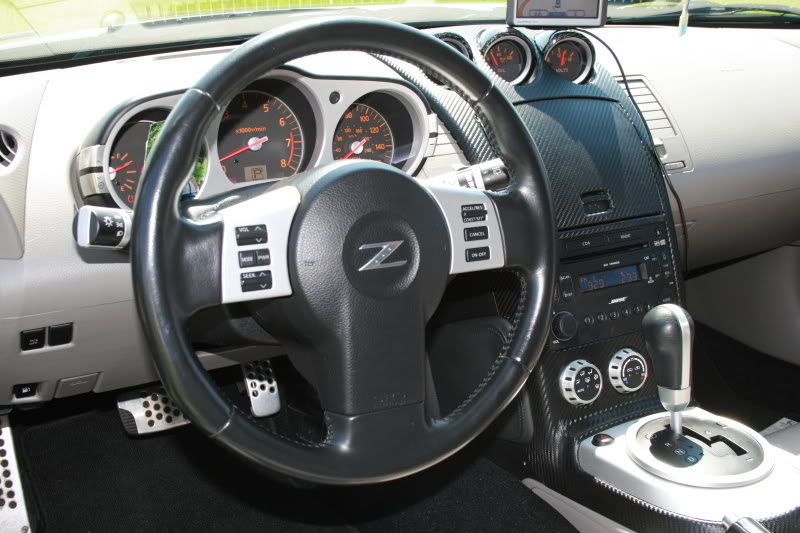
Last edited by abushong504; 04-15-2009 at 04:49 PM.
04-15-2009, 08:18 PM
#327
Registered User
iTrader: (87)
Join Date: Dec 2006
Location: Lexington, KY
Posts: 942
Likes: 0
Received 0 Likes
on
0 Posts
here is the link i followed to remove the rear.
https://my350z.com/forum/body-interi...and-paint.html
https://my350z.com/forum/body-interi...and-paint.html

 04-16-2009, 08:40 PM
#329
Registered User
iTrader: (4)

Join Date: Mar 2006
Location: south-central KY
Posts: 1,204
Likes: 0
Received 0 Likes
on
0 Posts
Hey guys,
I got soni to do this wrapping for me. His work is amazing. If you all want to have this done and you're afraid to attempt it yourself, contact Soni. He is a great guy and his work is top notch. He even overnighted my parts from Canada at no extra charge! I will have some better pictures in the future. The cubby door is a bit tight and required some trimming. I also had to trim down the inside of the AC control circles, but that was simple.
I got soni to do this wrapping for me. His work is amazing. If you all want to have this done and you're afraid to attempt it yourself, contact Soni. He is a great guy and his work is top notch. He even overnighted my parts from Canada at no extra charge! I will have some better pictures in the future. The cubby door is a bit tight and required some trimming. I also had to trim down the inside of the AC control circles, but that was simple.
 04-17-2009, 03:58 PM
#332
Banned

Join Date: Mar 2008
Location: puerto rico
Posts: 2,787
Likes: 0
Received 0 Likes
on
0 Posts
S-w-w-w-e-e-t! Great job, dude!
____________________________________________________________ __________________
Bone stock 'O4 Touring Coupe: NO feathering! NO oil-consumption issues! F-l-a-w-l-e-s-s AT!
____________________________________________________________ __________________
Bone stock 'O4 Touring Coupe: NO feathering! NO oil-consumption issues! F-l-a-w-l-e-s-s AT!
04-26-2009, 06:15 PM
#334
Registered User
iTrader: (1)

Join Date: Oct 2008
Location: Barrie, ON, CDN
Posts: 409
Likes: 0
Received 0 Likes
on
0 Posts
Ugh I should stick to design and stop getting my hands dirty. So I started this mid day, all seemed to be going fairly well and and I was figuring it all out or so I thought until I got to the guages. What a mess it turned into, I had cut a hole for the guage too long so it showed part of the dash, then I was having trouble getting it to fit nicely and around the guages. Eventually it was just such a mess the best thing I could do was tear it all off, which I did. The glue doesn't come off that easy with alcohol, it took me 2 hours with USP 90% to get it cleaned up and even still it doesn't look the same. There is white blemished everywhere, it is almost like the glue tore off some of the coating/material on the center console.
Soooo since it won't clean up like new again, I'm taking another shot at it tomorrow and removing all the guages and pods so I have a nice surface to work with. Oh and my shift **** is hella hard to get off, I put vice grips on the bottom and everything and still it wouldn't budge.
I now kinda wish I never touched my center console , props to you guys that made this work!!
Soooo since it won't clean up like new again, I'm taking another shot at it tomorrow and removing all the guages and pods so I have a nice surface to work with. Oh and my shift **** is hella hard to get off, I put vice grips on the bottom and everything and still it wouldn't budge.
I now kinda wish I never touched my center console
, props to you guys that made this work!!
04-27-2009, 05:19 AM
#335
Registered User

Join Date: Feb 2009
Location: Canada
Posts: 37
Likes: 0
Received 0 Likes
on
0 Posts
Ugh I should stick to design and stop getting my hands dirty. So I started this mid day, all seemed to be going fairly well and and I was figuring it all out or so I thought until I got to the guages. What a mess it turned into, I had cut a hole for the guage too long so it showed part of the dash, then I was having trouble getting it to fit nicely and around the guages. Eventually it was just such a mess the best thing I could do was tear it all off, which I did. The glue doesn't come off that easy with alcohol, it took me 2 hours with USP 90% to get it cleaned up and even still it doesn't look the same. There is white blemished everywhere, it is almost like the glue tore off some of the coating/material on the center console.
Soooo since it won't clean up like new again, I'm taking another shot at it tomorrow and removing all the guages and pods so I have a nice surface to work with. Oh and my shift **** is hella hard to get off, I put vice grips on the bottom and everything and still it wouldn't budge.
I now kinda wish I never touched my center console, props to you guys that made this work!!
Soooo since it won't clean up like new again, I'm taking another shot at it tomorrow and removing all the guages and pods so I have a nice surface to work with. Oh and my shift **** is hella hard to get off, I put vice grips on the bottom and everything and still it wouldn't budge.
I now kinda wish I never touched my center console
, props to you guys that made this work!! , I've met him before and he seems like a real nice guy. Fabric really isn't in my line of work to say the least lol.

 04-29-2009, 03:16 PM
#339
Registered User
iTrader: (1)
Join Date: Oct 2008
Location: Barrie, ON, CDN
Posts: 409
Likes: 0
Received 0 Likes
on
0 Posts
So I'm on the last piece, the cubby hole...
How on Earth do you take the button assembly off the cubby hole door. I have everything apart, the door in my hand but I can't get the button off the door. Or the sheet metal bracket at the top of the door off either but it doesn't look like it comes off.
Any help would be greatly appreciated so I can wrap this up tonight!