When you click on links to various merchants on this site and make a purchase, this can result in this site earning a commission. Affiliate programs and affiliations include, but are not limited to, the eBay Partner Network.
had Sam start building me the sequential light up led dome light.. totally needless but fk it.. this is what I do. lol
You can speed up or slow down the led lighting sequence, but I will set it to fast so it appears fluid.. it also incorporates a single rgb led into each dome light so you can "mood light" as u drive w out being super obnoxious.. a nice red glow like the choppah in Predator lol:
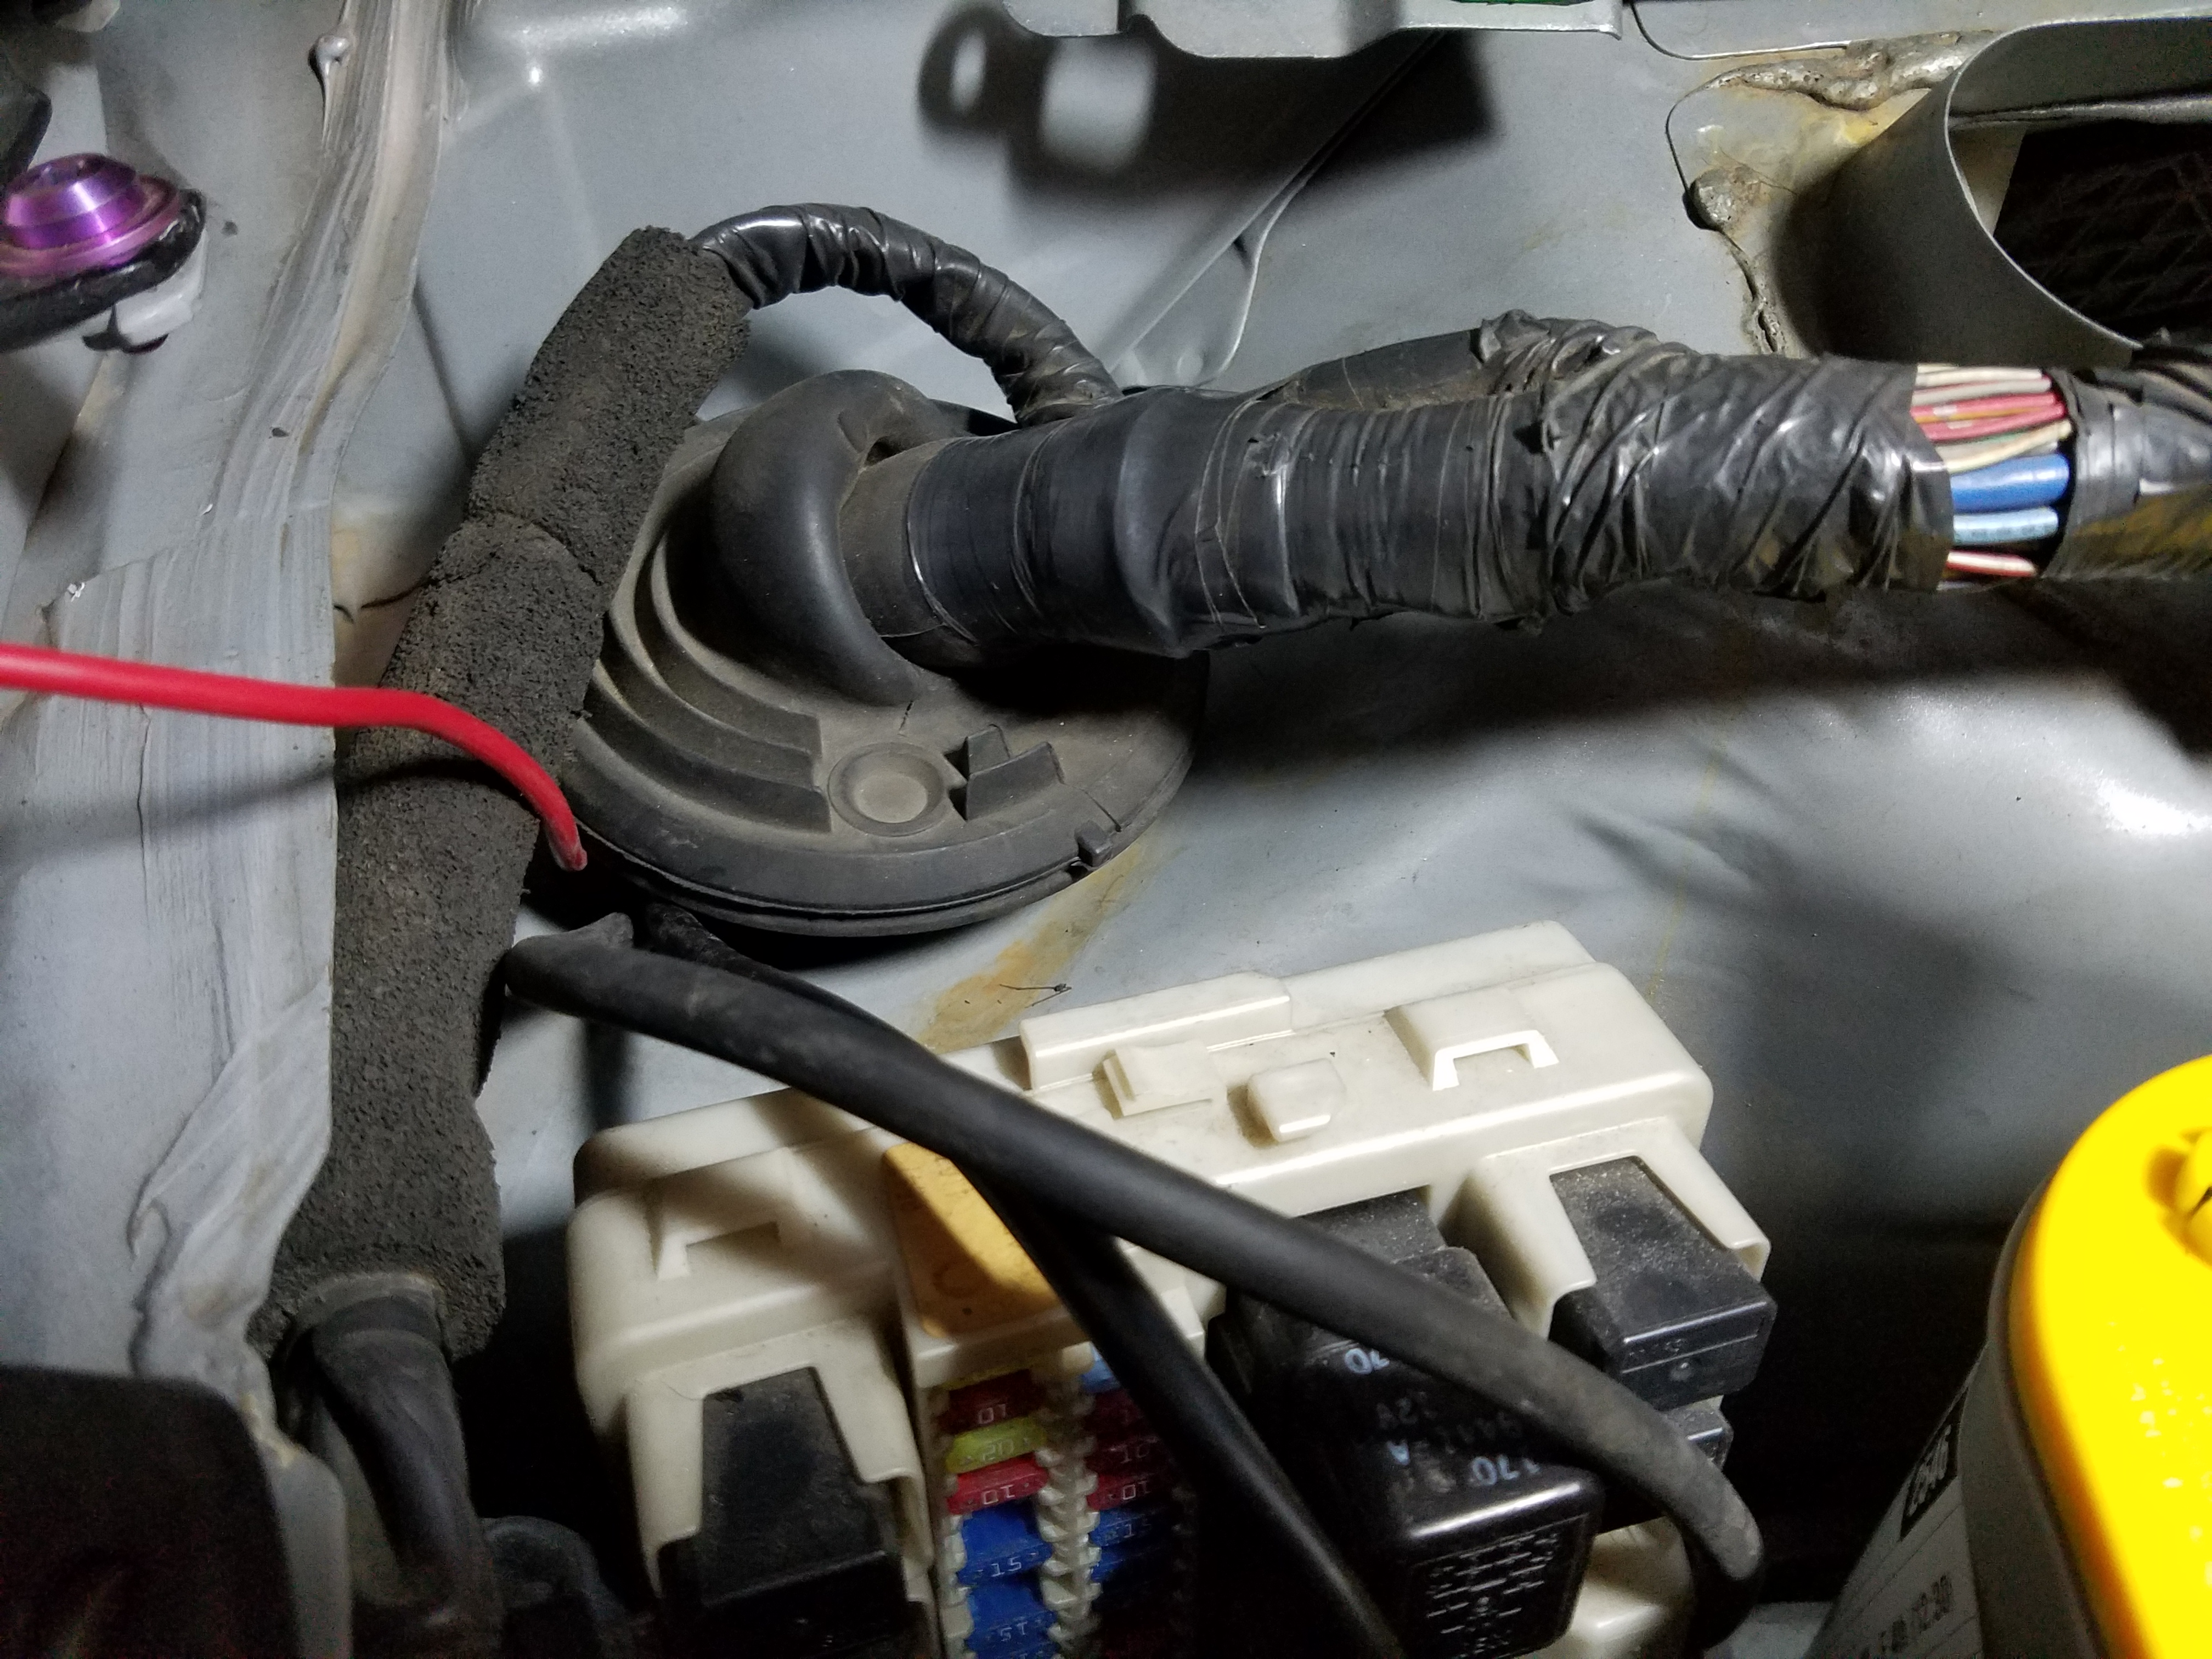
See, this is the kind of SHT I'm tired of.. this s what you get when you pay shops to install stuff vs doing it yourself.
why.
WHY pop the grommet completely off and just run vacuum lines and wiring for my boost gauge and solenoid when you can just pop a hole in the rubber and do it right the first time.. smh.
Needless to say, this has now been corrected.
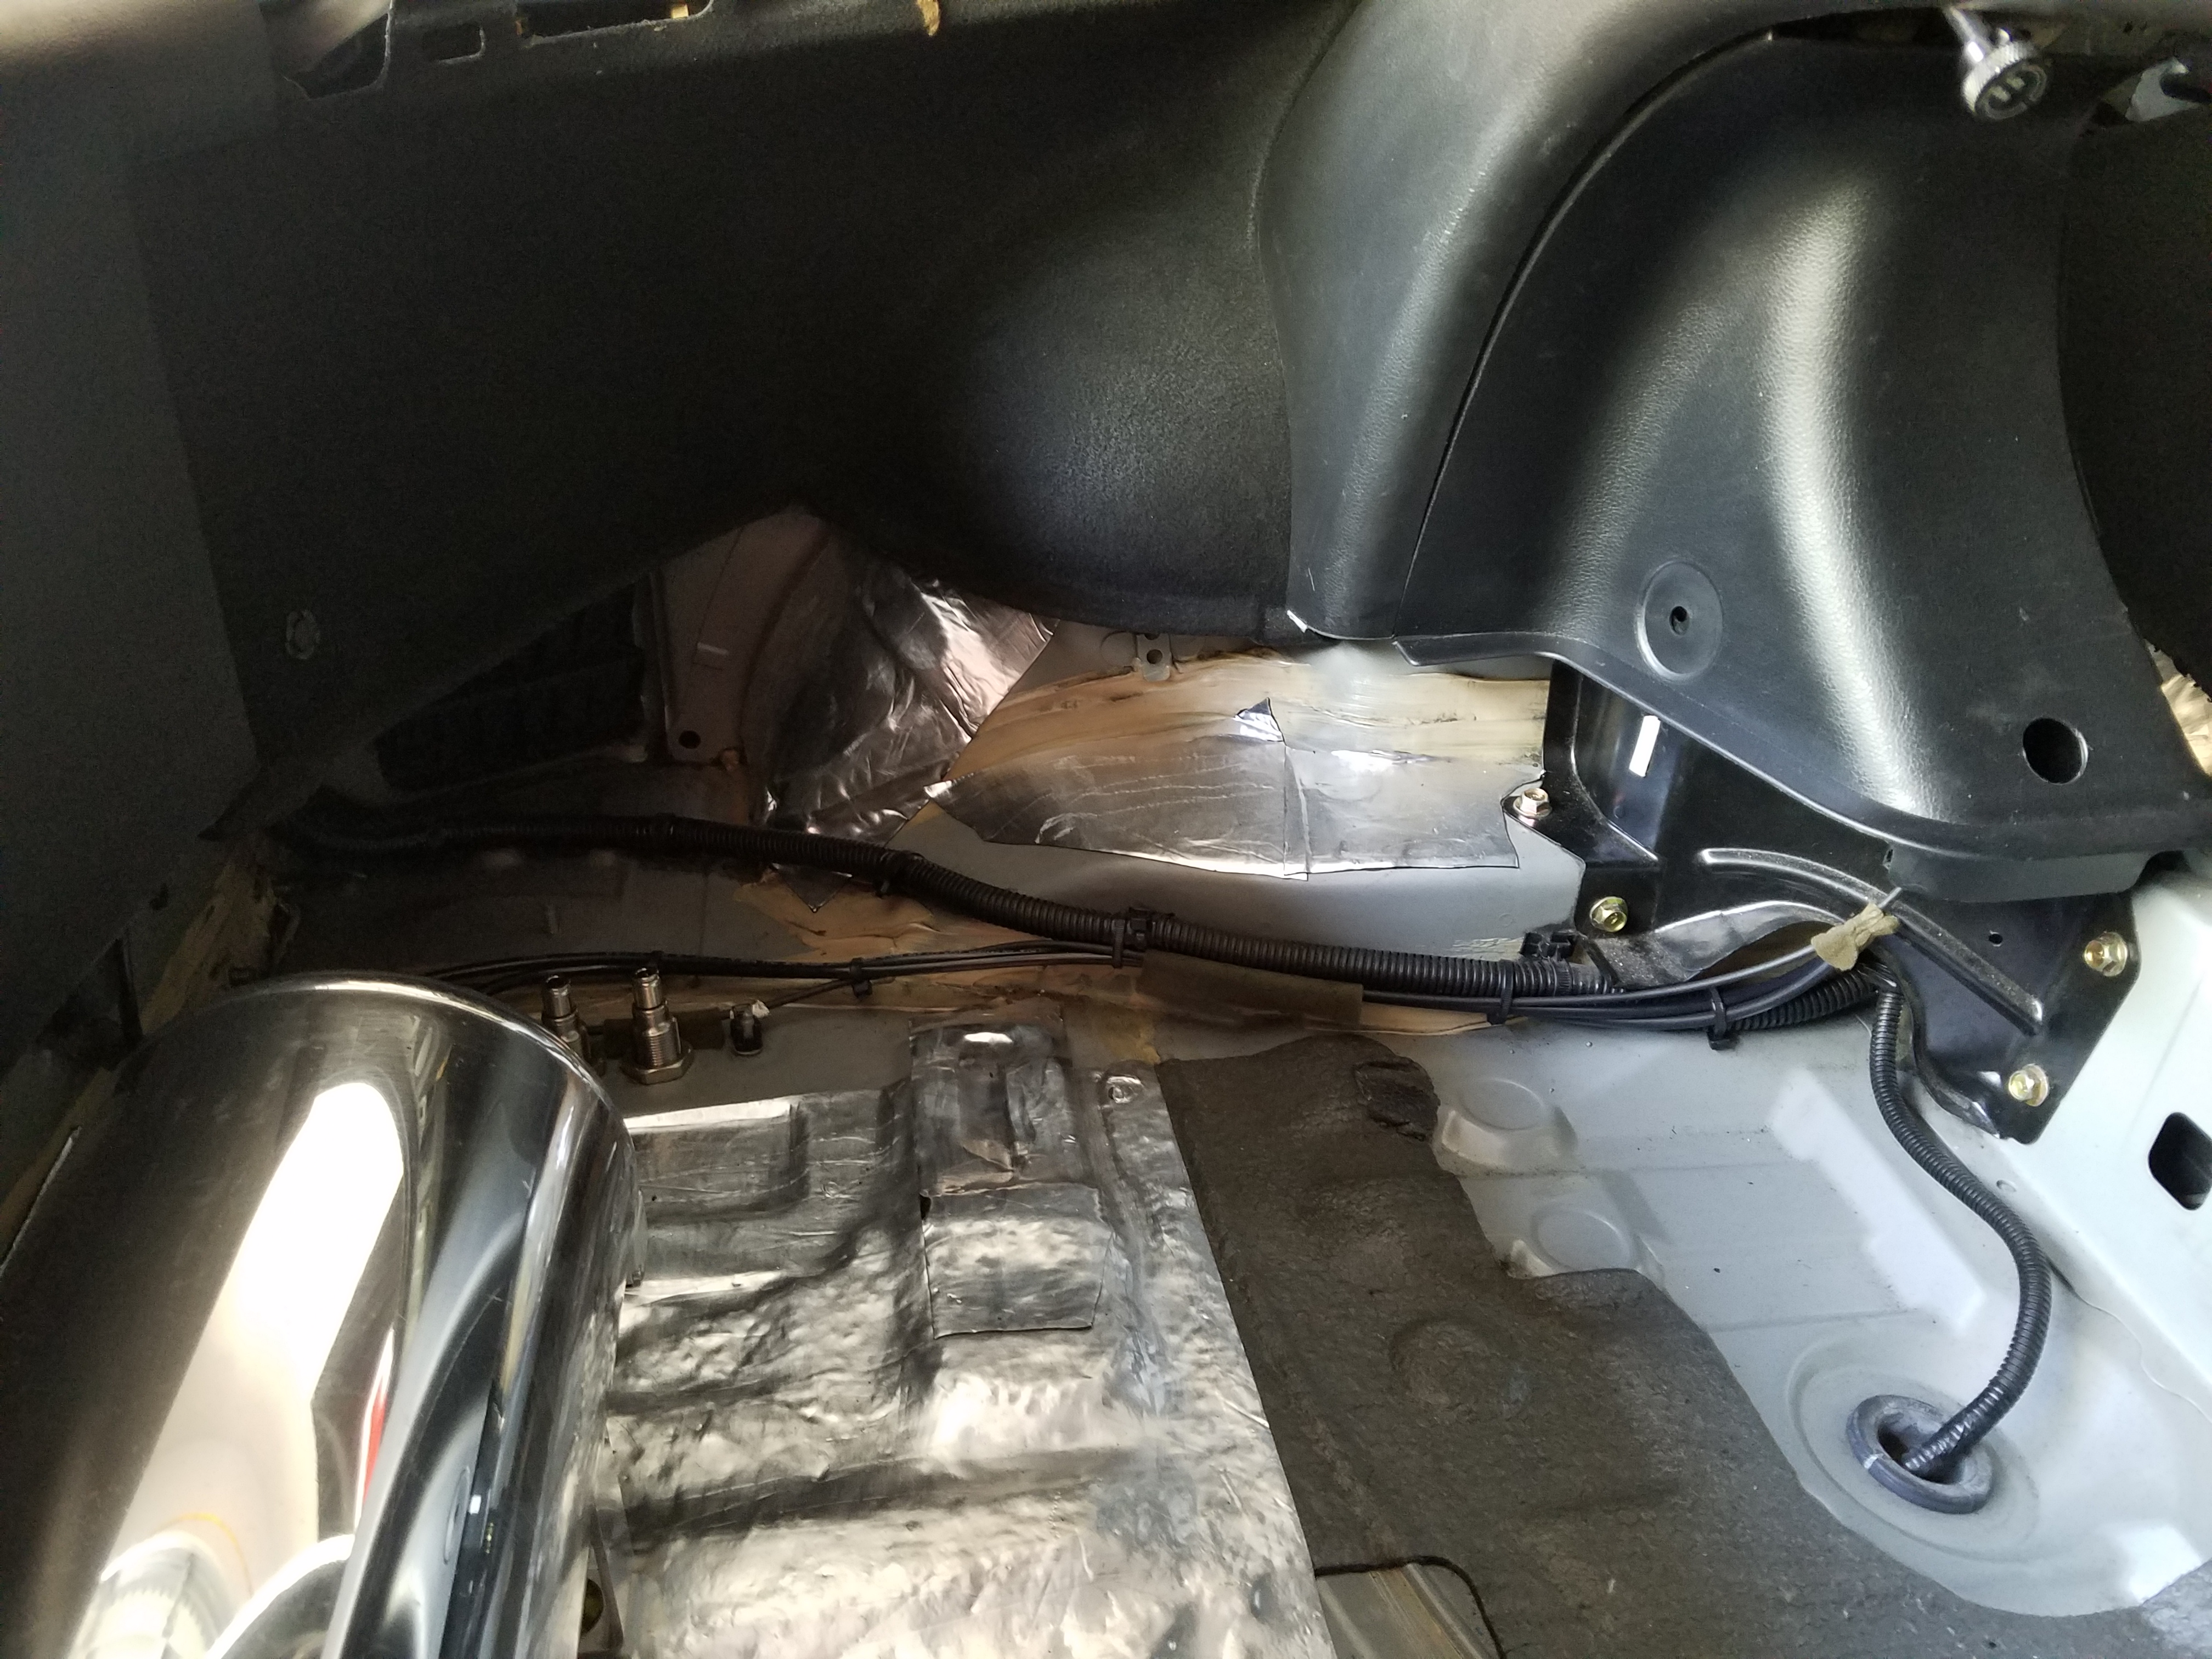
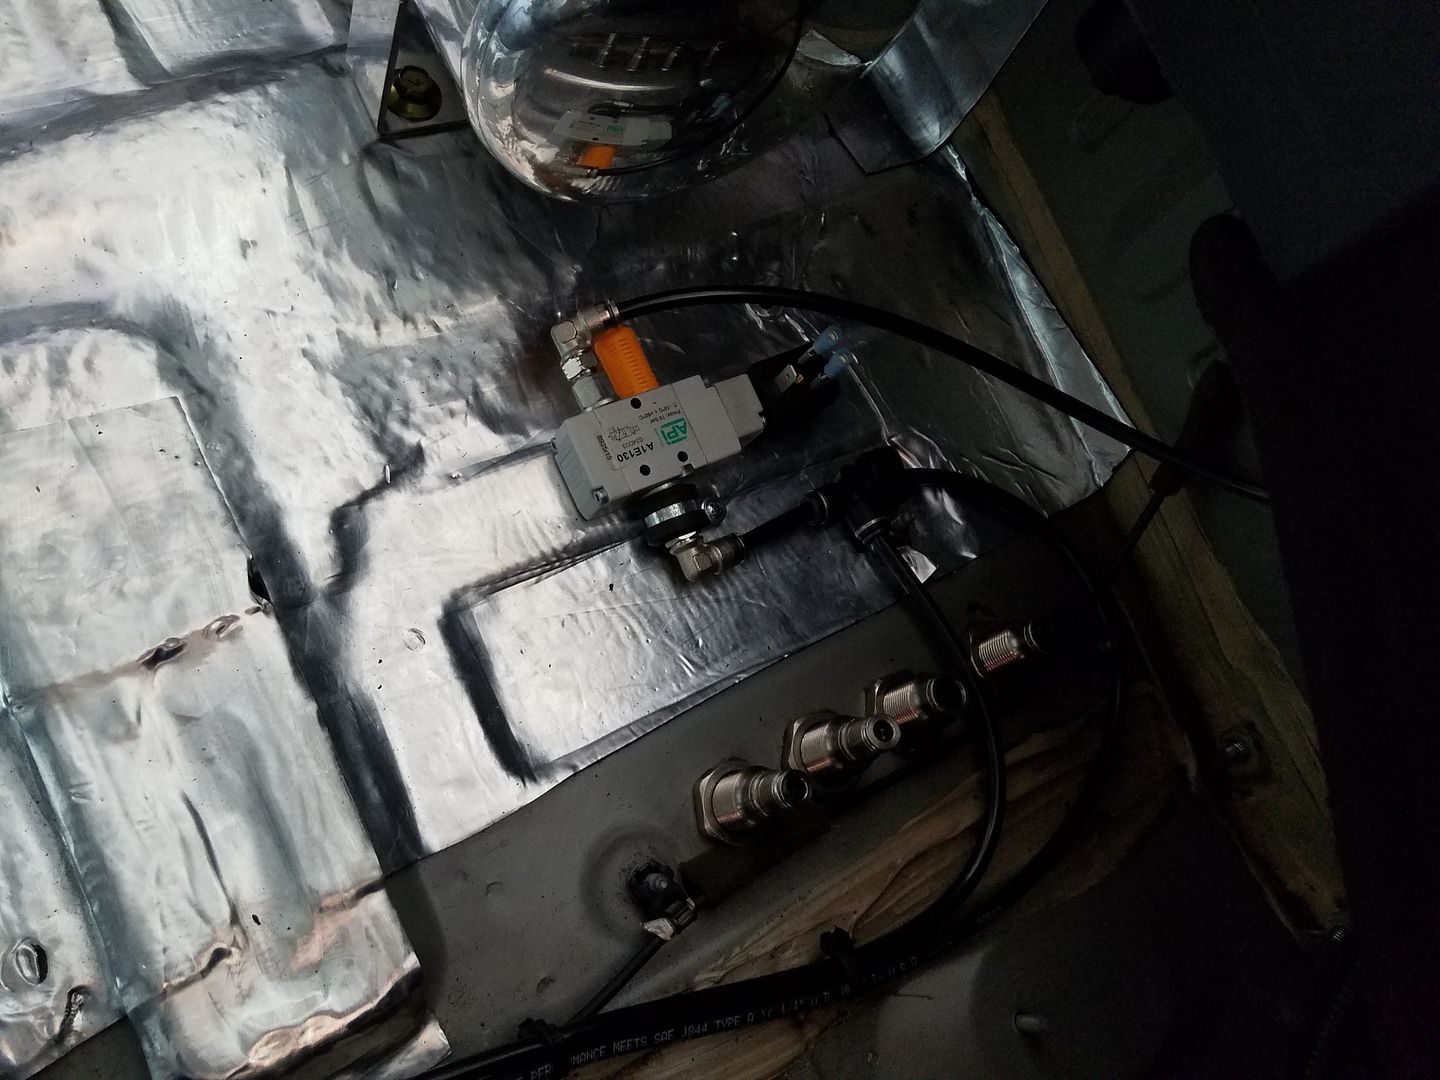
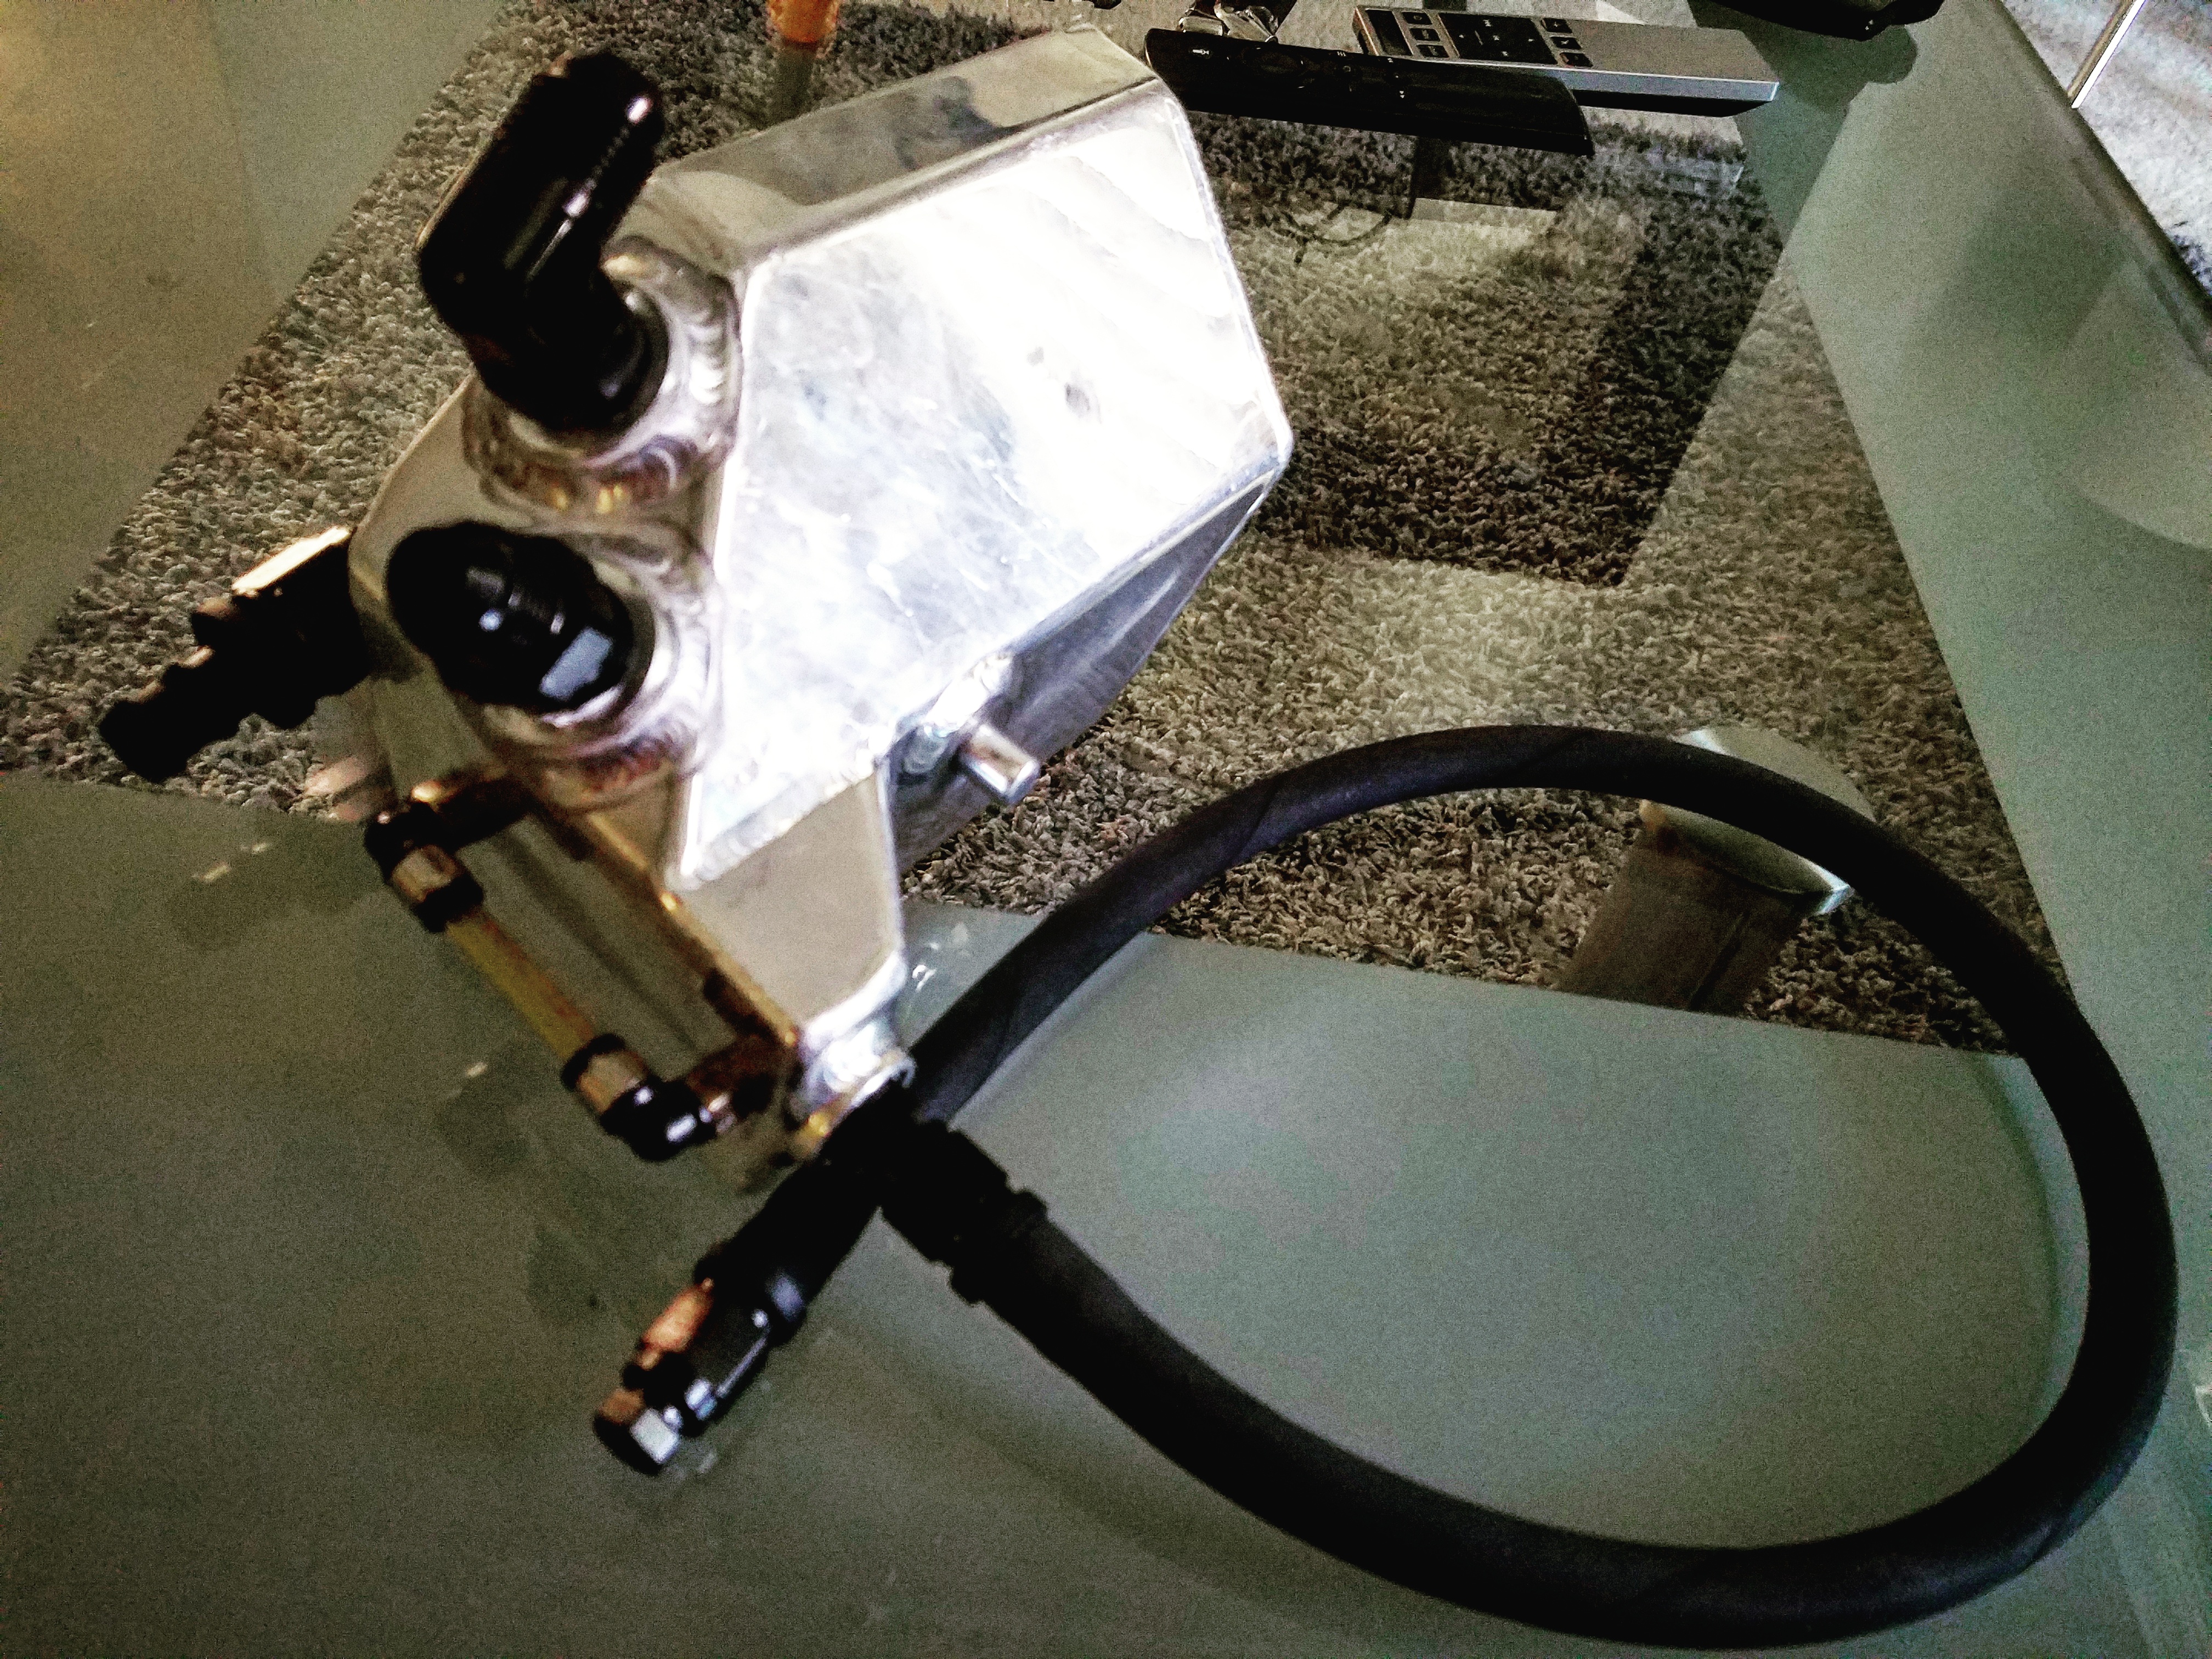
Got the air lines from the air cup front lift system ran and tucked nicely back to the tank and solenoid.
This car gets cleaner and more simply laid out by the day.
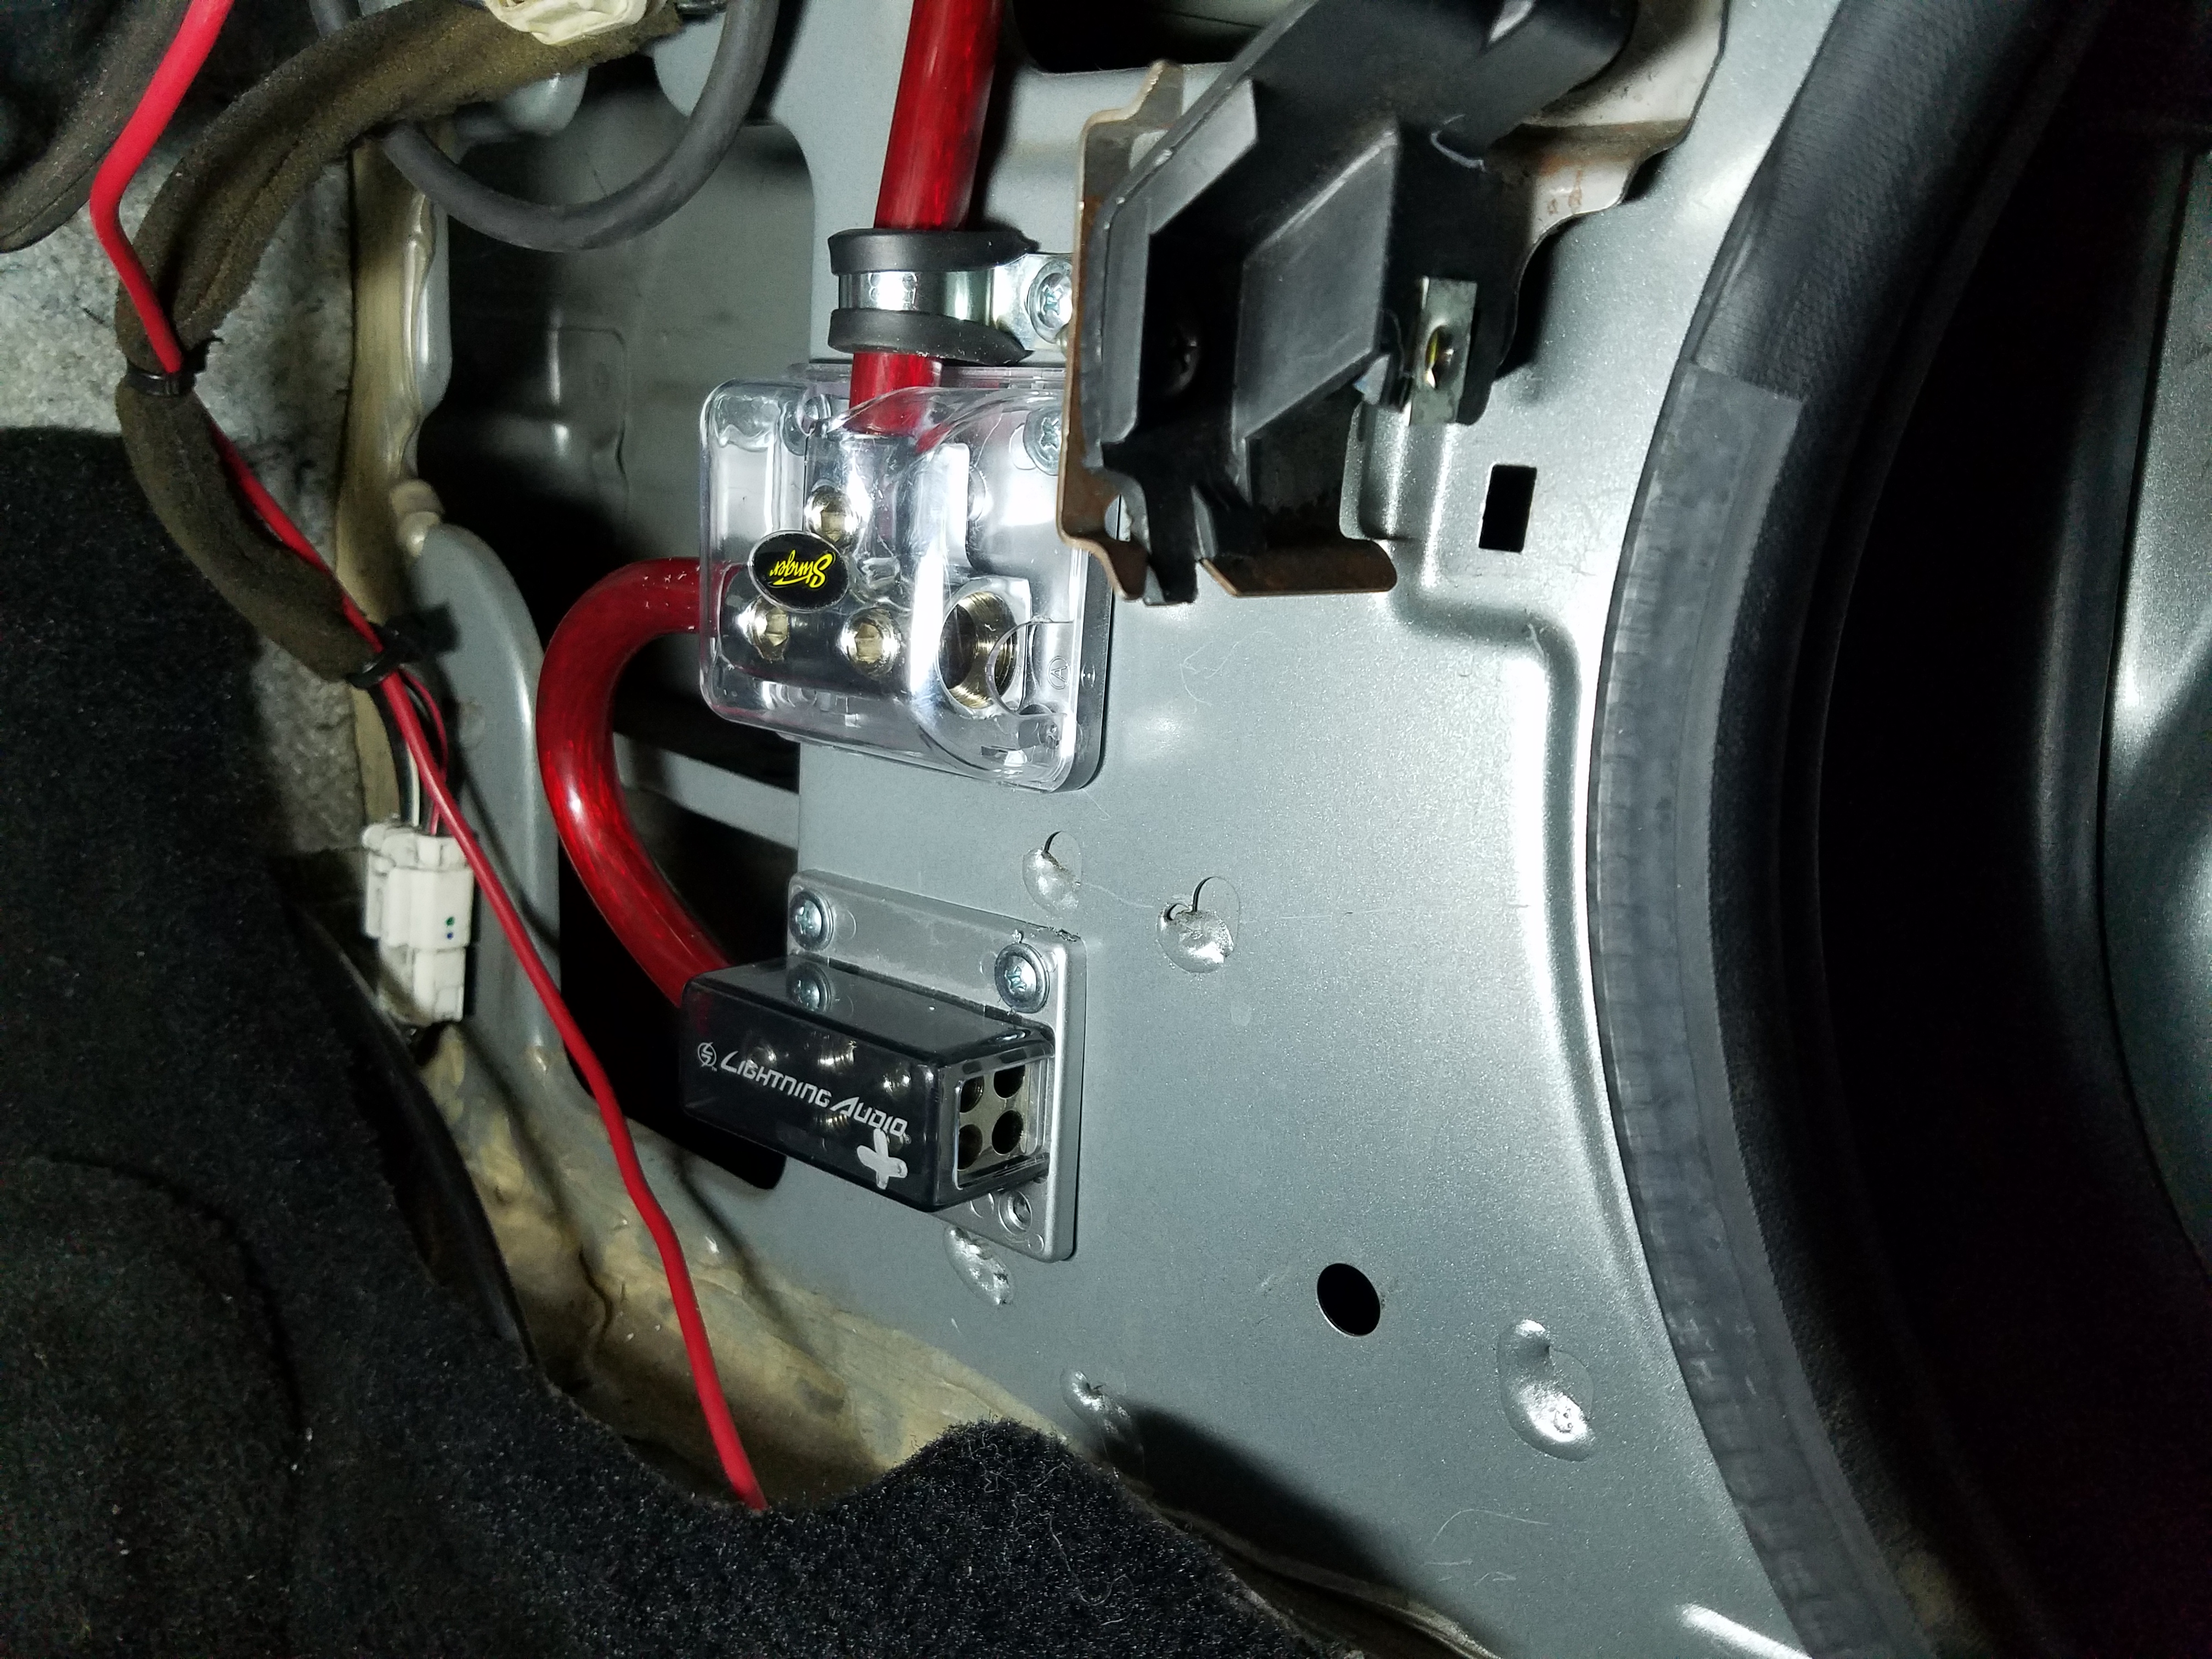
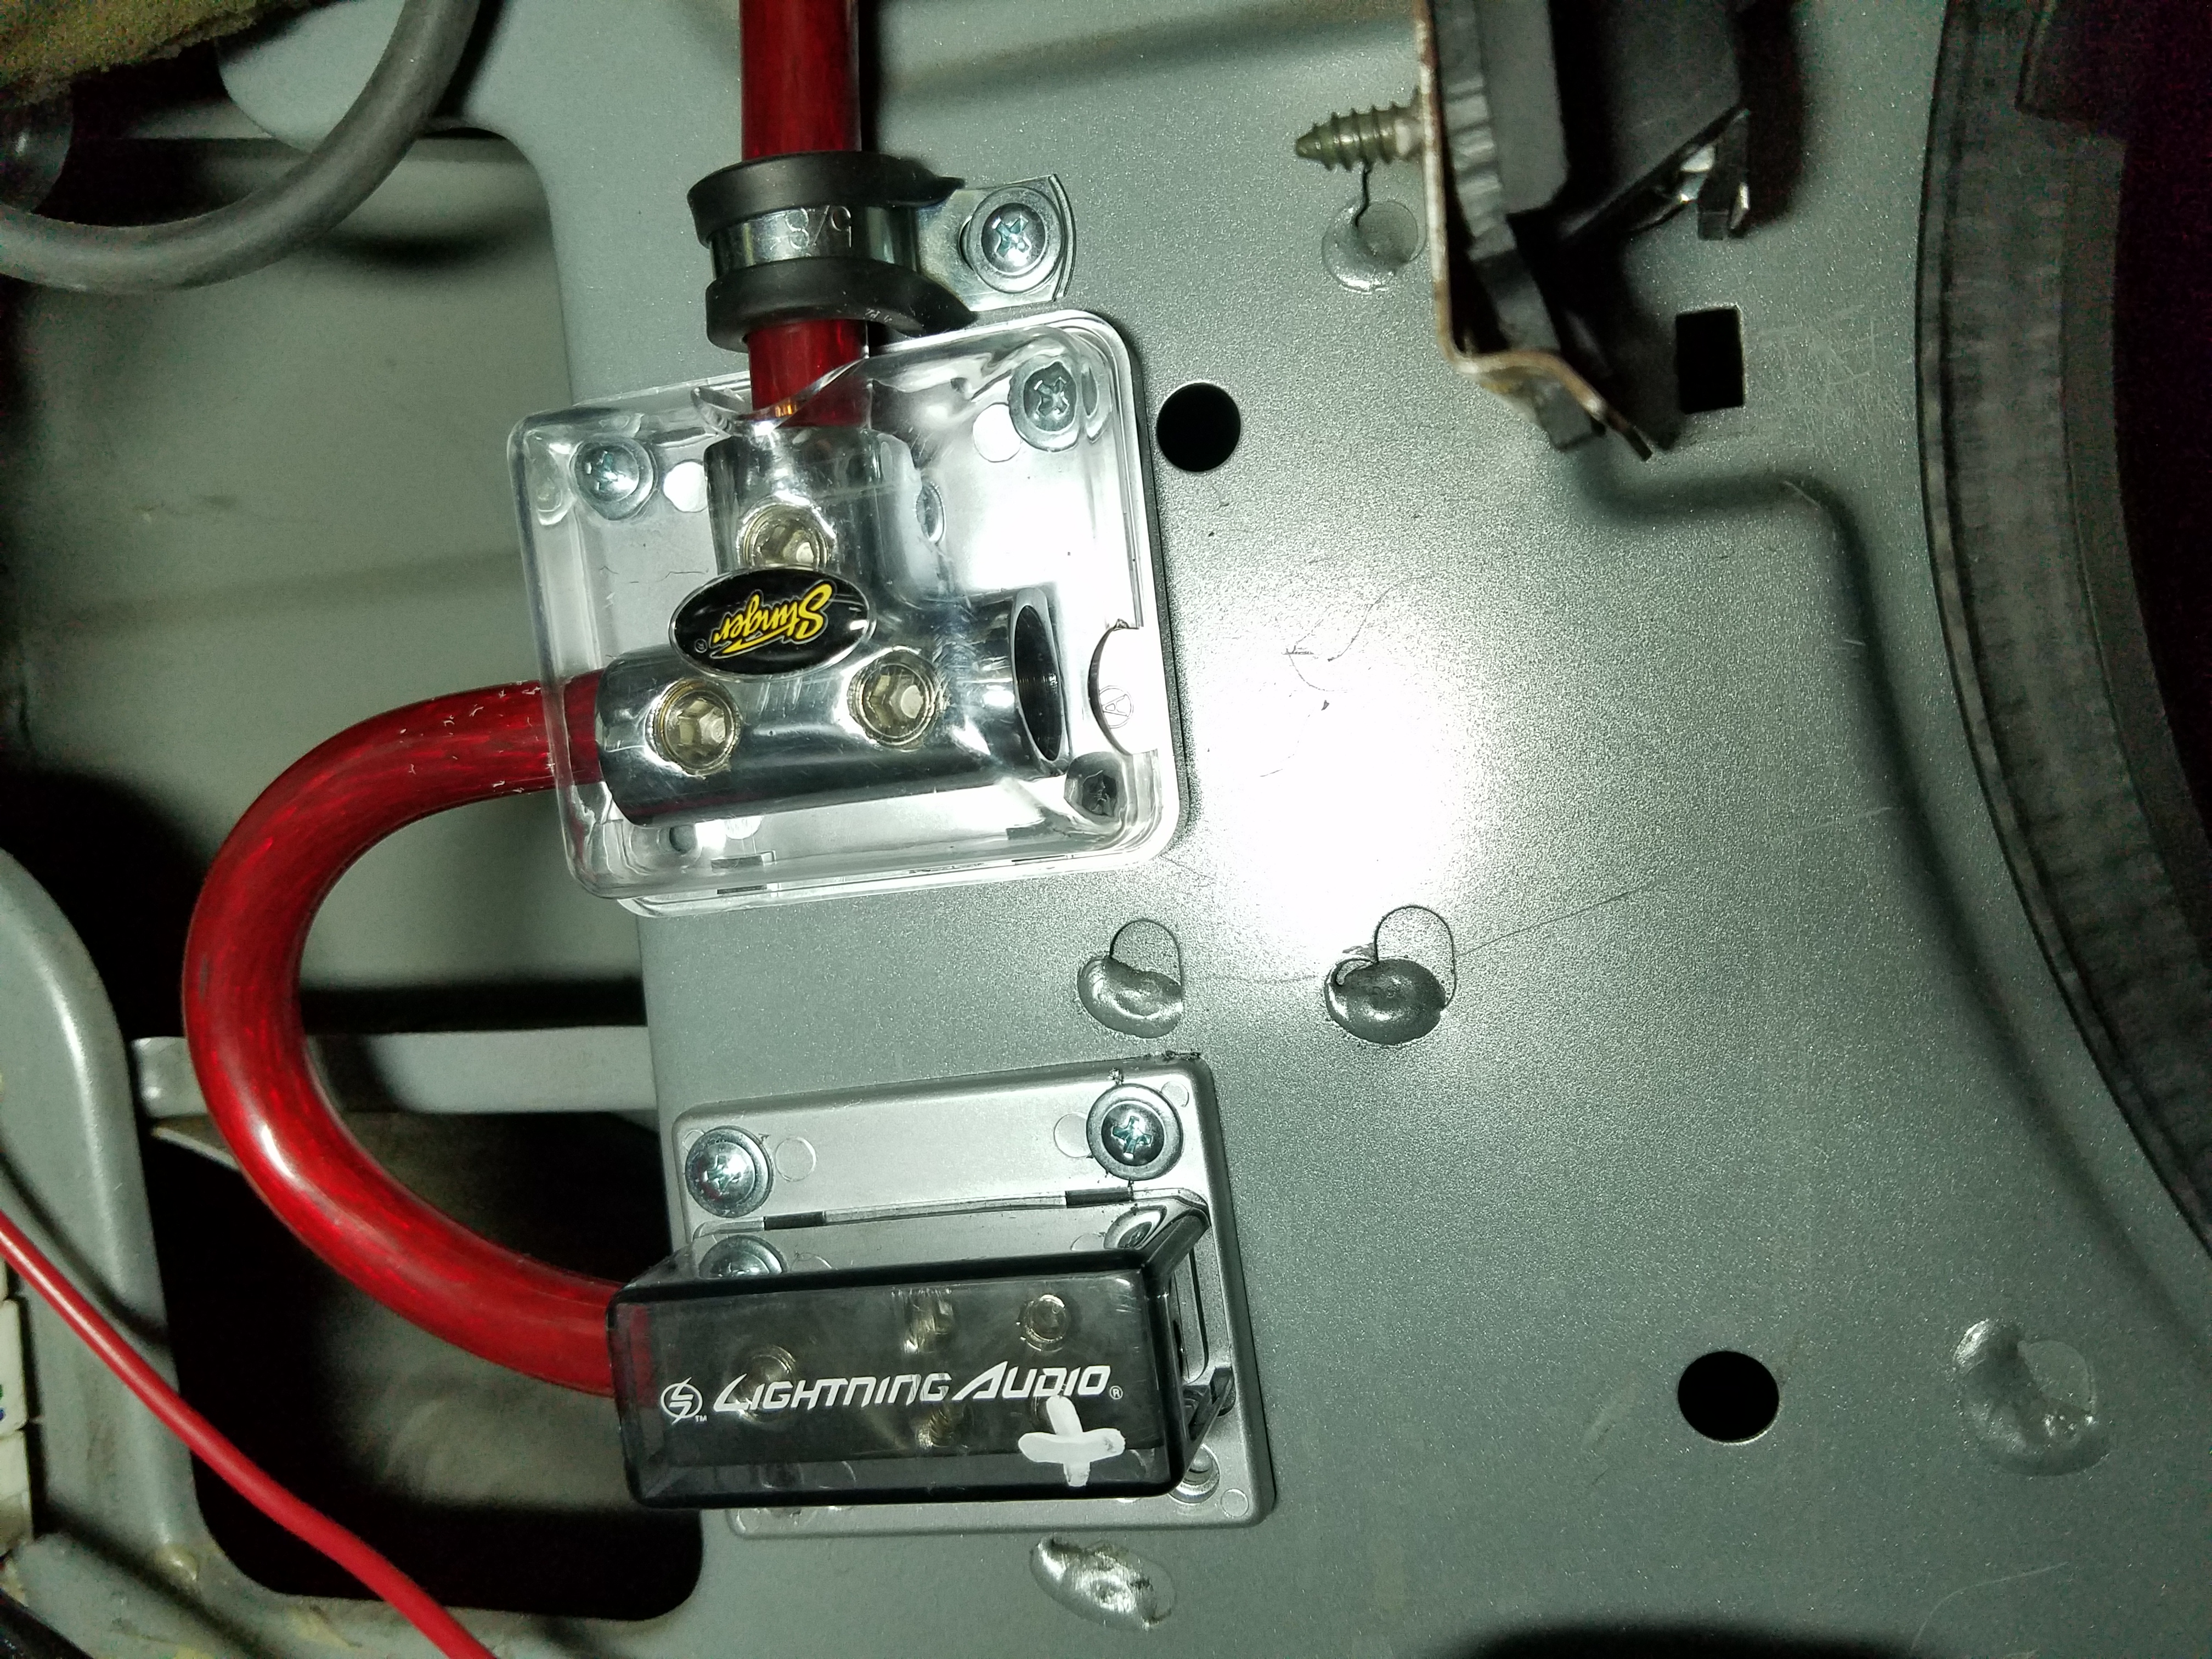
Since my amplifier will go in the factory airbag spot in the passenger dash, now the wire can be extremely short. I have about 4 feet of OFC 2 gauge wire right to the battery now.
Last edited by bmccann101; Apr 25, 2017 at 11:25 AM.
By moving the cruise control buttons you just freed up some 3 wires (if I recall correctly) possibly 4 in the clockspring. That would give you enough wires to set up shift lights on the steering wheel if you want to try something different especially if you are planning on getting your steering wheel modified anyway.
Chippernut makes an arduino based kit: Chippernut
And there is someone on his forums that already installed it in the 350z.
here's what I mean by steering wheel shift lights as an example (this is not the chipeprnut kit):
very nice, however, this cruise mod was done while I still planned on keeping the Keys racing wheel.. I decided to get a modified carbon oem steering wheel now though for a more quality oem feel. So I will actually have dual redundant cruise switches now.
Nothing will be freed up in the clock spring.
got my catch can set up done today.. finally got off my duff and found some 4an fittings and push lock barbs for the drain... since I don't want to have to remove the catch can to drain it, this will poke thru the splitter / wheel well area for draining, using high temp internally braided fuel hose. Should be more than robust enough for no problems.
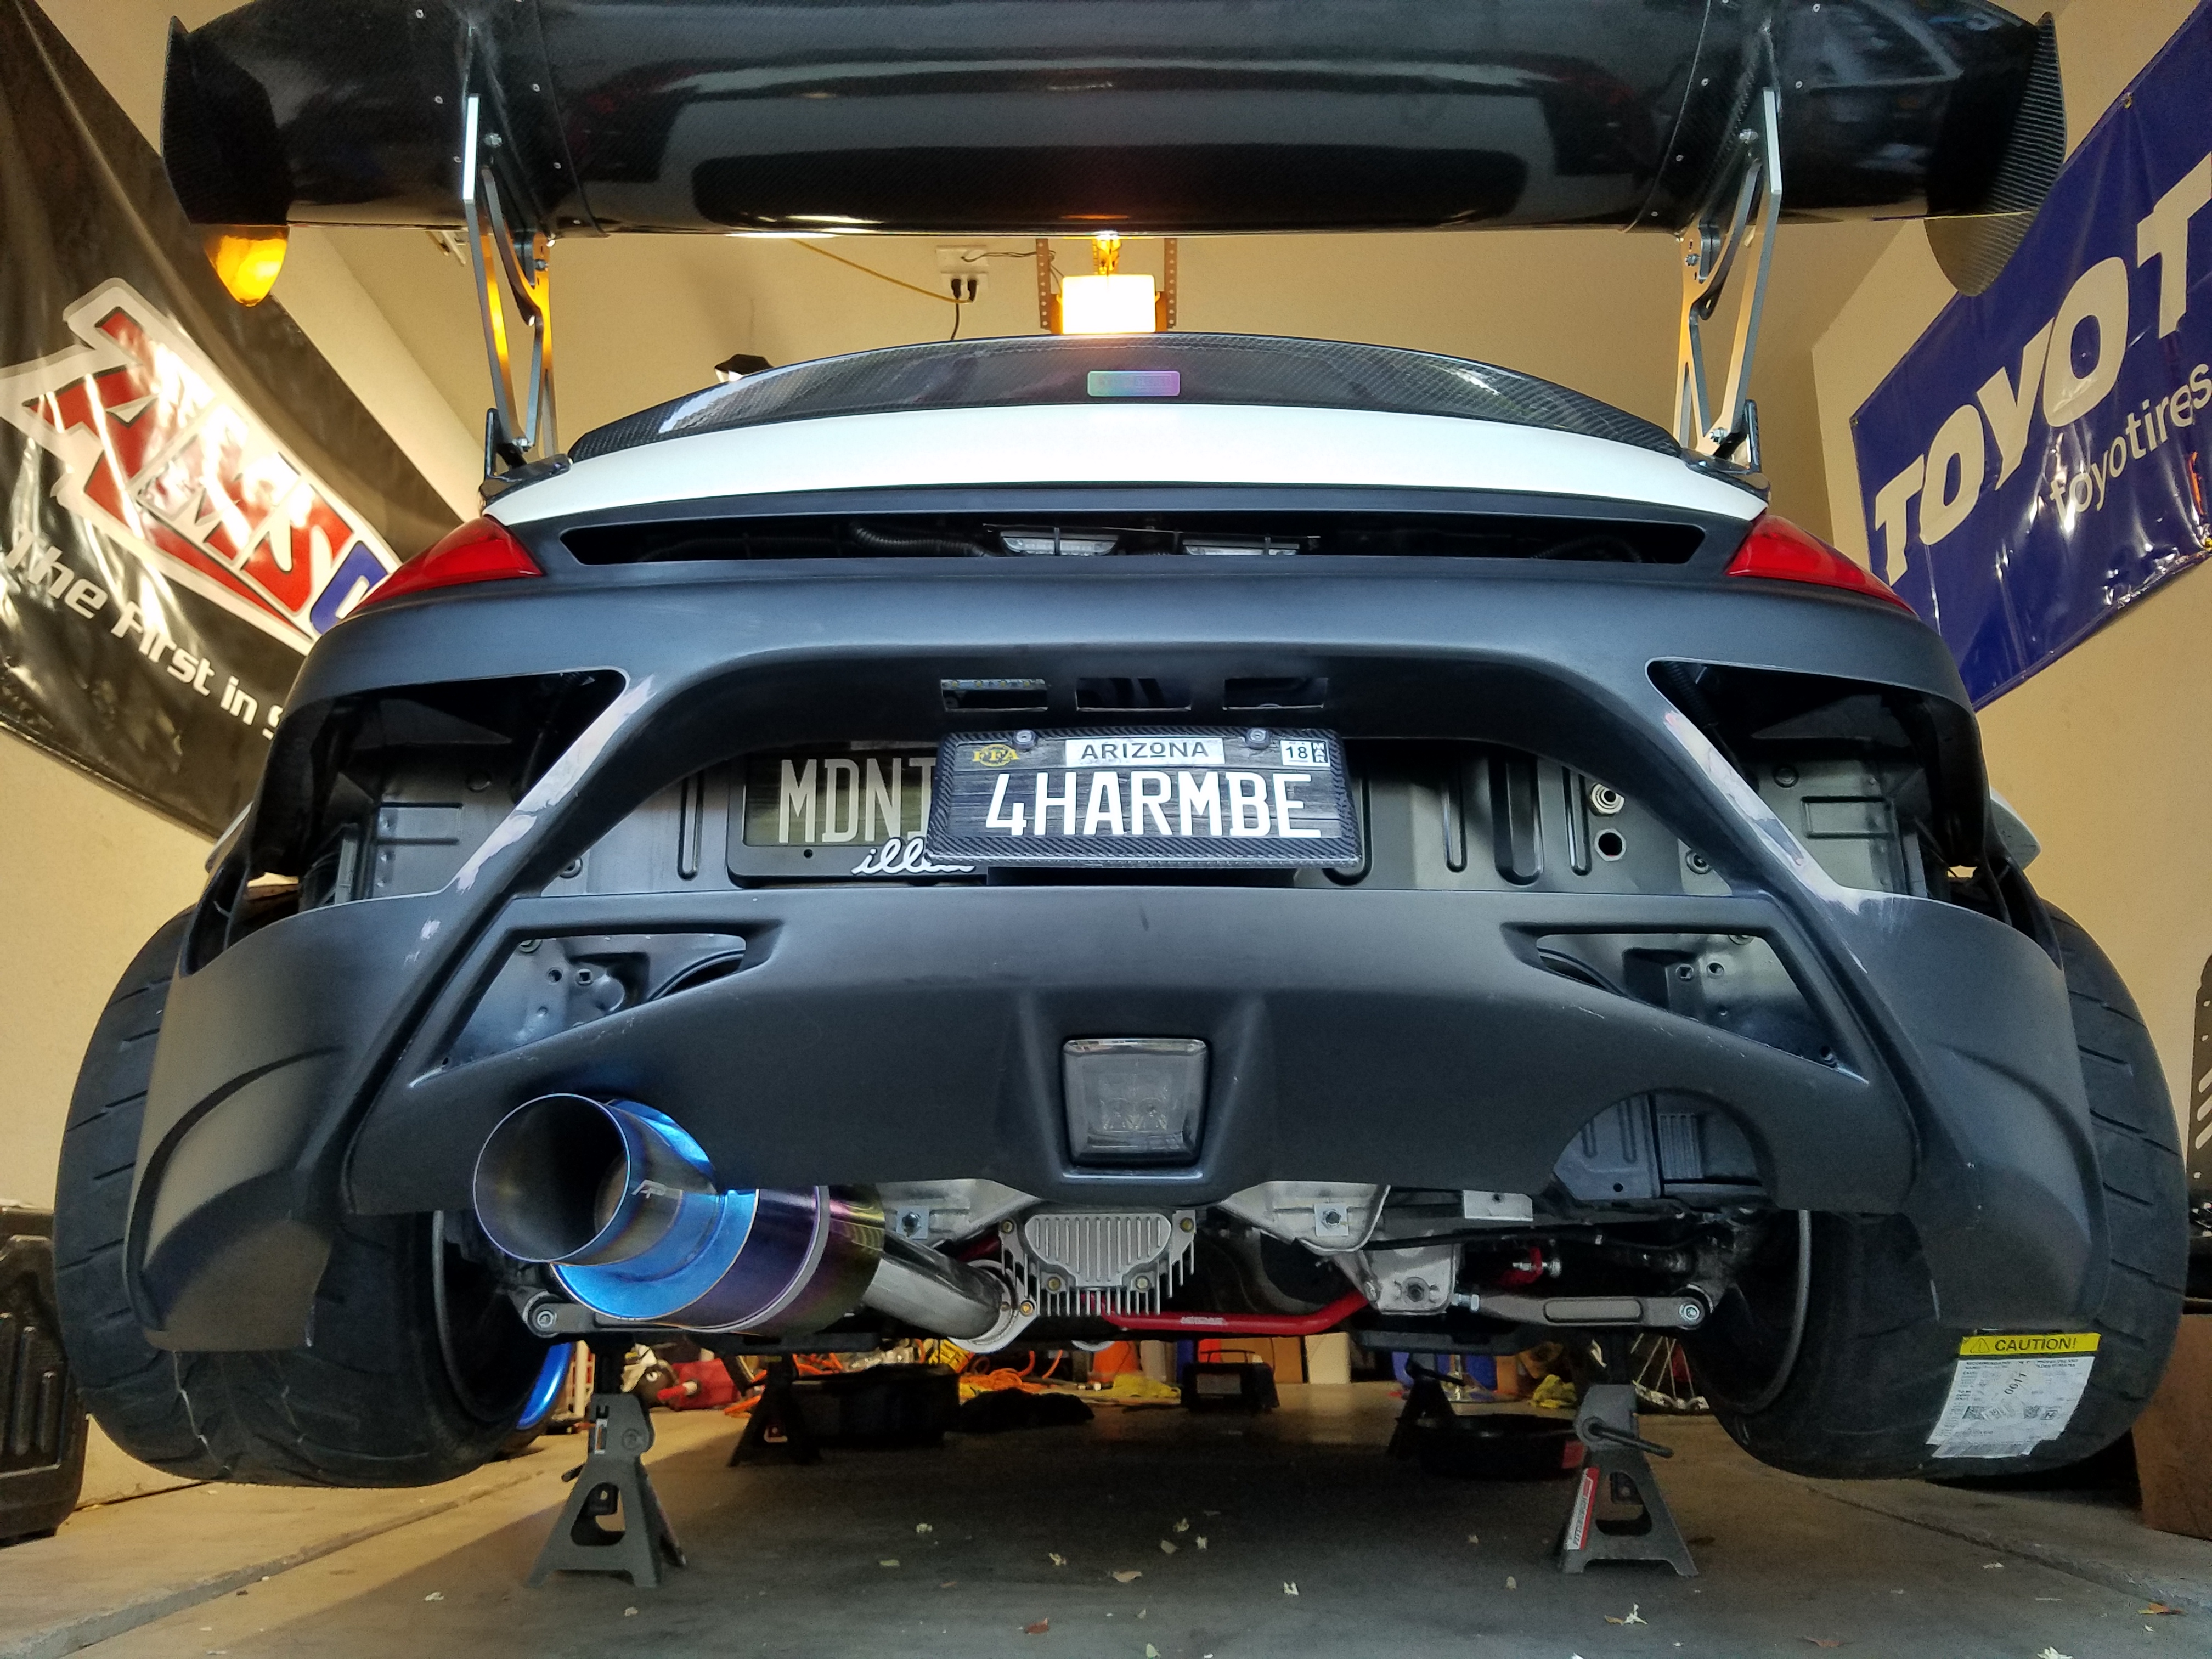
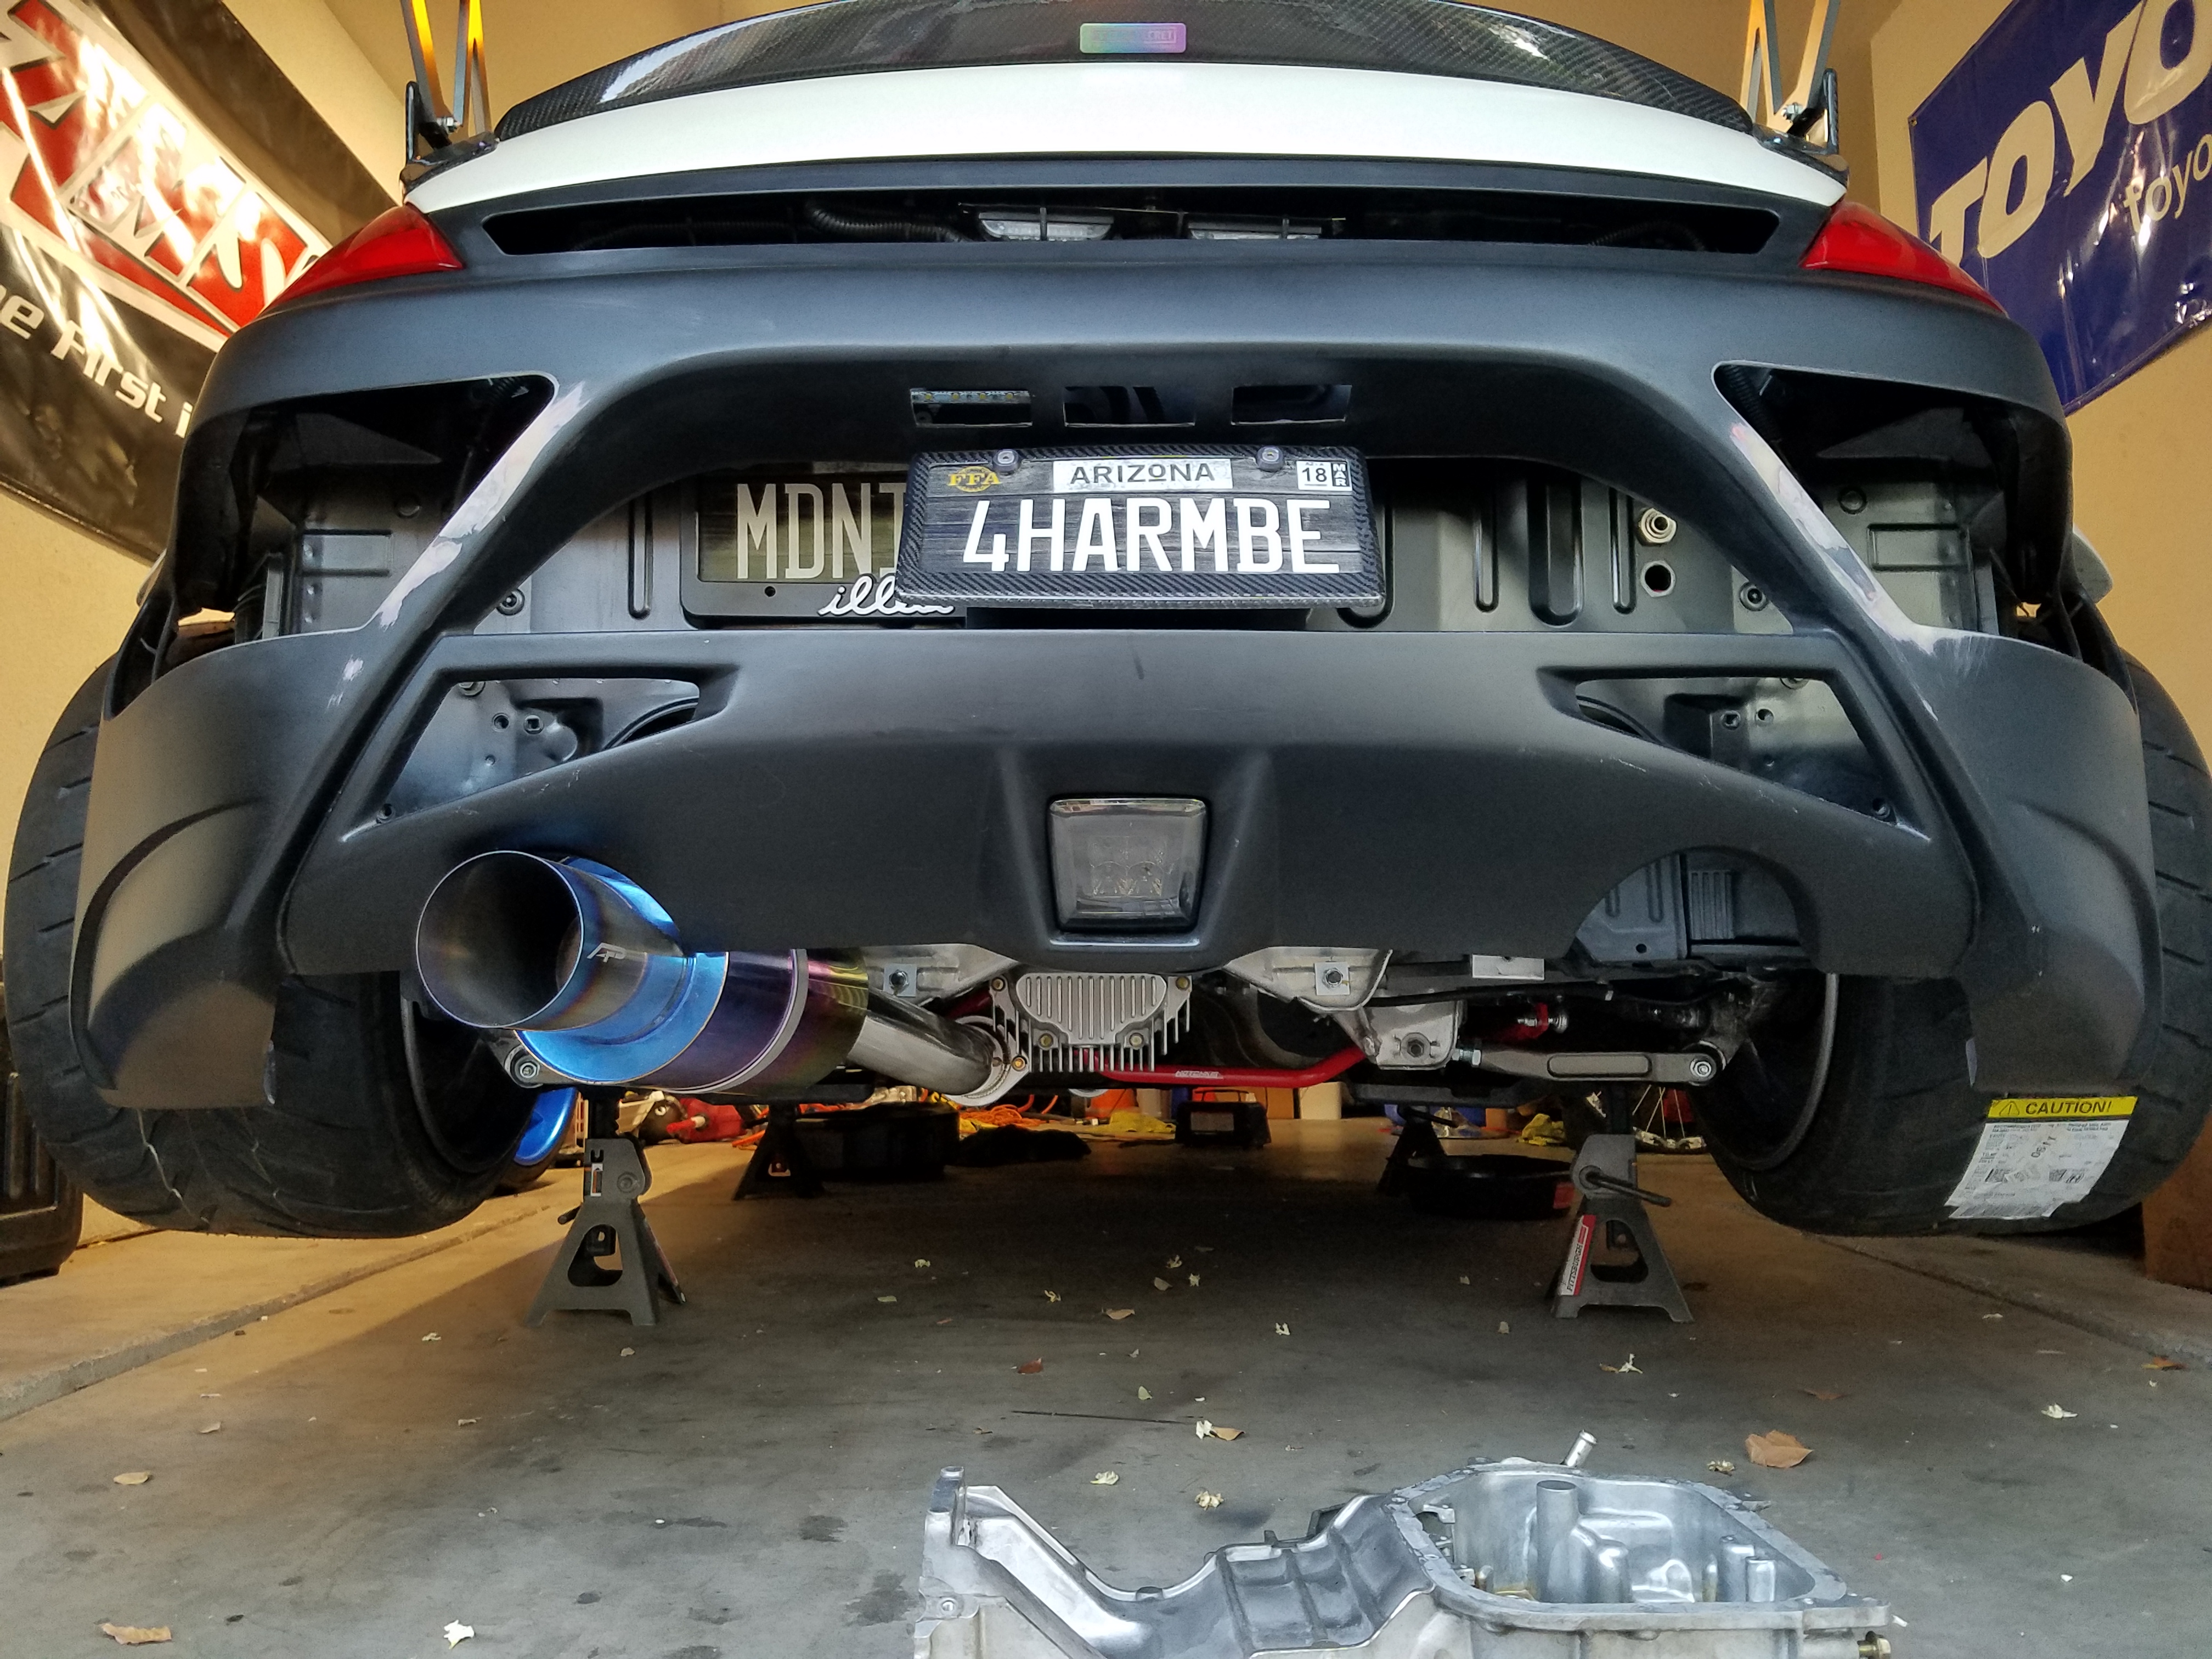
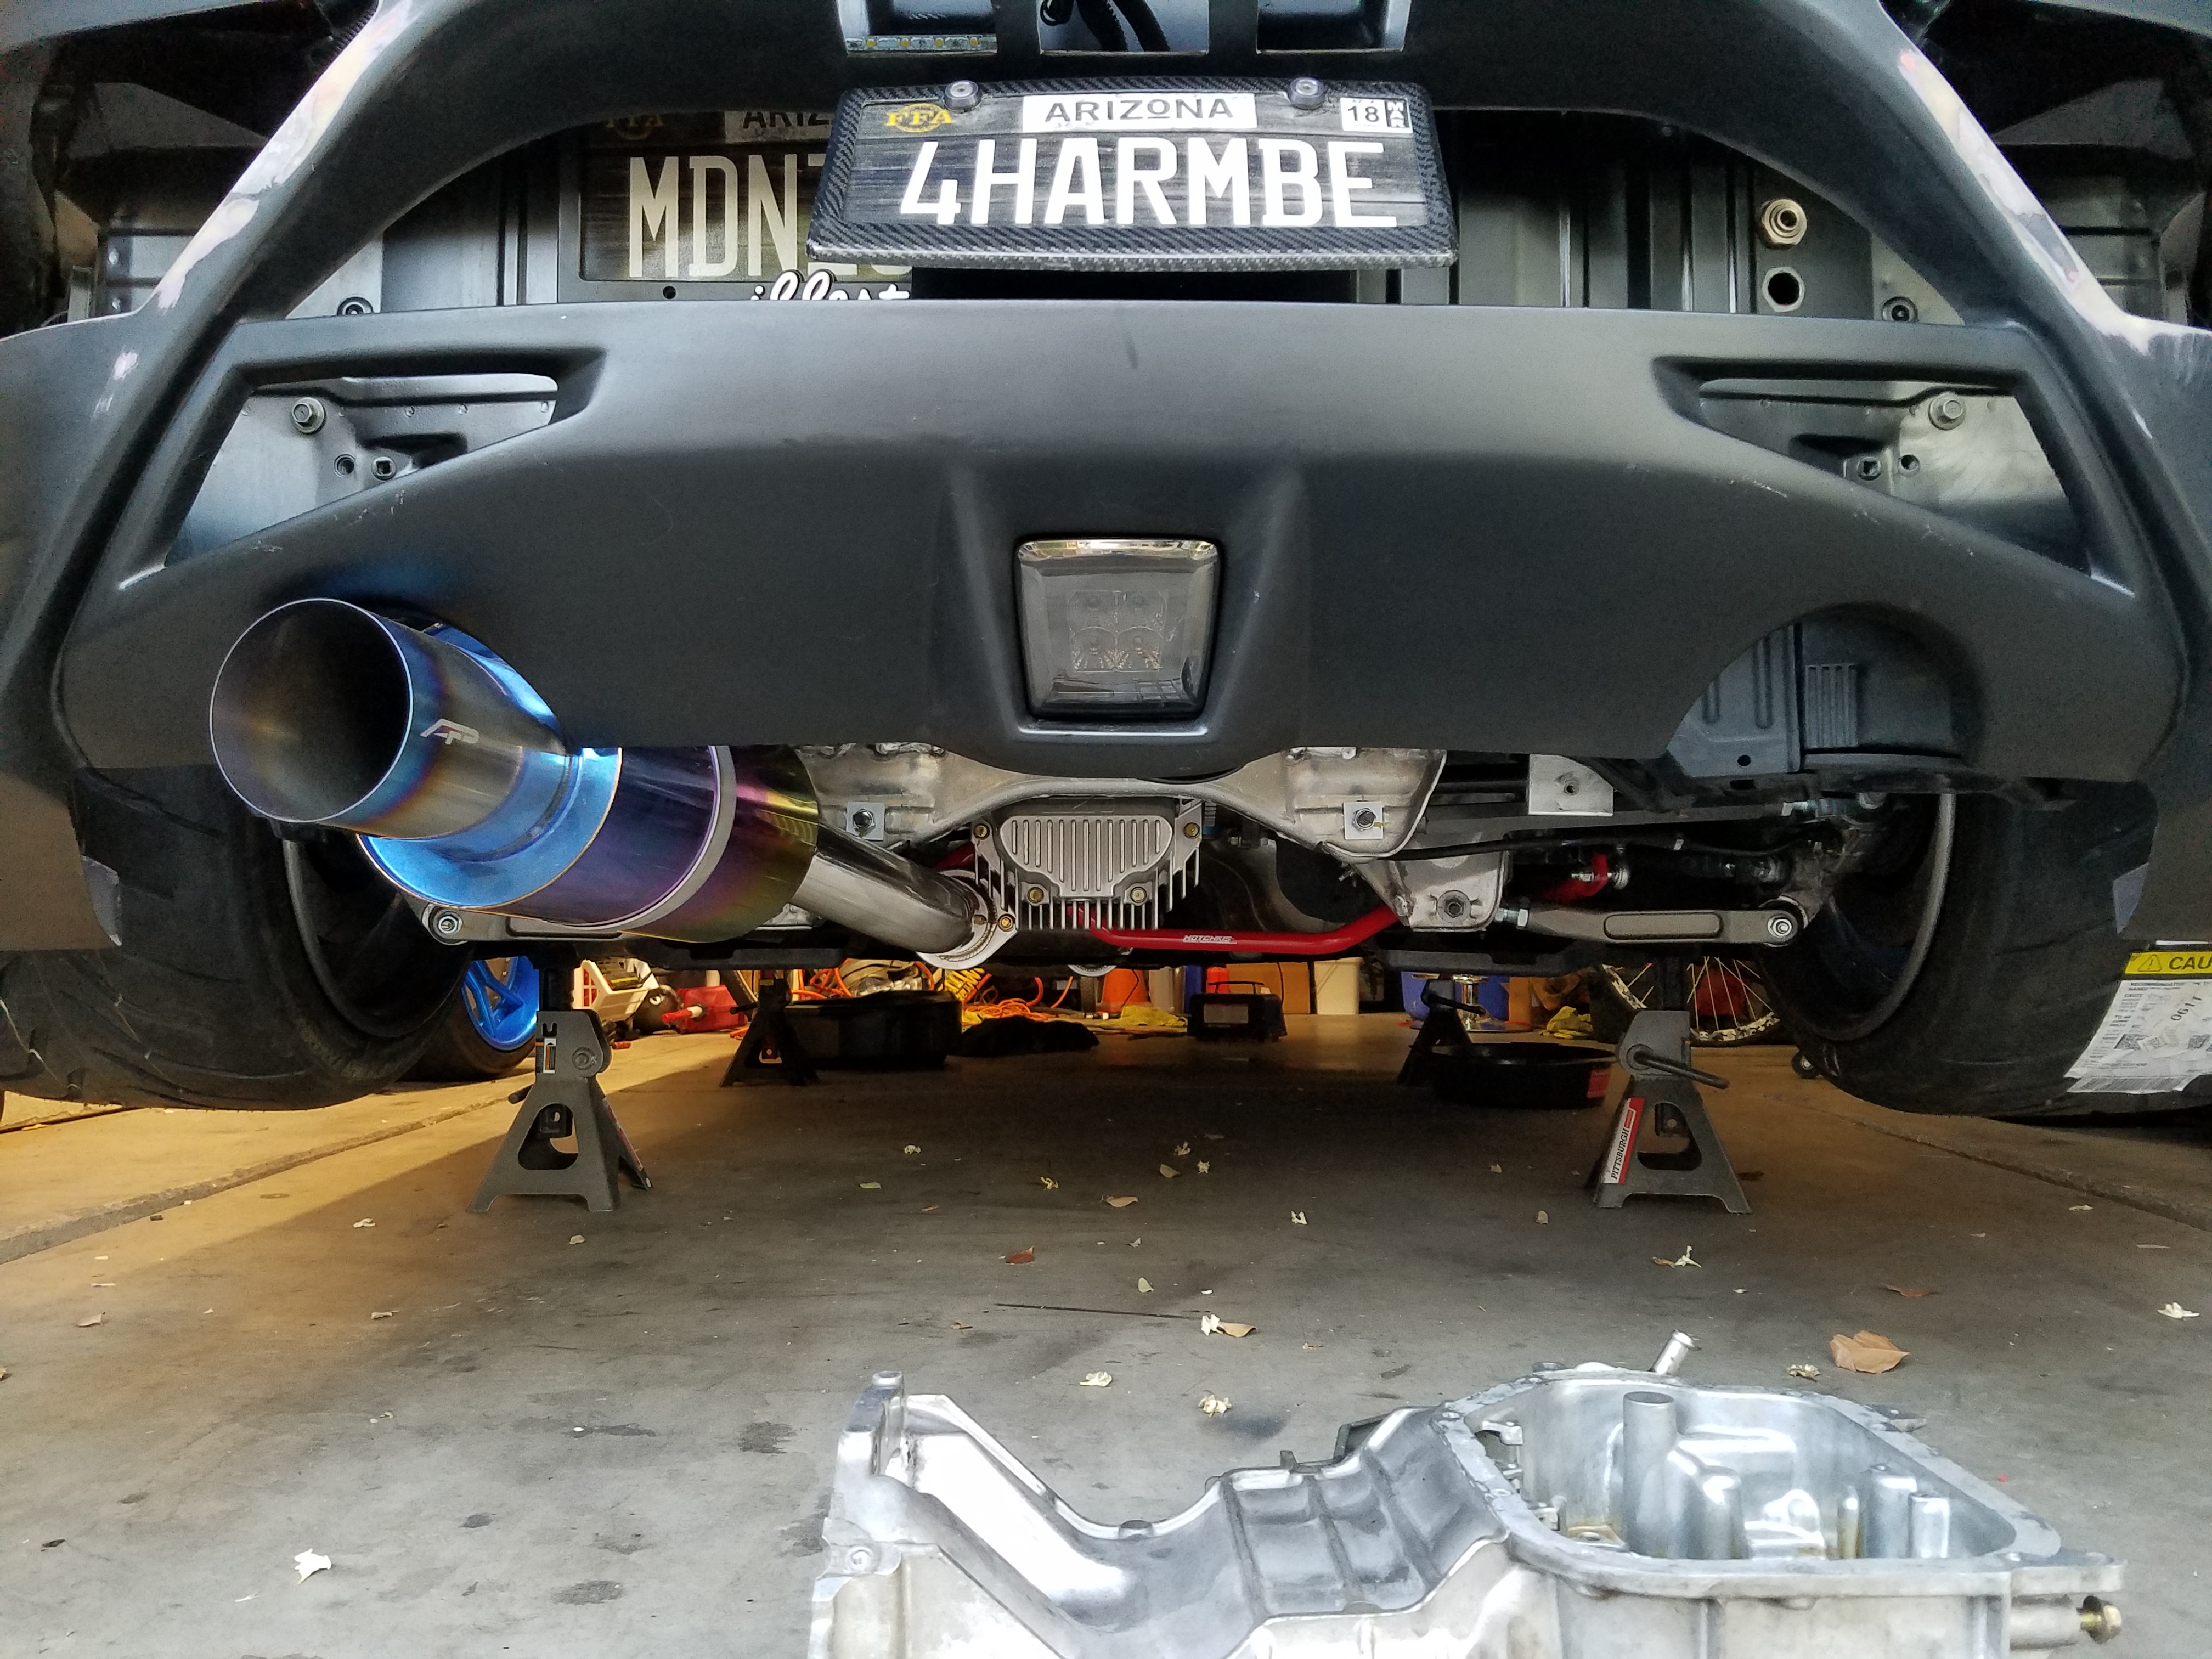
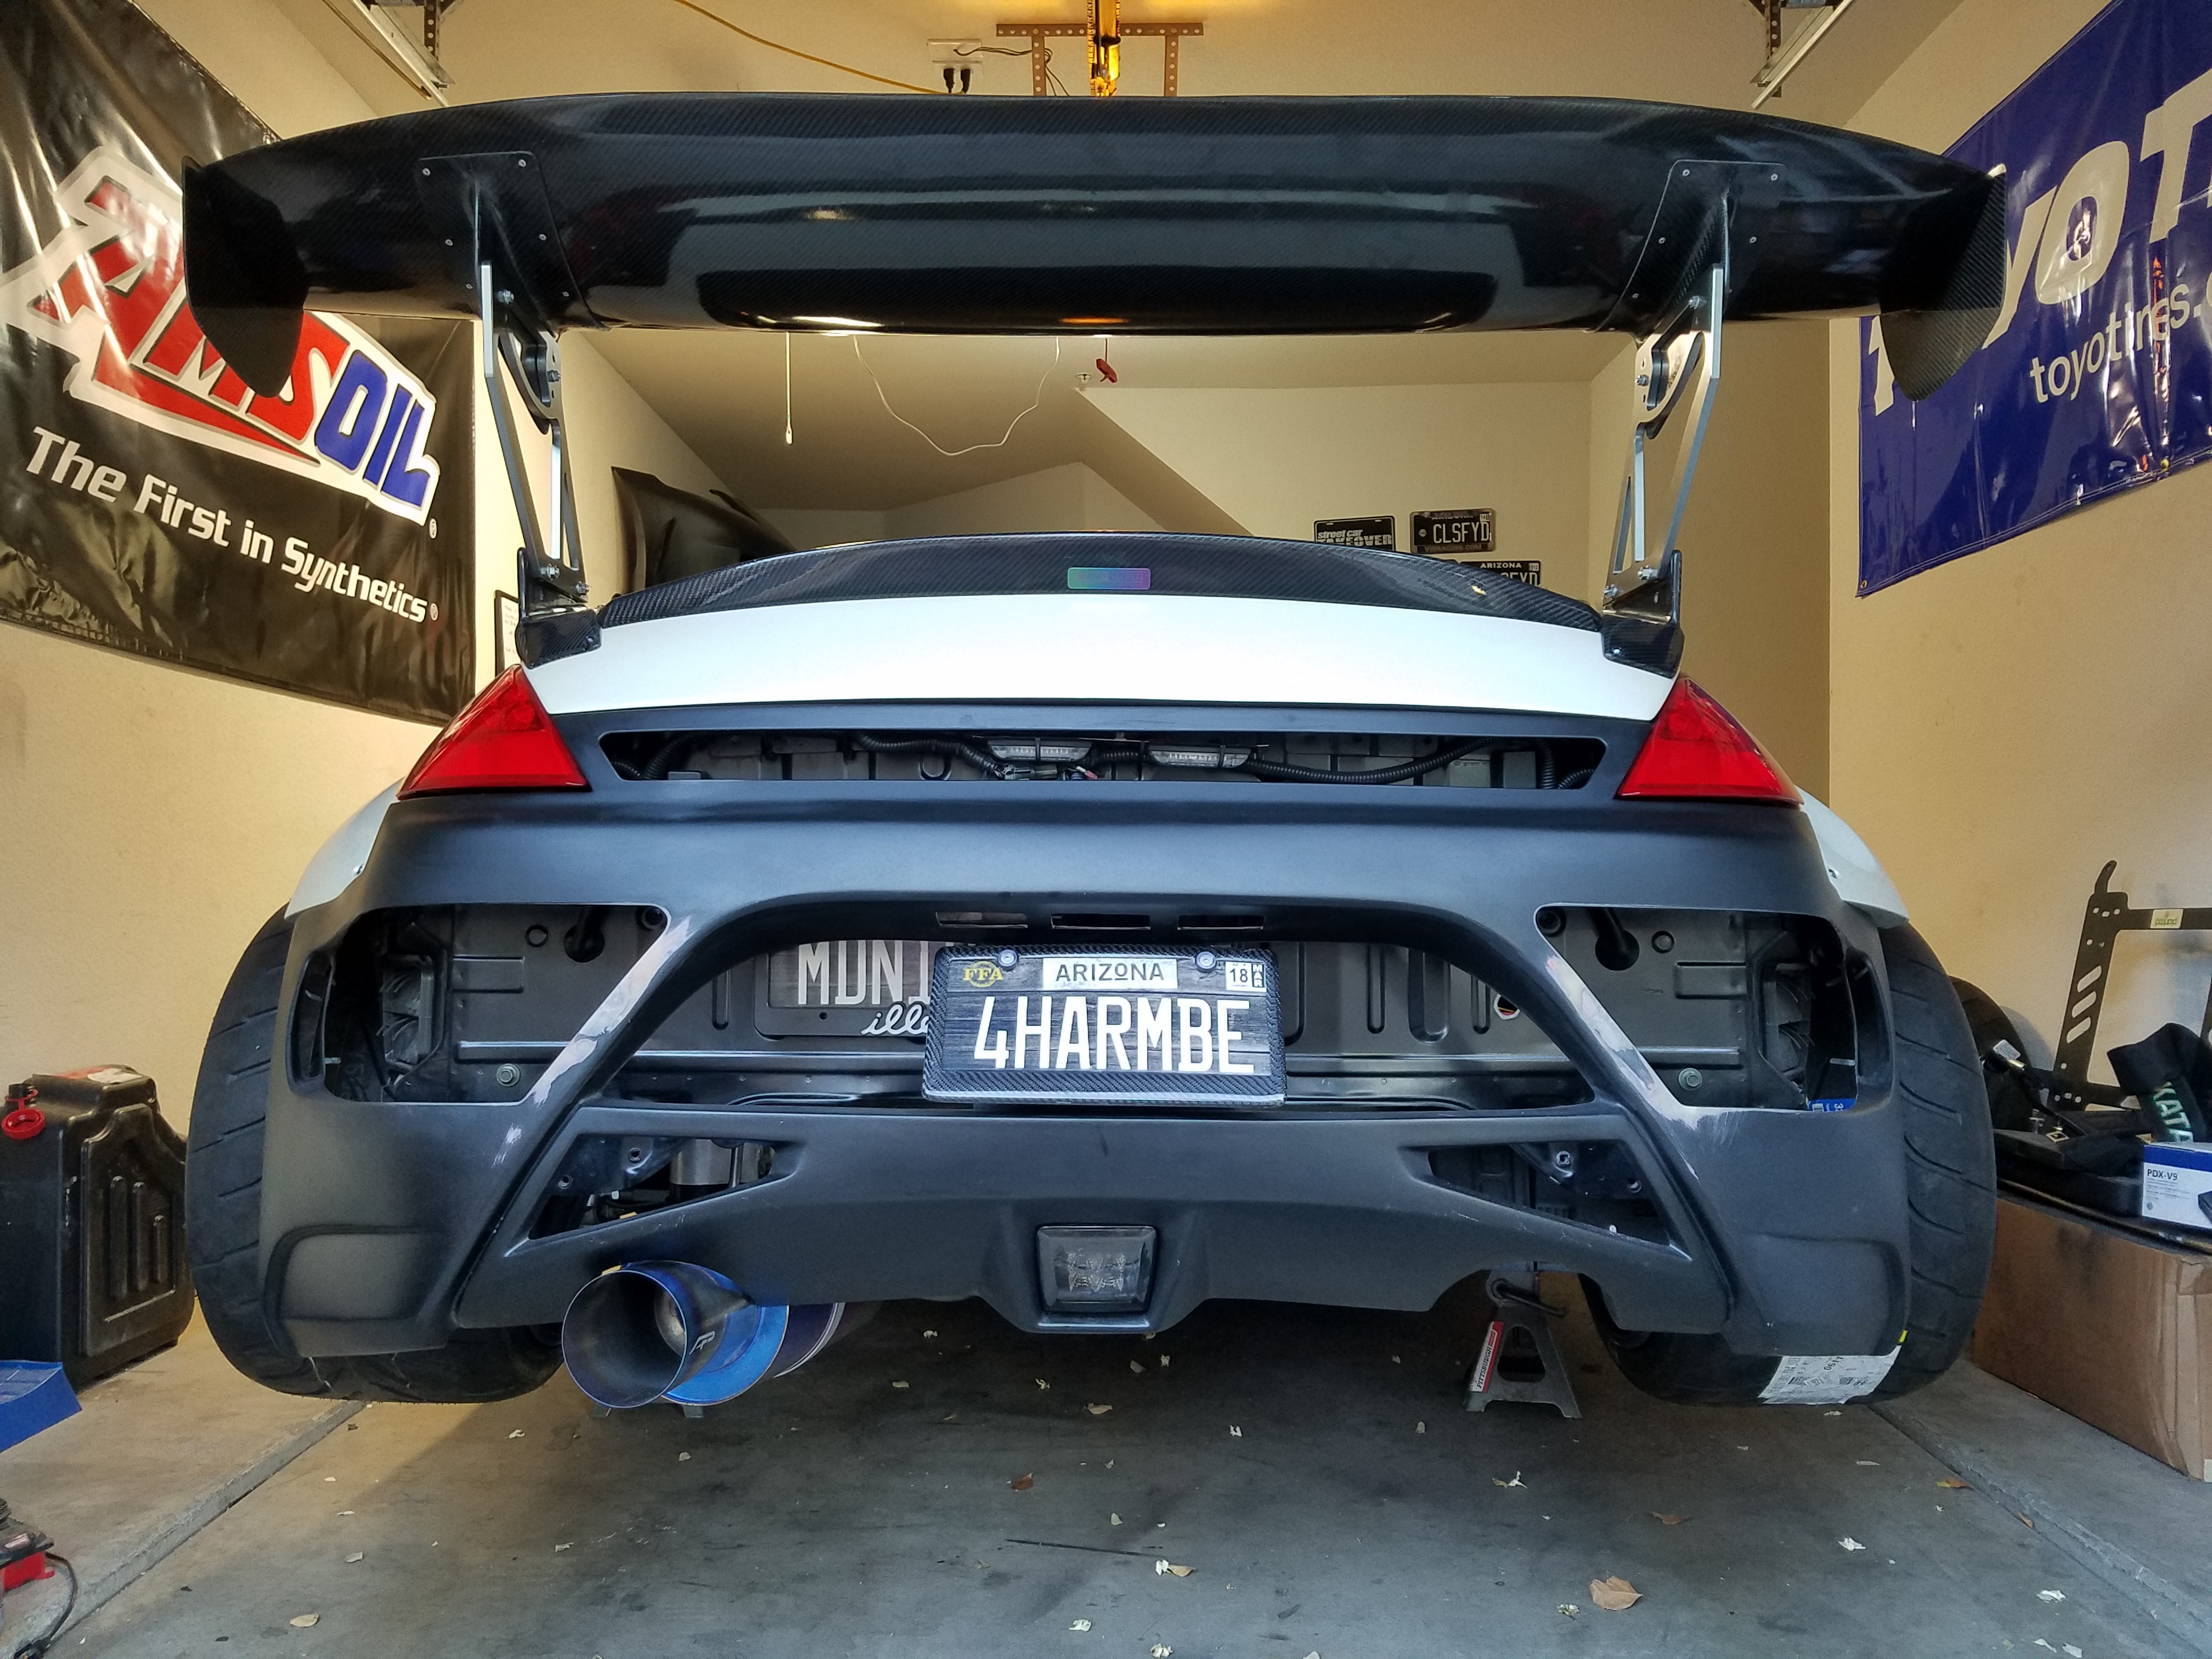
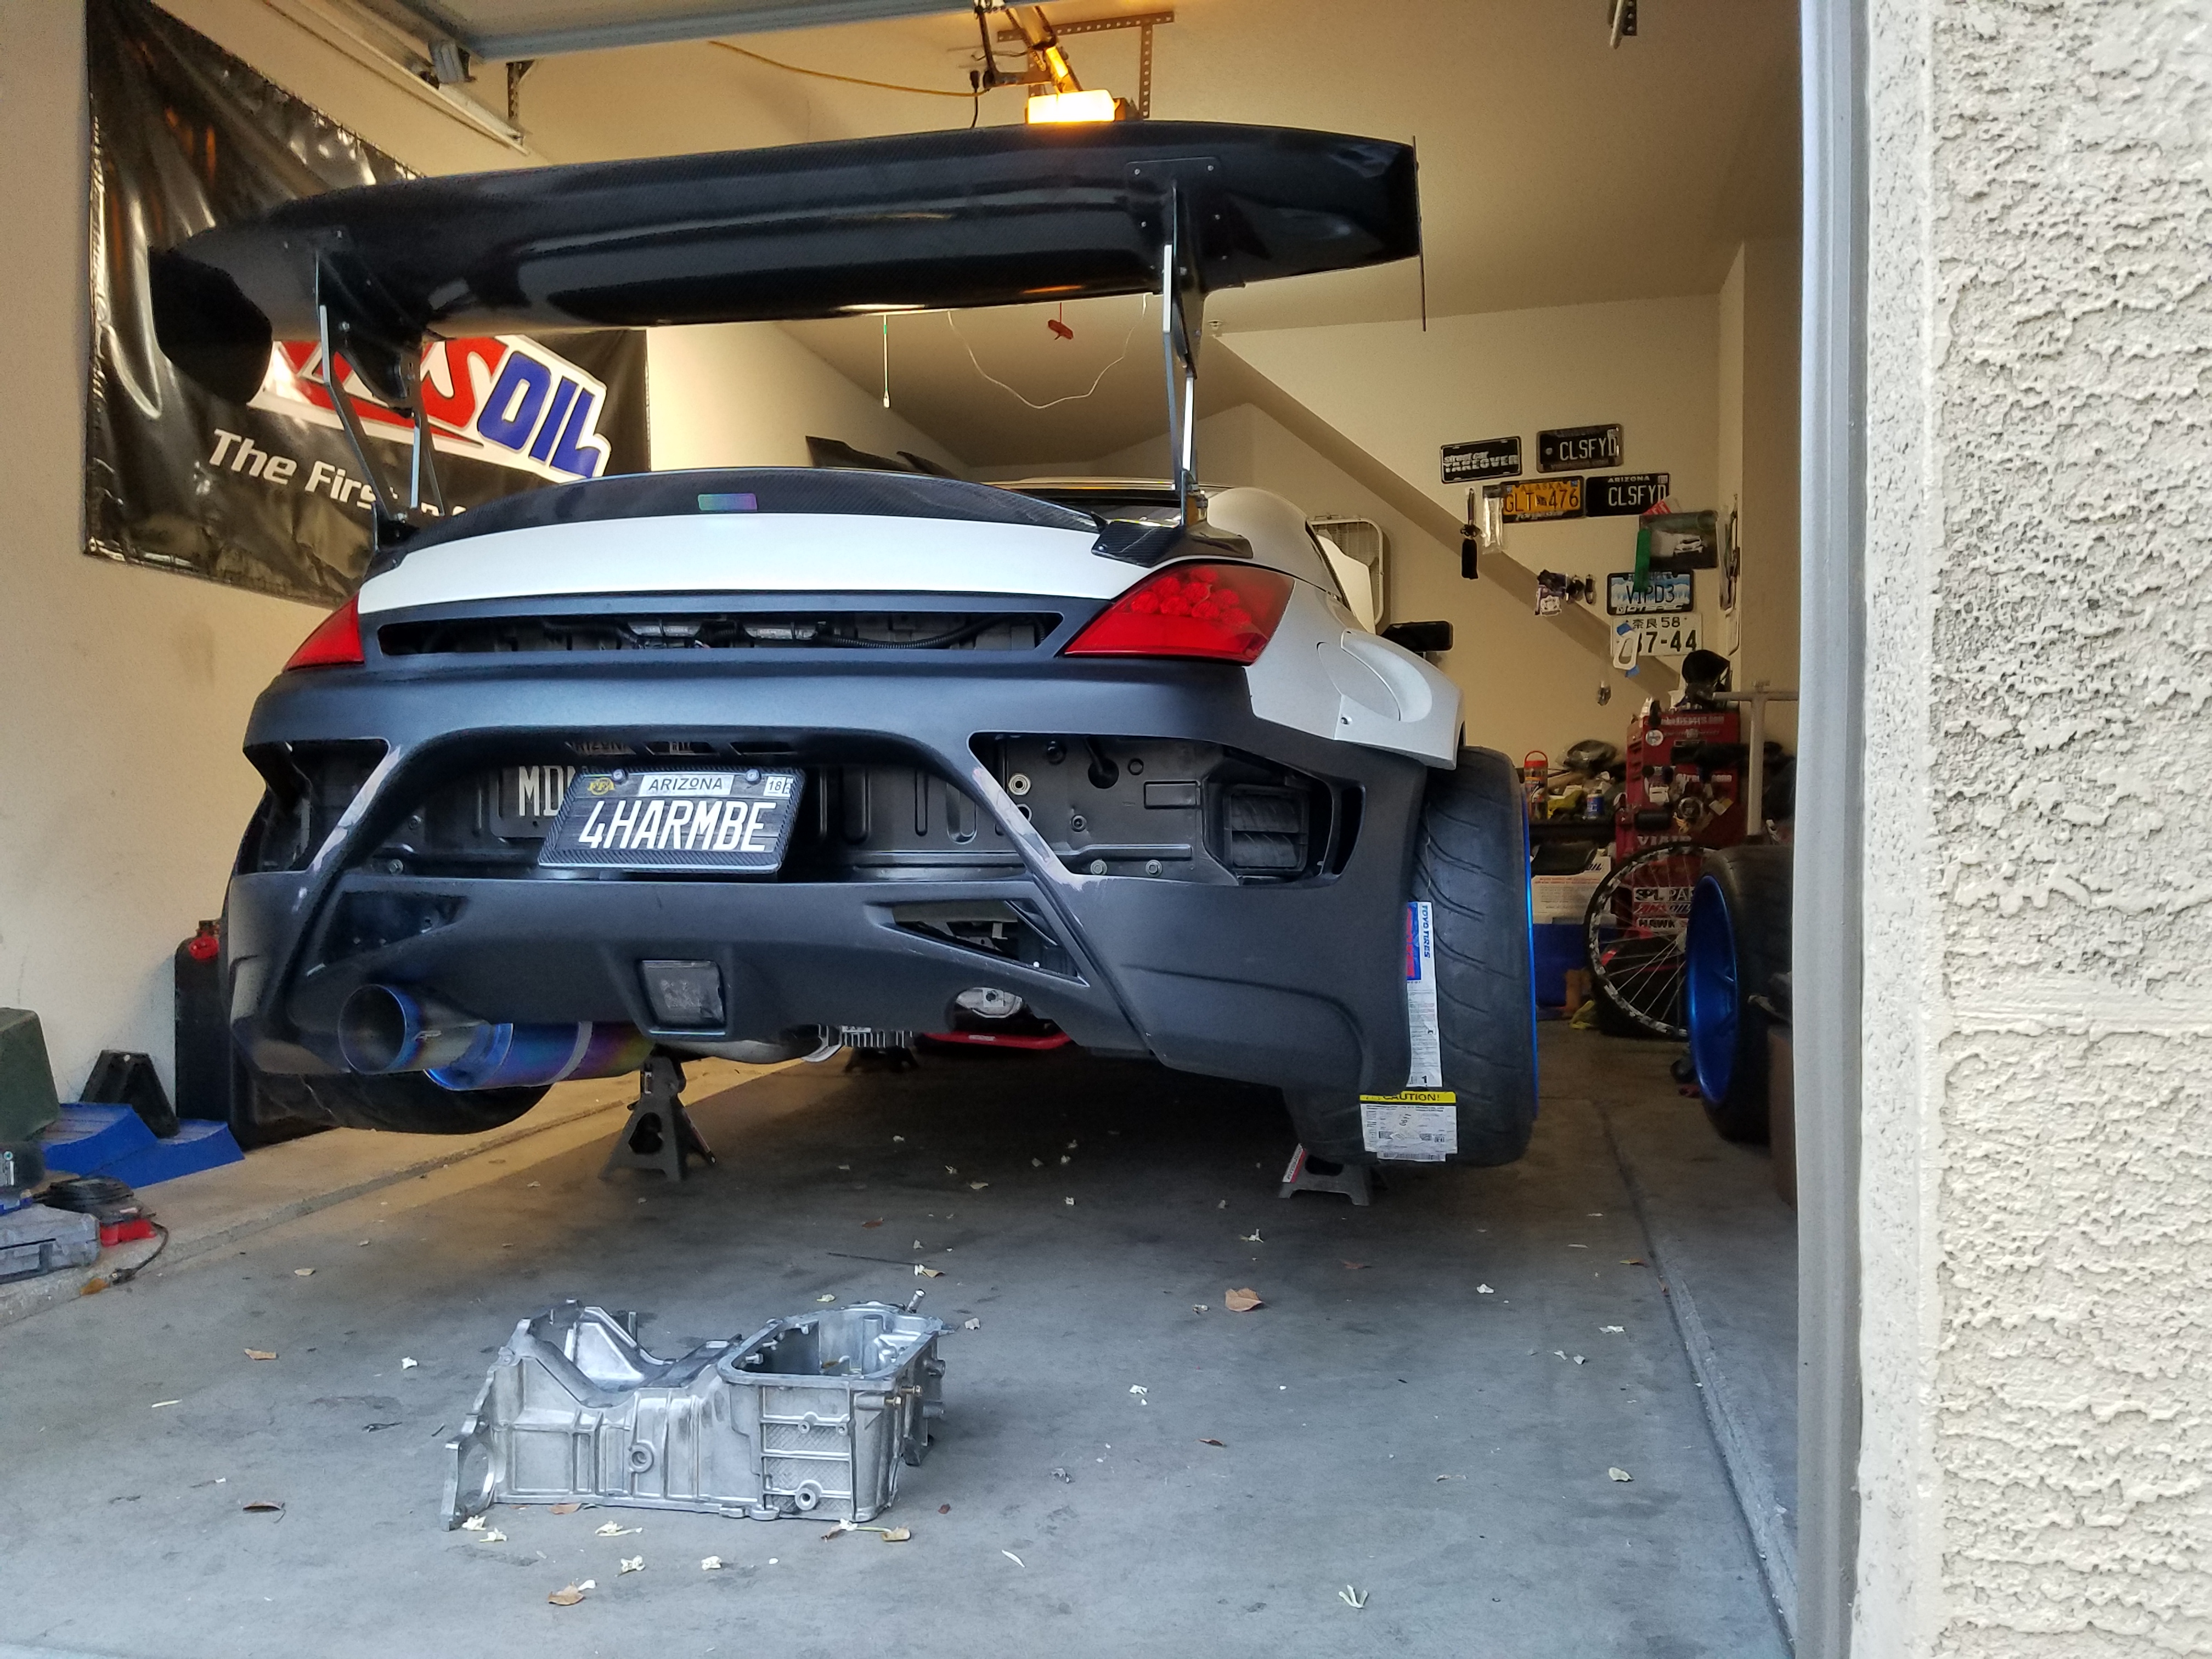
bleeding the brakes tonight, then putting the exhaust back on.. should be able ot get it off the jack stands as soon as my sandwich plate and new oil feed line show up.
I do have to wait bit on this part, because I don't have the touch screen up and running yet, but ....once I DO.. the triple gauge cluster ( hell, even the speedo etc) will be redundant.
Therefore, I am going to shave the triple gauges.. this looks SOOOO much cleaner.
What kind of program are you going to run on your touch-screen center console? Never heard of anyone shaving their cluster gauges. Funny that, I recall you have like a million gauges, and now you'll have one big screen?
What kind of program are you going to run on your touch-screen center console? Never heard of anyone shaving their cluster gauges. Funny that, I recall you have like a million gauges, and now you'll have one big screen?
that's the idea, yes.
Plenty of cars remove the oem gauge clusters. Very common for track cars, running Racepak, Spultronix, or other digital dashes. Now that its common for super/hyper cars, I thought it would be a great classy and functional touch.
The program is dashcommand, and the screens are open architecture so You can actually design your own, or have professionals do it.. Here's three different layouts that are already available and in my tablet, although the data/gauges shown aren't the read out s Id care for on my car.. but all of that can be changed.
Since there is plenty of room between the front of the cluster and the gauge faces themselves, there's no need to cut into any of the electronic part of the cluster, leaving my odometer, turn signals, empty gas light, shift light and interior lighting controls all intact.
I have a nicely fabbed up oem cluster now w custom gauges faces and lighting, no sense ruining that one when I have a spare I will use as the base for this.
Time to shave the triple center gauges and fill the holes.
TFW you went to great length to match all your aftermarket arms lengths to the spec of what was previously installed and removed.. but due who put them on apparently moved them all.. smh. like -7 toe and +16 camber lol.. guess I know what im fixing this morning.
Last edited by bmccann101; May 17, 2017 at 11:20 AM.
lol.. this is not as easy to fix as one would think.. you can spin a rod only so much before you have to chase the tension away by adjusting the rest out.. back n forth.. smh.
This could have been much easier.
should have pics of mine by the end of the week.
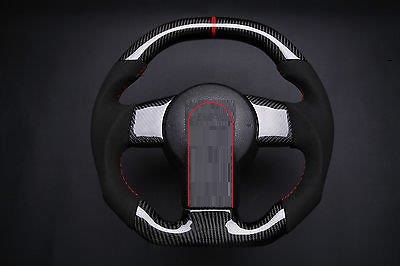
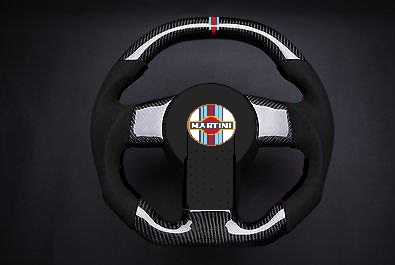
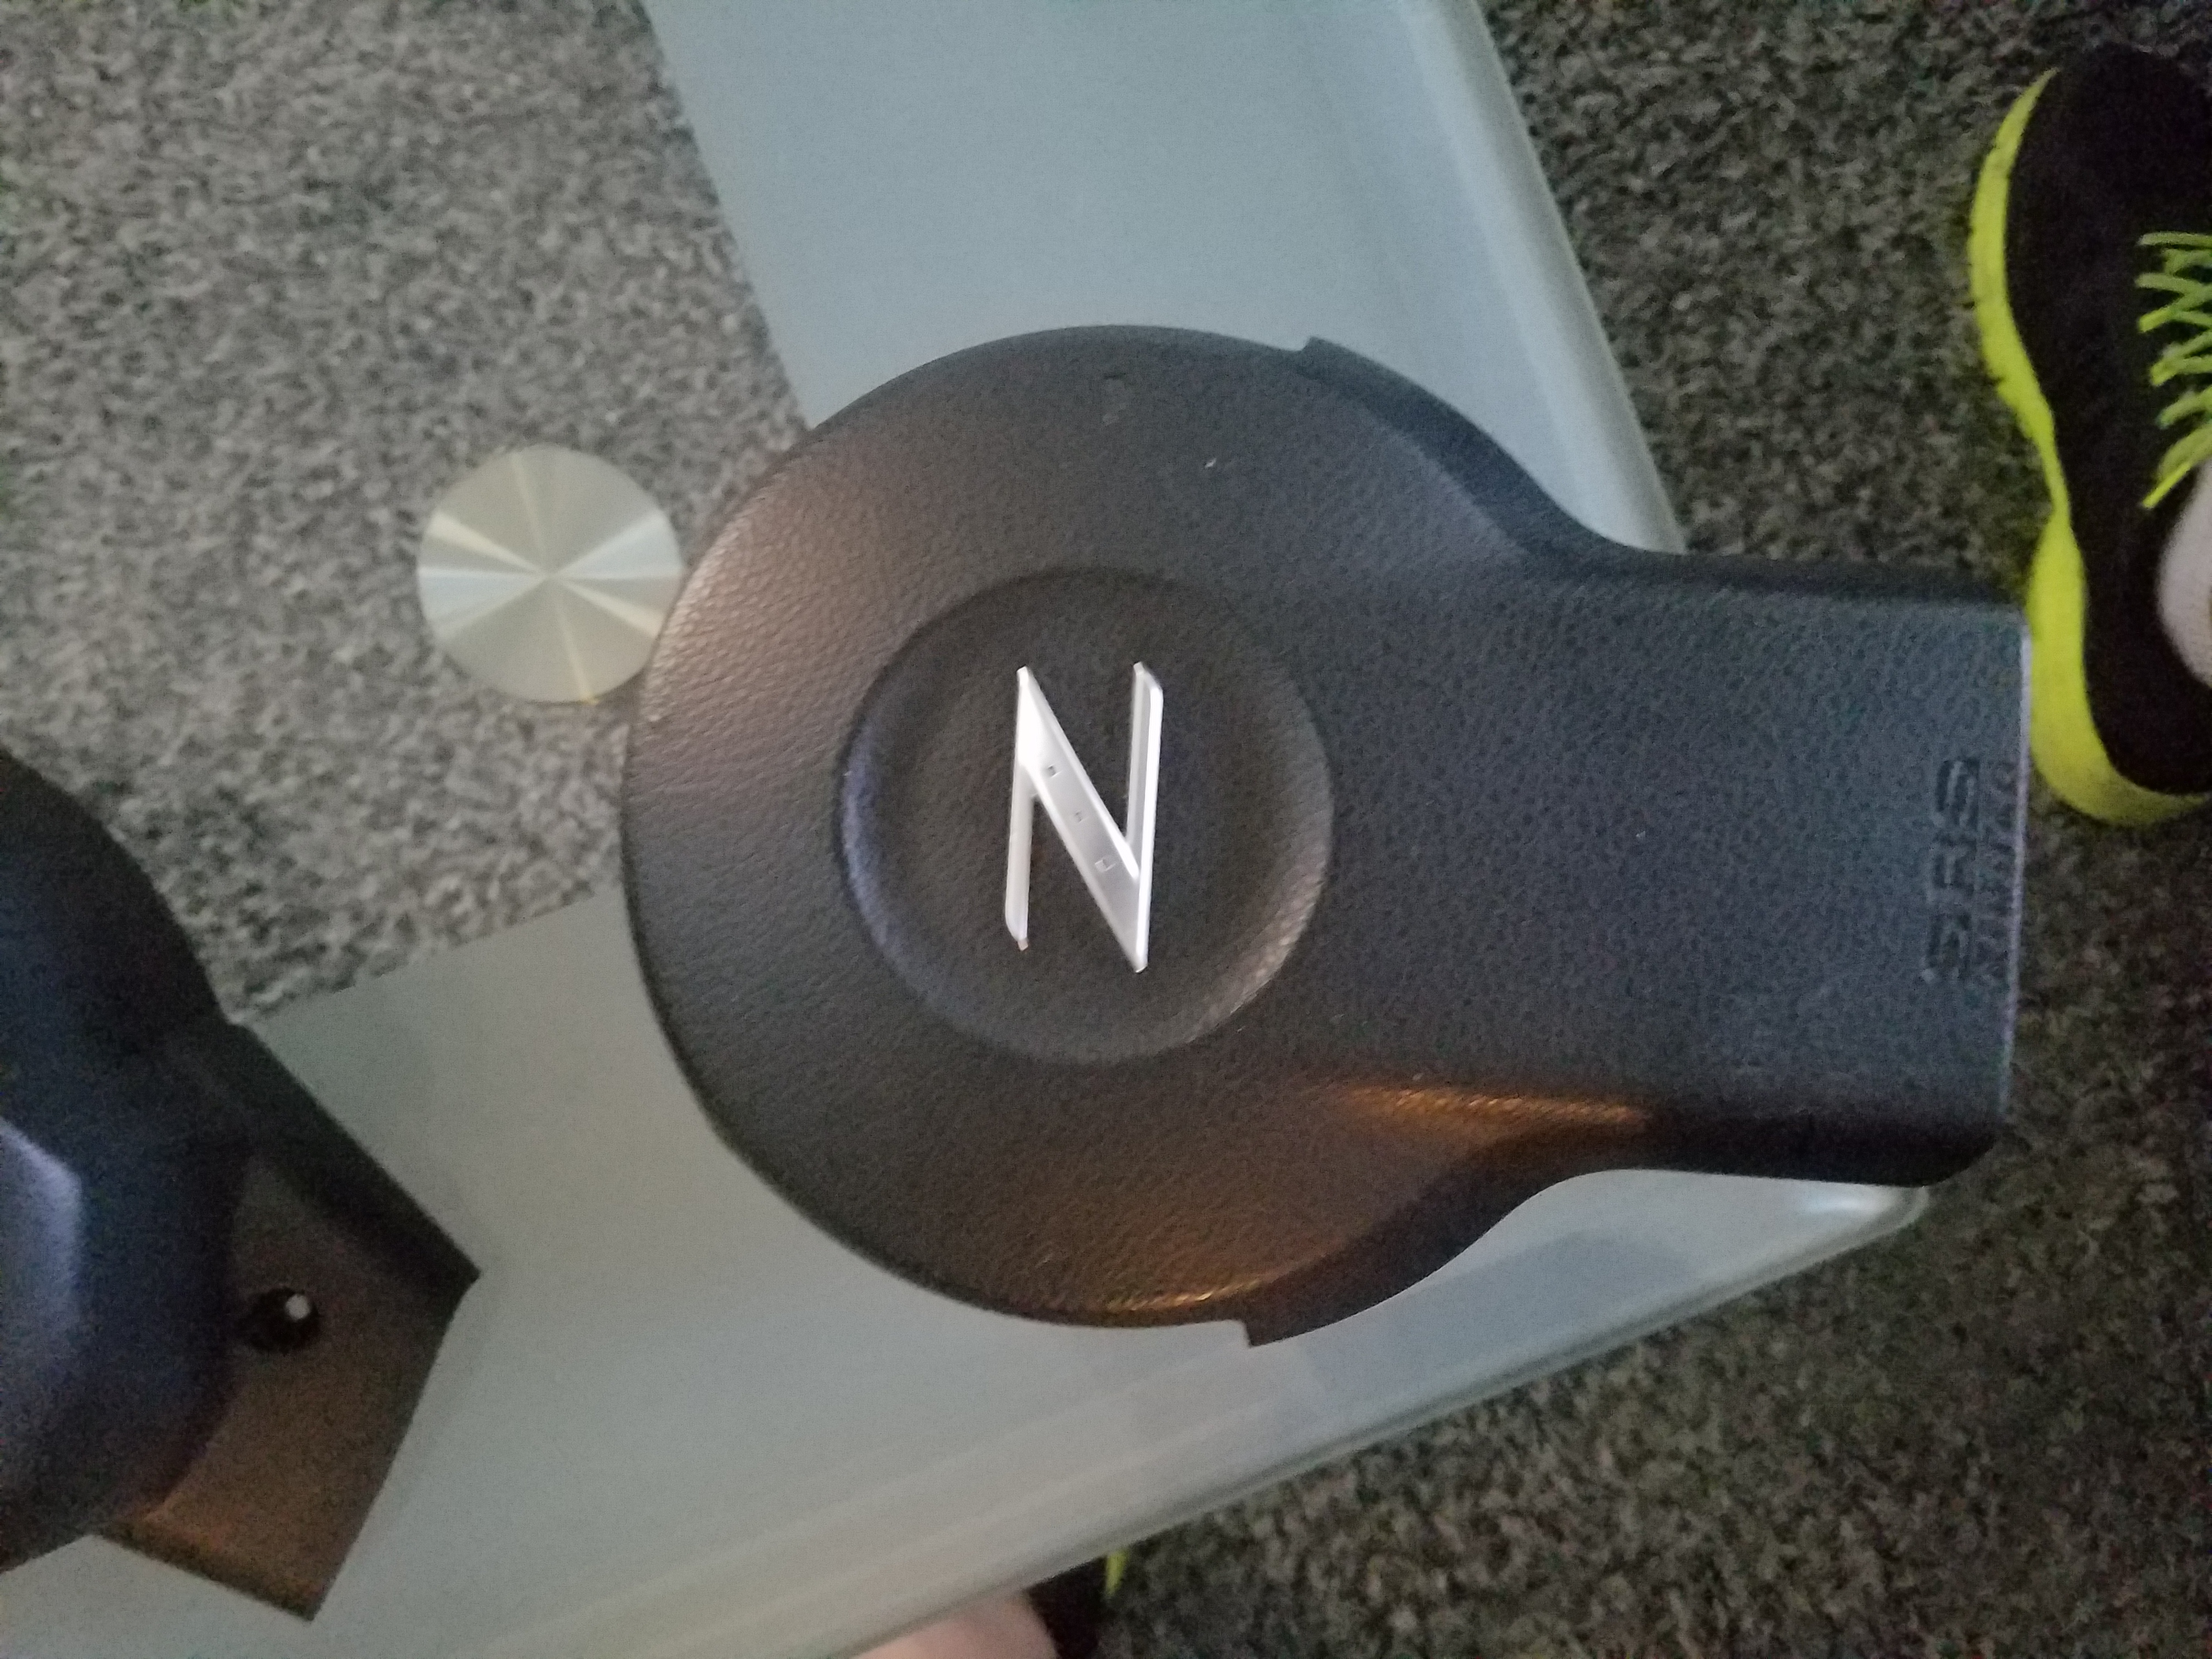
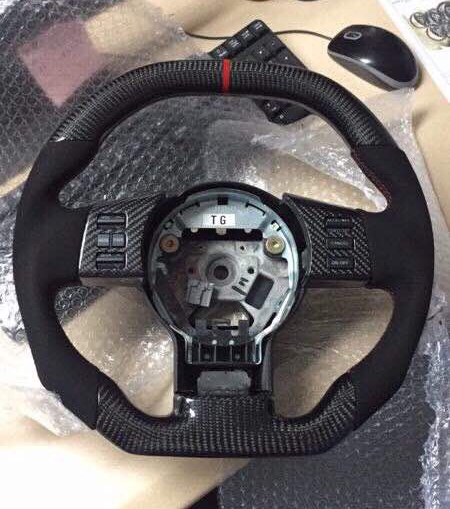
Flat top, flat bottom, no knuckle knurls, red stripe, red stitch, alcantara grip, carbon fiber switch panels as well.. and I have an appointment to have the OEM airbag reupholstered in alcantara and red stitch as well.
Im still trying to find a company to make me a custom gloss emblem as a horn button to match the vehicle livery.
had to move and redo all the sandwich plate fittings due to the location of the sway bar once it was adjusted properly w end links etc..
had to build a new drain line from the turbo to the pan.. and that should finally all be done tonight.. time to put the interior back together for now, and actually reinstall the oem seatbelts until I have funds to build this rear half cage.. barring any unforeseen issues upon start up, im hoping this thing runs ok and can make it over to its alignment easily.. next up?
Bumper mesh install and light bodywork.. and then having the rear flares re-glassed to fit the wheels. wrap it up quickly in some avery satin white, and should be done for a bit until OT opens back up and some more money starts flowing
Came back, looks like I misunderstood you. I thought you were going to shave the gauge cluster out like the passenger-side look, and add the said screen in the middle of where the iPad looks like it goes to in the middle.
Yeah not quite sure.
Building my center screen as before, but will just shave out the top three gauges from the center waterfall.
Wont need em if I add the tablet in place of the gauges on the steering column.
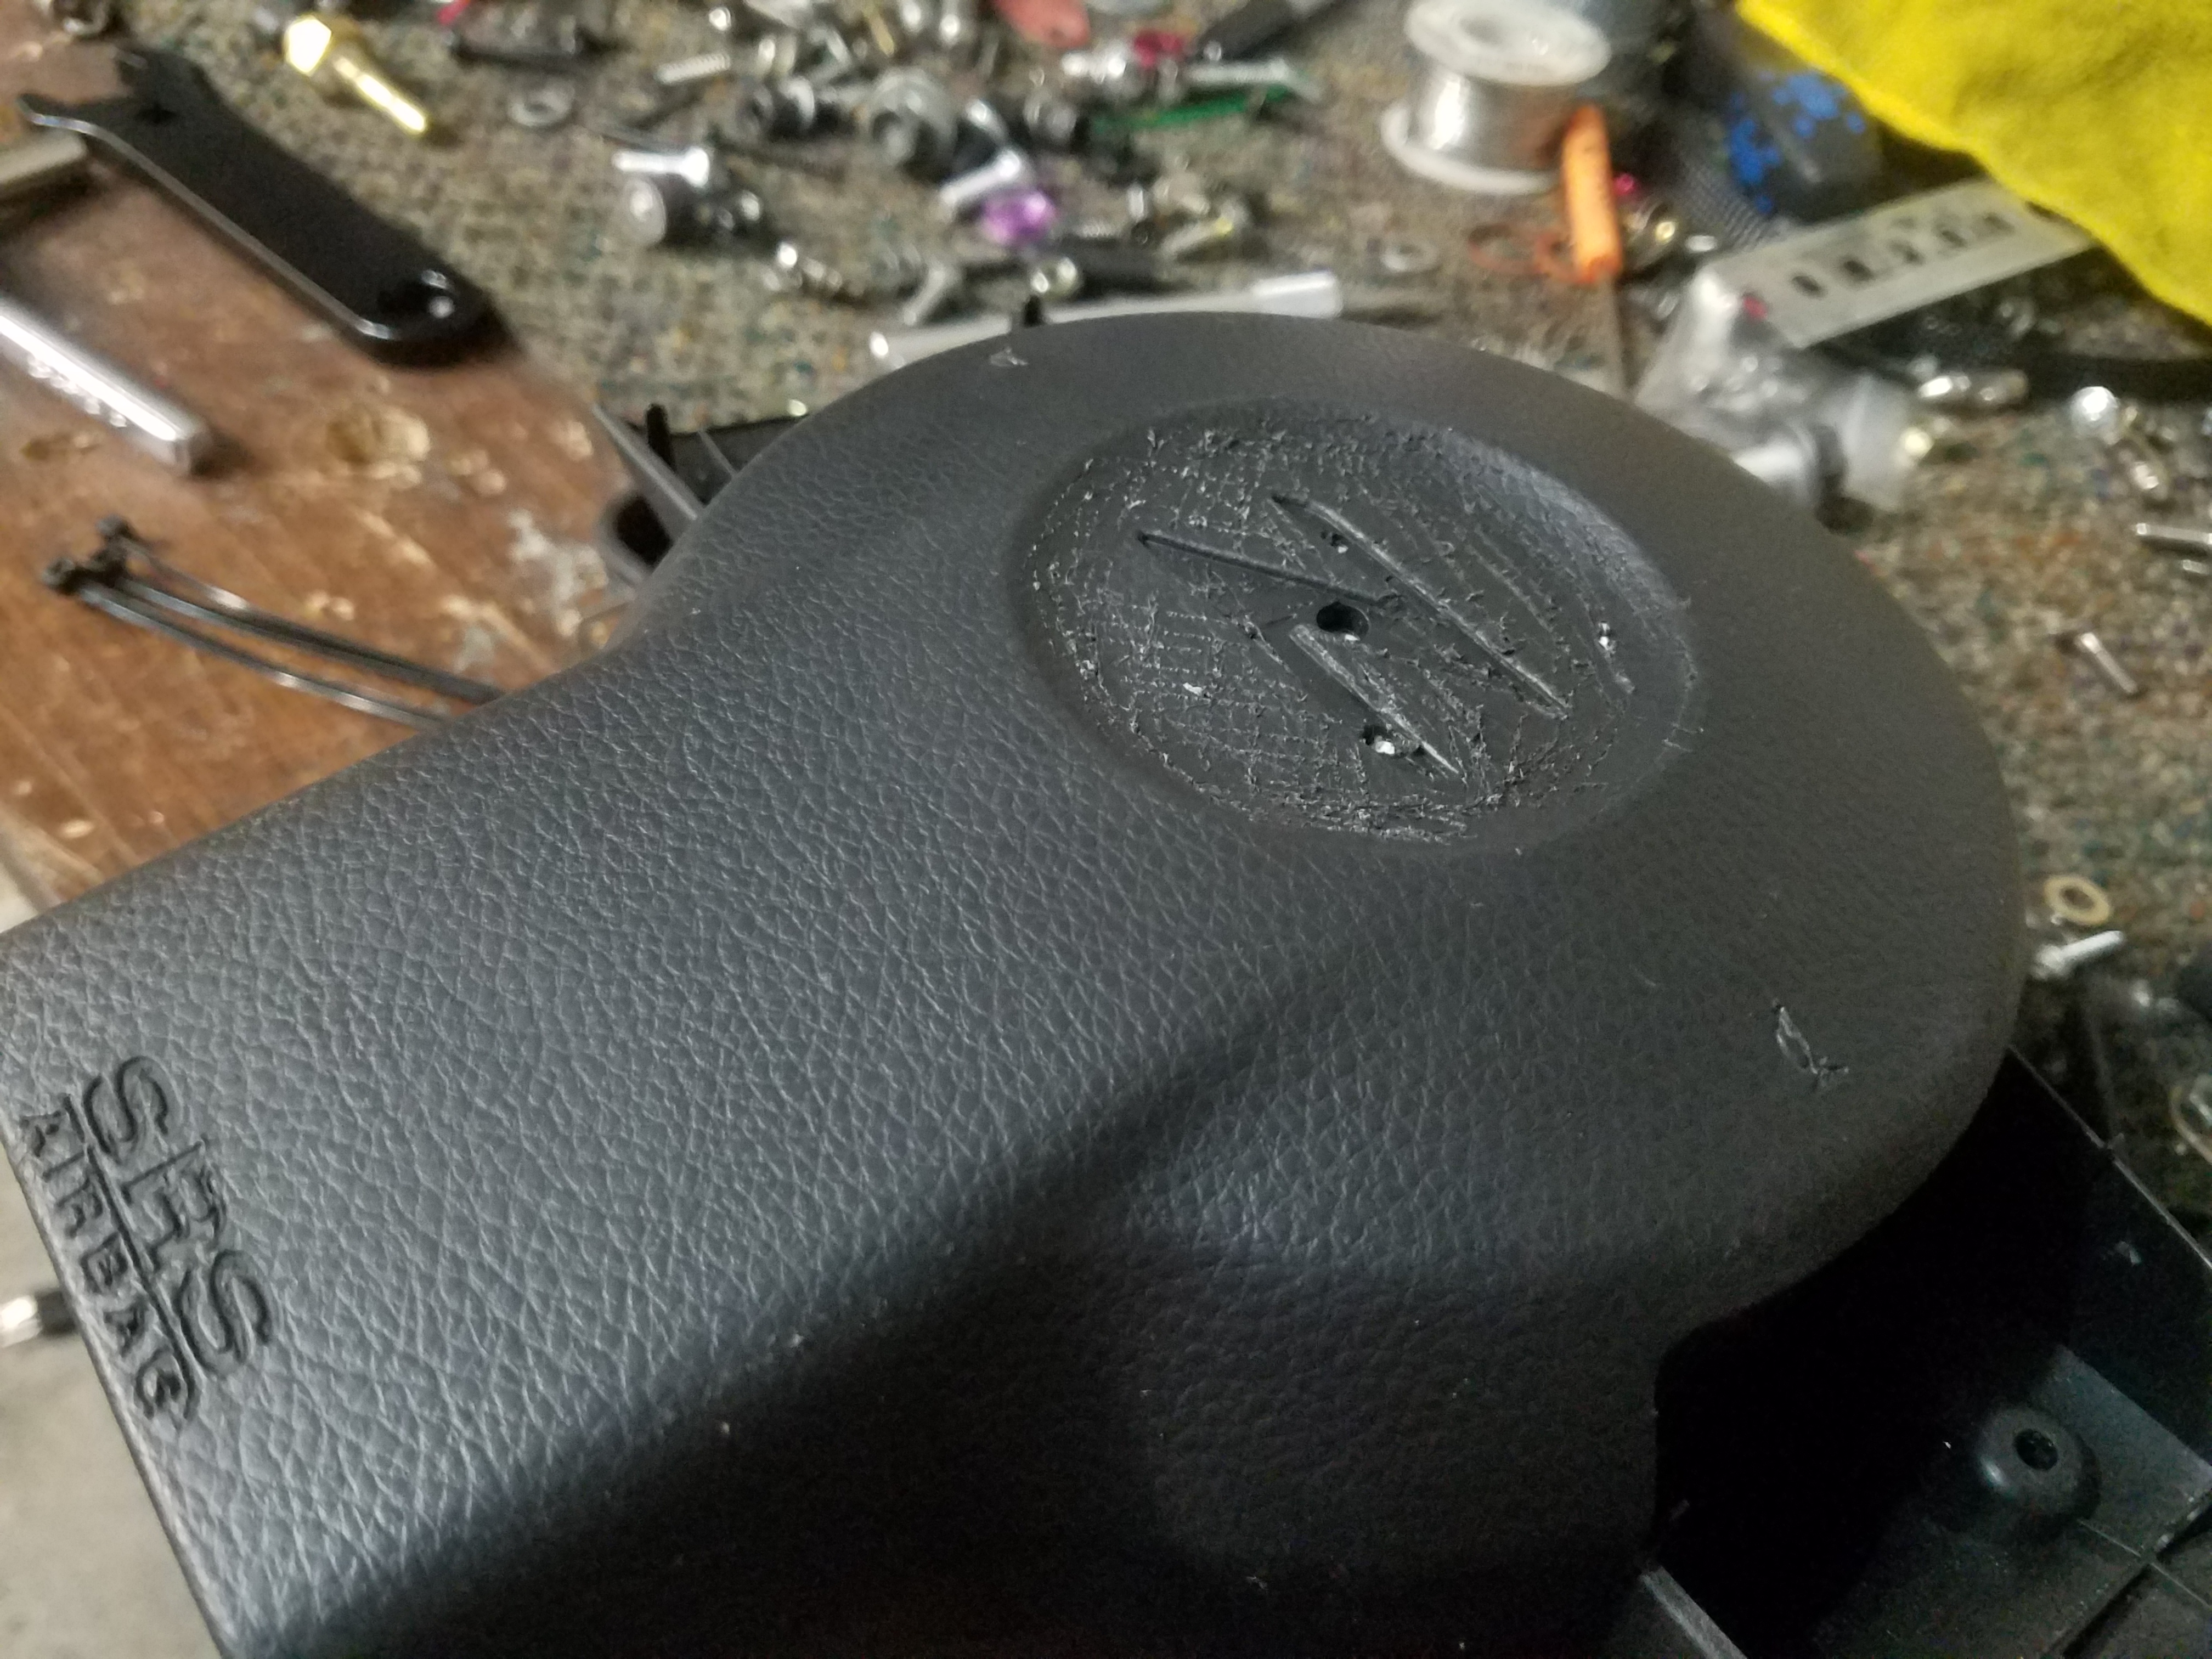
started the airbag modification. lol. pretty fancy so far haha.
no but next up, I need to find something that I can fill in the center indent with, and then ill drop it off to be reupholstered.
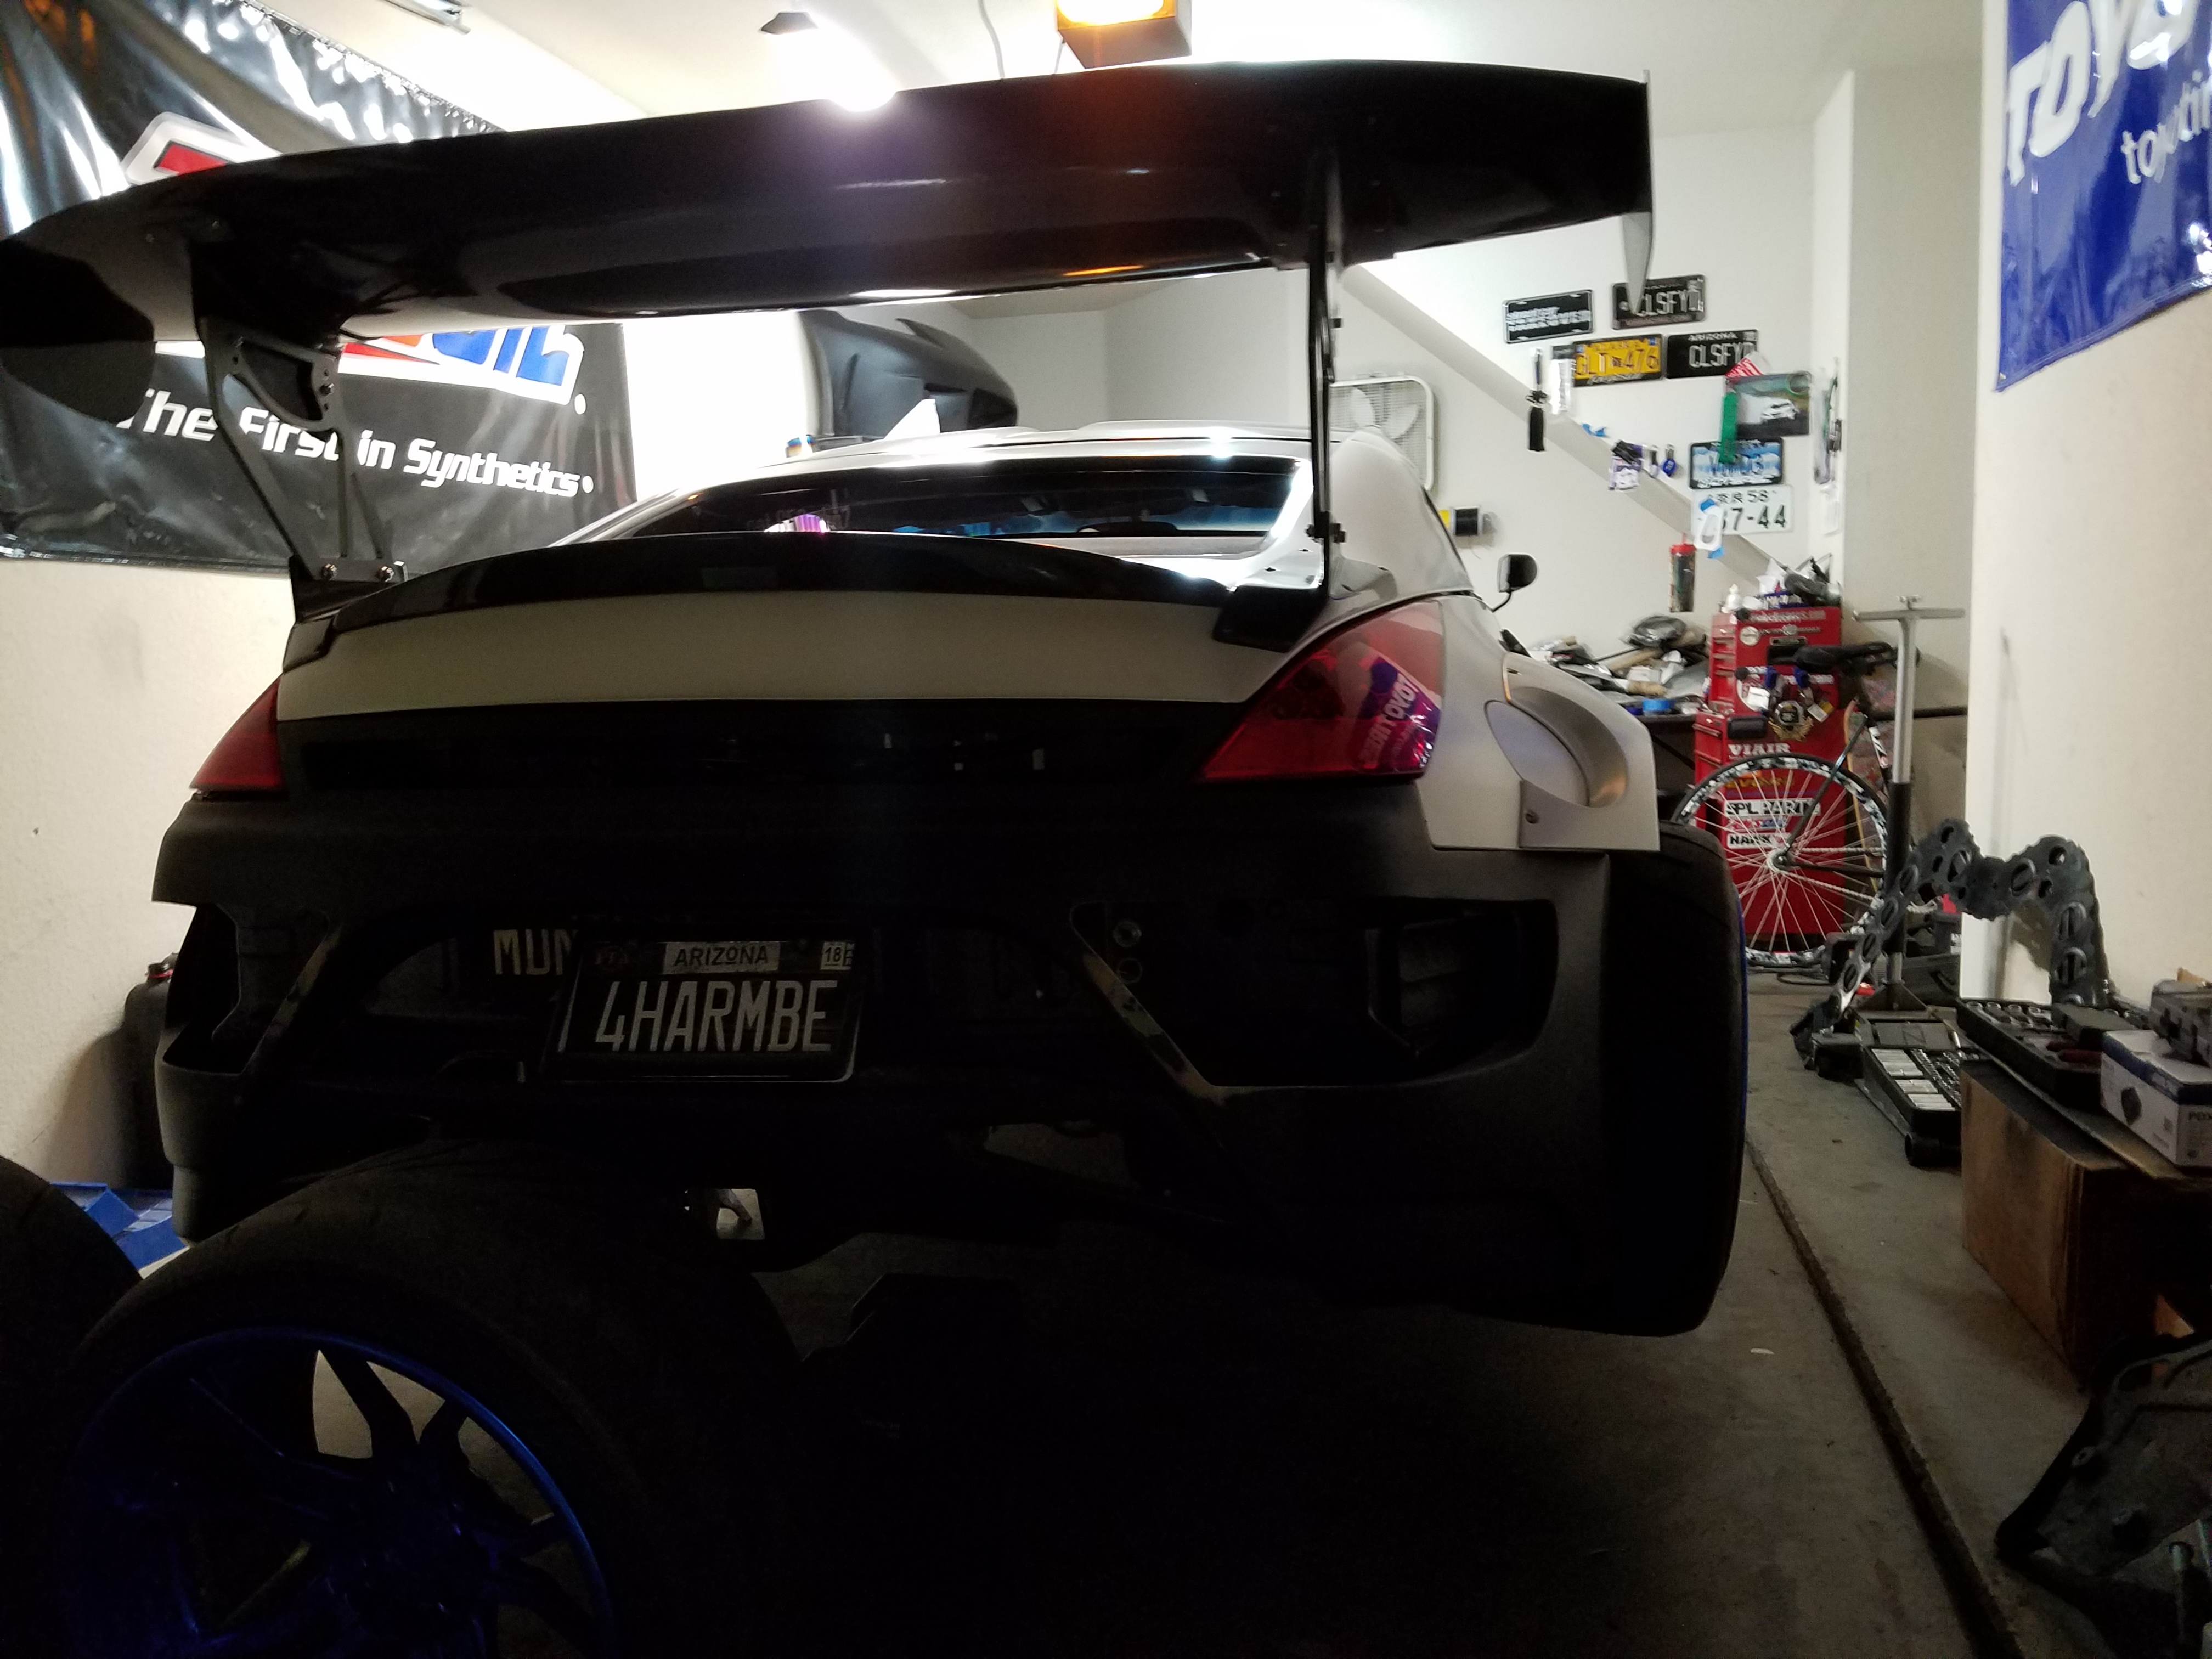
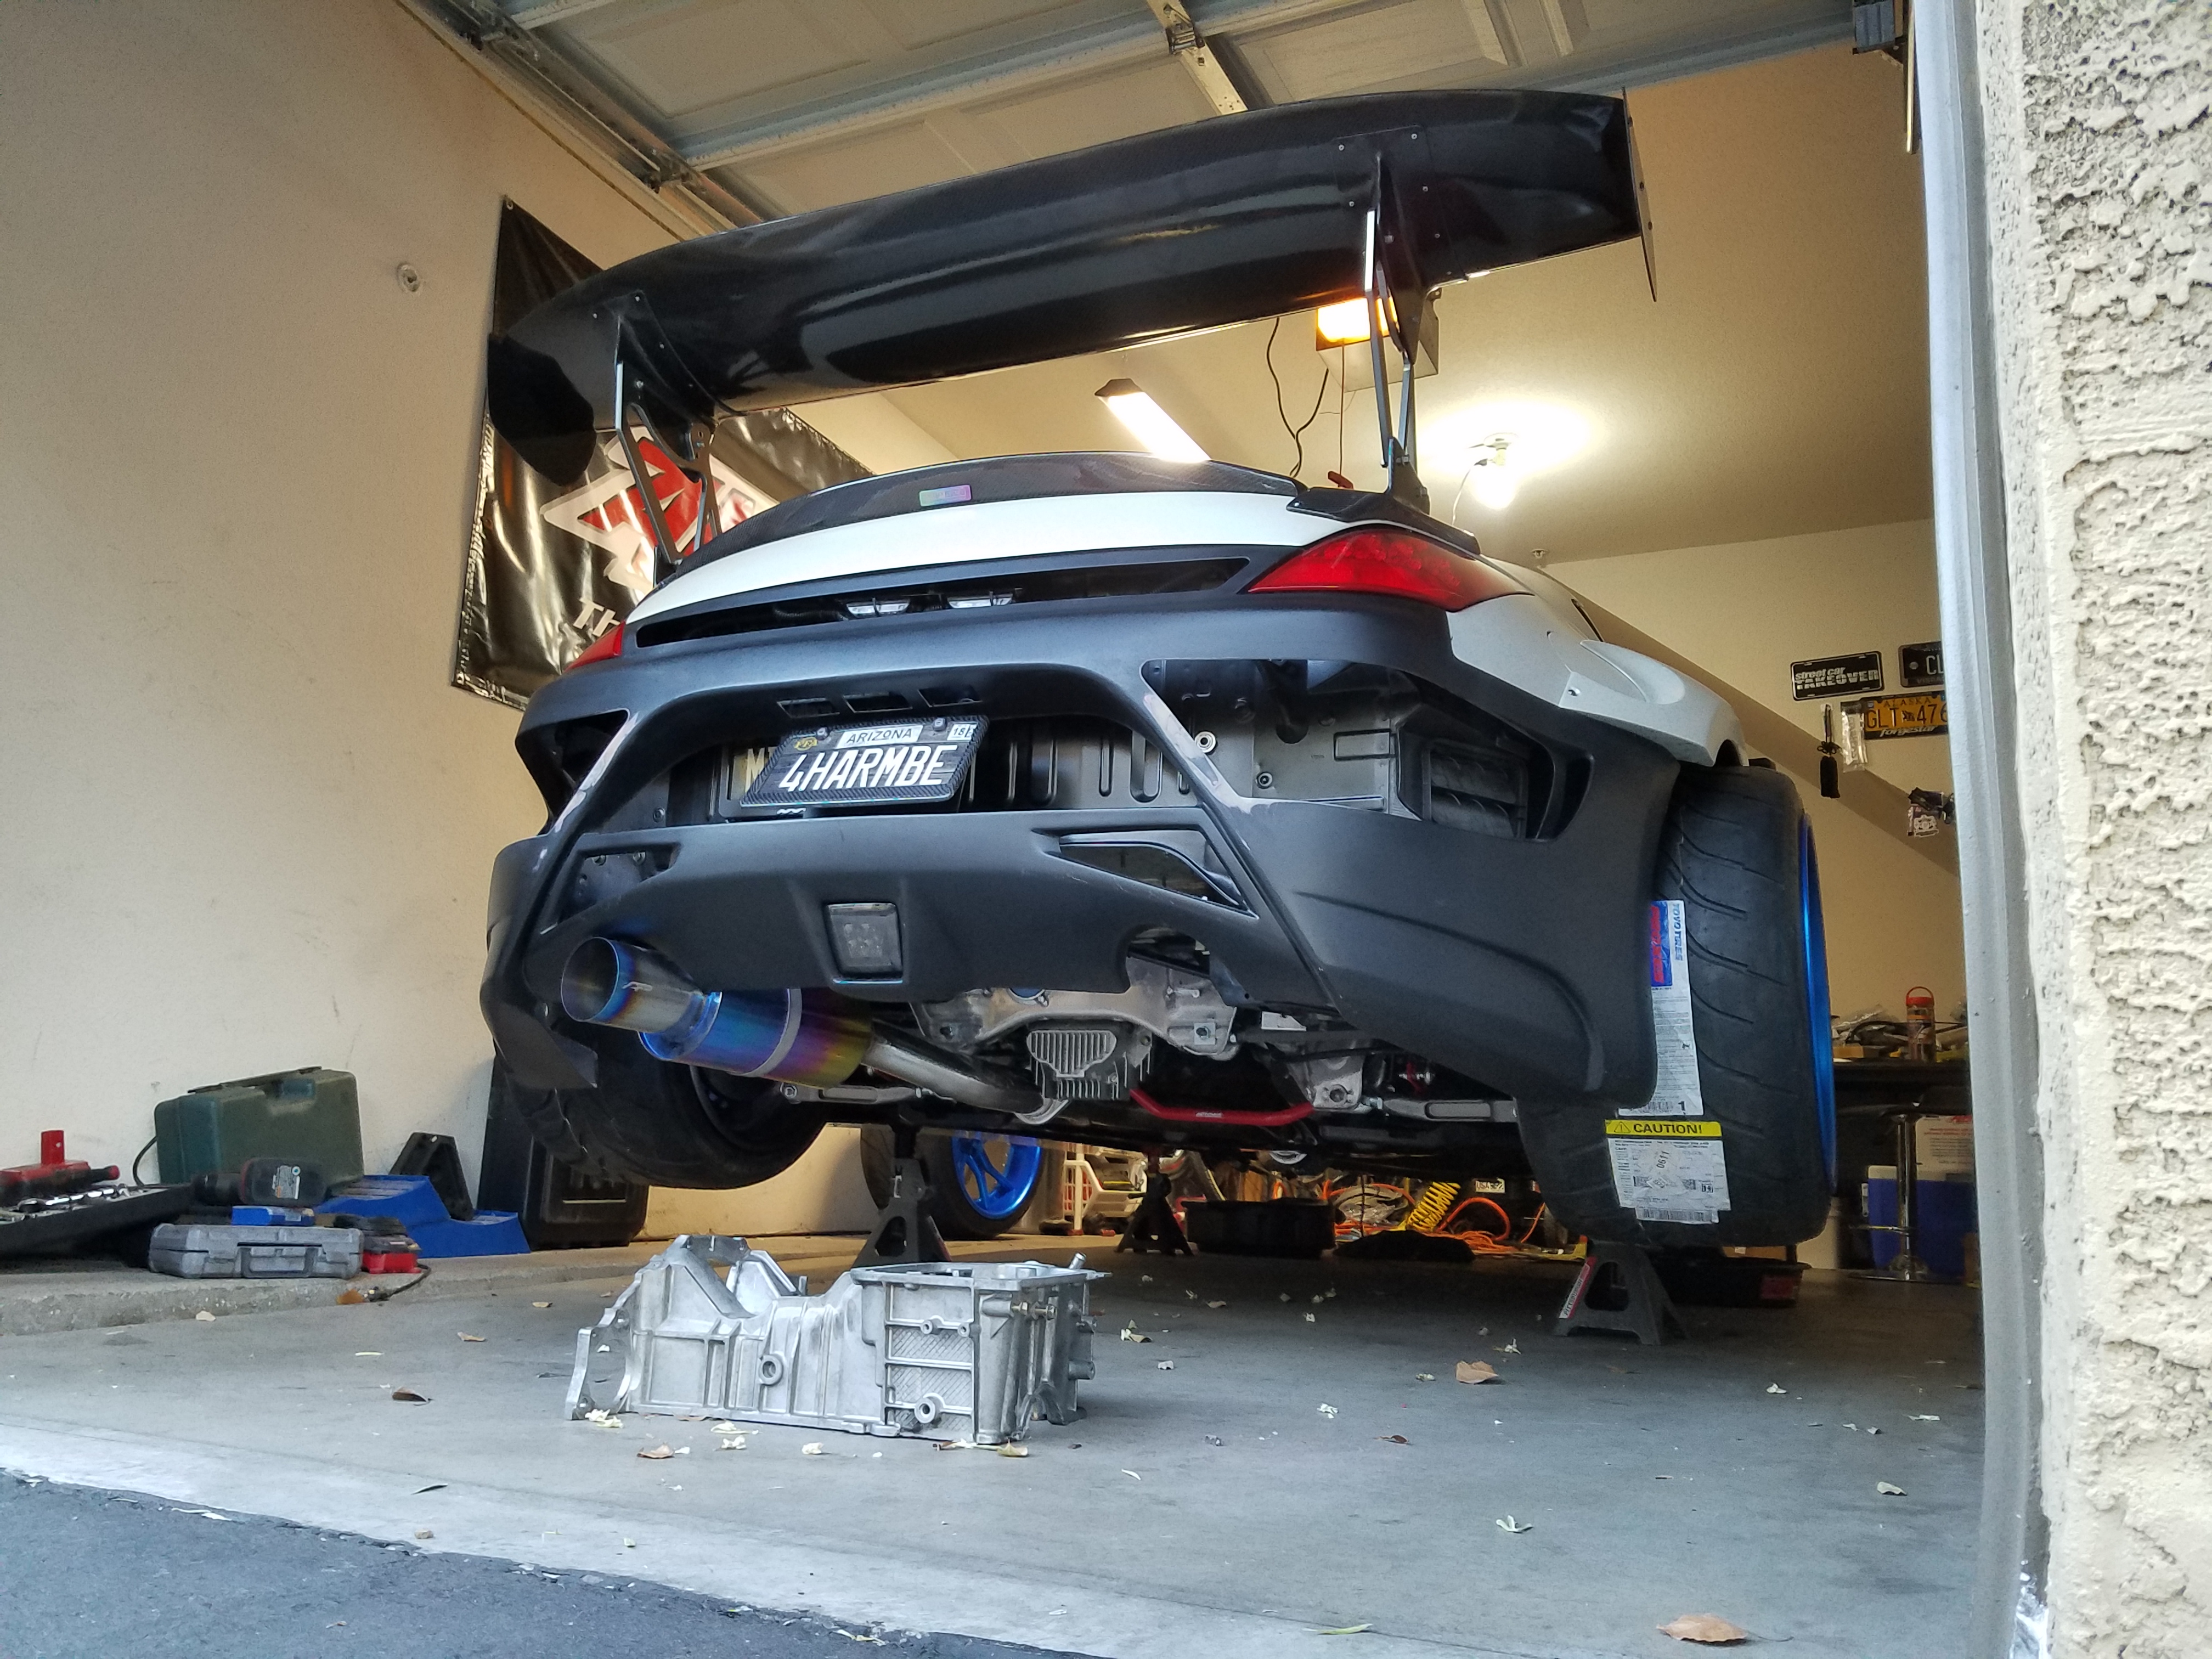
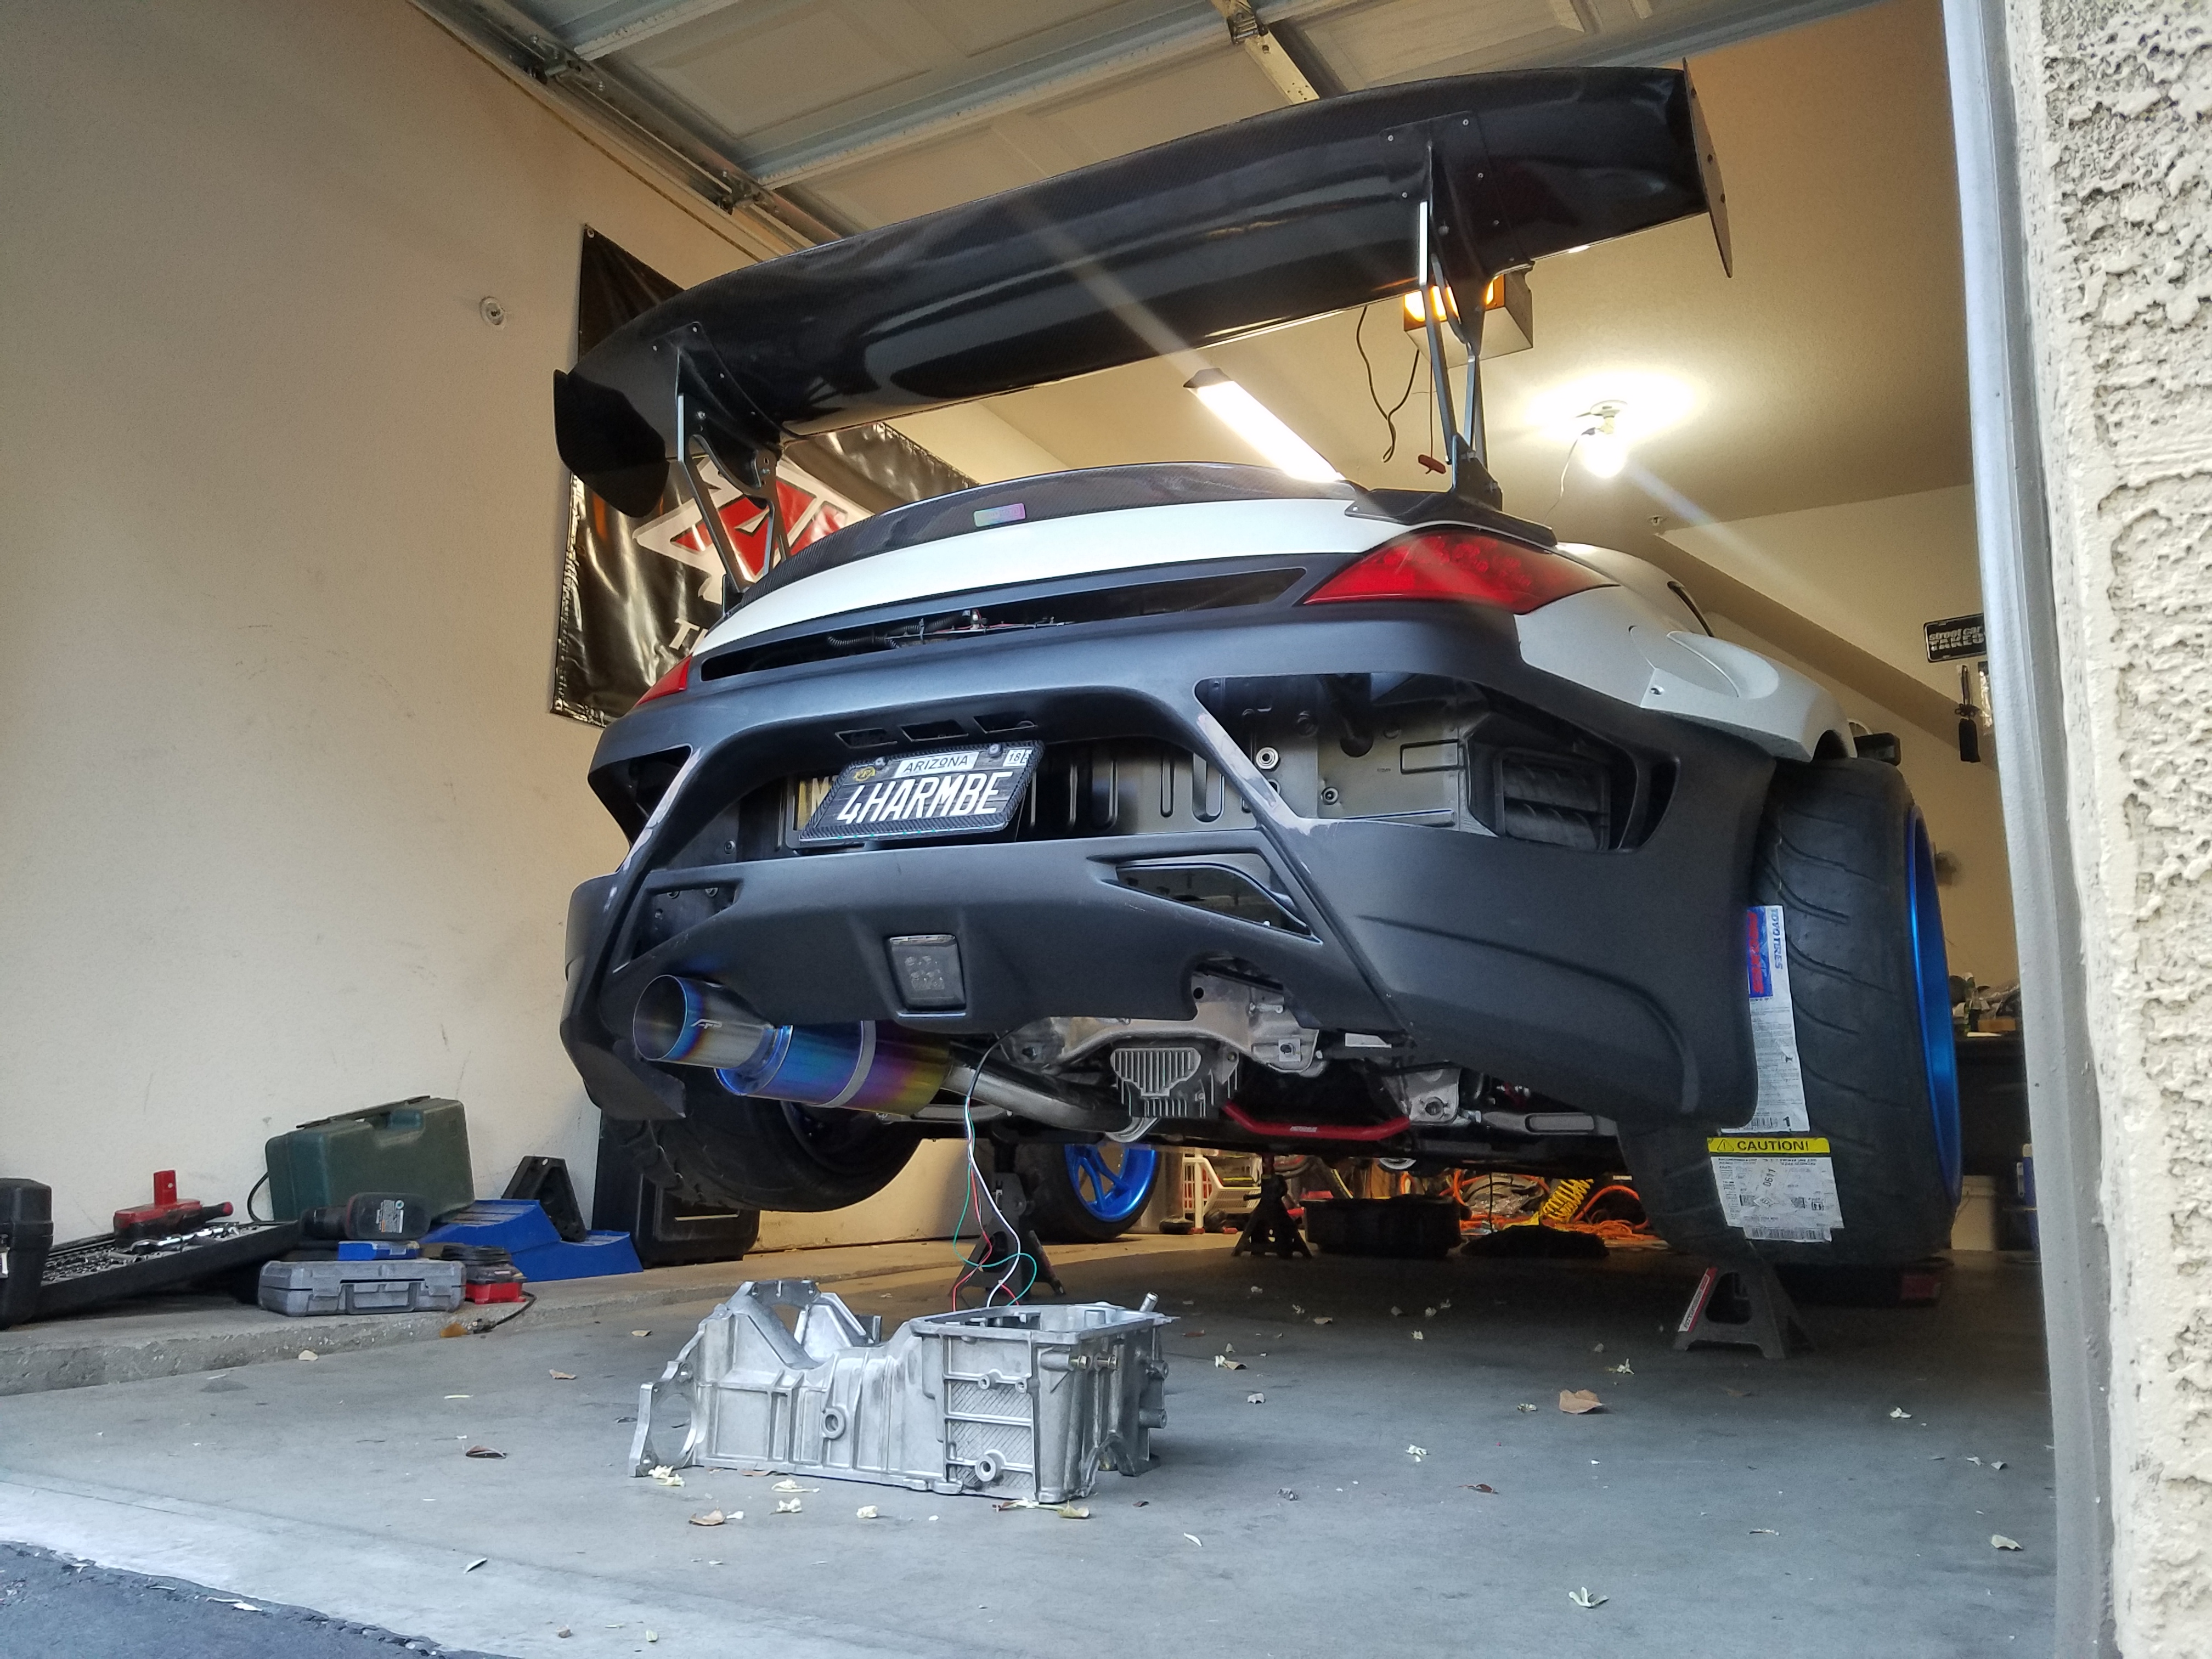
got the exhaust back on, should end up looking pretty clean. I really dig my undercarriage though.. lots of awesome stuff under there in these pics imo.
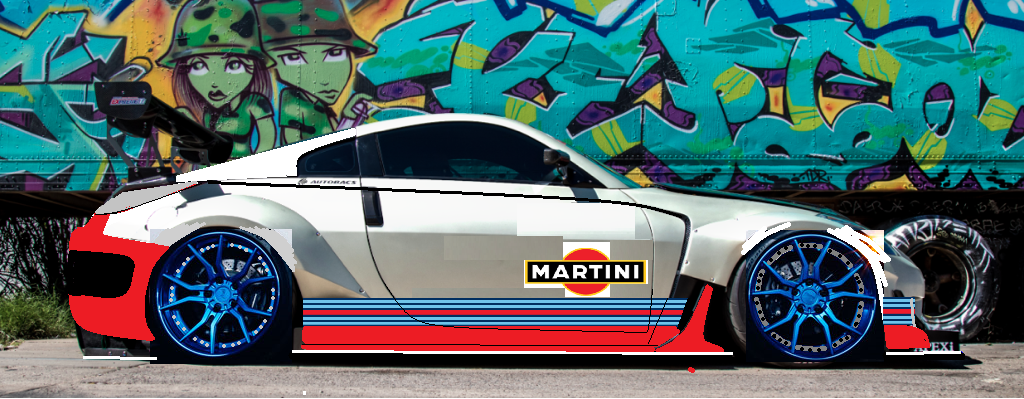
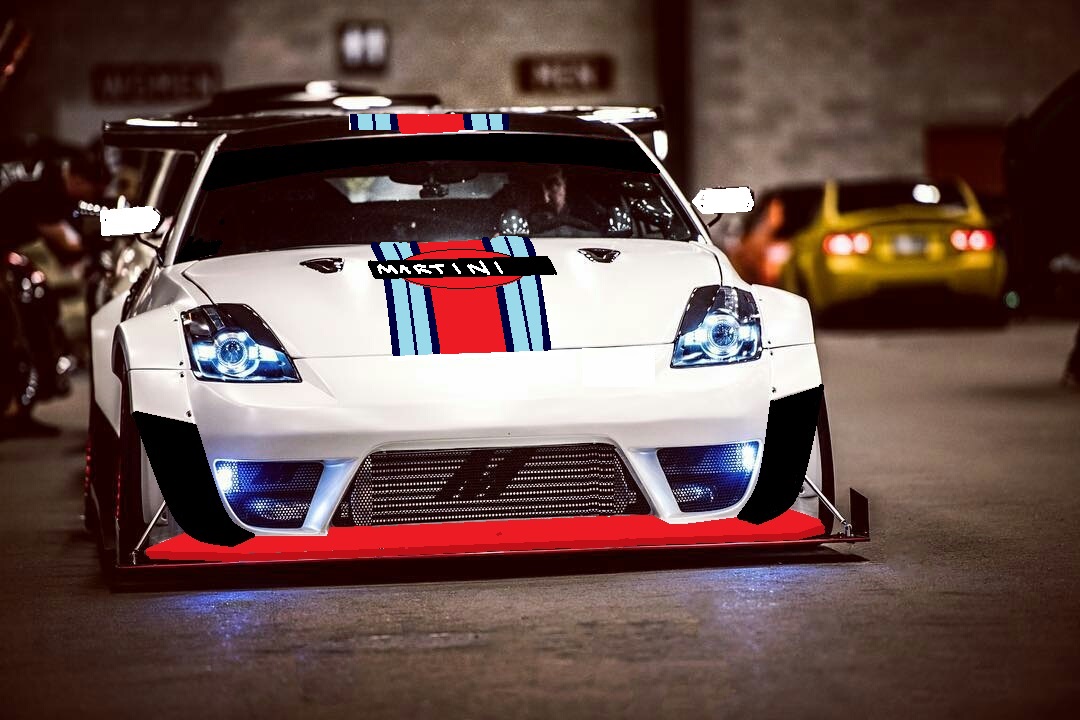
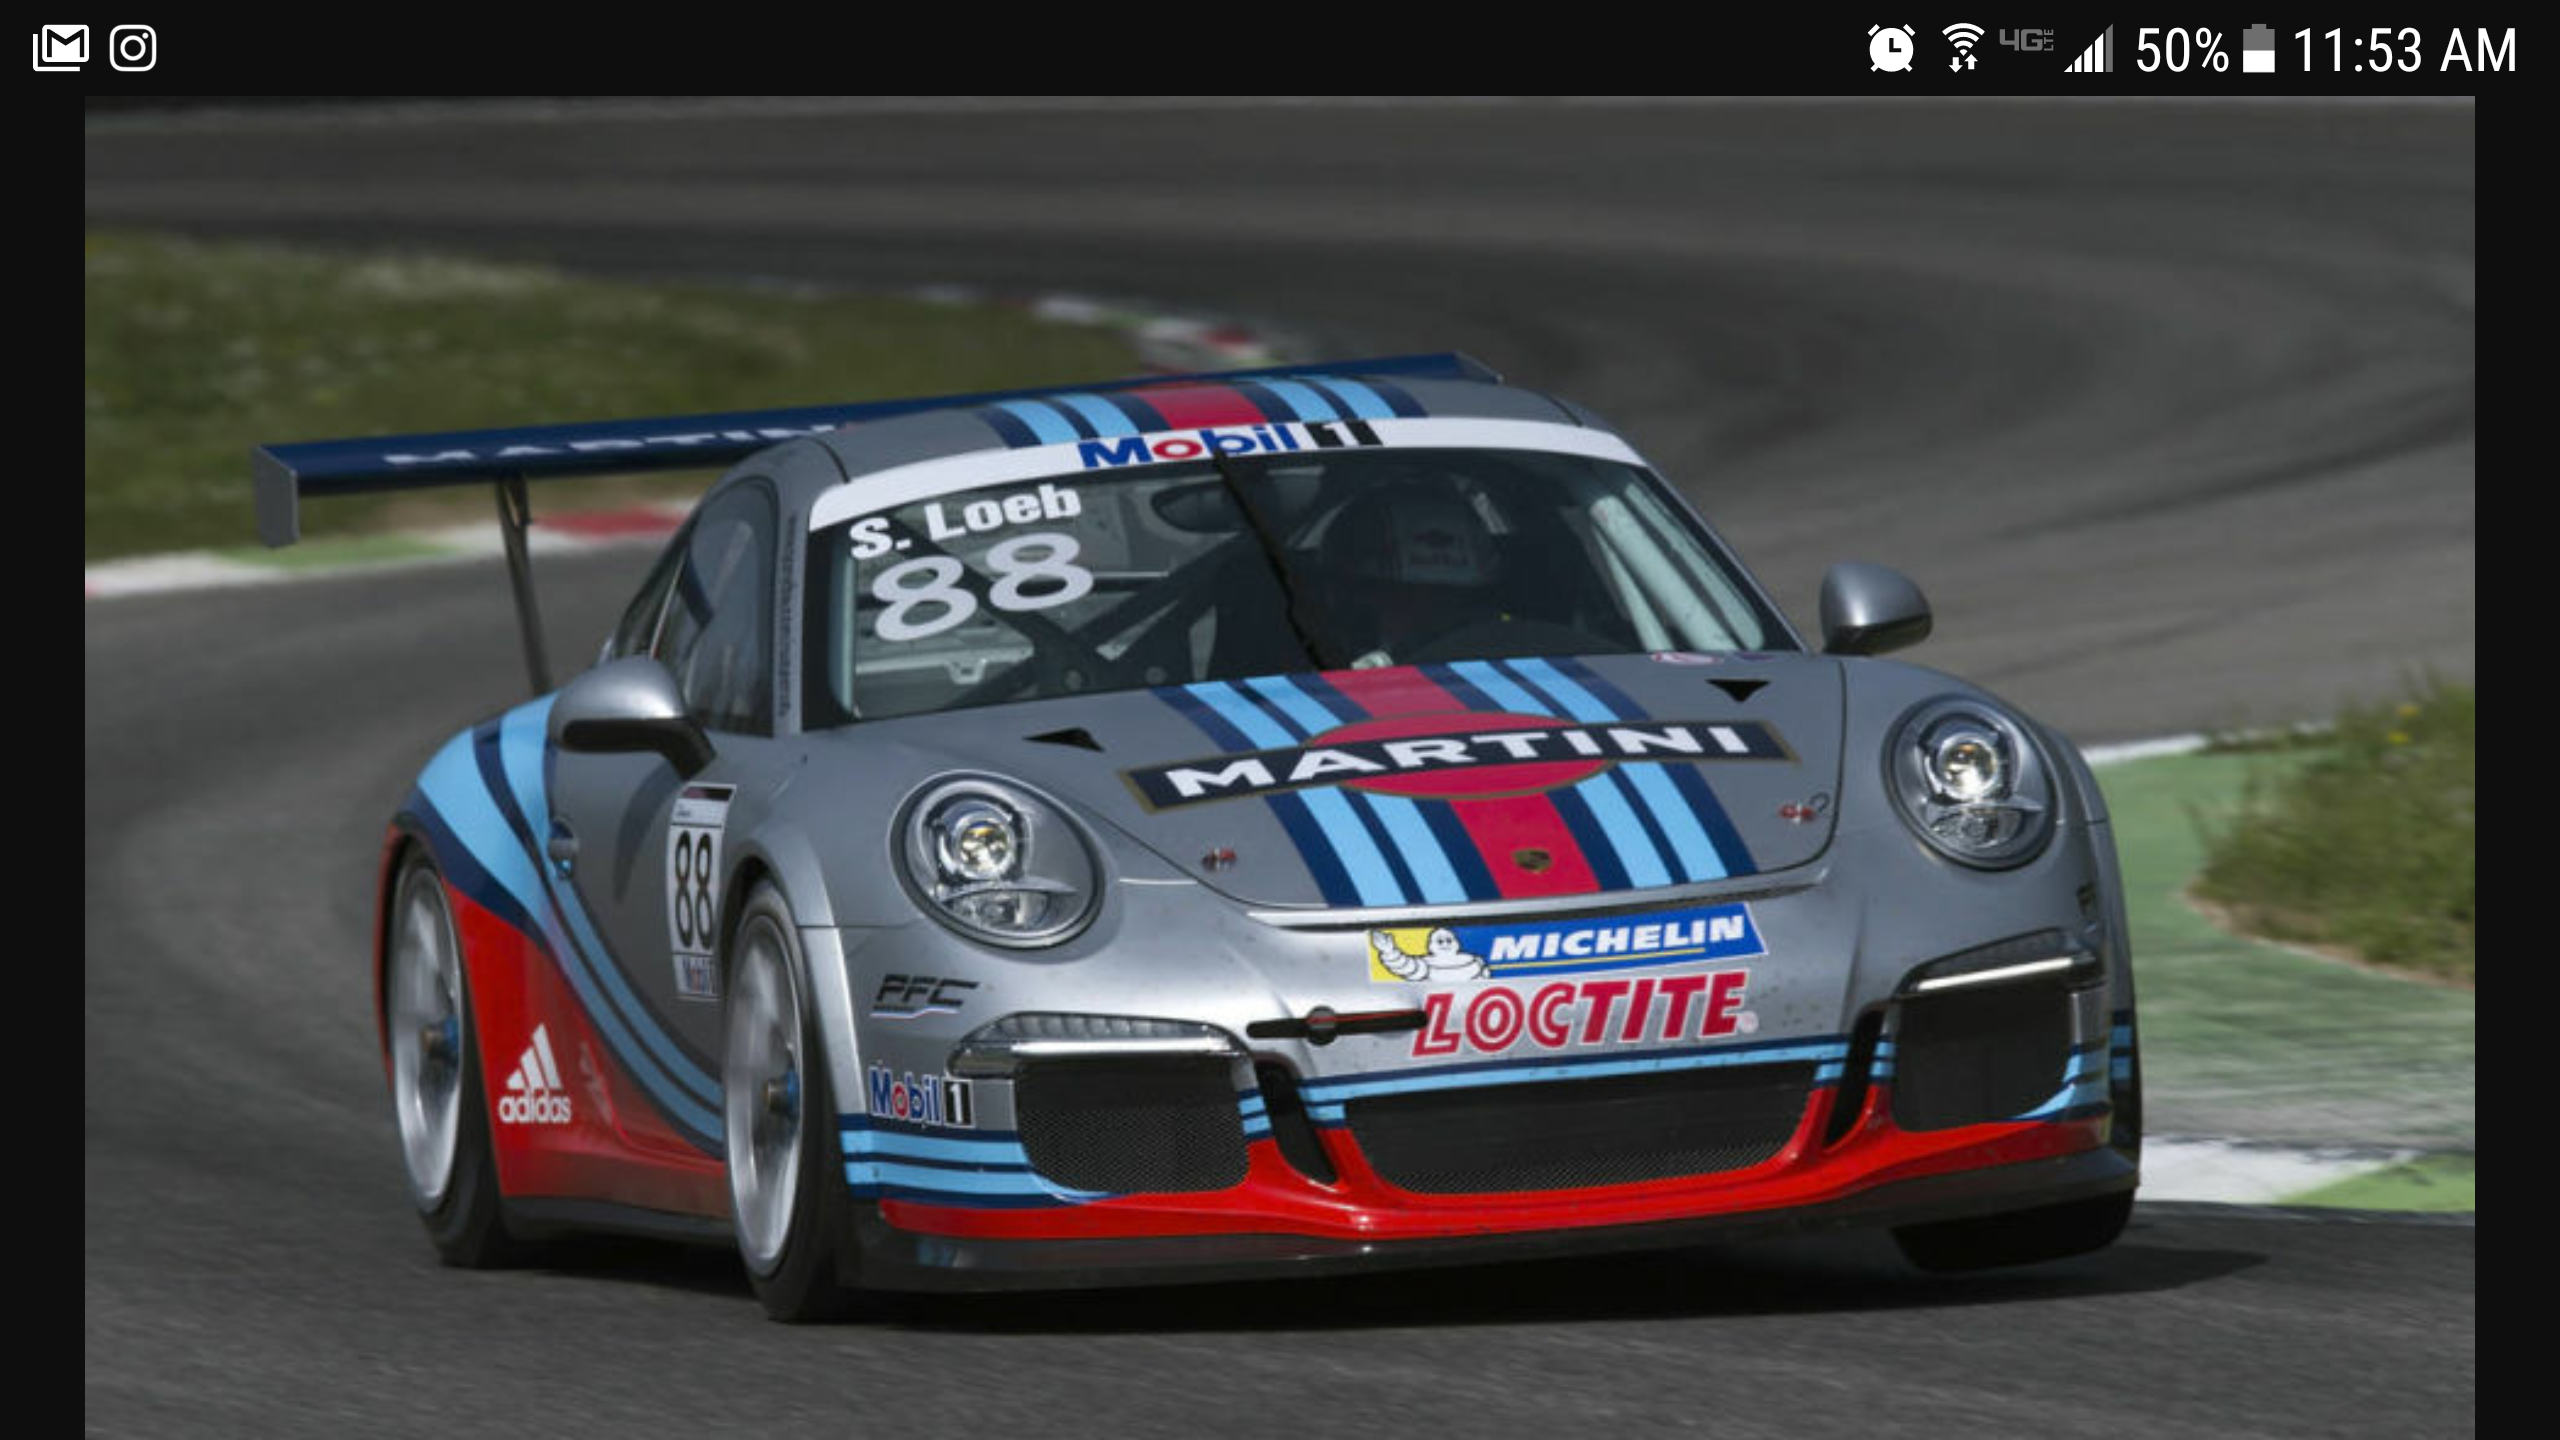
Instead of doing a big S curve martini Livery "swoosh", I was thinking going with a more simple hood and side stripe, with a bottom half in red as is often done. Mind you, my drawing is rough as hell and not spot on for color.
(Martini has always been my plan also btw, maybe I should add that lol. )
I do plan to add an aero piece to the leading edge of the rear flare, similar to this.. I think it flows w the stripe fairly well, gives the car some good shape.
got my steering wheel proof pics, shipping out to me soon.
DID the flat top as well as no knuckle knurls, and had the switch covers done too.
All of those features unfortunately are at additional cost of course.
Changed illum to white led also. should be cool.
Having the airbag redone in matching alcantara.
Photo is potato quality, but the stitch is red as well. lol. Better pics soon