
the "bmccann101s car gets a new look/ watch me suffer bodywork hell" thread

Thread Starter


Joined: Aug 2006
Posts: 8,321
Likes: 467
From: Scottsdale/coyote drophouse


Thread Starter
Joined: Aug 2006
Posts: 8,321
Likes: 467
From: Scottsdale/coyote drophouse
chase bay reservoirs mounted, lines run.
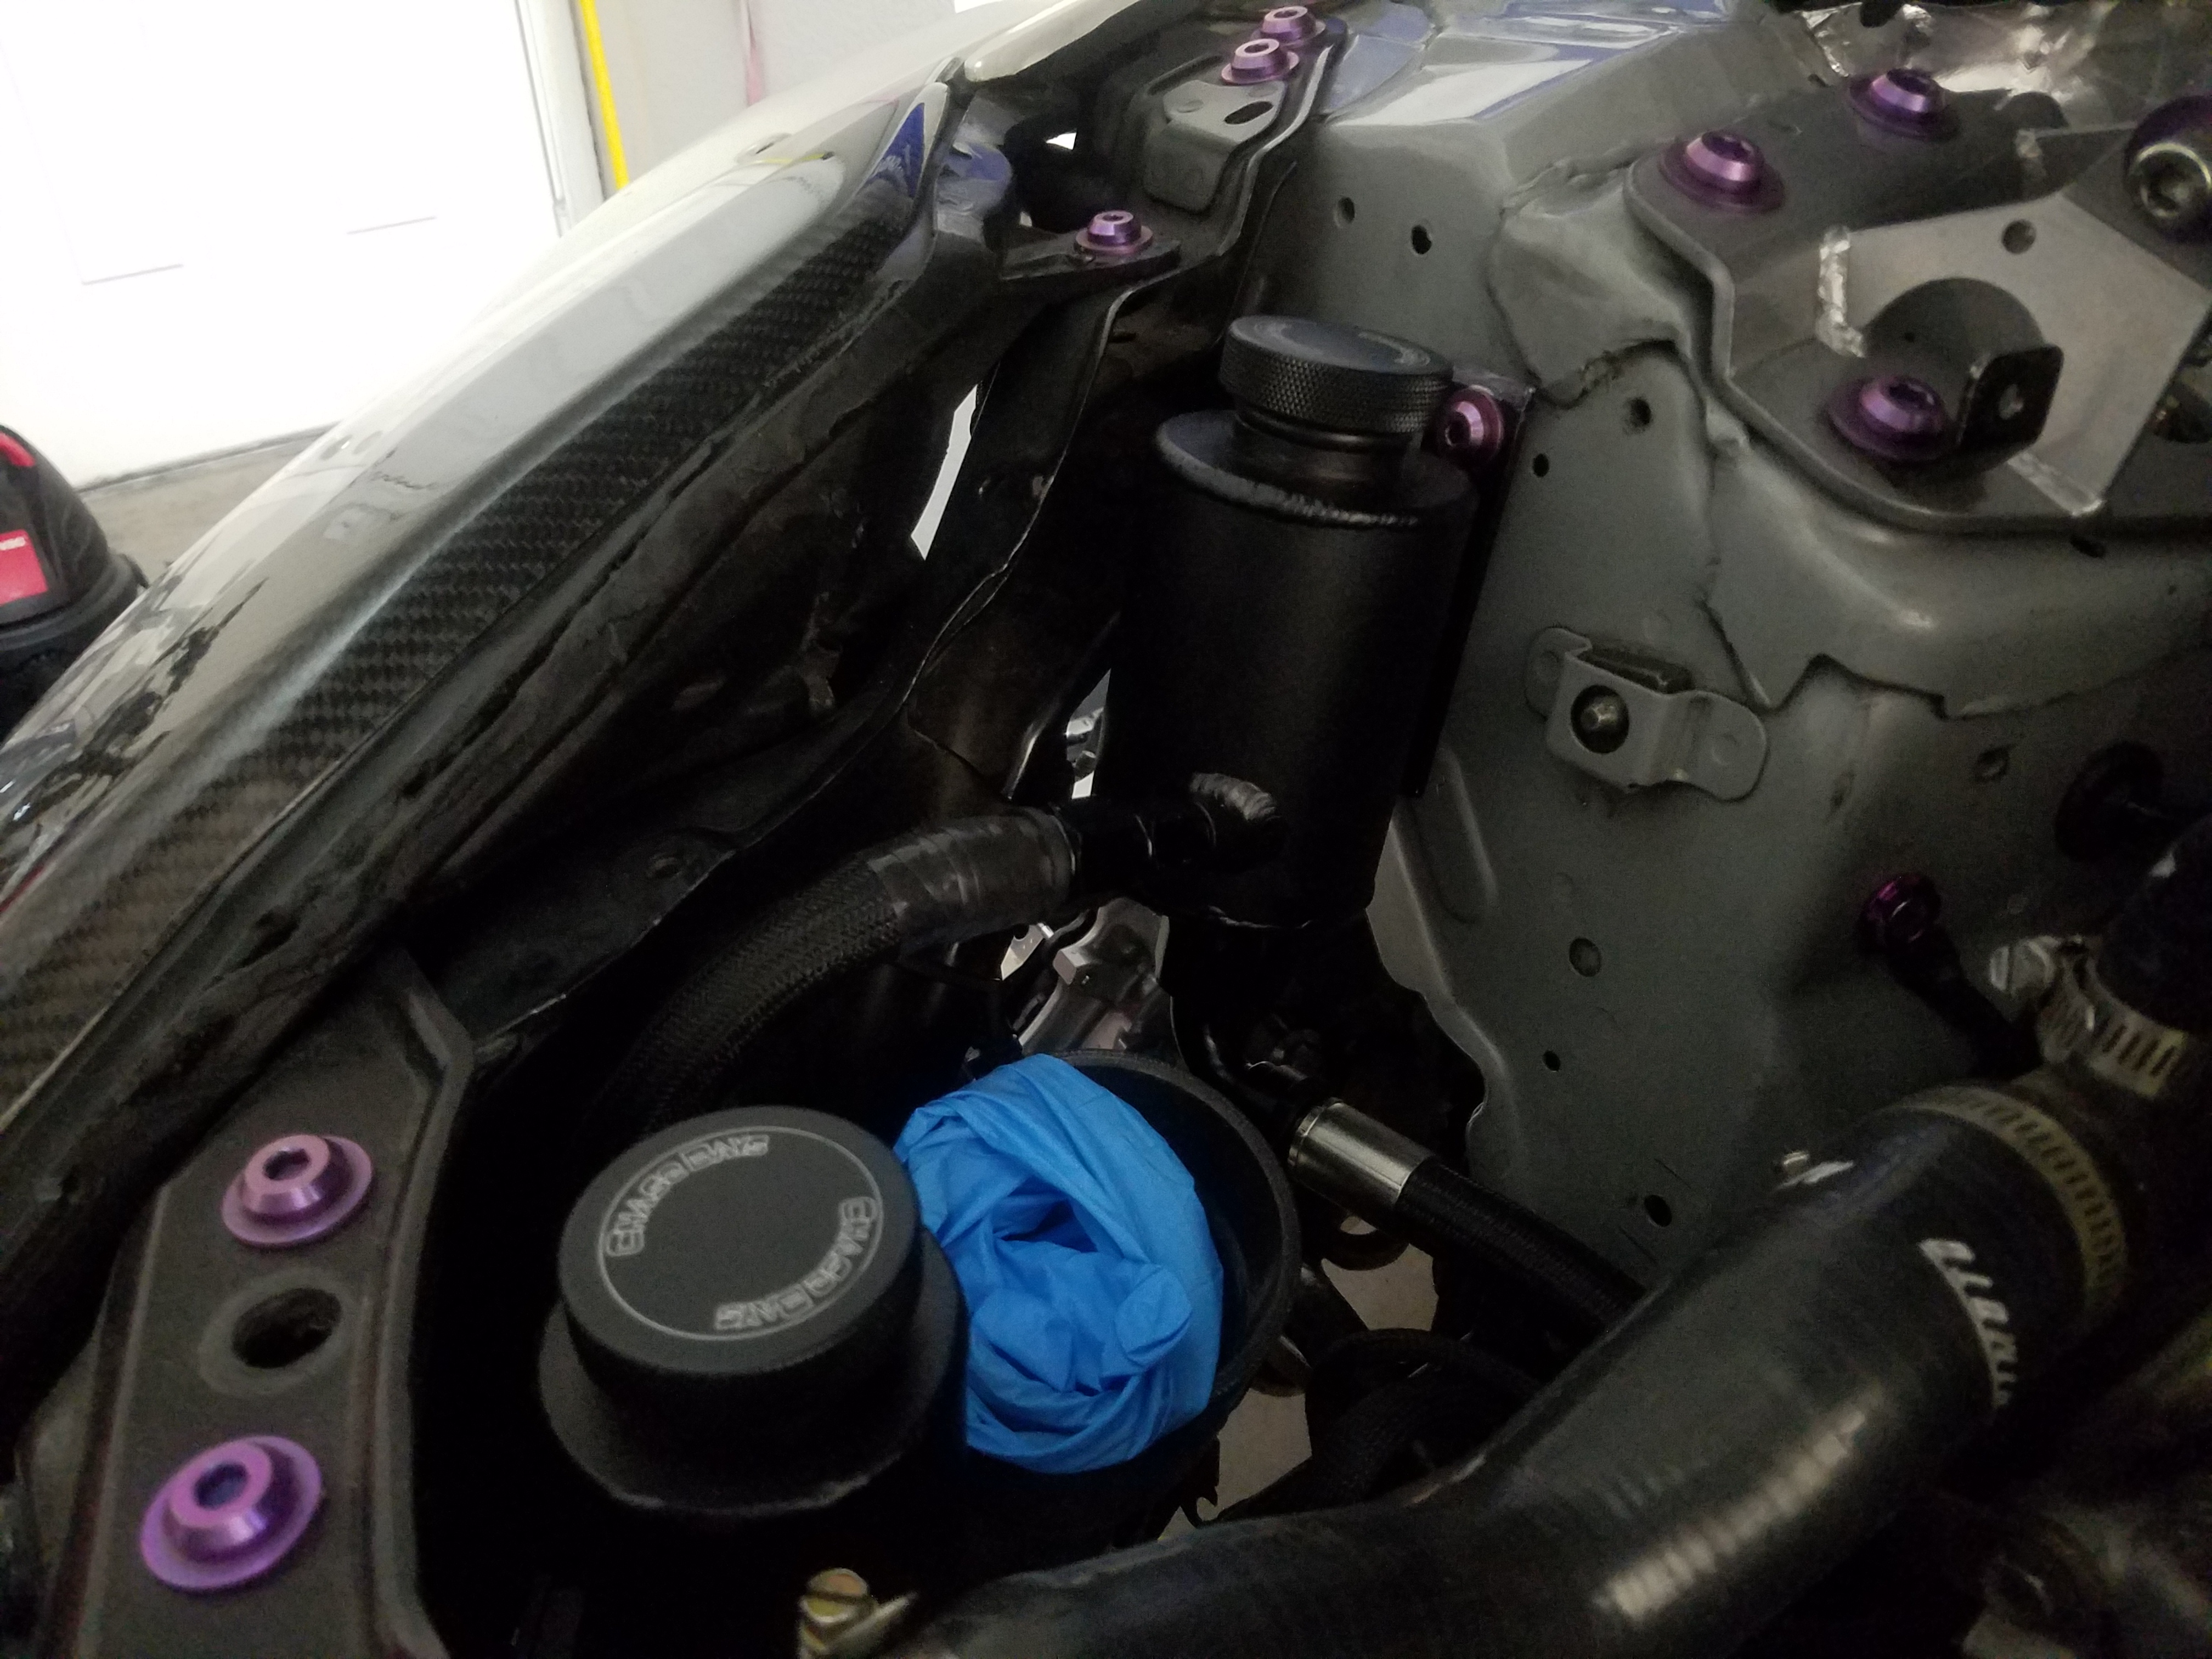
always nice to see brand new suspension parts..
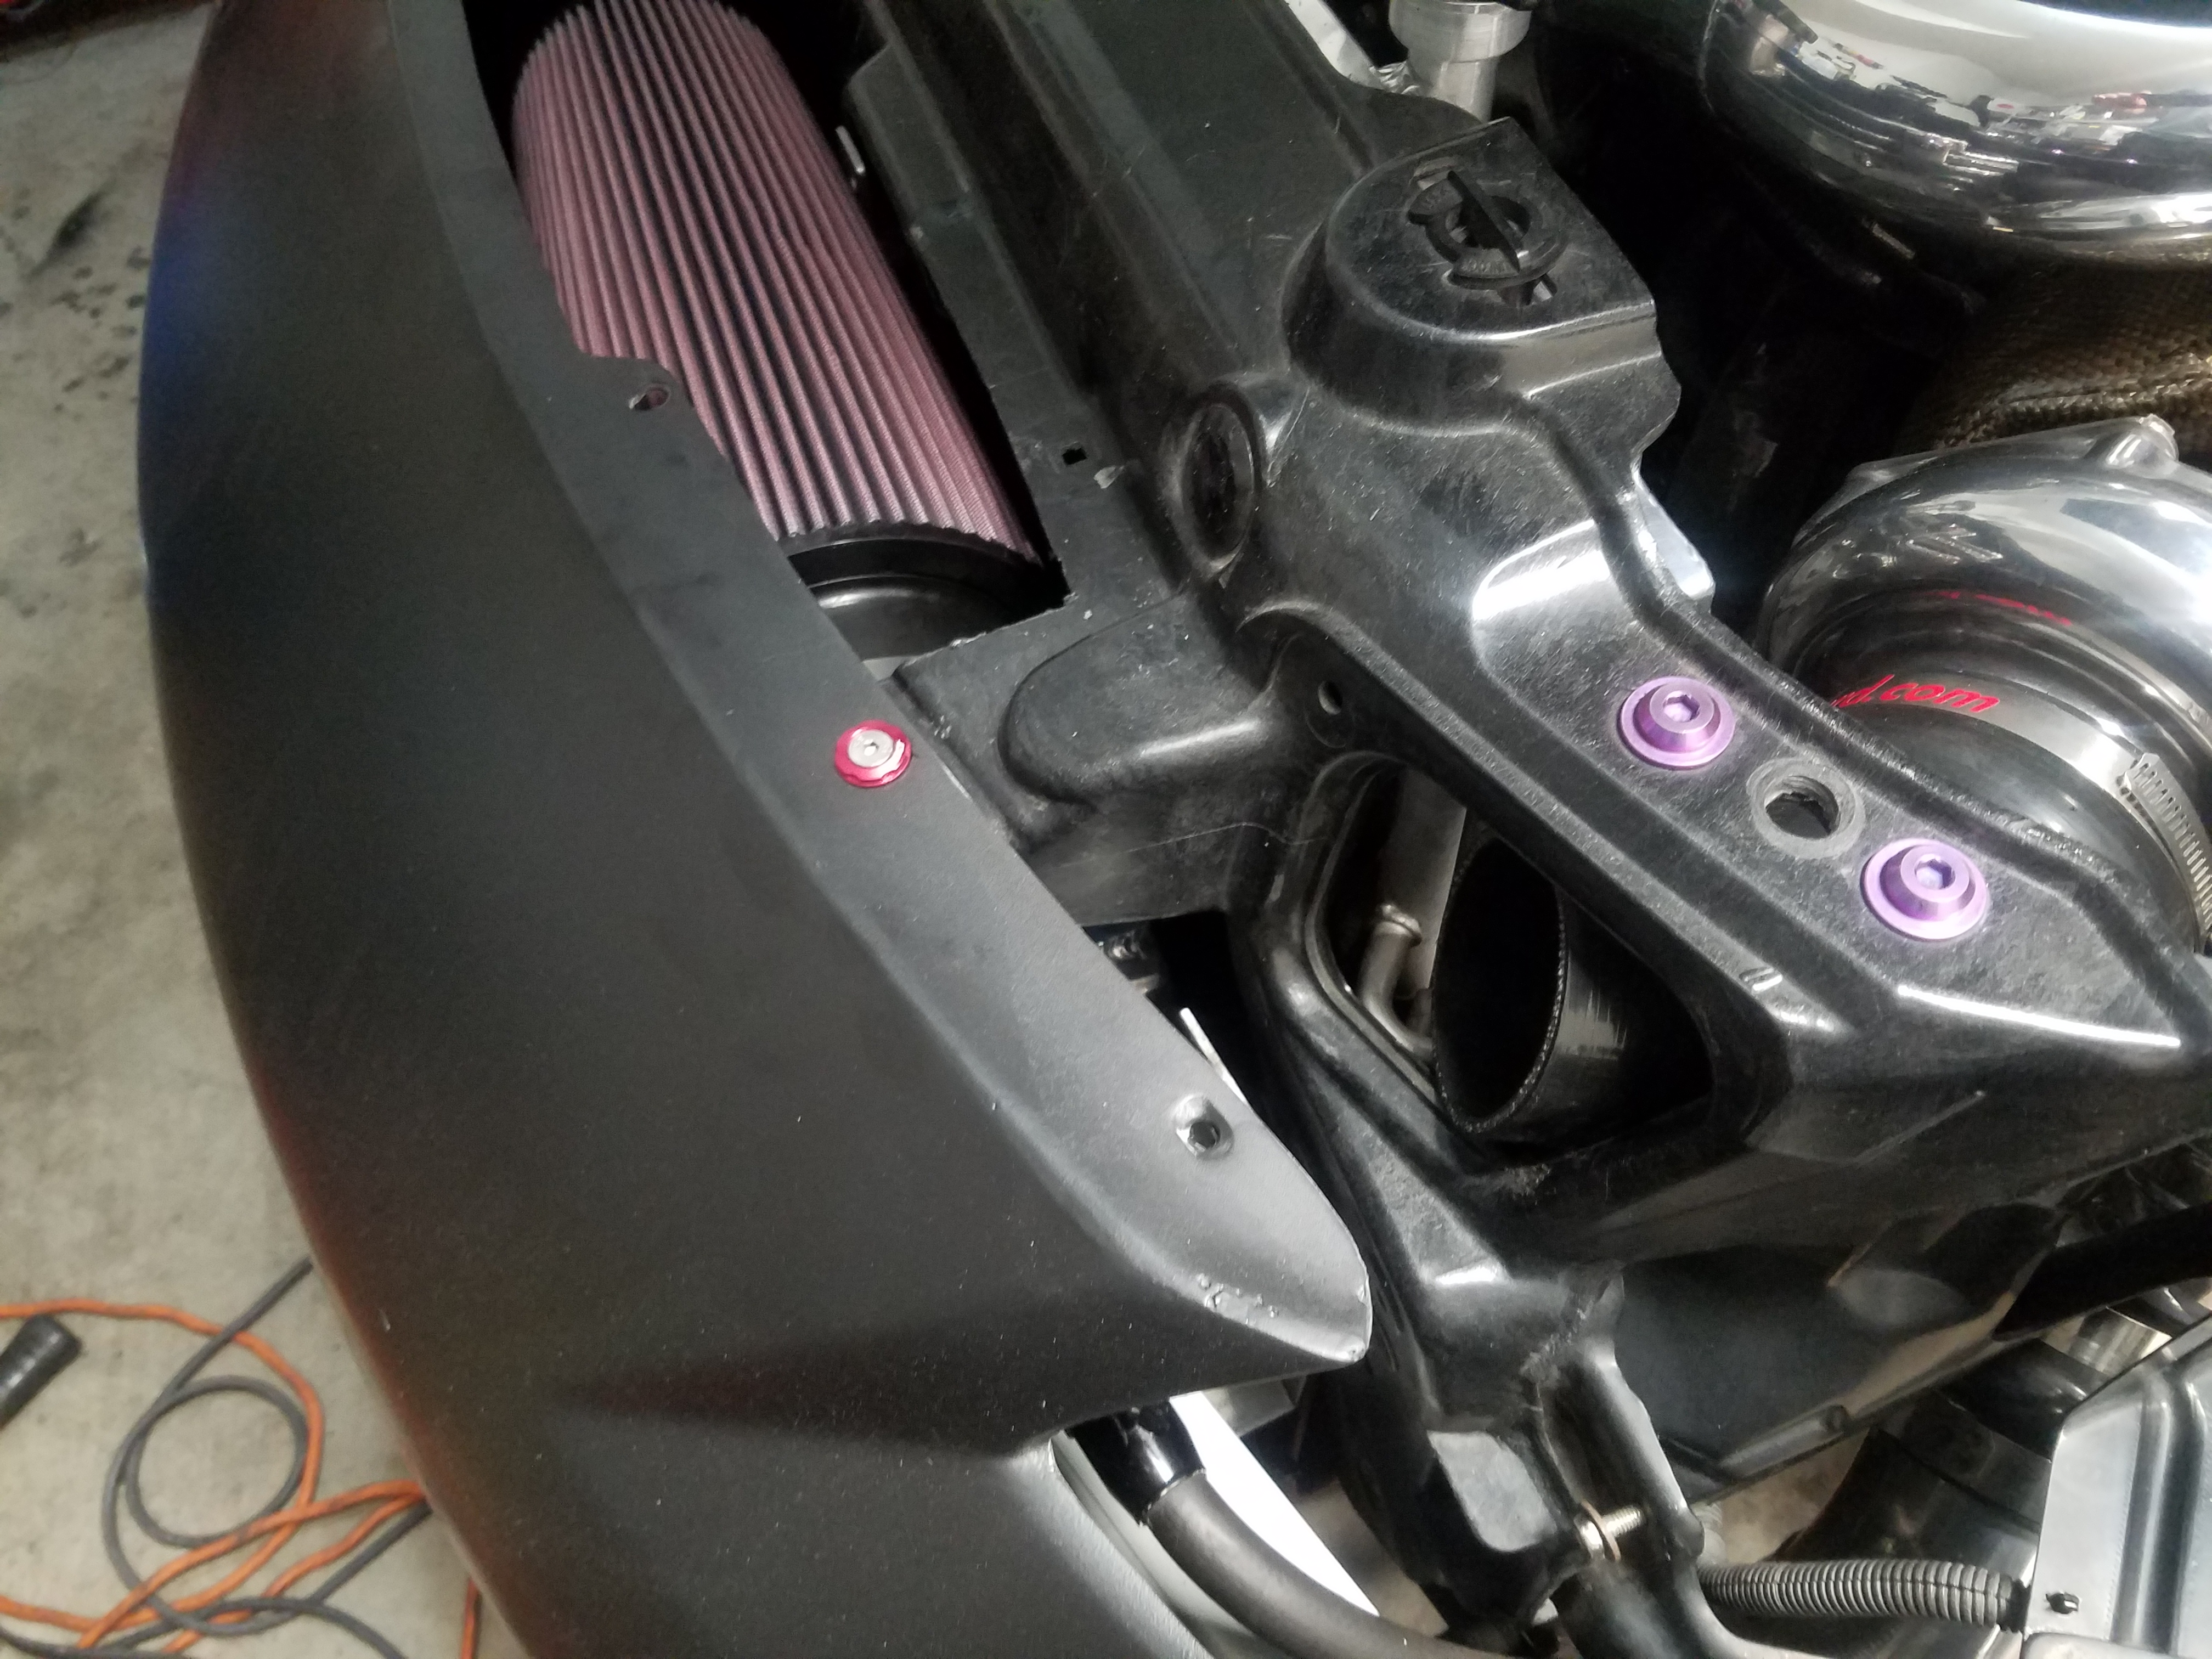
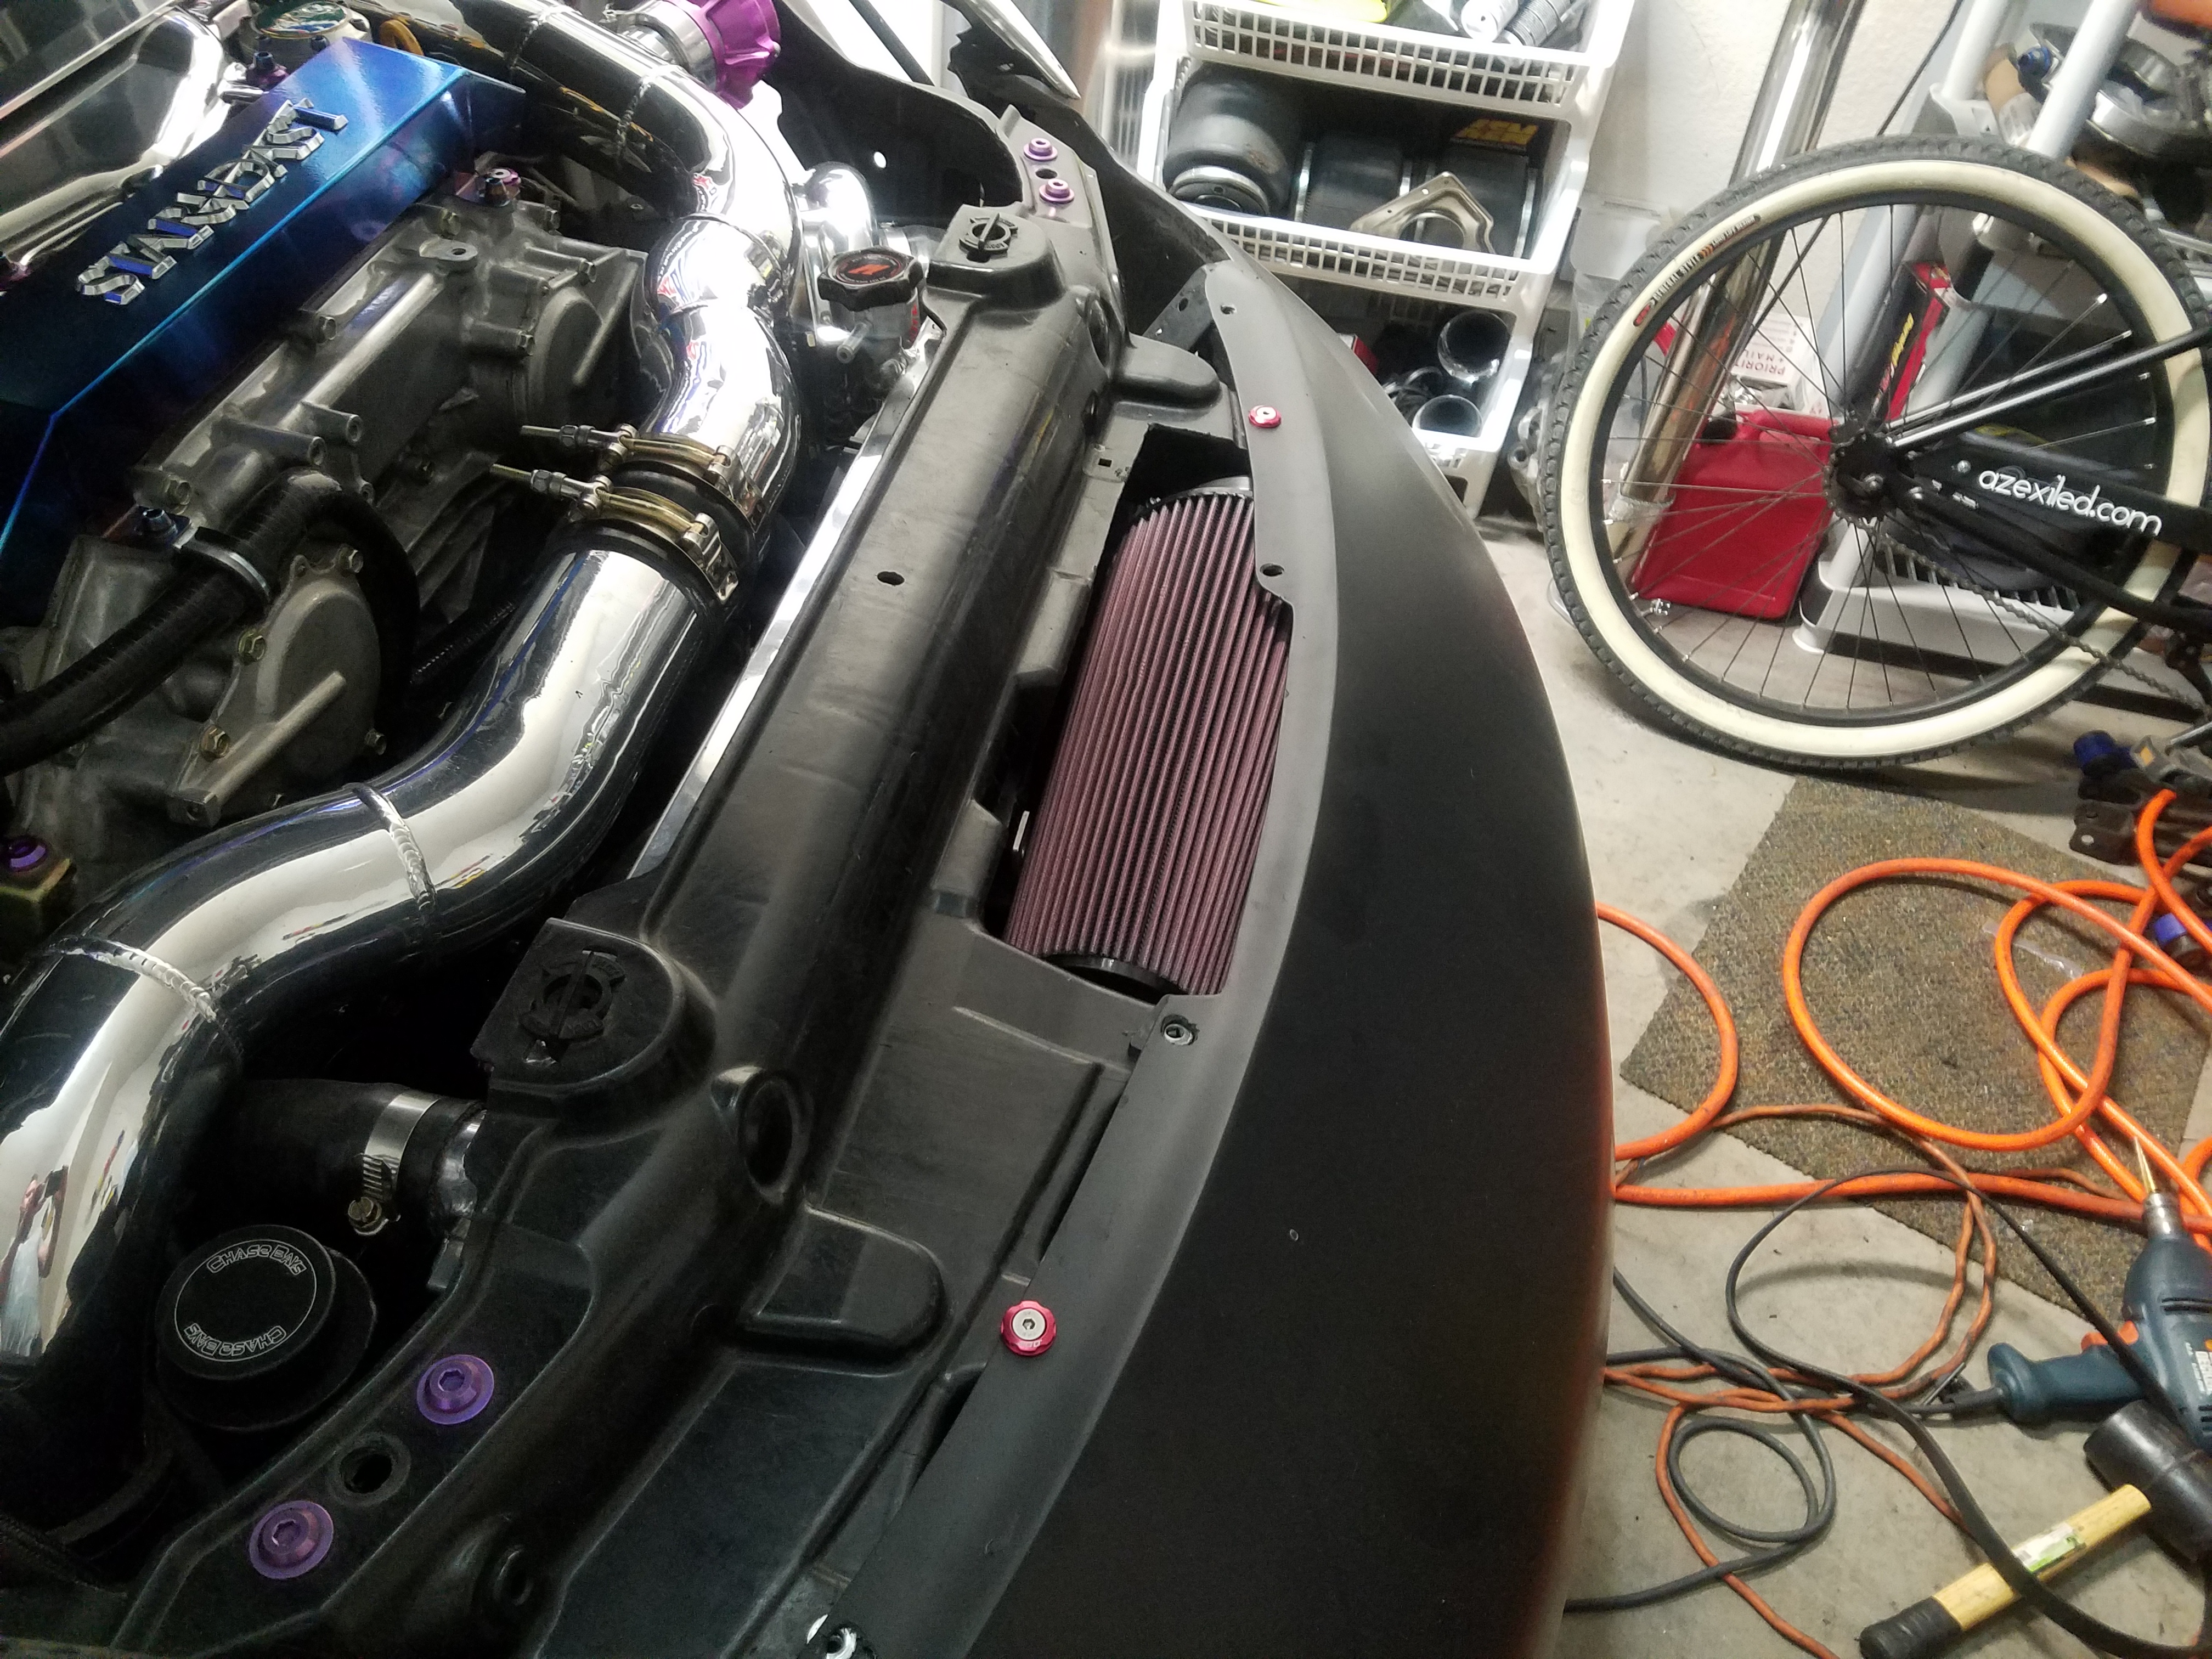
I pulled a headlight and am planning my intake upgrade.. what I have now is vastly under engineered. Will be opening up the hole to step up to a 4 inch turbo coupler and 4 inch intake tube, no more 3" step up to 4" turbo inlet. adding the intake creates a huge impact to the spool and power levels, as well as the sound.
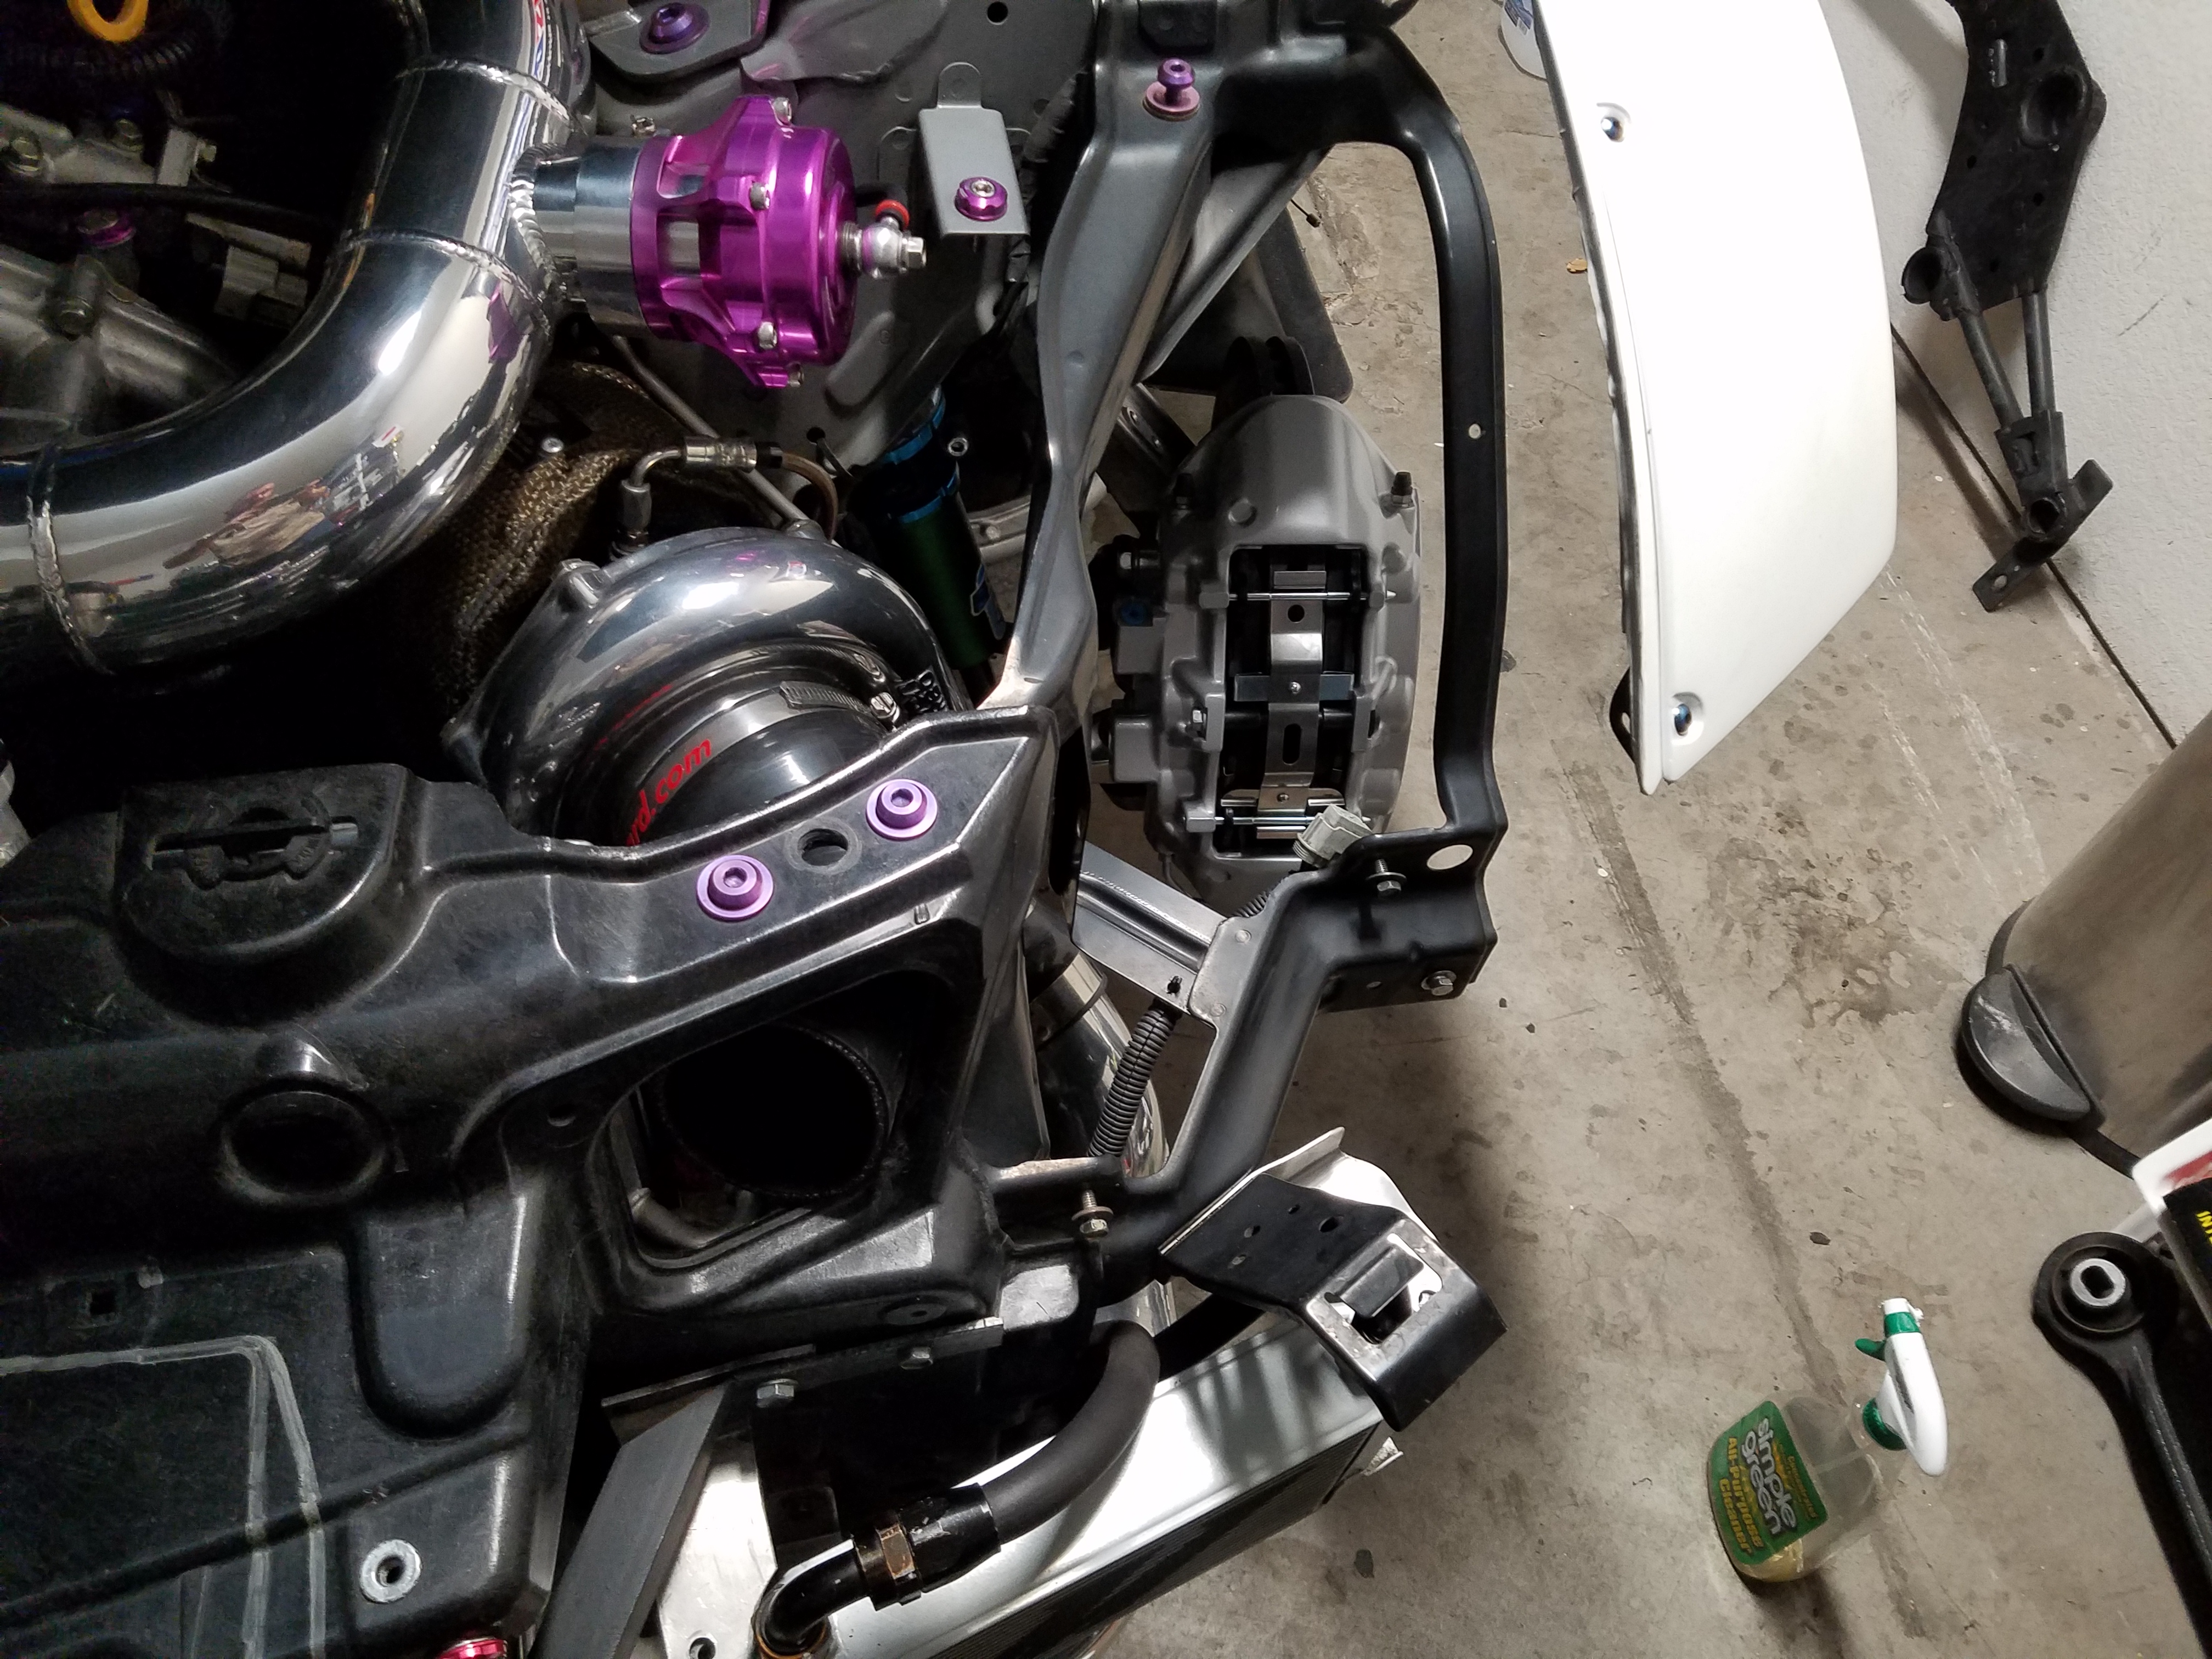
I currently have a 9 inch long 3" kn filter.. it only flows 846 cfm.
The new filter will require a new tube to be made w heavy pie cutting.. but will be a 4" inlet, and 14 inches long.. upping the cfm to 1404 .
Ill have to cut out some of the bumper mount tabs, but those are fairly worthless anyways seeing as I have so much going on w splitters and what not already..
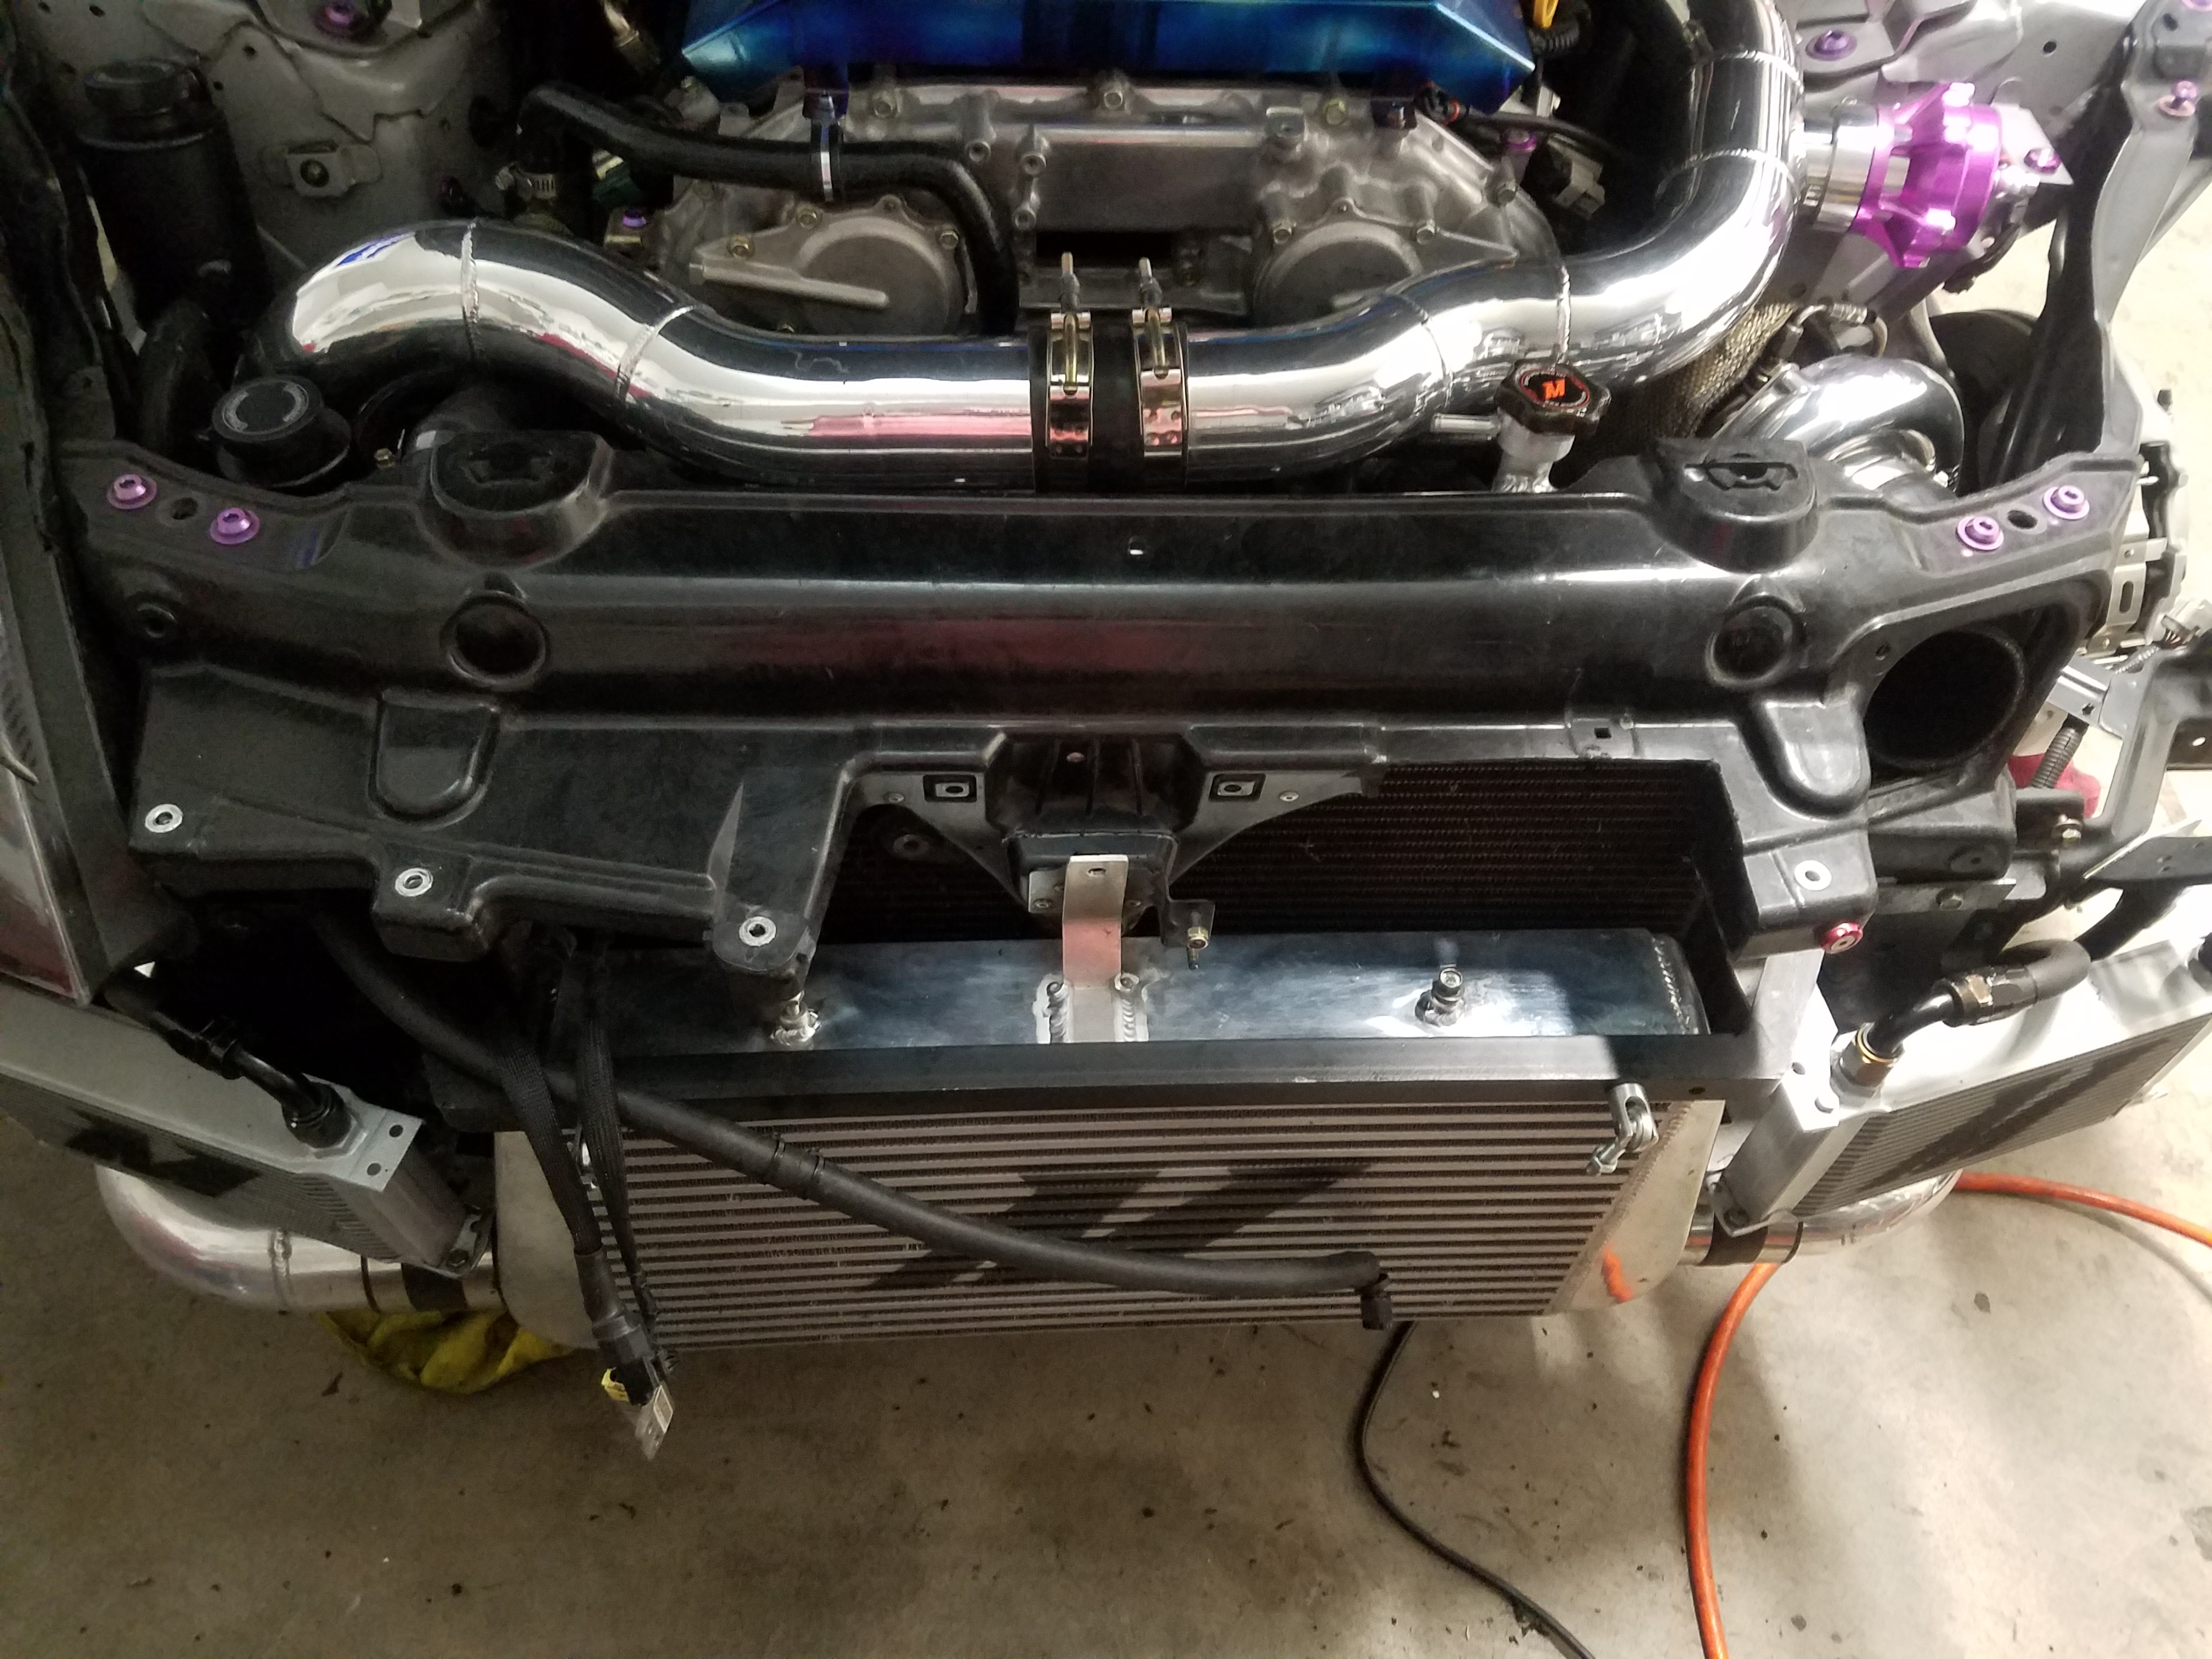
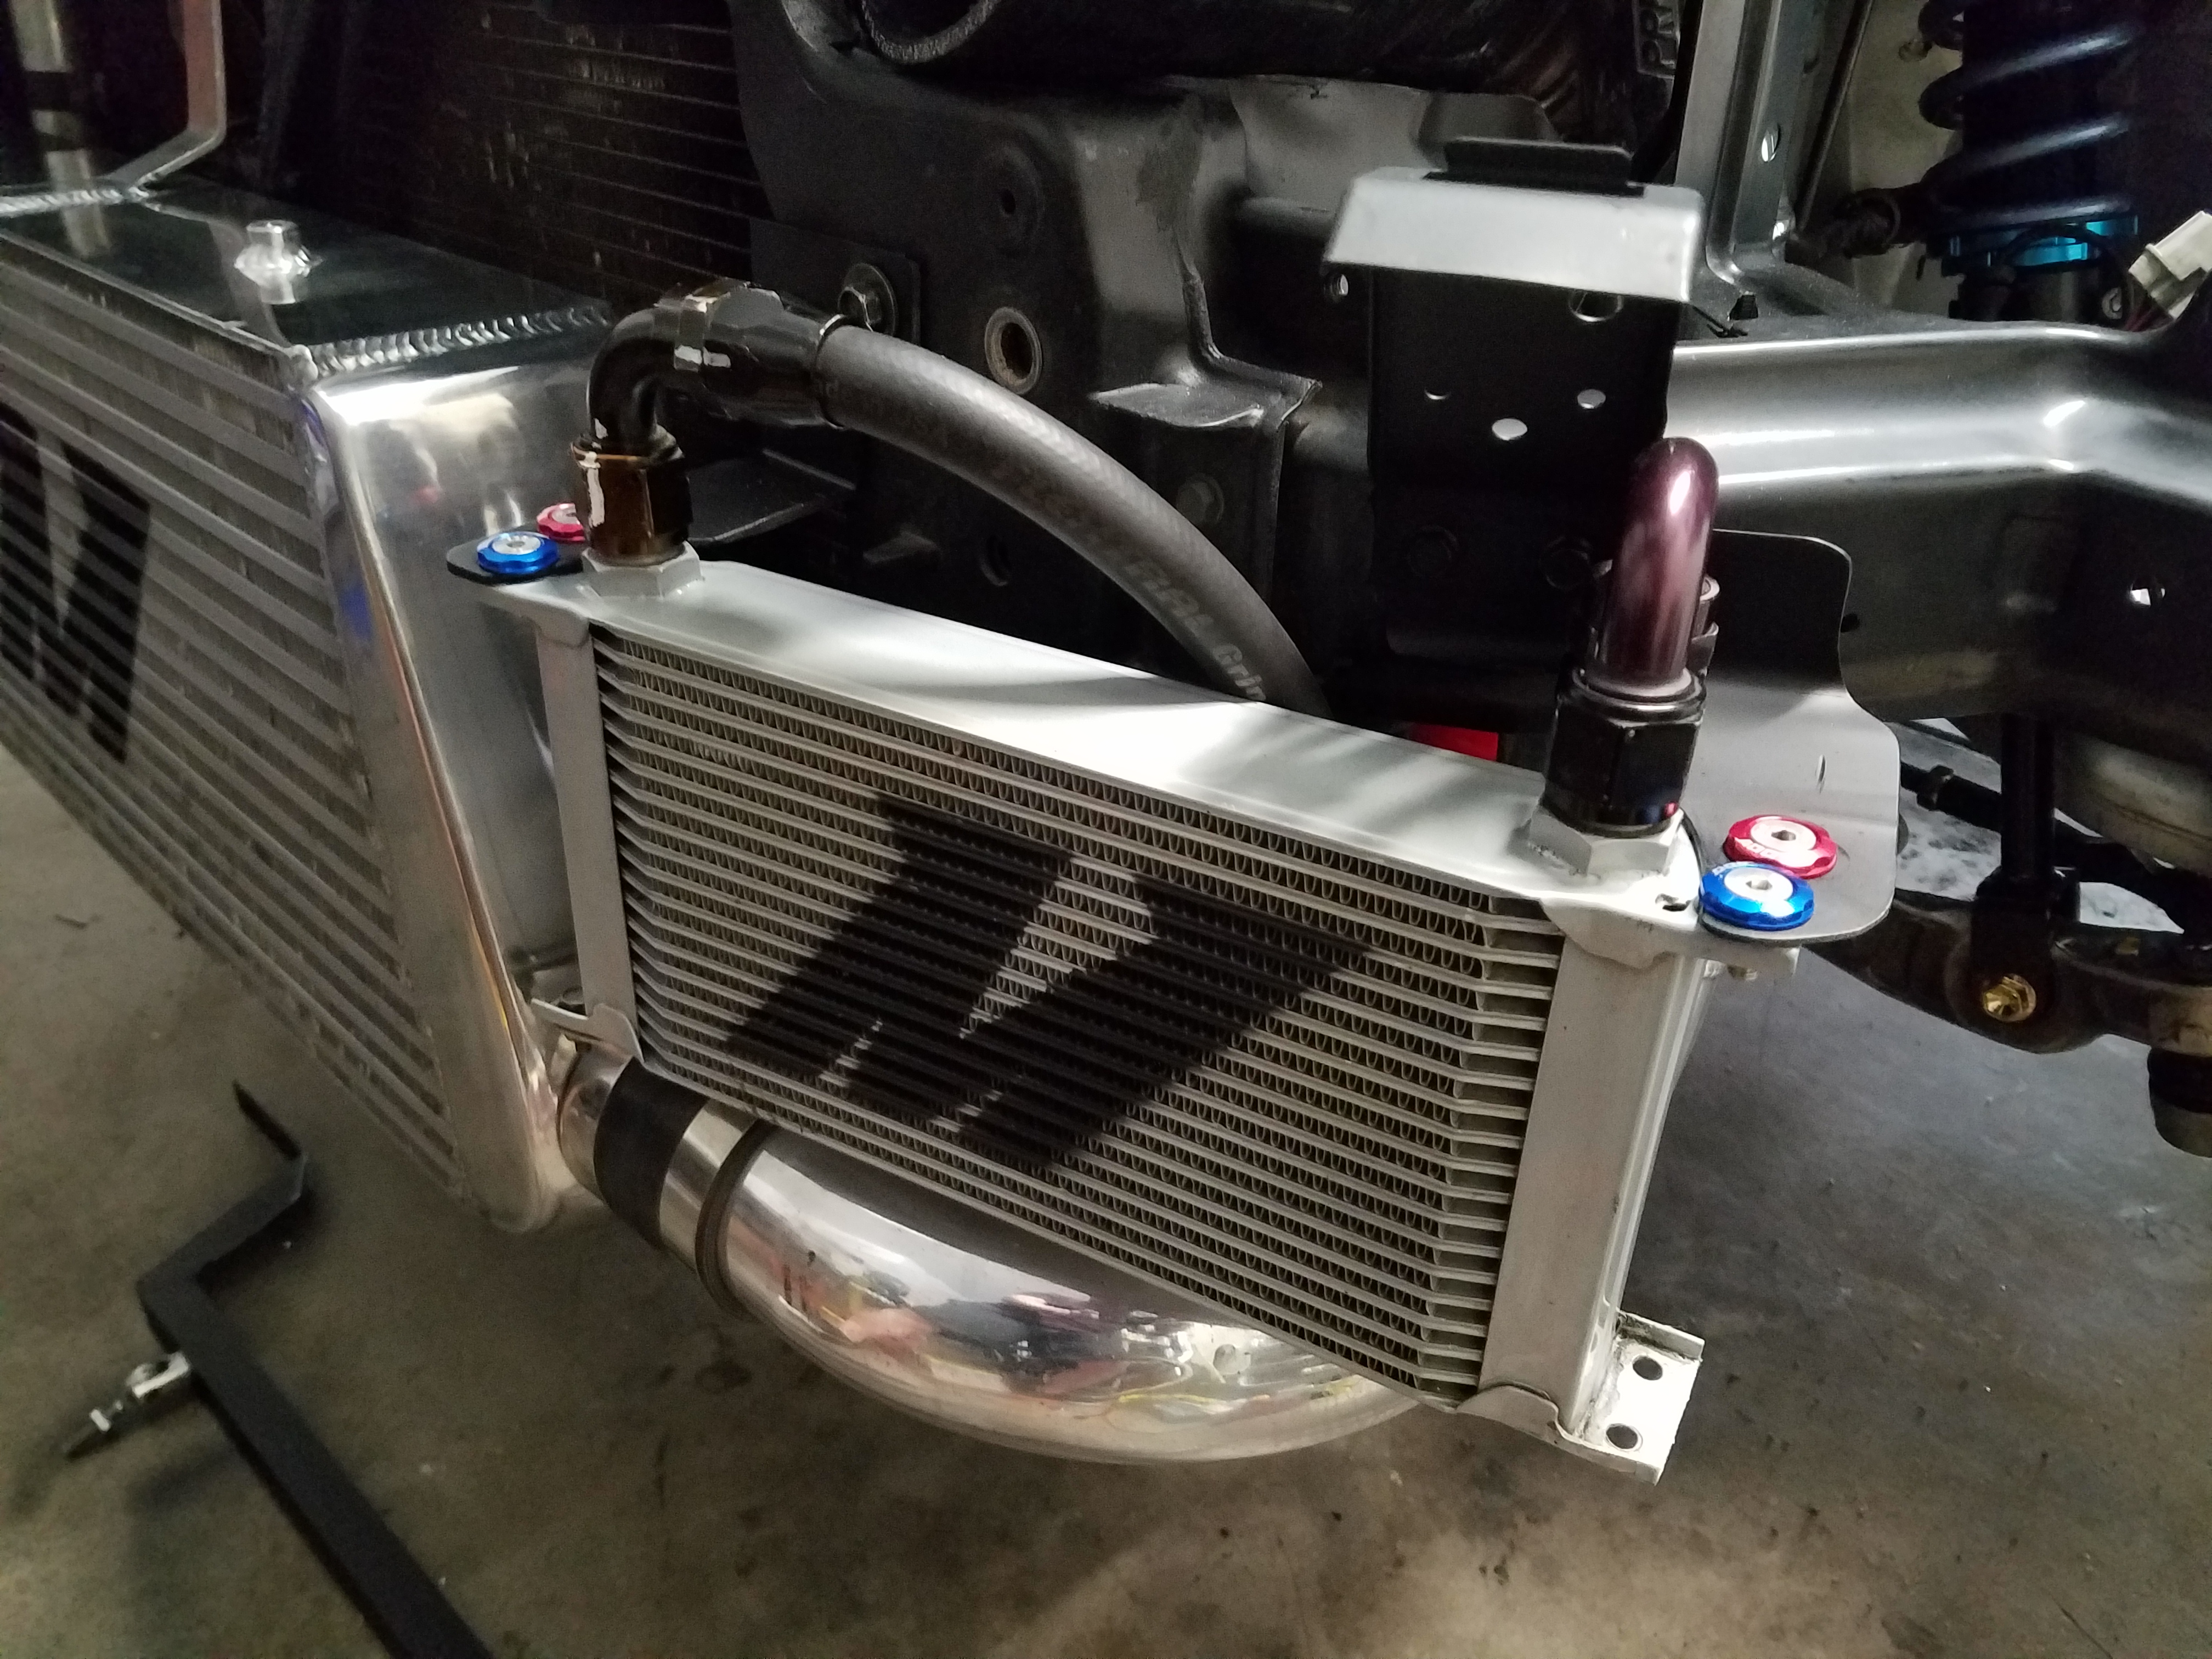
All in all, will be time to clean up the core support fluff, remove the hood latch system in favor of locking aero catch, shave down extra useless tabs and create better airflow to the radiator... as well as be able to more easily build ducting to direct all air thru the radiator and the fmic, makes a huge difference when you live in a hot place.
ill be able to heat shield the intake from the fmic fairly easily as well.


always nice to see brand new suspension parts..


I pulled a headlight and am planning my intake upgrade.. what I have now is vastly under engineered. Will be opening up the hole to step up to a 4 inch turbo coupler and 4 inch intake tube, no more 3" step up to 4" turbo inlet. adding the intake creates a huge impact to the spool and power levels, as well as the sound.


I currently have a 9 inch long 3" kn filter.. it only flows 846 cfm.
The new filter will require a new tube to be made w heavy pie cutting.. but will be a 4" inlet, and 14 inches long.. upping the cfm to 1404 .
Ill have to cut out some of the bumper mount tabs, but those are fairly worthless anyways seeing as I have so much going on w splitters and what not already..
All in all, will be time to clean up the core support fluff, remove the hood latch system in favor of locking aero catch, shave down extra useless tabs and create better airflow to the radiator... as well as be able to more easily build ducting to direct all air thru the radiator and the fmic, makes a huge difference when you live in a hot place.
ill be able to heat shield the intake from the fmic fairly easily as well.
Last edited by bmccann101; Apr 10, 2017 at 09:19 AM.
Thread Starter
Joined: Aug 2006
Posts: 8,321
Likes: 467
From: Scottsdale/coyote drophouse
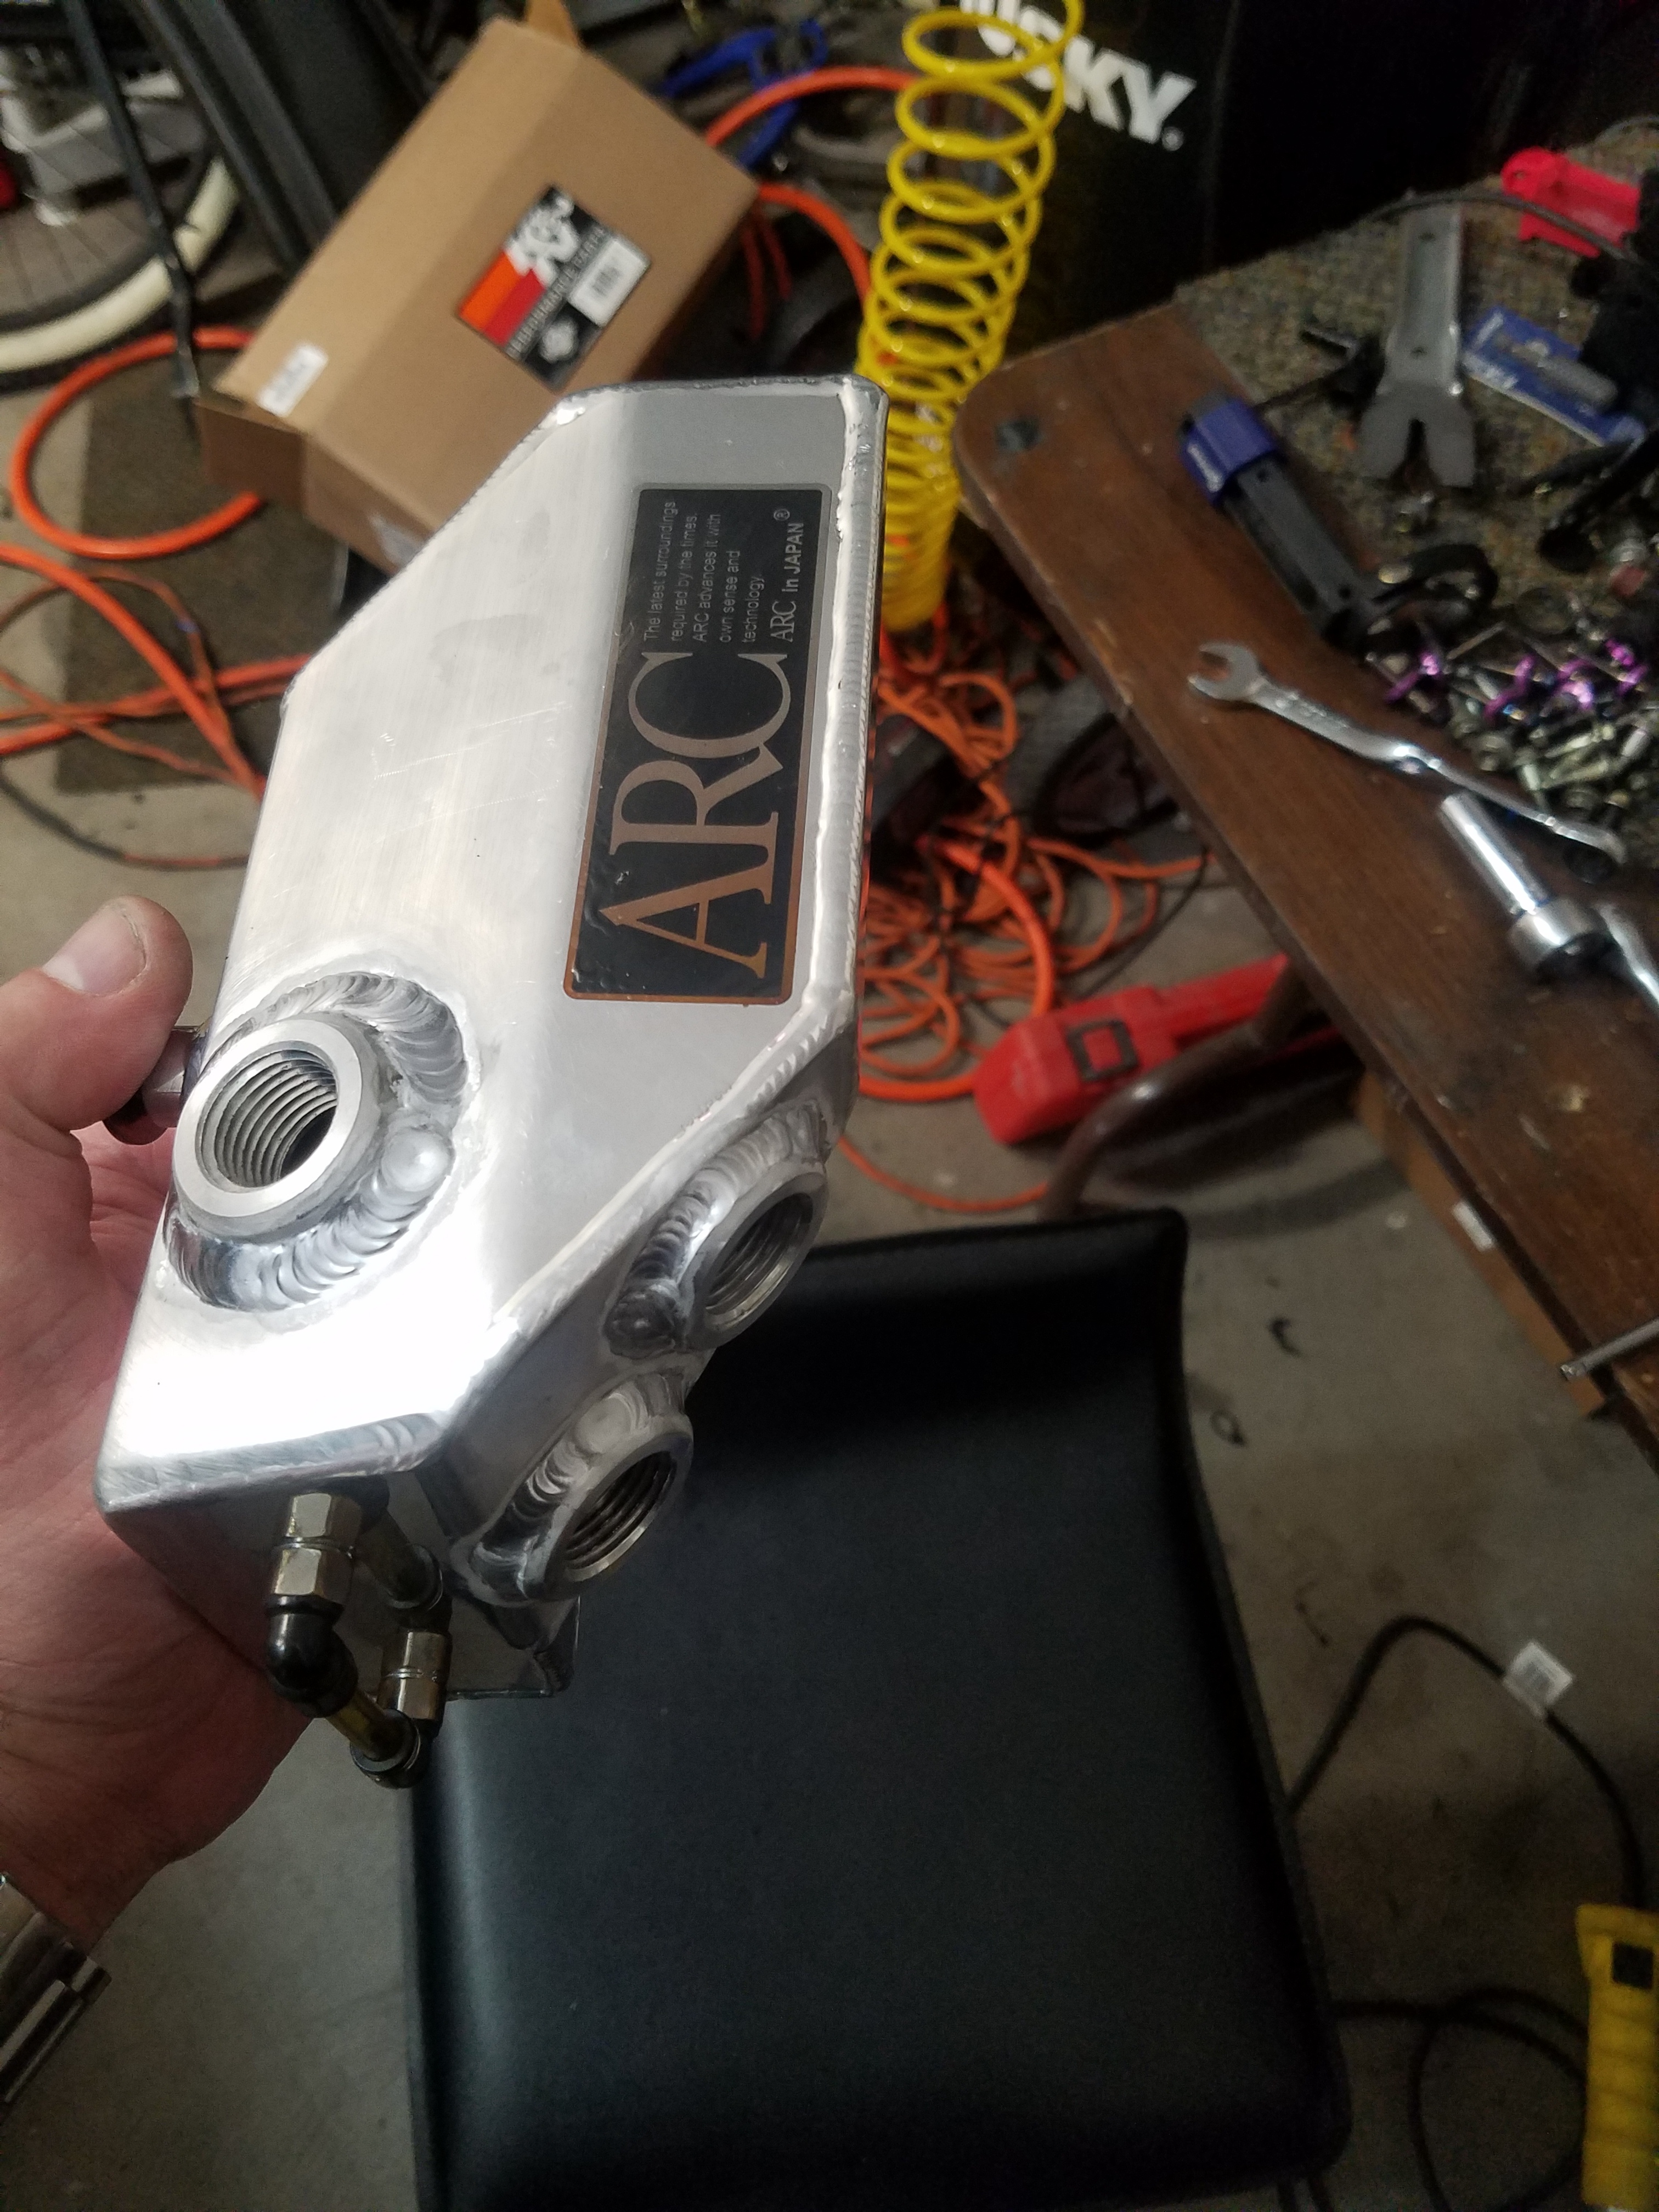
also dropped off my ultra rare ARC version one catch can to have it cut modified and re-welded by my buddy David over at Dyno Comp.
Yes a cut and modified rare ARC part.. no fks given.. I want things to work lol.
We're cutting off the input tube and adding dual 10an fittings, one for each valve cover.. as well as removing th4e pil box looking breather in leiu of another 10an fitting to run a tube out to the intake tube, post filter for vacuum and for the smell.
 Hardest- working man with the best imagination on this platform. Thanks for the inspiration!
Thread Starter
Joined: Aug 2006
Posts: 8,321
Likes: 467
From: Scottsdale/coyote drophouse
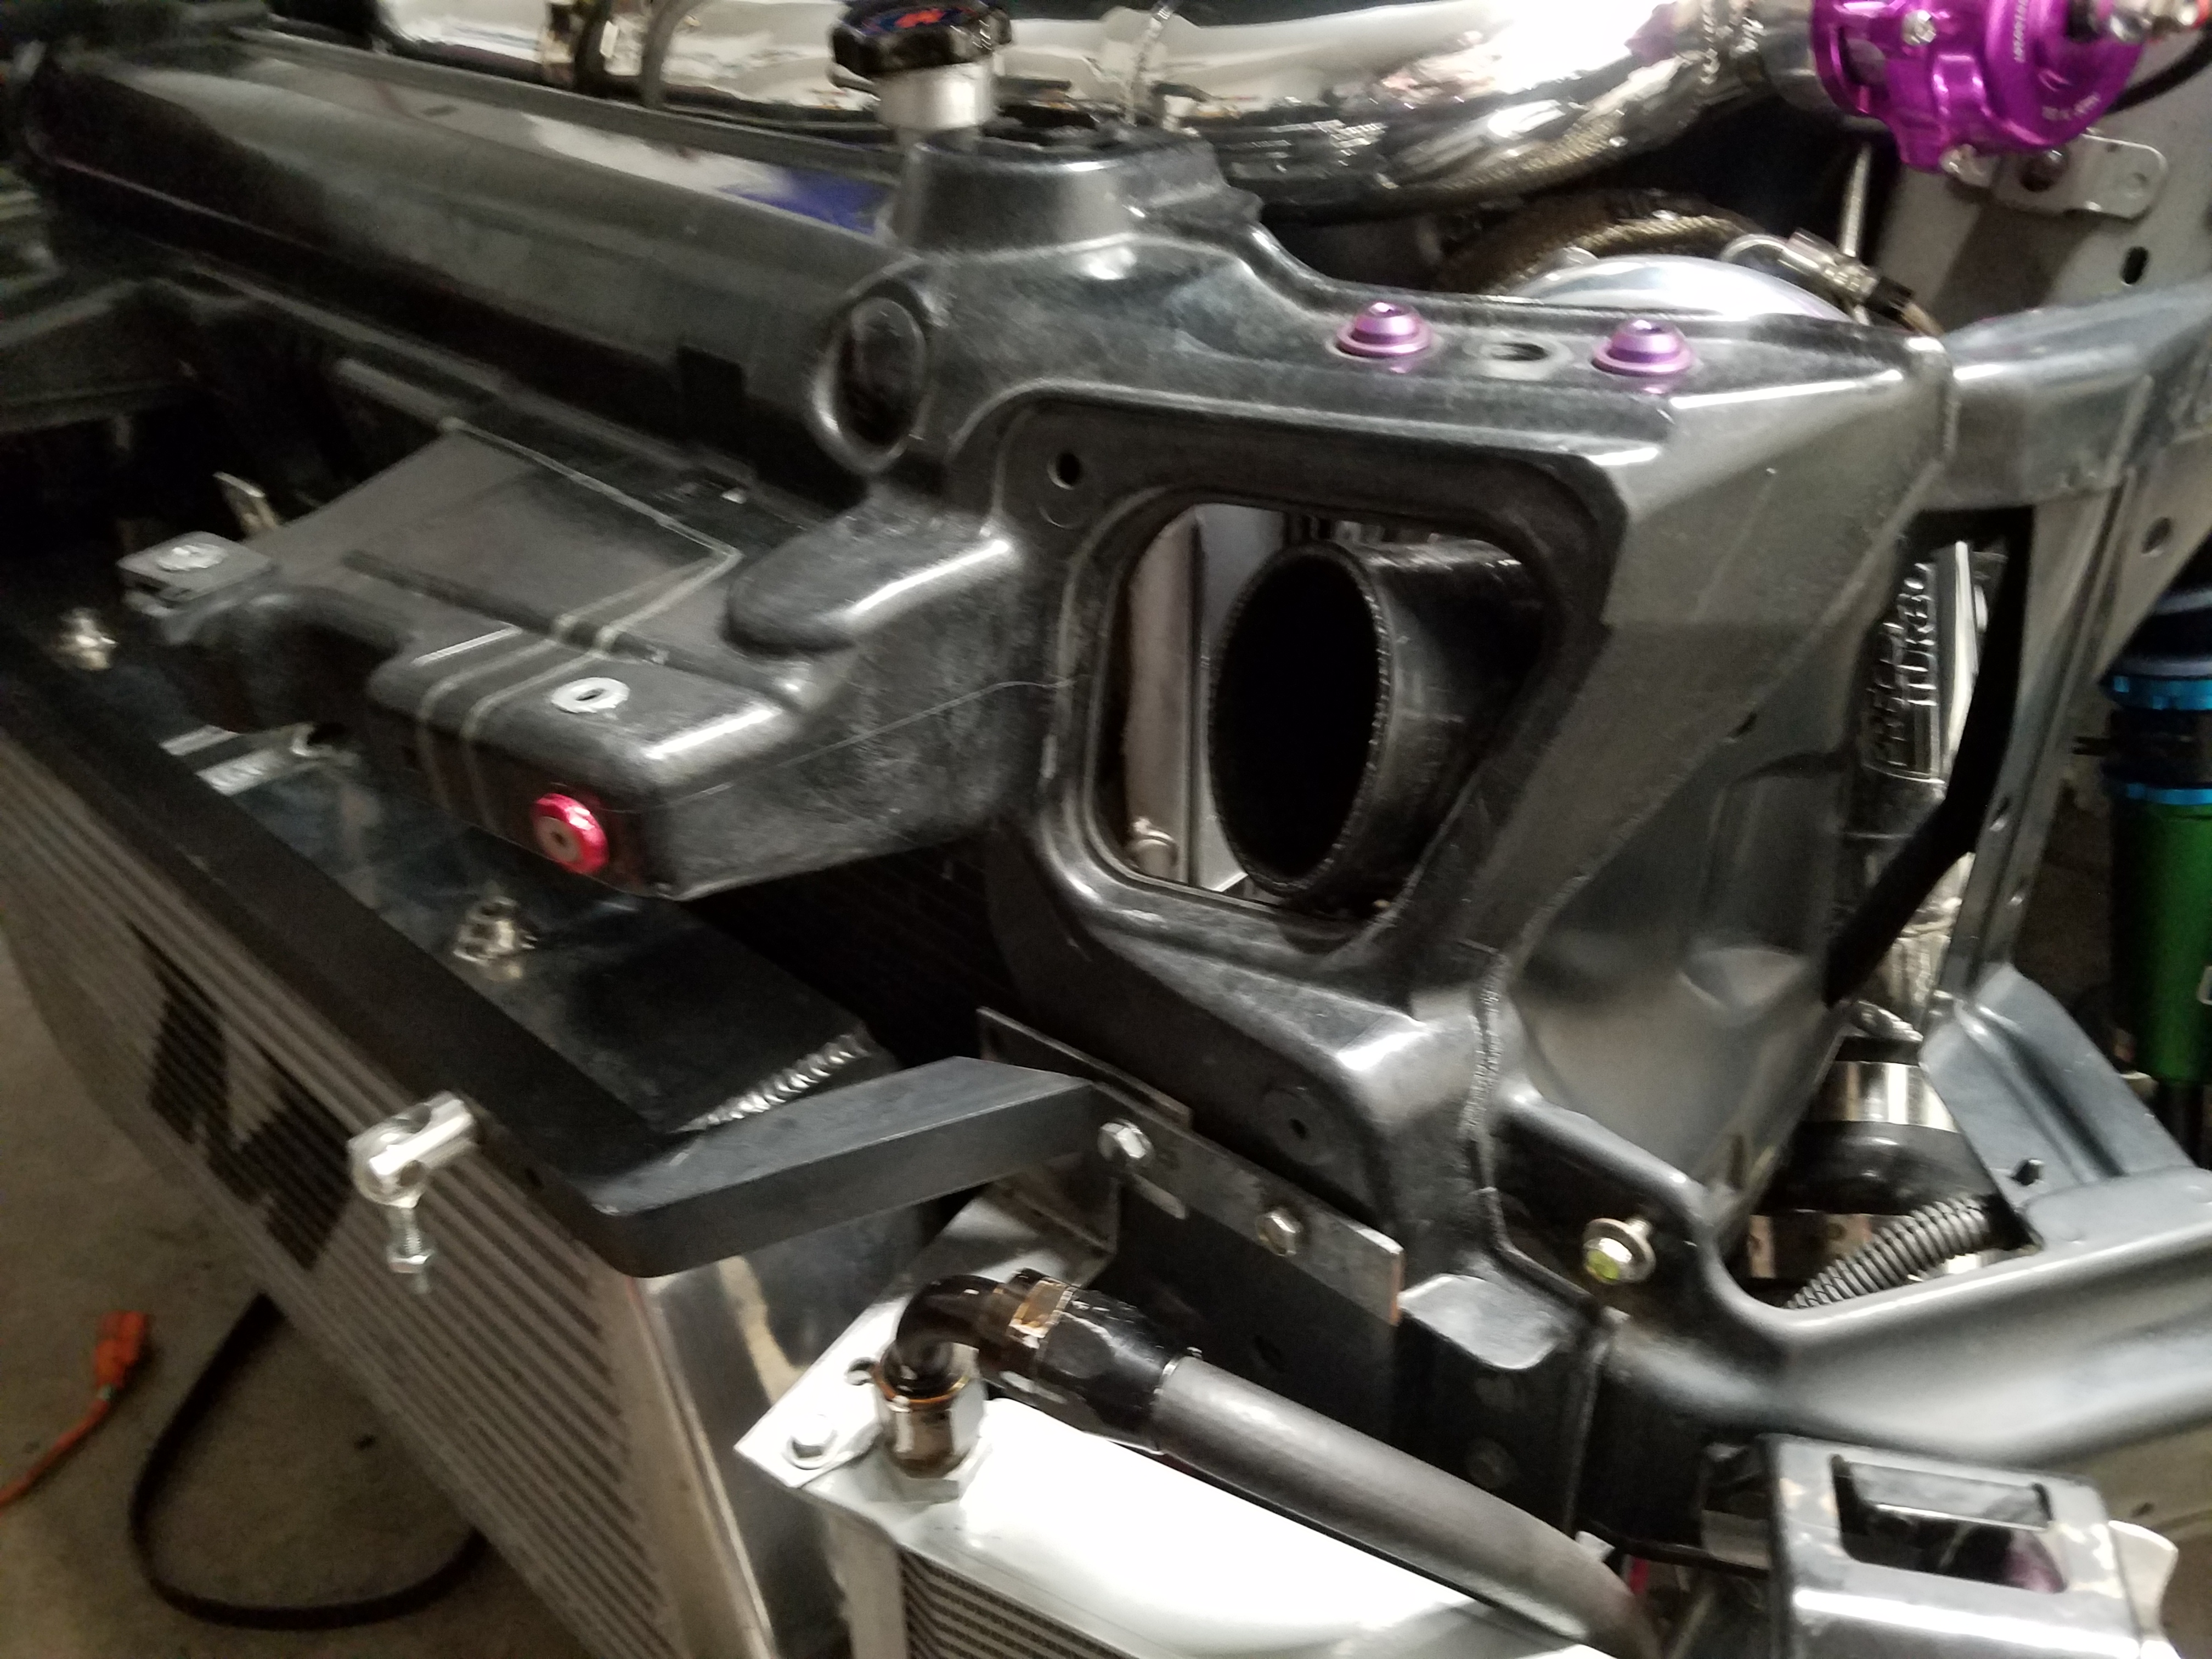
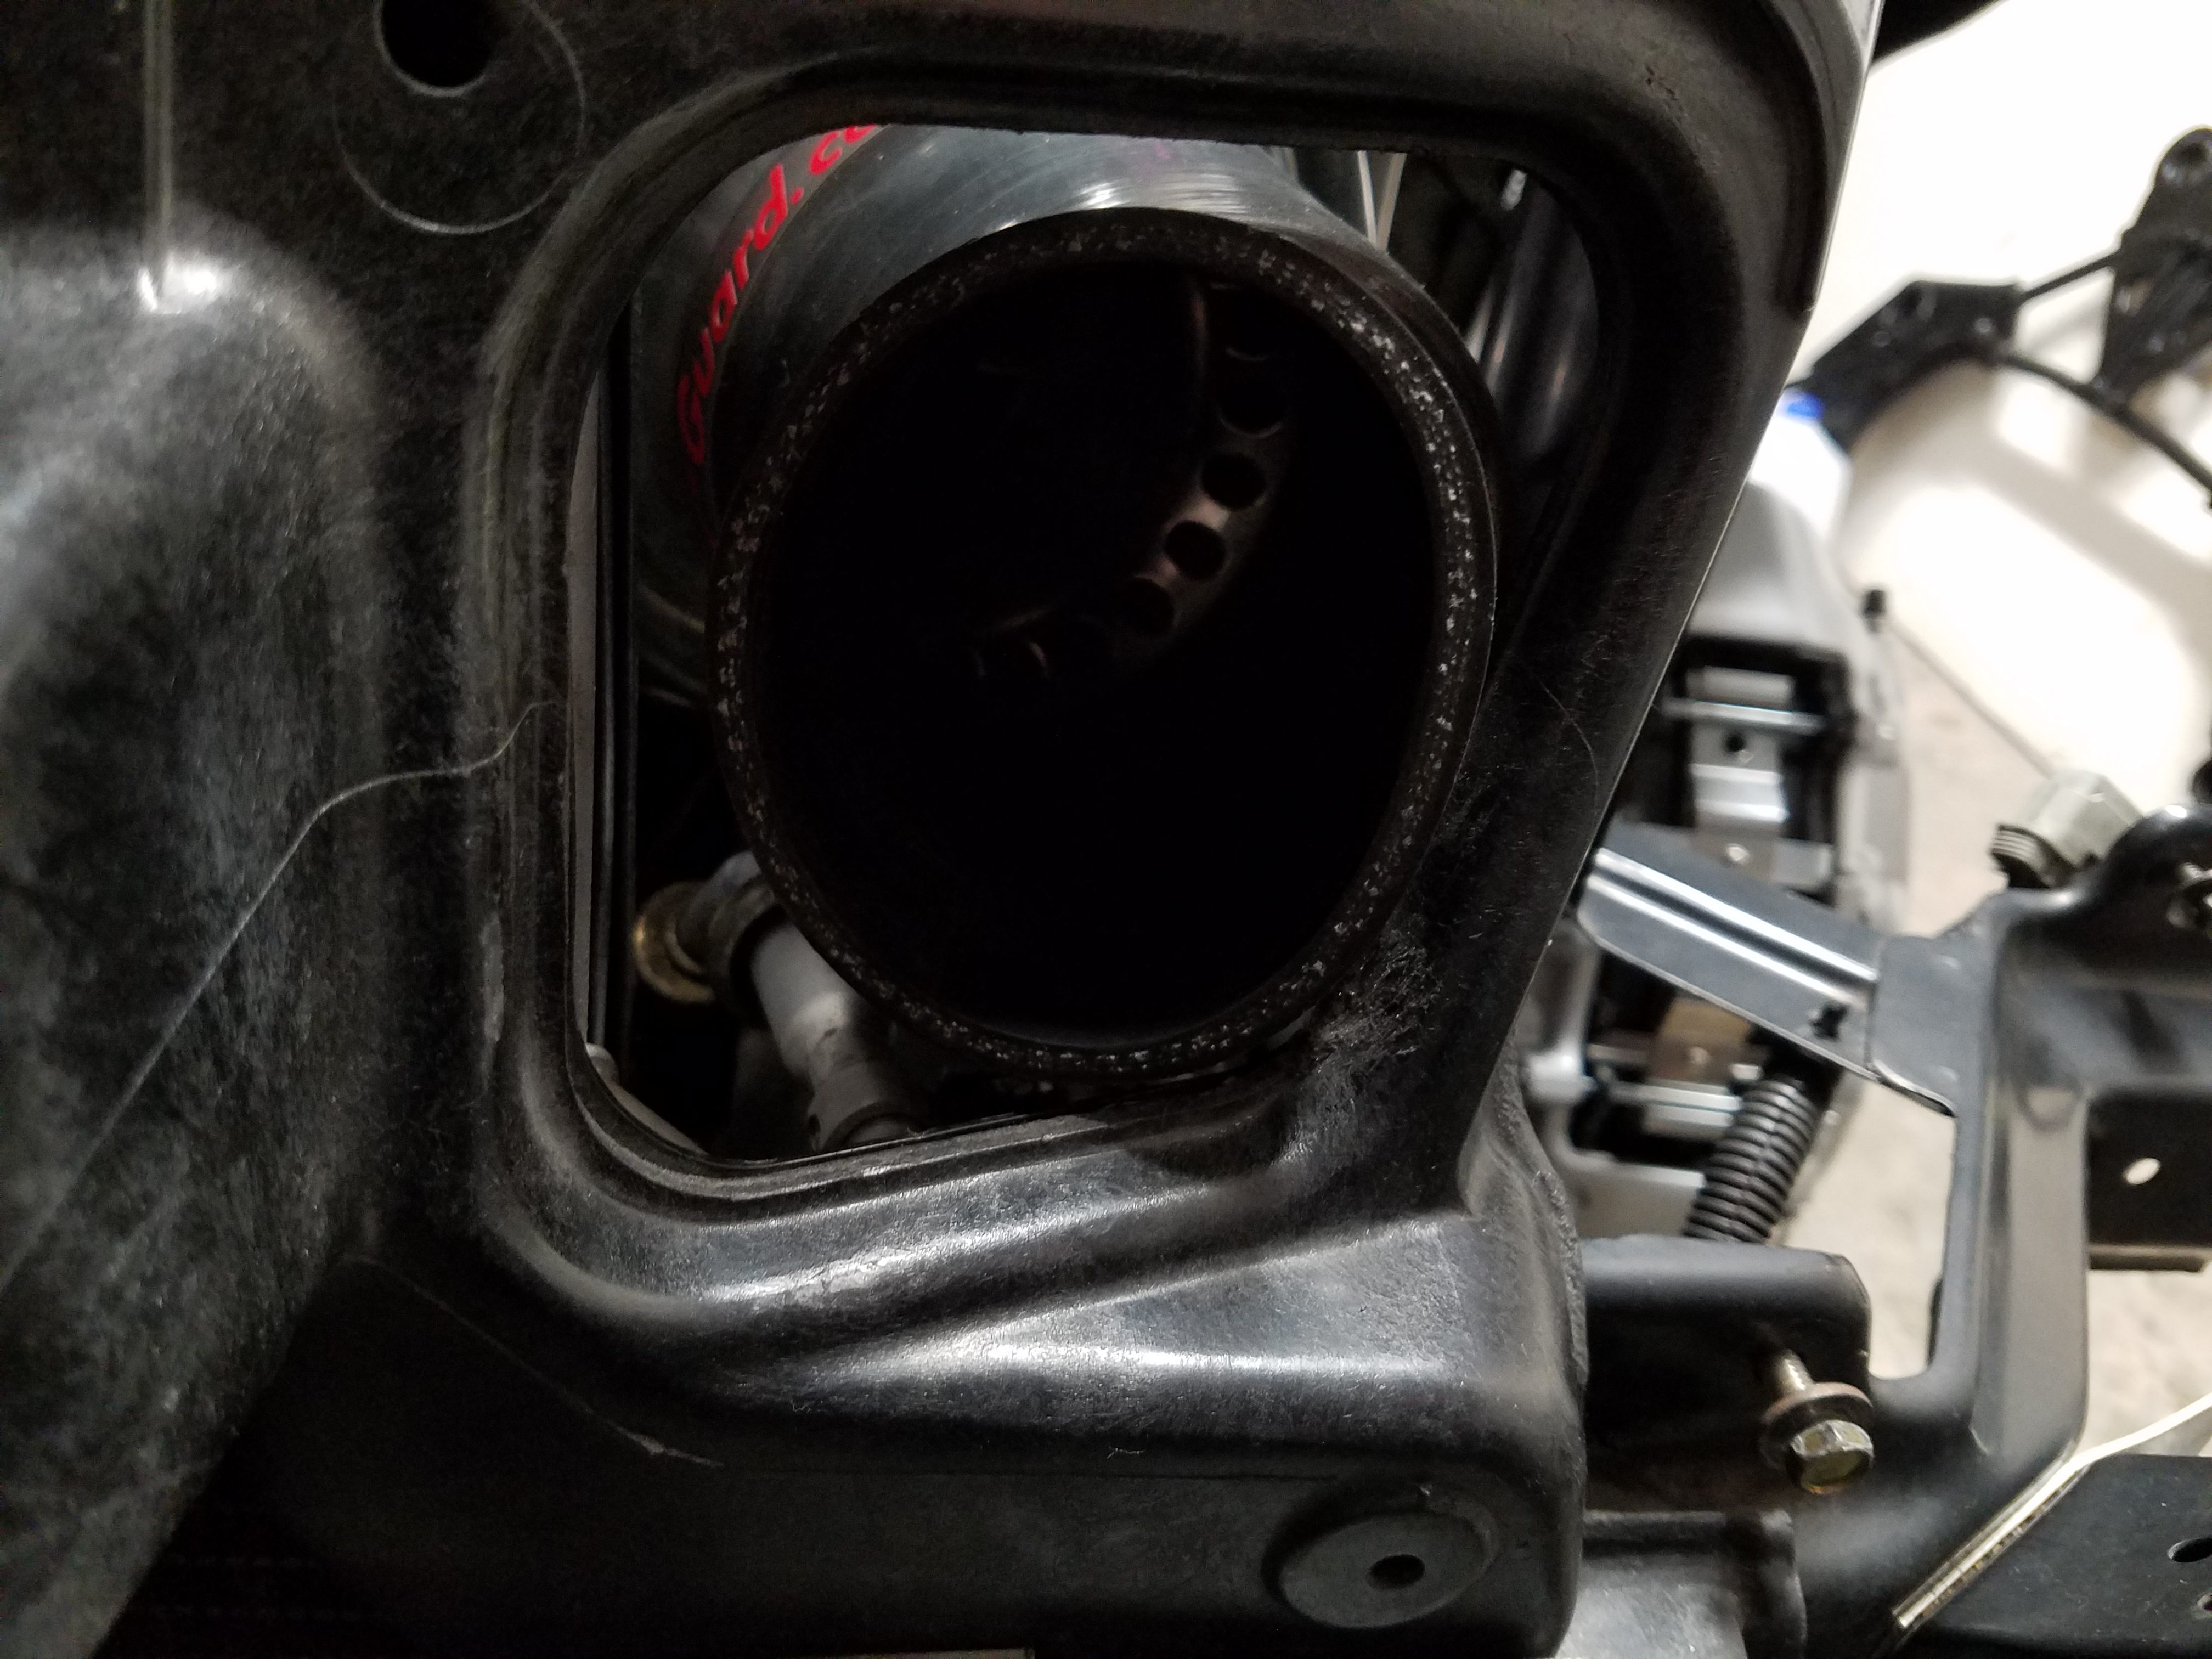
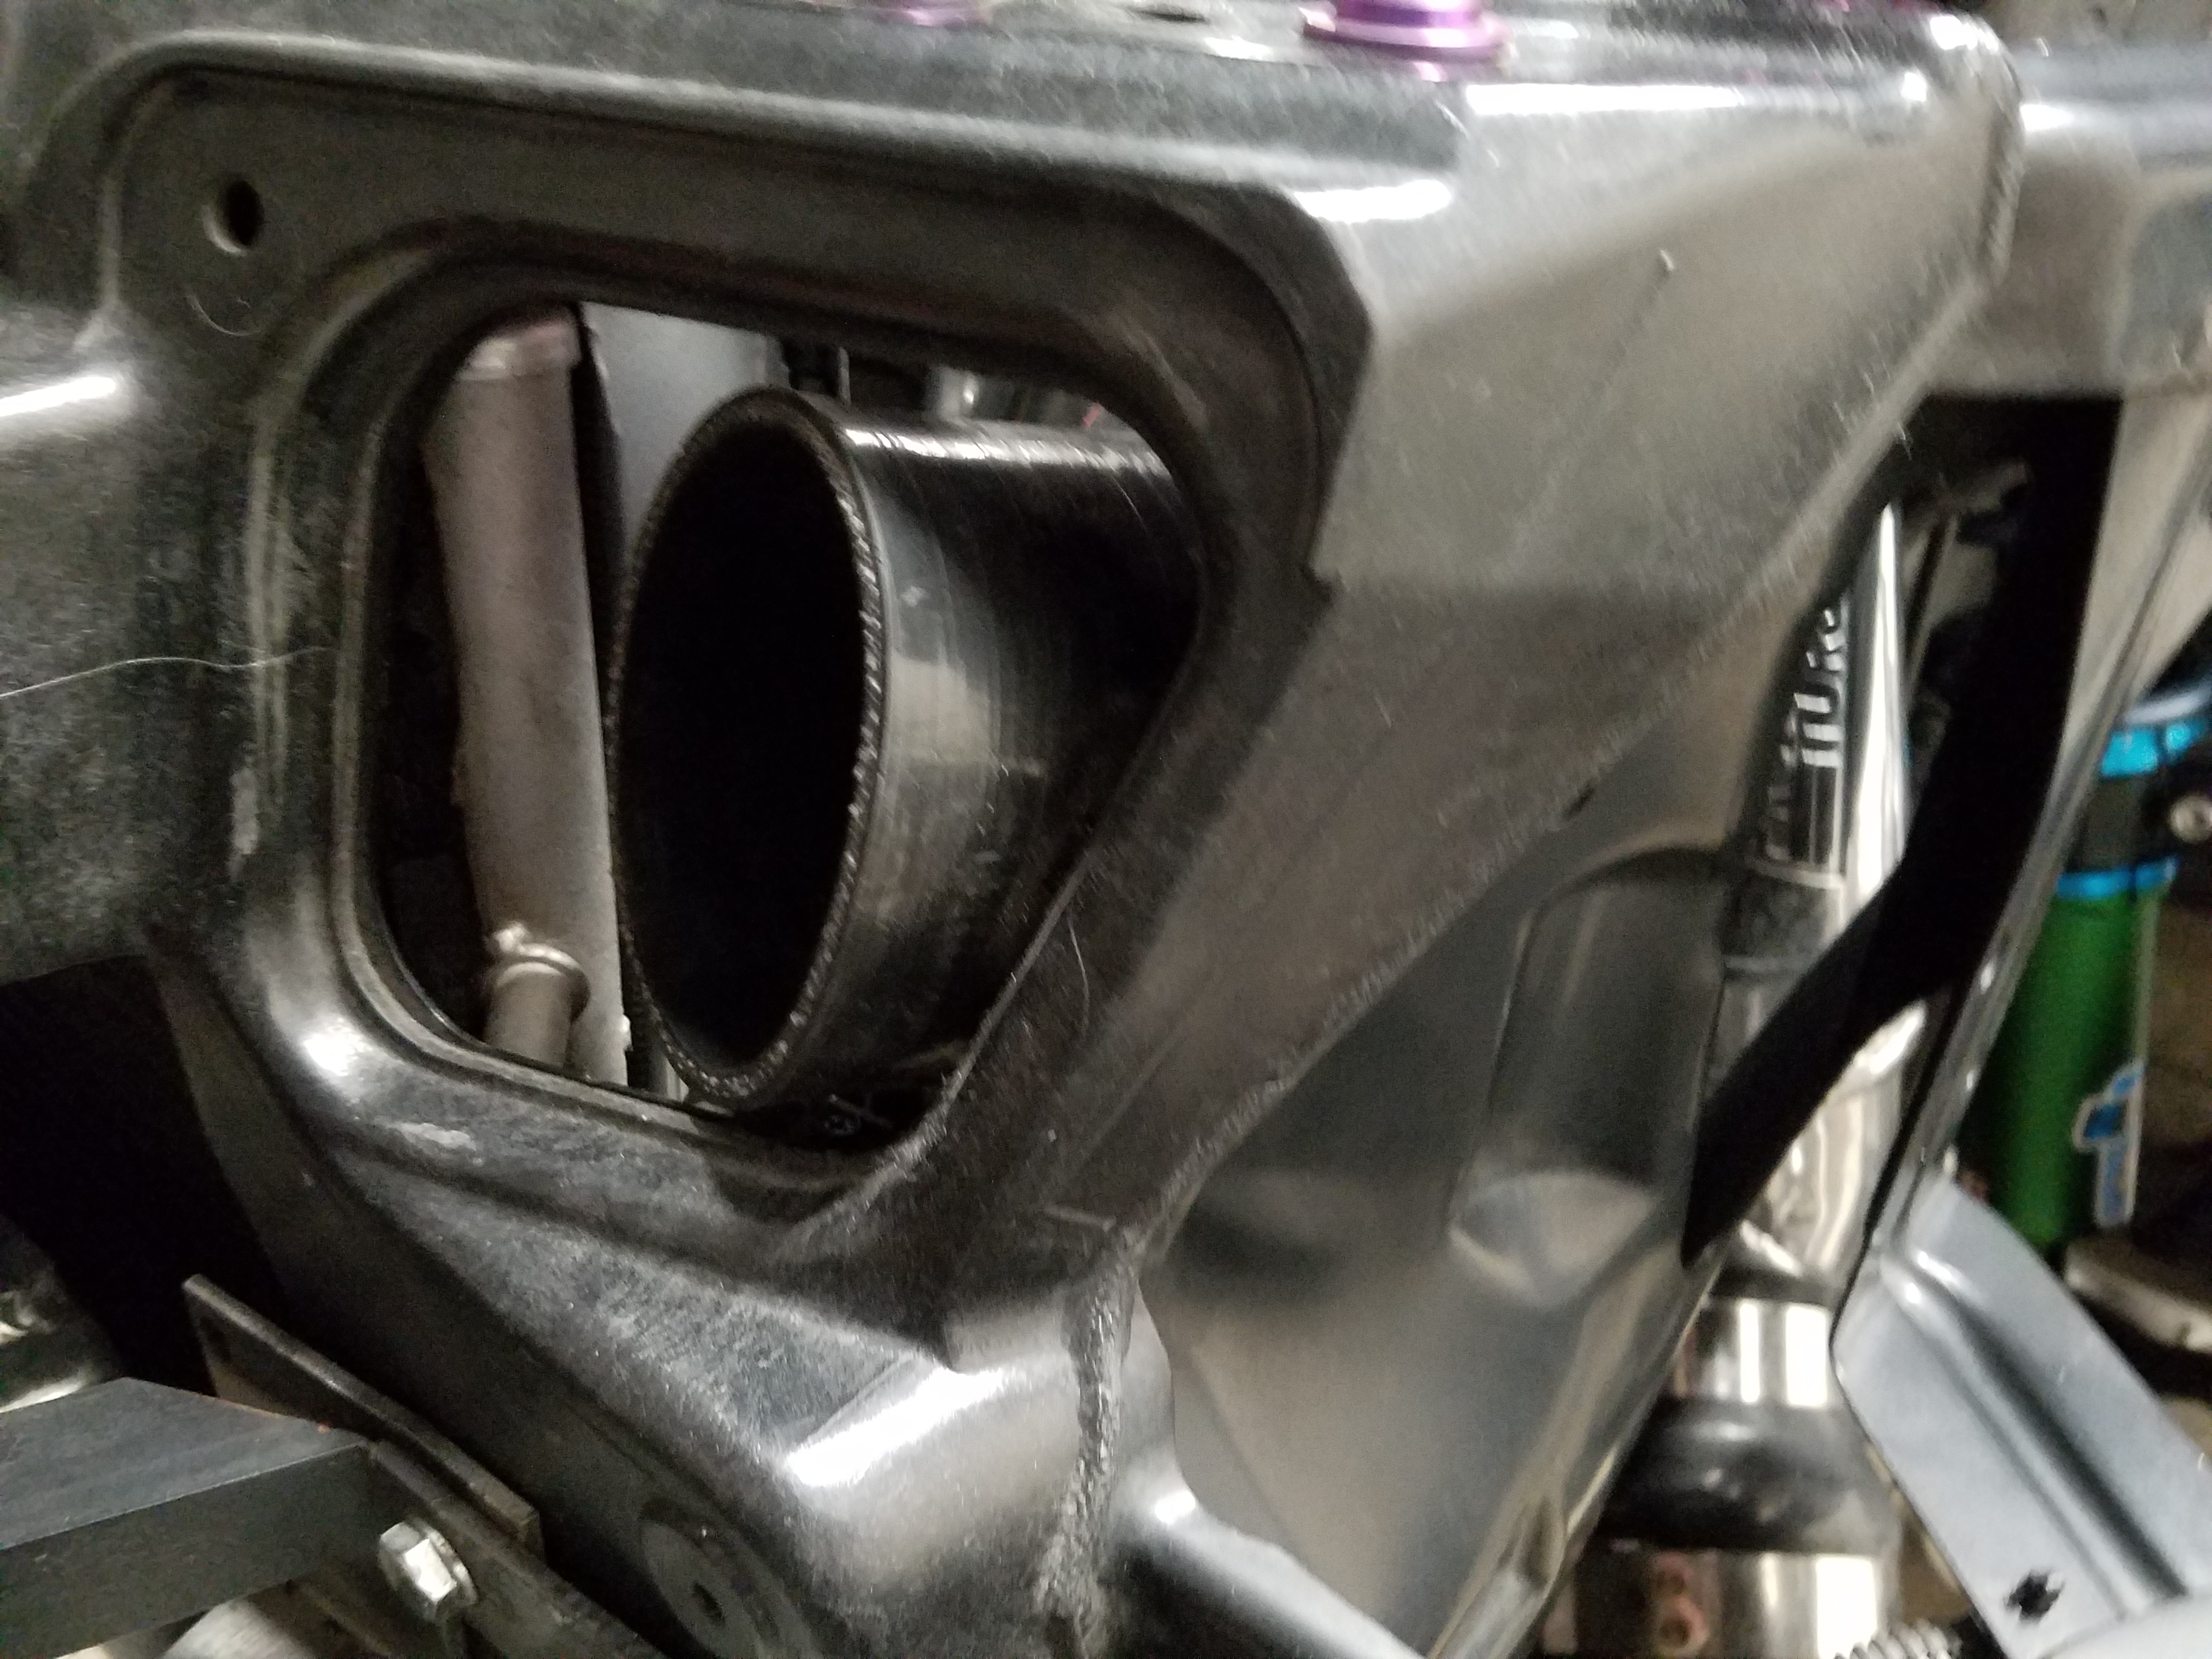
made some headway on the new intake and filter location. ( yes, everything will be filled and smoothed and pretty before it is done)
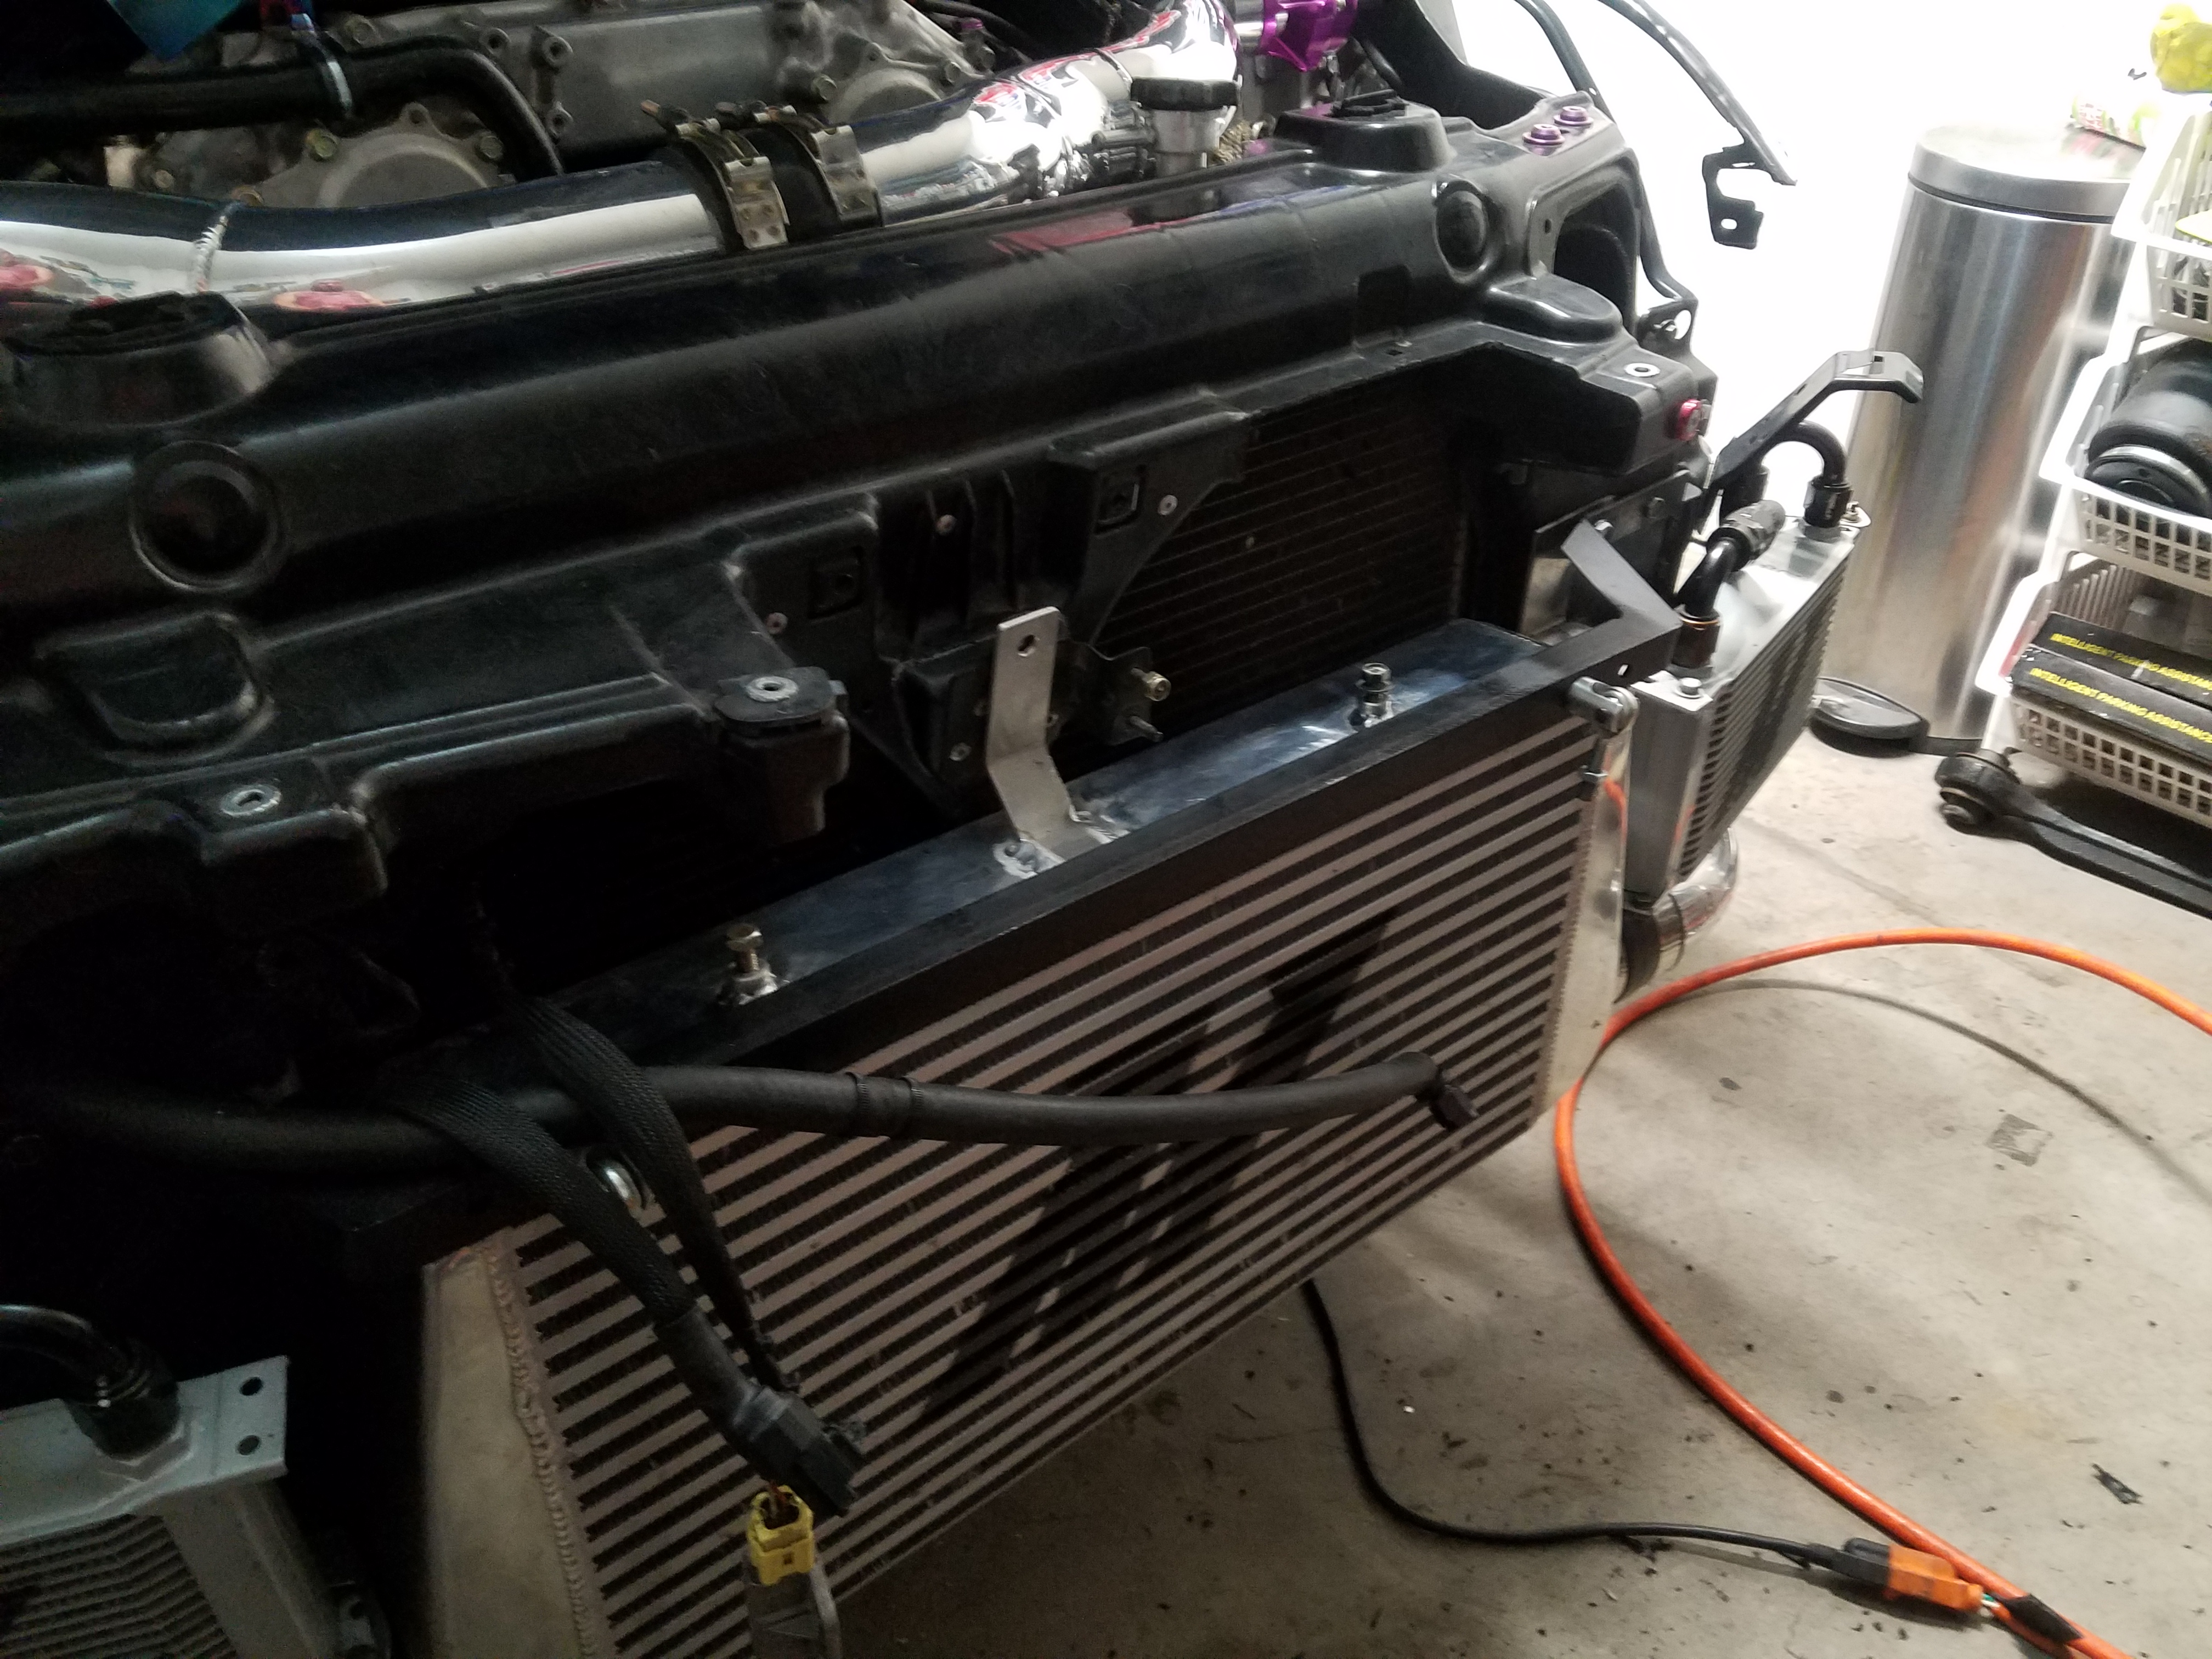
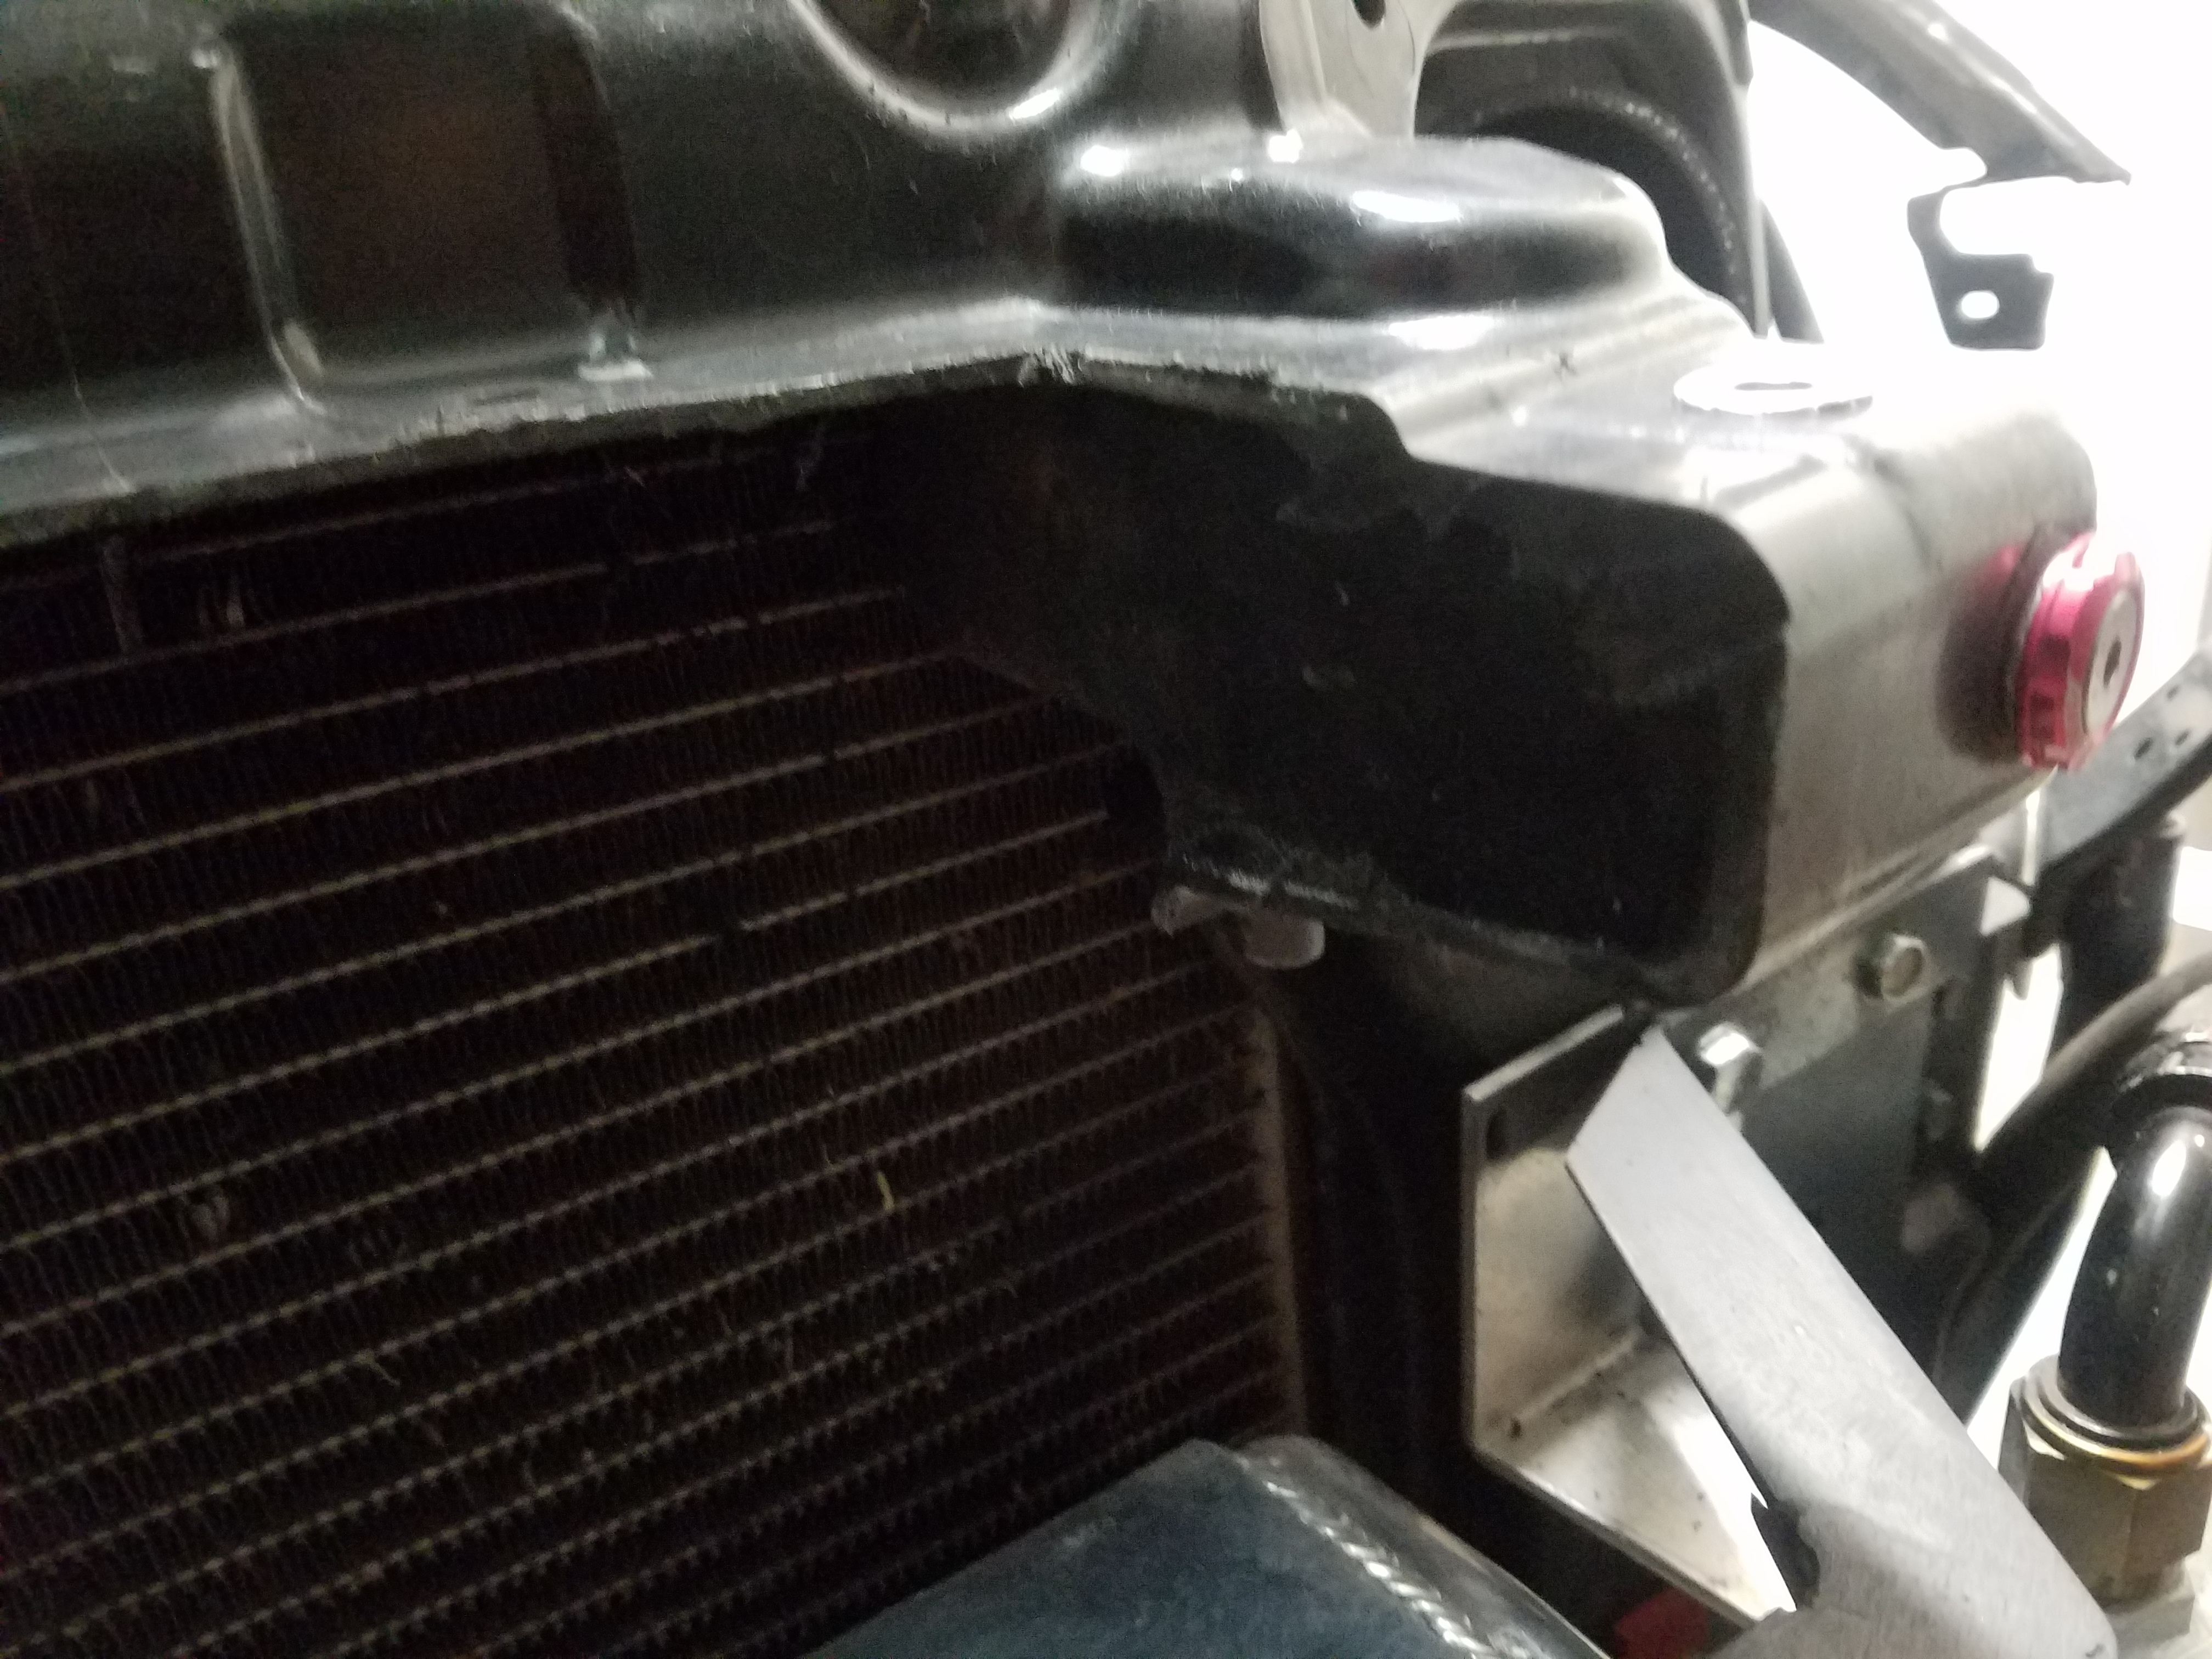
I removed the hood latch and trimmed out part of the center core support. It feels a bit more fragile, but I will be making a mild steel triangle shaped plate for it, with rivets, so this will likely be stronger than original.
^^
As you can see, now I can trace out my previous Mishimoto air diversion panel into a piece of carbon fiber sheet.. as I no longer need a large hood latch hole to be cut into the middle of it.. will help direct even more air where it should be
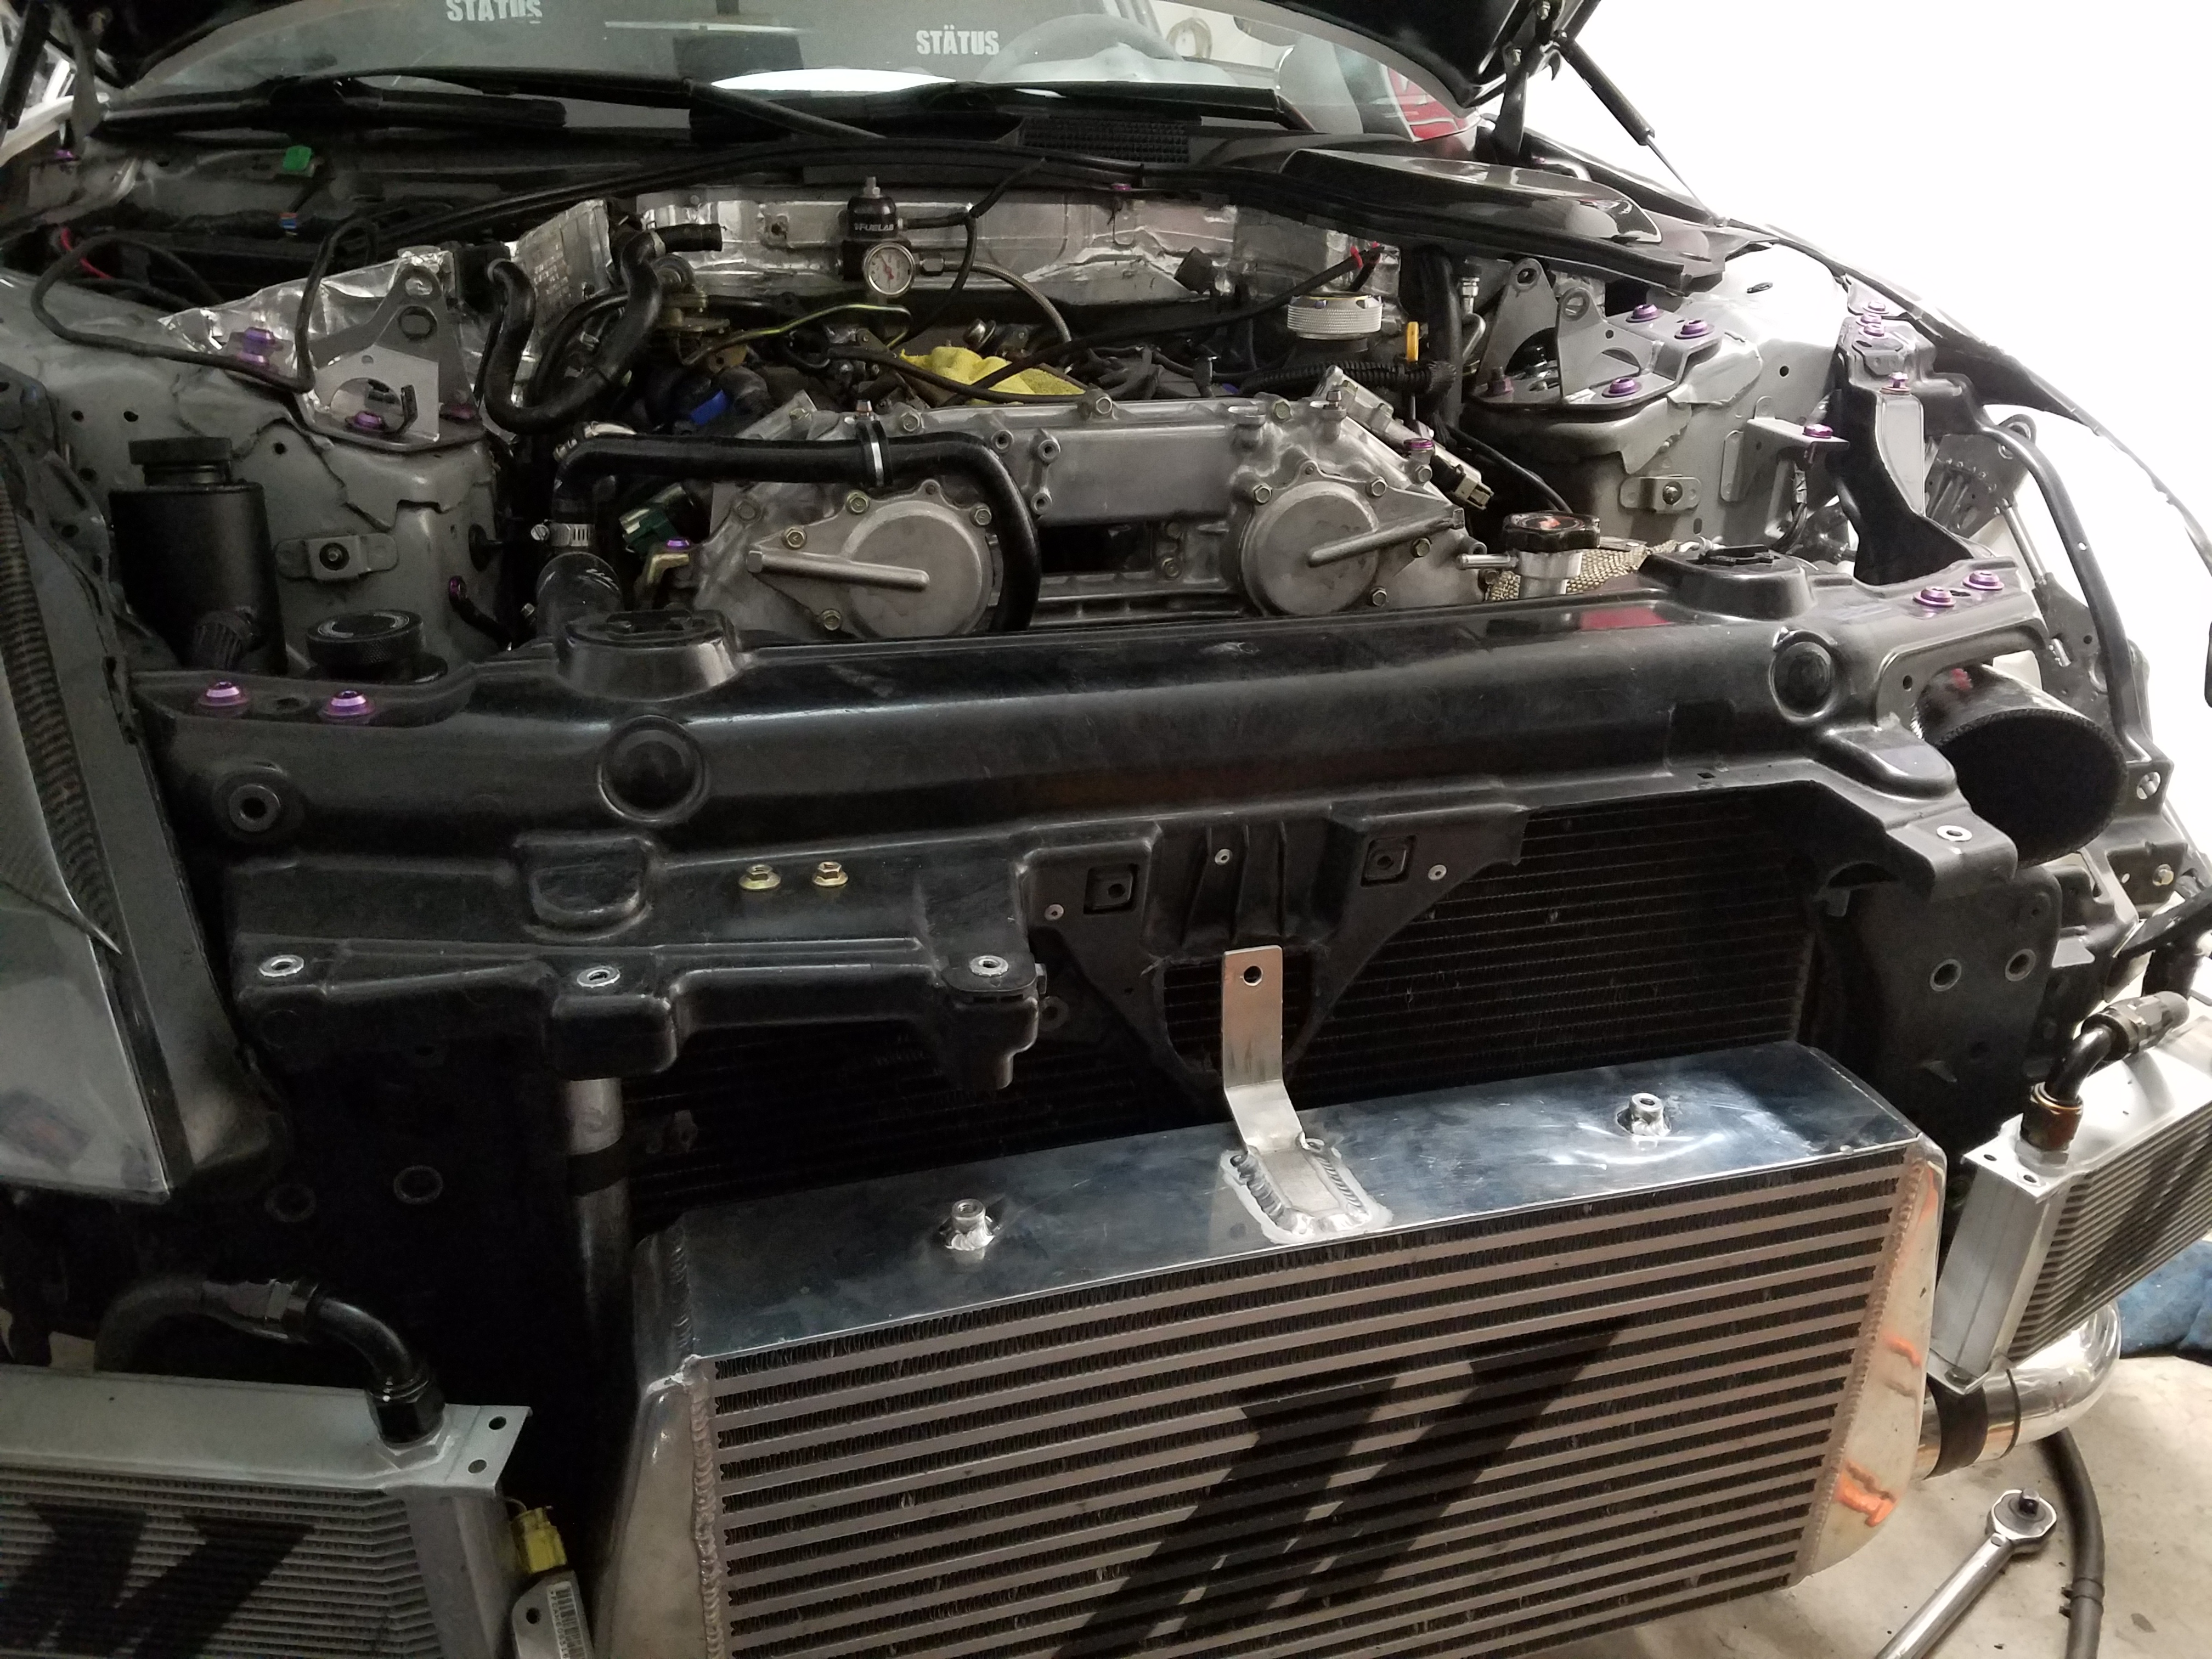
I bent the top tab for my fmic back, and also trimmed out a large section of the drivers side core support and bumper tab area, radiused the remaining parts for the 4" inlet, and will be able to have someone do some pie cut TIG work to make a 4" inlet tube from the filter right to the 4" inlet housing on the 6266 turbo.
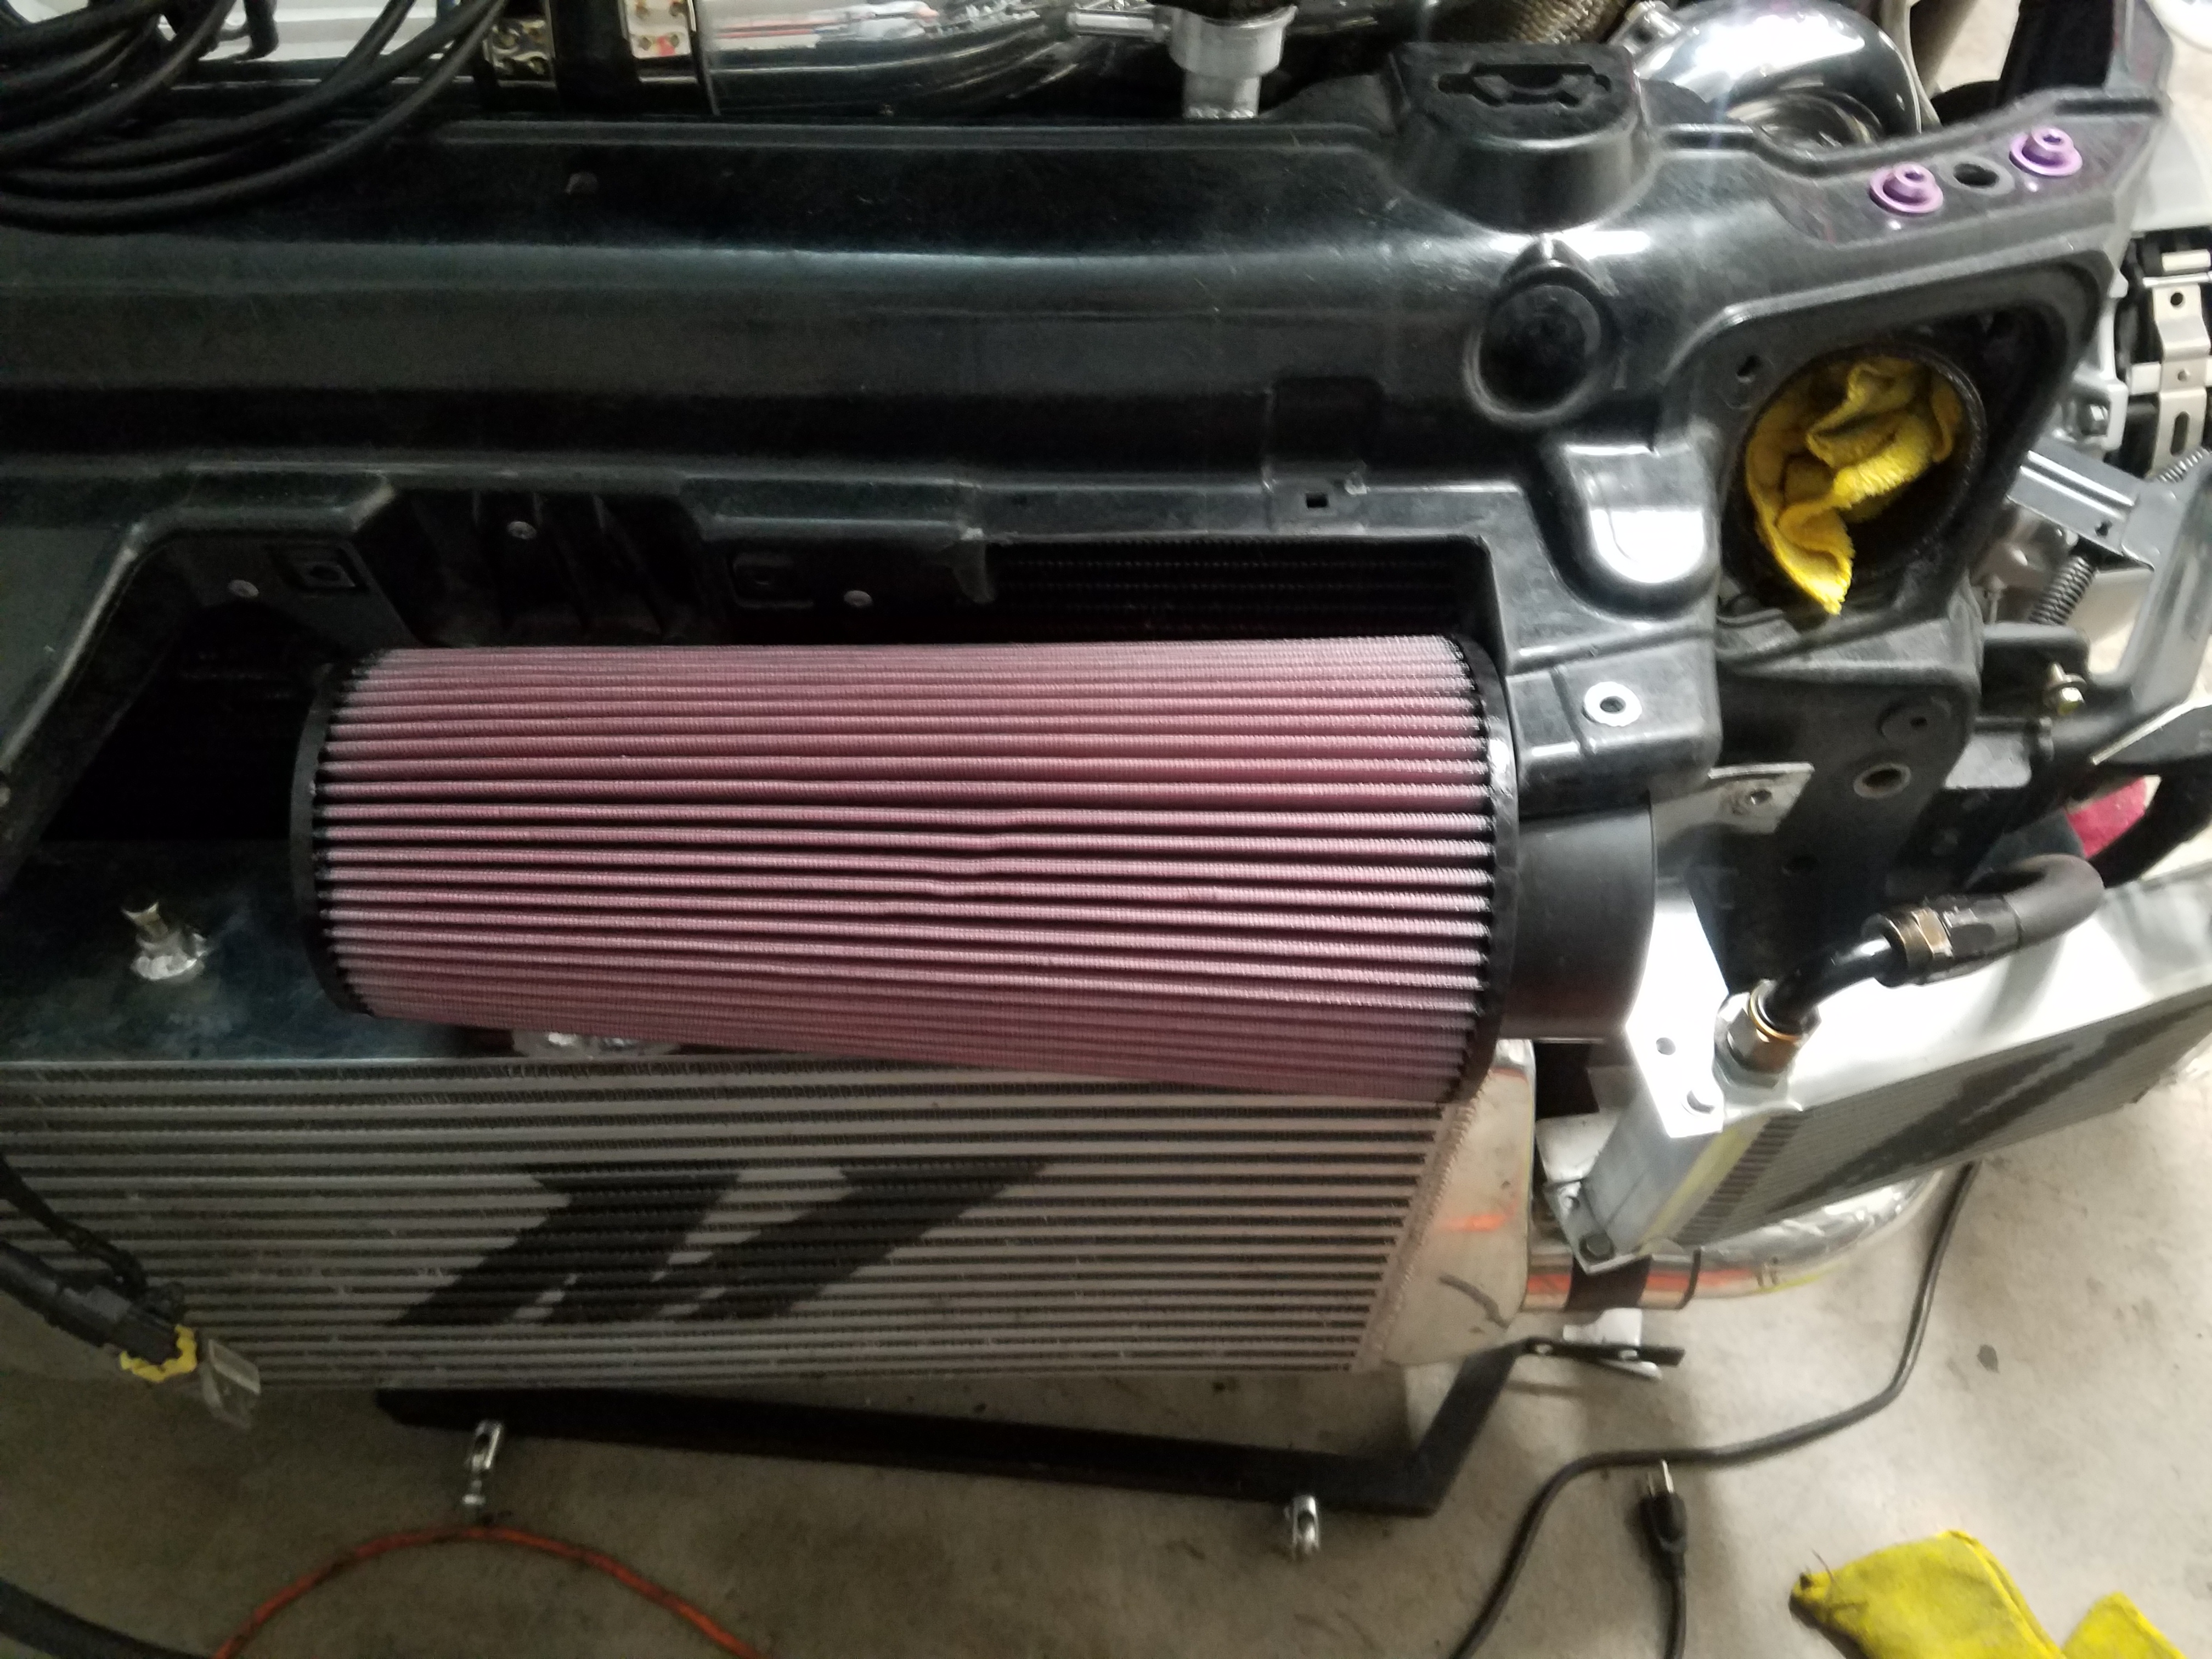


in the end, I will likely create some aluminum sheet metal ducting to seal the radiator and fmic up on the sides right to the bumper.. which is FAR better than just having everything sitting behind a bumper hole. I'm really looking fwd to that tbh. It always ends up looking super clean and functional, and adds tons of cooling improvement to the car.
The nose of each of my bumpers is cut out underneath to allow air up over the fmic to the radiator, as well as to the intake. Everything will be guided using ducting
I grinded down some extra tabs and rough shapes on the core support, started painting the cooler brackets black, should clean things up quite a bit.
I removed the hood latch and trimmed out part of the center core support. It feels a bit more fragile, but I will be making a mild steel triangle shaped plate for it, with rivets, so this will likely be stronger than original.


^^
As you can see, now I can trace out my previous Mishimoto air diversion panel into a piece of carbon fiber sheet.. as I no longer need a large hood latch hole to be cut into the middle of it.. will help direct even more air where it should be
I bent the top tab for my fmic back, and also trimmed out a large section of the drivers side core support and bumper tab area, radiused the remaining parts for the 4" inlet, and will be able to have someone do some pie cut TIG work to make a 4" inlet tube from the filter right to the 4" inlet housing on the 6266 turbo.


in the end, I will likely create some aluminum sheet metal ducting to seal the radiator and fmic up on the sides right to the bumper.. which is FAR better than just having everything sitting behind a bumper hole. I'm really looking fwd to that tbh. It always ends up looking super clean and functional, and adds tons of cooling improvement to the car.
The nose of each of my bumpers is cut out underneath to allow air up over the fmic to the radiator, as well as to the intake. Everything will be guided using ducting
I grinded down some extra tabs and rough shapes on the core support, started painting the cooler brackets black, should clean things up quite a bit.
Last edited by bmccann101; Apr 10, 2017 at 09:33 AM.
Thread Starter
Joined: Aug 2006
Posts: 8,321
Likes: 467
From: Scottsdale/coyote drophouse
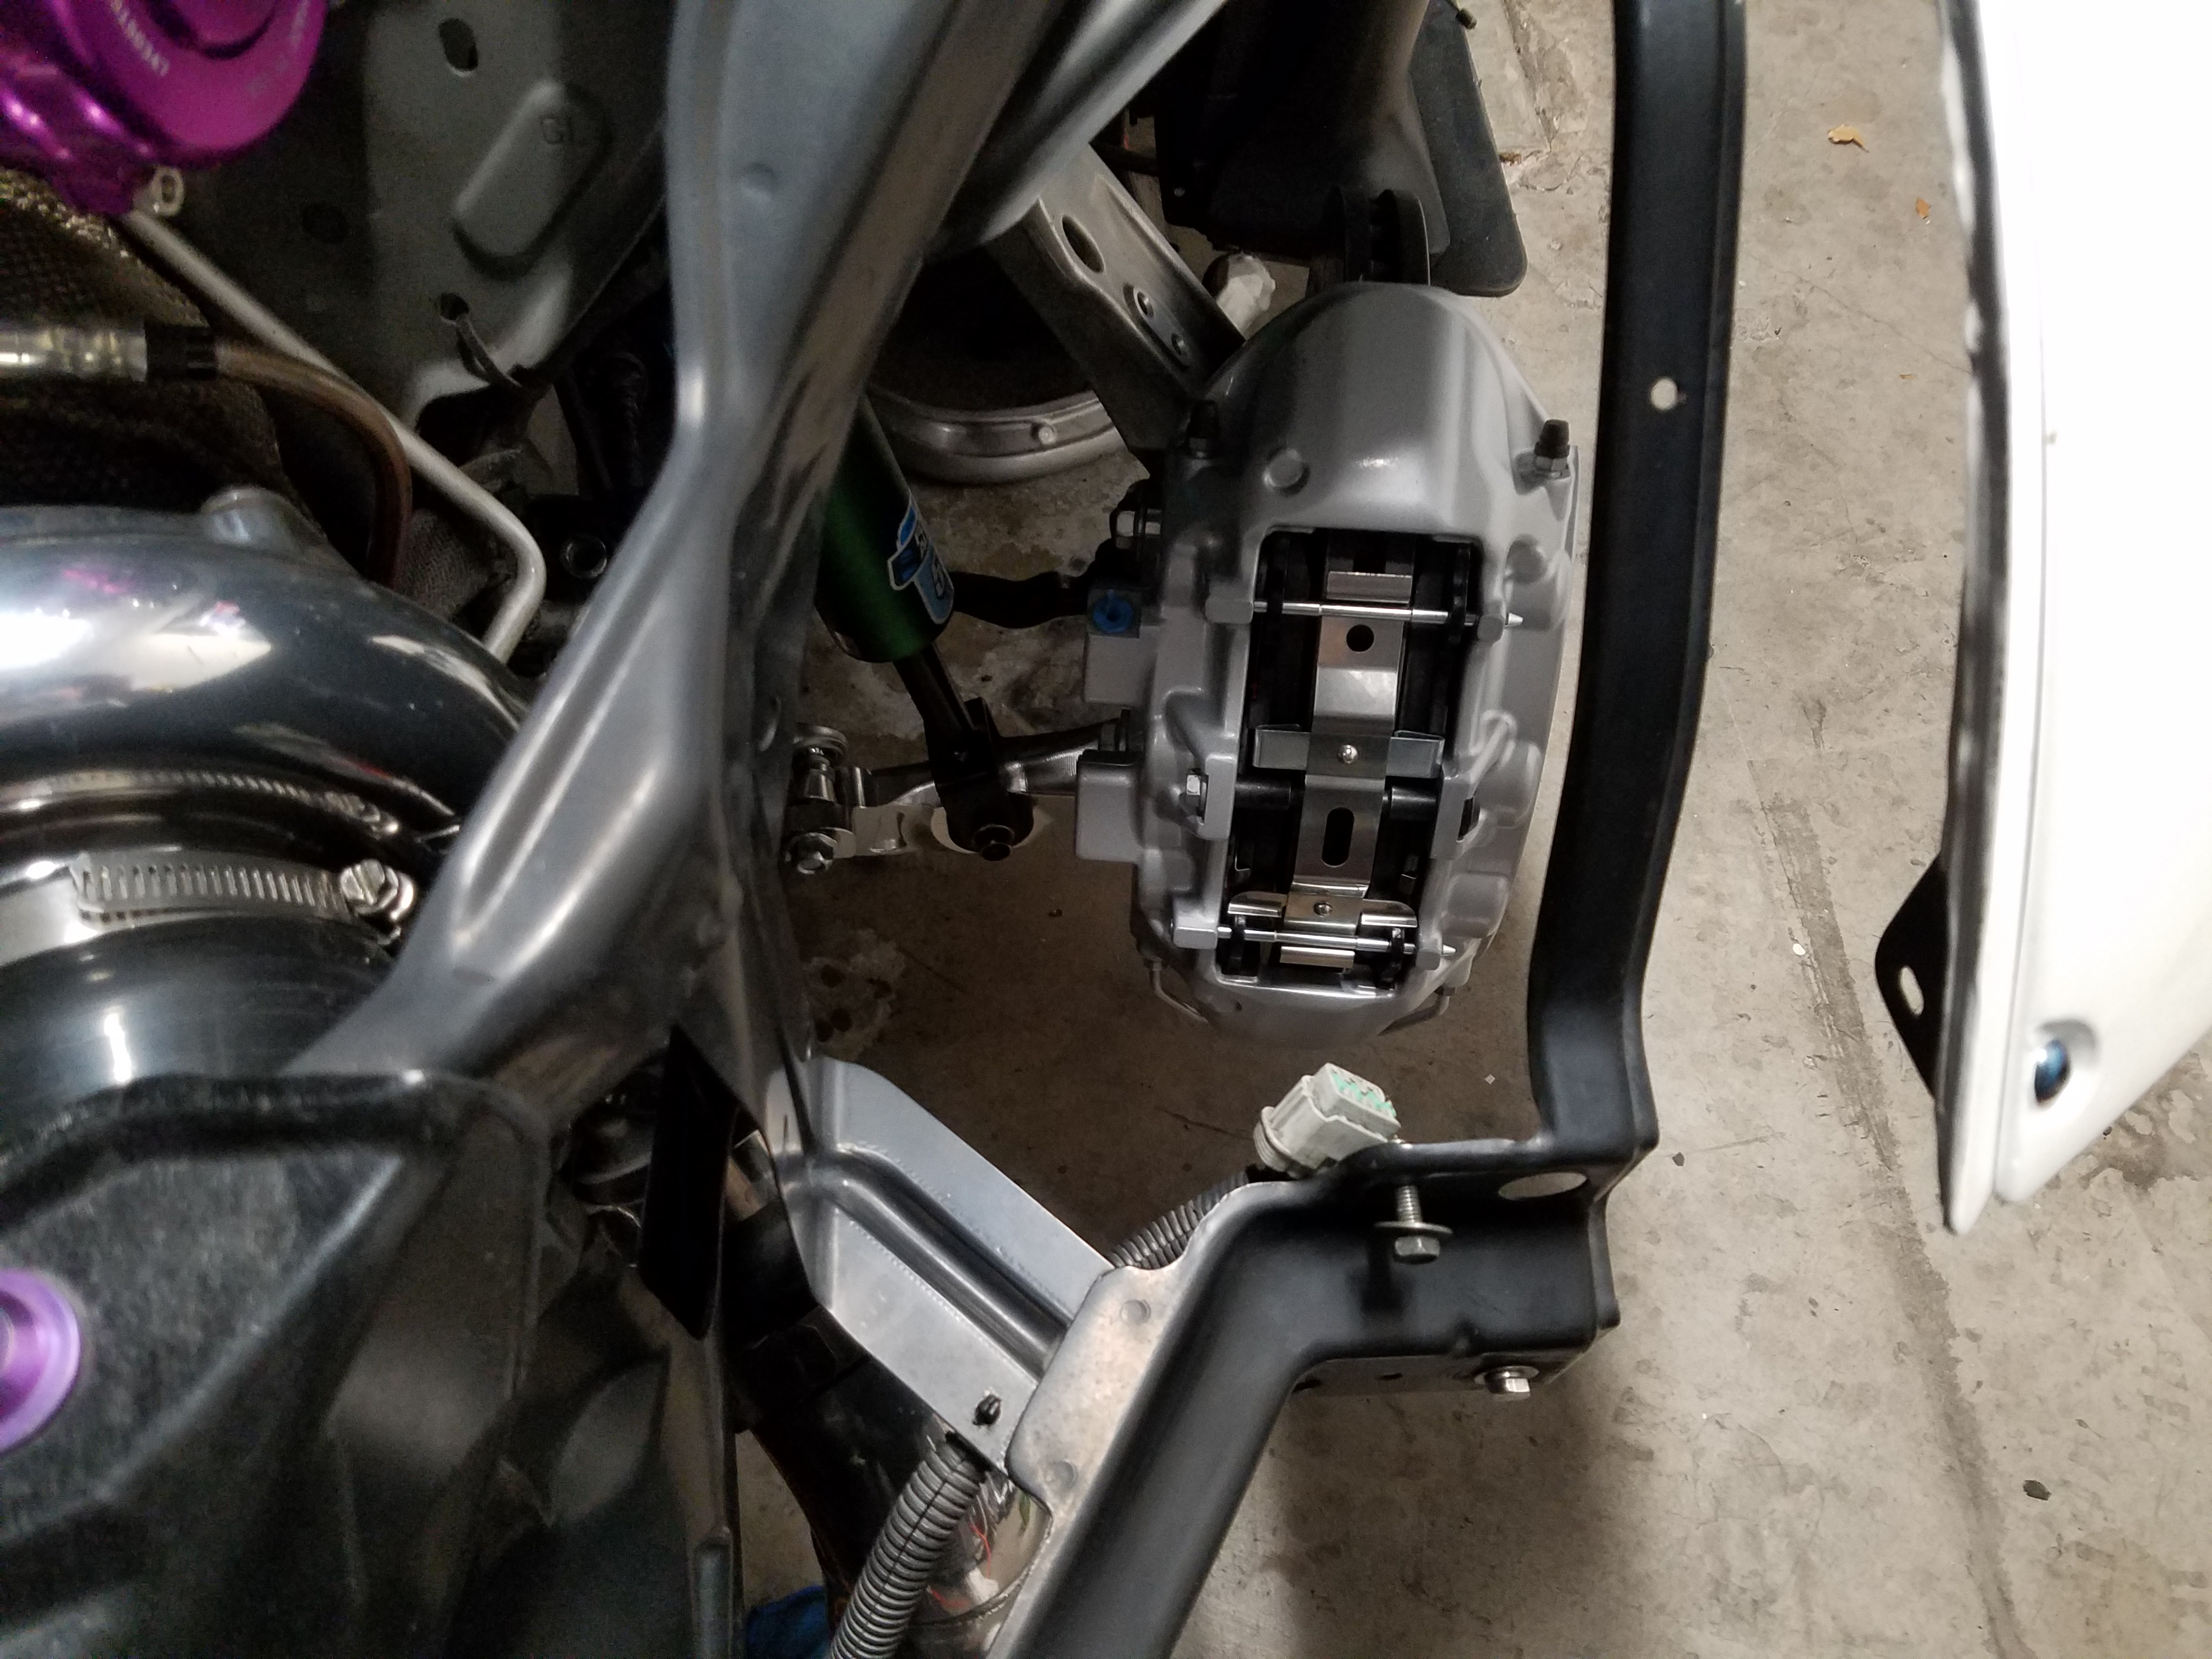
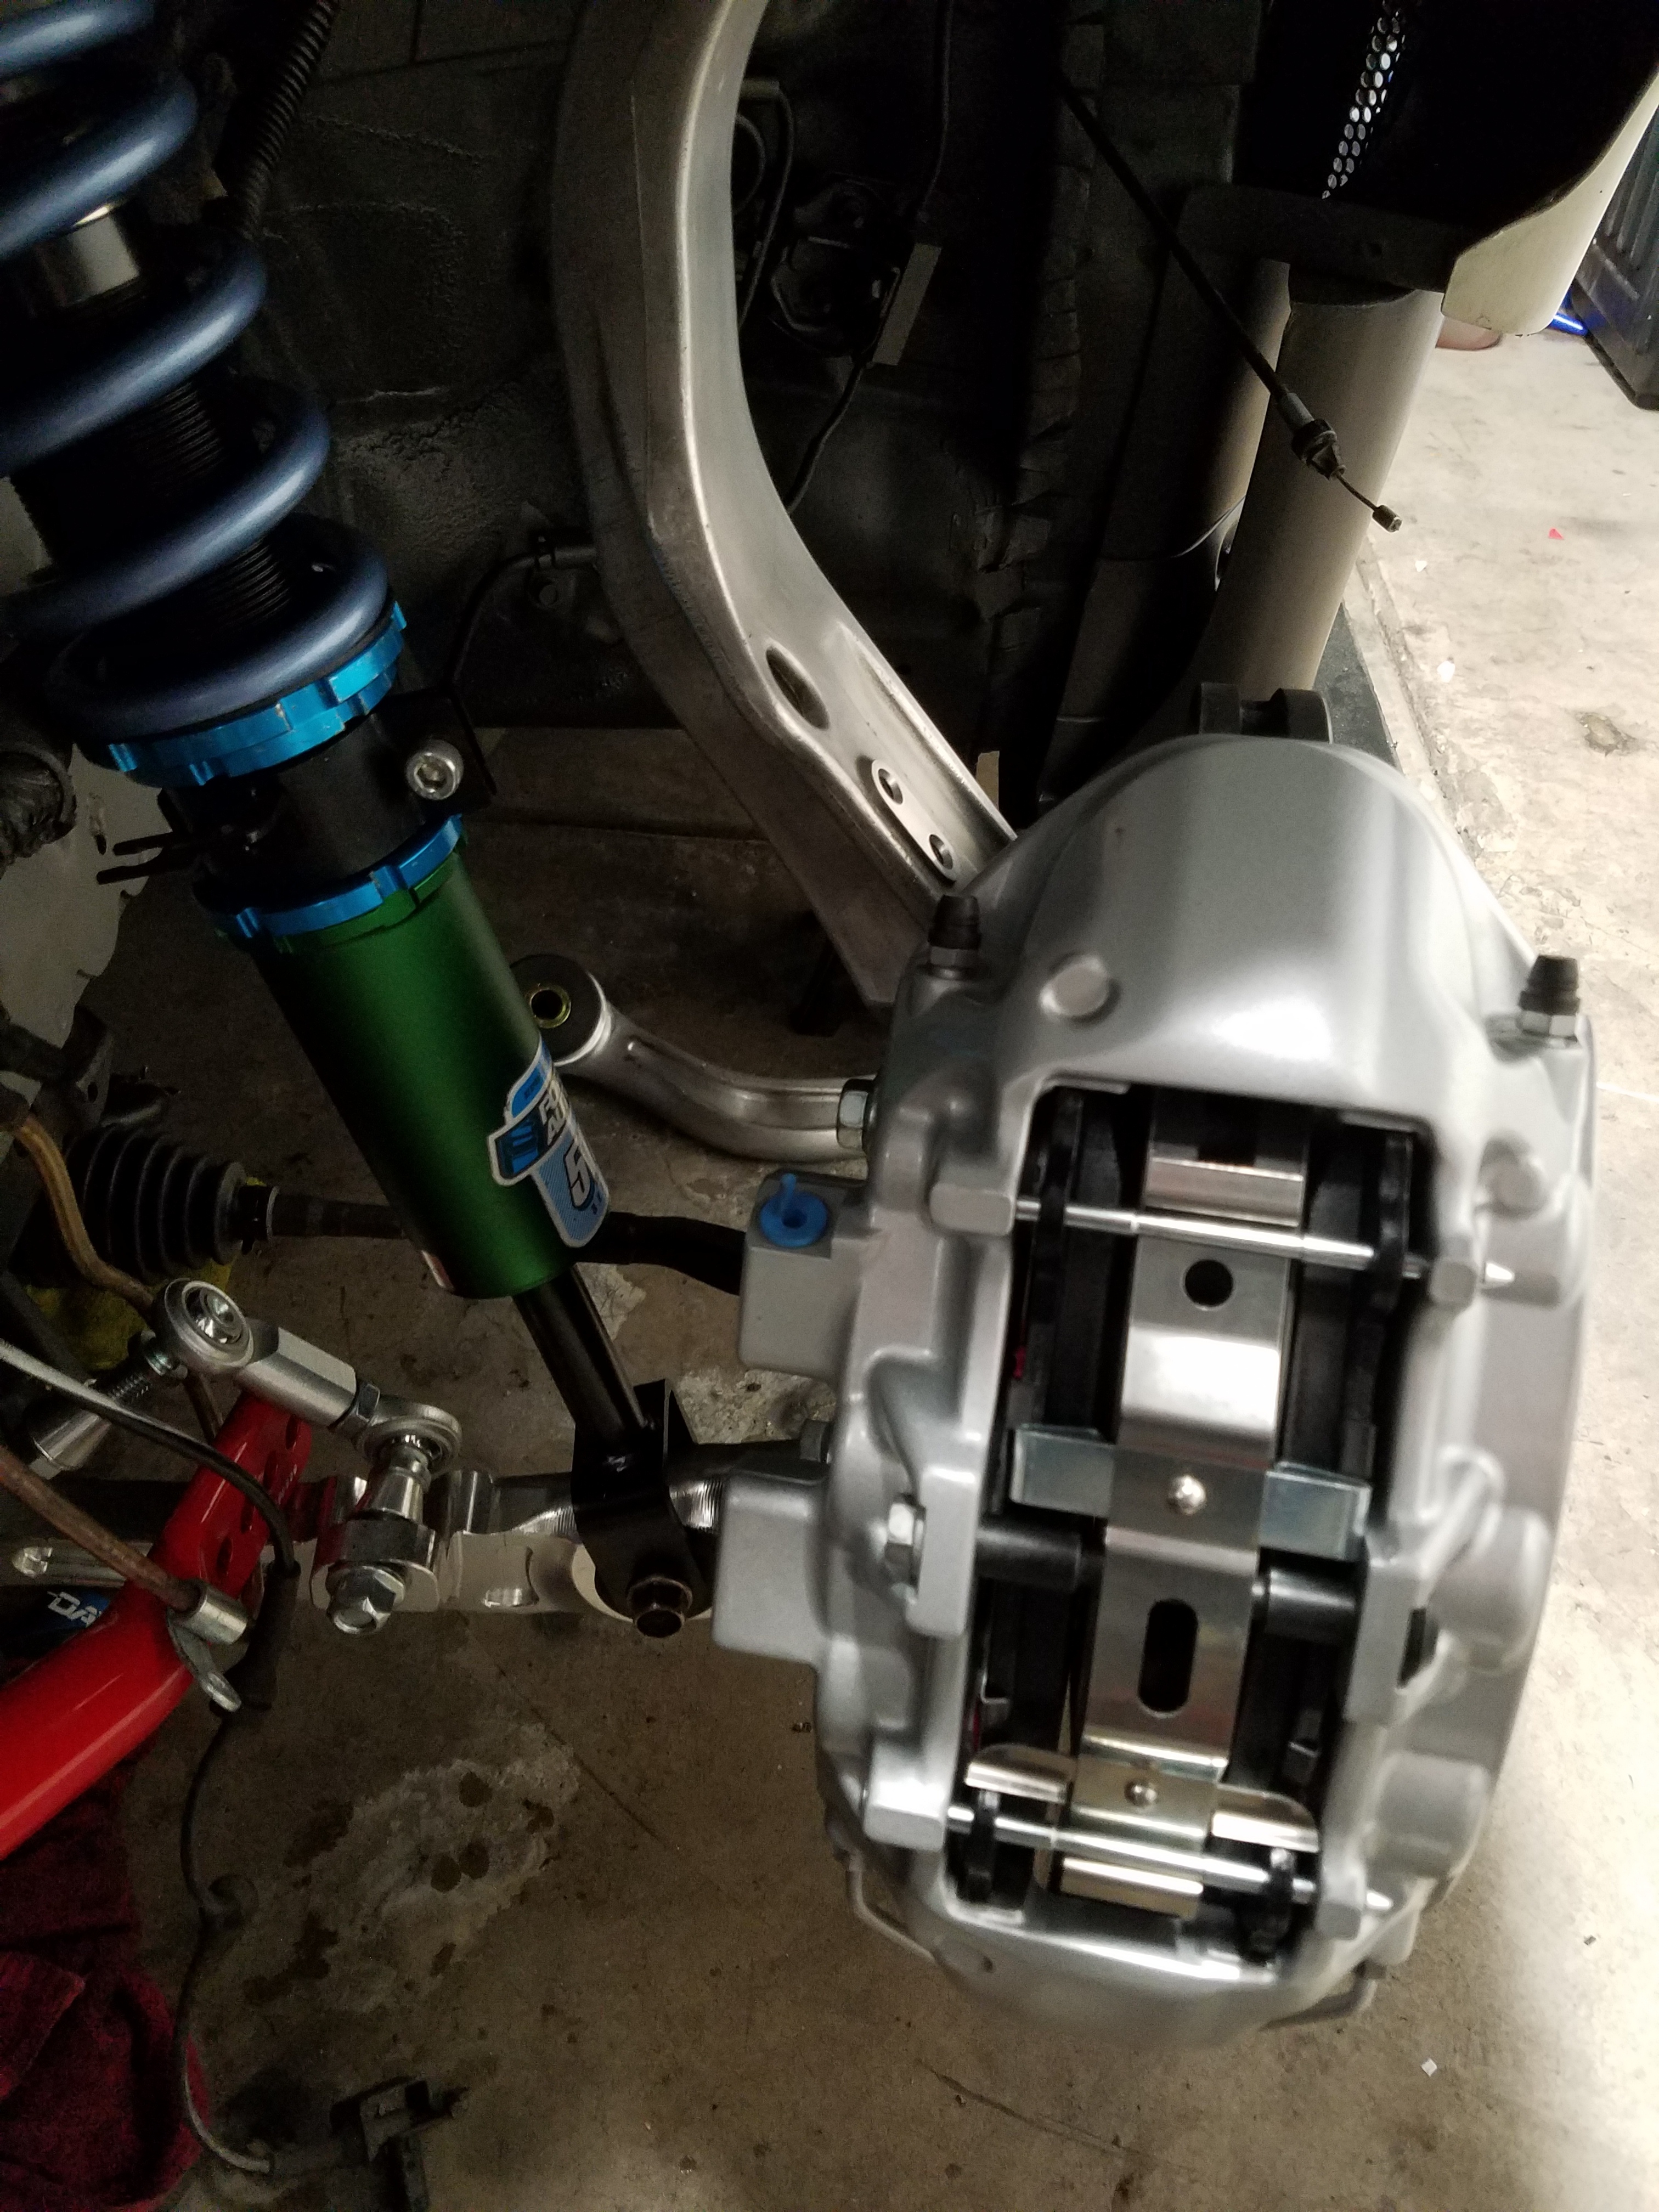
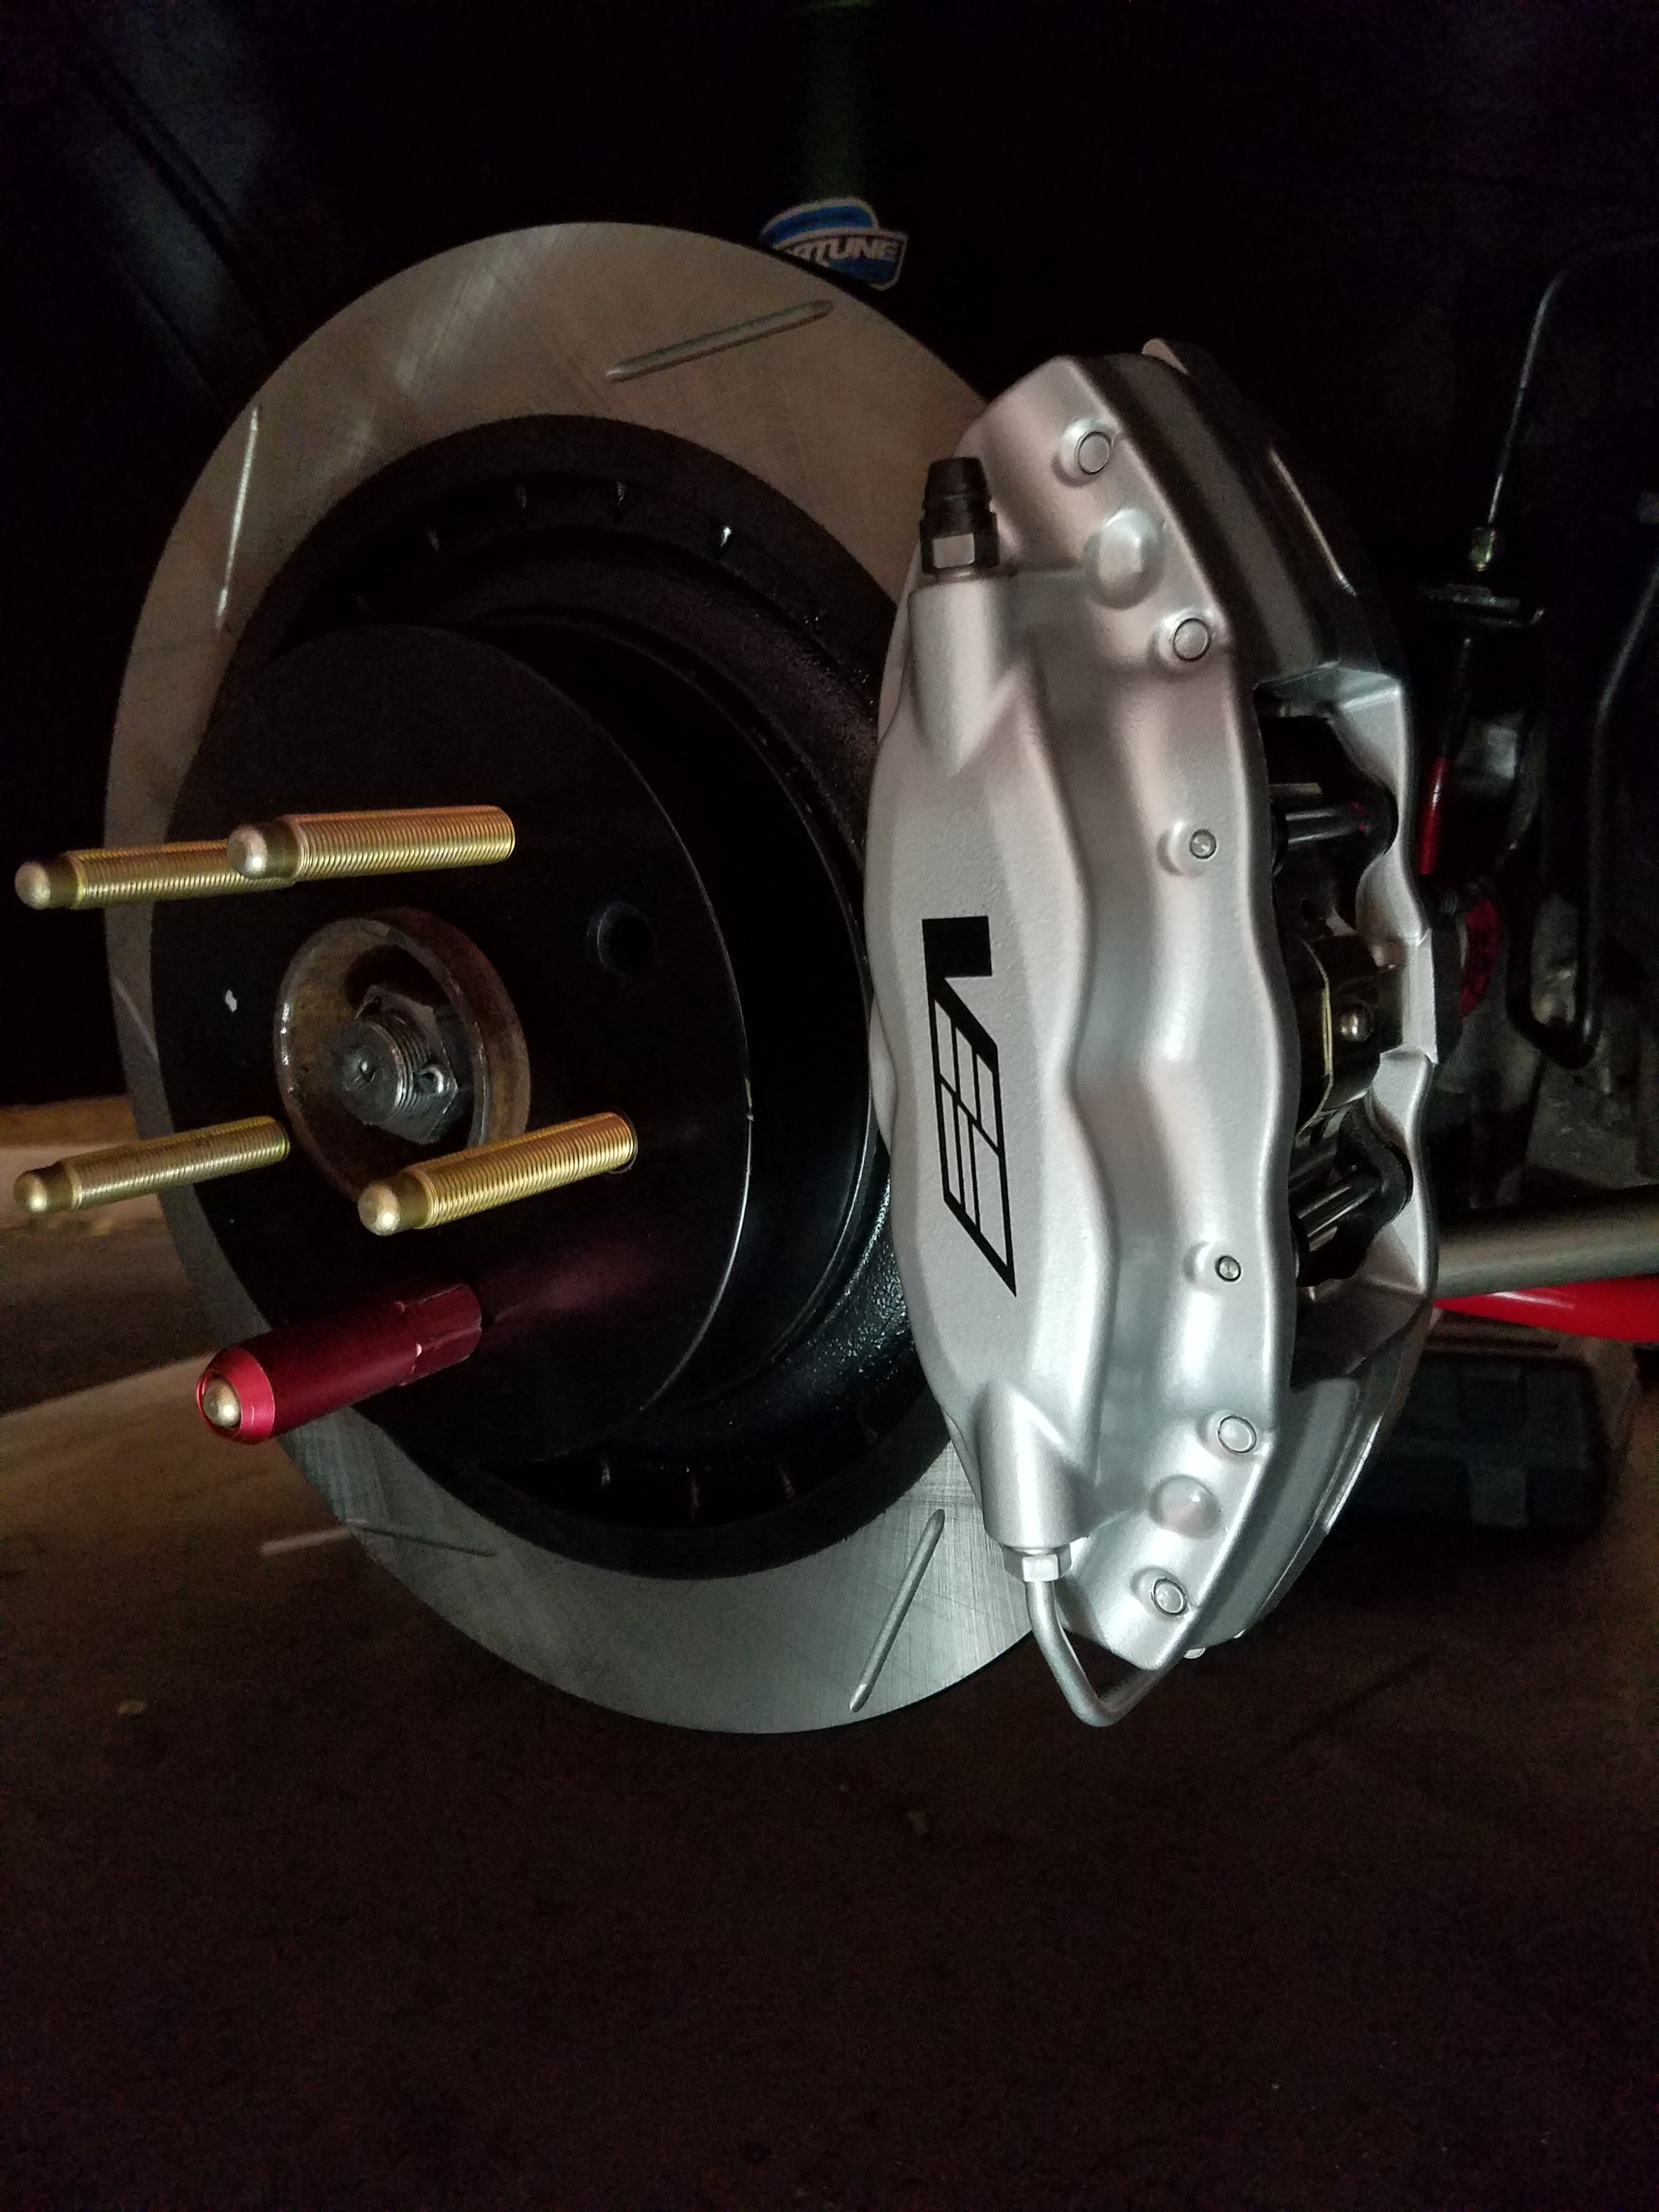
off to Lowes to buy a new dremel and some aluminum grinding bits.. will lightly reshape and oval out the rear caliper holes on the knuckle and get these rears installed and done tonight hopefully.
Not having been the one who took this car all apart... is making reassembly by myself a bit time consuming, sadly.
makes things tough when you aren't familiar w the hardware that came of what part etc.
Not having been the one who took this car all apart... is making reassembly by myself a bit time consuming, sadly.
makes things tough when you aren't familiar w the hardware that came of what part etc.
Thread Starter
Joined: Aug 2006
Posts: 8,321
Likes: 467
From: Scottsdale/coyote drophouse
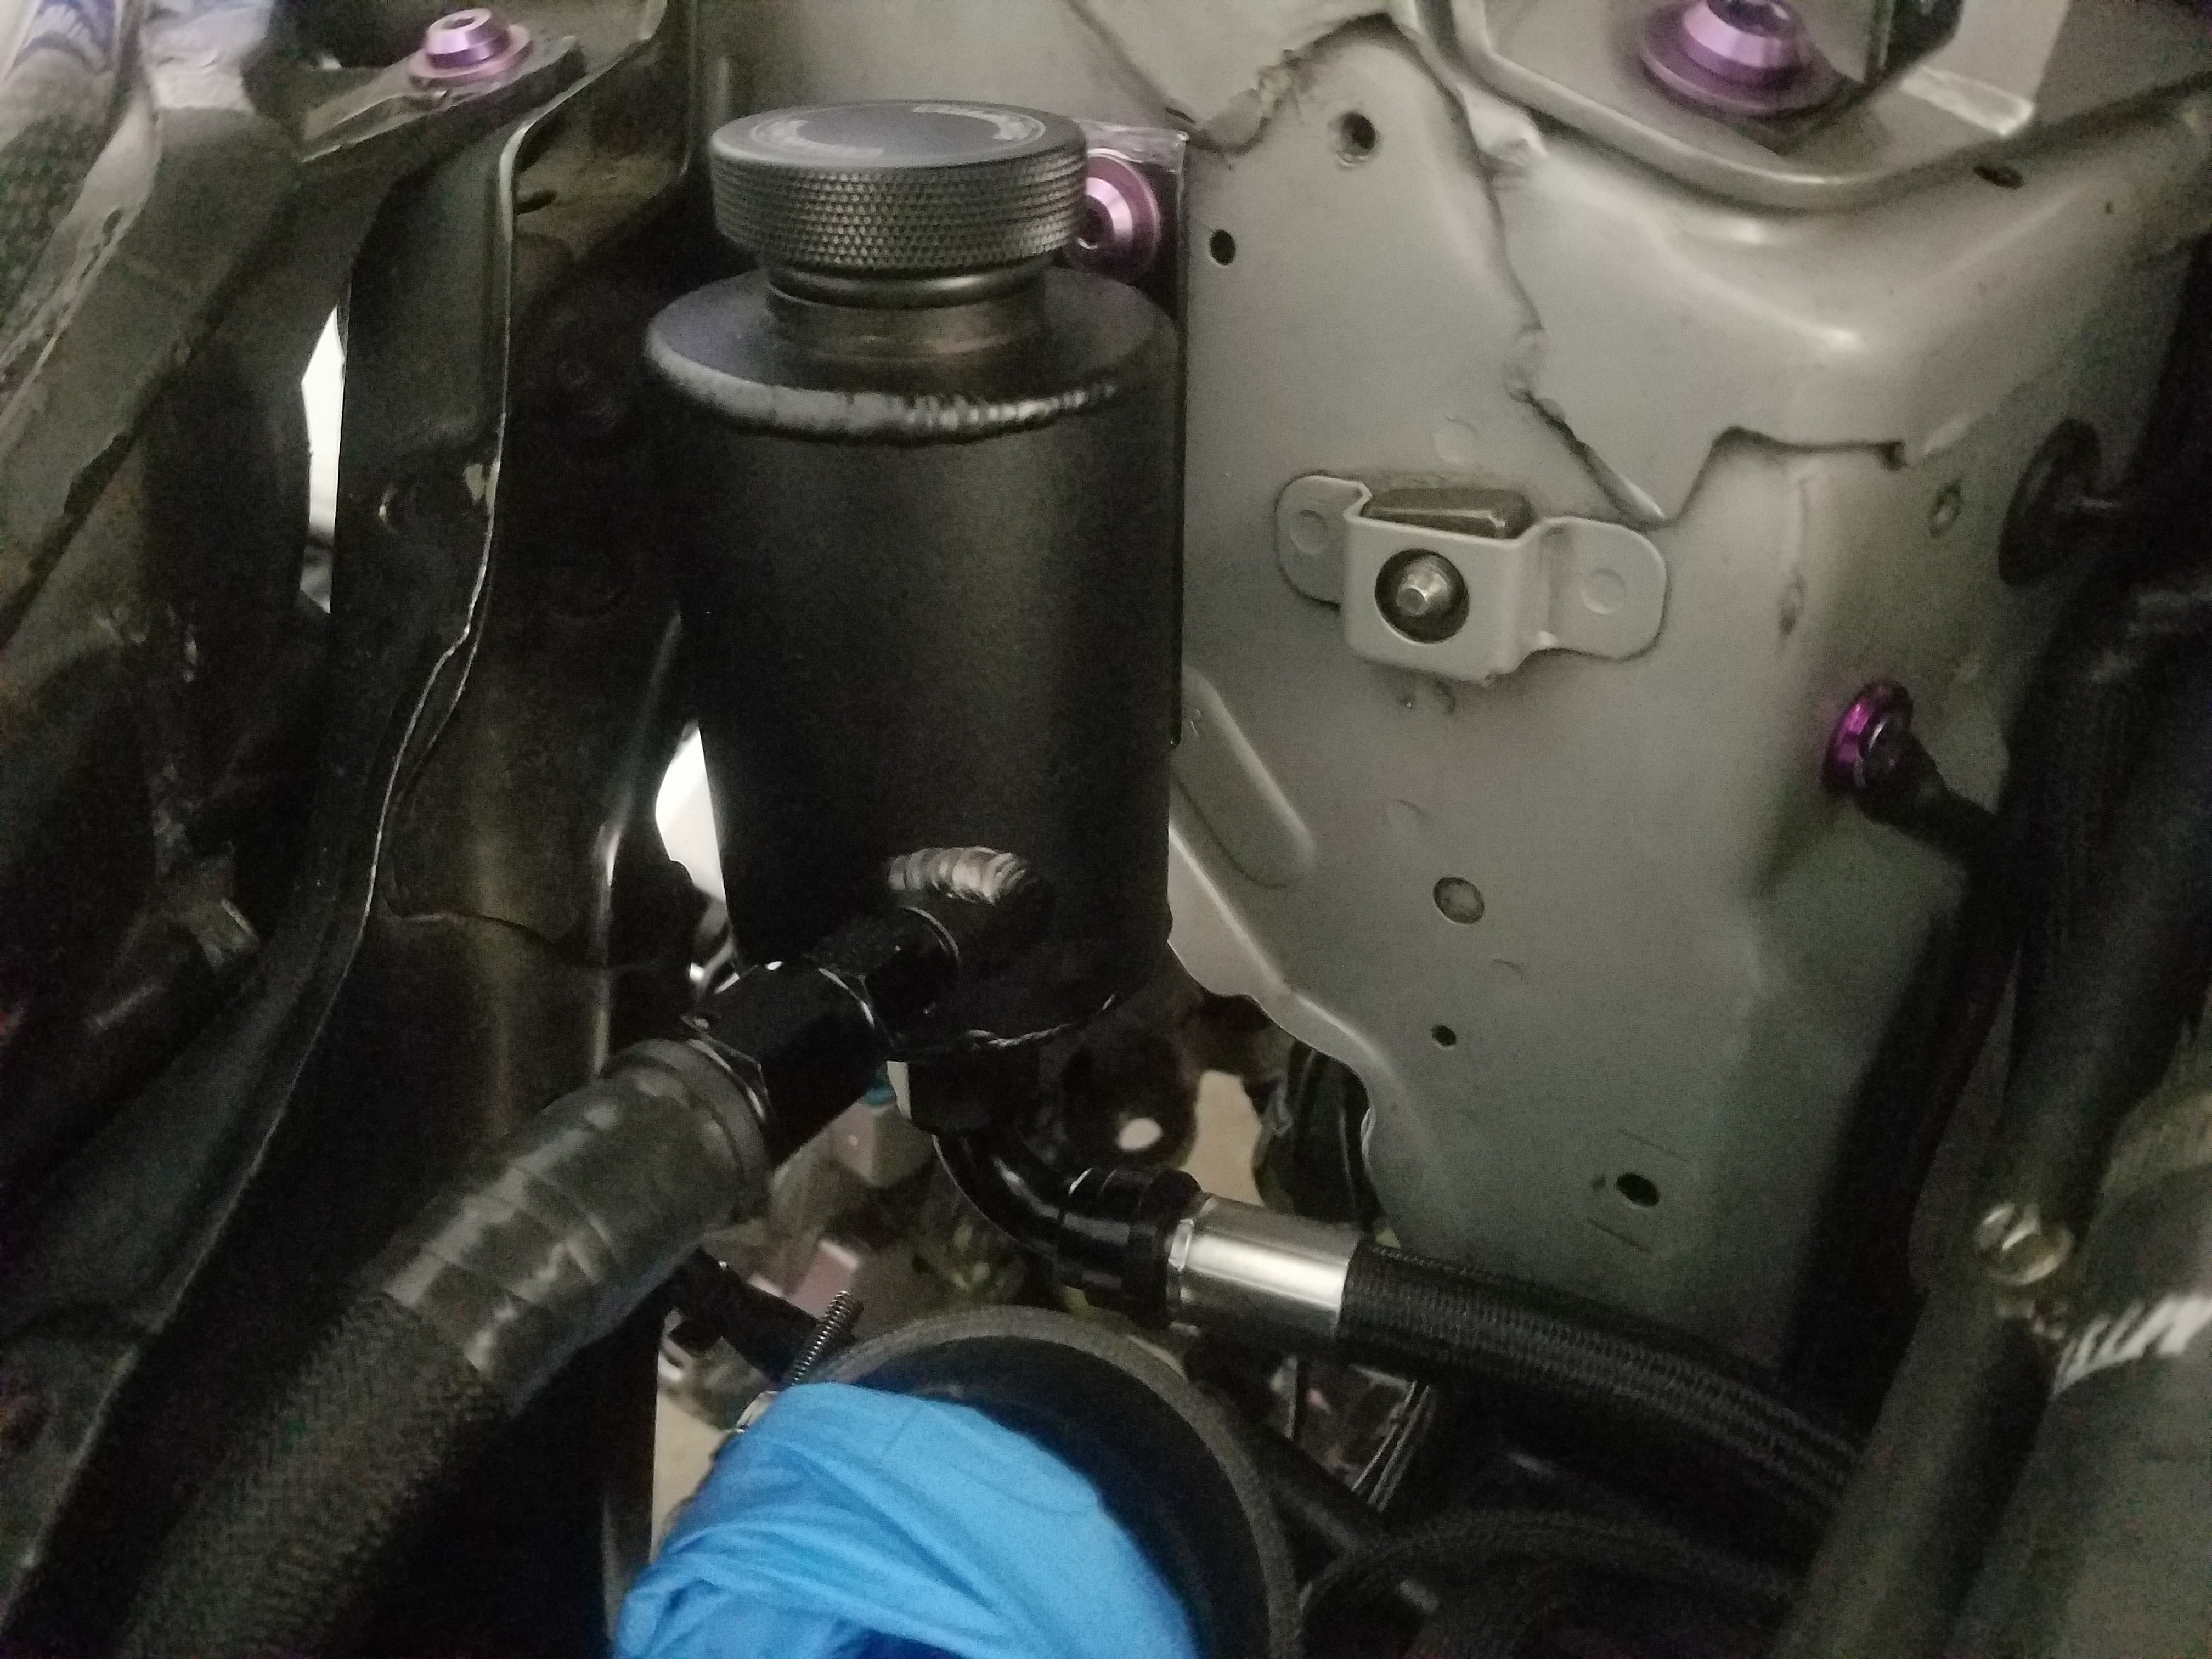
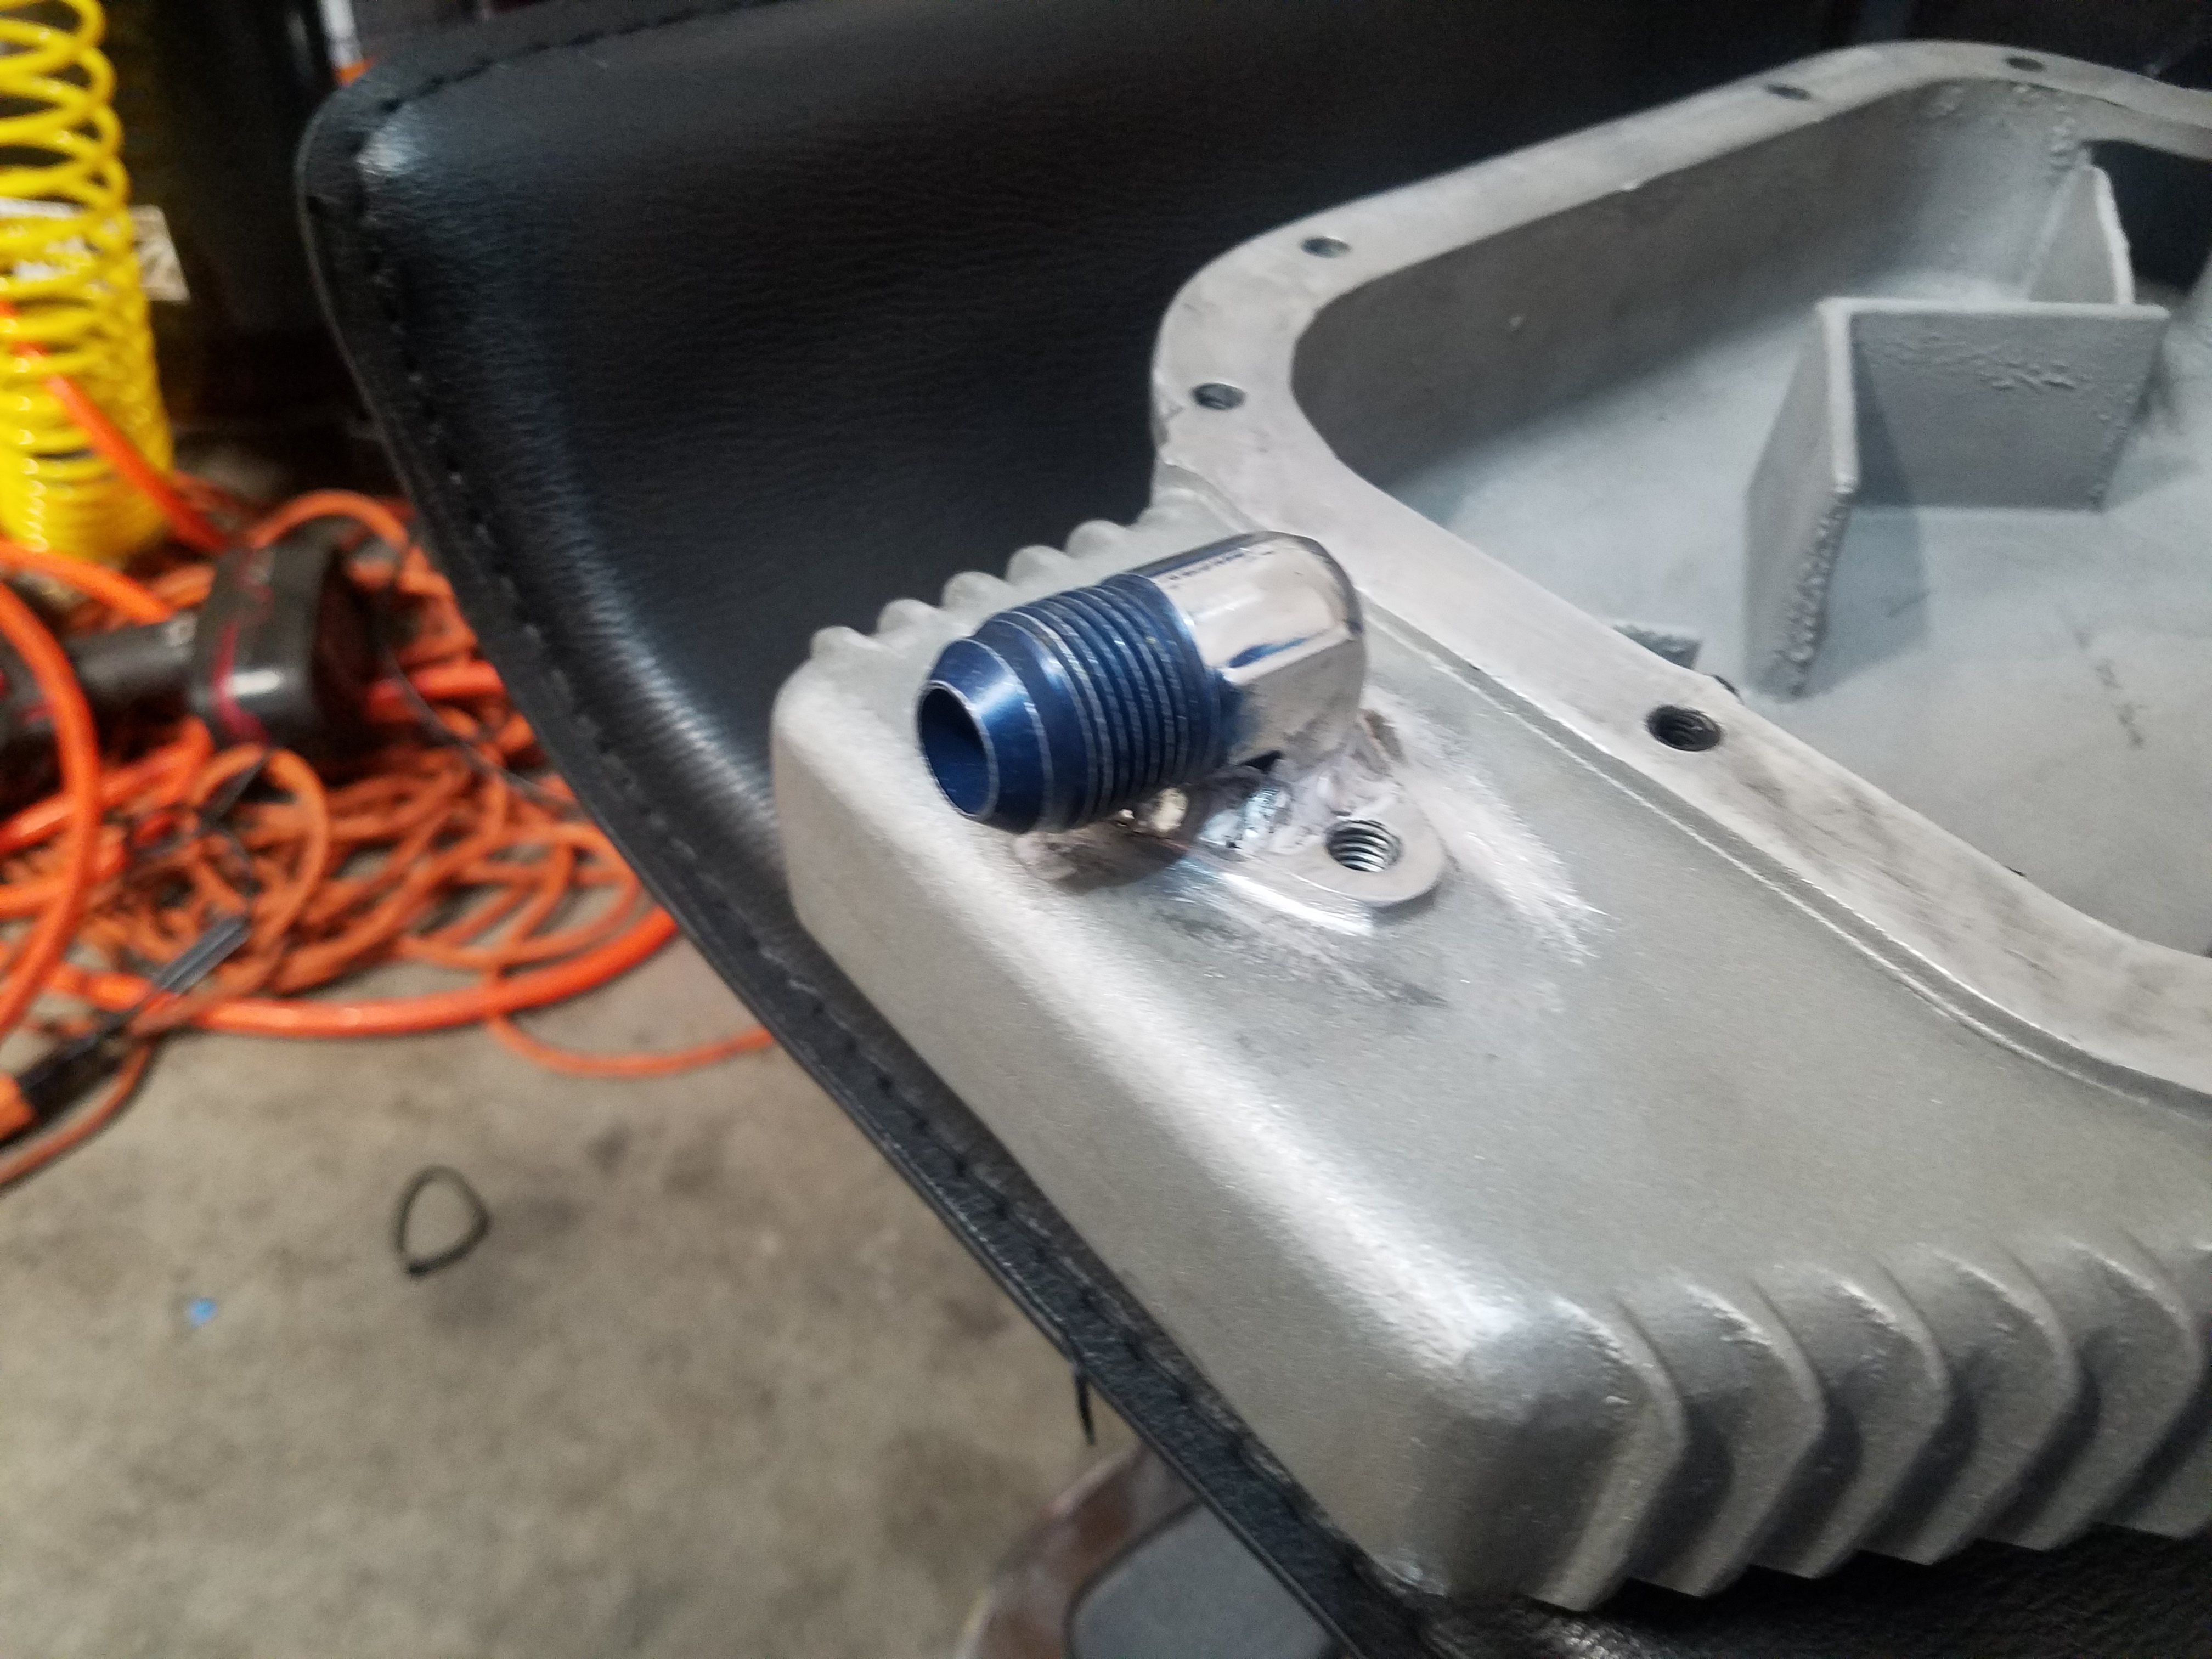
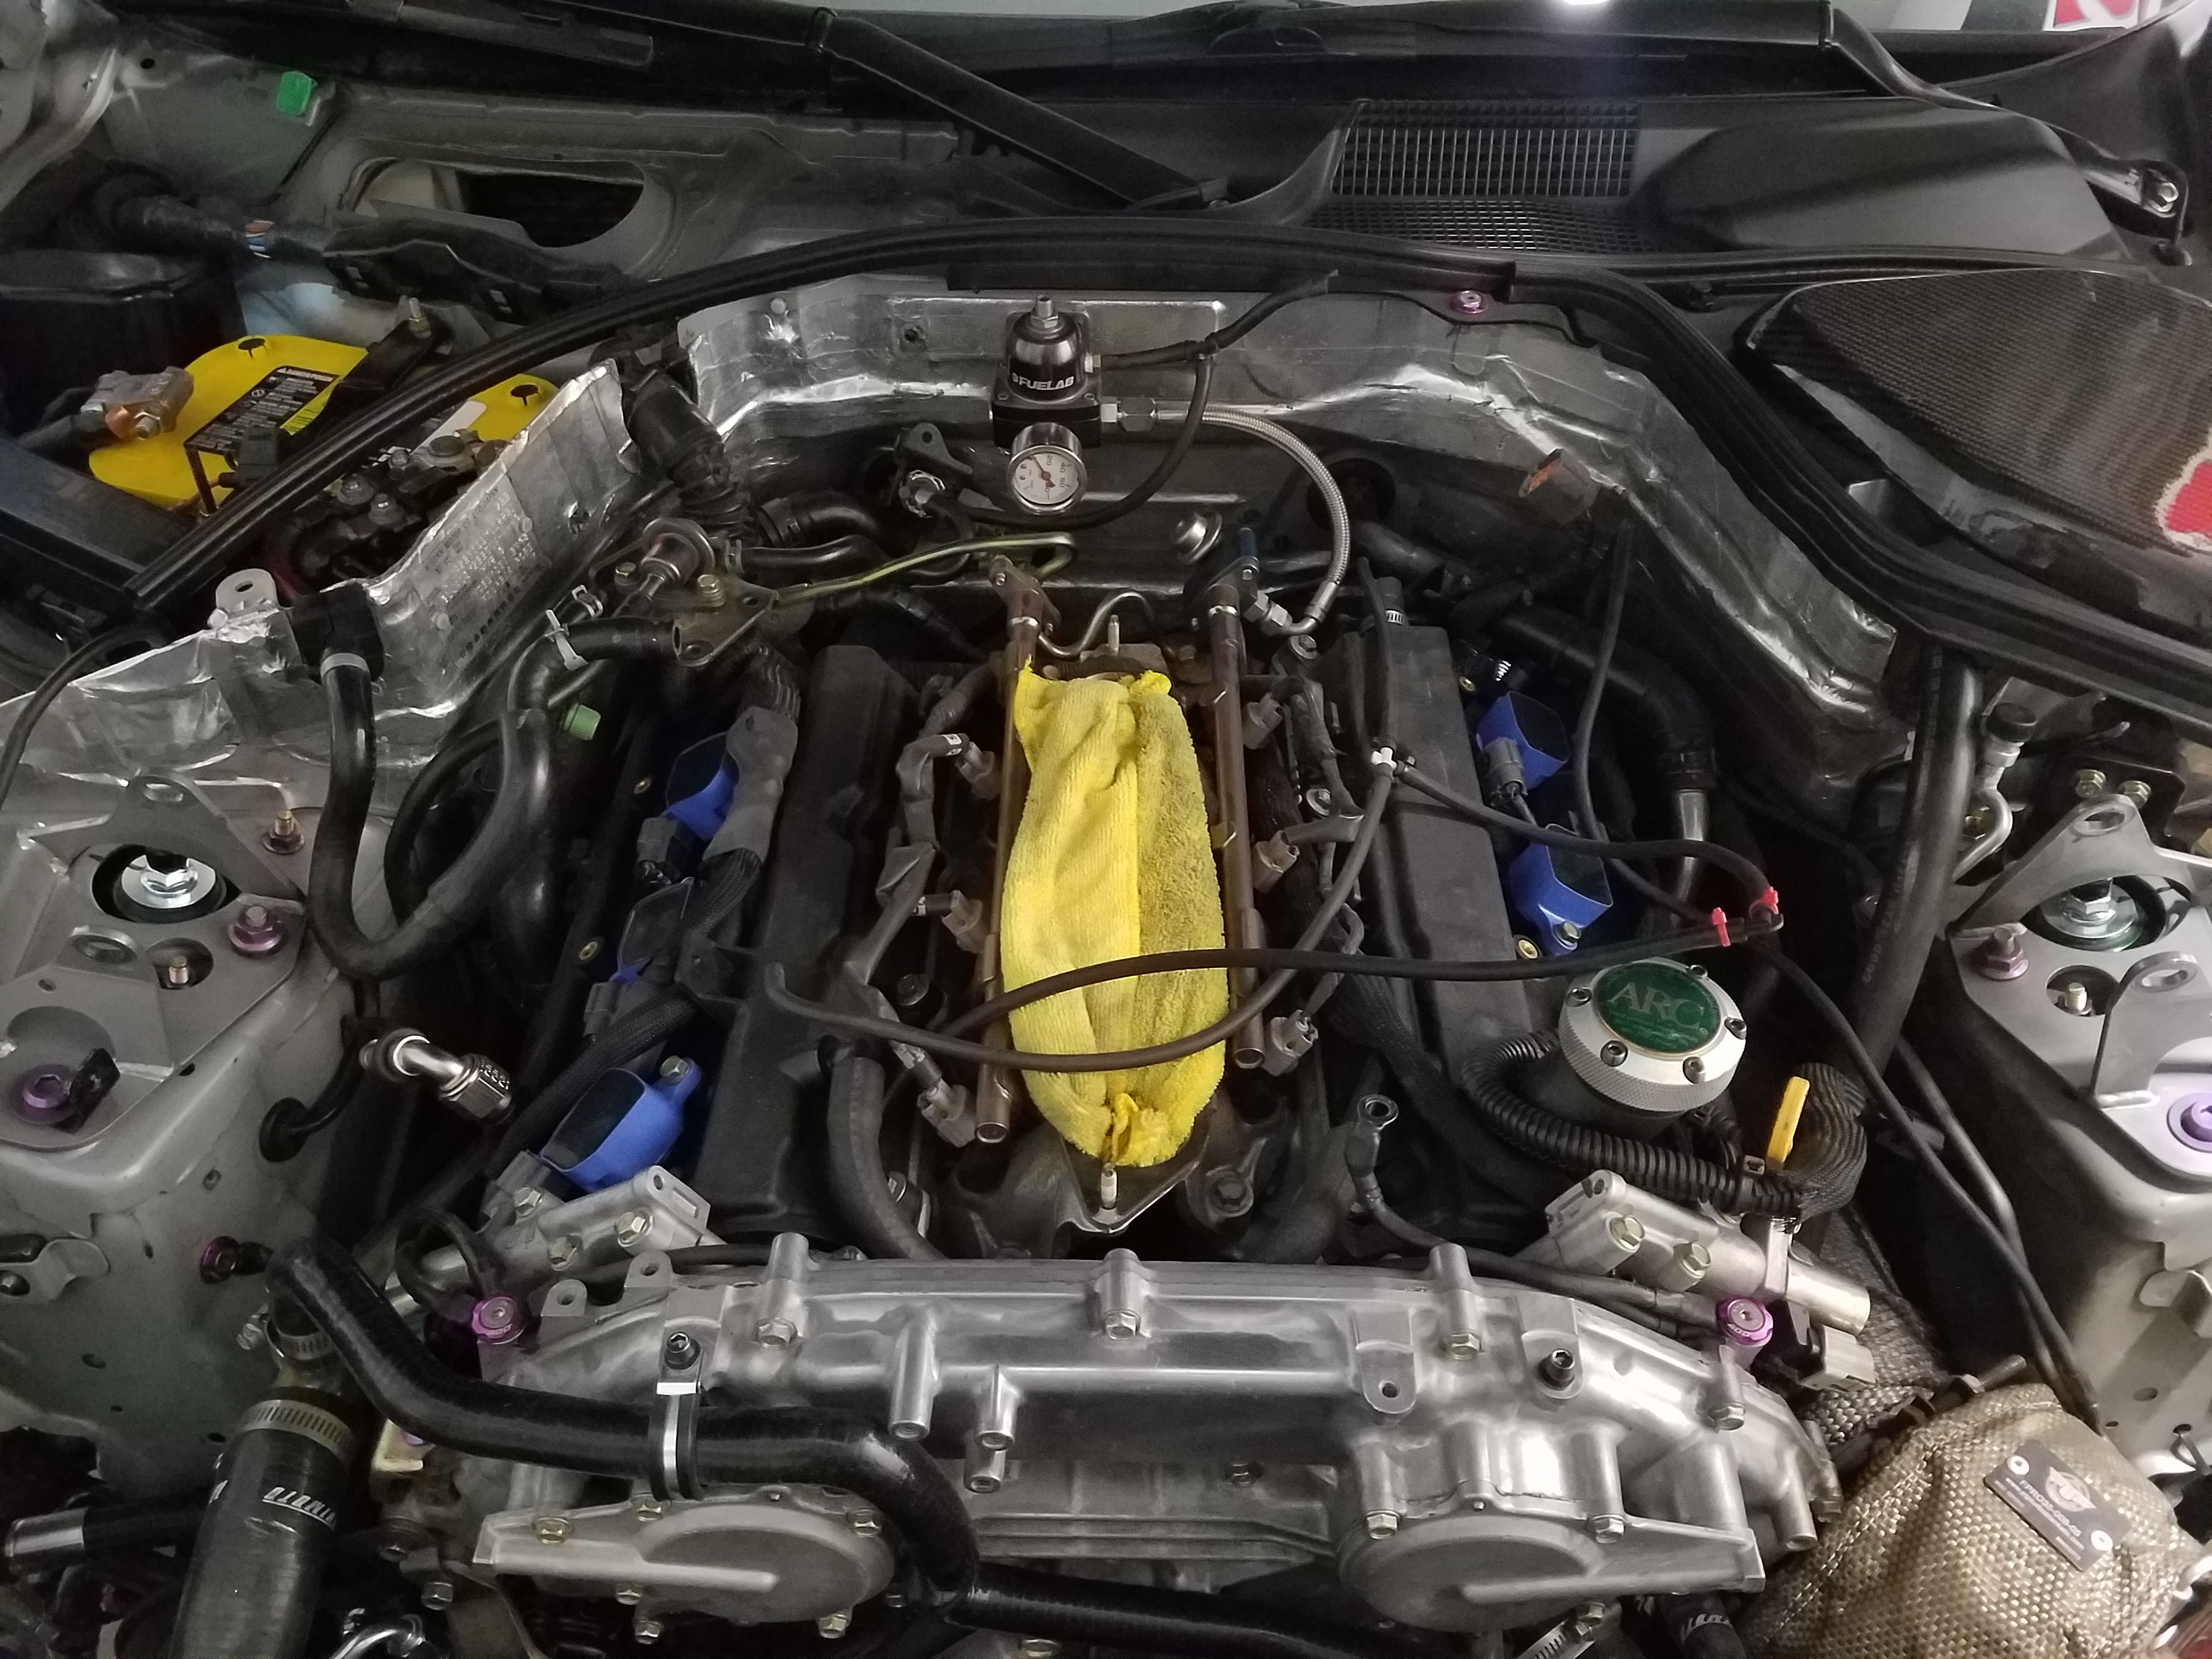
got my modified ARC v1 catch can back today.. running a push lock fitting from each valve cover to the can, and from the can breather out to the intake tube to rid of smell and pull a vacuum.

upped the pan fitting from a janky 8an to a proper 10an.
I yanked the driver vc off to have the vent tube poked out.. left it w my buddy who has a large enough drill bit to help me out w really quickly. if u look inside it, the hole is actually the size of a sheet rock screw thread, very small. Will be fun to rinse the shavings out as the inner baffle cant be removed.
re routing and replacing all the vacuum lines w new silicone line also.


upped the pan fitting from a janky 8an to a proper 10an.


I yanked the driver vc off to have the vent tube poked out.. left it w my buddy who has a large enough drill bit to help me out w really quickly. if u look inside it, the hole is actually the size of a sheet rock screw thread, very small. Will be fun to rinse the shavings out as the inner baffle cant be removed.
re routing and replacing all the vacuum lines w new silicone line also.


Last edited by bmccann101; Apr 12, 2017 at 03:28 PM.


Thread Starter
Joined: Aug 2006
Posts: 8,321
Likes: 467
From: Scottsdale/coyote drophouse
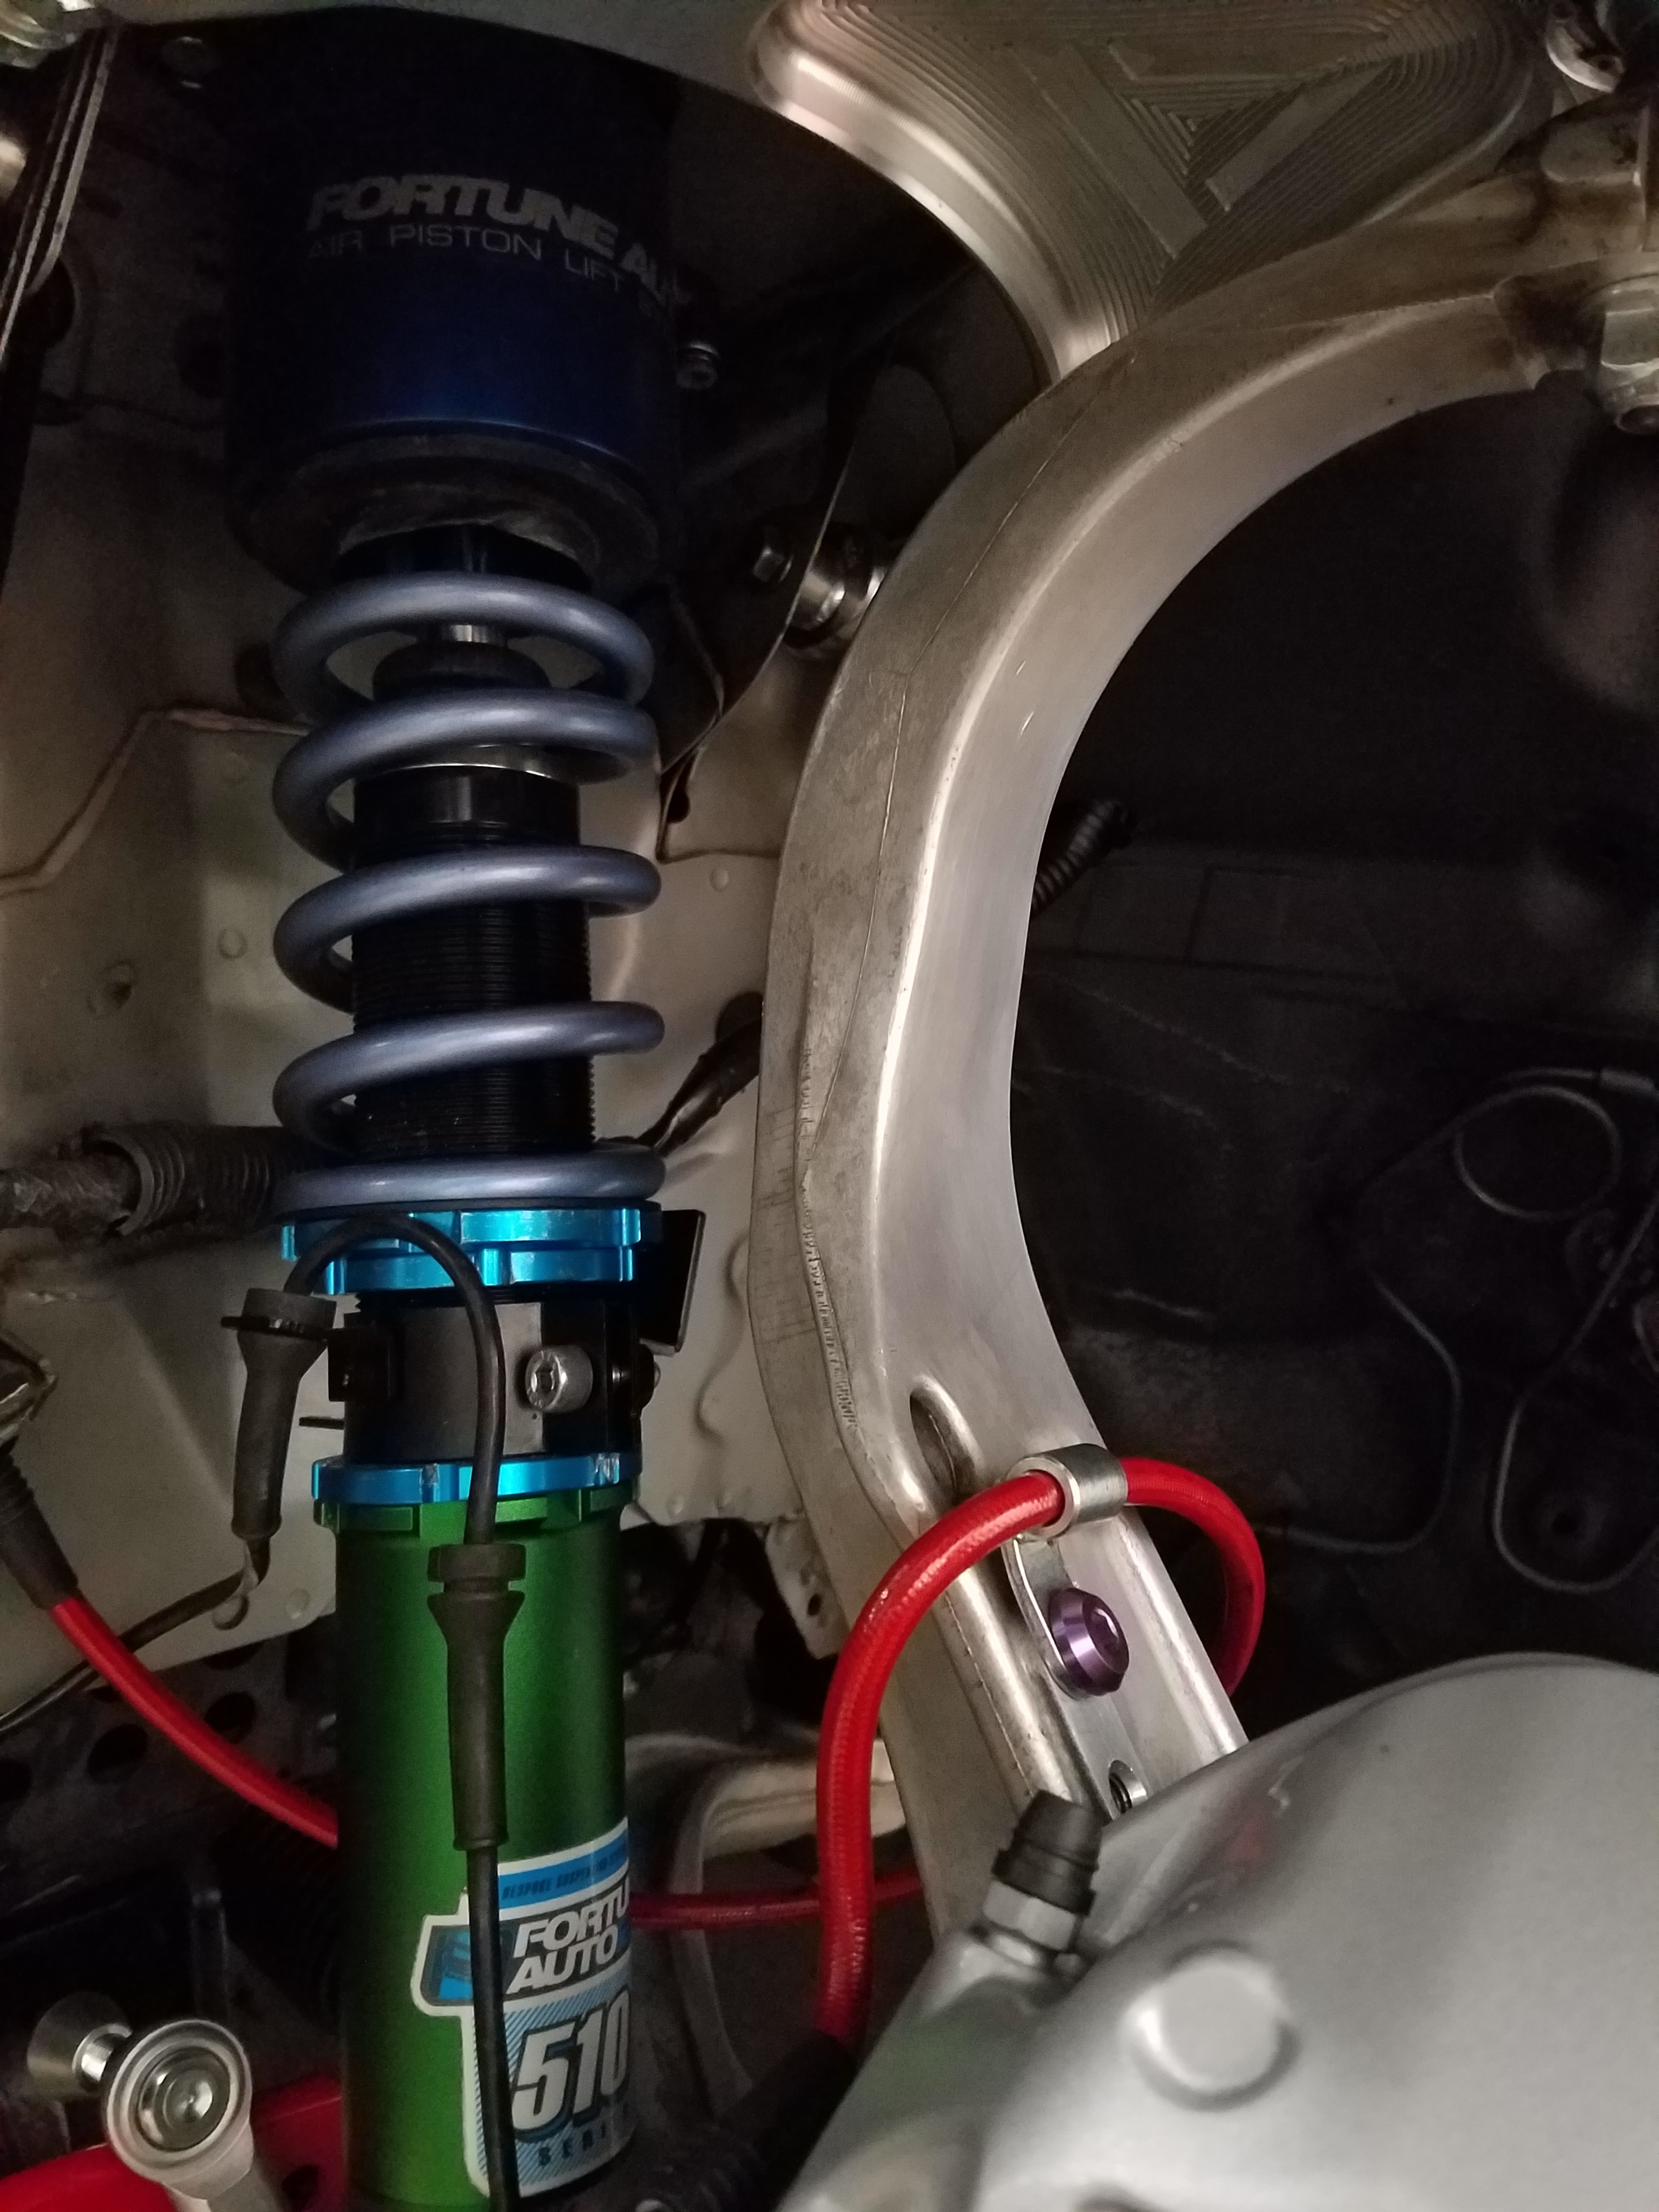
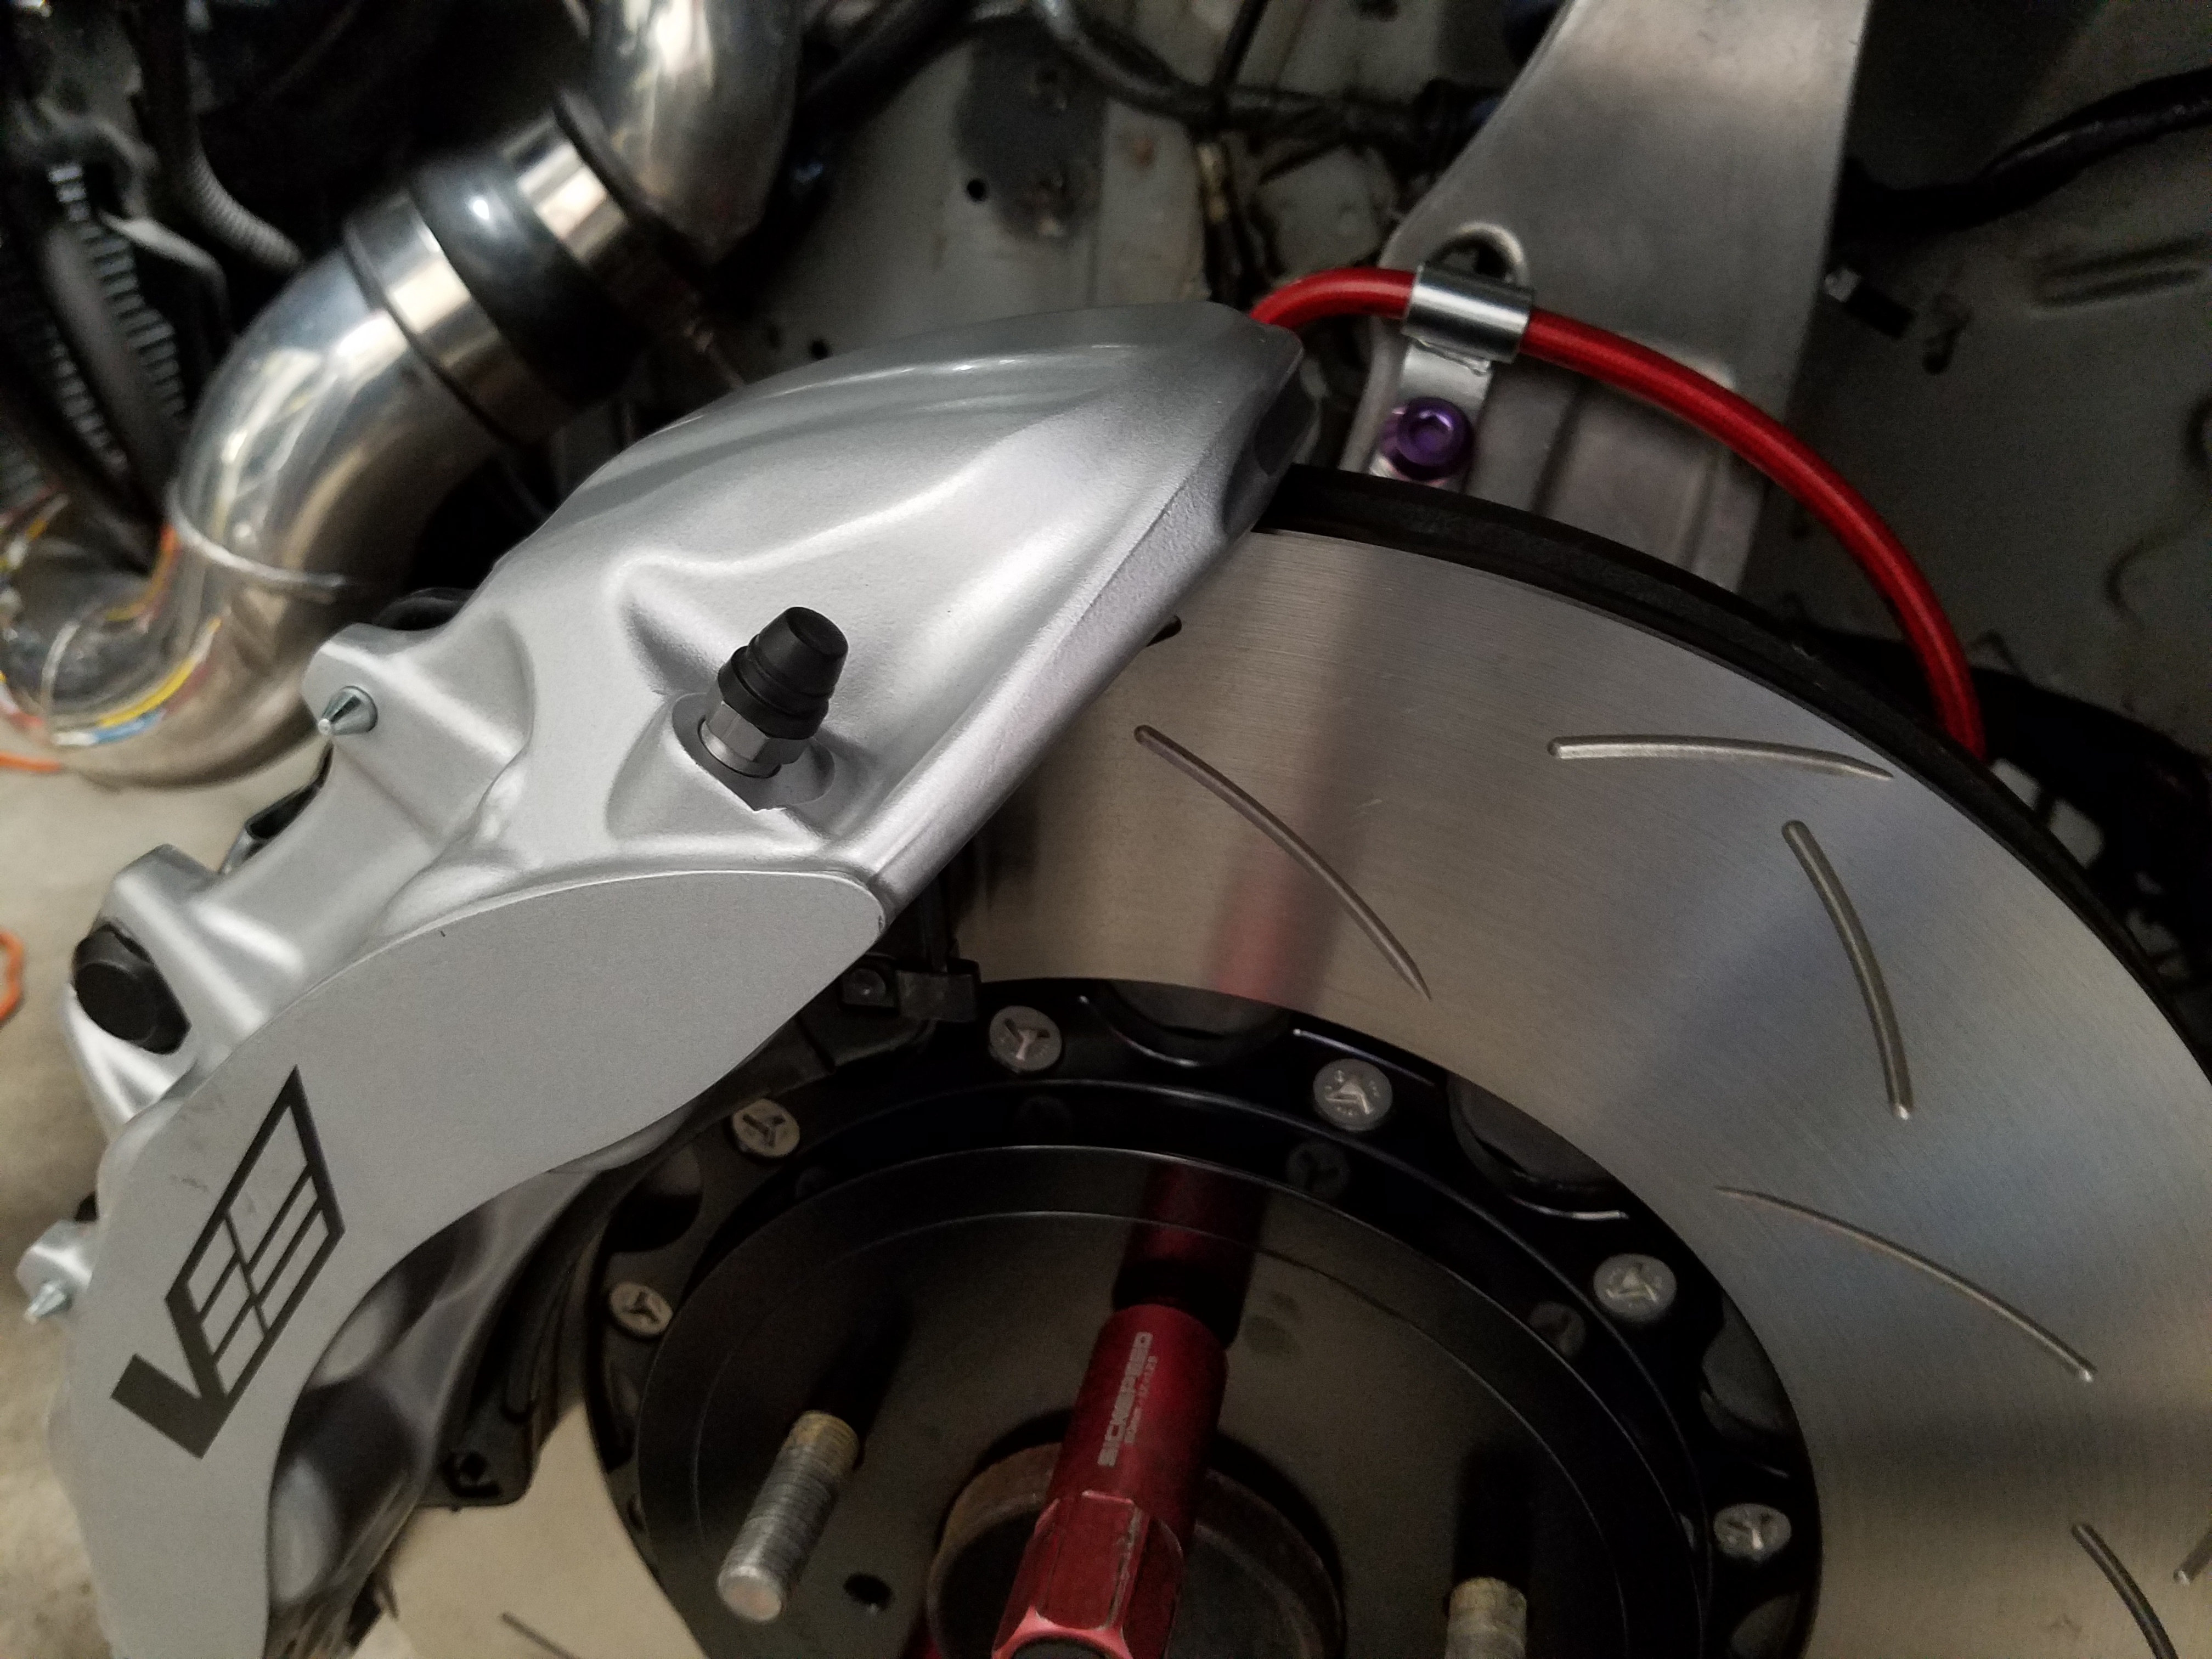
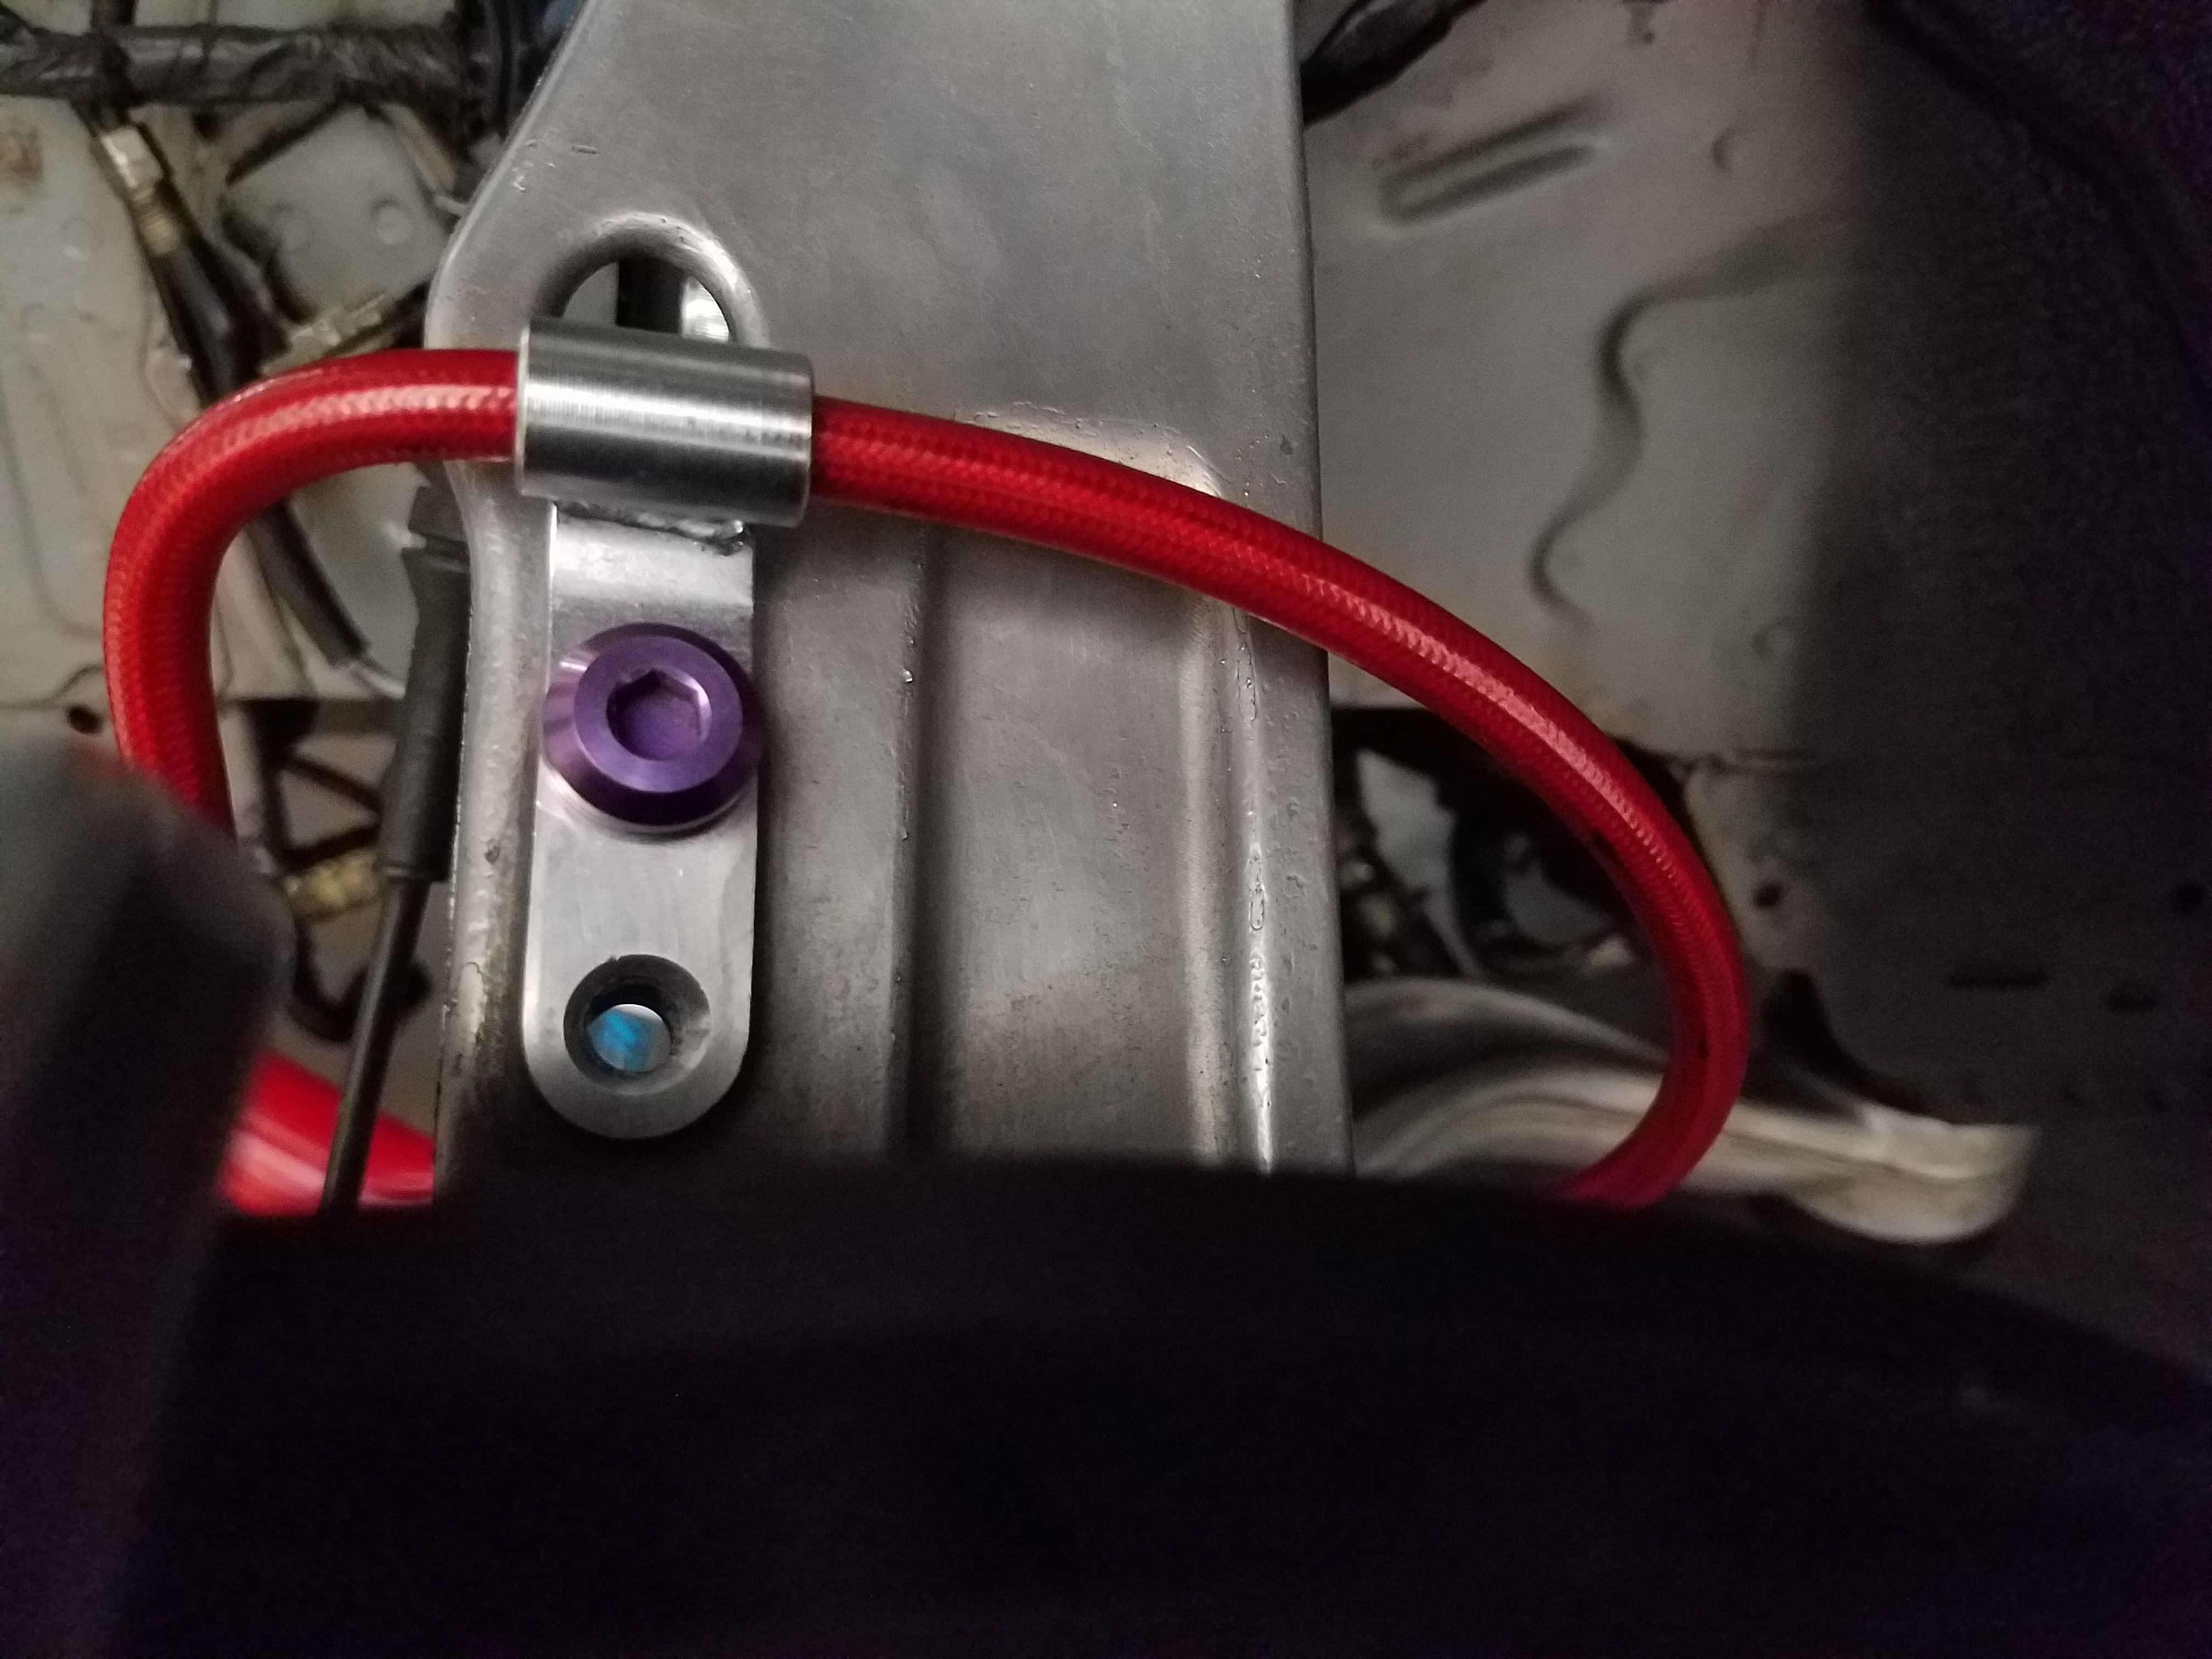
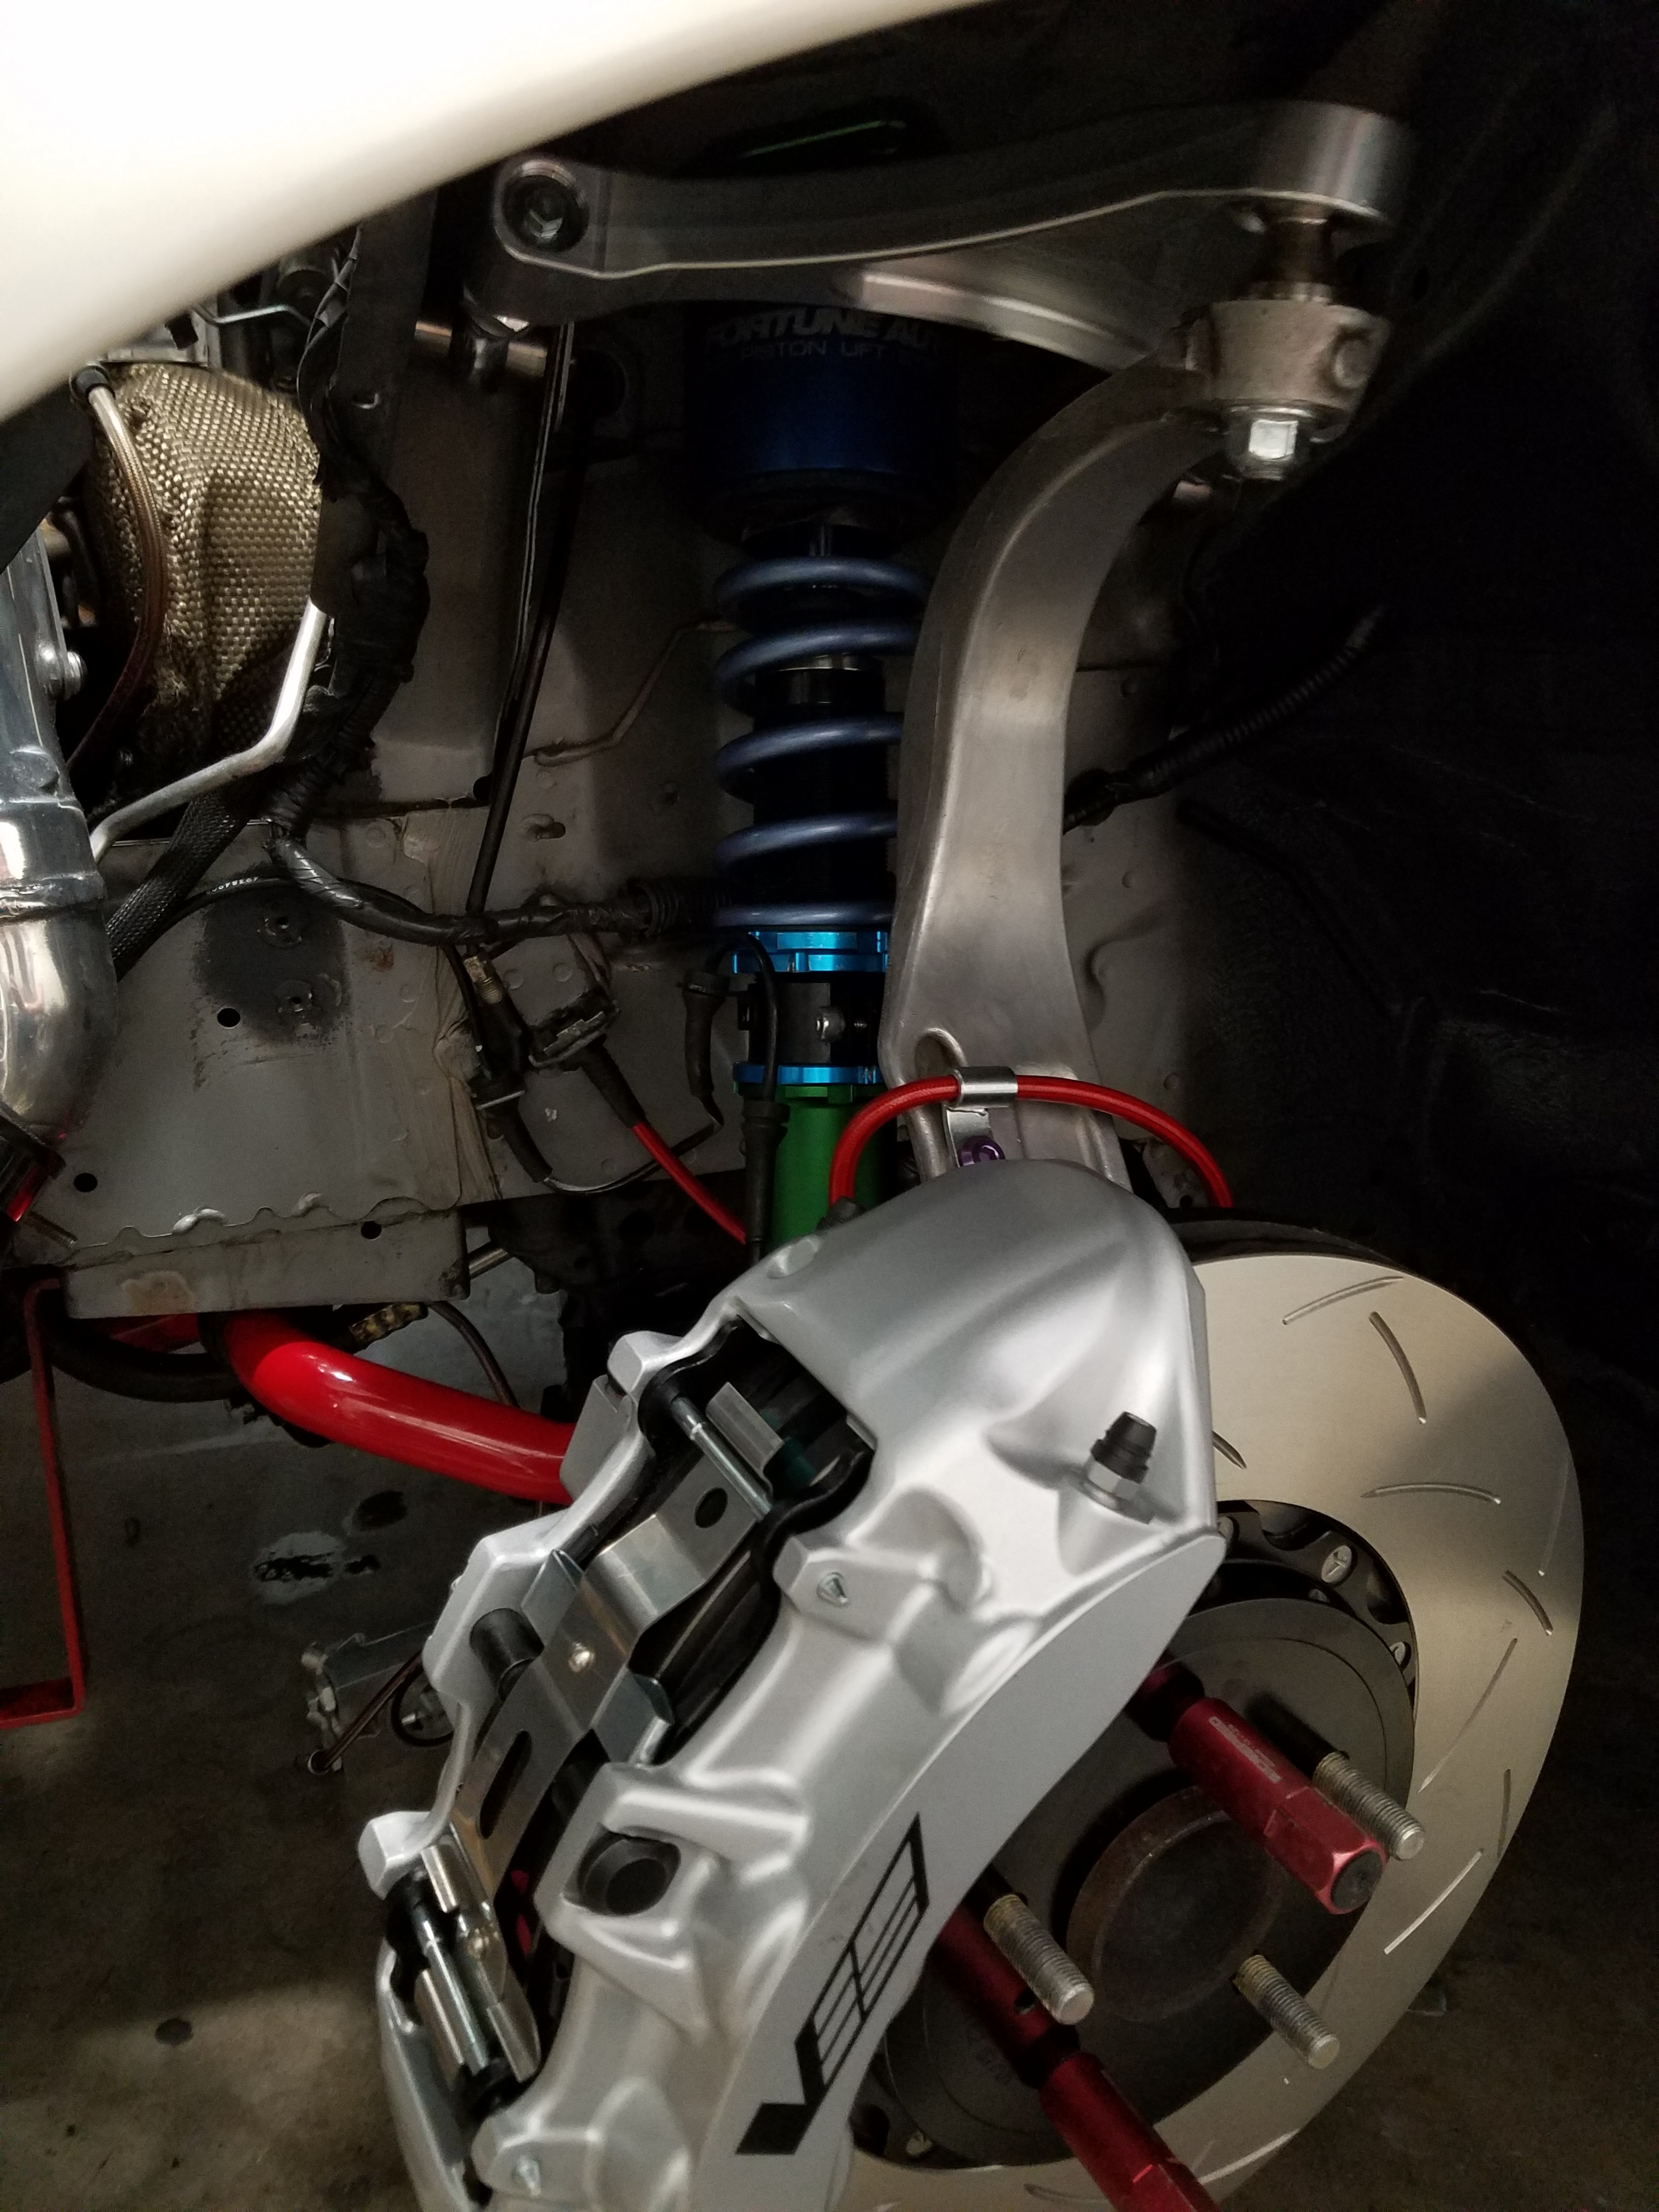
front brakes are all done, with the addition of clean new Agency power brake lines.
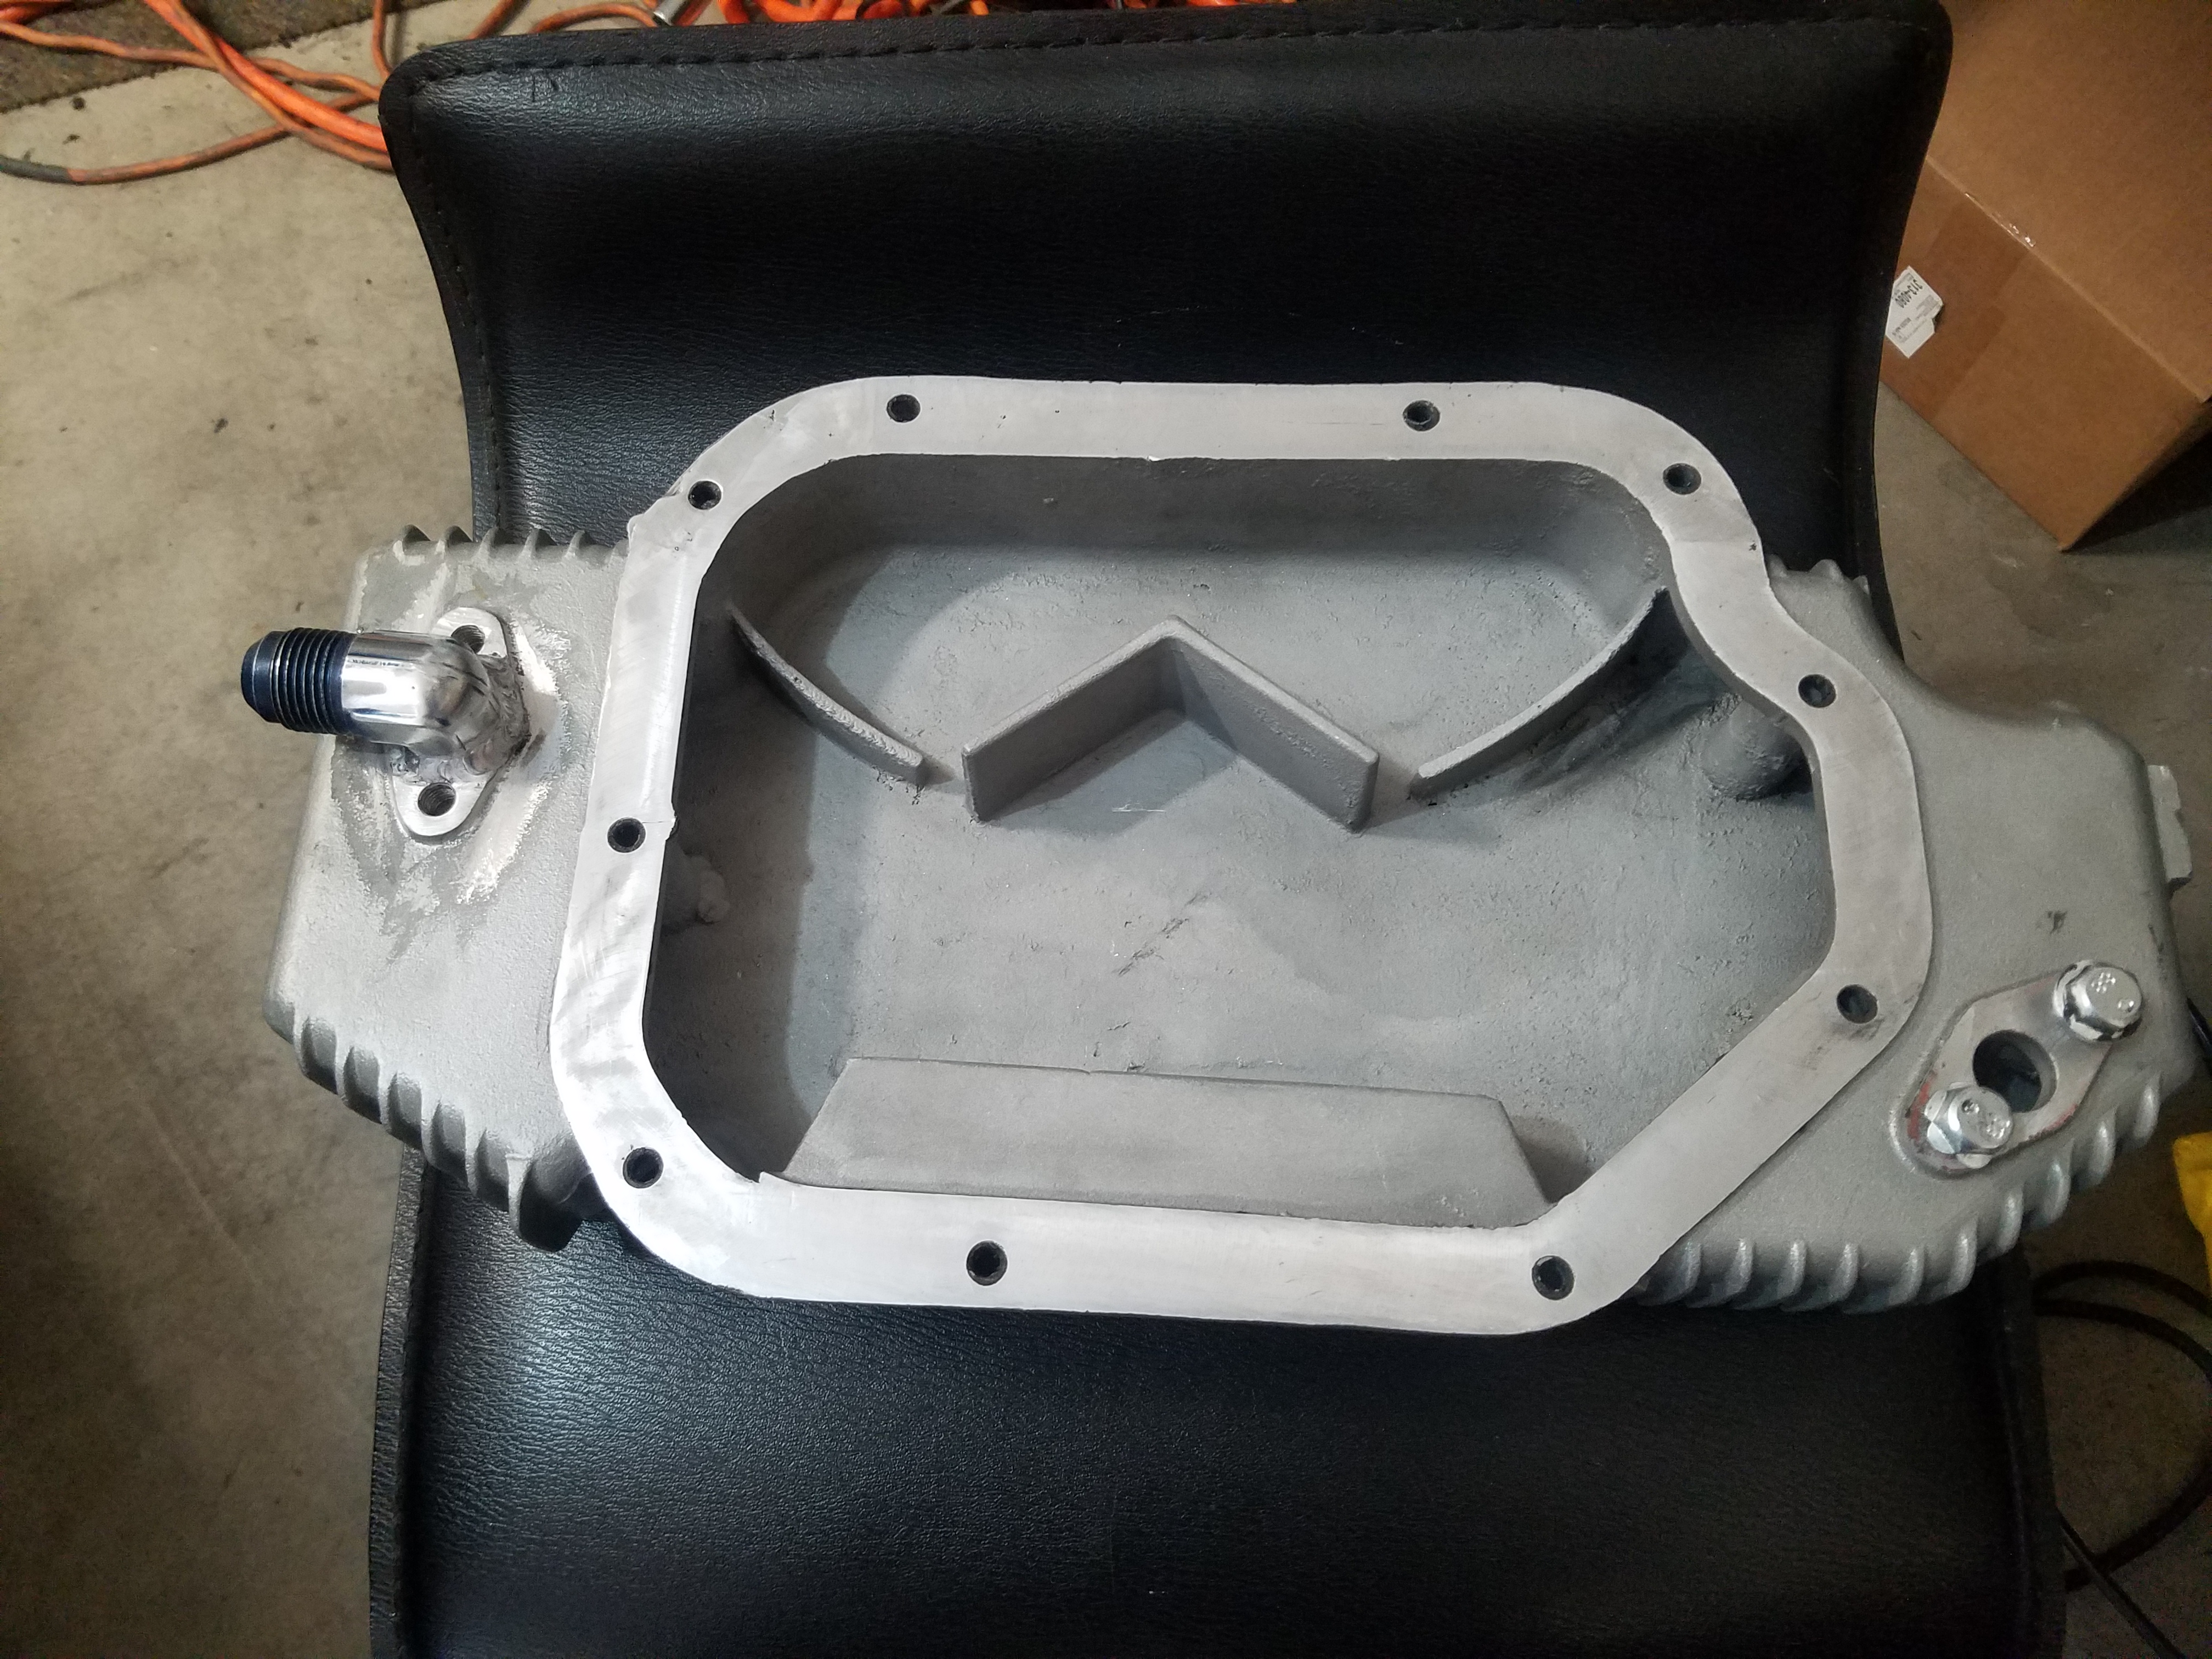
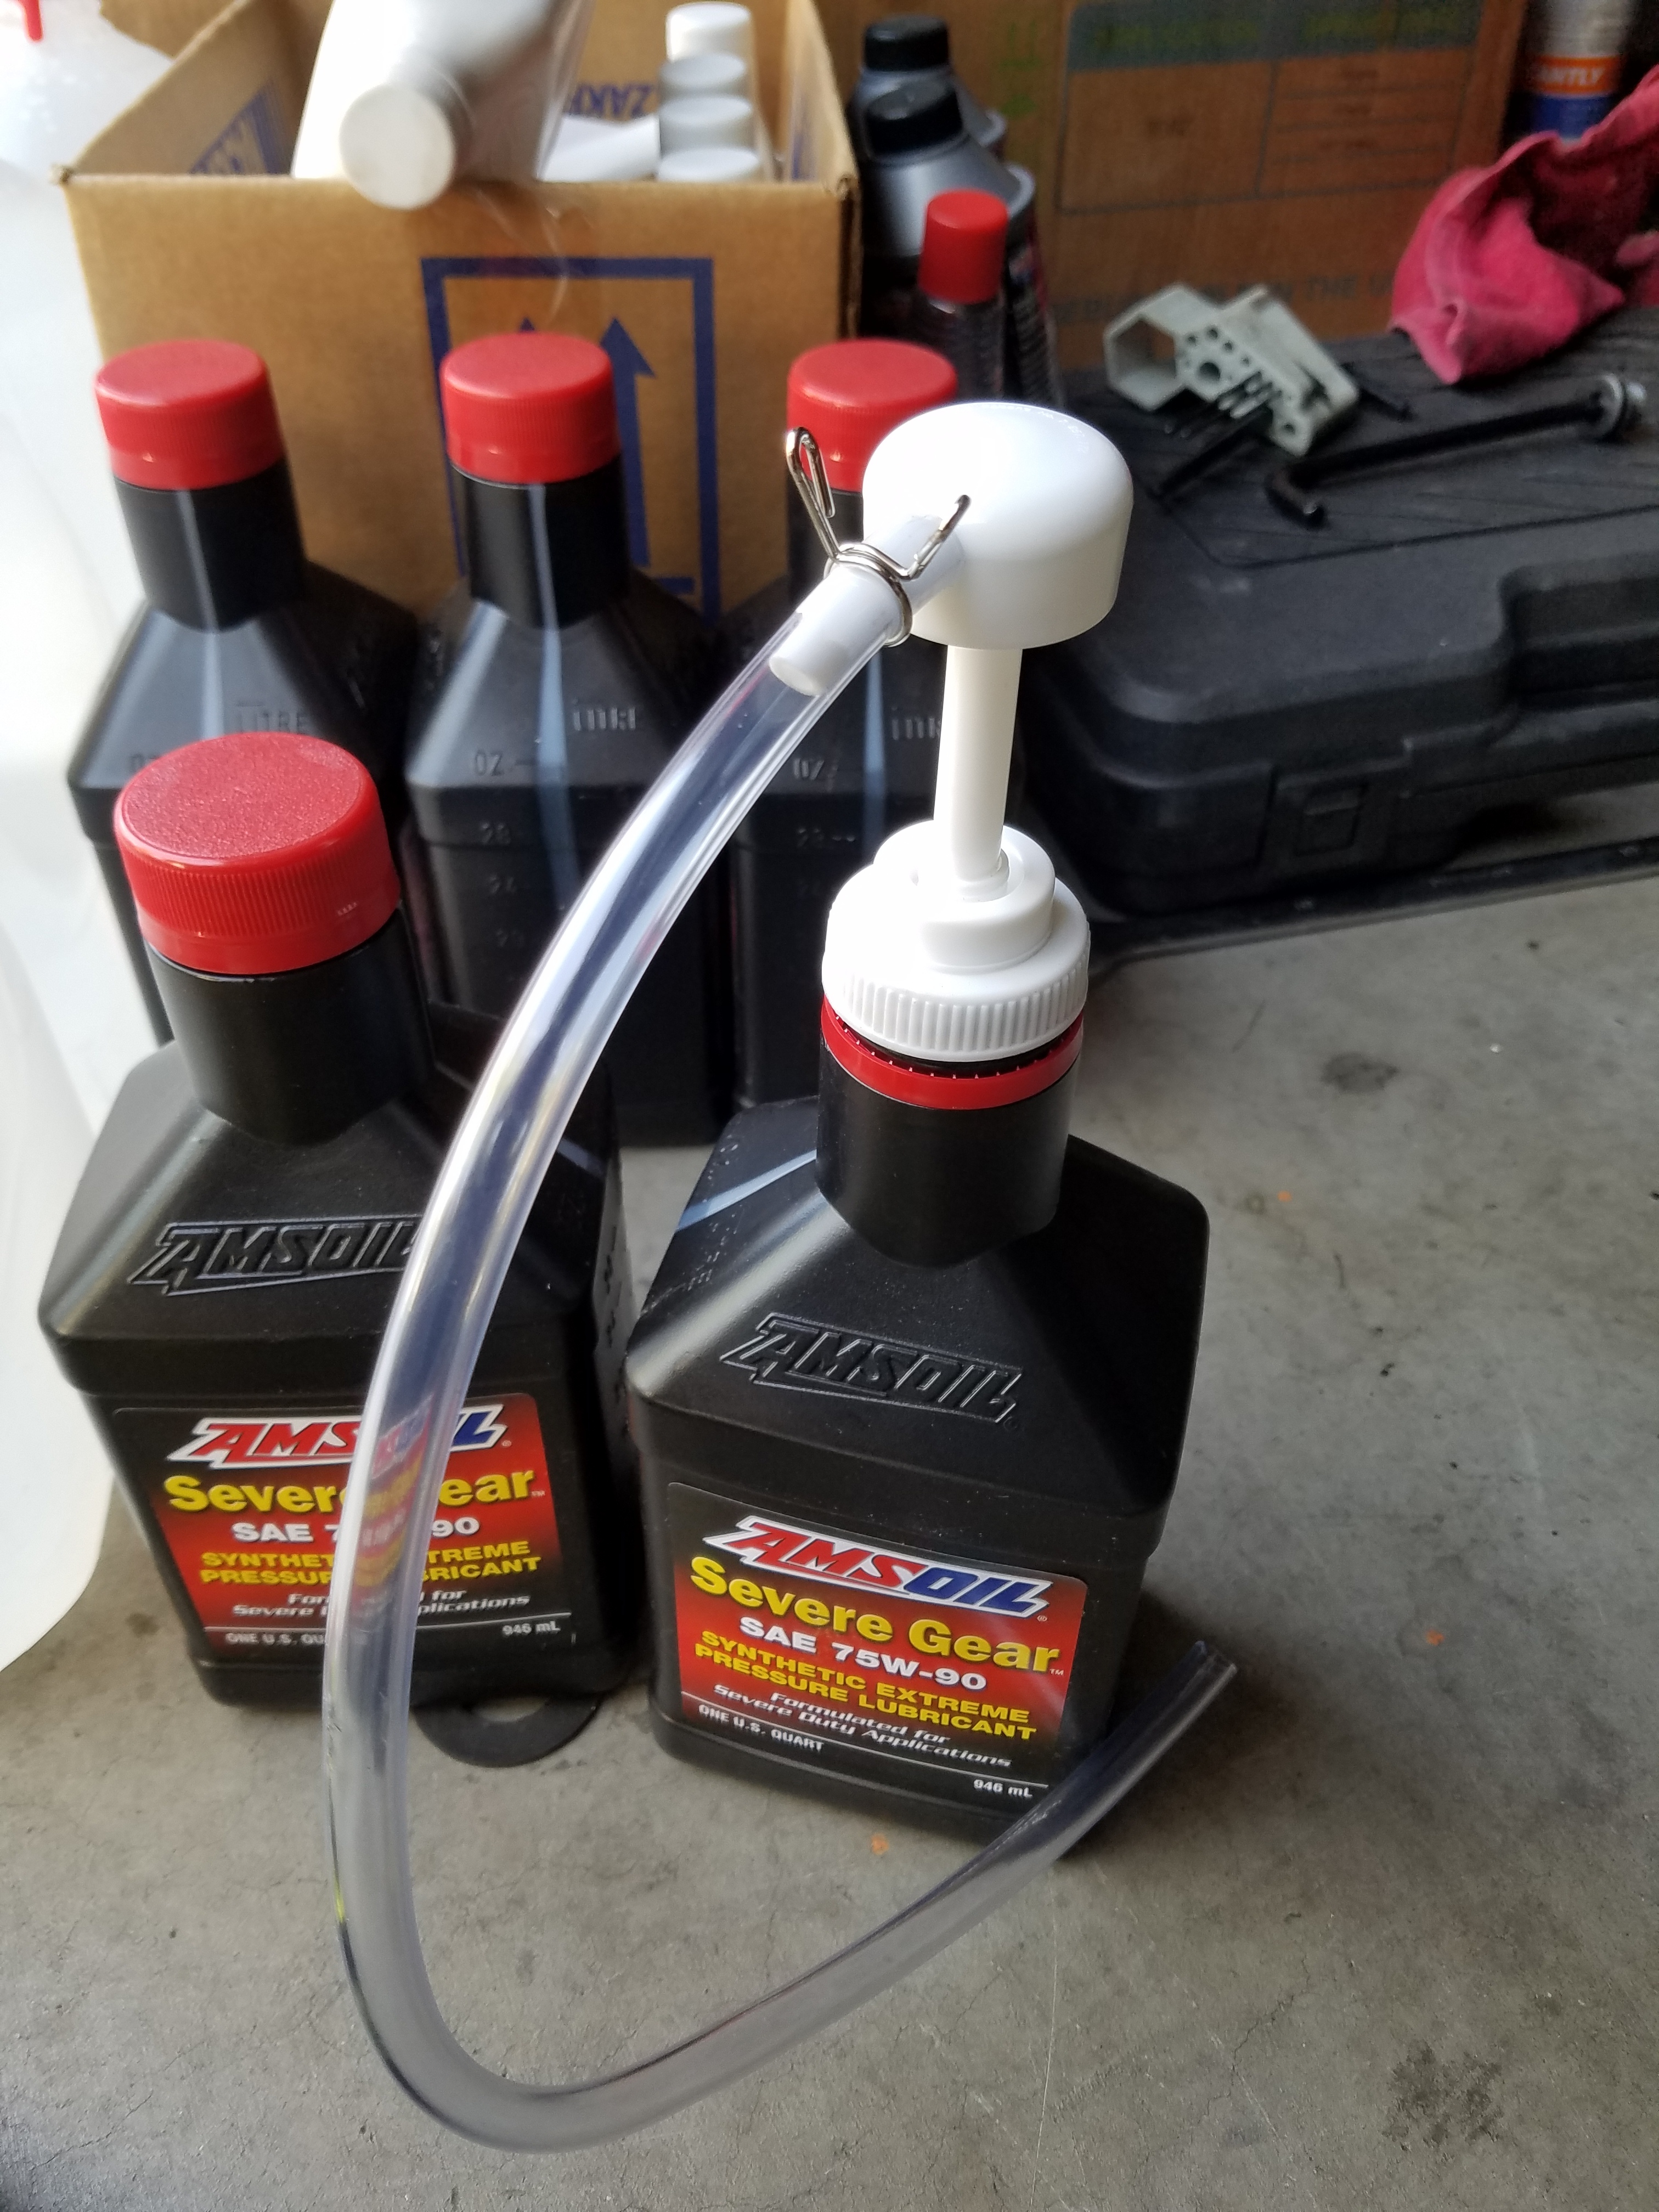
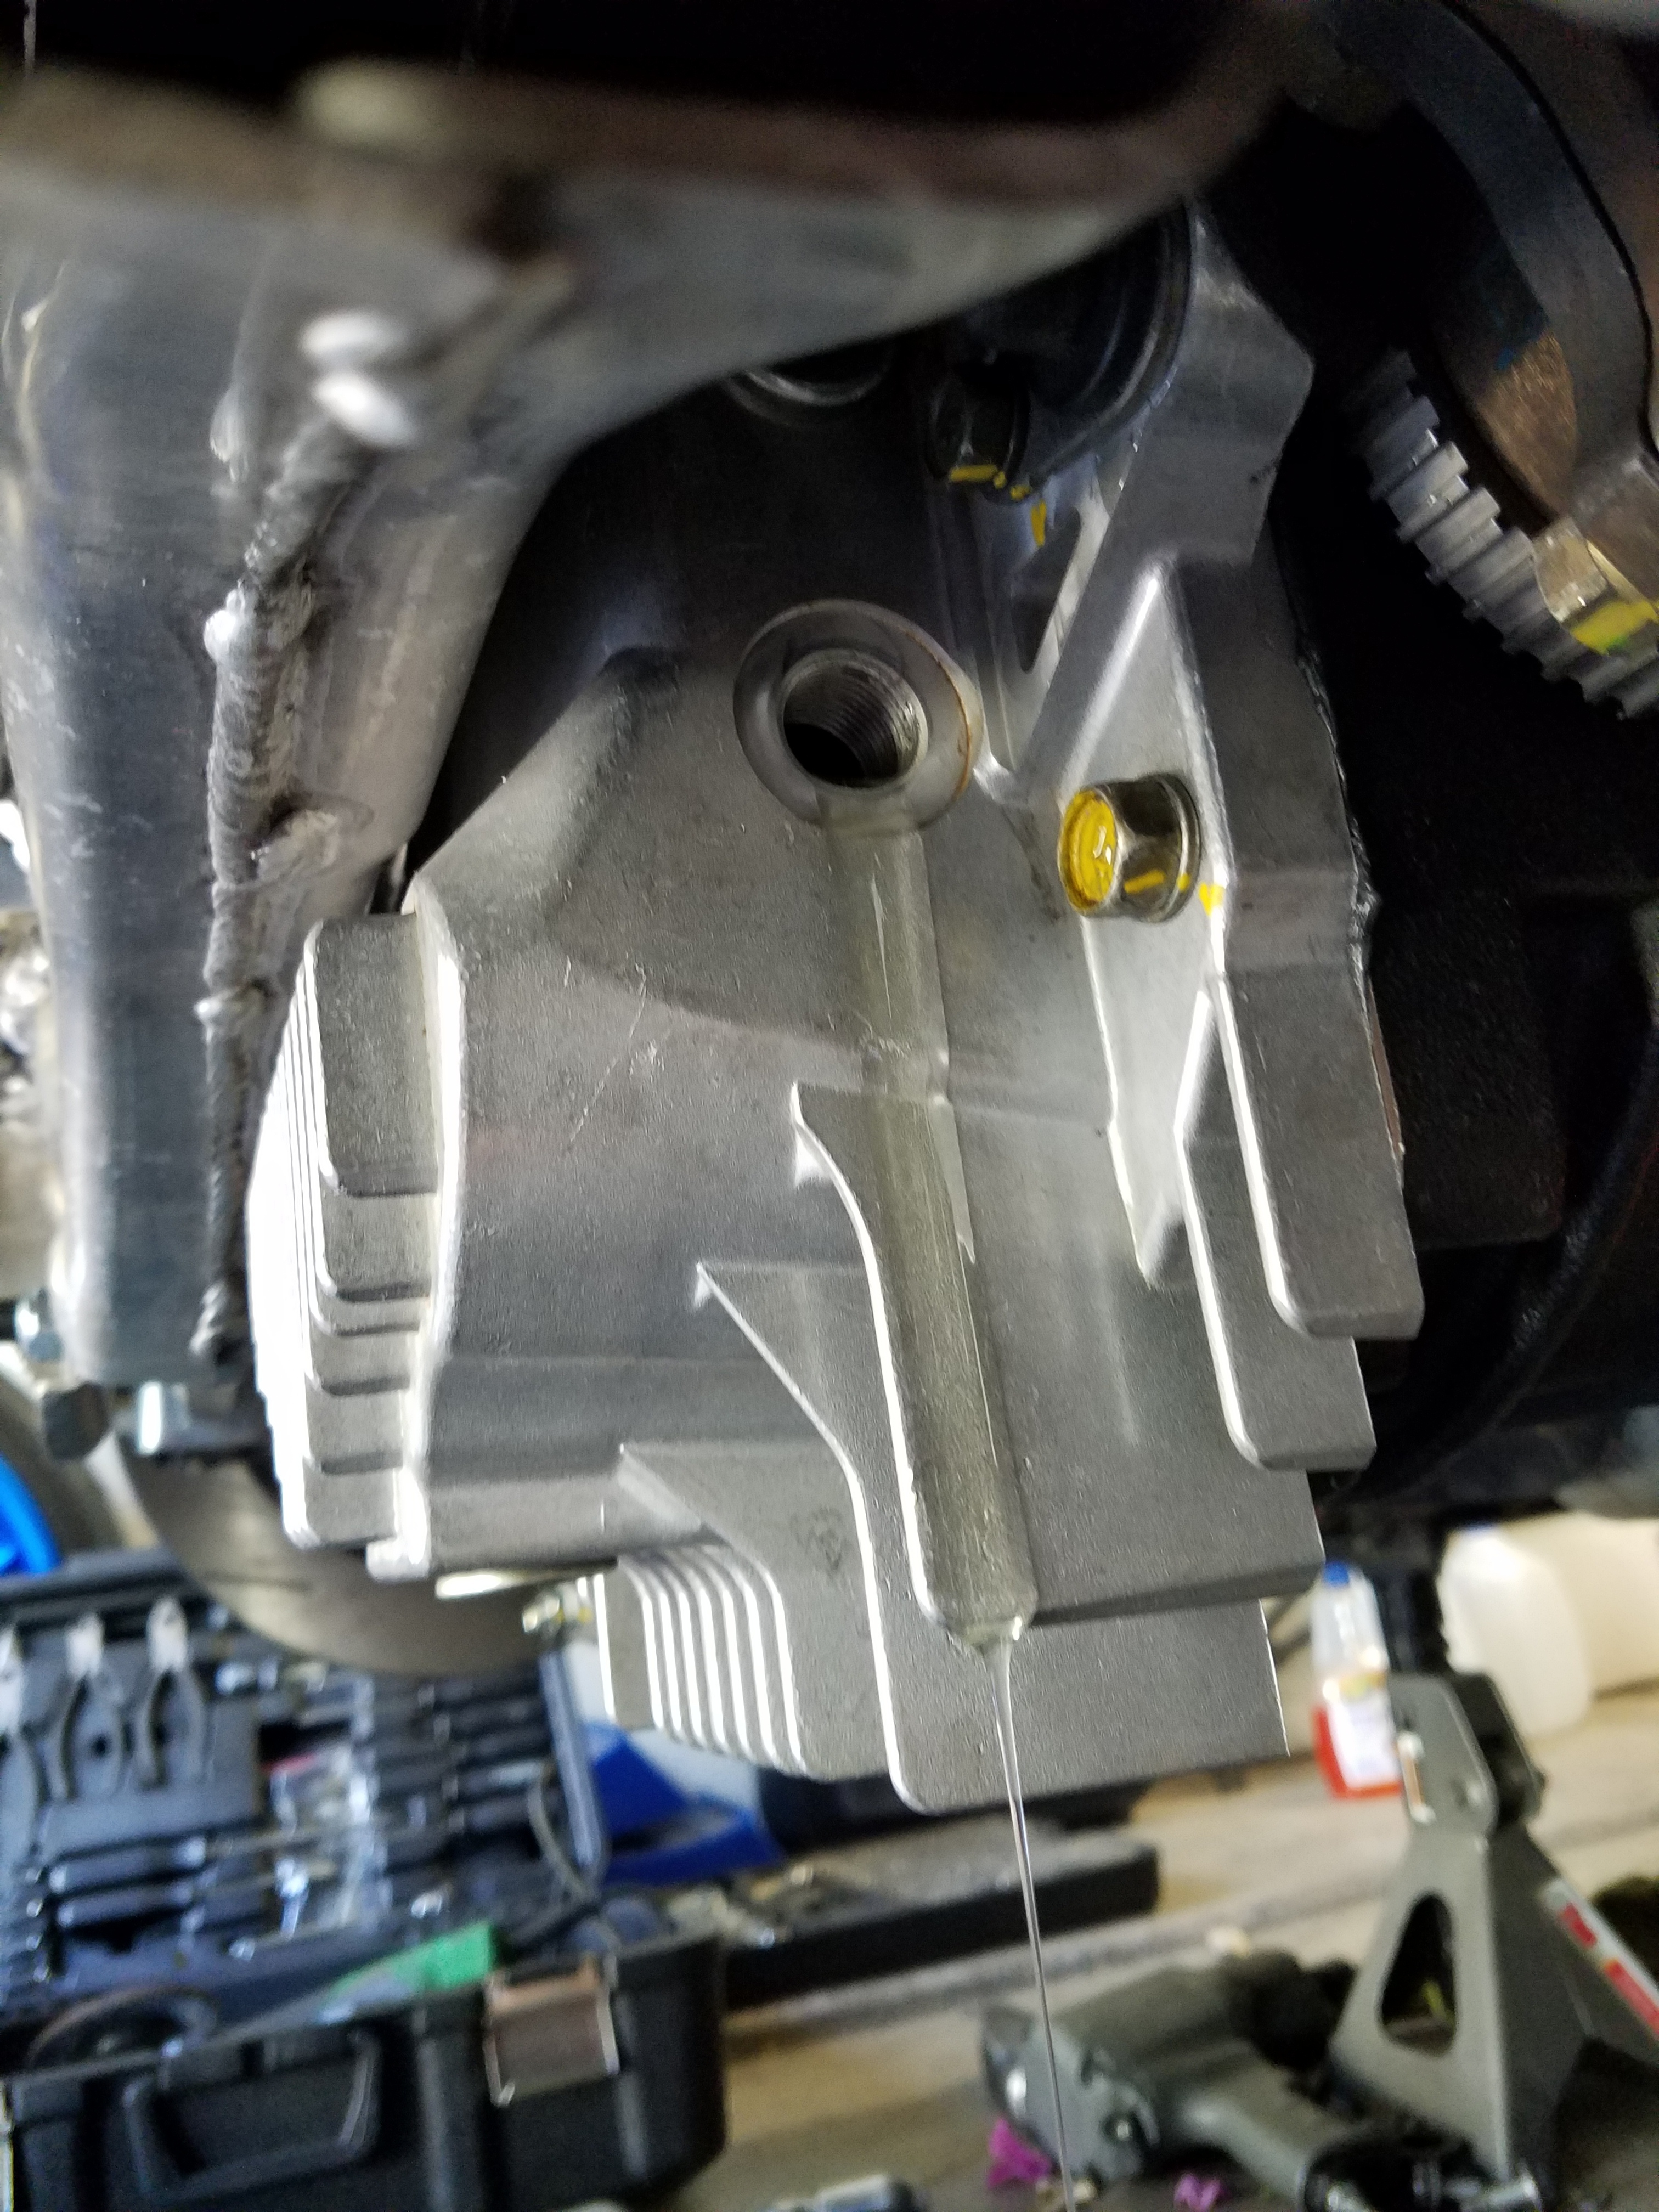
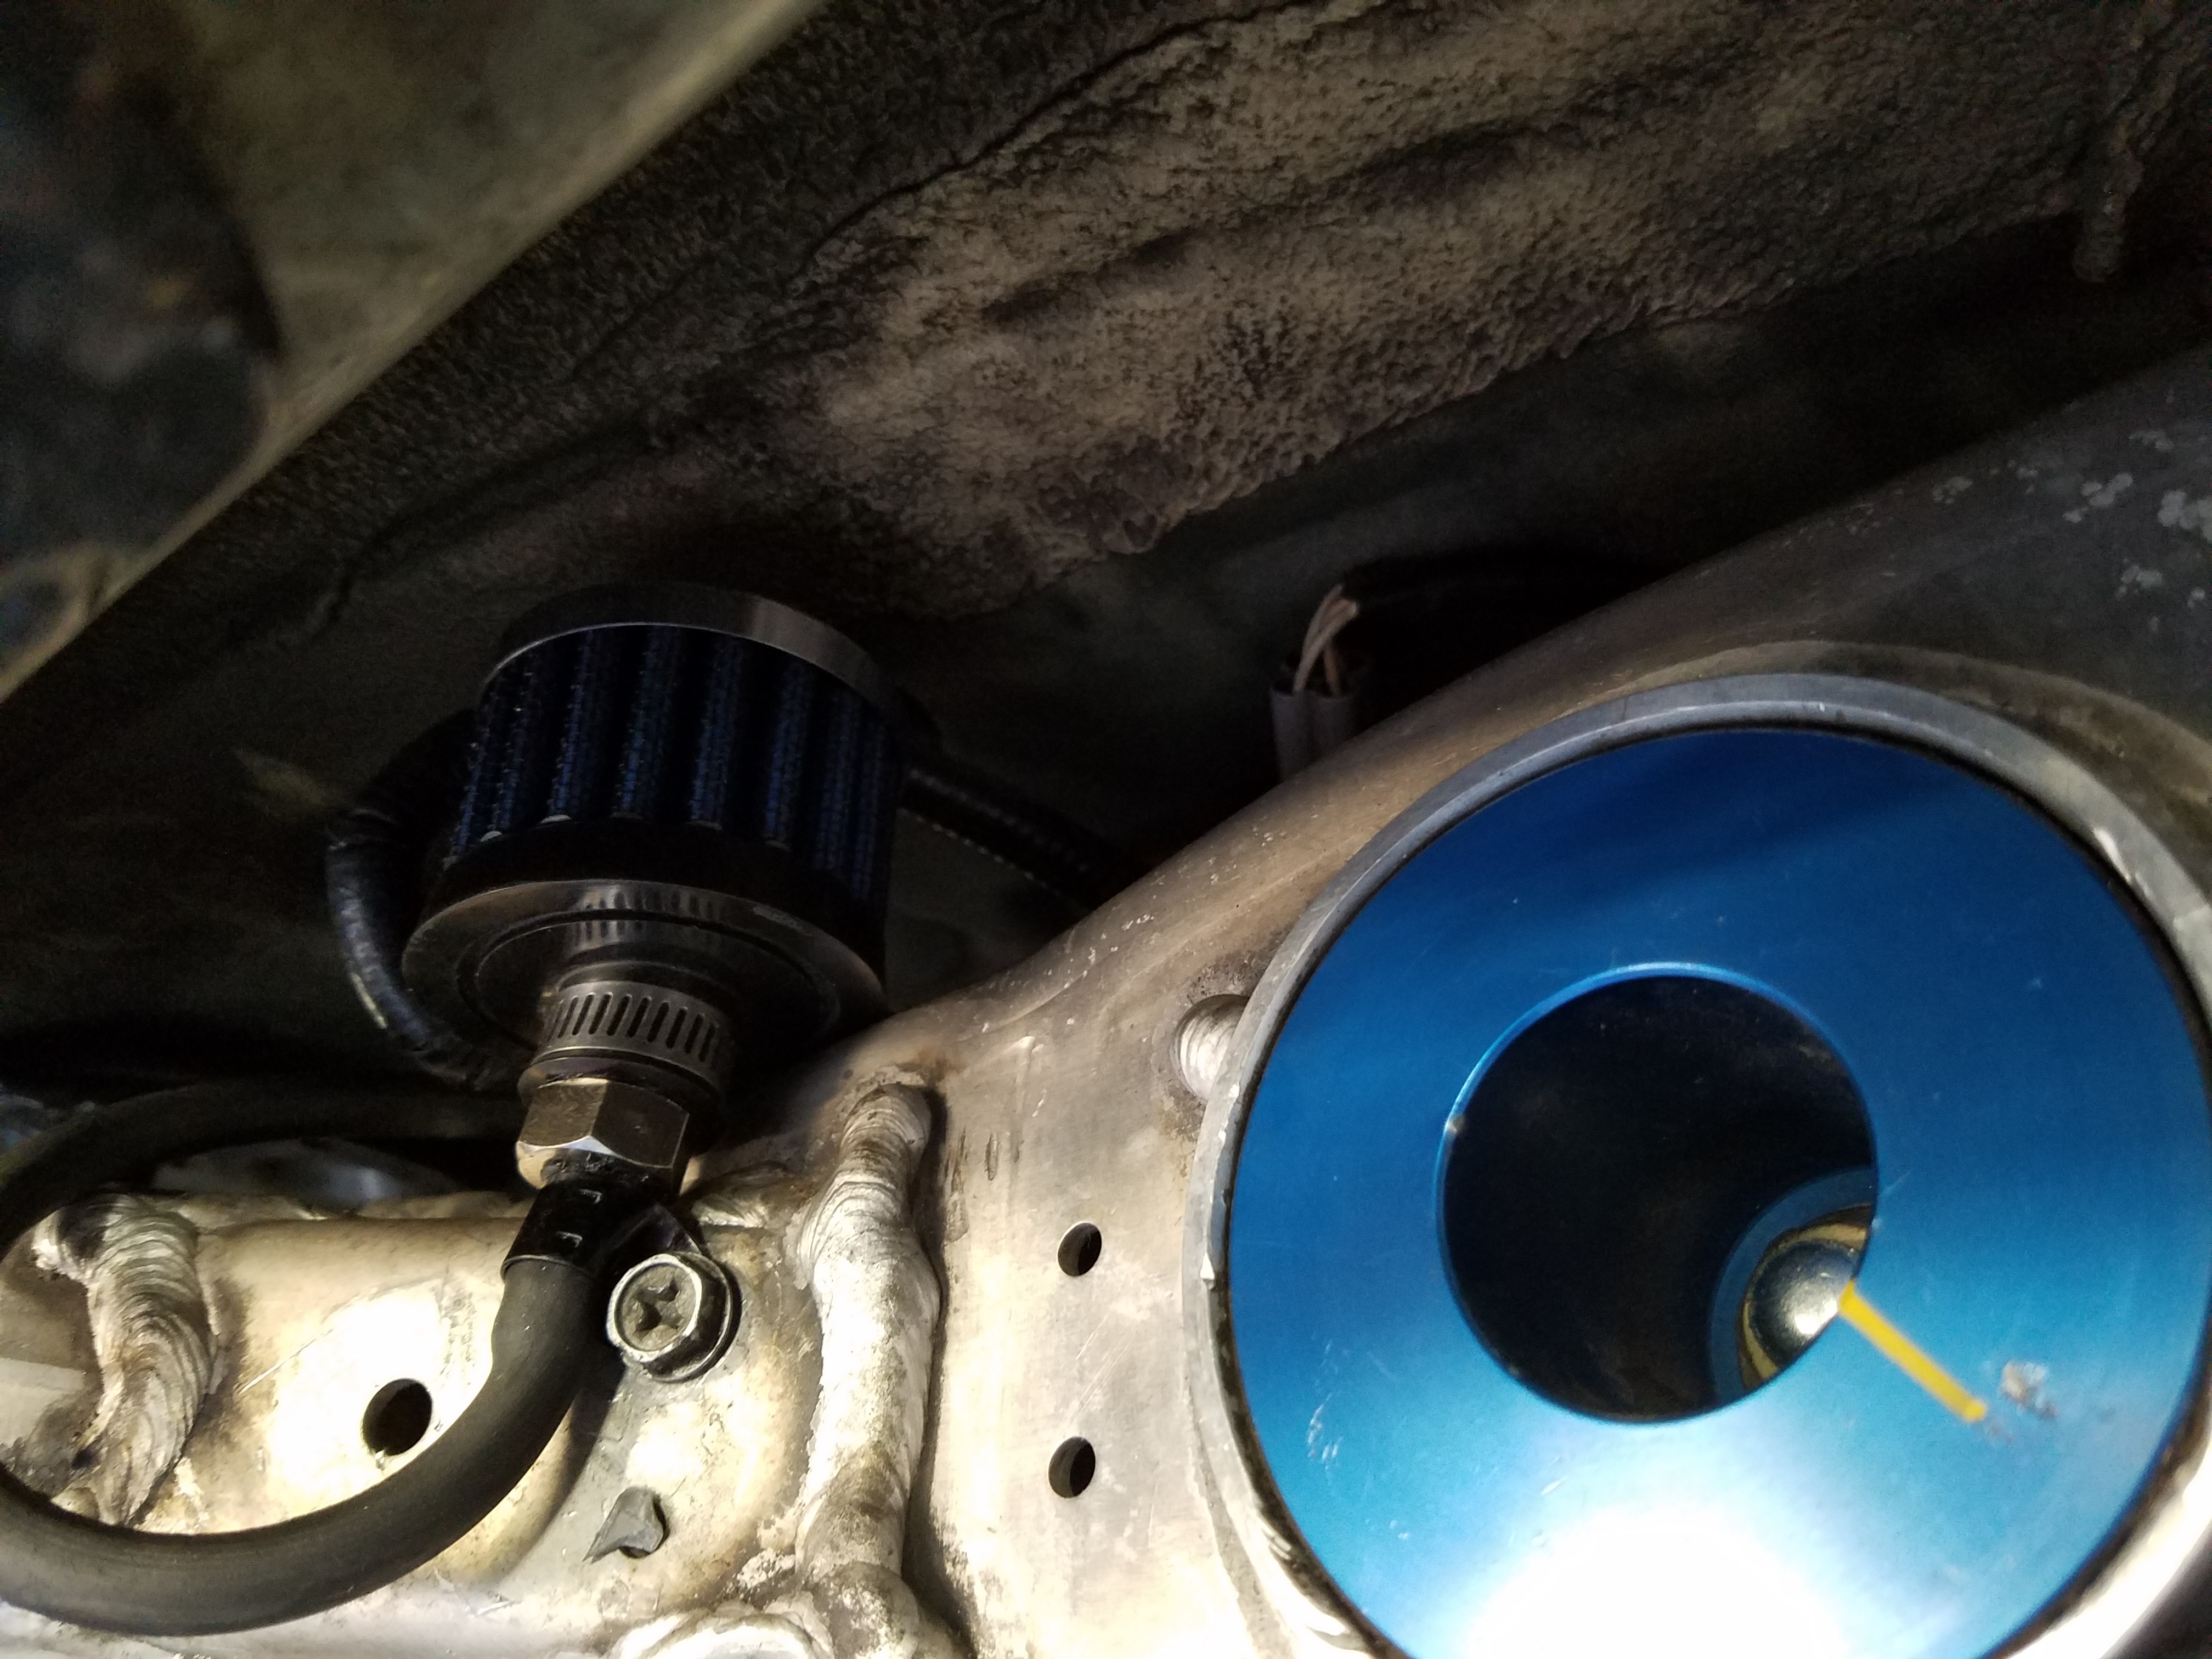
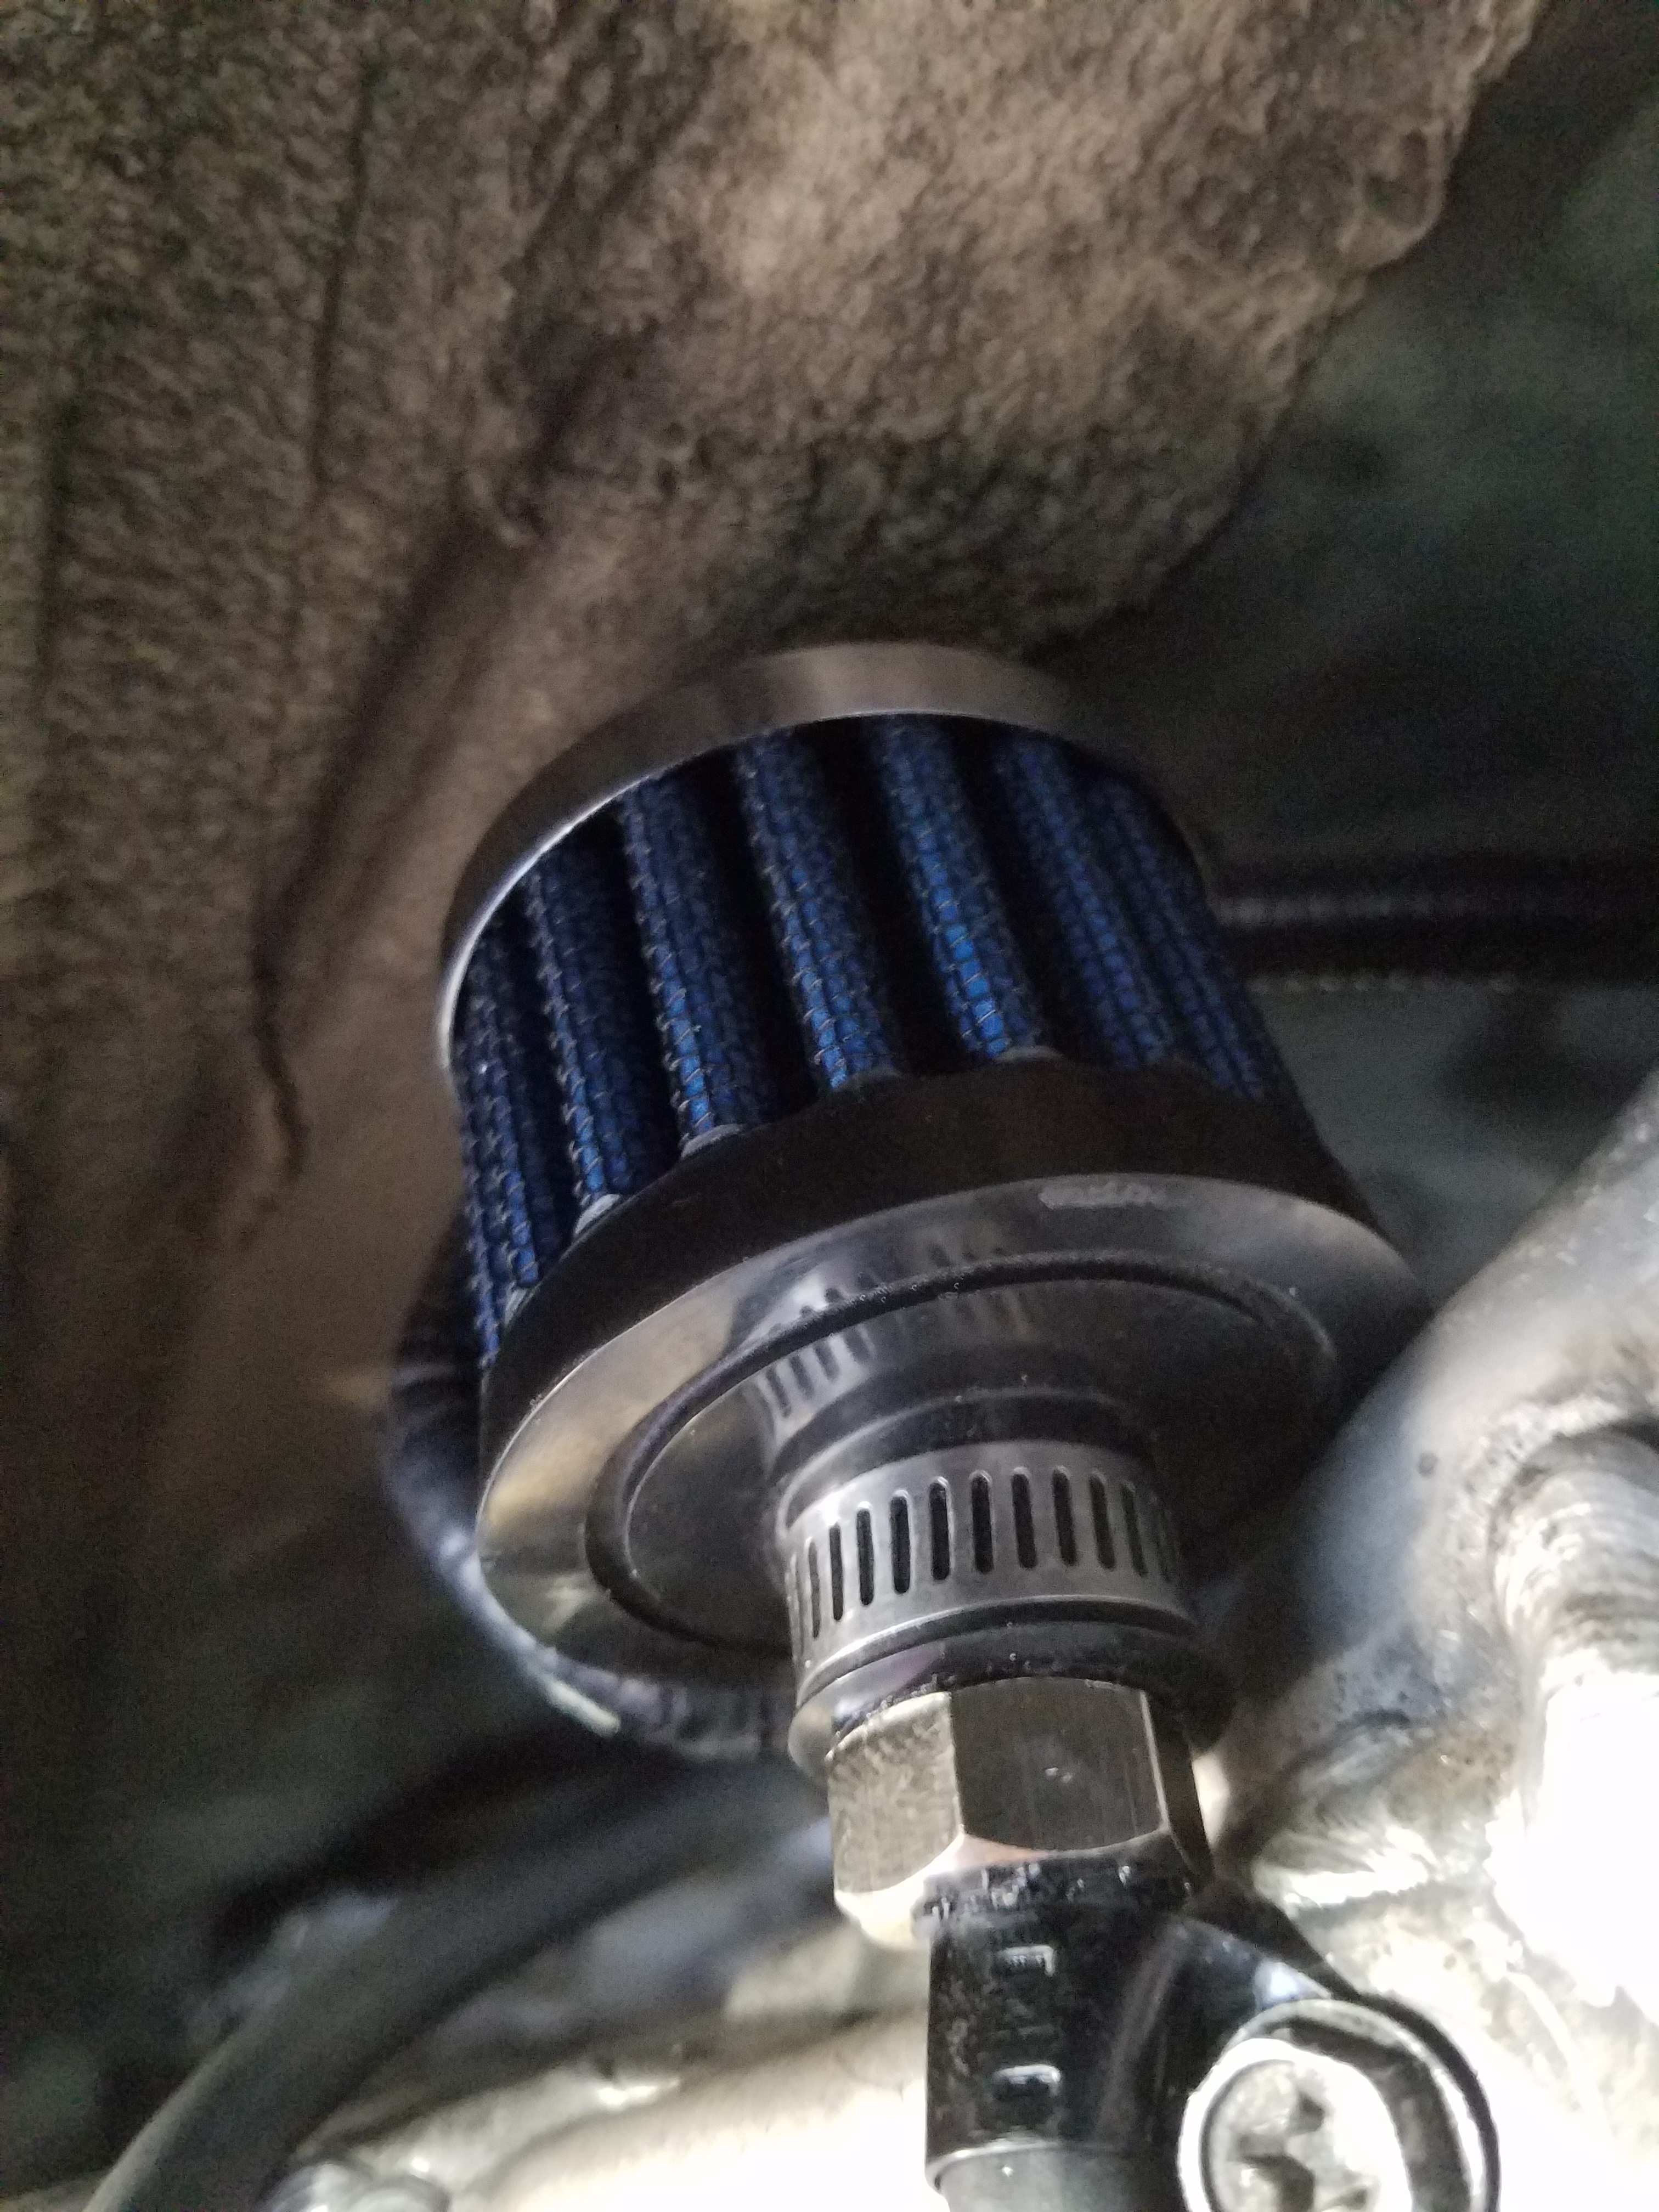
diff work is done, so it was time to fill it up, I also added a breather filter to the breather tube.
cleaned up the brackets and core support, fresh paint etc.

Finally finished my rear CTS V caliper mod.. whew.
Cheers to getting some long pending projects finished.


diff work is done, so it was time to fill it up, I also added a breather filter to the breather tube.


cleaned up the brackets and core support, fresh paint etc.


Finally finished my rear CTS V caliper mod.. whew.

Cheers to getting some long pending projects finished.

Thread Starter
Joined: Aug 2006
Posts: 8,321
Likes: 467
From: Scottsdale/coyote drophouse
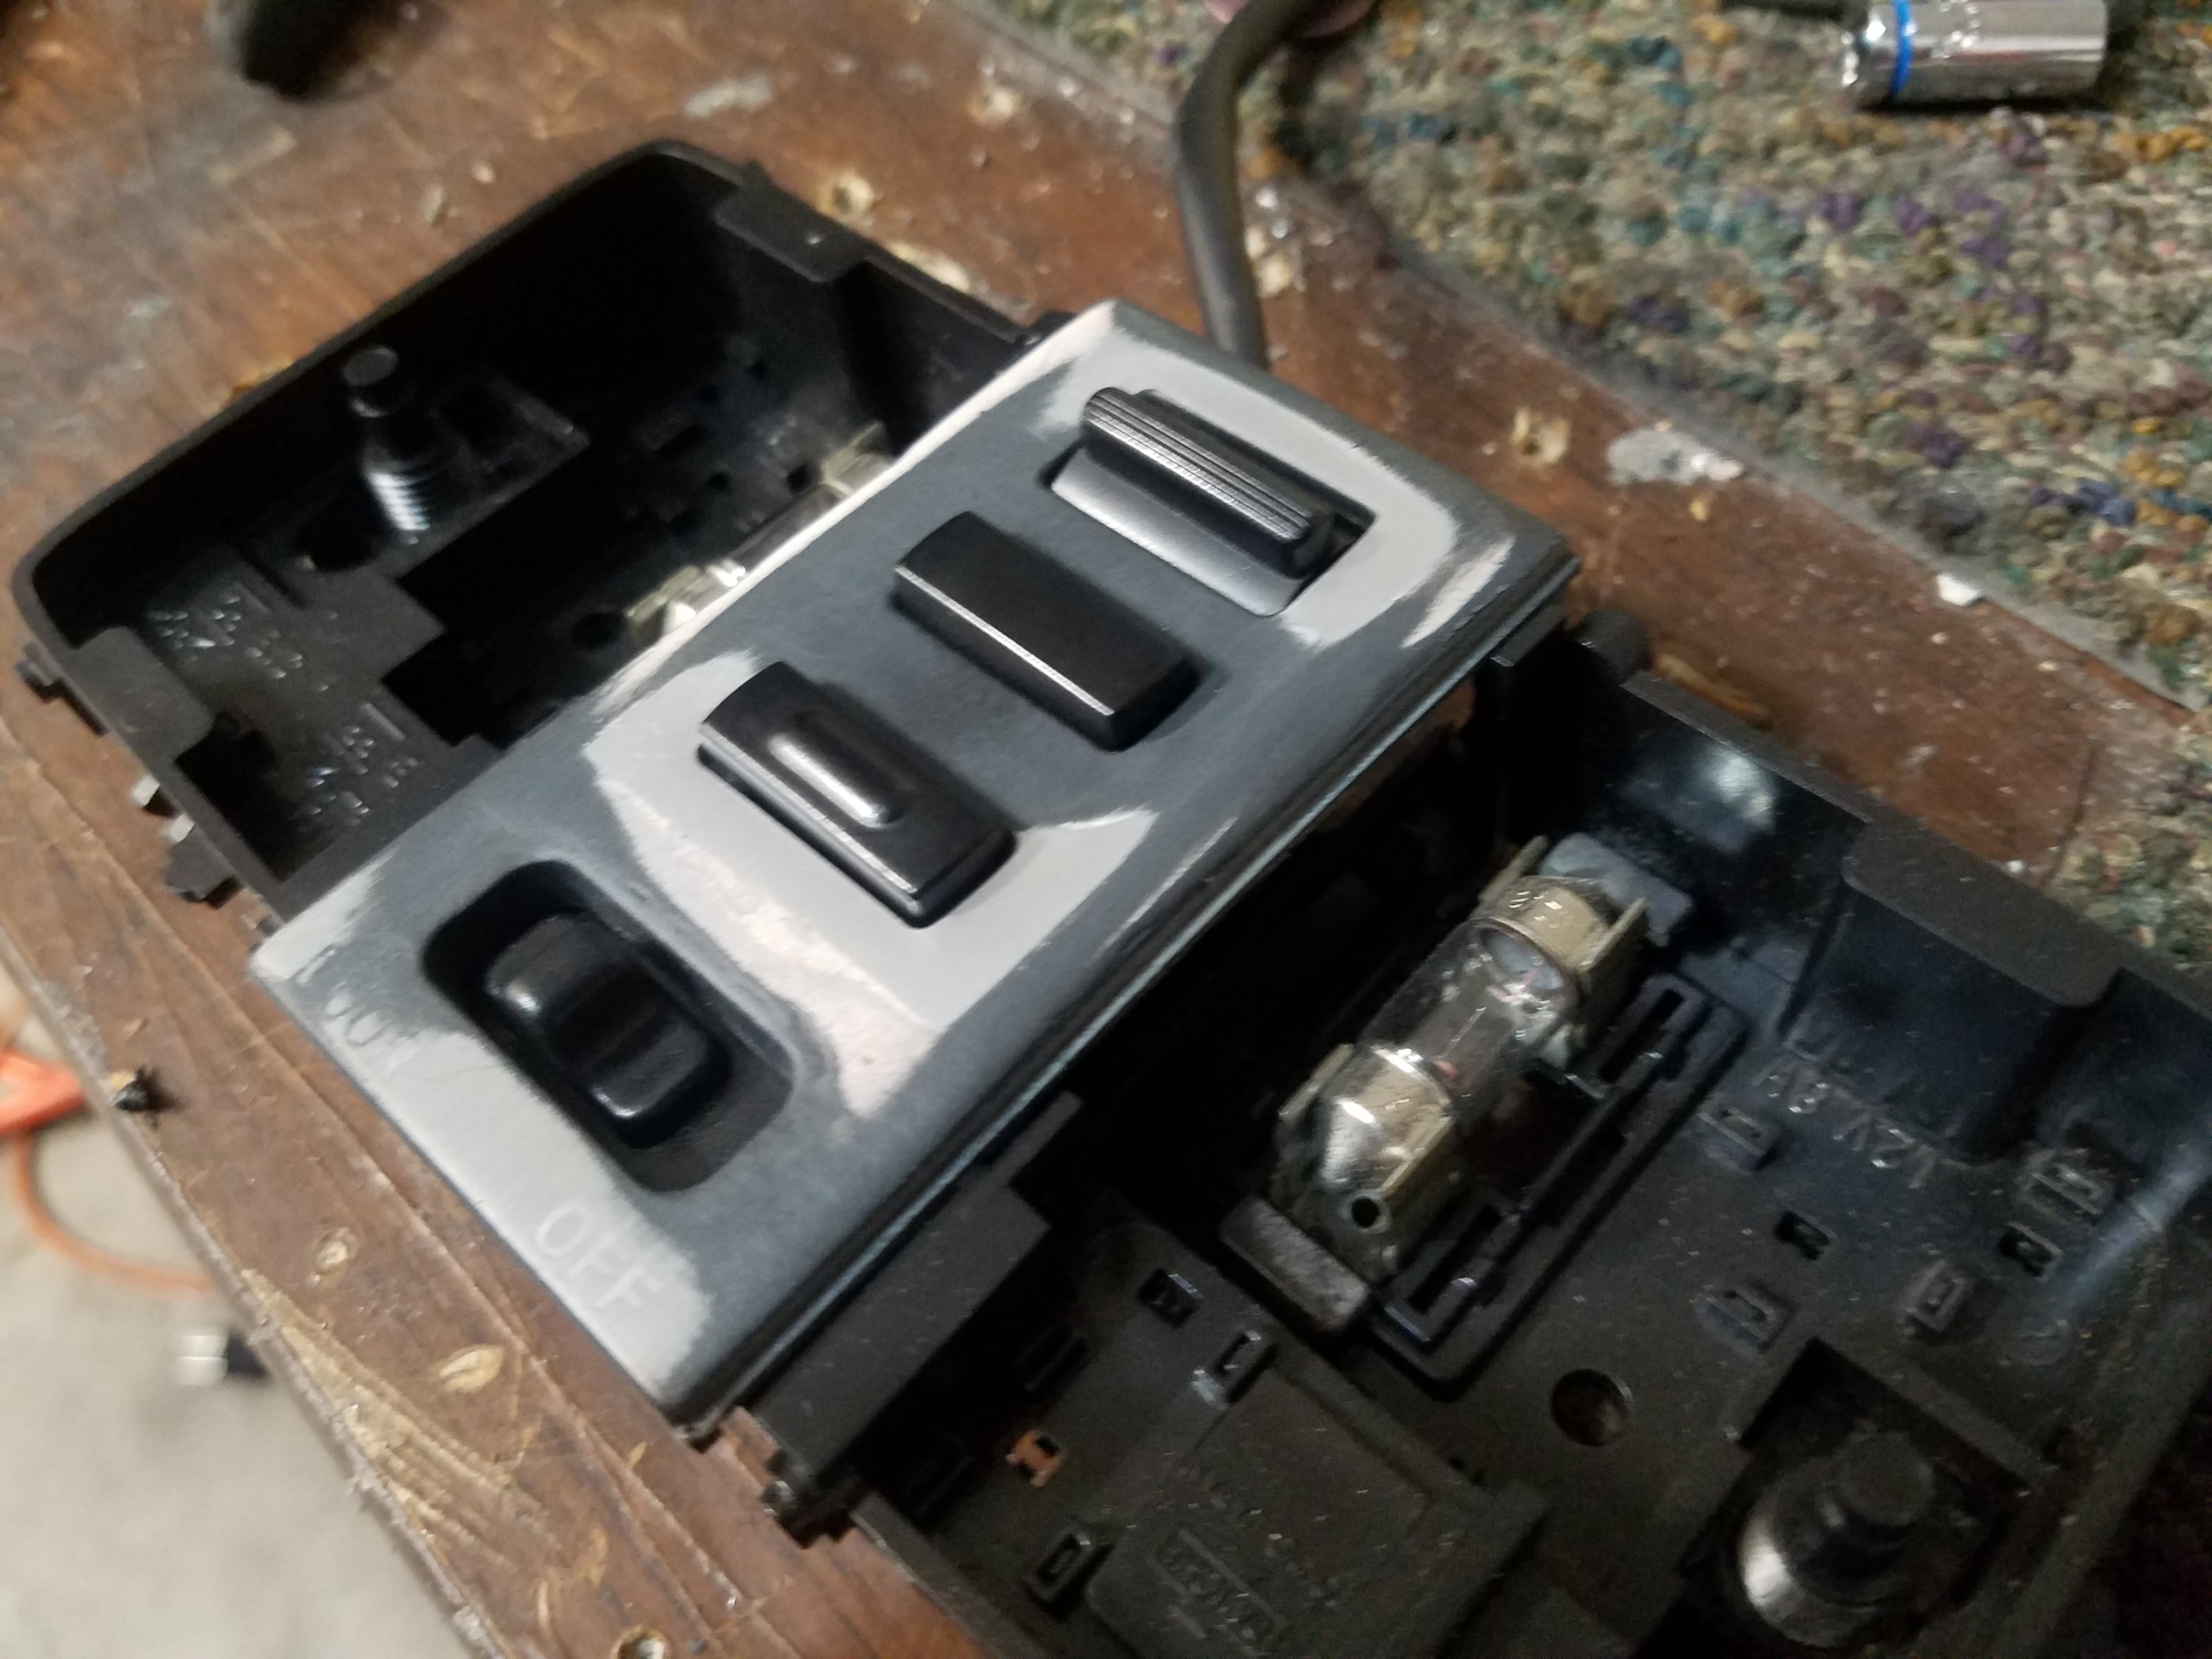
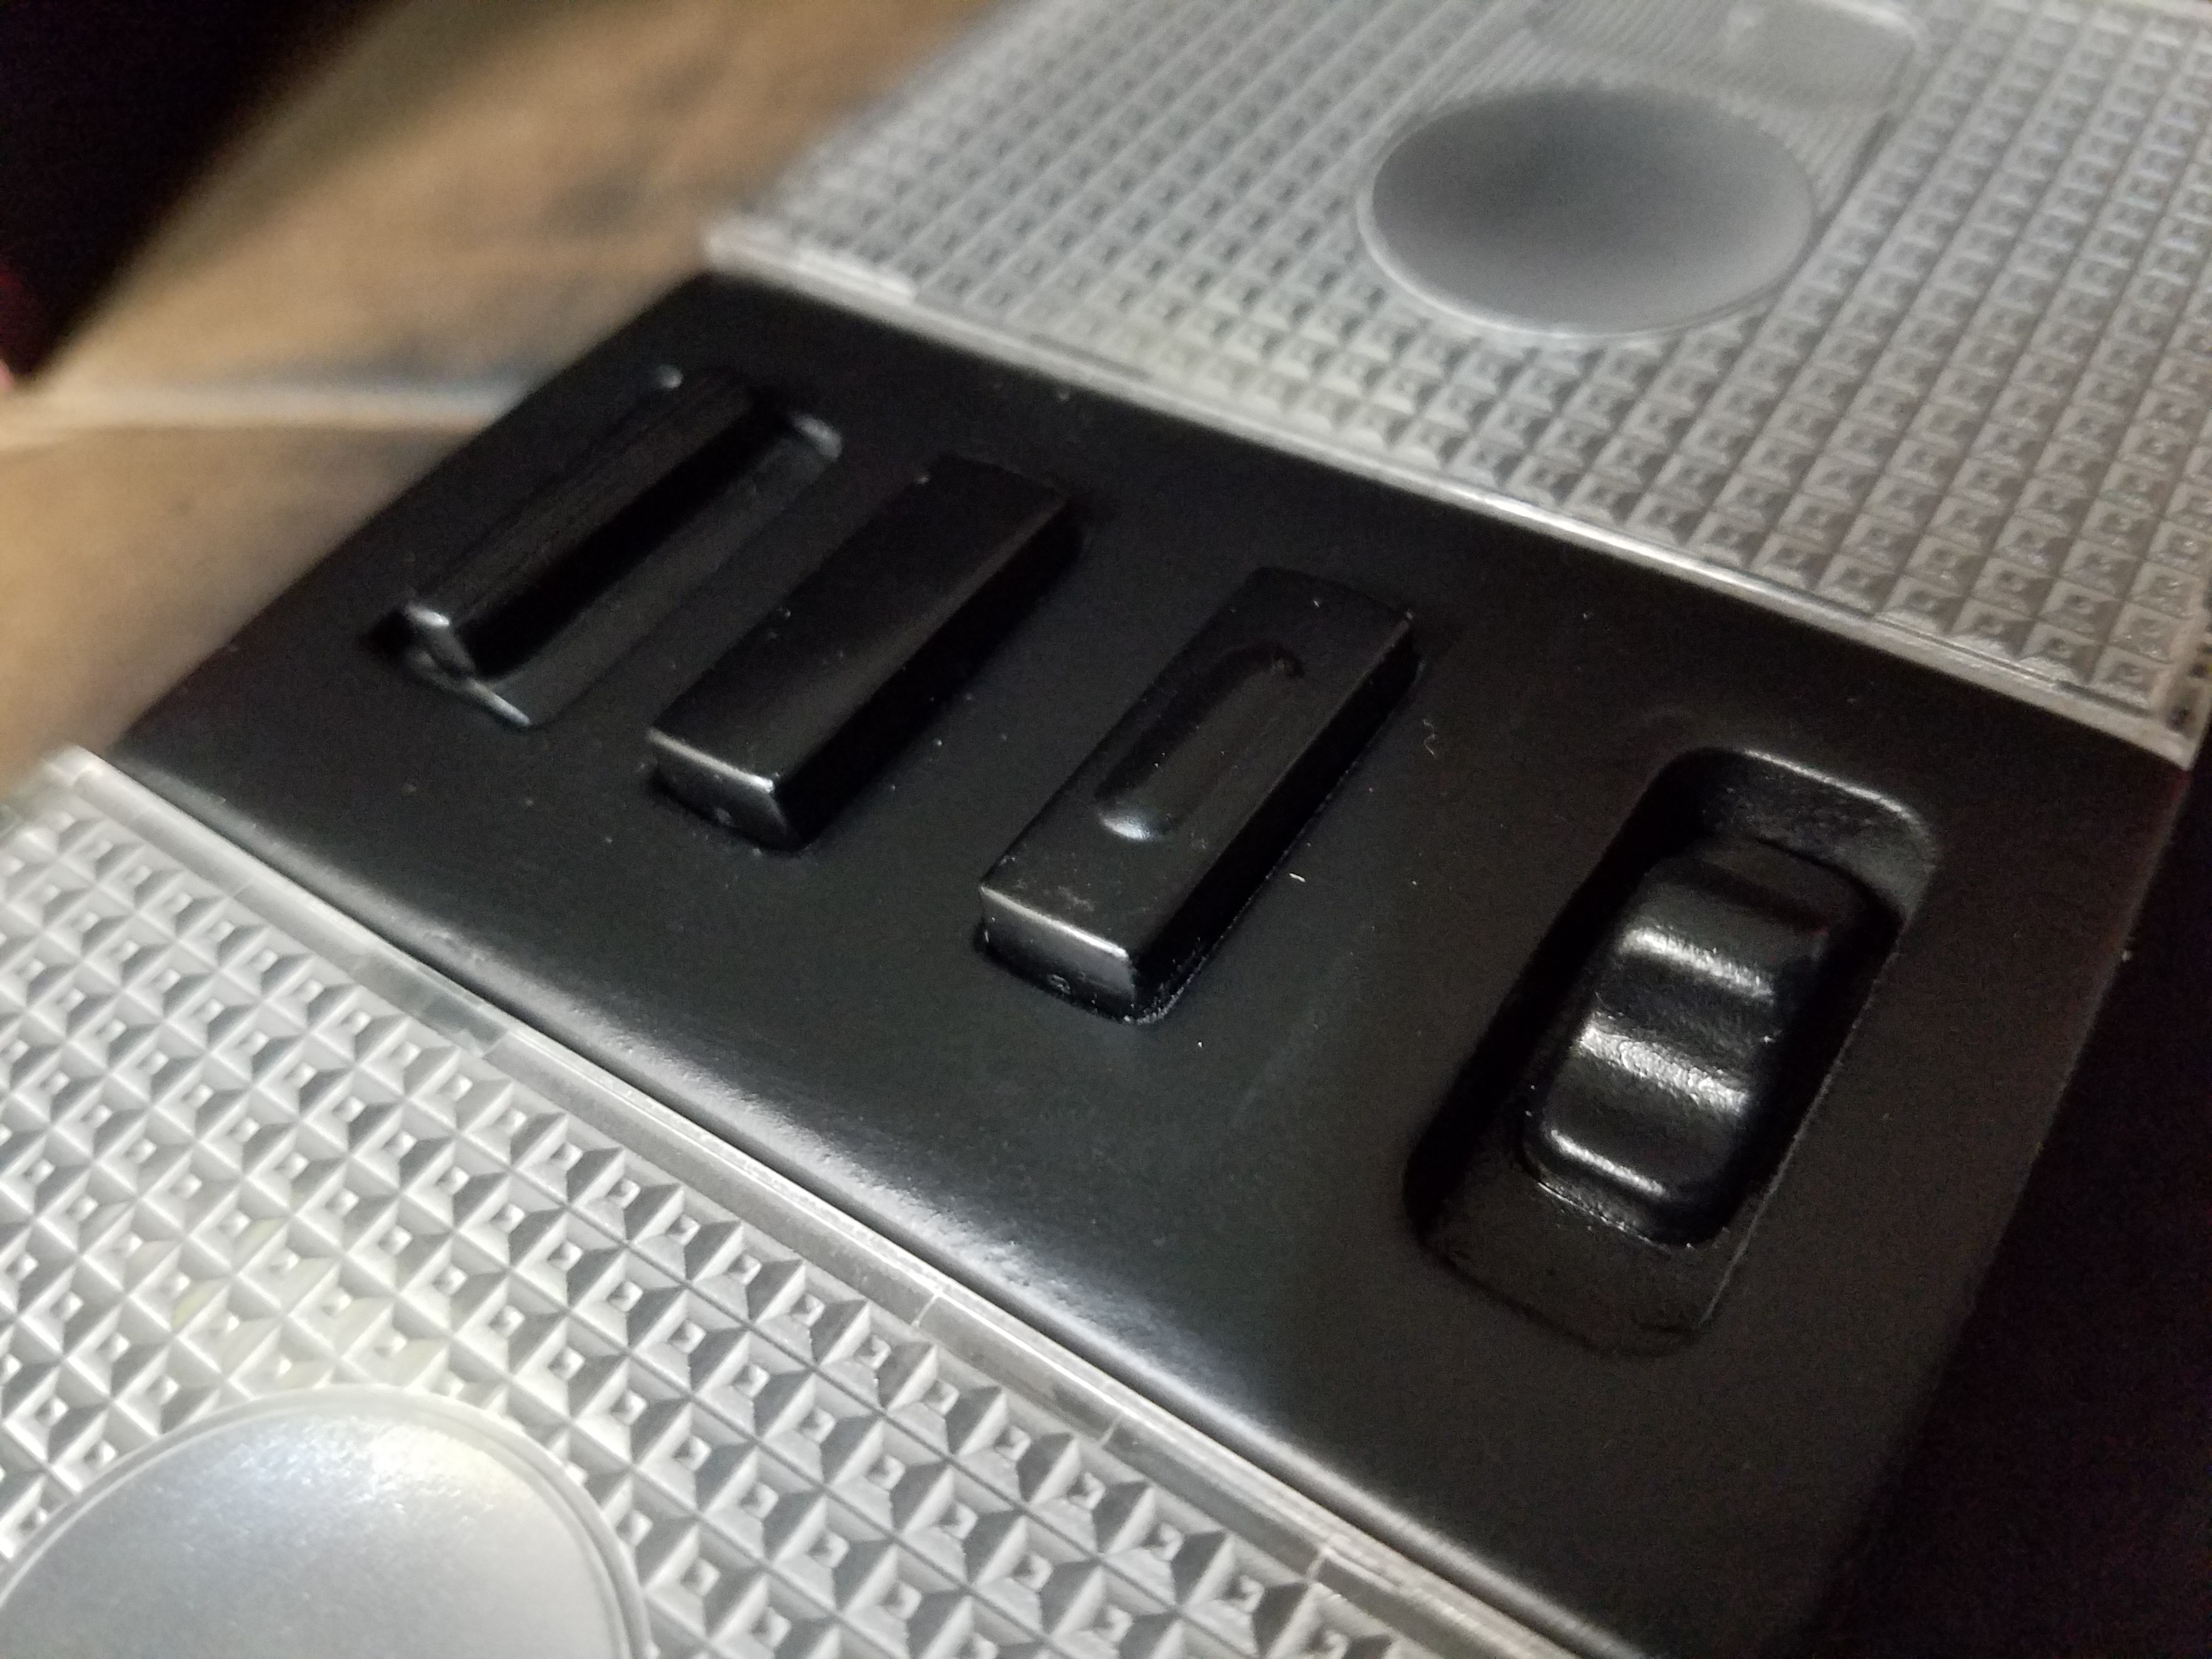
So I did a thing...
Finished my cruise control relocation project... lol.. just in time for it to not matter since I'm going back to a modified OEM wheel anyways lol, but this is still dope af.
I wanted the button holes to be perfect, so I just trimmed off the aluminum from the steering wheel and sandwiched it into the plastic and body filler, filled and sanded a bunch of times.. its not perfect, but for now it will do.
I will have it skinned in carbon fiber later this summer anyways.


Thread Starter
Joined: Aug 2006
Posts: 8,321
Likes: 467
From: Scottsdale/coyote drophouse